How does your telescope’s focal length and f/ratio change your night-sky views and images? Is there a hard magnification limit? Are “fast” f/ratio telescopes always better for astrophotography? In this post, I’ll break it all down—bust a few myths, share my hands-on experiences, and give you tips on picking the best telescope for your imaging or stargazing.
In this post, we’ll explore:
- What focal length is and how it controls both your “zoom” and your “window” on the sky
- How to calculate magnification and true field of view for visual observing
- How to calculate field of view and image scale for astrophotography
- Why f/ratio matters differently for stargazing versus astrophotography
- The pros and cons of fast (vs. slow) f/ratio telescopes
🔭 Focal Length: What It Is and What It Does
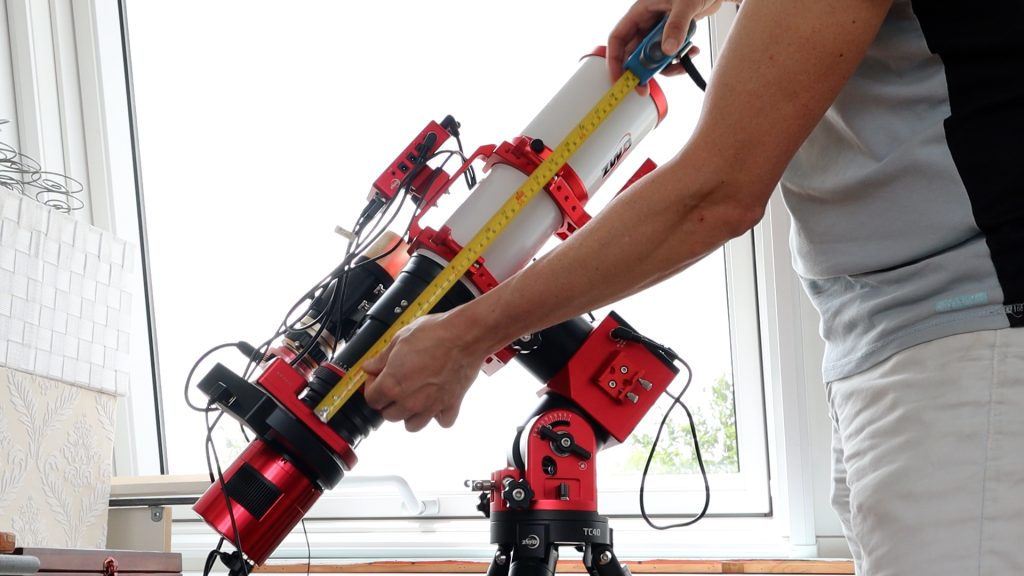
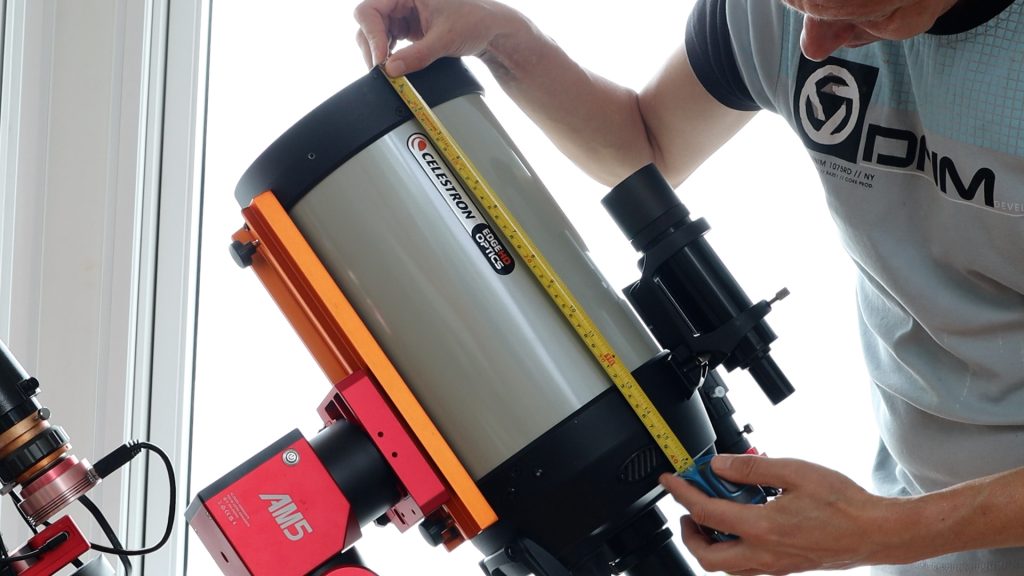
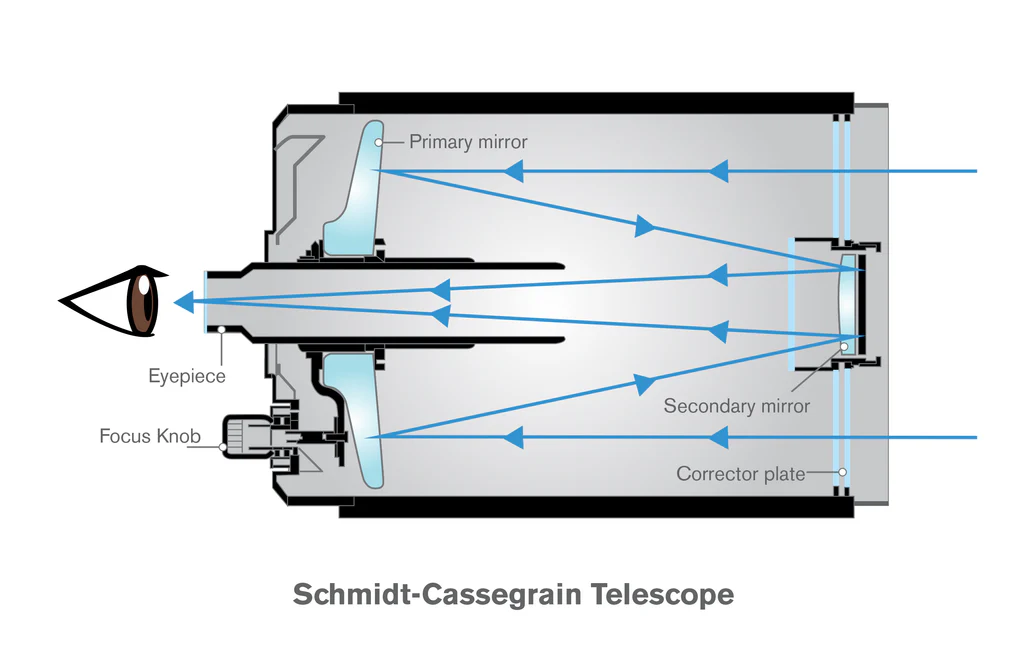
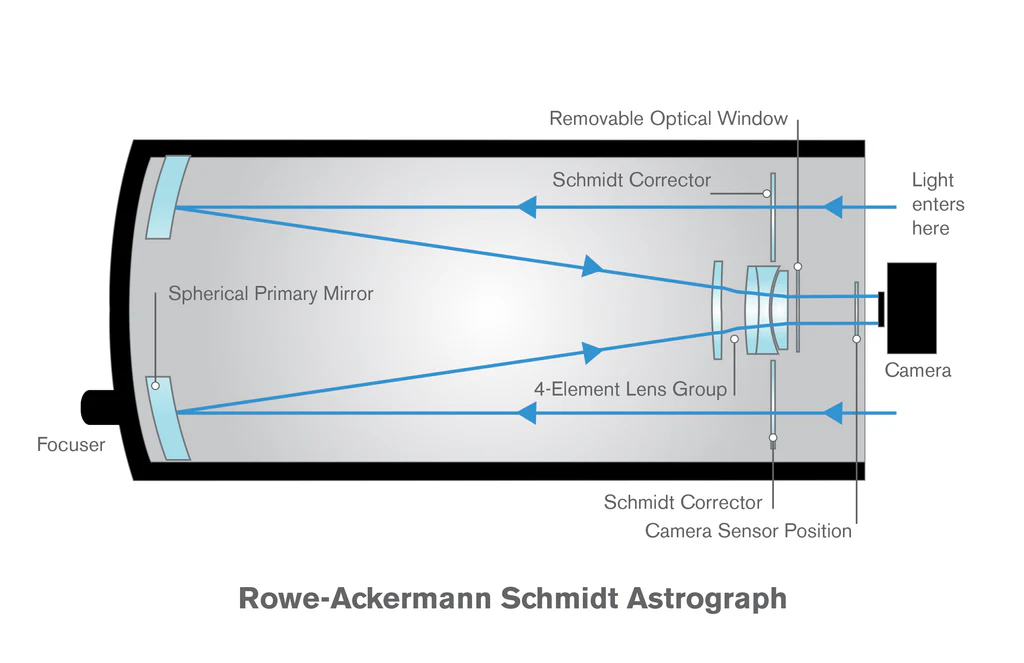
Let’s start with focal length. That’s the distance from your telescope’s lens or mirror to the point where the light comes into focus — where you place your eyepiece or camera. It is usually measured in millimeters. With refractors and Newtonians, the focal length is roughly the same as the physical length of the telescope. For example, my 600mm focal length APO telescope has a physical length of 540mm. However, some designs like Schmidt-Cassegrains or Maksutovs have a folded light path using multiple mirrors, letting you get a long focal length in a much shorter tube. For example, my Edge HD 8″ has a 2032mm focal length, but only a 432mm physical tube length.
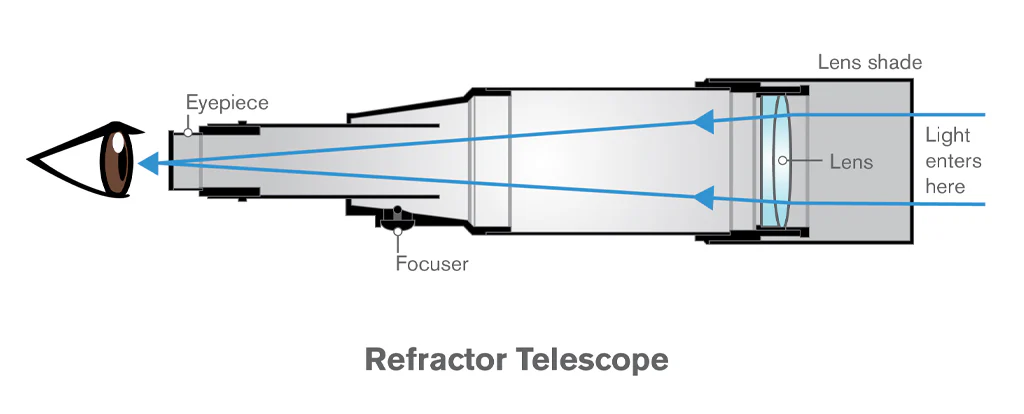
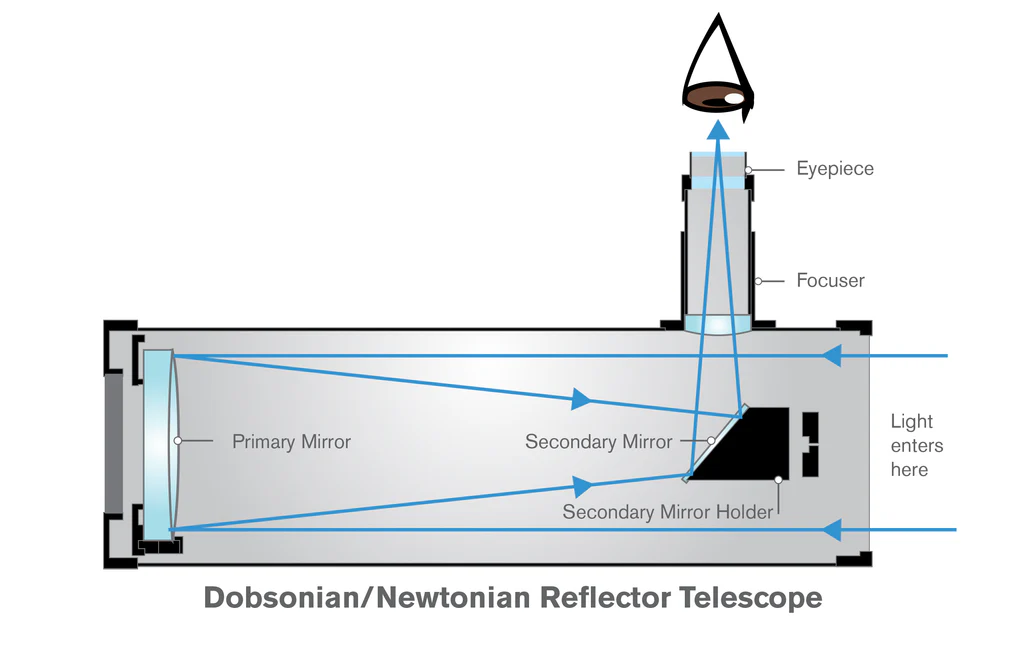
Below are illustrations of how light travels inside the tubes of apochromatic refractors, Newtonian and Dobsonian reflectors, catadioptric telescopes (SCTs and Maksutovs), and Rowe–Ackermann Schmidt astrographs (credit: Celestron).
👁️ Focal Length in Visual Astronomy: Magnification and True Field of View
For visual astronomy, focal length relates to magnification and it’s easy to calculate: just divide your telescope’s focal length by your eyepiece’s focal length. Imagine the telescope’s focal length as how much the telescope will “zoom” into the object, and the eyepiece’s focal length as how much that picture is magnified compared to your naked-eye view. A longer telescope focal length produces a larger intermediate image inside the tube, and a shorter eyepiece focal length magnifies that image more.
Here’s the formula to calculate your magnification:
Magnification = Focal length telescope / Focal length eyepiece
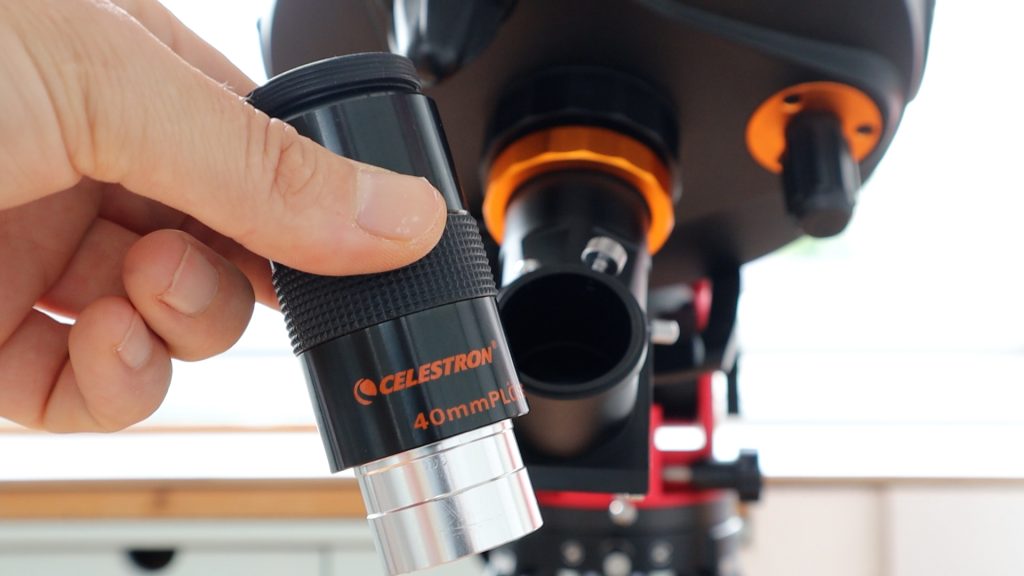
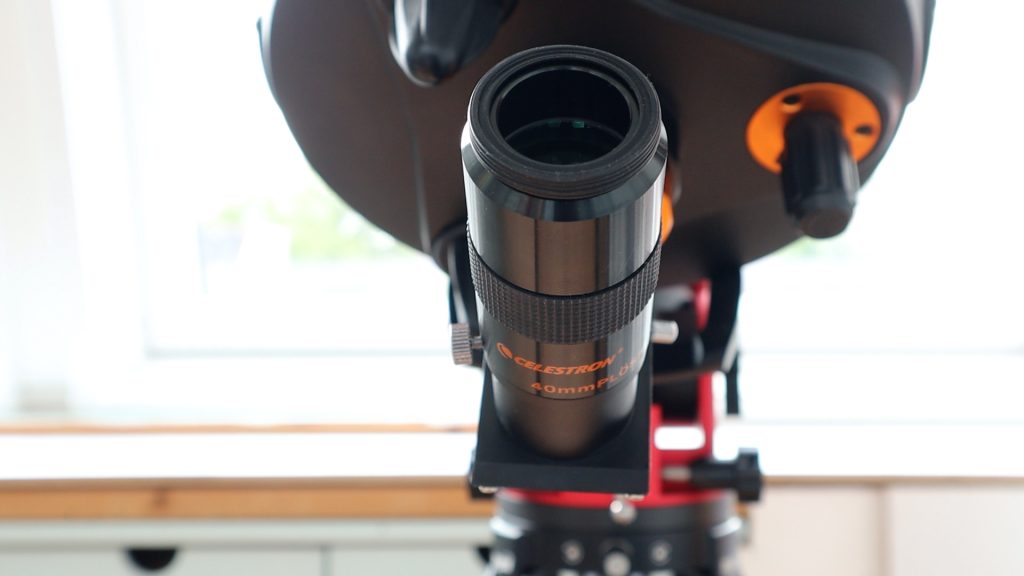
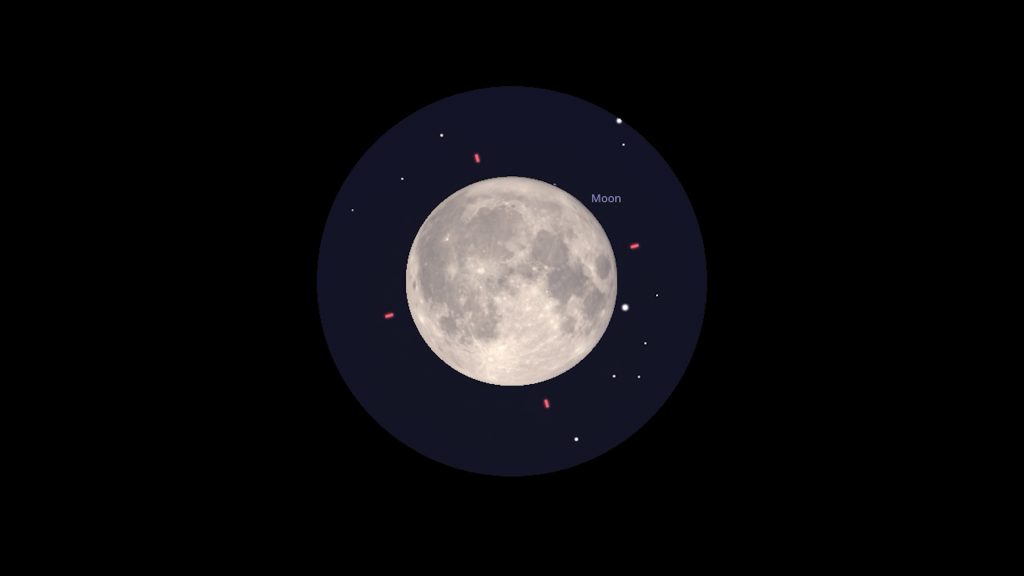
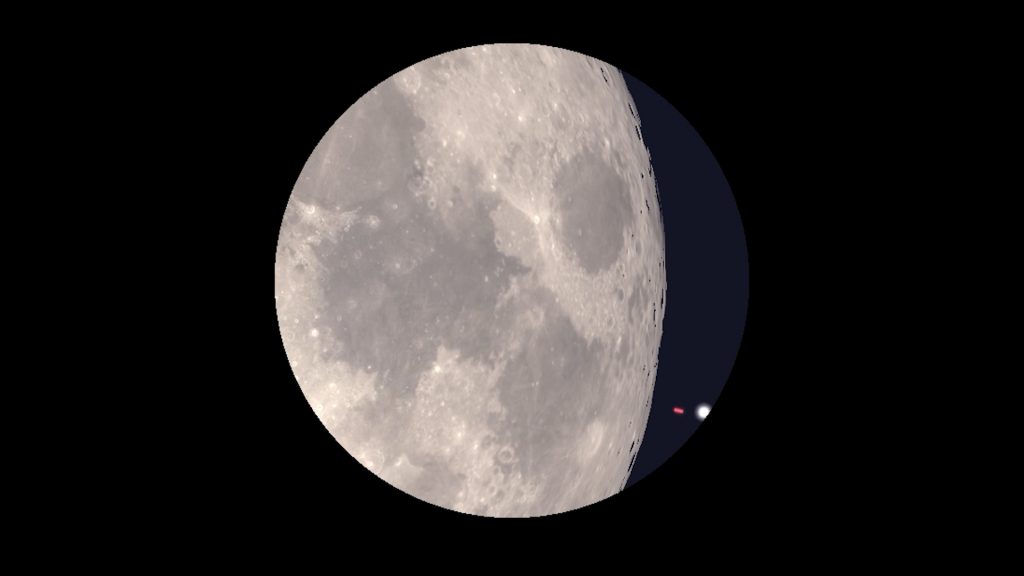
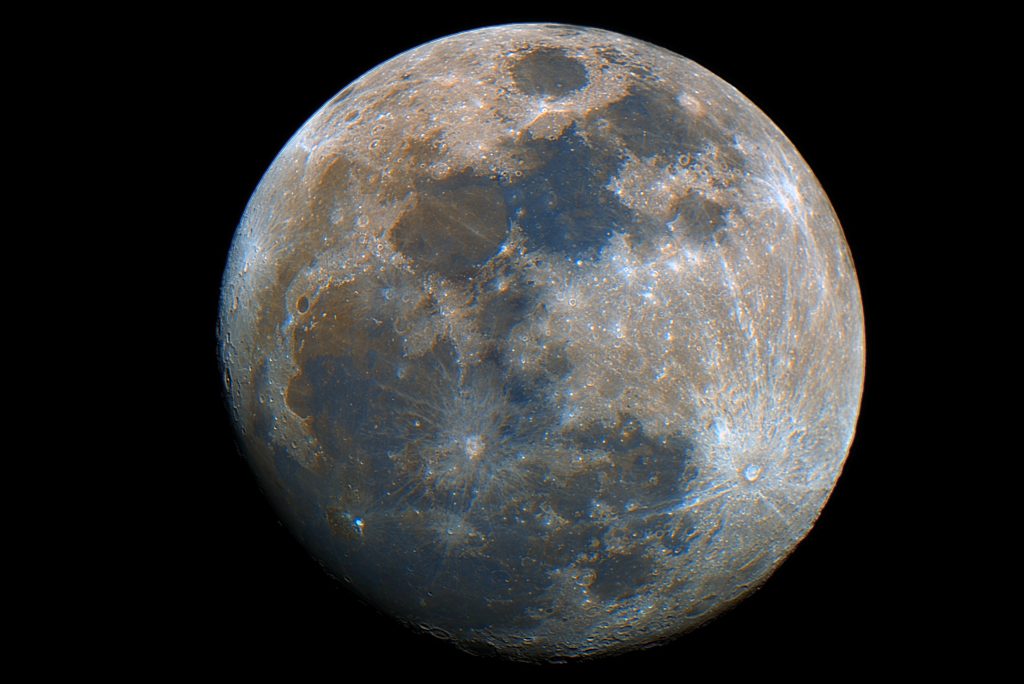
So, a 2000 mm telescope with a 40 mm eyepiece gives you 50× magnification. Swap in a 10 mm eyepiece, and you jump to 200×. What does that look like through the eyepiece? Let’s take the Moon as our example. At 50×, it appears fifty times larger than to the naked eye—perfectly framed with plenty of surface detail. Crank the power to 200×, and the Moon fills your entire view, letting you pick out individual craters and the finest textures up close.
Here’s a handy magnification calculator—just enter your telescope’s and eyepiece’s focal lengths below to see how much you’ll “zoom in” on a celestial object!
Visual Magnification Calculator
Now you might be wondering: will something like the full Moon even fit in your eyepiece view? That’s where field of view comes in—for stargazing, that’s basically the patch of sky you can see at once through your eyepiece. To get the true field of view, just divide your eyepiece’s apparent field of view by the magnification.
For example, my 40 mm eyepiece has an apparent field of view of 46°. On my 2000 mm telescope it gives 2000 ÷ 40 = 50×, so the true field is 46° ÷ 50 ≈ 0.92°. That’s nearly a full degree—more than enough to fit the Moon, which spans about 0.5° – like shown in the above picture.
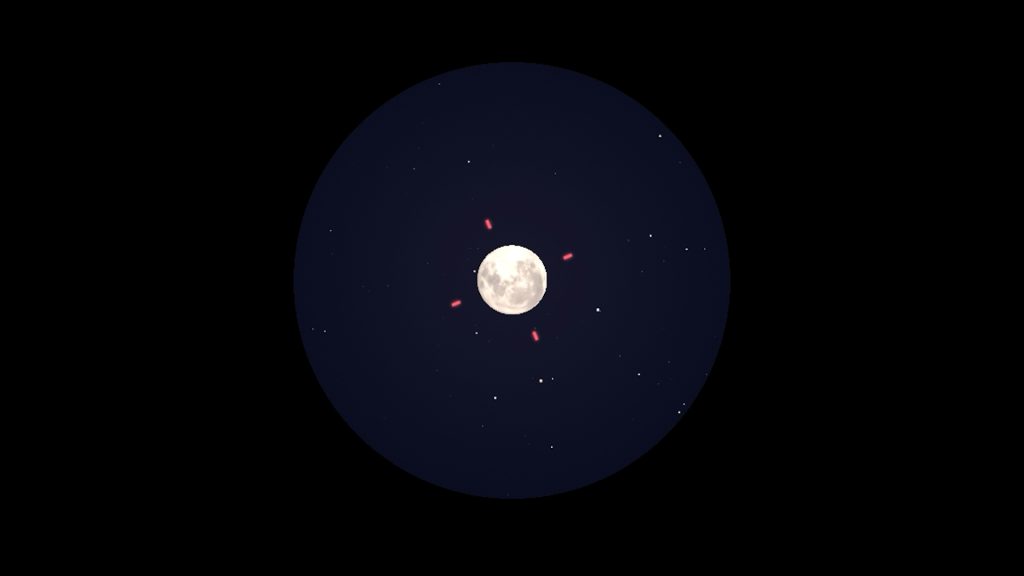
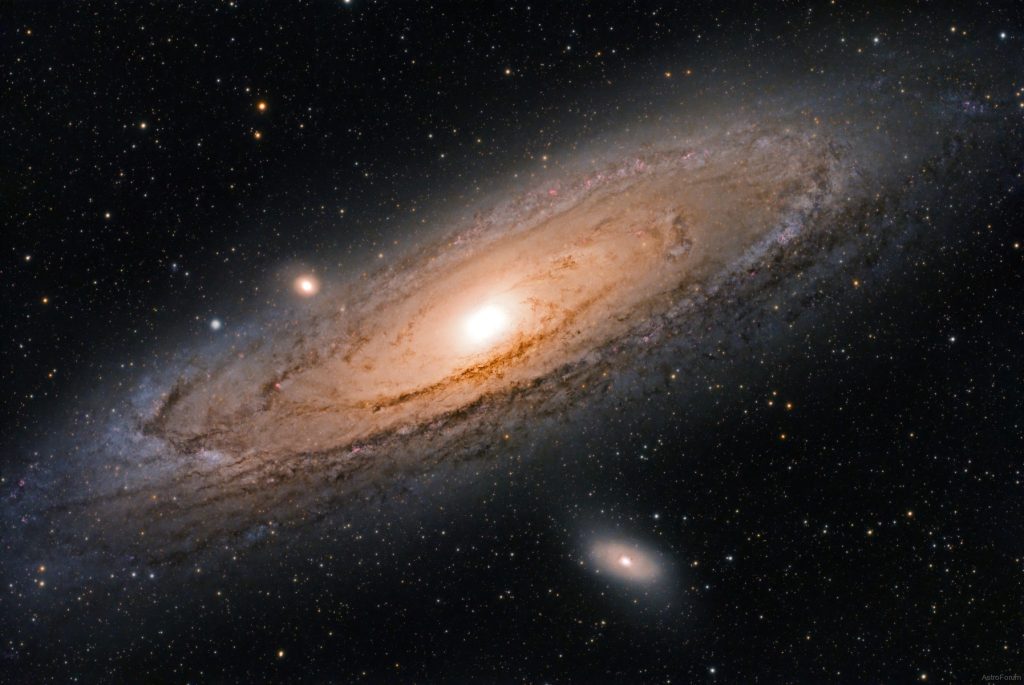
Switch that same eyepiece to a 600 mm scope and you get 600 ÷ 40 = 15×. Now the true field is 46° ÷ 15 ≈ 3.1°, wide enough to stack six Moons side by side—and even just about big enough to frame the Andromeda Galaxy (≈ 3° across).

Not a math person? No problem—I’ve included simple magnification and field-of-view calculators so you can plug in your own telescope and eyepiece specs.
Visual FoV Calculator
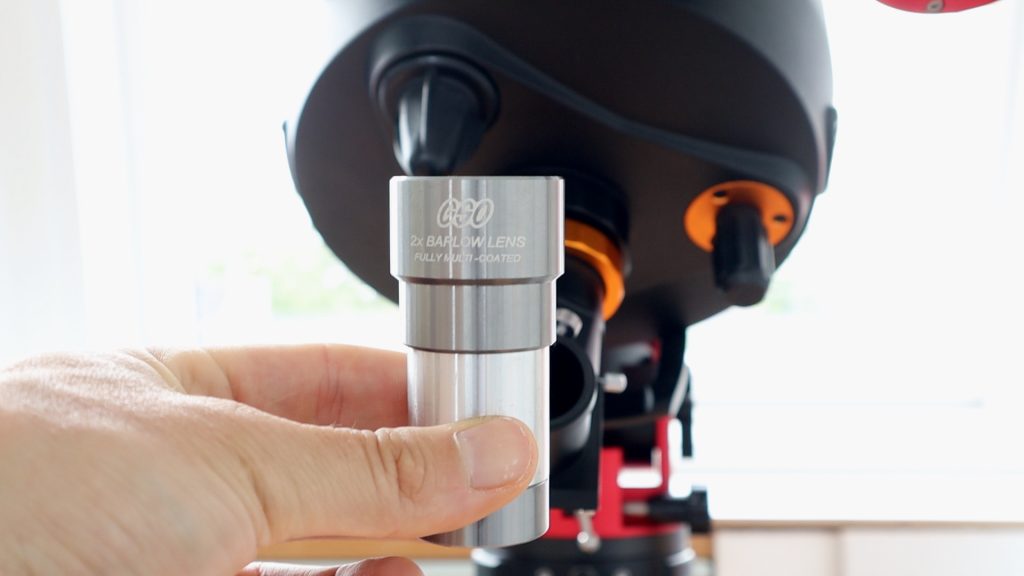
I’ve added a reducer/barlow multiplier to each calculator so you can see how extra lenses affect your view. Barlow lenses boost your telescope’s effective focal length—objects look bigger but dimmer—while reducers do the opposite, shortening the focal length for a wider, brighter view at lower power. For example, a 1000 mm scope becomes 2000 mm with a 2× Barlow, or 500 mm with a 0.5× reducer. To factor them in, just multiply your telescope’s focal length by the lens’s magnification (e.g., 2 or 0.5) before using the calculators to get your adjusted magnification and true field of view.
So how far can you push your magnification?
That mostly depends on your telescope’s aperture, the quality of your optics, and your local seeing conditions. I covered those limits in detail in my previous video about aperture, but here’s some quick advice:
Rule of thumb for maximum useful magnification:
• ≈ 50× per inch of aperture
• ≈ 2× per millimeter of aperture
(with excellent optics and steady seeing)
So on an 8-inch (200 mm) scope, that works out to a theoretical max of around 400×, though in average skies you’ll usually get the sharpest detail between 200× and 300×—any more just makes objects blurrier. That said, planetary observing can handle higher power under really steady skies (300× or even more) if you’ve got high-contrast optics like a Maksutov or a well-collimated SCT, because planets are bright targets.
Now, let’s switch gears to astrophotography, where things work quite differently.
Focal length in Astrophotography: Field of View and Image scale
Astrophotographers like me don’t really talk about “magnification” because, unlike visual observing, we’re not peering through an eyepiece—instead we’re capturing a fixed slice of sky on a camera sensor. What matters is how much of the sky (your field of view) ends up on that sensor, and how detailed the resulting image is (your image scale). Both depend only on two things: your telescope’s focal length and the physical size of your camera’s sensor.
Think of it this way:
- Field of view is like the zoom setting on a camera: it tells you the angular width and height of sky you’ll record.
- Image scale (in arcseconds per pixel) tells you how many arcseconds of sky each pixel covers—so smaller values mean finer detail.
Let's take an APS-C sized sensor like my ASI2600MC Pro that is 23.5 mm wide by 15.7 mm tall; we can plug those dimensions into a simple formula to find our true field of view in degrees:
Field of view (°) = (sensor dimension ÷ focal length) × 57.3
On a 600 mm telescope
- Horizontal FOV = 23.5 ÷ 600 × 57.3 ≈ 2.24°
- Vertical FOV = 15.7 ÷ 600 × 57.3 ≈ 1.50°
That’s a nicely wide shot—and it was just enough to frame the Andromeda galaxy (≈ 3° across) diagonally and catch its dust lanes and satellite galaxies in one frame.
Swap to an EdgeHD 8″ (2032 mm focal length)
- Horizontal FOV = 23.5 ÷ 2032 × 57.3 ≈ 0.66°
- Vertical FOV = 15.7 ÷ 2032 × 57.3 ≈ 0.44°
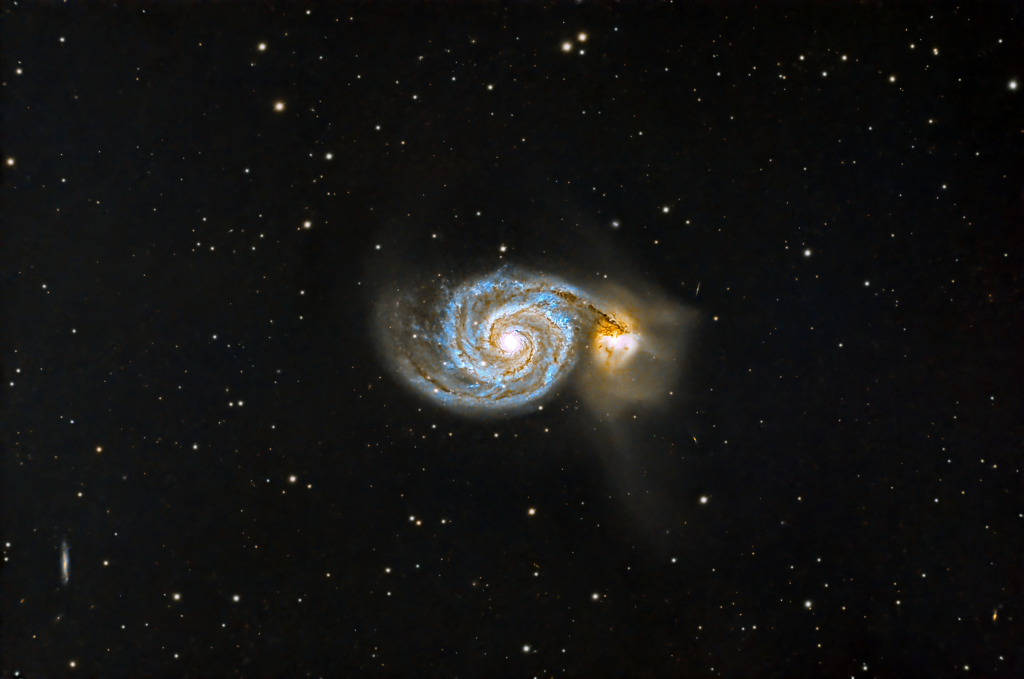
Now the view is over three times tighter—perfect for smaller deep-sky objects like M51 (≈ 11 arcminutes, or 0.18°).
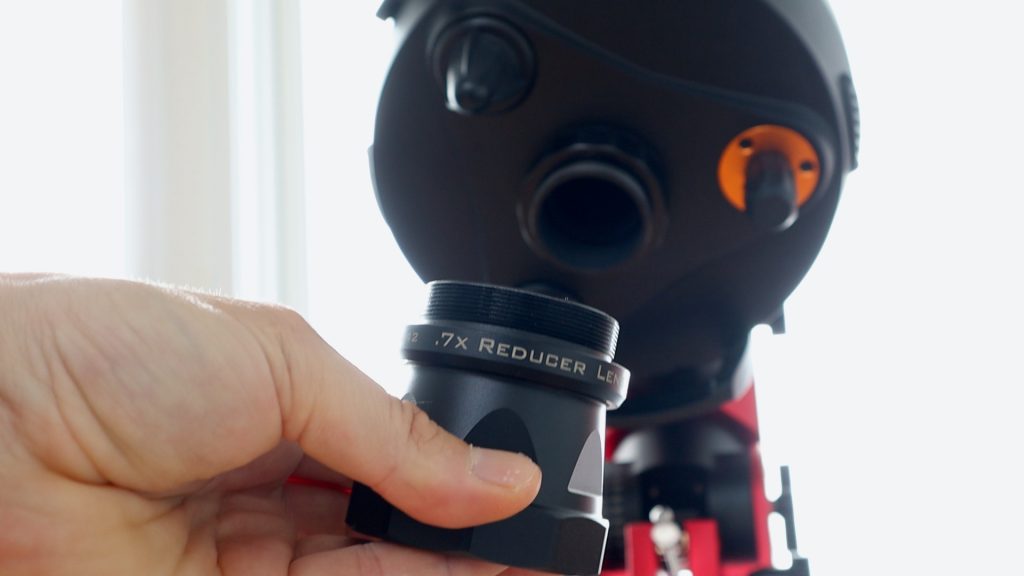
I also keep a 0.7× reducer handy—because at 2032 mm the full Moon (0.5° wide) won’t fit in that 0.44° vertical view. Pop on the reducer and you jump to roughly 0.95° × 0.63°, so big nebulae and the Moon fit beautifully. And when I want extra-close lunar or planetary shots, I use a planetary camera with - if necessary - an extra Barlow lens.

No math? No problem—just use this calculator and plug in your own telescope focal length, camera sensor size, and any Barlow or reducer factors to calculate your field of view.
Astrophotography
Field of View Calculator
Enter values and click Calculate.
Formula: Field of View (degrees) ≈ (Sensor dimension ÷ (Focal length × Barlow/Reducer)) × 57.3
That mysterious “57.3” comes from the fact that angles in math are often measured in radians, where 1 radian is the angle that spans an arc equal in length to the radius of a circle. Since there are about 6.28 radians (2π) in a full circle and 360 degrees in a full circle, one radian is roughly 360 ÷ 2π ≈ 57.3 degrees. Multiplying by 57.3 converts our result from “radians” into plain degrees—so we know exactly how many degrees of sky we’re framing.
Magnification in astrophotography?
So, is there a maximum magnification rule in astrophotography? Well, we astrophotographers don't use the term "maximum magnification". Instead —we focus on field of view as discussed, and image scale, which tells you how much sky each pixel covers (usually in arcseconds per pixel). Image scale depends on your camera’s pixel size and your telescope’s focal length. You can calculate it like this:
I
mage scale (″/px) = (206.265 × pixel size in µm) / focal length in mm
For instance, my ASI2600MC-Pro’s sensor is made up of tiny pixels that are just 3.76 µm across (that’s 0.00376 mm—about one-thousandth of a millimeter!). When you pair that with a 600mm APO refractor, the formula is:
image scale ≈ (206.265 × 3.76) / 600 ≈ 1.29″/px
And yes—I’ve got a calculator below so you can plug in your own gear and see your image scale instantly.
Image Scale Calculator
Enter values and click Calculate.
Formula: Image Scale ≈ (206.265 × Pixel Size) ÷ (Effective Focal Length)
That mysterious “206.265” is the number of arc-seconds in one radian ( 648 000 / π ≈ 206 264.8 arcsec ). In the small‐angle approximation, a sensor pixel of size p and focal length f subtends an angle θ≈p/f in radians. Multiplying by 206 265 converts that angle into arc-seconds, giving θ″≈(206 265 × p)/f. This constant saves you from carrying the full radian-to-arcsecond conversion each time.
For deep-sky astrophotography, a typical image scale sweet spot is around 1 to 2 arcseconds per pixel, depending on your local seeing conditions. For example, here in the Netherlands at sea level, astronomical seeing is often limited to around 1 to 2 arcseconds. So pushing much beyond that wouldn’t make much sense for me—it wouldn’t actually give me a much sharper photo of the object.
Tip: Check your astronomical seeing conditions here.
However, at prime observing sites like Mount Teide in Tenerife, Mauna Kea in Hawaii, or Dome C in Antarctica, the seeing conditions are much better—often well below 1 arcsecond. In those locations, using an image scale smaller than 1 arcsecond per pixel makes sense to capture finer details.
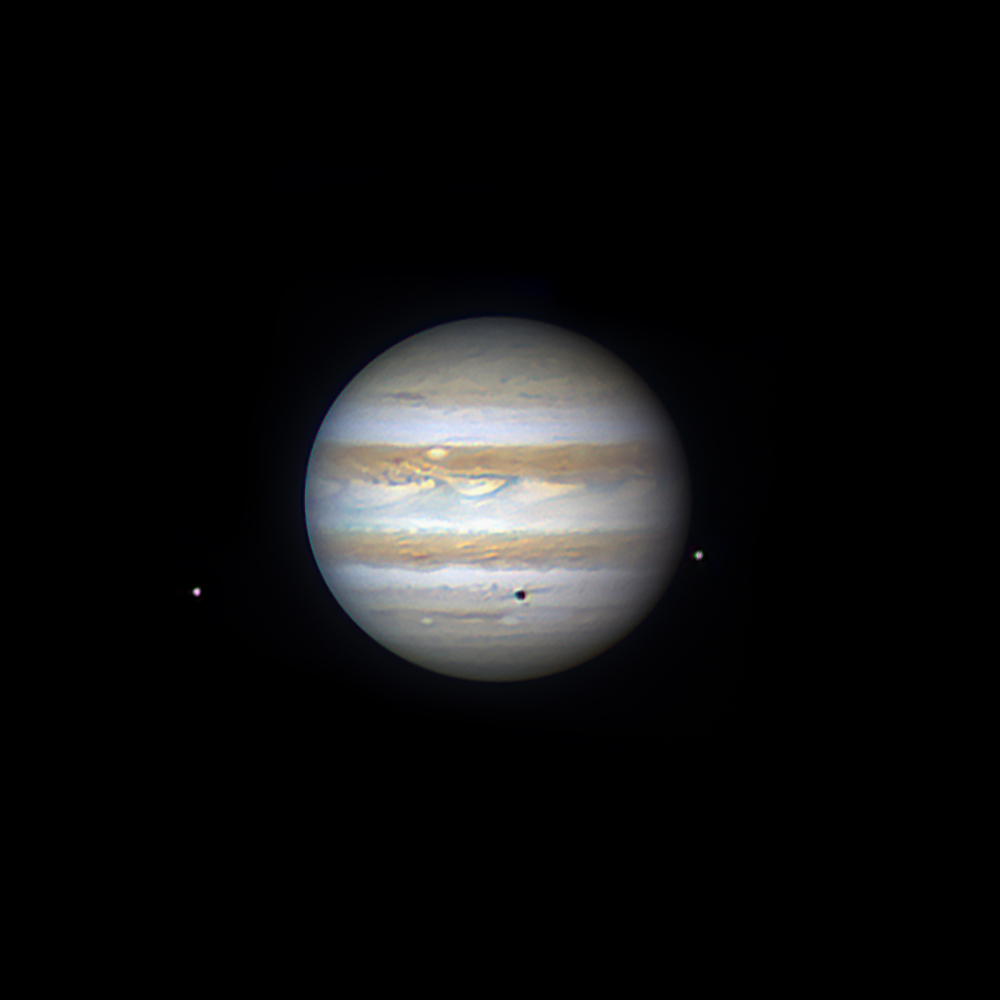
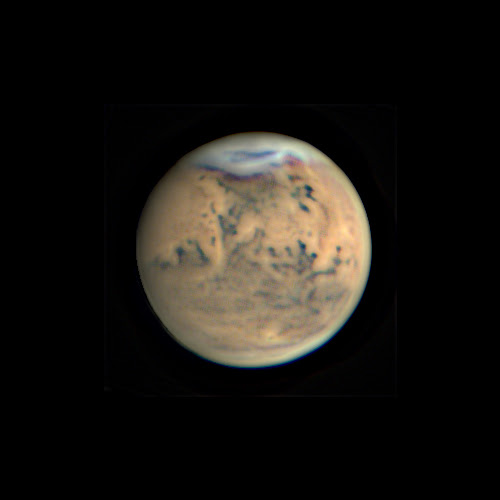
Another exception is planetary imaging, where it’s common to aim for 0.1 to 0.3 arcseconds per pixel to capture fine details—like Jupiter’s cloud bands, Saturn’s Cassini Division, or Mars’ polar icecaps. Barlow lenses are often used with small-pixel planetary cameras to reach this finer scale.
Rule of thumb for planetary imaging:
Aim for an image scale of 0.1–0.3″ per pixel, assuming good seeing conditions.
This works because planetary imaging is all about recording video at high frame rates and then stacking the sharpest frames. By doing this, we can effectively "beat" the astronomical seeing and recover much more detail than a single photo would show.

If you're interested, I have an online 3-hour planetary imaging course for my channel members. Big thanks to everyone who supports me financially by joining my channel, donating, or subscribing —you make it possible for me to create all this astrophotography content, you're awesome!
🌟 What is Focal Ratio?
So now that we’ve covered focal length there’s another topic that causes a lot of excitement and confusion among both visual astronomers and astrophotographers: the focal ratio. The focal ratio (f/ratio in short) is the ratio between a telescope’s focal length and its aperture. For example, a telescope with an 800 mm focal length and a 200 mm aperture has a focal ratio of f/4.
Focal Ratio (f/ratio) Calculator
👁️ f/ratio in Visual Astronomy
So what is function of f/ratio in visual astronomy and astrophotography? In visual astronomy, the f/ratio relates to the exit pupil—that's the width of the light beam that reaches your eye, here's the formula.
Exit Pupil = Eyepiece Focal Length ÷ f/ratio
Let’s break it down with an f/7 scope: if you pop in a 40 mm eyepiece, your exit pupil is 40 ÷ 7 ≈ 5.7 mm, and if you switch to a 10 mm eyepiece it shrinks to 10 ÷ 7 ≈ 1.4 mm. Larger exit pupils give brighter views—up to your eye’s dilation limit of about 7 mm in the dark, beyond which any extra light simply spills away. When you make the exit pupil smaller, brightness falls off rapidly because the light-gathering area scales with the square of the diameter. Halving the diameter from 6 mm to 3 mm reduces the area from 6² (36) to 3² (9), which is just one-quarter, so you’re left with only 25 percent of the original light and a noticeably dimmer image.
For lunar and planetary observing, an exit pupil of 1–3 mm strikes the ideal balance of sharpness and contrast without excessive brightness. When hunting faint nebulae, increasing the exit pupil closer to 7 mm lets you capture every last photon. Curious about other configurations? Check out the exit-pupil calculator below to fine-tune your perfect setup.
Exit Pupil Calculator
Alright—time to shift gears and talk astrophotography!
📷 f/ratio in Astrophotography
As an astrophotographer, I use a computerized EQ mount to precisely track celestial objects and capture long-exposure images, collecting photons on my camera sensor instead of looking through an eyepiece. The telescope’s focal ratio (often called the f/ratio) determines how quickly that sensor collects light—lower f/ratios produce brighter images in less time.
Relative illumination = (f_ratio₁ ÷ f_ratio₂)²
For example, an f/5 system delivers four times the sensor illumination of an f/10 system, so I can image faint nebulae and other deep-sky objects in one-quarter the exposure time. That happens because illuminance at the focal plane is proportional to the inverse square of the focal ratio. In other words, halving the focal ratio from f/10 to f/5 increases sensor illumination by (10 ÷ 5)² = 2² = 4× faster —meaning I reach the same signal-to-noise ratio in one-quarter the time. Here’s a handy tool to compare how different telescopes’ f/ratios stack up:
Light Collection Speed Comparison
That’s why “fast” scopes with low f/ratios are so appealing to astrophotographers—they deliver photons to your sensor more quickly, so you can keep exposures short. If an f/10 telescope needs 60 seconds to gather enough light, an f/5 setup can do it in just 15 seconds—four times faster. Those shorter exposures cut down on tracking errors and make it much easier to capture faint deep-sky objects.
The Trade-Offs of “Fast” (vs. "Slow") Telescopes
If fast-focal-ratio scopes are so awesome, why doesn’t everyone use them? A few reasons:
- Fast telescopes often suffer from optical quirks like coma, which stretches stars into little comets at the edges of your frame. Fixing that usually means adding a coma corrector or field flattener —extra gear that raises the price and complexity. You’ll also run into a smaller “sweet spot” where the image stays pin-sharp, so big camera sensors can end up with soft corners or vignetting.
- Fast scopes tend to have very short back focus, too, so it’s harder to shoehorn in filter wheels, off-axis guiders, or heavy cameras. And because the depth of focus is razor-thin, even tiny missed tweaks at the focuser can leave your stars looking mushy.
That said, if you want ultra-wide, speedy captures, specialized “fast” designs like the f/2.2 Celestron RASA series really shine—they give flat, well-corrected fields at breakneck speed. Just be ready for precise focusing and camera alignment.
Step up to medium-speed rigs (around f/4–f/8) and you get what I call the astrophotography workhorses: fast Newtonians and APO refractors. With focal lengths between 400 and 1000 mm, these telescopes deliver fields of view wide enough to capture most nebulae and galaxies, yet long enough to tease out detail in smaller objects. Plus, you can easily tweak your field of view with reducers or Barlow lenses.
Finally, telescopes with f/ratios of f/10 and above (like Schmidt–Cassegrains and Maksutovs), often at focal lengths of 2000 mm or more, are perfect for lunar and planetary work—they provide high magnification and tight fields for crisp surface detail. The trade-off? Deep-sky targets require much longer exposures, so a top-notch tracking mount is essential.
If you enjoyed this post, I’d love it if you checked out my other content on my website or join me on YouTube—it really helps me creating these blogs and videos about astrophotography and backyard astronomy.
Clear skies!
Wido Oerlemans
One Reply to “Telescope Focal Length & f/Ratio Explained for Stargazing vs. Astrophotography”