Finding the perfect astrophotography camera can be a challenging task. To assist you, I regularly evaluate the specifications of ZWO cameras, considering crucial factors like read noise, quantum efficiency, dynamic range, and specific requirements for planetary or deep-sky imaging. After careful assessment, I have determined that the ZWO ASI662MC camera (USA, EU), currently priced at $249, and the ZWO ASI678MC (USA, EU) at $299, offer great value for planetary imaging in 2023. The ASI678MC provides superior resolution, a higher frame rate, and reduced read noise for an additional $50. Conversely, the ASI662MC offers higher quantum efficiency and increased Full Well Capacity. Both cameras utilize a 12-bit Analog to Digital Converter adjustable to 10-bit for improved frame rates. Featuring cutting-edge Sony IMX sensors with STARVIS 2 technology, these new ZWO cameras eliminate amp glow and offer an HGC mode to minimize read noise and preserve dynamic range. For deep-sky color cameras within the $1000 range, I recommend the ZWO294MC Pro (USA, EU) and ZWO533MC Pro (USA, EU). The 294MC Pro provides a larger, landscape field of view, ideal for capturing large celestial objects, and offers a higher dynamic range and full-well capacity compared to other sub-$1000 options. The 533MC Pro offers a square field of view at lower read noise, higher quantum efficiency, and reduced amp glow compared to the 294MC Pro. In the $1000-$2000 range, the ASI2600MC Pro (USA, EU) stands out with its high quantum efficiency, dynamic range, and resolution of 26MP. Furthermore, the recently released ASI2600MC DUO (USA, EU) incorporates a unique guide camera chip, eliminating the need for separate guiding equipment. For those unconstrained by budget, the ASI2400MC (USA, EU) is recommended for longer focal length telescopes, and the ASI6200MC (USA, EU) boasts an impressive 61-megapixel resolution.
In this blog post, I will begin by explaining the main differences between planetary and deep-sky imaging. After that, I will discuss the important factors to consider when purchasing a high-quality astrophotography camera for planetary and deep-sky photography. In the final part of the blog, I will compare all the color cameras offered by ZWO that are currently available in the market. I will consider different criteria and price ranges while conducting the comparison. It’s important to note that this blog is not sponsored by ZWO. I personally have a preference for ZWO cameras and have used them for several years, which allows me to evaluate them more easily. The main focus of this blog is to discuss color cameras for astrophotography.
If you like comparison tables, please click here to view my dynamic comparison table for ZWO cameras that are on the market today, with links to trustworthy astrophotography shops in the USA and EU.
Introduction
As a beginner, selecting your first astrophotography camera can feel overwhelming. When you ask for advice on the best camera for your hobby, you might receive complex answers involving terms like quantum efficiency, read noise, dynamic range, resolution, and arcseconds per pixel. Moreover, people will tell you that there isn’t a single camera that can do everything well. In fact, experienced astrophotographers will ask you to choose between planetary imaging and deep-sky astrophotography. So, what are the main differences between these two? I will do my best to explain all these aspects in simple terms, without getting too technical.
Planetary imaging
Planetary imaging is a fascinating aspect of astrophotography. Although technically it’s not truly “astro” photography since we’re capturing images of planets rather than stars. When it comes to planetary imaging, it’s important to note that planets appear relatively small in size when observed from Earth. Even during the best conditions, when planets are at their closest point to us (opposition), their apparent size is only about 1/50th the size of the moon, and sometimes even smaller.
Additionally, planets are bright objects because they are illuminated by our own sun within our own solar system, similar to the moon. As such, photographers often use short videos to capture the planets. Many planetary imagers record one to three-minute videos of the planets using specialized software like SharpCap or FireCapture. These videos are later processed using specific software for planetary processing, such as AutoStakkert or Registax. During processing, high-quality frames are selected and stacked, while low-quality frames are discarded. Read my tutorials on planetary imaging to find out more.
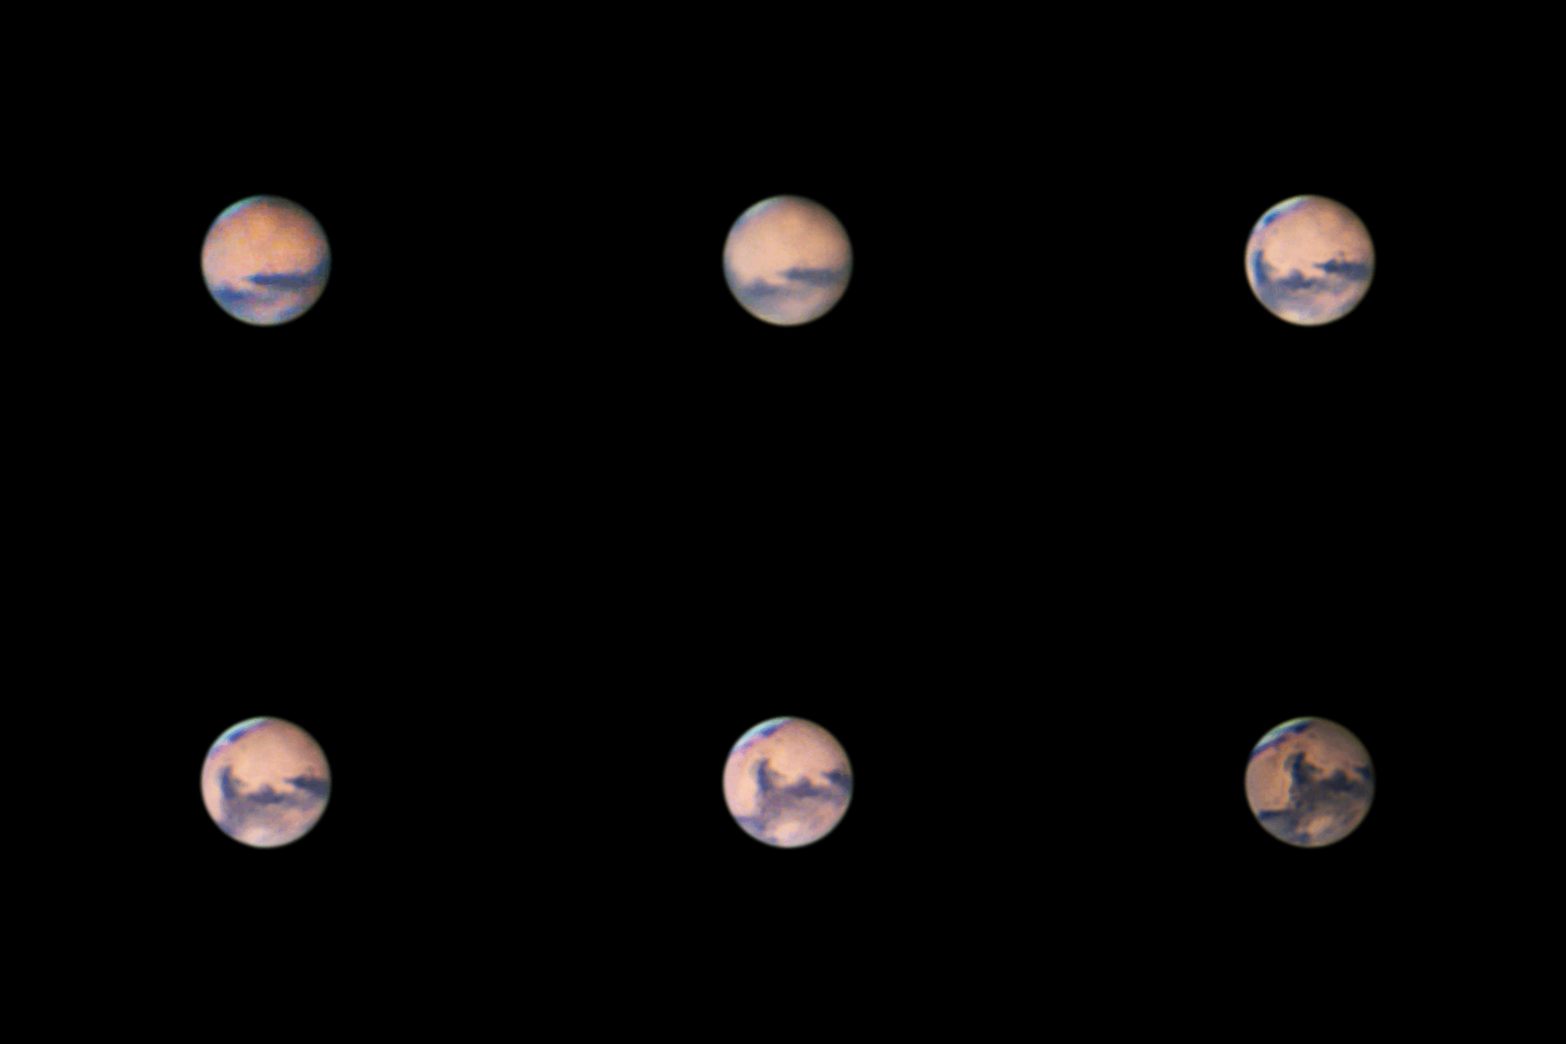
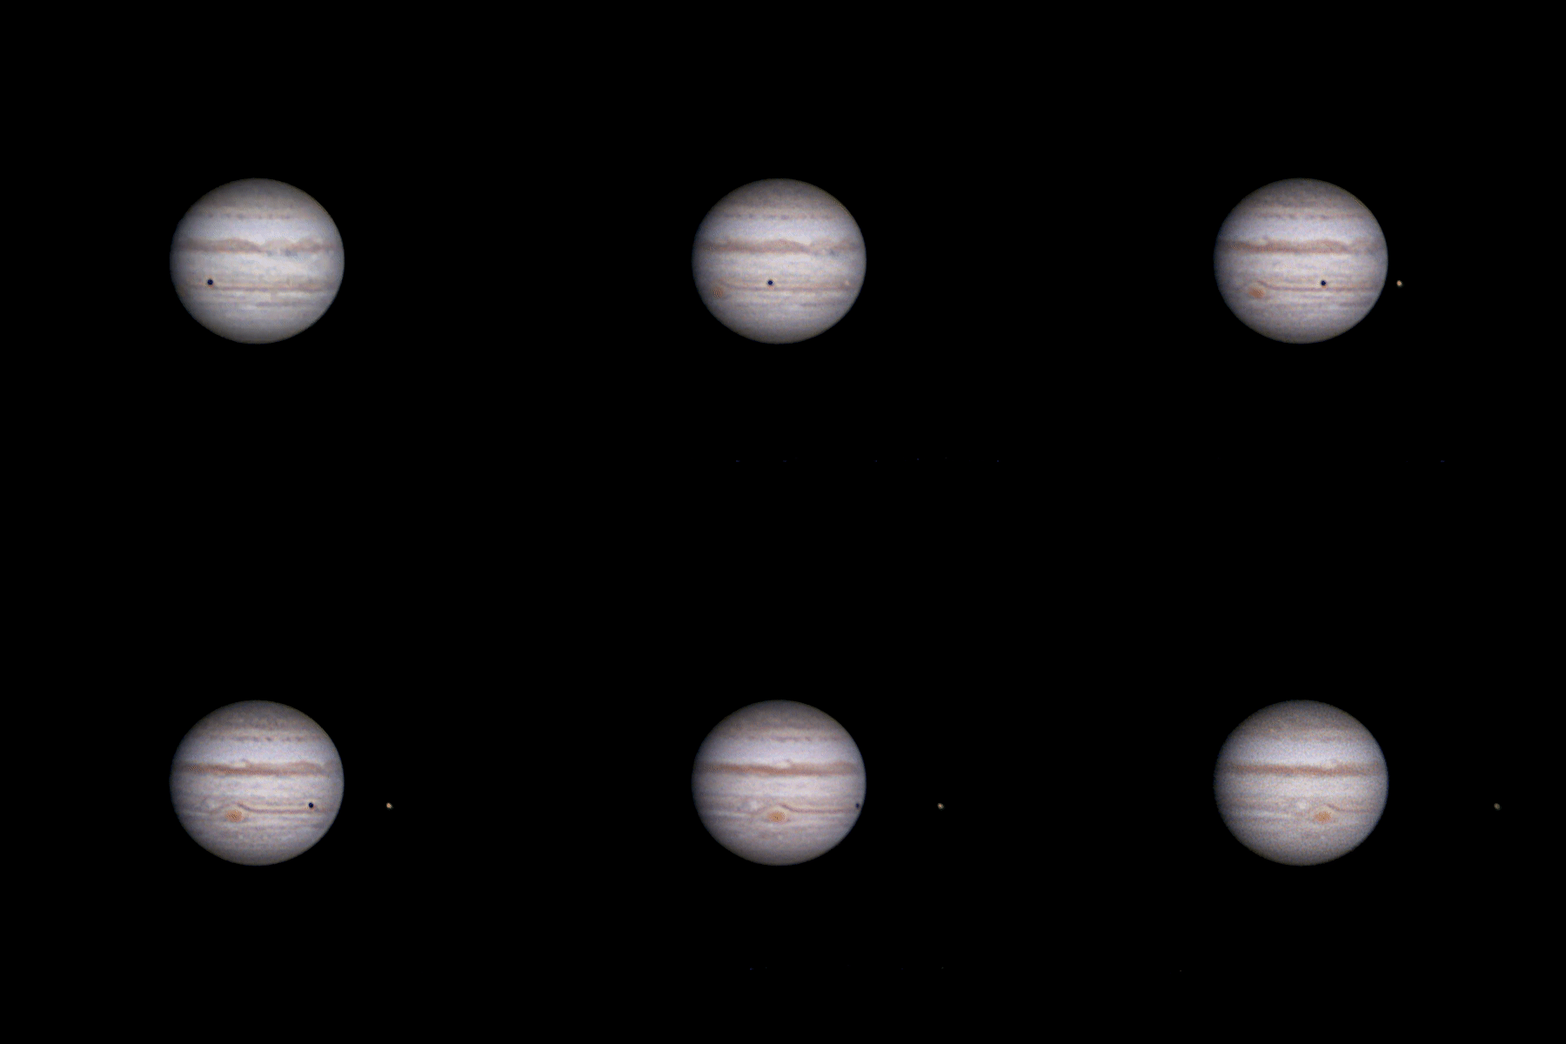
Planetary imaging presents various exciting opportunities. Planets like Mars and Jupiter display intriguing surface details, provided you have a good planetary camera and a telescope with sufficient aperture and focal length. Moreover, these planets rotate—Mars takes about 24 hours to complete one rotation, similar to Earth, while Jupiter completes a rotation in around 10 hours. By capturing videos of a planet at different times throughout the night, you can create an animation that shows the planet’s rotation. Another thrilling activity is capturing the moment when a moon passes in front of a planet. For instance, Jupiter has four major moons—Io, Europa, Callisto, and Ganymede—which complete orbits around Jupiter ranging from 2 days (Io) to 16 days (Callisto). With careful planning, you can capture the moon and the shadow it casts on the planet’s surface, resulting in captivating images like these two timelapse videos I’ve created of Jupiter and Mars.
Deep Sky Astrophotography
Now, let’s compare planetary imaging with deep-sky astrophotography. Although there are some similarities, there are significant differences between the two. Both activities require a camera, telescope, and mount to track and capture objects in the night sky. Both involve capturing and processing images, but that’s where the similarities end. The main distinction is that deep-sky astrophotography involves capturing light from objects outside our solar system. These objects can be located tens, hundreds, thousands, or even millions of light-years away. Consequently, the light emitted by these objects is extremely faint. This presents a major challenge for deep-sky astrophotography—you need to take long exposures, sometimes lasting several minutes, to capture the faint light from these deep space objects (DSOs). Accurately tracking the object in the night sky with a high-quality equatorial mount is also crucial. Typically, multiple images, often 10, 20, or more, are captured and stacked together to create a final image. This means that deep-sky astrophotography requires hours or even days of capturing time.
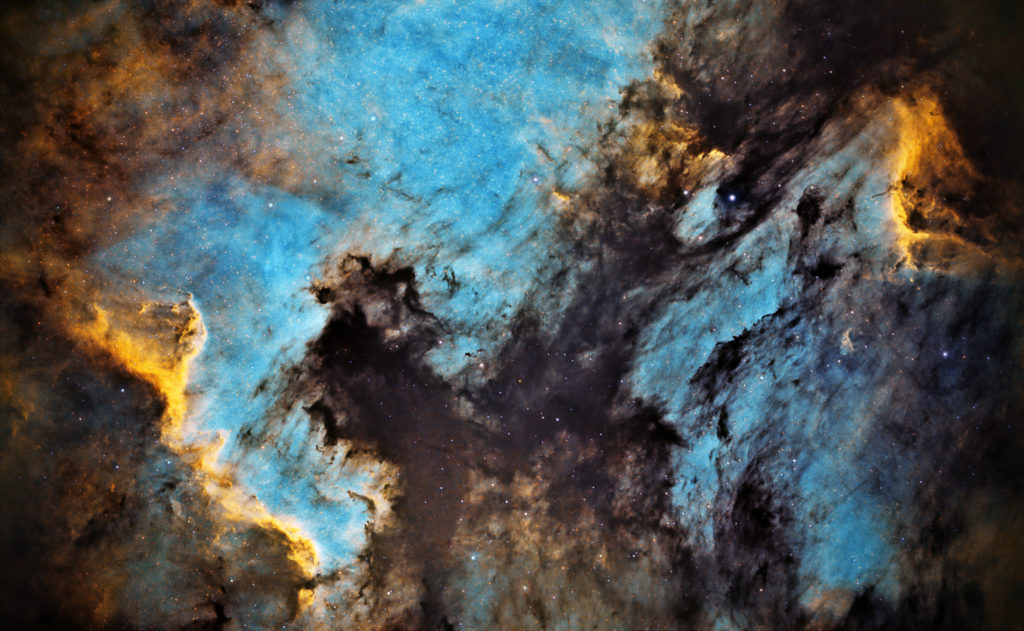
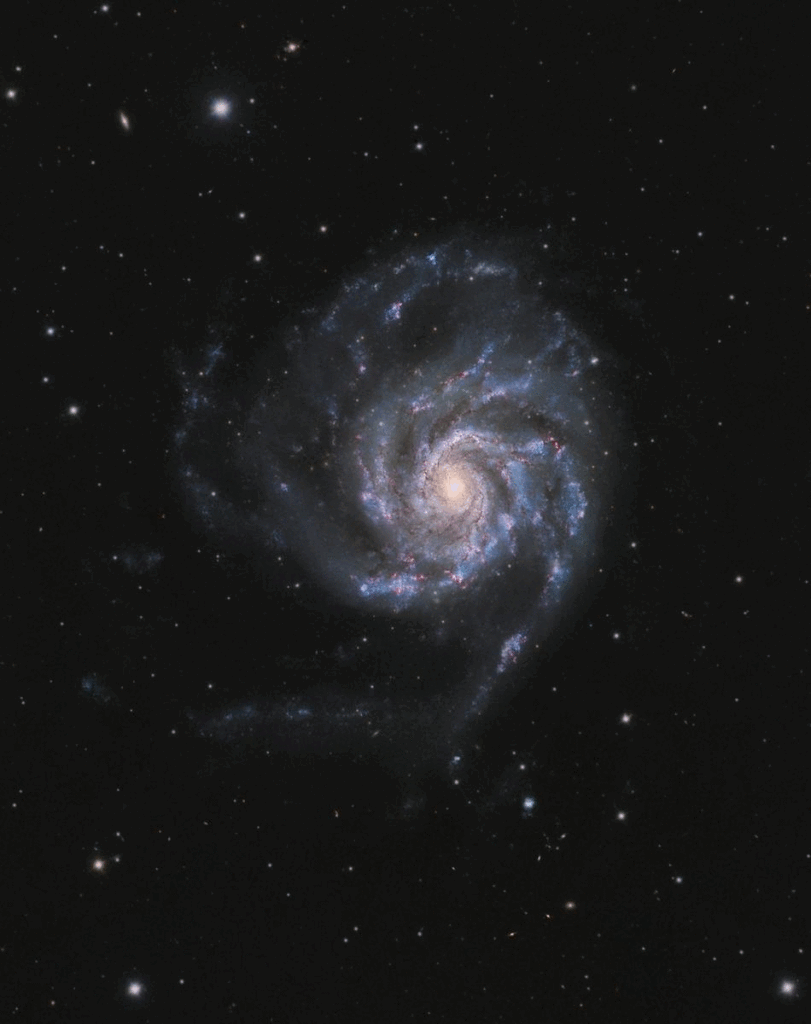
The software used for deep-sky astrophotography is different from that used for planetary imaging. People often utilize software like NINA, ASIAIR, Sequence Generator Pro, Astrophotography Tool, Backyard EOS, or similar for capturing deep-sky images. When it comes to processing, popular choices include Deep Sky Stacker, PixInsight, Photoshop, or similar software. As you can see, both the capturing and processing aspects are quite distinct for planetary and deep-sky astrophotography. I mention these differences because they relate to the specific criteria to consider when searching for a camera suitable for either planetary or deep-sky astrophotography. Below are some examples of deep-sky astrophotography pictures I’ve taken with some of my backyard telescopes and a dedicated astrophotography camera.
Main differences between planetary and deep-sky astrophotography:

Criteria for selecting a ‘good’ planetary or deep-sky astrophotography camera
So, how do planetary imaging and deep-sky astrophotography impact the criteria for choosing a suitable camera? I’ve created a table below to explain the criteria I would consider when selecting a camera for either planetary or deep-sky astrophotography. I will focus on the main differences between the two (highlighted in red) and also mention some similarities.
Table: Requirements for selecting a planetary and a deep-sky astrophotography camera
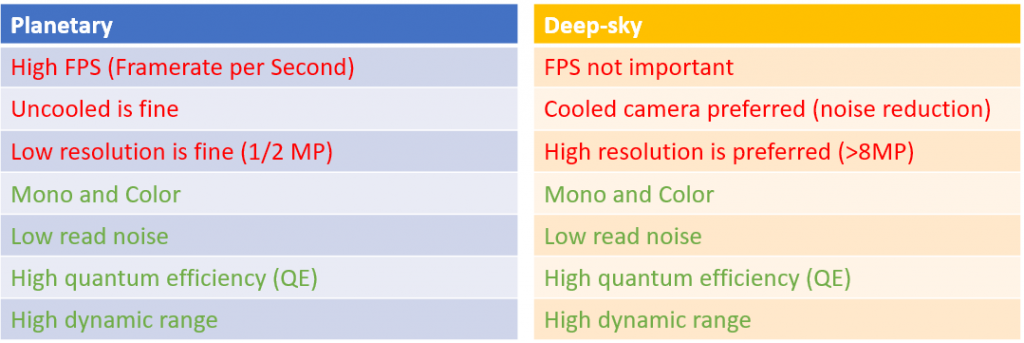
By understanding these differences and similarities, we can better evaluate the factors that matter when choosing a camera for planetary or deep-sky astrophotography. So let’s discuss these similarities and differences in more detail.
Framerate Per Second (FPS)
When choosing a camera for planetary imaging, the framerate per second (FPS) becomes an important factor, unlike in deep-sky astrophotography. In planetary imaging, we capture short exposure videos, typically lasting one or two minutes, of the planets in our solar system, as mentioned earlier. Let’s simplify things with some basic math. Suppose you’re recording a one-minute video of Jupiter, and your camera has a 10 FPS capability. This means that your camera can take 10 pictures every second. Consequently, you would end up with 600 pictures (10 FPS x 60 seconds = 600 frames) from that one-minute video. Now, let’s compare this to a camera with a 50 FPS capability. With the same one-minute video of Jupiter, you would have 3000 pictures (50 FPS x 60 seconds = 3000 frames). Even without being a math expert, it’s clear that having 3000 frames offers a much better chance of obtaining high-quality images of Jupiter compared to having only 600 frames. For those who are unfamiliar with processing planetary videos, specific software such as AutoStakkert or Registax is often used. These programs select the highest-quality frames from the video, which are then stacked together to create a final image. Low-quality frames are discarded during this process. As a result, the FPS value becomes quite significant for planetary imaging, as it directly affects the number of frames available for selection and stacking. On the other hand, in deep-sky astrophotography, where we capture long-exposure images, often lasting several minutes, the framerate per second is not relevant at all. Deep-sky objects require these extended exposures to capture the faint light emitted from objects outside our solar system. Therefore, FPS does not play a role in deep-sky astrophotography cameras.
Cooling
When capturing long-exposure pictures of deep-sky objects, the heat generated in your CMOS camera can lead to the appearance of hot and cold pixels, which result in undesirable “noise” in your deep-sky images. While techniques like compensation frames (such as darks and flats) and dithering can help reduce this noise, it’s best to avoid dealing with it altogether. That’s why, starting in 2016, companies like ZWO, Altair, and QHY began offering cameras equipped with a dedicated Peltier cooler. This cooler allows you to lower the temperature of the camera sensor and electronics while capturing long-exposure images of deep-sky objects. By cooling your camera, often to around -30 degrees Celsius below the ambient temperature, you can significantly reduce the noise caused by heat buildup. Although cooling is not a necessity for deep-sky astrophotography (many people use DSLRs, for example), it is extremely beneficial, and I highly recommend considering a dedicated deep-sky astrophotography camera with cooling capabilities. On the other hand, for planetary cameras, cooling is not as crucial. Planetary imaging involves capturing very short videos. After each capture, the planetary camera has enough time to cool down. Therefore, planetary imaging with an “uncooled” camera is perfectly acceptable and does not pose any significant issues.
Resolution (Mega Pixels)
As mentioned earlier, planets appear very small when observed in the night sky. Therefore, you don’t necessarily need a camera with a high resolution to capture clear images of planets. In most cases, a camera with 1 or 2 megapixels is sufficient for this purpose. However, there is one exception to this rule: if you also want to photograph the moon. The moon is larger, occupying about half a degree of arc in the sky. In such cases, a higher-resolution camera may be beneficial. On the other hand, when it comes to deep-sky astrophotography, you encounter objects of various sizes, including small and large galaxies, globular clusters, nebulae, and more. It is often desirable to have larger objects fit within the field of view of your camera. The size of your field of view depends on two factors: the focal length of your telescope and the resolution of your camera (including the size of its pixels). To simplify matters, having a larger field of view allows you to capture larger deep-sky objects, such as the Andromeda galaxy, the Horsehead nebula, the Orion nebula, and so on. Therefore, selecting a high-resolution camera enables you to capture these larger celestial objects effectively.
Mono or Color
For both planetary and deep-sky imaging, selecting either a mono or a color camera is a personal choice. I’ve written this blog on the advantages and disadvantages of mono versus color imaging. In general, I would recommend starting with a color camera when you are inexperienced, as mono imaging requires more gear (filters, filter wheel). It is also more time-consuming and includes more complex capturing and processing techniques.
Read noise
Read noise refers to the unwanted electronic noise present in the camera’s system. When the camera reads the value of each pixel, there may be a small random fluctuation in the signal due to the loss or gain of a few extra electrons. This variation can cause the readout value to deviate slightly from the actual signal recorded. Read noise becomes particularly significant when dealing with faint signals, such as in deep-sky astrophotography where you are capturing dim objects. In deep-sky astrophotography, the goal is to capture weak photons emitted by these objects. To ensure accurate detection, these photons must surpass the level of read noise produced by the camera’s electronics. Therefore, it is crucial to consider the level of read noise when selecting a camera for deep-sky astrophotography. However, it is also advisable to check the read noise levels of a planetary camera, even though it is not as critical as in deep-sky imaging.
Quantum Efficiency
The main purpose of a camera sensor is to accurately measure the amount of light, or photons, it receives and convert them into a digital signal. Ideally, if 20 photons reach a pixel, the sensor should register a value of 20 for that pixel. However, there is a factor called “quantum efficiency” (QE) that affects the sensor’s ability to detect photons effectively. QE measures the percentage of photons that the sensor can actually count and convert into a signal. For example, if the QE is 50%, the sensor will only register half of the photons it receives. High-end sensors can have a QE of around 95%, meaning they are very efficient at detecting photons. However, most amateur astrophotography cameras typically have a QE ranging from 50% to 85%. It’s important to check the quantum efficiency of both planetary and deep-sky cameras to ensure they can capture photons effectively.
Dynamic Range
Dynamic range refers to variations in tonal values and intensities your camera can produce in your picture. In general, a higher dynamic range is always better. The dynamic range of your camera depends on the analog to digital converter or ADC in short. Let’s start simple with the lowest number of bits: 1 bit. This simply means that your camera is able to create two variations; 0=black, 1=white. Now, an 8 bit sensor can already hold (2x2x2x2x2x2x2x2) 256 variations from black to white (0 to 255). So here are some examples:
8 bits can hold a number from 0 to 255.
12 bits: 0 to 4095
14 bits: 0 to 16,383
16 bits: 0 to 65,535
The more bits you have, the subtler variations in tonal values and intensities you can have, and the larger values you can store. We call the large range of values in an image its dynamic range. More dynamic range is always better when processing your images. Depending on the camera, the variations may be rescaled into a range of from 0 to 65,535. Another aspect of dynamic range is the full well capacity of the pixels of your camera sensor. The full-well capacity is the largest charge a pixel can hold before saturation which results in degradation of the signal. When the charge in a pixel exceeds the saturation level, the charge starts to fill adjacent pixels, a process known as Blooming. The camera also starts to deviate from a linear response and hence compromises the quantitative performance of the camera. I’m no camera technician, and just want to help you to select a good camera. I will simply say that higher bit ADC and a higher full-well capacity will result in a higher dynamic range. That is what we need to look for when comparing different cameras on dynamic range.
Best ZWO color camera for planetary imaging?
Let’s first focus on ZWO’s color cameras for planetary imaging. In line with the criteria mentioned, I will focus on uncooled color cameras. In 2023, ZWO released ten uncooled cameras, including the ASI120MC-s ($149), ASI224MC ($199), ASI662MC ($249), ASI178MC ($269), ASI385MC ($299), ASI462MC ($299), ASI678MC ($299), ASI482MC ($349), ASI485($399), ASI 485MC ($399), and the ASI183MC ($549).
To simplify the comparison process and in addition to this blog, I’ve also created a dynamic table specifically for ZWO cameras (color and mono). It’s designed to help you quickly find the information you need for each camera, without having to sift through extensive spreadsheets. The table offers convenient filtering options such as price range, color or mono, cooled or uncooled cameras, and the year of release, so you can easily identify the latest models or older options. Each camera entry in the table includes details like price, links to reputable astrophotography shops in the USA and EU, sensor brand and resolution, pixel size, cooling information, DDR memory, Frames per Second, Read noise, quantum efficiency, full-well capacity, and ADC information. You can also sort the columns to organize the data according to your preferences. I believe this table will be a valuable tool in your camera selection process. I would appreciate your feedback on how it serves you.
Best bargain < $200
When looking at the <$250 price range, we have the ASI120MC-S and the ASI224MC. Both have a one-megapixel camera with similar pixel sizes. Note that a one-megapixel sensor is already large enough to capture all of the planets in our solar system. The sensor brand of the ASI120MC is Aptina versus Sony on the ASI224MC. The Sony sensor is better in terms of lower read noise and higher quantum efficiency, due to a higher full-well capacity. Also, the ASI224MC is almost three times faster in terms of framerate per second than the ASI120MC (150 vs. 60 FPS).
The ASI224MC is available at Agena Astro (USA/WW), High Point Scientific (USA/WW), and Astroshop (EU/WW).
Best ZWO Planetary Color Camera ($250-$550)
In this price range, we have several ZWO color cameras to consider. The latest releases are the ASI662MC and the ASI678MC, which offer several advantages over older models. These cameras use advanced Sony IMX sensors with STARVIS 2 technology, resulting in zero amp glow. They also have a special HGC mode that reduces read noise and preserves dynamic range when using higher gain settings. It’s worth noting that older models like the ASI485MC and ASI482MC are being discontinued, so I recommend considering the newer ASI662MC or ASI678MC.
In terms of specifications, the ASI678MC has a resolution of 3840×2160 pixels with 2 pixels per micron, while the ASI662MC offers 1920×1080 pixels with 2.9 pixels per micron. The ASI678MC provides a larger field of view at a lower arcsecond per pixel. When comparing FPS at a similar resolution of 1920×1080 pixels and a 12-bit depth (RAW16), the ASI678MC achieves 95 FPS, while the ASI662MC reaches 76 FPS. For capturing planets, reducing the resolution to 640×480 pixels at 12 bits yields 215 FPS for the ASI678MC and 161 FPS for the ASI662MC. However, it’s important to consider that factors like USB cable quality and the capturing device used can affect the actual FPS in real-life scenarios.
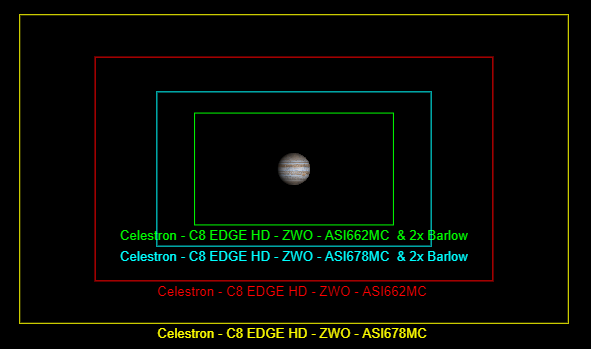
Both the ASI678MC and ASI662MC cameras feature a built-in HCG (High Conversion Gain) mode, which effectively reduces read noise at higher gain settings. The ASI678MC’s HCG mode starts at a gain level of 182, while the ASI662MC’s HCG mode starts at 252. Consequently, the ASI678MC achieves a minimum read noise beyond those gain levels of 0.6e-, whereas the ASI662MC achieves a minimum read noise of 0.8e-. In terms of Quantum Efficiency (QE), the ASI678MC has a slightly lower peak QE of 83% compared to the ASI662MC, which peaks at 91%. Notably, the green and red wavelengths of the ASI662MC have a peak approximately 10% higher compared to the ASI678MC. Both cameras support 12-bit (RAW16) Analog to Digital Converters (ADC), which can be scaled down to 10-bit (RAW8). The ASI662MC has a larger pixel size, resulting in a higher full well capacity of 38.2K compared to the ASI678MC’s 11.3K.
Overall, both the ASI662MC and ASI678MC are excellent cameras for capturing planets within our solar system. From a technical standpoint, the ASI678MC offers a higher resolution, faster FPS, and reduced read noise at an additional cost of $50. On the other hand, the ASI662MC provides a higher Quantum Efficiency (QE) and a larger Full Well Capacity per pixel. Both cameras use a 12-bit Analog to Digital Converter, which can be scaled down to 10-bit (RAW8) for enhanced frame rates. Compared to older models, the newer ZWO cameras incorporate STARVIS 2 technology, resulting in zero amp glow, and feature an HGC mode to minimize read noise and maintain a wider dynamic range at higher gain settings.
The ASI678MC is available at Agena Astro (USA/WW), High Point Scientific (USA/WW), and Astroshop (EU/WW)
The ASI662MC is available at Agena Astro (USA/WW), High Point Scientific (USA/WW). and Astroshop (EU/WW)
Best ZWO color camera for deep sky astrophotography?
Currently, ZWO has introduced a lineup of eight cooled color cameras designed for deep-sky imaging. These cameras include the ASI183MC Pro ($799), ASI533MC Pro ($799), ASI294MC Pro ($999), ASI071MC Pro ($1280), ASI2600MC Pro ($1799), ASI2600MC Pro DUO ($1999), ASI2400MC Pro ($2999), and the ASI6200MC Pro ($3799). Let’s delve into a discussion about these cameras based on their distinct price categories.
Check this table for a complete overview of all ZWO cameras available in 2023
Below $1000
When you’re looking for a dedicated cooled color camera below $1000, ZWO offers three options; the ASI183MC Pro ($799), the ASI533MC Pro ($799), and the ASI294MC Pro ($999). ‘Pro’ stands for the notion that all cameras are equipped with a Peltier cooler that cools to at least -30C below ambient temperature. Also, all Pro cameras have internal DDR memory (256MB) which enables a very high read-out speed of the pictures onboard the camera, before transferring the data via USB to your laptop or desktop. This is nice, as it prevents noise or amp glow in your pictures due to low(er) transfer speeds via USB. When comparing the three cameras, you may be tempted to think that the ASI183MC Pro offers the highest resolution at 20MP (5496×3672), as compared to the ASI533MC Pro (3008×3008) and the ASI294MC Pro (4144×2822). While this is true, the camera also offers the lowest pixel size of 2,4μ, vs. 3,76μ (ASI533) and 4,63μ (ASI294). If we translate all of this in the field of view you’ll be getting, you should be aware that the ASI294MC – due to its larger pixel size – will offer you the widest field of view, as demonstrated in the picture below.
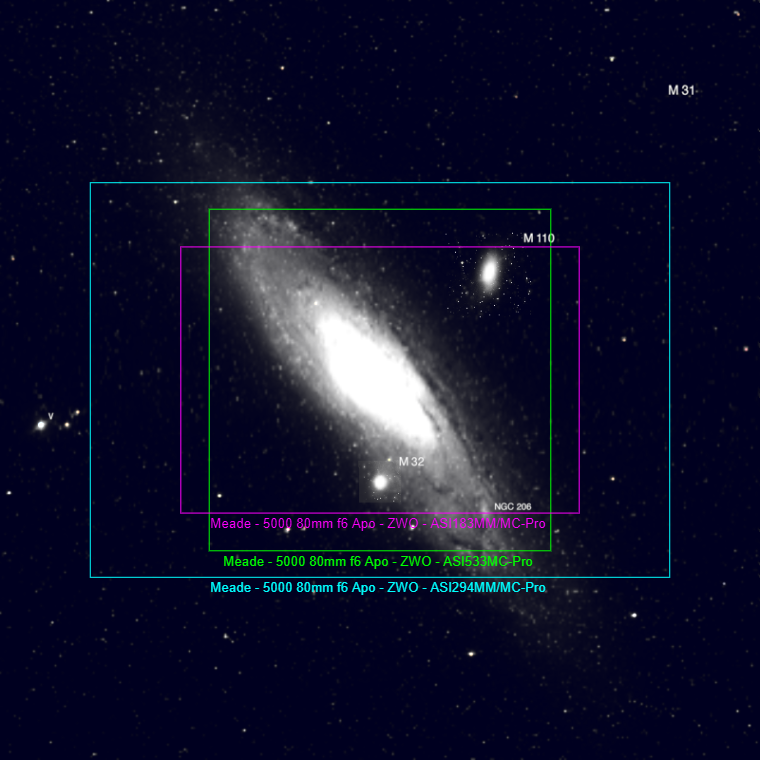
When comparing read noise, the newest ASI533MC Pro has a significantly lower read noise (1.0 – 3.8e) as compared to the ASI183 Pro (1.6 – 7.0e) and the ASO294MC Pro (1.2 – 7.3e). Also, the ASI533MC is equipped with the latest Sony sensor technology that doesn’t show any amp glow, whereas the ASI294MC Pro and the ASI183MC Pro suffer from some amp glow that needs to be calibrated out with flat frames. The ASI183MC Pro has a slightly higher quantum efficiency (84%) as compared to the ASI533MC Pro (80%) and the ASI294MC Pro (75%). Looking at dynamic range, the ASI294 MC Pro has the largest Full Well capacity (63.7K), followed by the ASI533MC (50K), and the ASI183MC Pro (15K). Also, both the ASI294MC Pro and the ASI533MC Pro have a 14-bit Analog-to-digital converter, whereas the ASI183MC has a lower, 12-bit ADC.
In sum, at the $1000 price point, the ASI294MC Pro and the ASI533MC Pro are the preferred choices. The newer ASI533MC Pro offers zero amp glow and lower read noise at a lower price. In contrast, the ASI294MC Pro offers a higher resolution in landscape versus the square sensor of the ASI533MC Pro and a slightly higher quantum efficiency. Both cameras offer a good dynamic range with a 14-bit Analog to Digital Converter.
The ASI294MC Pro is available at Agena Astro (USA/WW), High Point Scientific (USA/WW), and Astroshop (EU/WW)
The ASI533MC Pro is available at Agena Astro (USA/WW), High Point Scientific (USA/WW), and Astroshop (EU/WW)
The ASI183MC Pro is available at Agena Astro (USA/WW), High Point Scientific (USA/WW), and Astroshop (EU/WW).
For an overview of all ZWO camera specifications, check this table.
$1000 to $2000
In this price range, ZWO offers three options: the ASI071MC Pro ($1280), the ASI2600MC Pro ($1799), and the ASI2600MC DUO ($1999). The ASI2600MC DUO is essentially the same as the ASI2600MC Pro, but it includes an additional guide sensor (SC2210; 1920×1080 pixels) built into the camera. This guide sensor allows for auto-guiding without the need for an extra guide scope and guide camera.
When comparing the ASI071MC Pro with the ASI2600MC Pro, a few notable differences emerge. Both cameras provide the same field of view, but there are significant distinctions. The ASI2600MC Pro offers higher resolution (6248×4176 pixels) and a smaller pixel size (3.76 μ) compared to the ASI071MC (4944×3284 pixels, with a pixel size of 4.78μ). It may seem logical to assume that a smaller pixel size always leads to more detailed images because of the increased pixel count. However, it’s essential to consider factors such as astronomical seeing conditions, guiding accuracy, and the aperture and focal length of your telescope, as they all impact the level of detail you can capture in your astrophotographs.
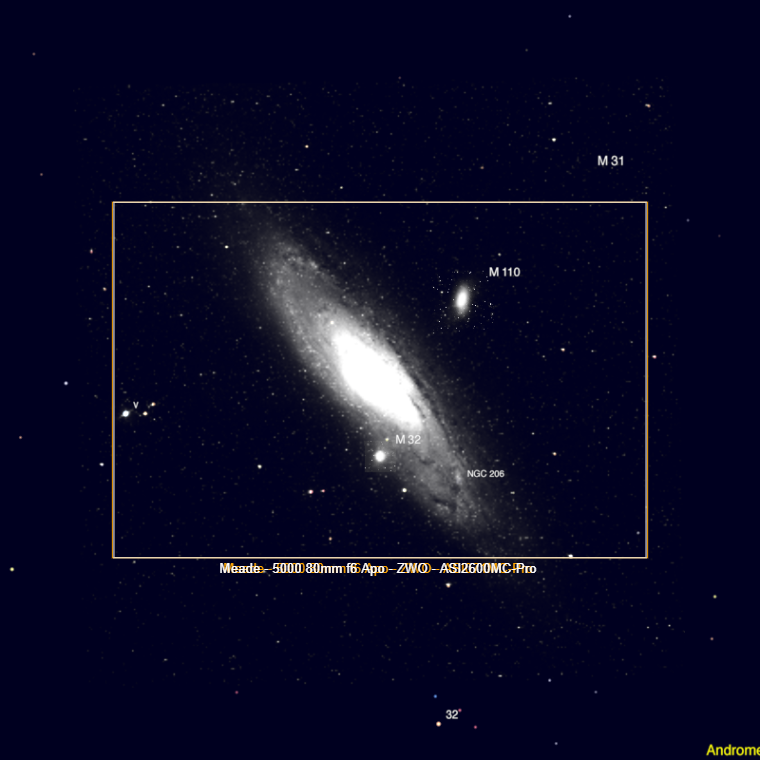
The ASI2600MC Pro outperforms the ASI071MC Pro in several key aspects. It has a higher quantum efficiency (80% compared to 50%), a 16-bit analog to digital converter (compared to 14-bit), and a larger full-well capacity (50K versus 46K). Overall, the ASI2600MC Pro is a superior camera, but it does come with a higher price tag, costing an additional $500.
If you’re interested in capturing deep space images without the need for an additional guide scope and guide camera attached to your telescope, you might want to consider the latest option, the ASI2600MC DUO. It offers this convenience for just an extra $200 compared to the ASI2600MC Pro.
The ASI071MC Pro is available at Agena Astro (USA/WW), High Point Scientific (USA/WW) and Astroshop (EU/WW).
The ASI2600MC Pro is available at Agena Astro (USA/WW), High Point Scientific (USA/WW) and Astroshop (EU/WW).
The ASI2600MC DUO is available at Agena Astro (USA/WW), High Point Scientific (USA/WW) and Astroshop (EU/WW).
For an overview of all ZWO camera specifications, check this table.
$3000-$4000
Before we proceed, it’s important to note that at this price range, you could also consider investing in a high-quality telescope and mount. However, if you have the budget, ZWO offers two exceptional color deep-sky cameras for astrophotography: the ASI2400MC Pro ($3699) and the ASI6200MC Pro ($3999).
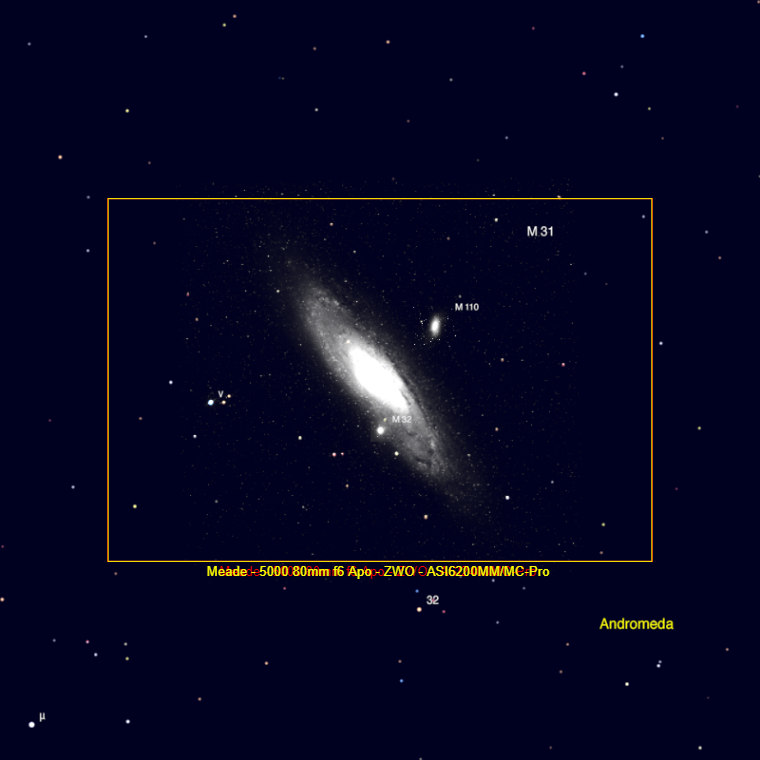
There are two noteworthy aspects to consider. Firstly, both cameras provide the same field of view. Although the ASI6200MC has a higher resolution (61 MP compared to 24 MP), it also has a smaller pixel size (3.76 vs. 5.94) compared to the ASI2400MC Pro, resulting in an equivalent field of view as shown in the picture below. It’s important to remember that having more pixels doesn’t necessarily mean capturing more details of a deep-sky object (DSO). If we take one arcsecond per pixel as an ideal size to image deep-sky objects, you’ll need to pair the ASI2400MC to a telescope with a focal length of about 1220mm, and the ASI6200MC Pro to a telescope with a focal length of about 775mm. Keep in mind that various factors such as astronomical seeing conditions, guiding accuracy, and the telescope’s aperture and focal length all contribute to the level of detail you can capture in your DSO images. Still, it’s impressive to see the expansive field of view provided by both cameras. With a focal length of 480mm, the Andromeda galaxy easily fits within the field of view of both cameras.
The ASI6200MC camera is notable because it has a better dynamic range with a 16-bit analog-to-digital converter (ADC), while the ASI2400MC Pro has a 14-bit ADC. However, the ASI2400MC Pro surpasses the ASI6200MC in terms of full-well capacity, which means it can handle a higher amount of light without saturation (100K compared to 51.4K). Both cameras have the same quantum efficiency of 80%. Considering the significant amount of money involved, it would be wise to spend an additional $300 and choose the ZWO ASI6200MC Pro. This camera offers higher resolution and a better dynamic range, making it a more desirable option.
The ASI2400MC Pro is available at Agena Astro (USA/WW), High Point Scientific (USA/WW) and Astroshop (EU/WW).
The ASI6200MC Pro is available at Agena Astro (USA/WW), High Point Scientific (USA/WW) and Astroshop (EU/WW).
For an overview of all ZWO camera specifications, check this table.
I would like to start by saying, I find your videos very entertaining and I have learned a lot from you. I have recently purchased the ZWO ASI462 MC. I was surprised to not see it on the list of cameras. From what I have gathered, it is a very good planetary camera and hope you could review it someday to compare to the 290. Keep up the great work and thank you for your videos.
Hi Jeff, thanks for your feedback, I’ll include the zwo asi462mc in my blog and table.
Hi Wido.
Thank you for this review. Helped me a lot. I wanted to ask you something: in the Quantum Efficiency column of the comparison table, some of them have the value “TBD”. What does TBD mean?
Thank you!
Hi Marcia, it means “to be discussed”. ZWO didn’t release any official QE figures for these cameras.
Hi Marcia, it means “to be discussed”, ZWO didn’t release any official QE percentages for some of their cameras.
I’m moving from visual observation into astrophotography and trying to limit my beginner (expensive) mistakes as I learn. I currently have an 80mm APO and am in the purchase process for the 8″ EDGE HD. I have decided, for now at least, to stick with OSC cameras just because things are already getting complicated enough, (and I think some of the new narrow band filters are going to be fun!) but I want to be able to use any new expensive cameras I buy for both of these very different telescopes. In using the CCD suitability calculator at astronomy.tools, both your recommended 178 solar system and 294 DSO cameras work great with the 80mm APO. For both cameras however to be in the suitability range with the 8″ Edge HD, I need to increase the binning to 3×3 to get away from over-sampling. I honestly don’t know the final impact of doing that. Do I need to be looking for a different solution, or is this 3×3 “binning” just not an issue when it comes down to my final output. A very related final question; if the ASI462 had been on your chart from the beginning would it have changed your recommendations? Thanks for the great job you do, glad I found you on the web!
Hi Jeff,
Thanks for your positive feedback. Yes, you have a point about binning, although for solar system objects this is less of an issue. At the end of my edge HD video I show some pictures of the moon taken with my asi1600mm pro (3,8 um pixel size), they weren’t so bad especially considering the poor seeing conditions: https://youtu.be/tEVNKi9ryYc?t=818 Still, a larger pixel size camera may produce better results for solar imaging (e.g. the 174mm has a larger pixel size). For deep-sky I have seen some amazing pictures with 2000mm FL telescopes paired with ZWO cameras…see for instance this picture of m101 https://www.instagram.com/p/CA3Hx2UJnt9/?utm_source=ig_web_copy_link -taken with an asi071MC Pro. So I’m not too worried that you’ll end up with good pictures using any of these cameras. I’m just looking at real-life results, and understand that the astrocalculators’ recommendations are different :-). As for the 462MC, I think this one is direct competition with the asi290 and the asi224 cameras. Either of those cameras will be good for planetary imaging, I don’t think you’ll see a huge quality difference between those cameras but maybe I’m missing something….a secret weapon that the 462MC has…Clear skies!
Thank you for all of your work gathering this information and sharing for all to consume .. You compared cameras based on price delimiters . But what if those delimiters were moved .. Say Comparing the ASI294MC Pro to the ASI071MC Pro ?
Hi Karl, thanks! Well, in this particular case I think its a tough decision. The 071 offers a larger chip which will get you a wider field of view, which is nice. But when looking at other things such as full well capacity, analog to digital converter (indicators for dynamic range) and read noise, the 294 is very similar, and in case of Full well even slightly better. So the choice in this case is: do you want a larger field of view and are you willing to pay 500 dollars extra for that. Clear skies!
Hi Wido!
I finally found your web site and discovered that you have a mine of useful information about astrophotography. Just before I came here, I had just selected and ordered a new planetary camera as an upgrade from the Sv305 that I have been using. Playing around a bit with “astronomy.tools”, I did some checking on field of view and found that the ZWO ASI178MC has a slightly bigger FOV than my current camera. Checking specs, it also has 14-bit ADC, higher resolution and decent overall performance for a non-cooled camera. Also, it was “IN STOCK” at OPT! So its on it’s way now. Thankfully, you also mentioned that this camera is a good one in the price range I was looking at. It probably won’t do much for my DSO interests (although I’ll try a few brighter objects) but that will come later when I update my mount and get the focal reducer. It’s only money, right !! Clear skies!
Martyn
Hi Martyn,
I only read your comment now. Thanks! I have been so busy with work and family (first my wife and then my dad in the hospital). How are you doing? I’ve made some life decisions. Will step back from my ambitious carreer path as an assistant professor to spend more time with my family, friends, and hopefully the nightsky :-). Hope you’re fine, talk to you soon. The 178MC is a nice one as it has a larger FoV and a higher quality ADC. I only use it for planetary, not deepsky (dark frames show to much noise). Have a great summer!
Wido.
hello and congratulations for the beautiful site. I wanted to ask you something: I have a zeiss Telemator 63/840, with which I make visual observations of the moon, sun and planets. but I would also like to do some shots of planets and moon, which room would you recommend me? because I read about the zwo 462, the 178, etc… I don’t understand which one could be the most suitable. I was also thinking of buying a Barlow baader VIP 2x (which, if necessary, can become 3x or 4 … I don’t remember). you surely know a lot more than me, I just understood that it must have small pixels. ah, I use Mac. but I don’t know if there are any video processing programs. thank you
Hi Davide,
Thanks! I think I would go for something like the ASI224 (e.g. https://bit.ly/3dIUHka) as it is a good bargain. You’ll have a small pixel-sized camera with a fast FPS to make videos of the planets – which you can stack and turn into a picture.
And yes, a 2x or 3x barlow lens would get you to about .5 to .3 arc pseconds per pixel, which is nice when you want to catch planets.
The only thing to consider is that with the asi224MC, you wont be able to fit the full moon in your picture. If you also want that, you could go for the 178MC(https://bit.ly/31lINHQ) which has a larger sensor with which you might be able to also capture the full moon in one picture.
As for software, I would consider firecapture which has a MAC version to capture the moon and planets (http://www.firecapture.de/)
Good luck, clear skies!
Wido
I hope your parents’ situation gets better, sorry I didn’t write it down. I thank you for recommending these rooms, from what I understand, the “oldest” is 224, but still very good. while the 178 is better? or just because it allows me to film the full moon in full? because I noticed that it only has 60fps while the 224 has a lot more, and I knew that on the planets the higher number of fps was very important. the 462 then you would discard it. I am currently only interested in the planetarium, because I only have this instrument. the software you indicated to me are already included in the purchase of the zwo room and are used to resume. I was looking for something to process videos and stacks on Mac (like directorx or autostakker). again thanks and sorry.
Hi Davide,
I mainly recommended the 178MC because of the larger sensor (6MP), to capture a larger piece of the moon as compared to the 224.
Also, take into account that the max FPS of the 178 is lower because of the larger sensor. You can reduce the resolution in capturing software like firecapture.
When you do, you can run the 178 at 130FPS with a resolution of 1280 x 960 – still a bit slower than the 224.
Also, take into account that the length of your USB cable will also influence FPS speed.
The 462 has a sensor size that is in between the 224 and the 178.
224 –> 1 Mega Pixels
462 –> 2 Mega Pixels (is also a fine camera, but lower dynamic range as compared to the others)
178 –> 6 Mega Pixels.
As planets are very tiny objects in the sky, the 224MC is enough to capture all of the planets.
I don’t know any processing software on the mac, but on the autostackert site it does state you could run autostackert in an “Vine” enironment on your Mac.
Hope this helps.
Wido.
NO mention of the ASI290MM? Many consider this to be better than the MC version, and the best camera for planetary imaging…did you just forget about it, or ignore it cos it’s mono?
Hi David, the 294mm Pro was released at the time of writing this blog last year. I’ll update the blog, thanks for noticing.
The asi294mm Pro is the successor of the asi1600 MM Pro. It has a better full well capacity and Quantum efficiency but does suffer more amp glow (which can be calibrated out by applying dark frames).\
Clear skies!
Dear Wido,
Thanks for a very informative and comprehensive overview of the ZWO cameras!
I am still in the “exploratory phase” regarding astronomy, and would like to buy a camera not because of taking amazing pictures, but because I hope to see more stuff on a PC monitor than in the eyepiece. I am using Celestron NexStar 6SE.
One thing still puzzles me: if I choose a deep sky camera with small pixel size, such as ASI183MC Pro, will I be able to take good planetary images? I know making a video will take longer, but what else did I miss? I found a lot of information about imaging deep sky objects using a planetary camera, but nothing about the opposite – about imaging planets using a deep sky camera.
Hi Pavel,
The main differences are in FPS – Frames Per Second. Planetary cameras are often faster in FPS than deep-sky cameras. The reason for this is that you’re going to take videos of the planets (often one or two minutes in length), and the higher your FPS the higher your number of frames (aka pictures) of the planet will be. That’s important because you can select the best frames and disregard the bad ones. The more high quality frames you have, the better your picture of the planet will be. For deep sky FPS is not important as you’re going to take long exposure pictures of the night sky. Hope this helps.
hello and congratulations for the fantastic blog. I wanted to ask you for advice. I have two refractors, a zeiss 63/840 and a Lich 90/1300, and I will get a Newton 12 “f5 … I only want to make planets, mainly with 12”, but maybe using the other two as well. which camera would you recommend me in combination? I have no problem spending for something of quality. I saw that new sensors came out like 174 and 464… what do you say? because every seller here in Italy recommends a different product, and I wouldn’t want to make a mistake in the purchase. Thanks and happy new year
Hi David, I completely missed this post, sorry. If you want the absolute best pictures of planets you’d need to consider a mono planetary camera with separate RGB filters…
I have a classic 8 inch Dob and want some planetary astrophotography. Its ok to use this ZWO cameras? I am particulary interested in the ZWO ASI 224 MC .
Hi Juan, definitely, go for it! the 224MC is a very nice all-round planetary camera.
Hi congratulation for your site and for your videos, i have a question, everywhere i see cams for planetary or deep sky, but what about a cam for double stars? what parameters are more significant than others? Would prefear a native color, since i would like to shoot colour contrasted pairs. what bout asi 482 or 585?
Hi Nevio, stars are pretty bright so you can buy a so called planetary camera yo shoot the double stars, like the ones you mention. If you also want to capture dimmer nebulae it’s best to take long exposures with a cooled astrocam. Clear skies!
hi thanks for the quick answer, i have another doubt, I see the for example that in my telescope asi 482 (5,8um pixel dimension) has lower resolution than asi 585 (2,9um pixel dimension) 1,49″/pixel vs 0,74″/ pixel but match better my 115/800 refractor for sampling combination as in https://astronomy.to…ccd_suitability reported. So in this case is it better to care about resolution or sampling suitability? i posted same question in cloudy nights but got no answer, i hope you can understand the question despite my bad english
Hi Nevio, for double stars I’d take the 585mc as double stars are quite small and bright objects in the night sky you can also use it for moon and perhaps some planetary (you’d need a Barlow lens).
Hi Wido,
I’m thinking of getting a cooled color camera (besides the 585mc which I already have) for deep space photography. I own redact 51 and Celestron C8 (with 0.67 reducer) telescopes. I’m interested in the 071mc and the 2600mc but am struggling with what would be a wise purchase. What would be your thoughts here? As a fellow countryman, I don’t have the luxury of a low bottle sky in my back yard an will be planning on using dual band/UHC filters to capture images. Thanks for your time.
Hi Michael, the asi071MC Pro is nice but a somewhat older model. In terms of pixel size, it would fit your C8 with reducer nicely and it’ll get you to a “sub arcsecond per pixel”, landscape field of view that is almost similar to the ASI2600MC Pro. The camera is somewhat less sophisticated (lower quantum efficiency, higher read noise, 14 bit vs 16 ADC in comparison to the 2600MC Pro) – so the 2600MC should give you a more dynamic picture with less read noise. If you’re looking for a newer model in a similar price range, the the ASI533MC Pro doesn’t suffer from amp glow (don’t know if the 071 Pro does), with a higher QE, meaning it is more efficient at coverting light (photons) into a digital signal, but the 533 does have a squared and smaller field of view (vs. landscape) compared to the asi2600MC and the asi071MC Pro. I’d say the 2600MC Pro is the best, but also the most expensive one. There is a new one on the market with a built in 2nd sensor for autoguiding, eliminating the need to buy a guidescope and guidecam. I deliberately don’t use that one, as I engage in narrowband imaging and I’m worried that the narrowband filters will prevent accurate guiding. Hope this helps!
Hi Wido,
Thanks for taking the trouble to put all this info together – much appreciated!
I stumbled across your website as I have been researching the most suitable camera for my astrophotography setup for high resolution solar and lunar photography.
I am currently using an ASI2600MM pro with my AP Traveler setup at 730mm and F7 and it works brilliantly for deepsky astrophotography.
I’ve settled on using a Daystar Quark (with in-built 4.2x Barlow) with my Traveler, giving a f29.4 setup. The ASI174MM with 5.86 micron pixels, high frame-rate and global shutter seems like a reasonable match but I’m starting to lean more towards the ASI432MM (which isn’t yet included in your table). The calculated optimum pixel size for my f29.4 setup is 6.56 micron.
The ASI432MM has a larger sensor than the ‘174’ but more importantly has larger pixels (9 micron) and a much larger full-well depth of 97ke. It still has a respectable 120 FPS and is 12-bit.
What do you think Wido? I imagine that a lot of the parameters for planetary imaging are shared with high-res lunar and solar imaging.
Of course, one of the most important factors, seeing conditions, are largely beyond our control 🙂
Many thanks!
Hello Graham,
Apologies for the delayed response! I make it a point to check my emails at astroforumlive@gmail.com daily, so feel free to reach out anytime.
Regarding the ASI432MM, it’s quite an intriguing device, as you mentioned, with its large pixel size and other features. However, I believe it could complement the Daystar Quark quite well, especially considering its 4.2 barlow, if I remember correctly.
With your 730mm focal length telescope, you could achieve approximately 0.6 arcseconds, providing a view of about half the sun’s disc within a 0.3×0.2 degree frame. Additionally, opting for the Mono version eliminates the challenge of dealing with the Bayer matrix inherent in color cameras, making calibration easier.
In essence, I see no reason why you shouldn’t proceed with this setup :-). Although you may find the ASI432MM primarily dedicated to solar observations with the Daystar, other cameras might serve you better for capturing the moon and planets.
Wishing you the best of luck!