I often get questions about how to photograph the planets with a telescope in the night sky. I have been struggling with this question myself as I went from photographing planets with my smartphone to a small refractor telescope, and eventually a larger Schmidt-Cassegrain telescope. To get a good quality picture of the planets, you’ll need the right gear, software, and processing skills. As for gear, I would recommend getting a large aperture (=> 200mm or 8″) and focal length telescope (=> 2000mm), a computerized go-to mount that can automatically track the planets in the sky, and a dedicated planetary camera with low read noise and a high FPS (Frames per Second). Next, I’d recommend using either Firecapture or Sharpcap to take about 60-second to max. 300-second videos of the planets at high gain and low exposure settings. Finally, I’d advise you to stack the highest quality frames of your videos in Autostakkert and process the stacked picture in Registax.
Below, I’ll discuss each of these recommendations in more detail. I hope this information will help you to become better at imaging the planets with a telescope, and save you from some of the “mistakes” that I’ve made in the past. The first couple of tips are about the kind of astrophotography gear you can best use to capture the planets. After that, I’ll share some tips on how to find and capture the planets in the night sky. Finally, I’ll discuss some software options to process your pictures. Throughout this blog, I’ll link to relevant information and I’ll make follow-up v/blogs where I discuss each of these tips about equipment, capturing, and processing the planets in more detail. So if you’re interested in the topic of planetary imaging and astrophotography, I invite your check out my website and subscribe to my YT channel. Also, if you have useful information or questions about planetary imaging you want to share, please leave your comments in the comment section. I’m always happy to learn new things and I’ll do my best to answer each of your questions.
#1: What telescope should I get to capture the planets?
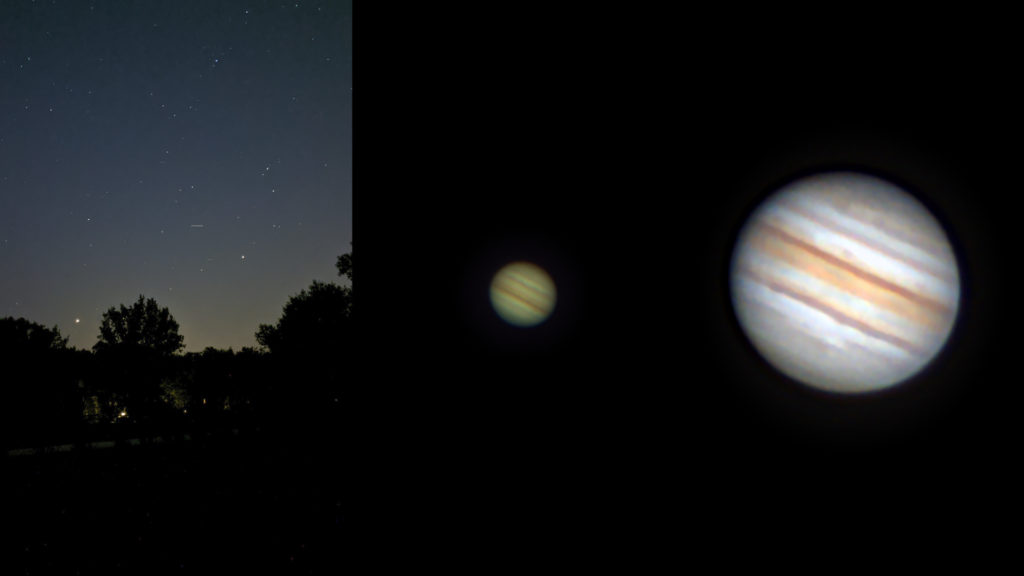
The planets are some of the brightest but also smallest objects in the night sky. So you’ll need a telescope with high magnification capabilities. Here’s a blog I wrote with more info about high-quality planetary telescopes. In that blog, I mention a number of “must-haves” and “nice-to-haves” that are important when picking a good planetary telescope. The most important point of that blog is that – in my opinion – you need a telescope with a sufficient aperture (at least 200mm or 8″) and focal length (at least 2000mm) to get high-resolution images of the planets, where the surface details of the planets such as the red spot and cloud bands of Jupiter, Saturn’s rings and Cassini devision, and the polar icecaps on Mars are visible in your pictures. The focal length determines the magnification power of the telescope whereas aperture relates to the light-collecting power of your telescope. Preferably, you want your telescope to have a focal ratio of about 1:10 to 1:15 (aperture: focal length).

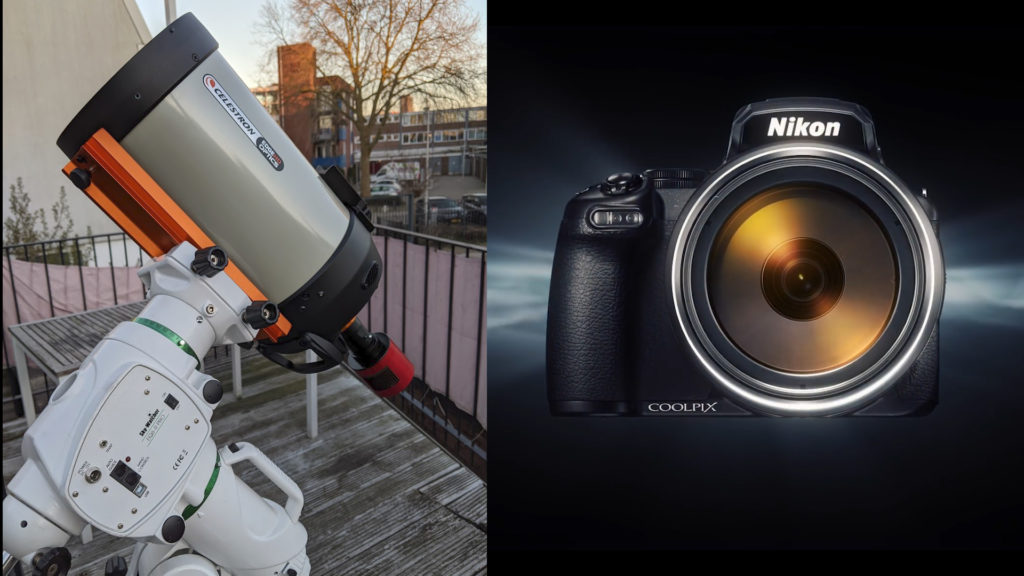
Some good examples are Schmidt Cassegrain telescopes like the Celestron C8 XLT with a 200mm (8″) aperture and a 2000mm focal length (1:10, or f/ratio 10) or the SkyWatcher MAK180 with an aperture of 180 and a focal length of a whopping 2700 (1:15, or f/ratio 15). Note that these telescopes are already around the $/€1000,- and unfortunately that is still on the “low end” of getting a good quality image of the planets. If you want excellent pictures, you’ll need a telescope with an even larger aperture. For example, Celestron offers a Schmidt Cassegrain range of telescopes with apertures ranging from 8″ to 9.25″, 11″ and 14″, with the 14″ topping out at about $/ € 5000,-. So next time you see some awesome high-resolution images from folks who used such telescopes, you also know the price tag of that picture…If you have the money, it is undeniably true that a larger aperture and accompanying focal length translates into higher light gathering and magnification power – and that improves the ability to see and capture awesome surface features like the red spot and cloud bands on Jupiter, the Cassini division in Saturn’s rings, and clear surface features on Mars.
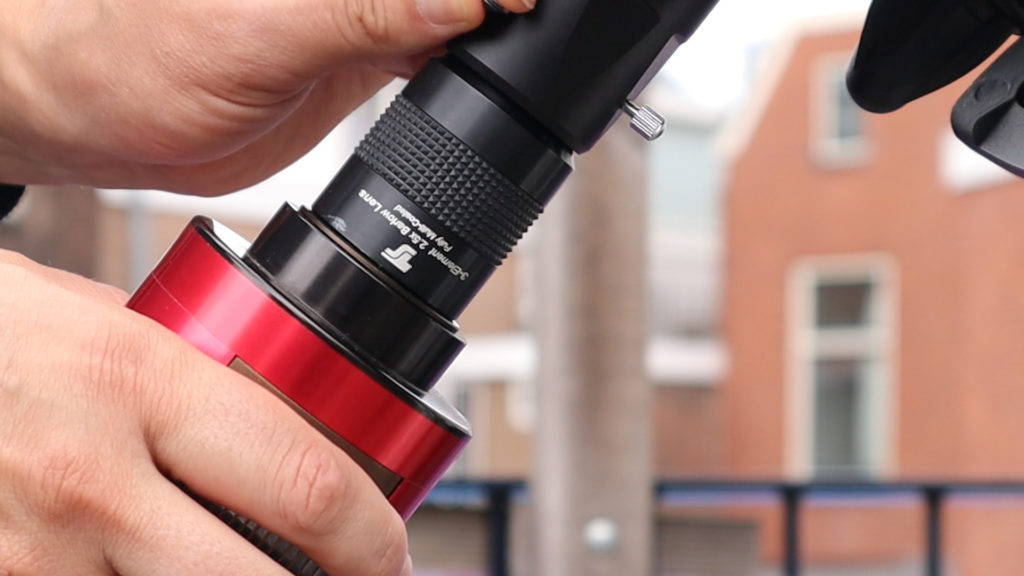
For those of you that, like me, think that the C14 price tag is a little over the top to get a nice image of the planets (what would your partner say?), there is a public secret that many planetary imagers use called a Barlow lens. If you have a Barlow lens, you can double, triple, quadruple, or even quintuple (if that’s a word) the focal length of your telescope, giving you the ability to zoom in on the planets. This, however, comes with a catch. As your aperture cannot be increased simultaneously (as that relates to the diameter of your telescope which cannot be changed), only increasing the focal length WITHOUT increasing the aperture will decrease your f/ratio of your telescope. For example, a Barlow lens will change your f/ratio from f/10 to f/20 (in case of a 2x Barlow), or to F/30 (in case of a 3x Barlow), and so on. I should warn you that doing so will eventually result in what is called “empty magnification”. You probably know this phenomenon already, as most of you have experienced this phenomenon when trying to photograph a far away object with your smartphone. When you pinch and zoom on your smartphone, this often results in a grainy, blurry picture because the tiny lens in your smartphone cannot collect enough light to get a high resolution picture of the object you want to photograph. The same logic holds for telescopes. Many planetary imagers settle for a Barlow in the range of 2x to 3x magnification which still provides lovely images of the planets.
#2: What mount is best suited to capture the planets?
My first and most important tip would be to get a sturdy, stable astrophotography mount that includes tracking capabilities to capture the planets with a telescope. Let me explain why. The planets in the night sky are at best about 1/60th the size of the moon or less. When you are planning on viewing the planets with a 2000mm to 5000mm focal length, you also need a very stable, sturdy mount to avoid any kind of vibrations that can destabilize your telescope during your observation or imaging session. In addition to that, the earth’s rotation causes the planets to quickly move out of your telescope’s field of view. The solution for this is to buy a solid, motorized tracking mount – often called a GoTo mount – that is able to automatically slew to and track the planets in the night sky. This avoids many frustrations of having to reposition and re-align your telescope every time when a planet moves out of your field of view.
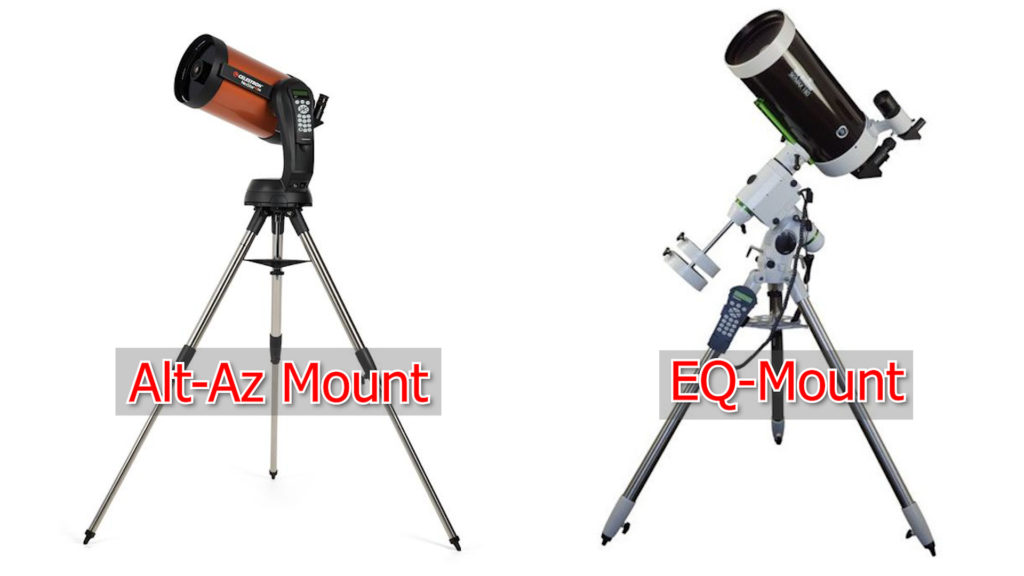
There are different types of computerized (GoTo) mounts: Altitude-Azimuth (Alt-Az) and equatorial (EQ) mounts. You can use both mounts to capture the planets. From personal experience, I can inform you that Alt-Az mounts are a lot easier to set up and use as compared to EQ mounts – which have to be polar aligned. As always, there is a catch. Alt-Az mounts are not so well suited for deep-sky astrophotography. So if you are also planning on photographing so-called Deep Sky Objects (DSO’s) – which are all astronomical objects outside our solar system – I do recommend you to get an EQ mount. Click on the links to learn more about beginner equatorial mounts and advanced equatorial mounts.
#3: What camera is best suited to capture the planets?
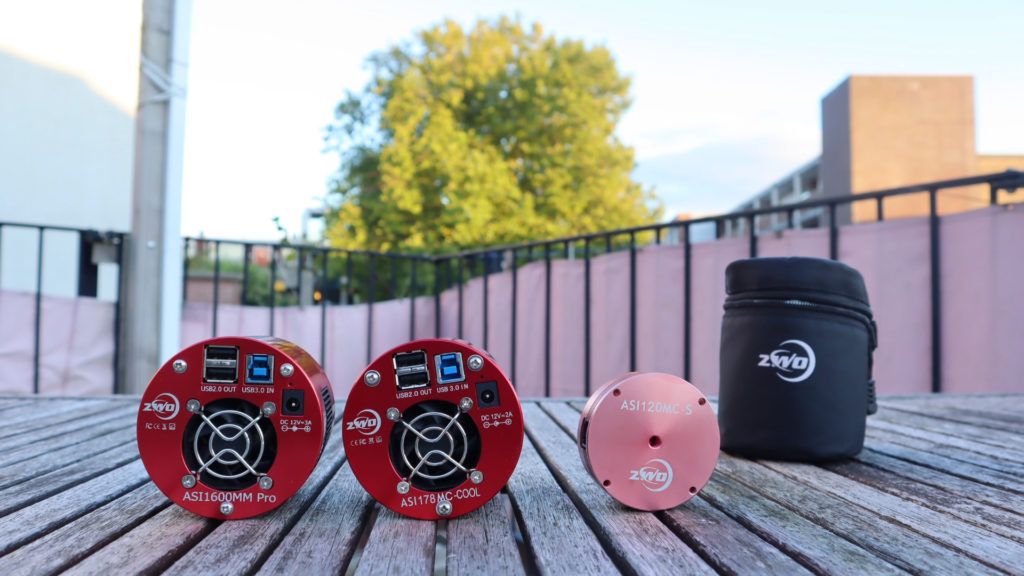
Capturing the planets is most commonly done by recording short videos with the help of a camera that is connected to a telescope. Most planetary imagers use an affordable, dedicated astrophotography camera that you can connect to your telescope. Planetary cameras are specifically designed to capture videos at night with low read noise, and a high framerate per second, or FPS in short. A camera with a high framerate per second is very useful as it is able to record more data of the planet during a given amount of time. Luckily, planetary cameras are not that expensive. You can already buy some decent cameras ranging from 100 to 400 dollars or euros. For more information about good planetary cameras, check out this v/blog.
Alternatively, you could also start by connecting your DSLR camera or smartphone to your telescope, as both your DSLR and smartphone also have recording options. In addition to that, some modern-day DSLR cameras like the Nikon P1000 have incredible optical zoom capabilities. Still, using a telescope and camera combination will result in a higher quality picture, because your telescope has a much larger aperture with which you can collect more light as compared to the Nikon P1000, which is not particularly designed for nighttime photography. I will make a separate v/blog to discuss equipment to capture the planets in more detail, so if you’re interested, please subscribe to the channel.
#4: What is the best time to capture the planets?
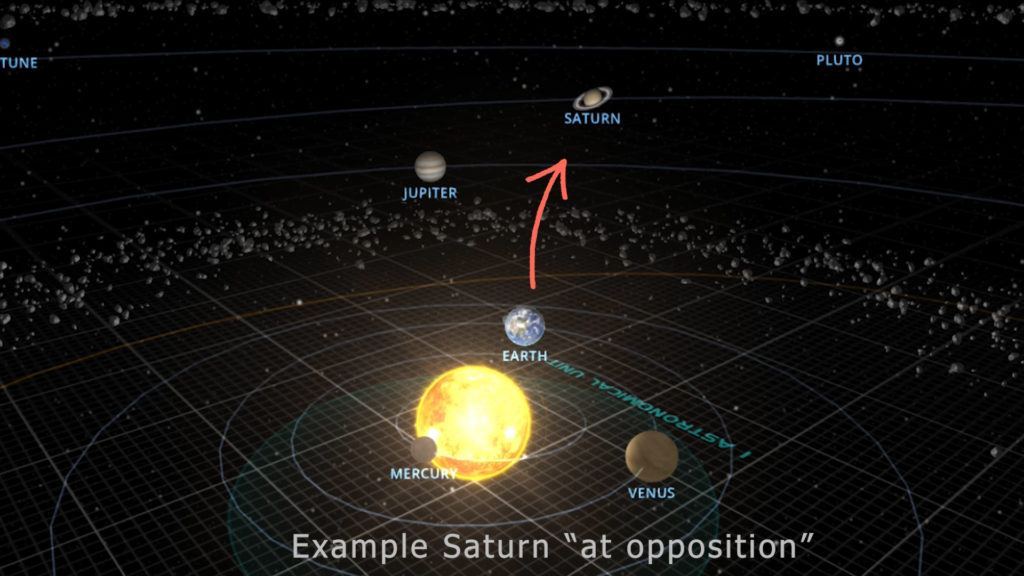
The outer planets are the planets that are further away from the sun as compared to earth, like Mars, Jupiter, Saturn, Neptune, and Uranus. You can best image these planets during their opposition. When a planet is “At opposition” this simply means that the planet is at its closest distance from earth. See an example of Saturn at opposition below. Note that the earth is exactly between the moon and Saturn, giving us the best viewing opportunities.
For the inner planets – Venus and Mercury – you can best capture them when these planets are at their greatest elongation. At greatest elongation means that Venus and Mercury will appear at their farthest apparent distance from the sun in our sky.
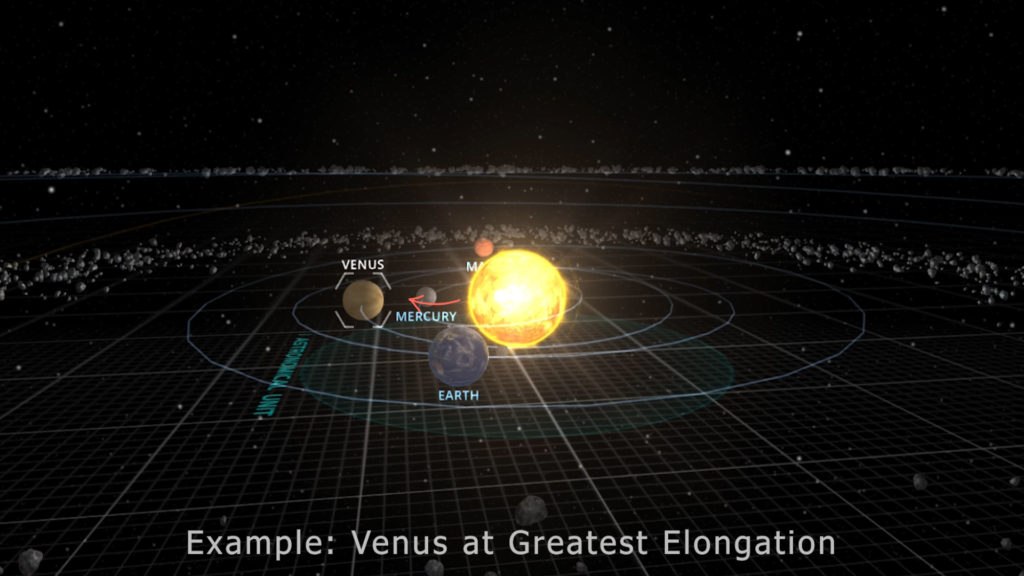
When the inner planets are at eastern elongation, they will appear as evening stars after sunset whereas when they are at western elongation, they will appear as morning stars before the sun rises. Opposition and elongation times can be found throughout the internet.
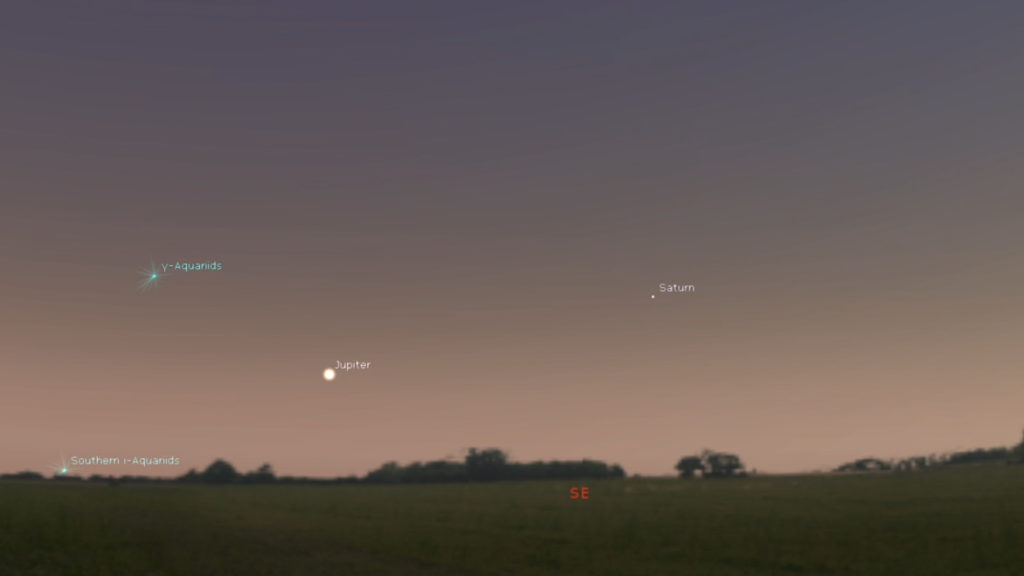
#5: How to find the planets
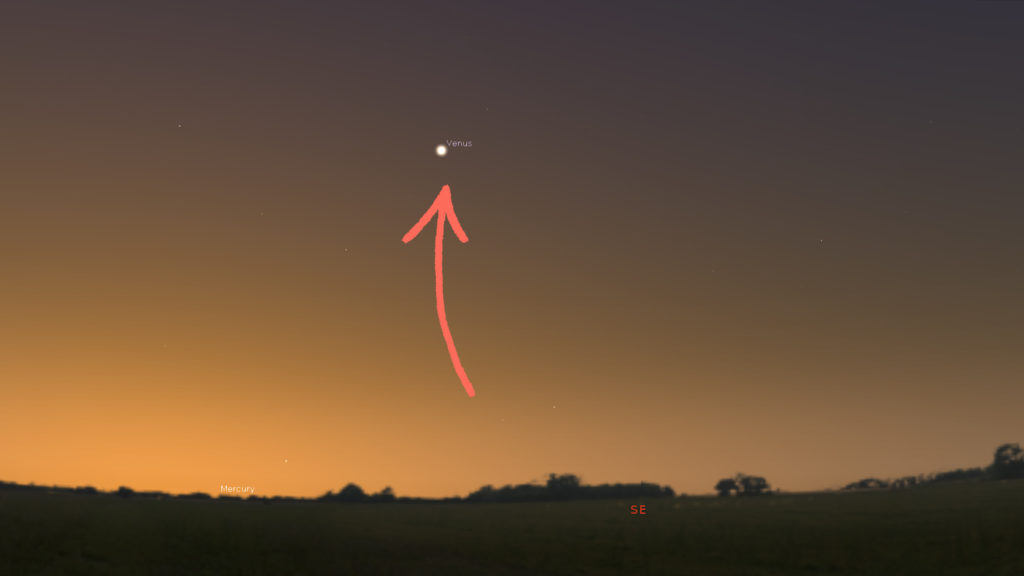
The planets are among the brightest targets in the night sky, so it is pretty easy to spot them with the naked eye. If you’re unsure where to look, Stellarium, sky saftheari, and ISS detector are three excellent apps you can use to locate the planets in the night sky from your location. If you have a GoTo mount, all you need to do is to select the planet of your choice and your mount will automatically slew to that location.
If you plan on imaging the planets at high magnification, it is really useful to attach a finder scope to your telescope and align the field of view of your telescope with the view you’ll get in your finderscope. This can avoid a lot of frustrations at night. You can use your finderscope at night to get the planet into the field of view of your camera, after which you can finetune the position of your mount so that the planet is in the center of your telescopes’ field of view.

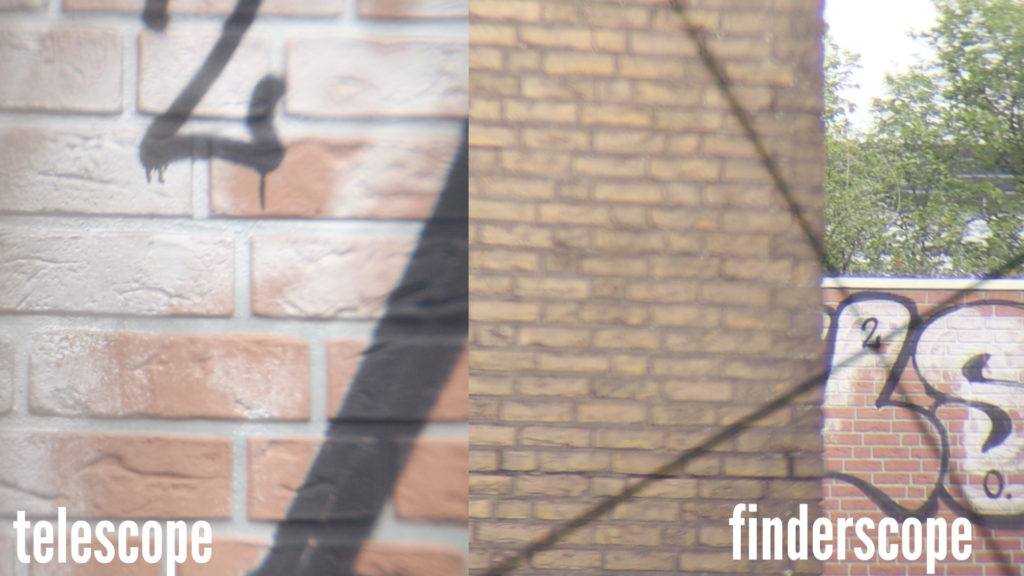
See above pictures of my finder scope on top of my telescope (left) and accompanying views during daytime (right). Aligning your finderscope during the daytime saves you a lot of frustration at night…
#6: What other things do I need to consider before capturing the planets?
It is always good to check if the telescope is correctly collimated. The best option to check this is by defocussing your telescope on a bright star, like Vega, Altair, or Deneb. If you defocus your telescope, the rings around the star should be spread out in an equal fashion. If that’s not the case, your telescope is in need of collimation. Another important tip is to avoid imaging the planets when they are still close to the horizon. The atmospheric turbulence is very high at such low altitudes, and that results in unsharp images.
#7: How do I capture the planets?
Planets are best captured by taking short videos of often only one or a few minutes. Depending on the framerate per second of your camera, you’ll end up with hundreds or even thousands of pictures of a planet in your video. For example, if your framerate is 25 frames per second, you’ll be able to collect 60 x 25 = 1500 images for each minute of video. You’ll be able to select the best and sharpest images of that video when processing these videos.
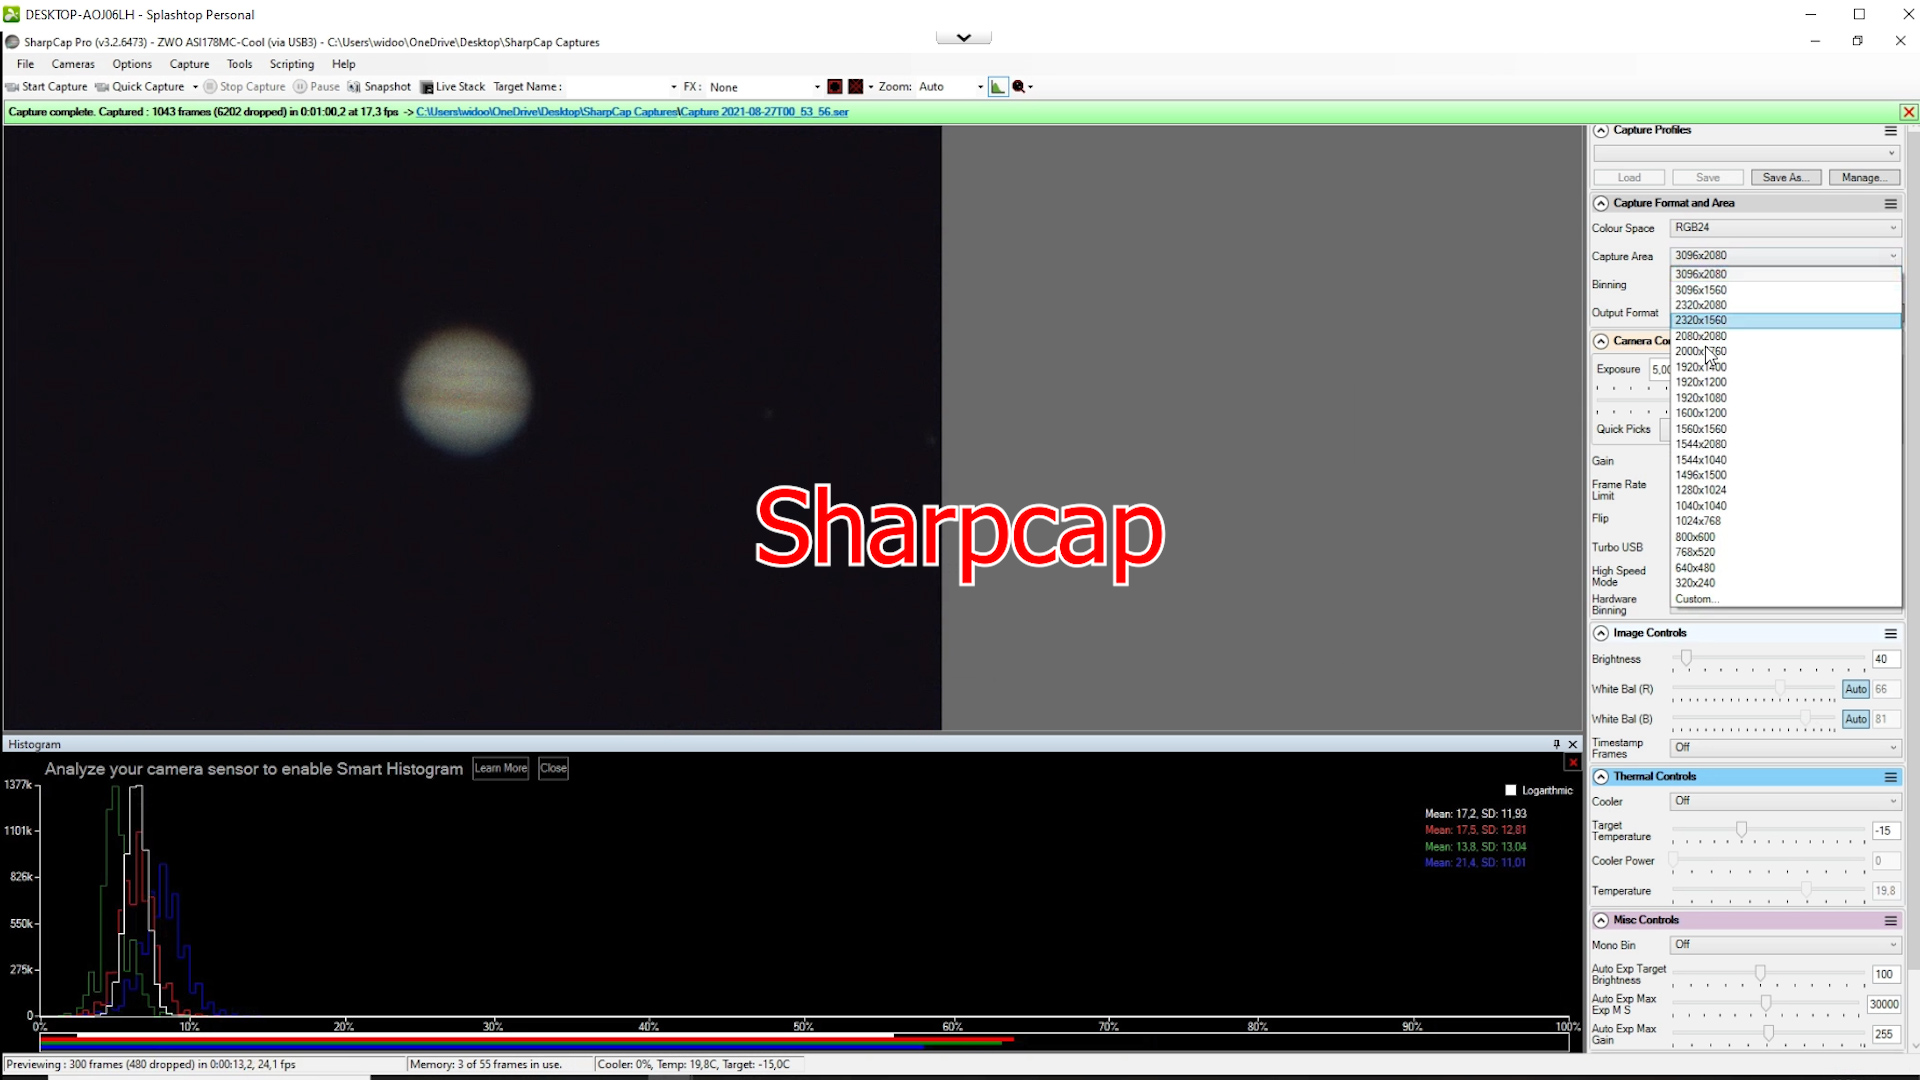
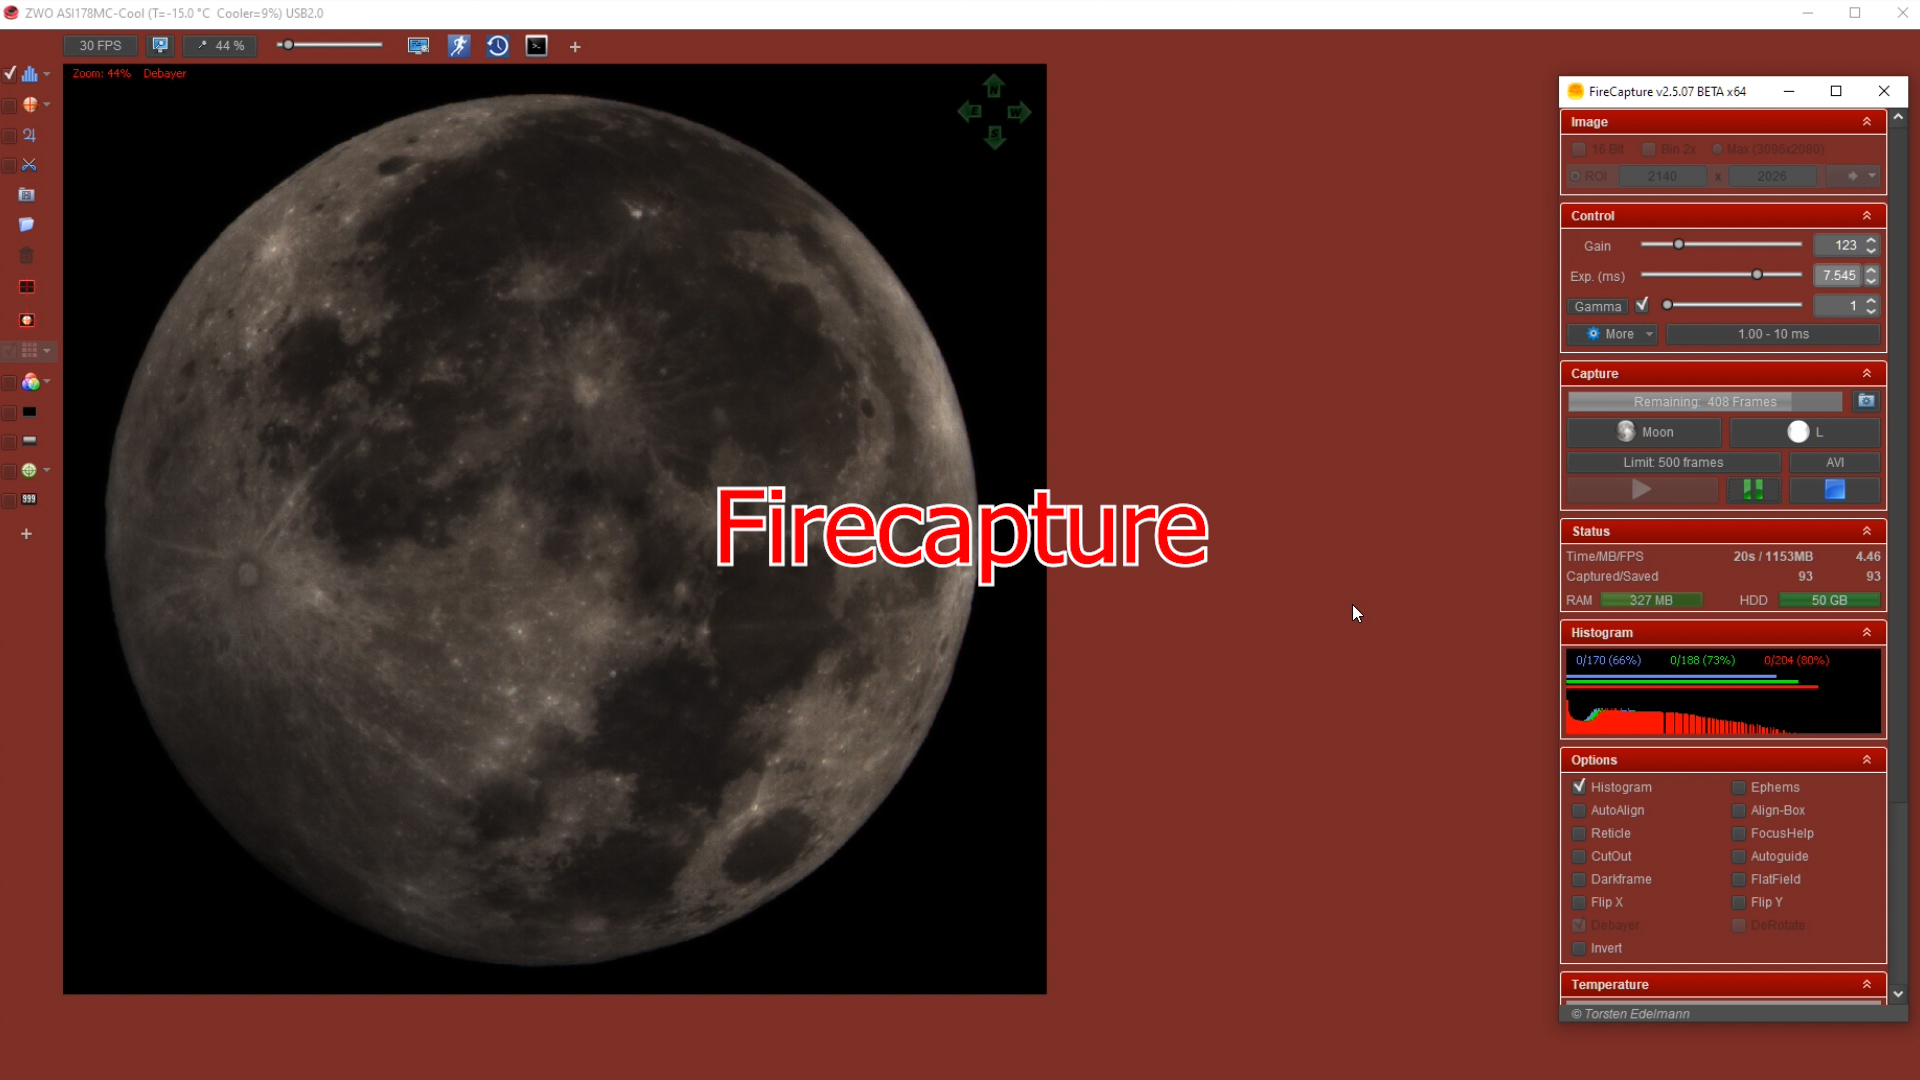
Planetary imagers who have a dedicated Astro camera often use either Sharpcap or Firecapture software to capture the planets. Both software programs were developed by some enthusiastic open-source programmers, so be sure to donate a couple of dollars or euros to show your appreciation. Sharpcap also includes a pro version, but you don’t need the pro version for planetary imaging. Here are two links to sharpcap and firecapture. I will make a separate v/blog to discuss finding and capturing the planets in more detail, so if you’re interested, please subscribe to the channel.
#8: What are the best video settings to capture the planets?
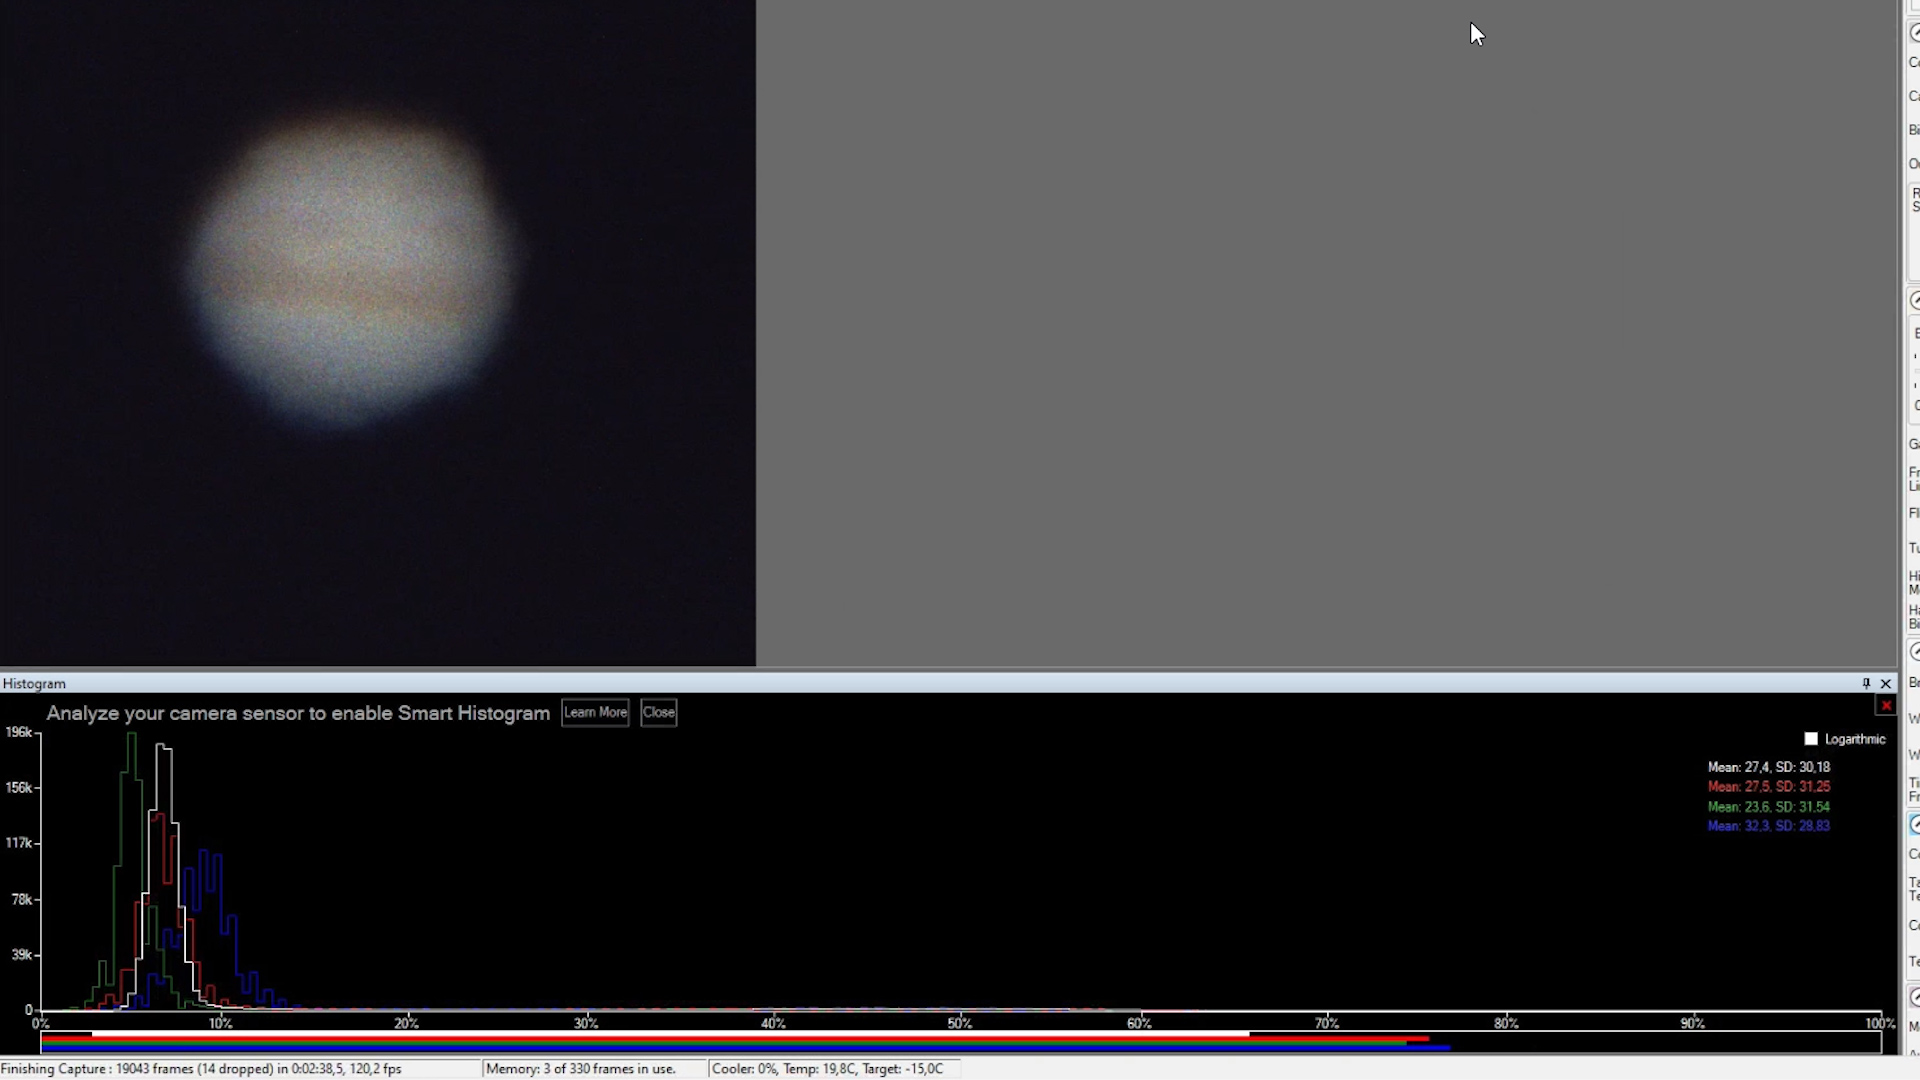
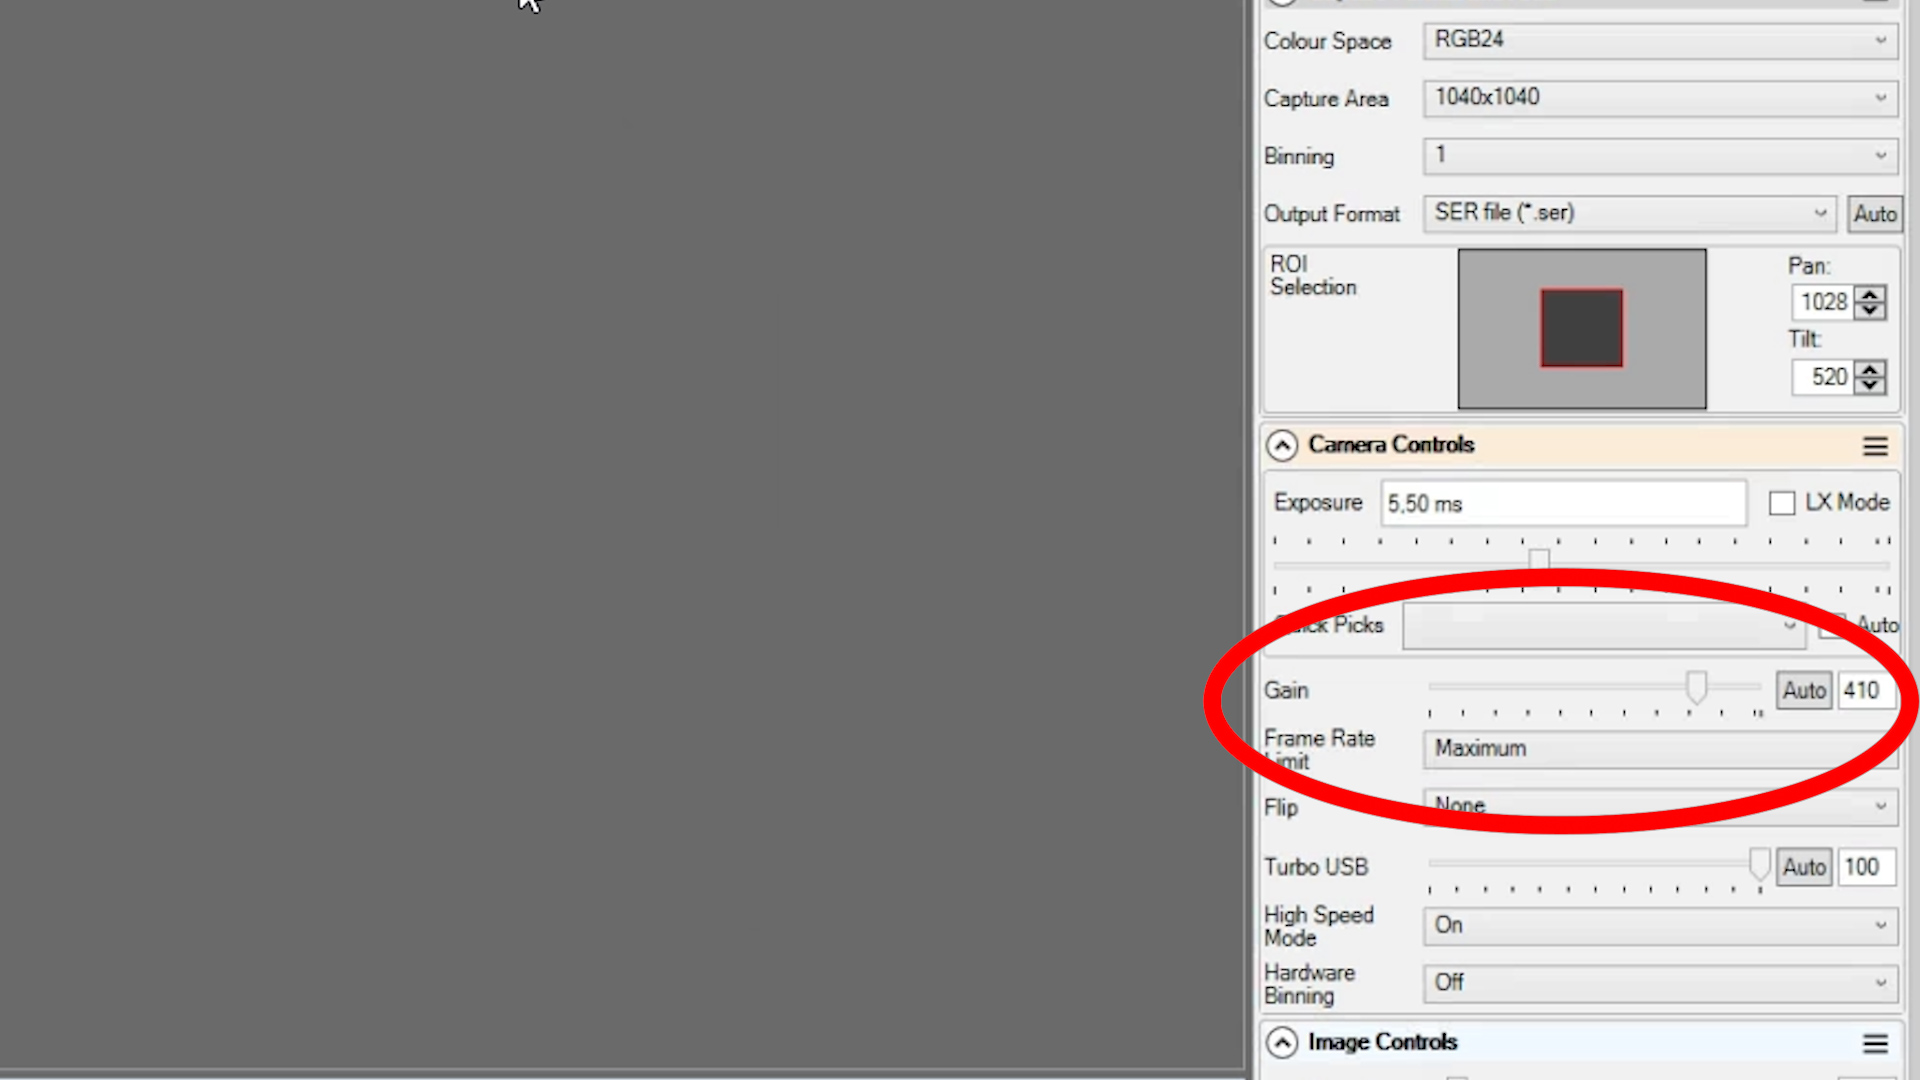
Best video settings depend a bit on the camera, but here are some general rules. Most planetary imagers will capture the planets at a high gain setting – often 80% to 90% of the max. gain of a camera. This will result in a grainy video of the planet, but you can compensate for that in post-processing by stacking lots of frames together, so you’ll end up with a smoother picture. Also, a high gain setting reduces the exposure time needed resulting in sharper pictures of the surface details of a planet. As for exposure time, it is best to look at the histogram when catching the light from a planet. Both sharpcap and firecapture provide a histogram option. Most planetary imagers will put their exposure time such that the light captured will cover about 80% of the histogram. A final tip is to reduce your region of interest such that your field of view mainly shows the planet. This will increase your framerate per second so you end up with more images, and it avoids capturing lots of space surrounding the planet which you don’t need anyway. One final tip is to use the fastest connection – currently USB 3.0 – and preferably a short cable to your laptop or PC which should have a decent processor. This avoids frames being dropped from your video during your capturing time.
#9: How do I process videos of the planets?
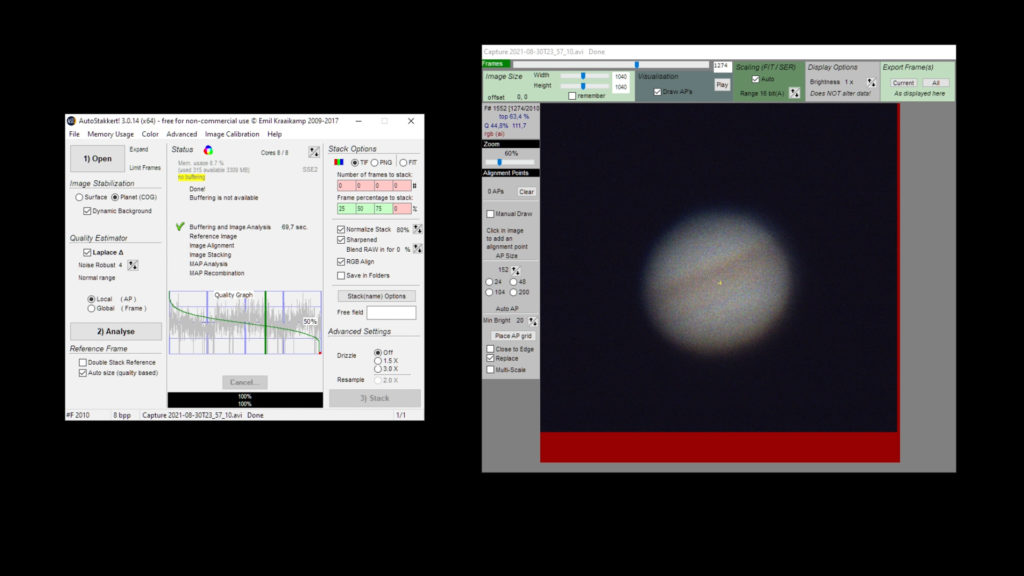
Processing consists of two steps. First, you’ll need to select the highest quality pictures of your video and stack them. Planetary imagers often use Autostakkert! which is developed by Emil Kraaikamp, a Dutch software developer. As I’m from the Netherlands myself, I call upon all of you to donate a nice cup of coffee to Emil for creating this awesome freeware! Here’s the link to Autostakkert! It would take a separate v/blog to discuss all options but here are some general tips to process your videos. Autostakkert will first analyze and align all the frames in your video after which you can create a stack. One tip is to stack only part of your frames. For example, you can ask autostakkert to stack only 25% of your highest quality frames, so you’ll end up with a sharper picture. Other options in autostakkert are to sharpen your image by blending in some RAW images and using drizzle to get a sharper final stacked image of the planet.
#10: How do I process my stacked picture of a planet?
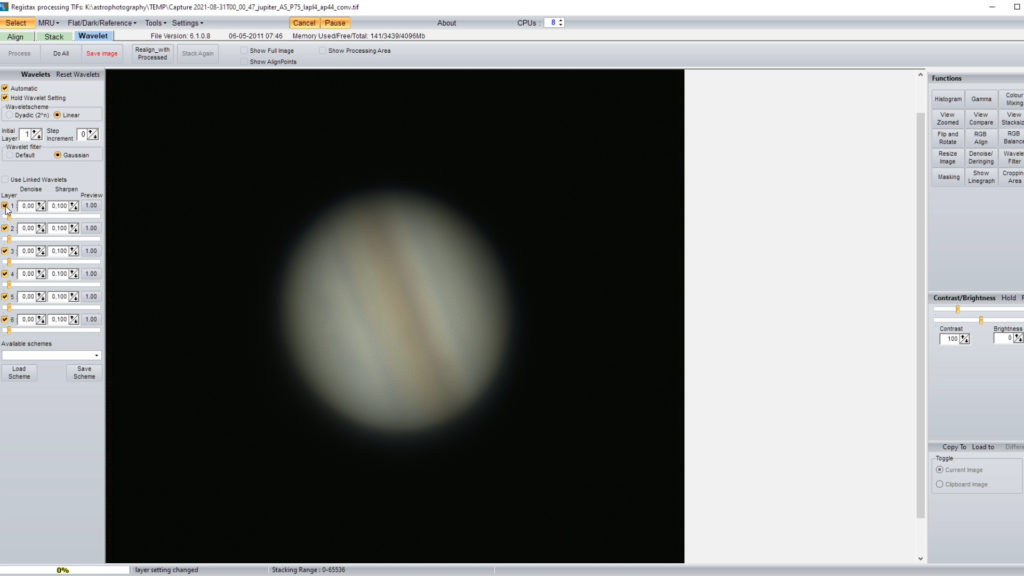
In the second step, most planetary imagers use Registax which is freely available for further processing. The most famous tool in Registax is the Wavelet option, with which you can further sharpen and denoise your picture at different wavelets. The best way I can think about to explain wavelets is to imagine that your 1d picture is converted into a 3d picture. In fact, Registax creates 6 different layers that are stacked on top of one another. You can think of these layers as 6 independent pictures. Now, each of these layers can be sharpened and/or denoised without affecting the other layer, and this technique really helps to sharpen and/or denoise your picture so you’ll end up with a nice picture of your planet. I will make a separate video to discuss capturing and processing the planets in more detail, so if you’re interested, please subscribe to the channel.
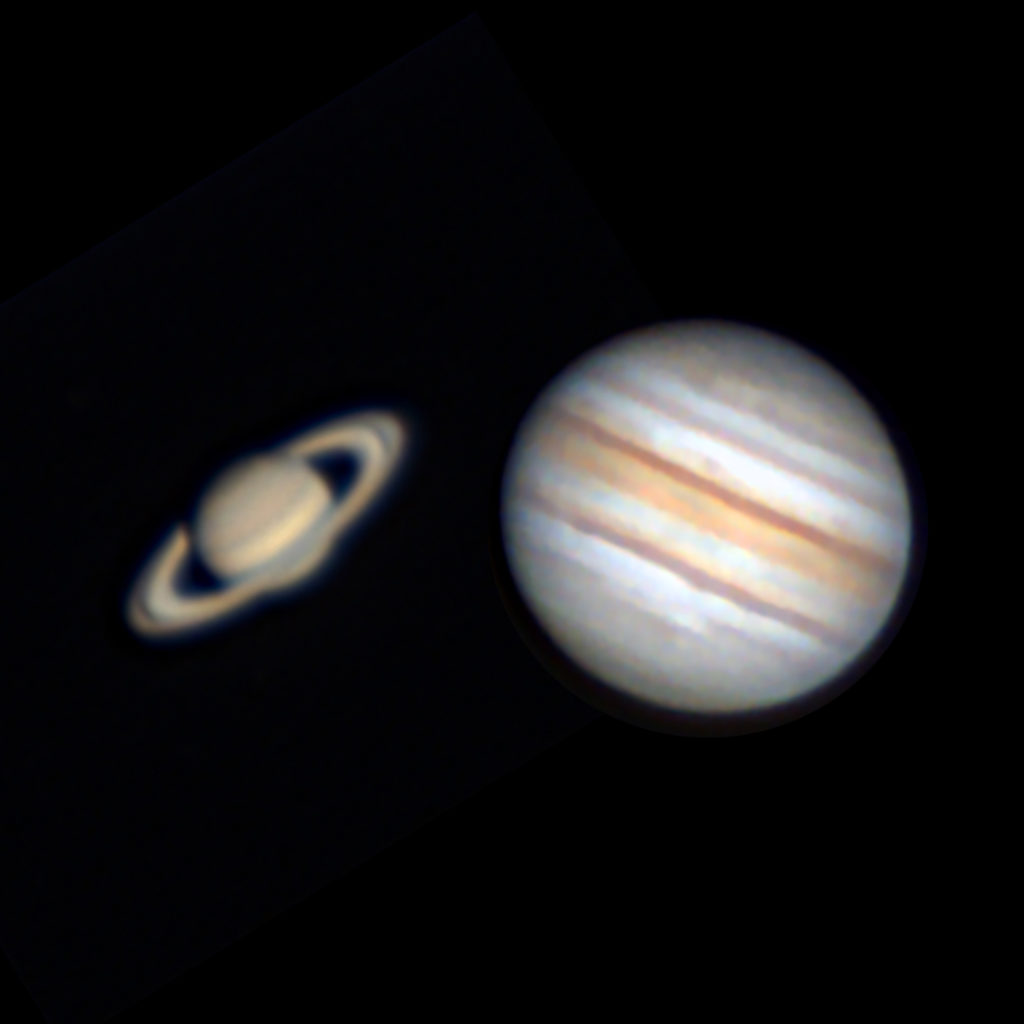
My personal attempt to capture Saturn and Jupiter
If you have anything to add to these tips, please leave your comments or questions in the comment section below. I will make additional v/blogs to discuss the 10 tips in more detail, so I hope you’ll stay tuned. Thanks for reading and clear skies!
One Reply to “Top 10 tips to PHOTOGRAPH the PLANETS with a TELESCOPE”