Autoguiding is pretty much required when you want to take long exposure pictures of deep-sky targets. Without it, you’ll end up with smeared objects and elongated stars. But what gear do you need to get started? In this blog, I get into what autoguiding is and why you need it for astrophotography. Next, I’ll discuss several guide scopes and cameras that are available on the market today. Here’s a short summary if you’re in a hurry:
An affordable way to start auto-guiding is to buy a 50mm mini guide scope ($99) with a guide camera like the ASI120MM mini guide camera at $149 (or its QHY 5L-II equivalent) – this combination will cost you about $250. For this price, you can achieve very decent guiding at 4.77″ per pixel which is enough to accurately guide telescopes with a focal length up to about 1000mm. If you are willing to pay a bit extra, you may want to consider guide scopes with longer focal lengths such as the 60mm guide scope ($150) which also come with solid mounting rings and a dovetail rail. As for higher-quality cameras, you may want to consider the ZWO ASI290mm or the ASI178mm (or its QHY 5-III 290/178/678 equivalents) if you are looking for a guide camera that can also be used as a high-quality lunar and planetary camera. If you want to think outside the box, a high-quality Sky-Watcher EVOGuide 50ED guide scope is a doublet guide scope with high-quality FPL-53 glass. Although the price far exceeds the other guide scopes, it will offer you a chance to use the EVOguide as a portable, main imaging scope to shoot wonderful widefield astroscapes of the night sky.
Why do you need autoguiding?
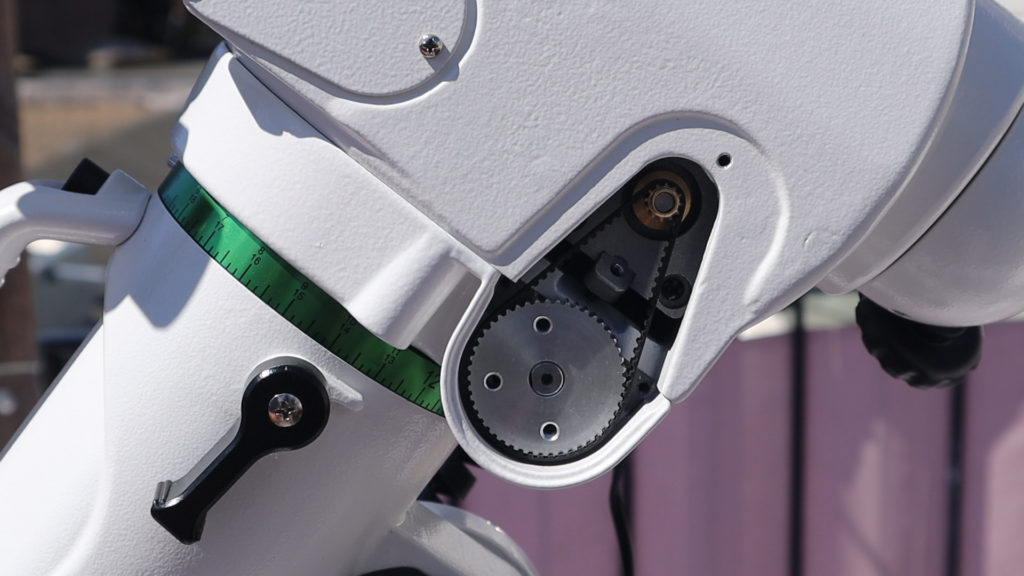
An equatorial mount is probably the most important piece of equipment you’ll need for astrophotography with a telescope. A good equatorial mount is able to automatically track the apparent movement of objects in the night sky caused by the rotation of the earth. But however good these equatorial mounts are, they are not perfect in their tracking. Even the best equatorial mounts will show some mechanical imperfections in either their gears or their bearings and those imperfections will result in tracking errors. So, when we take long exposure pictures, these tracking errors lead to elongated stars and smeared deep sky objects in our images. Most equatorial mounts I discussed in my videos and blogs are able to track accurately up to 30 to 60 seconds – also depending on the focal length (zoom level) of your telescope. But when taking multi-minute exposures, most mounts will need help to accurately track objects in the night sky, and that is where auto-guiding comes in.

What is autoguiding?
Autoguiding involves the application of small corrections to the position of an equatorial mount when taking long-exposure pictures of the night sky. In the past, those corrections were made manually by the Astro-imager. Until the 1990s, amateur astronomers guided manually by visually tracking a guide star – often through their finder scope. So they used a secondary, smaller telescope that was placed on their main imaging telescope and focus on a particular star during a long exposure image. They would then nudge the mount mechanically or electronically whenever the star moved from its original position to get the mount back onto the right path.
In the age of digital cameras and computers, guiding is now accomplished automatically. A camera and specialized software can monitor the position of a star nearby the object that you are imaging. It will send small corrections and nudge your mount automatically to keep the position of the star in the same position. This is what autoguiding is all about in a nutshell. If you’re taking short exposure pictures of bright objects like the moon and planets, you do not need autoguiding. But if you’re planning on capturing the weaker light from most deep sky objects outside of our solar system, you’re going to take multi-minute exposures to capture the faint light from those objects, and autoguiding becomes a necessity.
Importantly, autoguiding only works when your mount is already properly polar aligned and correctly operating. If you are unsure how to polar align your mount you might want to check out this blog where I explain how to polar align an EQ mount. Also, auto-guiding cannot correct for sudden errors in tracking by a poor-quality mount, or sudden errors caused by strong winds. Importantly, auto-guiding can only be used in combination with an EQ mount, and cannot correct for the field rotation caused by tracking with an alt-az mount.

What gear do I need for autoguiding?
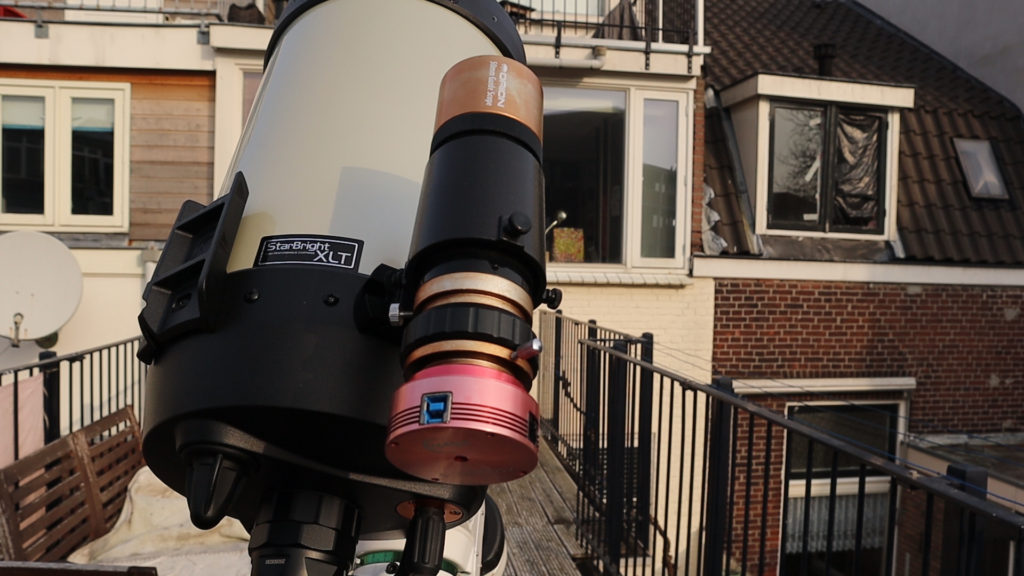
There are several options to autoguide an equatorial mount. The two most often used methods are to auto guide with a separate guide scope and a guide camera attached to your main telescope. Another method is to use an off-axis guider, which splits off light collected by the main telescope to a separate guide camera. The guide camera can detect and track a star somewhere in the same field of view as the main object that’s being imaged.
There are pros and cons to each guiding method. In this blog, I’ll focus on the first option to guide with a guide scope and guide camera. Using a separate guide scope and guide camera is ideal for beginning imagers. From my personal experience, I can tell you that this method works well with a telescope that has a focal length of up to about 1500mm. I will first get into selecting a good guide scope for astrophotography, after which I’ll discuss guide cameras.
What is a good guidescope for auto guiding?
You need to take several things into account when selecting a good guide scope and a camera for autoguiding.
Aperture and Focal length
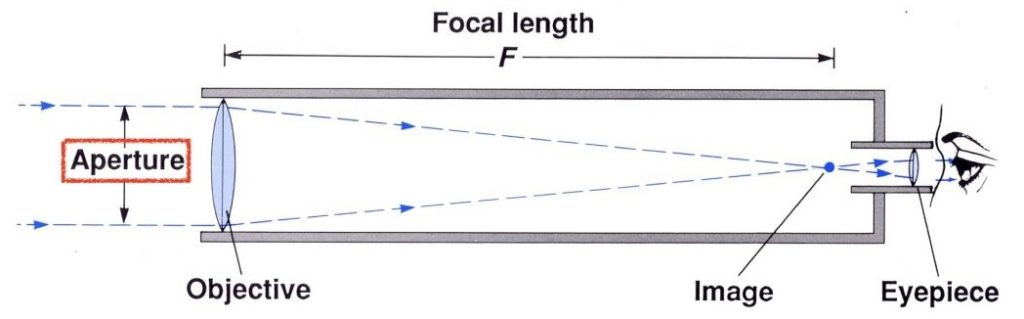
When selecting a guide scope, you might be tempted to choose a guide scope with a larger aperture and focal length. A larger aperture translates into a higher resolution that enables you to detect fainter stars in nearly any field of view anywhere in the sky, and a larger focal length enables you to “zoom in” and detect smaller displacements in the position of the guide star. However, there are additional concerns beyond aperture and focal length you should take into account, most importantly…
Weight and Size
Larger apertures and focal length telescopes are also heavier and larger in size. You don’t want to select a guide scope that is too heavy as it will tax the mount in its tracking capability. Also, a longer focal length telescope can introduce flexure relative to the main scope which will cause guiding errors (differential flexure). also, you’ll want a sufficiently wide field of view to detect a larger number of potential guide stars. So what is a good focal length and aperture for a guide scope?
How to calculate a good Focal Length and Aperture?
In the past, before the age of computers and digital cameras, astro images would use a guidescope that was about 1/3rd the focal length of a telescope for visual guiding with the human eye. So when talking to older Astro- imagers, you may still hear this recommendation. For example, if your telescope has a focal length of 1500mm, older astrophotographers may recommend guide scopes with a focal length of 500mm. However, digital cameras today are much more sensitive than the human eye and most guide cameras can detect apparent deviations in the guide star of about 0.1 pixels on average. So assuming that you want to detect a tracking error with a sensitivity up to1 pixel, a soft rule of thumb would be to select a guide scope with a focal length that is at least about 1/10th the size of your imaging scope. Now, this is not a hard rule, and of course, and you should take into account that the pixel size of your guide camera may be different from the pixel size of your imaging camera. To be on the safe side, you could take 1/5th the focal length of your main telescope as a soft rule of thumb. As an example, if you have a telescope that is 1500mm in focal length, you should select a guide scope with a focal length of at least 1500/5 = 300mm.
As for the aperture, you’ll want a telescope with a low F/ratio. A lower F/ratio means that more light can be detected by each of the pixels of your guide camera, which is important when tracking stars. Most guide cameras have an F/ratio of about F/3 to F/5. The F/ratio is simply the focal length of your telescope divided by the aperture. So if we take a focal length of 150mm and divide it by 3, a good aperture would be 50mm. Again, these are soft rules of thumb to get you started. So, assuming that your main telescope has a focal of 750mm, a good guide scope would have a focal length of about 150mm and an aperture of 50mm.
Solid Focuser and Mounting Rings
Finally, your guide scope needs to have a solid focuser that is able to hold the guiding camera in place and keep it from moving around during an imaging session. Also, good, high-quality mounting rings and an adequate dovetail rail helps to mount the guide scope securely on your main telescope or rig.
Good Guidescopes to Get Started
I’ll be focusing on guide scopes that have a focal length of 150mm to 250mm, as it really helps you to use that guide scope with the most consumer-rated AP refractor and reflector telescopes. Note that this is not an exhaustive list, I always encourage you to do your own research. You’ll find links to each of the guide scopes in the blog so you can check current prices and availability.
50mm Mini Guide Scope with Helical Focuser
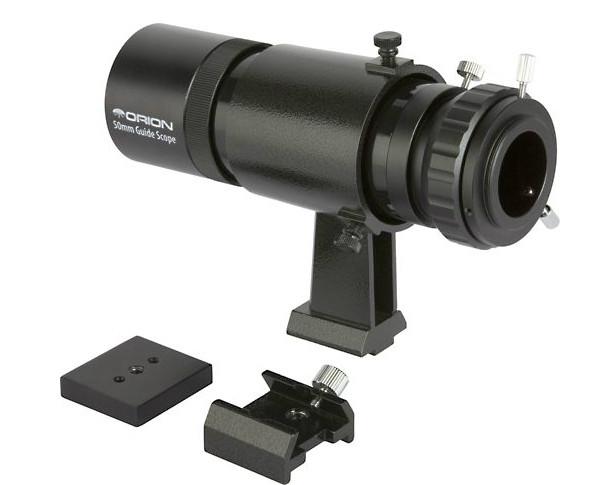
This mini guide scope is one of the most affordable scopes on the market today – and available under different brands (Agena, Omegon, Orion). At under $100, it offers a generous 50mm aperture and 162mm of focal length. I used this mini-scope for years with great satisfaction. It comes with a solid helical focuser which works very well to focus your guidescope on the stars. Also, it has a solid mounting ring for the camera to fix it securely in place. I never experienced any movement of the guide camera in the guidescope during an imaging session. The standard bracket to mount the guidescope is a bit basic but it does the job well. I mounted this guidescope at the back of my telescopes. As it is so lightweight at about 1 lbs / 0.5kg, it has a minor impact on the payload capacity of your equatorial mount. I’ve successfully guided with the mini-scope at focal lengths up to 1500mm. I would recommend it for focal lengths up to 1000, after which you may want to consider an off-axis guider or one of the longer focal length guidescopes mentioned below.
50mm guide scopes are available at Agena Astro (USA/WW), High Point Scientific (USA/WW), and Astroshop (EU/WW)
60mm Guide Scope with Helical Focuser
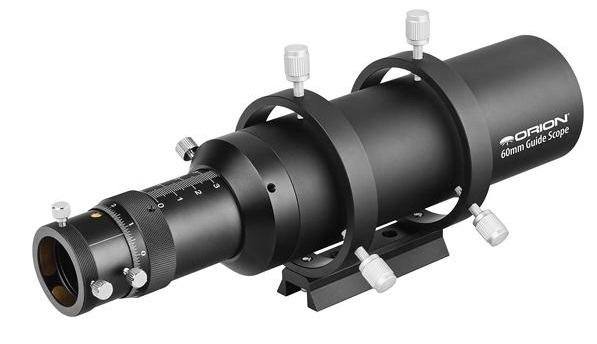
This is the bigger brother of the 50mm guide scope – and is available under different brand names (Agena, Omegon, Orion). It offers a longer focal length of 240mm and a larger aperture of 60mm. A longer focal length helps in detecting smaller movements of a guidestar, and with an aperture of 60mm you can detect fainter stars that could be used for autoguiding as compared to the Orion mini 50mm guidescope. Moreover, it comes with additional telescope rings and a dovetail mounting bar to safely secure the guidescope on your main telescope. This scope has a weight of about 2 LBS, or 1 kg. The helical focuser will help you focus on the stars and prevent any movement of your guidecam during an imaging session. All of this comes at a higher price of $169, but it may be worth it. Especially when you are considering to guide at focal lenghts beyond 1000mm, this guidescope may be exactly what you are looking for.
60mm guide scopes are available at Agena Astro (USA/WW), High Point Scientific (USA/WW) and Astroshop (EU/WW)
PrimaLuceLab 60mm Compact Guide Scope
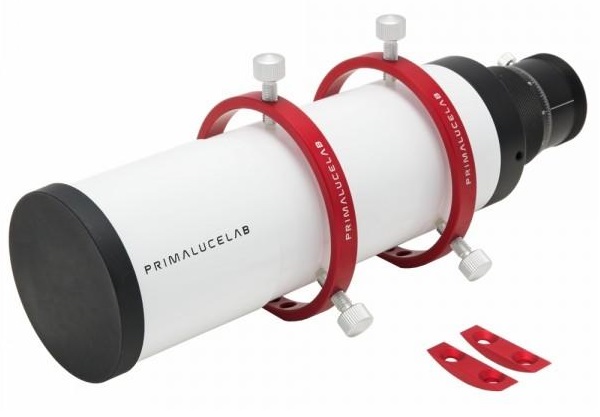
The PrimaLuceLab 60mm Compact Guide Scope is very similar to the Orion guide scope discussed above. It offers the same 60mm aperture and 240mm focal length that allows you to get a good magnification and resolution on a potential star field and detect minor movements in a guide star when tracking objects in the night sky. It also comes with a helical focuser, two additional mounting rings, and a dovetail mounting bar (not in the picture). It weighs 2 lbs / 1 kg. Also, the price is a bit higher as compared to the above 60mm guide scope at the time of writing. It may come down to availability, price difference, and color preferences to decide if you’re going with the orion or the PrimaLuceLab guide scope.
The Primalucelab 60mm guidescope is available at Agena Astro (USA/WW), High Point Scientific (USA/WW), and Astroshop (EU/WW)
Sky-Watcher EVOGuide 50ED Guide Scope
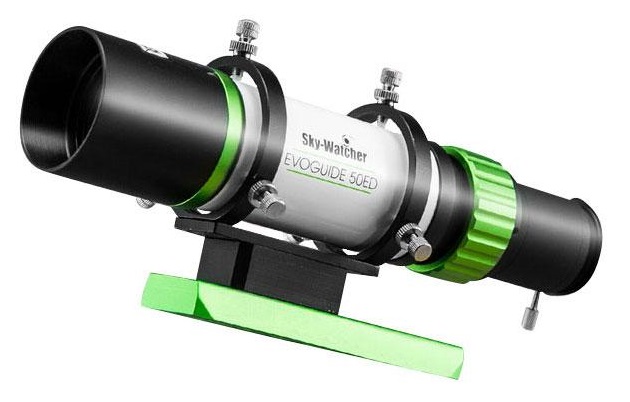
OK, hold on. Before you call me insane to include this guide scope of about $300 at the time of writing, let me defend myself. Yes, this guide scope is more than twice the price of the above-discussed scopes, whereas it doesn’t offer a larger focal length (242mm) or aperture (50mm). But it has a secret weapon. This telescope has high-quality FPL53 glass and consists of two glass pieces turning your guide scope into a doublet with good color correction. Why is that important? Well, it doesn’t matter so much when using this telescope for guiding, but…you might want to consider using this telescope once in a while as a MAIN IMAGING telescope. That’s right, with the EVOguide and a camera, you should be able to get a pretty decent widefield picture of the night sky. So in addition to using this telescope for autoguiding, you may want to use this scope to get out of town with some portable gear for a widefield imaging session. The EVOguide comes with two rings and a dovetail bar to secure it safely on your main telescope rig.
The SkyWather Evoguide 50 ED is available at Agena Astro (USA/WW), High Point Scientific (USA/WW), and Astroshop (EU/WW)
Selecting a Good Guide Camera
A guide camera doesn’t has to be as sophisticated as your main imaging camera. But there are a couple of things you should take into account when selecting a guide camera.You may want to consider a monochrome camera for guiding. When guiding, you don’t need a color camera and the bayer matrix in front of the sensor of a color camera causes some loss of resolution and sensitivity. In addition, you want a guide camera with relatively low read noise in order to minimize “hot pixels” so that the guiding software doesn’t mistake them for stars. It is also useful to have a compact, lightweight guide camera to minimize the weight on the focuser of the guide scope. You’ll probably also want a USB connection, 2.0 at minimum, for fast data transfer. Finally, a built-in ST4 guiding port is useful if you want to connect the camera directly to your equatorial mount. The more popular and better option is to use an ASCOM driver for your equatorial mount so that your computer or laptop can communicate directly with your telescope mount instead of the slower ST4 connection. This being said, it is nice to have the ST4 guiding port as a back-up whenever your ASCOM driver fails for some reason. You don’t need a large sensor camera. A small sensor camera (often 1 or 2 MP) combined with a guide scope that has a modest focal length is good enough to pick up potential stars for guiding in your field of view.
Recommended Guide Cameras
The rise in CMOS sensors over the past decade has made sensitive cameras extremely affordable. If you are interested in an overview, please check out this blog where I discuss CMOS cameras from ZWO that are on the astrophotography market today. Any of the cameras I mention in that overview can be used for auto-guiding as well. However, if you want to keep costs at a minimum, I highly recommend you’ll take a look at the CMOS cameras below that are specifically made for auto-guiding, as they offer excellent auto-guiding performances at a reasonable price.
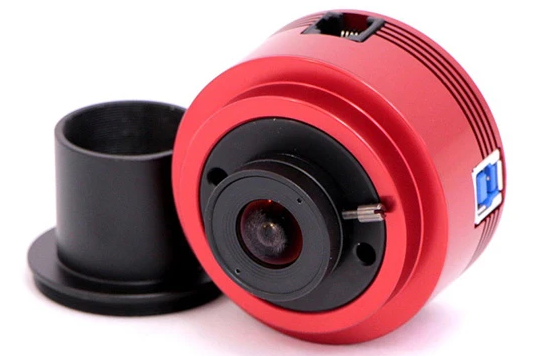
ZWO ASI120MM Mini Monochrome Camera

A popular camera with beginning imagers. This compact and affordable CMOS astronomy camera at about $150 makes a great autoguider. This monochrome camera has a pixel size of 3.75 um which will provide you with a resolution of about 4.77″ per pixel when combining it with a short 162mm FL guide scope, and an impressive 3.22″ per pixel view resolution when combined with a 240mm guide scope (see above). Certainly good enough for guiding, especially when considering most of us live under skies that often offer average astronomical seeing conditions that exceed 1″ per pixel. The 1 MP camera resolution (1280*960) is small but combined with a short focal length guide scope, you will get a sufficiently wide starfield to select a guide star. Also, the read noise at 4e is not the best, but certainly good enough to prevent hot pixels from being mistaken for stars when autoguiding. The mini version offers a Framerate Per Second (FPS) of 35, which is nothing to write home about but certainly fast enough when considering that most of us use about 1-second exposures to guide on a star in PHD2. Also, the 2.0 USB connection offers fast enough communication between your camera, laptop/PC, and mount. The high 75% quantum efficiency, along with the 12 bit Analog to Digital Converter and the 13k Full Well Capacity are certainly good enough for autoguiding. You may even want to use this affordable guide camera for some basic lunar and planetary imaging.
The ZWO ASI120MM mini guide camera is available at Agena Astro (USA/WW), High Point Scientific (USA/WW) and Astroshop (EU/WW)
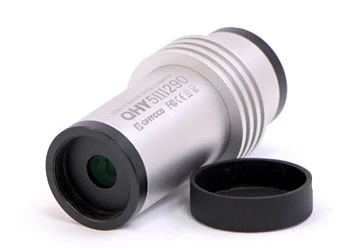
QHY 5L-II Monochrome Camera
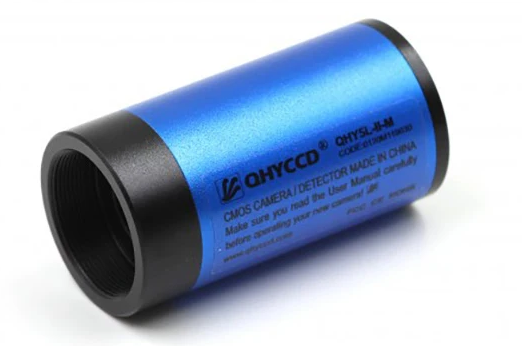
At this point, I want to mention that QHY – an alternative brand to the ZWO cameras – has very similar cameras on the market that include similar camera sensors and specifications as compared to the ZWO cameras I’ve mentioned above and in my other blogs. For example this QHY 5L-II – at the time of writing at a price of $169 – offers the exact same features as the ZWO ASI 120MM mini guidescope as discussed above, so I will not re-iterate these features. Instead, let’s be happy that we have various brands offering us with affordable prices that give us the ability to choose. It might come down to prices and availability in order for you to decide which camera you want to buy.
The QHY5l-II is available at Agena Astro (USA/WW) and Astroshop (EU/WW).
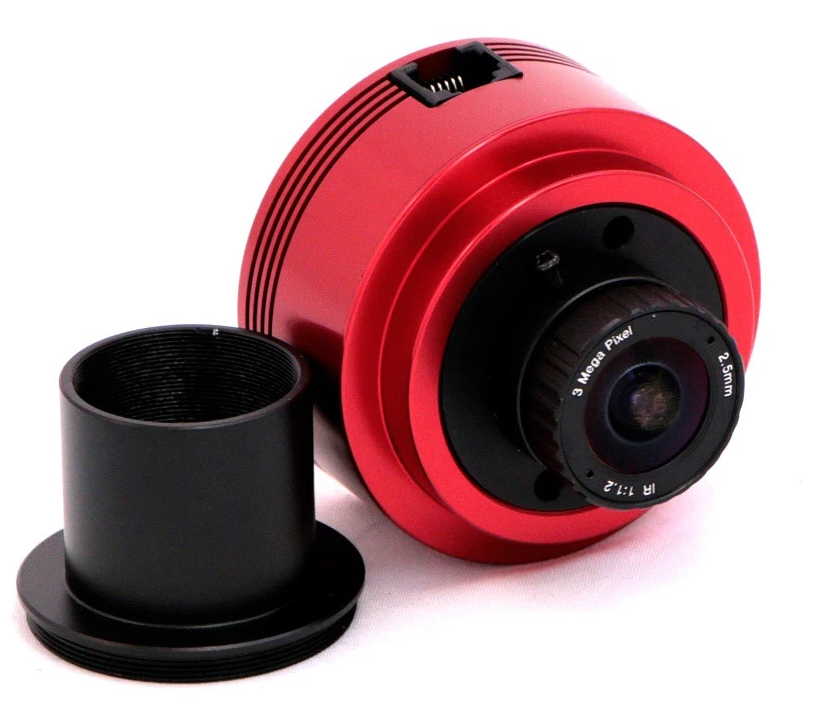
ZWO ASI120MM-S Monochrome Camera

One final thing to consider in the 120 range is whether to go for a dedicated guide camera or to pay a bit extra for the “regular” planetary camera at $179 at the time of writing. The main difference between the guide cam versions and this 120MM-S version is that this camera offers a USB 3.0 connection (instead of 2.0) with twice the FPS speed (FPS = 60 instead of 30). A higher FPS is especially useful when engaging in lunar and planetary imaging, because it allows you to take twice the number of pictures at any given timeframe. When engaging in planetary imaging, most of us use software like sharpcap or firecapture to take videos of the moon and planets, where the (best) individual frames of such a video can be stacked using free software such as autostakkert! or Registax. If you are able to capture twice as many frames in a video, you’ll end up with twice the amount of pictures from which you can choose the best frames. If you’re going down this route, you should also consider if you want to capture the planets and moon using different filters, or go for a color camera – but that is beyond the scope of this blog. I do want to mention that the ASI120MM-s, like the mini versions, includes an ST4 port. Actually, before the introduction of the mini versions, this was the “go-to” affordable guide camera on the astrophotography market.
The ZWO 120MM-S is available at Agena Astro (USA/WW), High Point Scientific (USA/WW) and Astroshop (EU/WW)
ZWO ASI290MM Mini CMOS Telescope Guide Camera
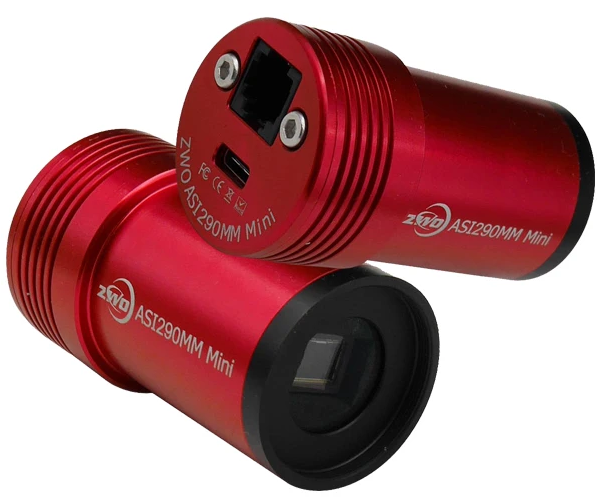
Let’s move on to a higher quality segment of guide cameras. The first one is the asi290MM mini guide camera at $299, considerably higher in price than the 120MM. For this price, you’ll get a camera that offers a smaller pixel size of 2.9 (vs. 3.75 on the 120mm) – offering you a lower resolution per pixel of 3.69″ in combination with a 162mm focal length guide scope, and a 2.49″ per pixel resolution when combining it with a 240mm focal length guide scope. All of this amounts to an increased ability to detect smaller movements in the position of a guide star which should increase your ability to accurately track the object of your choice in the night sky. Moreover, the resolution of the 290mm mini is 2 MP (1936×1096) – instead of 1 MP on the ASI120MM – and the read noise is considerably lower at 1e. Moreover, the camera offers 20 FPS with a 2.0 USB connection, an ST4 guideport, a 12 bit ADC, a high quantum efficiency of 80%, and a full well capacity of 14.6k. Certainly good enough for auto-guiding and you may even want to consider this camera for good quality planetary and lunar imaging.
Available at Agena Astro (USA/WW) for $249
Available in Europe (Astroshop) for €335
ZWO ASI 290 Monochrome CMOS Telescope Camera
Again, if you are considering to use the 290MM for planetary imaging, you should also consider the regular planetary versions of this camera from ZWO and QHY mentioned below. The only differences between the mini-guide cam and the planetary versions below are the higher price, for which you’ll get a higher FPS (170 FPS instead of 20 at max. resolution), and USB 3.0 (vs. a 2.0) connection.
Available at Agena Astro (USA/WW) for $249
Available in Europe (Astroshop) for €449
QHY 5-III 290 Monochrome CMOS Telescope Camera
Available at Agena Astro $309
Available in Europe (Astroshop) for €499
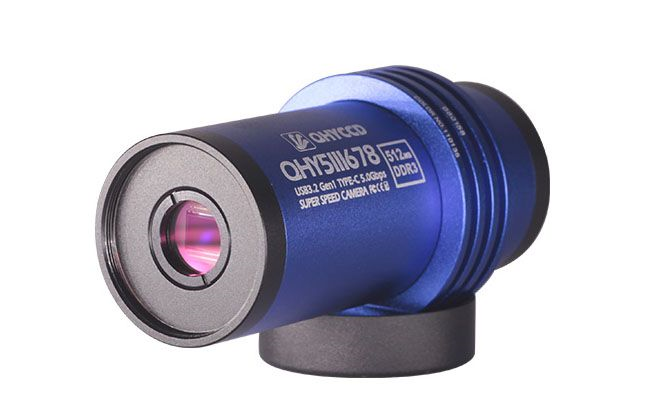
ASI178mm and QHY678M CMOS Camera
The final two cameras I would like to mention are the ZWO ASI178MM, and the newest QHY equivalent: QHY 5-III 678. I would consider both cameras at the high end of what you may want to consider buying for autoguiding. Actually, both cameras are full-fletched, high-quality planetary cameras but do offer some advantages in terms of autoguiding as well. As for the ZWO ASI178MM First, the pixel size at 2.4 um is about the lowest you’re able to buy on the market today. This low pixel size translates into the lowest resolution of 3.05″ per pixel in combination with a 162MM focal length guide scope and an impressive 2.06″ per pixel when using this camera in combination with a 240mm focal length guide scope. With such a combination, you’ll be able to track very minor variations in the position of a guide star which will enable very high precision tracking. This camera offers an ST4 guide port for those who prefer that to working with ASCOM drivers and a PC/laptop. Also, the high quantum efficiency (81%) and resolution (3MP; 3096 x 2080) offer a wide enough field of view to select a potential guide star. The read noise is low at 1.4e, and the camera offers a generous 60 FPS at a USB 3.0 connection at max. 3MP resolution. Take into account that you can diminish the resolution of the camera to 2MP/1MP to get an even higher FPS. Moreover, this camera offers a 14 bit ADC (instead of the 12 bit ADC on the other cameras) and the highest full well capacity of 15K. All in all, this camera is great for lunar and planetary imaging as well.
The newer QHY5-III 678, belonging to the second generation of the QHY5III series, is a recently released planetary and guiding camera. It serves as an upgraded version of the QHY5III178M and boasts remarkable sensitivity to near-infrared light. The latest sensors in this series feature a deeper photodiode section within each pixel well, enabling greater penetration of longer wavelength photons into the substrate. Consequently, the sensor exhibits a significantly heightened sensitivity to red and near-infrared (NIR) light. Its peak sensitivity to NIR light is nearly equivalent to that of visible light. All cameras in the QHY5III (Ver. 2) series, including this new model, are equipped with a 512MB DDR3 image buffer. This buffer serves to alleviate the strain on computer transmission, particularly beneficial for planetary photography where substantial data needs to be written within short timeframes. By comparison, certain deep-sky astrophotography cameras currently available in the market possess only 256MB of memory. The inclusion of 512MB DDR3 memory in the new QHY5III (Ver. 2) series cameras represents a noteworthy upgrade.
Available at Agena Astro (USA/WW) for $299
Available at high Point Scientific (USA/WW) for $242
Available in Europe (Astroshop) for €449
QHY5-III 678 Monochrome CMOS Telescope Camera
Wido,
Rare vraag hier:
Kan je eens een video maken over astrofotografie met een verkeerde opstelling ? 🙂
Ik heb een Celestron CPC 9.25 (goto) met zo een standaard vorkmontering ? Met een oude dslr camera of een Orion Starshoot.
Bedankt moet niet onmiddellijk zijn he
Groeten
Rudi
What about the SVBONY SV305 color and the SV305 pro mono cameras. I can read that there are some issues using them with Sterllarmate (Rpi) but apart from that they feature the IMX290 sensor and seem to be acceptable performers. Are they worth a try?
Hi Kasper,
I haven’t tried SVBONY cameras yet so I can’t say. But with an IMX290 sensor they should be good enough for some planetary imaging sessions. For deep sky I would opt for a camera with cooling.
Cheers,
wido.
Excellent review and I like all your videos too. I’m seeing the limitations of my current equatorial mount (worm gear defects) with a 1500 mm Mak-Cass GoTo telescope. I was wondering if you had any insights on why two-motor GoTo systems like SynScan still need to be accurately polar aligned. I would have thought that with full control over a telescope’s orientation, the onboard computer could artificially define the location of the polar axis regardless of the orientation of the mount after locating 2 or more stars. Instead, I find that there’s still significant long term tracking error unless my scope is polar aligned to less then a few arc-minutes.
Hi Albert,
Polar alignment is essential for any EQ mount. Your mount has to be able to exactly track the movement of the stars due to the rotation of the earth. By polar aligning your mount to the celestial Pole, your mount can exactly track the arc stars make in the sky. Without it, you’ll be getting startrails. There are alternative alt-az mounts that can be placed in all kinds of positions. These mounts are able to find objects in the sky but will not exactly follow the path of the stars in the night sky and you will suffer from rotation. Long story short, EQ mounts need to be polar aligned. Clear skies!
Beste Wido,
Allereerst complimenten voor je fantastische site en dito heldere video’s. Ik woon in een buurtgemeente van Utrecht, en heb dus met vergelijkbare waarnemingscondities te maken. Als beginner heb ik veel aan jouw tips en reviews.
Ik heb een vraag over guiding camera’s. Ik heb een Celestron 8” edge hd, met een standaard Celestron 50mm Finder scope. Ik wil graag een guide camera dat hierbij past. Mij is de ZWO 220mm aangeraden, en de William optics uniguide 50mm.
Ik zie echter ook dat de Celestron Starsense Autoguider binnenkort verkrijgbaar is. Die is uiteindelijk een paar honderd euro duurder. Maar ik wil als beginner en met deze lichtvervuiling ook een guider die snel en gemakkelijk mijn workflow kan ondersteunen.
Wat zou je aanraden: wachten op de Celestron Autoguider, of kiezen voor wat mij geadviseerd is?
Wat zou je aanraden
Beste Wido,
Complimenten allereerst voor je website. Voor mij als beginner een absolute must-read! Ik woon in een buurgemeente van Utrecht; we hebben vergelijkbare waarnemingscondities.
Mijn vraag gaat over autoguiders/camera’s. Ik heb sinds bijna twee jaar geleden een celestron edge hd 8″, de ZWO Camera ASI 120 MC-S Color en werk met ASIAIR pro. Ik heb nog geen autoguider camera, alleen de standaard celestron 50mm finder scope.
Mij is geadviseerd om de ASI 220mm en de William Optics UniGuide 50mm te nemen. Ik heb echter ook gezien dat de Celestron starsense autoguider binnenkort verkrijgbaar is. Dat is een duurdere optie, maar het gebruiksgemak lijkt mij vele malen groter. Jij hebt daar meer zicht op. Wat denk jij van de nieuwe celestron autoguider: overdone of raadzaam om daar even op te wachten? Alvast dank voor je reply.
do you have any insight on using svbony sv905 camera gor autoguide duties. i have a stsradventure2i pro.