Do you have trouble deciding what telescope mount would be best suited to start your astrophotography hobby? Then you have come to the right v/blog! I’ll compare eight beginner telescope mounts in the $750-$1250 range on several criteria that I think are essential when taking your first steps into astrophotography.
After having reviewed eight mounts, I would recommend the Celestron Advanced VX (USA, EU), the Sky-Watcher HEQ5 Pro (USA, EU), and the Orion Sirius EQ-G (USA, EU) as excellent telescope mounts to start your astrophotography hobby in 2021. These three mounts have been on the market for several years, and include all the things you need to start your astrophotography hobby such as (1) a computerized (GoTo) option, (2) Autoguiding, (3) Periodic Error Control, (4) ASCOM, and (5) a USB connection. They can support about 14 kg (33 lbs) of instrument capacity, which is sufficient to pair these mounts with a mid-sized refractor telescope, filter wheel, camera, and tracking gear. Note that both the HEQ5 Pro and the Sirius EQ-G are made in the same Synta factory in China. I also want to make an honorable mention of iOptron who have introduced two new next-generation mounts – the GEM28 (USA, EU) and the CEM26 (USA, EU). Both mounts are very promising as they are lightweight and include advanced features such as PPEC and built-in WiFi.
In the first part of this blog, I’ll mention seven criteria to look out for when buying your first dedicated equatorial mount for astrophotography, and in the second part, I’ll compare eight mounts that are available on the AP market today based on the criteria mentioned in the first part. If you are a bit like me and prefer figures and tables over text, you can check out this table to compare the mounts in this v/blog.
Seven tips to choose your first telescope mount for astrophotography
Lots of people think about buying expensive telescopes and cameras to start their astrophotography hobby. However, when you ask people who have been in the hobby for a couple of years, they will advise you to “put your money where your mount is”. Just think about it, you can buy the most expensive camera and telescope, but if you’re unable to compensate for the rotation of the earth and you’re unable to track the objects in the night sky, you’ll still end up with blurry pictures.
So, what exactly is a “good telescope mount” to start astrophotography? Ah, yes, that’s a good question. In my opinion, good telescope mounts to start astrophotography are entry-level mounts that are relatively affordable, but at the same time stable and reliable enough to accurately track objects in the night sky with some beginner astrophotography gear. With beginner astrophotography gear I mean a decent low to mid-sized refractor telescope, a camera, some tracking gear (additional small telescope with camera), and the optional filter wheel. Also, the mount should have some specific features so you can control it from a computer and use specialized astrophotography software which greatly enhances your ability to find, track, and photograph deep-sky objects. In fact, I have seven tips for you that can help you choose a good first telescope mount to start your astrophotography hobby.
Tip 1: Buy an Equatorial Mount
You are probably aware that the earth is turning around its axis once every 24 hours. So you need a mount that can compensate for the earth’s rotation and accurately track objects in the night sky. There is only one type of mount that is able to do just that: a “German Equatorial Mount”, or an “Equatorial mount”, or “EQ mount” in short. EQ mounts can be aligned with either the north or south celestial pole, depending on your location on earth, which will enable you to accurately compensate for the rotation of the Earth and ‘track’ and image your favorite Deep Sky Objects (DSO’s) from any location on earth. For a further explanation about polar alignment check this blog.
Tip 2: Buy a telescope mount with a Computerized (GoTo) system
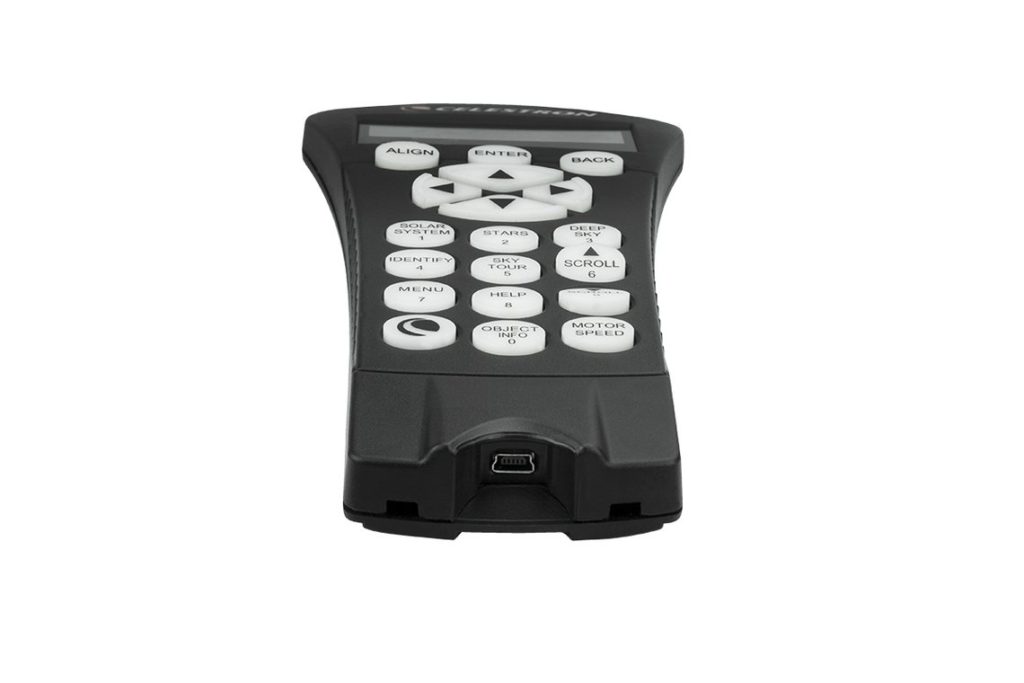
Once upon a time, before the age of computers, astronomers used star charts to find objects in the night sky and they manually ‘tracked’ those objects themselves. Today, thanks to the miracles of modern technology, we have consumer-level EQ mounts with computerized ‘GoTo’ systems. These mounts are equipped with a hand controller or a small computer which can be used to instruct the mount to point to any object in the night sky. The telescope mount will automatically slew to that object and start tracking that object. Some ‘traditional’ astronomers are deeply unhappy with the computerization of astronomy, as this leads to ignorant amateur astrophotographers (like me) who are unable to find objects in the night sky without the aid of a computerized system. You could compare it to using a GPS system in your car to get from A to B. It may be a good thing to bring a map in case your GPS fails…but let’s be honest, it has made traveling so much easier. Similarly, a computerized GoTo system is definitely an option you want to have on your mount when getting into astrophotography.
Tip 3: Look for a telescope mount that can be connected to your PC/Laptop via “ASCOM”
I would also encourage you to buy a telescope mount that can be connected to your laptop, tablet, MAC or PC via a so called “ASCOM” driver. ASCOM is a non-commercially developed software standard with which you can connect your astrophotography gear such as your telescope mount to ‘plug-and-play’ astronomy software that use the ASCOM standard. Some often used tools include PHD2 Guiding, AstroPhotographyTool, Sequence Generator Pro, which can help you to find, track, and image your favorite DSO’s, making your life as an astrophotographer much easier. With ASCOM, you can control your mount from a nice warm room with your computer or laptop, eliminating the need to go outside on those cold, winter nights.
Tip 4: Buy a telescope mount that supports autguiding
My fourth tip is to choose a telescope mount that supports “autoguiding”. Autoguiding helps to considerably increase the tracking accuracy of your telescope mount. In order to use autoguiding, you’ll need to set up a second, smaller telescope with a second camera – also referred to as your tracking gear – in addition to your main telescope and camera. You can connect your mount and tracking gear to a software tool called PHD2 guiding. This tools can be used to track a nearby star during your imaging session with your second camera and scope. When the star wobbles a bit (i.e. when it moves up or down, left or right), guiding software such as PHD2 will send corrections to your EQ mount to reposition the star to its original location. Autoguiding will enable you to take multi-minute exposures of a DSO, whereas without PHD2, many beginner astrophotography mounts are quite limited in their tracking accuracy which means you’ll be limited to 30 to 60 second exposures, which is often inadequate to capture all of the details a DSO has to offer.
Tip 5: Choose a telescope mount with a payload capacity of at least 10 kg (22 lbs)
Payload capacity refers to the maximum weight your EQ mount can carry. There is an unwritten astrophotography rule that you should take about 50% of the maximum payload capacity as the upper weight limit for astrophotography purposes – especially for so-called “beginner” astrophotography mounts with adequate, but basic motor gears. For example, if you have a mount that can support up to 10 kg’s (22 lbs) as reported by the supplier, all your astrophotography gear such as your telescope, camera, and tracking gear, should not weigh more than 50% of that weight, so about 5 kg (11 lbs). Of course, this may vary between mounts but as a general rule, your tracking will become less accurate when you increase the total weight of your gear on your beginner astrophotography mount. Also, 5 kg (11 lbs) is enough to mount a small to mid-sized refractor telescope, a camera, tracking gear, and a filter wheel.
Tip 6: Look for a telescope mount that doesn’t break the bank
The sixth tip is to consider your price range. Astrophotography is an exciting hobby and you will be amazed by all the wonders the universe has to offer, but it is not an easy hobby. You’ll have to learn how to set up your gear, find objects in the night sky, track those objects with sufficient accuracy, image those objects, and post-process those images. All these steps take time and energy to learn and this can be a bit overwhelming. It would be unwise in my opinion – to start your hobby with very expensive astrophotography gear (which you may need to sell again). On the other hand, I started this blog by mentioning “you have to put your money where your mount is”. In other words, you want to buy a steady, reliable mount to avoid the many frustrations you may otherwise experience such as inaccurate tracking, instability in your setup, or failing motor gears. In this v/blog, I will be focussing on mounts that are about $750 to $1250. To go below this price would mean you’ll probably end up with a frustrating experience – but please correct me if you think otherwise. Going beyond $1250 is perhaps too much to ask for people who are just starting out doing astrophotography. If money is less of an issue for you, please check out this blog where I’ll also discuss and compare more advanced astrophotography mounts.
Tip 7: Choose a telescope mount that is easy to set up and use.
Finally, I would advise you to ask other astrophotographers for any experiences with telescope mounts you are interested in buying. You can find many aficionados on cloudynights.com, stargazerlounge.com or even in the comment sections below my blogs on my website and my YouTube channel. Feel free to use the comment section of this blog and my YouTube channel to ask for feedback. For example, you may want to ask questions regarding the portability of a mount as you don’t want to end up with a mount that breaks your back every time you have to set it up and tear it down after your imaging session. Other things you can ask mount owners are whether mounts are easy to set up and polar align. For example, EQ mounts come with altitude and azimuth bolts that you will use to polar align your mount with the north (or south) celestial pole. It is important that these bolts are comfortable and easy to use. Also, the mount may have different connectivity options for telescopes (Vixen, Losmandy). Users can also inform you about the reliability and durability of mounts they have owned over the years. One word of advise, a new mount on the market with all the latest tech might be tempting, but may still be suffering from bugs that need to be ironed out.
8 beginner Telescope Mounts to start Astrophotography in 2021
Below, I’ll discuss 8 beginner telescope mounts in the price range of $750 – $1250 that in my opinion are interesting mounts to start your astrophotography hobby in 2021. If you are interested in more advanced (and more expensive) telescope mounts for astrophotography, check out this blog. I pre-selected these eight mounts based on the following criteria – taking into account the seven tips I mentioned in the first part of this v/blog:
- All mounts are equatorial mounts
- All mounts have a Computerized (GoTo) system
- All mounts have AutoGuiding and ASCOM
- All mounts have a minimum payload capacity > 10kg/22lbs
- All mounts are below $/€ 1250 (as per jan. 2021)
Applying this pre-selection, I ended up with the eight beginner mounts. I’ll discuss the main advantages and disadvantages of each of these mounts below, and I’ll conclude by giving you my personal preferences. I also created this dynamic comparison table for those who love to filter, sort, and compare the various features for each of the eight mounts. I always advise you to Do Your Own Research, and I hope this v/blog is informative in this respect.
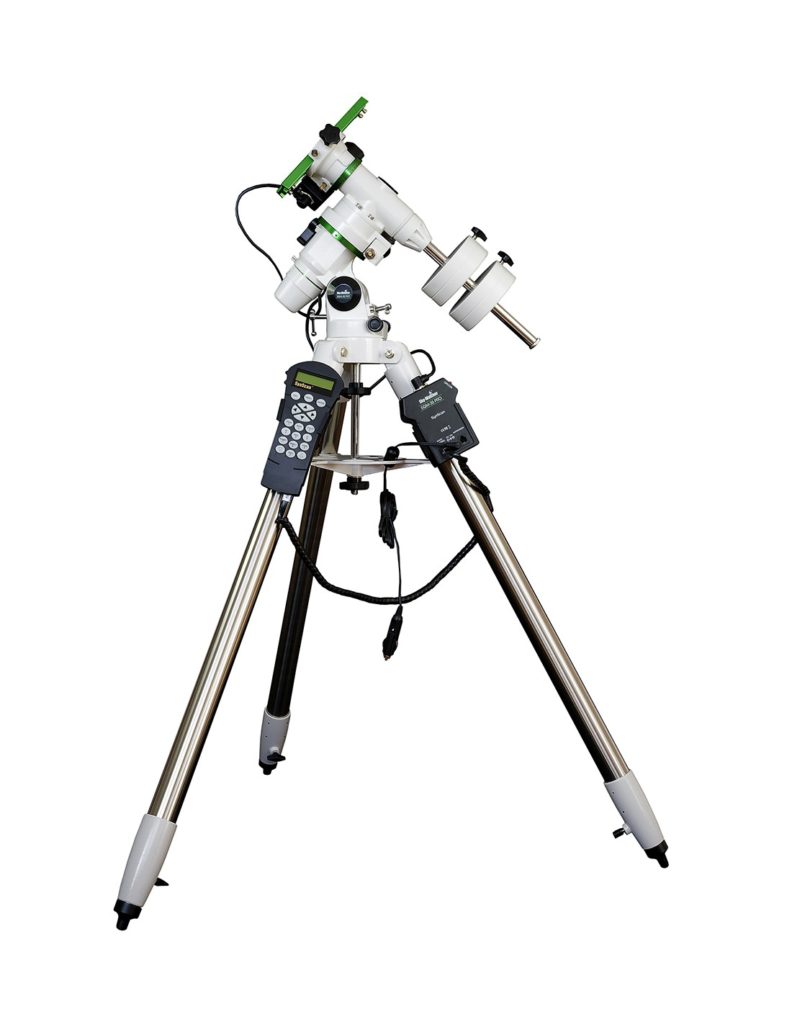
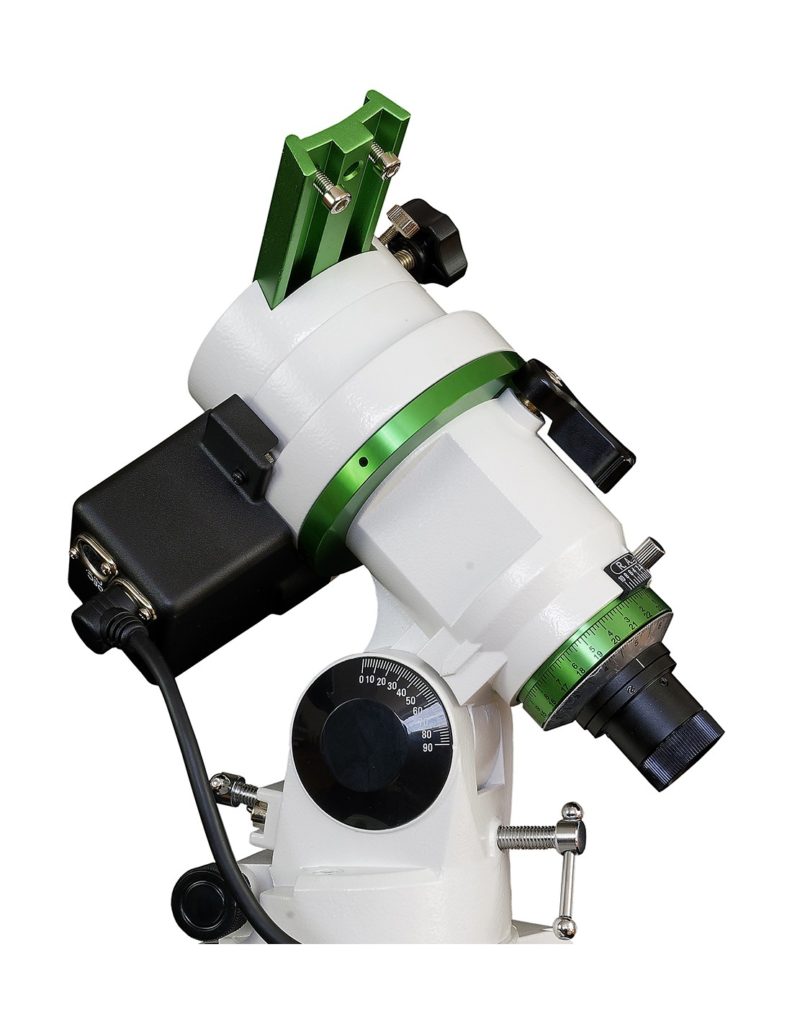
MOUNT 1: The Sky-Watcher EQM35-Pro
Sky Watcher EQM-35 Pro 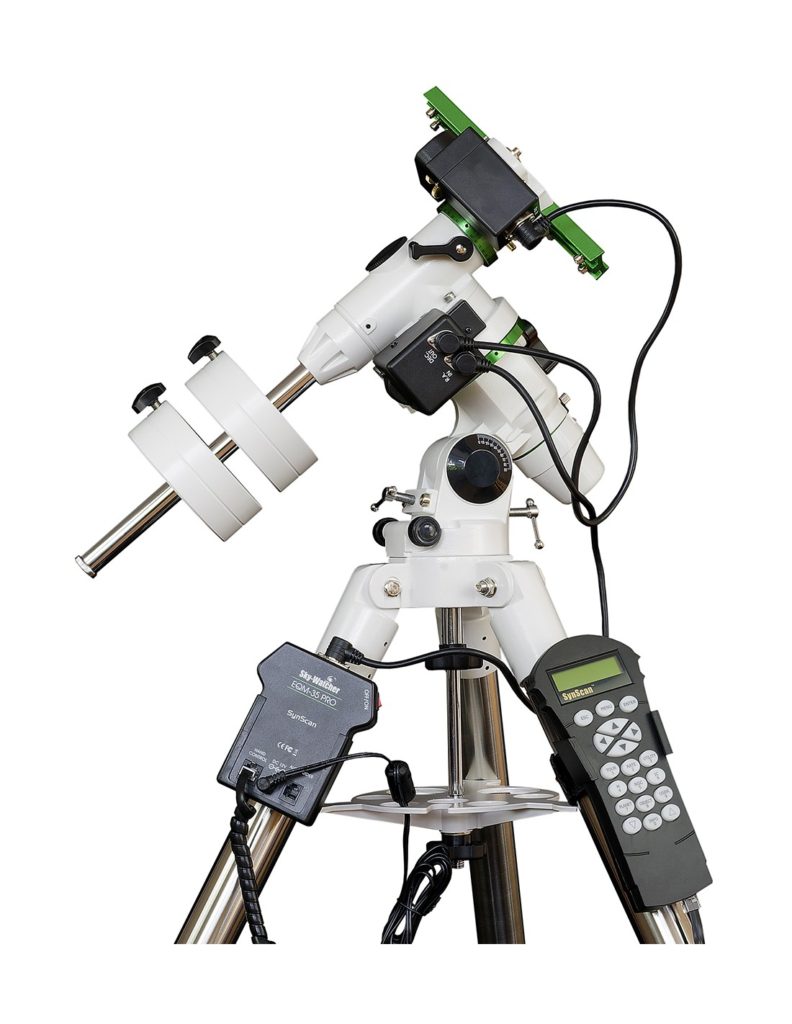
Available in the USA for $725
Available in Europe for €755
Main advantages and disadvantages
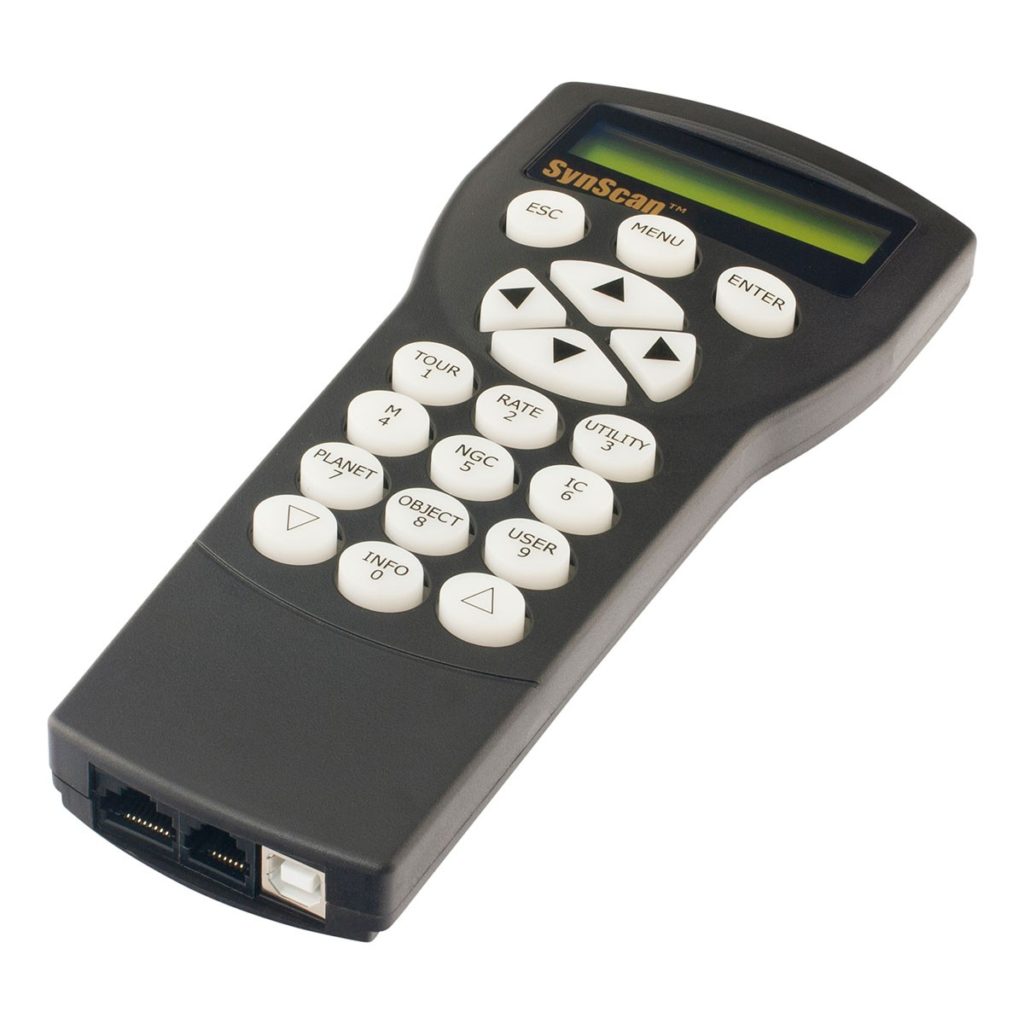
This is the most affordable mount in my overview, and also the lightest mount. The total weight of the mount (mount head and tripod combined) is only 10 kg (22 lbs). This is great when you are looking for a portable mount which you can use to travel to different locations without breaking your back. The mount supports all the basic features we need to perform astrophotography such as a computerized GoTo system, autoguiding, ASCOM, and Periodic Error Correction which can be used to increase the tracking accuracy of the mount. The mount comes with the Sky-Watcher SynScan controller with a USB connection to connect your mount to your PC, laptop, or MAC. The EQM-35 has been around for several years, so there are many users who are able to help you out! The main disadvantage is its payload capacity of only 10 kg (22 lbs), which you should consider before buying this mount. If you are primarily interested in widefield astrophotography with some lightweight gear (small telescope, camera), this mount might be perfect for you. If you are considering to buy heavier telescopes and tracking gear down the road, you may want to consider a different mount.
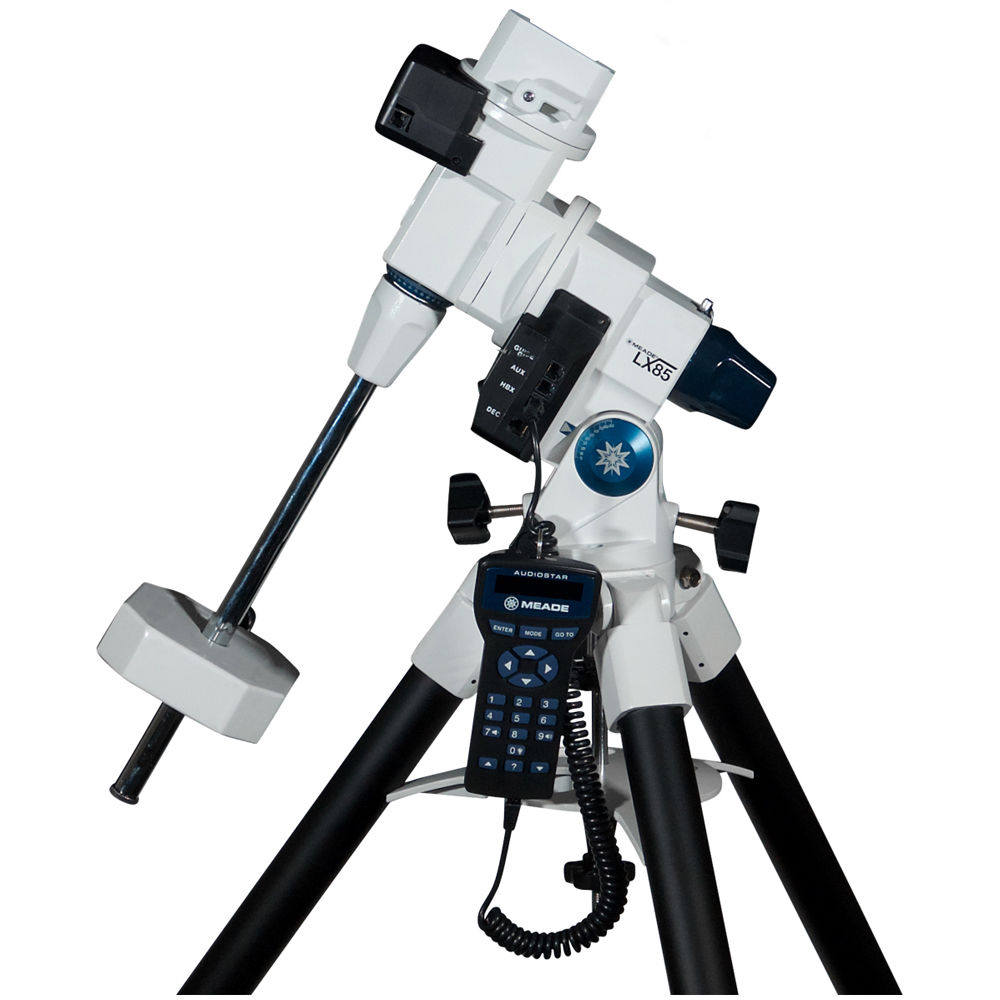
Mount 2: The Meade LX-85
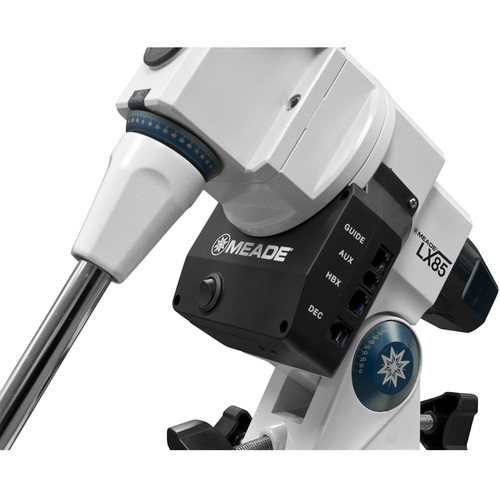
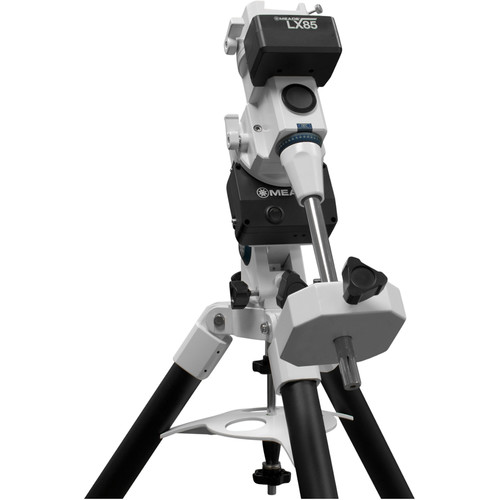
Available in the USA for $799
Available in Europe for €980
Main advantages and disadvantages
This telescope mount is the second most affordable mount in this overview. Moreover, this mount has the highest (claimed) payload capacity of 15 kg, or 33 lbs, which is impressive considering the price. The LX-85 has all the things you need as an astrophotographer: a hand controller that supports computerized GoTo, autoguiding, ASCOM, and PEC. Note that you do need a special “Meade 505” cable to connect the mount to your computer via the hand controller. This mount is still relatively new, it was introduced on the market about 2 years ago. As such, it initially had some bugs. Some users reported difficulties connecting this mount to ASCOM. However, this issue appears to have been solved with this ASCOM driver. Another, minor reported complaint is that this mount is a bit noisy when slewing to your favorite DSO which may upset the neighbors. On a more serious note, the mount appears to have an AUX port that is wired backwards. Some users have reported the mount to have stopped working after they attempted to use the AUX connection with external gear. It is unclear whether this issue is resolved at this point in time. Another thing to consider is that, unfortunately, Meade filed for bankruptcy about a year ago. The Meade website, however, is still online, so hopefully Meade is able to continue their services as it benefits all users to have different brands and suppliers to choose from.
Mount 3: the Celestron Advanced VX
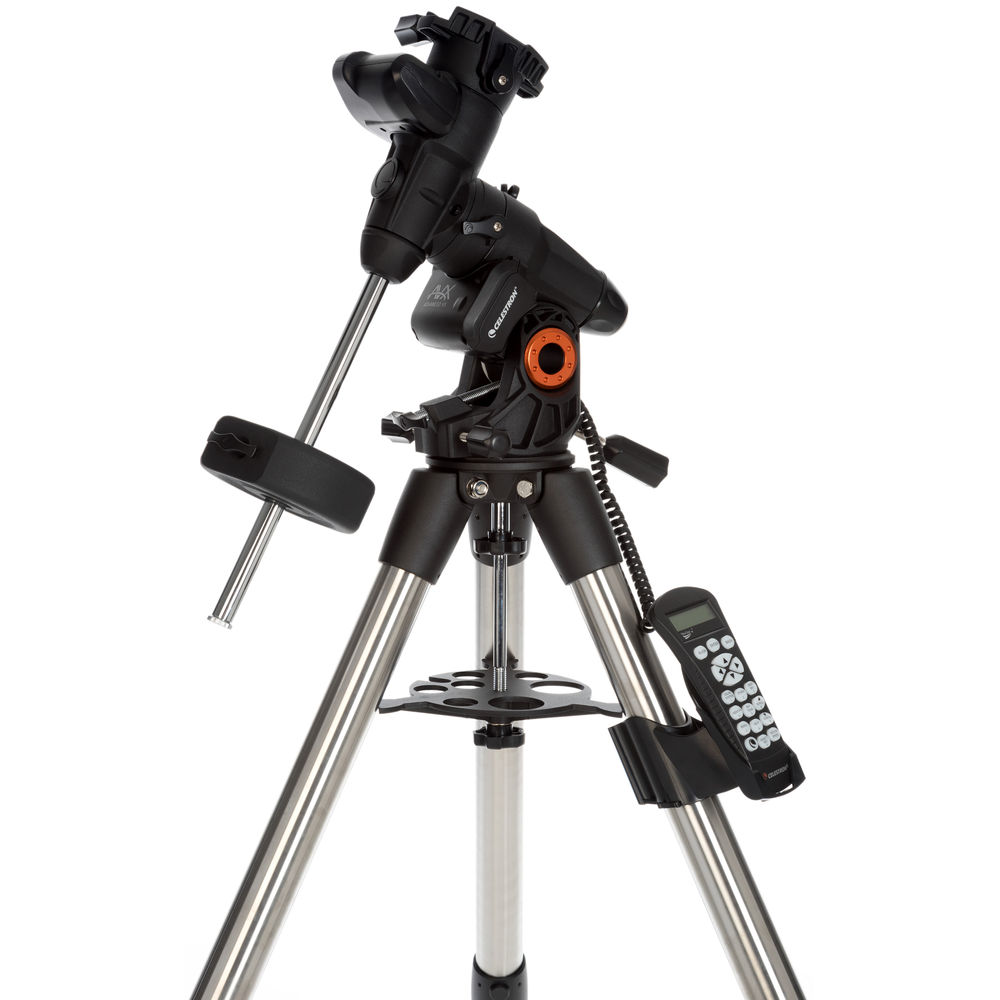
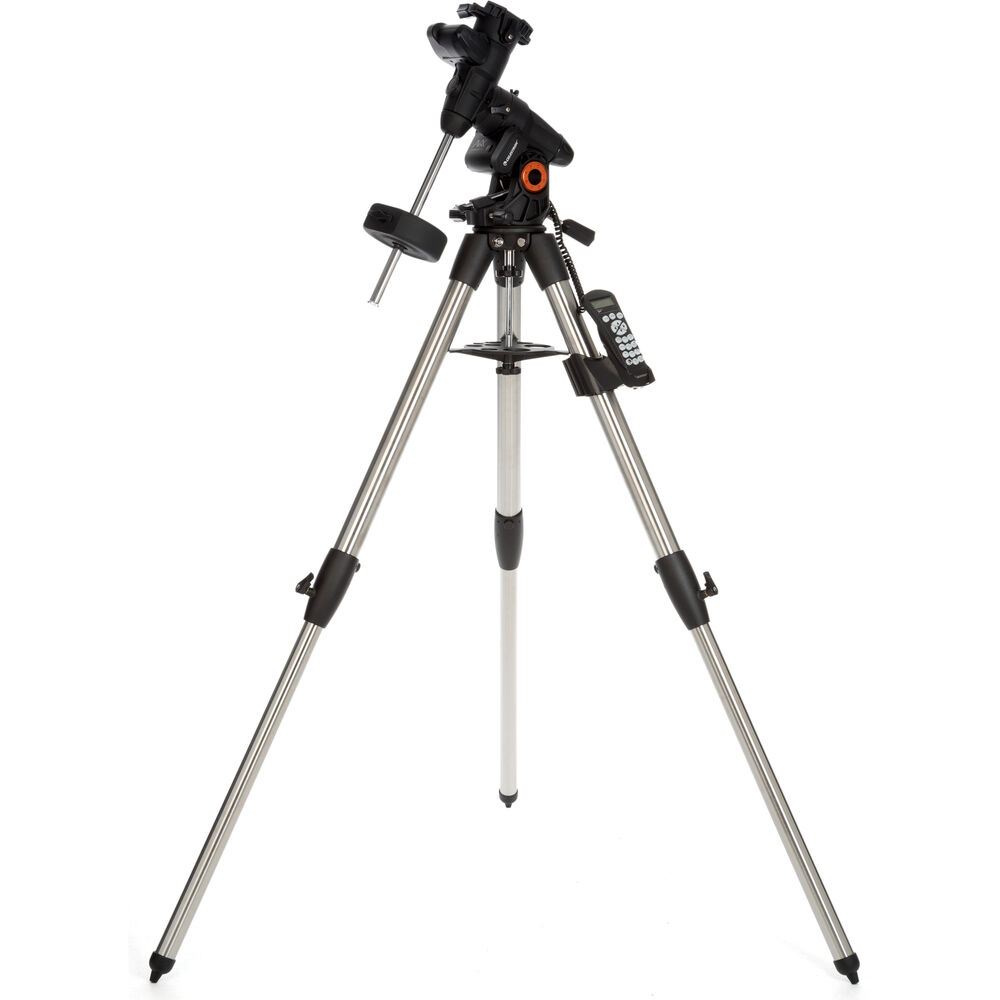
Available in the USA for $899
Available in Europe for €1095
Main advantages and disadvantages
This is my first astrophotography mount and I have a more in depth review you can find here. First of all, the price of the Celestron AVX seems to have exploded in Europe, probably due to COVID-19 and associated issues with availability and delivery time. I remember paying about 900 euros for this mount a few years ago…Anyhow, the AVX is a good, mid-range priced (in USA at least) telescope mount with a high payload capacity of 14 kg (30 lbs) – which is sufficient to mount astrophotography gear such as a mid-sized refractor telescope, filter wheel, camera, and tracking gear. The payload capacity is similar to the LX-85 and some of the most expensive mounts in this overview. It also includes all the things we need as astrophotographers such as computerized GoTo, Autoguiding, ASCOM, and PEC. The newer Nexstar hand controller comes with a USB connection, making it easy to connect your computer to your mount via USB. Another advantage is that – unlike the LX 85 – this mount has been around for many years and lots of users seem to enjoy the mount as demonstrated by the 4.5 out of 5-star rating on the OPT website. Also, you can find loads of information and experienced users (including myself) who can help you out if necessary. Before becoming overly enthusiastic, I need to point out a couple of things you should take into account. First off, the motors are noisy, the mount sounds like an espresso machine when slewing to objects in the night sky. If you’re fine with that, then that’s no serious issue. Truth be told, there are some reports of users claiming to have received a non-functioning mount that had to be sent back to the supplier. I do think this issue is limited to a rather small group of unfortunate individuals, and those mounts could be returned and replaced of course. Another issue – perhaps not unique to the AVX – is that I experienced some backlash in the motors after having used the mount for a couple of years. I have an older video on how I was able to solve this issue by repositioning the motors of the mount.
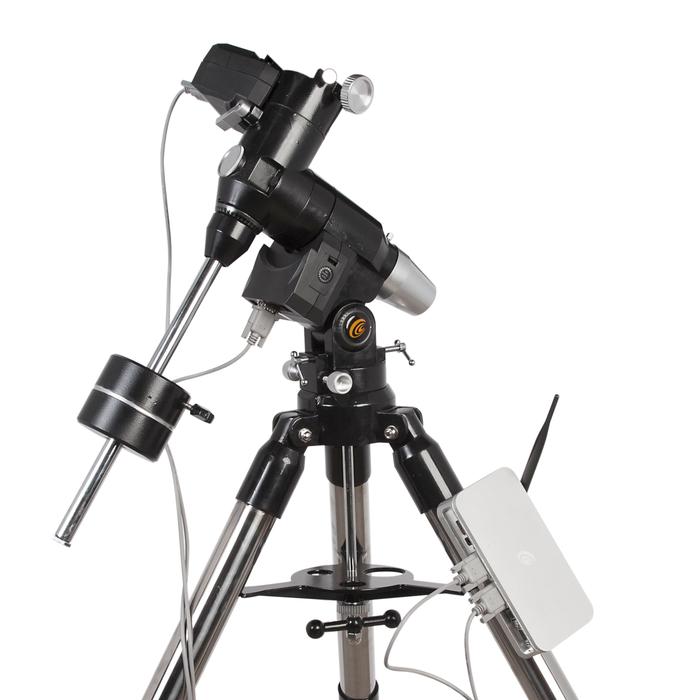
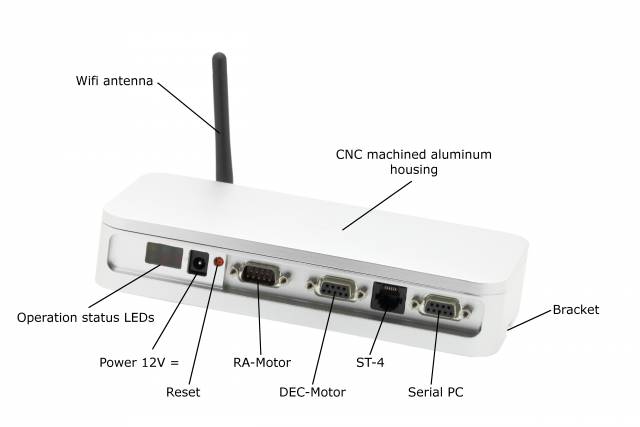
Mount 4: the EXOS2-GT with PMC Eight GoTo

Available in the USA for $900
Available in Europe for €799
Main advantages and disadvantages
The EXOS2-GT with PMC Eight GoTo is a midrange priced mount with at least two pleasant surprises. The payload capacity is pretty decent (12 kg / 28 lbs) and it puts this mount right in the middle of the eight mounts in this overview. Also, all the features needed for astrophotography are available. The mount has computerized GoTo, autoguiding, and ASCOM. The first pleasant surprise is that the mount also comes with a belt drive. Belt drives generally increase the tracking accuracy of the mount – which is very important when you want to take multi-minute exposures of deep-sky objects. Also, the mount is pretty quiet when slewing to objects so this mount will not upset your neighbors if you have any. The second surprise is that this mount includes the PMC Eight GoTo module (third picture) to which you can connect wirelessly. Some of you may prefer a wireless connection over using a USB cable to connect your mount to your computer. This being said, I need to point out that some users have experienced some difficulty with the Explore Stars APP that has been developed to wirelessly connect to the mount and point the mount to objects in the night sky. More specifically, some users have reported that the APP crashed during the night, requiring them to reconnect and go through the process of finding and tracking objects again. Of course, when you get into astrophotography, software crashes are part of the deal, but you want to minimize this as best you can. Another thing to take into account is that the mount doesn’t come with a hand controller. You always need to have an extra device to connect and control your mount. Is that a disadvantage or an advantage? I leave that up to you to decide. Finally, this mount does not include Periodic Error Control. PEC is useful as it is able to record and play-back any tracking inaccuracies found during one full turn of the worm gear. Being able to playback guiding corrections generally increases the guiding accuracy of the mount. With this mount, you probably always need to use extra tracking gear in combination with PHD2 guiding to take multi-minute exposures. But actually, that is what you end up doing anyhow when you get further into this hobby.
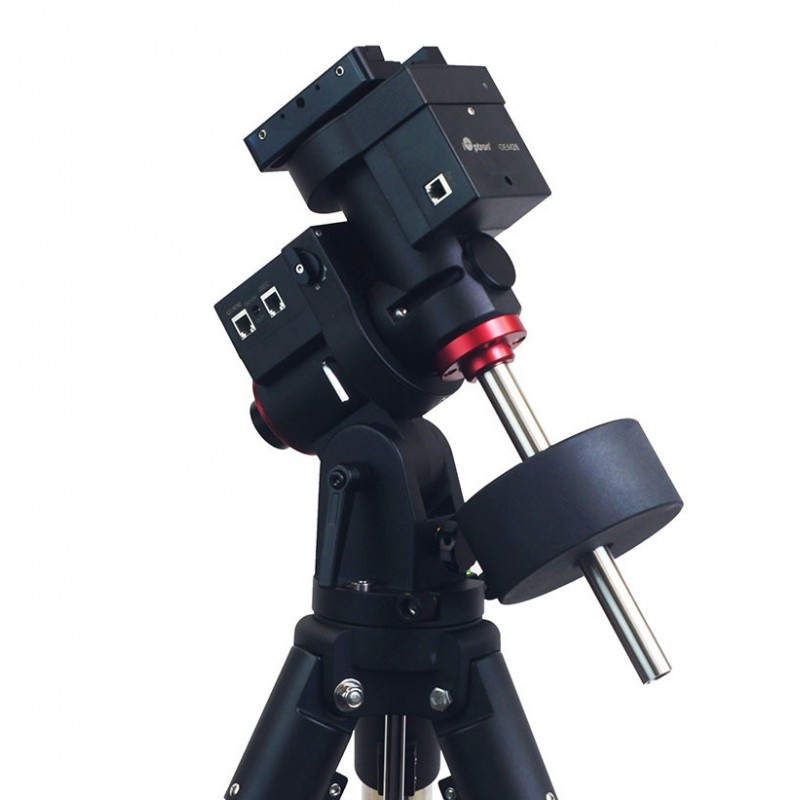
Mount 5: the iOptron GEM28
Available in the USA for $1028
Available in Europe for €1185
I had two reactions when I became aware that iOptron was developing brand-new next-generation mounts: WOW! and Huh? The second reaction refers to the name of the mount: the GEM28. Up until now, iOptron has been developing their own Center balanced mounts (CEM) – which always set iOptron apart from other suppliers in at least two ways: The “Z” design of the CEM mount puts the weight of the payload at the center of gravity allowing for greater natural stability. Because of this feature, the “Z” designed mounts of iOptron are known to be unusually light as compared to GEMs. But now, iOptron is also introducing their own classic German Equatorial Mount and everyone is guessing why that is. At least two reasons may play a role. First, the German Equatorial design is still the most accepted design astrophotographers prefer to use, and secondly, the GEM mounts can be used from a wider range of latitudes across the globe in comparison to the CEM mounts.
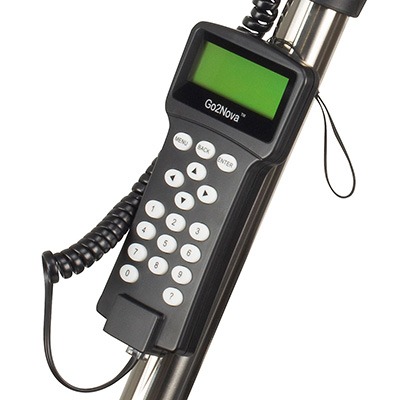
Anyhow, I welcome the effort of iOptron to produce GEM mounts – and the GEM28 appears to be a well thought out example. The mount supports 28 lbs (13 kg) of payload capacity, which is only 5 lbs (2 kg) below the maximum payload capacity of all the mounts included in this overview. Next, in tradition with iOptron, the mount is pretty lightweight as the mount head and tripod combined weigh only 28 lbs (13 kg). Of course, the iOptron GEM28 includes all the features astrophotographers need such as computerized GoTo, autoguiding, and ASCOM. A special feature is that the mount supports PPEC – Permanent Periodic Error Correction. The main difference with regular PEC is that the GEM28 will always record and playback any inaccuracies automatically. With regular PEC, tracking inaccuracies are usually recorded during one full turn of the worm gear only (usually about 10 minutes), after which this one recording is played back to the mount to increase tracking accuracy. With PPEC, the mount will continuously record and playback information without the need for users to do anything. Another awesome feature is the diversity in connectivity options. The GEM28 includes built-in WiFi, but also a GoToNova hand controller and USB connection. The mount also comes with its own integrated optical polar scope, so there’s a lot to like. The only thing is that…uhm…the mount is brand new at this point in time. It looks great on paper but we still need to wait and see how the mount behaves in “real life”. In fact, I would be happy to test this mount :-). If you like to take a small risk in this respect, I do think this mount is definitely worth your consideration. It will be very interesting to read the reviews of early adopters in 2021.
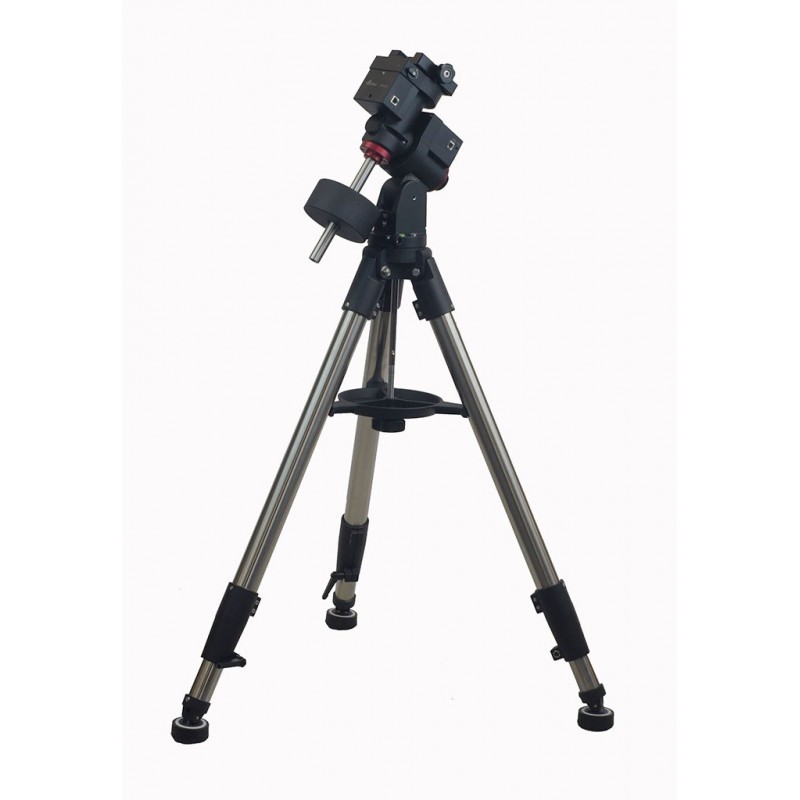
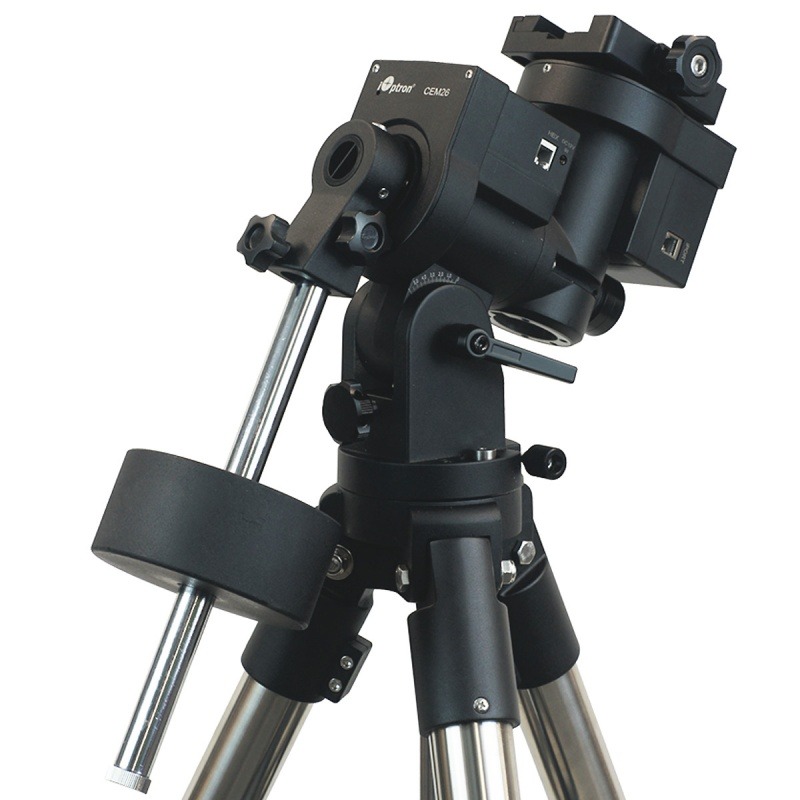
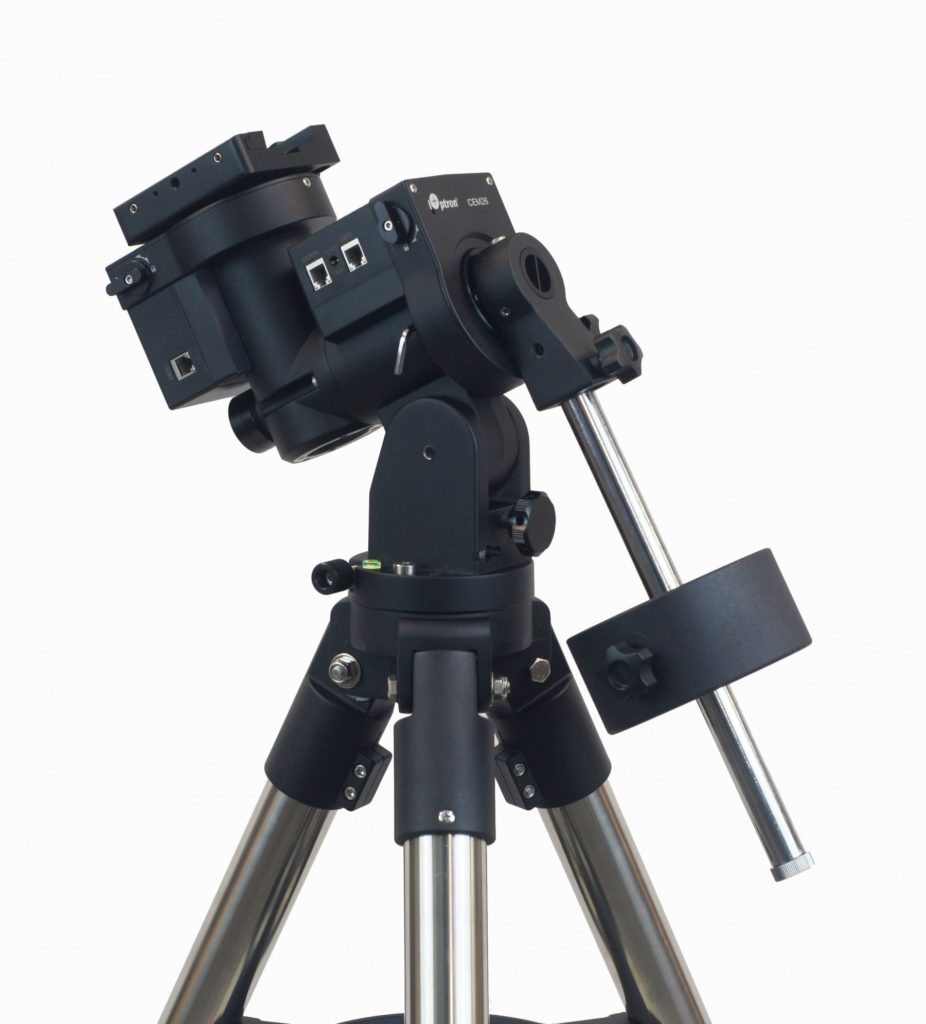
Mount 6: the iOptron CEM26

Available in the USA for $1048
Available in Europe for €1140
Main advantages and disadvantages
The second, brand new mount iOptron is introducing to the market is the next-generation CEM26. This particular mount is very similar to the GEM28 (see above), with the main difference being that this is a center balanced mount (CEM) like we are used to seeing from iOptron. The “Z” design of the CEM mount puts the weight of the payload at the center of gravity allowing for greater natural stability. Because of this feature, the “Z” designed mounts of iOptron are known to be unusually light. In this case, though, the CEM26 is very similar to the GEM28. The payload capacity is a bit lower with 26 lbs (12 kg) – as its name suggests – and the combined weight of the tripod and head is 30 lbs (13 kg) – very similar to the GEM28. This mount also supports computerized GoTo, auto-guiding, and ASCOM, as well as PPEC – Permanent Periodic Error Correction as explained above and usually only included on more expensive mounts. The CEM26 also supports built-in WiFi, comes with the GoToNova hand controller, supports a USB connection, and has an integrated optical polar scope. Again, there is a lot to like on paper, and it will be very interesting to see how this mount will perform in real life. If you are willing to become an early adopter, both the GEM28 and the CEM26 are very tempting mounts to start astrophotography in 2021.
Mount 7/8: The Sky-Watcher HEQ5 Pro and the Orion Sirius EQ-G
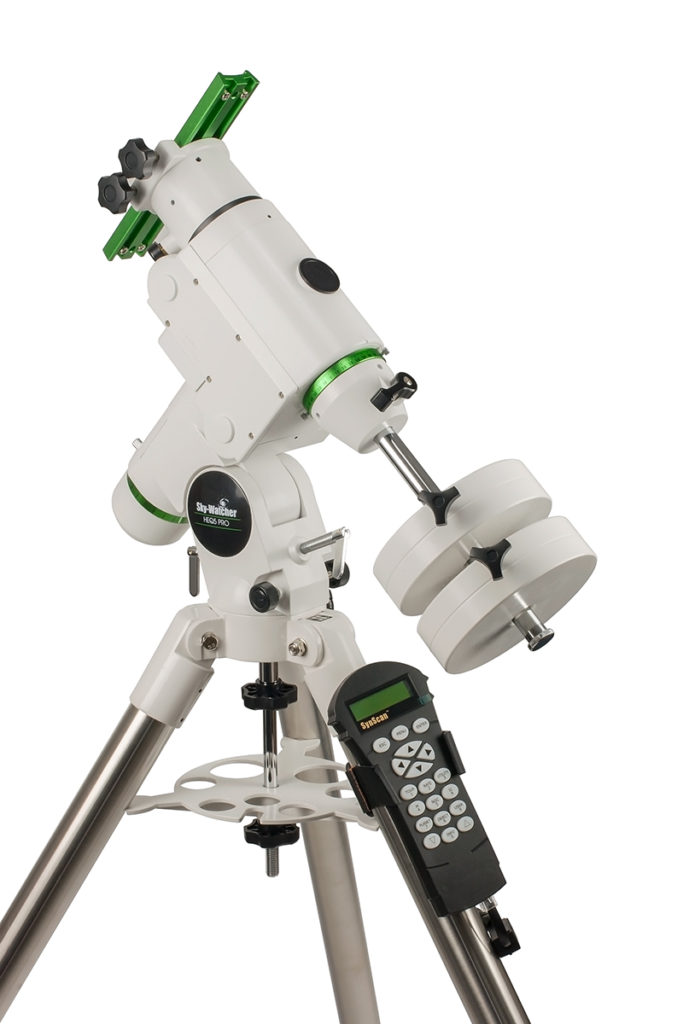
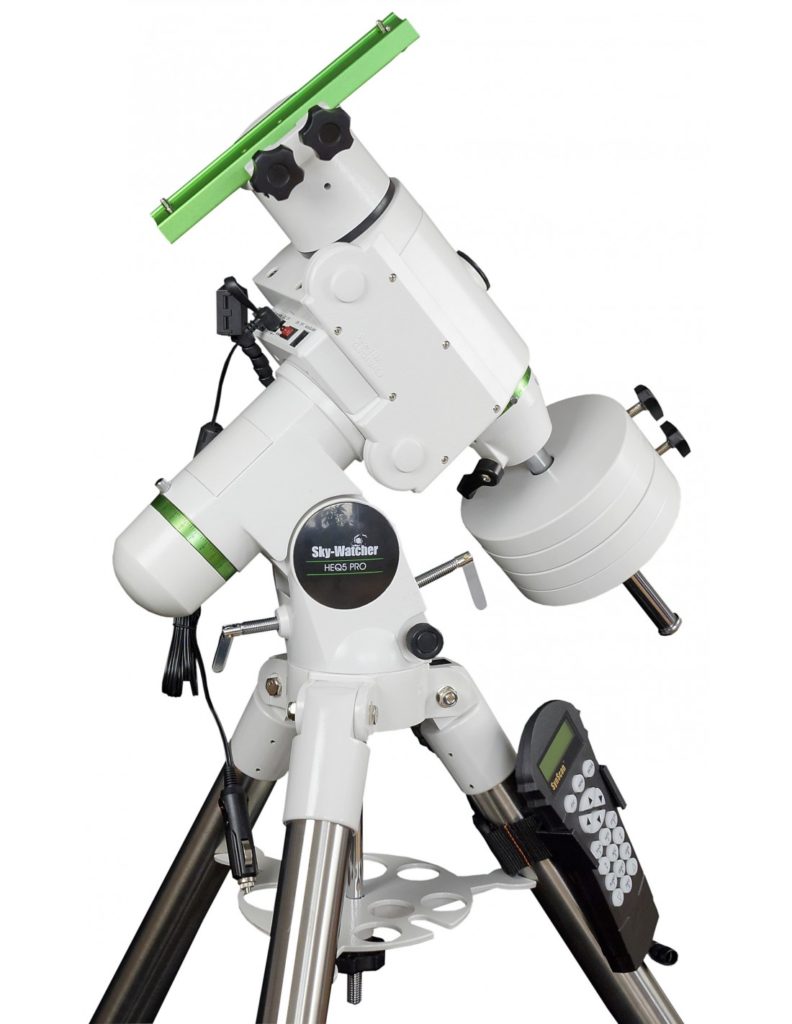


The Sky Watcher HEQ5 Pro:
Available in the USA for $1150
Available in Europe for€1119
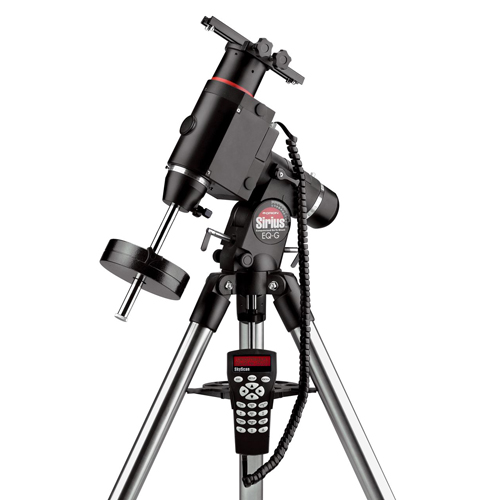
The Orion Sirius EQ-G
Available in the USA for $1199
Available in Europe for€1319
Main advantages and disadvantages
Before discussing these mounts, you probably want to know why I discuss two mounts at once. Well, that is because both the Orion Sirius EQ-G and the Sky-Watcher HEQ5 Pro are made in the same Chinese Synta factory. The mount is predominantly sold in the USA as the Orion Sirius EQ-G, whereas in Europe and elsewhere the mount is sold as the Sky-Watcher HEQ5 Pro. Apart from some optical and design differences (white vs. black), the mounts are pretty much the same in terms of specifications and capabilities. Both mounts have been around for a long time now, and they are much loved among astrophotographers. Chances are high that – when asked what astrophotography mount you should buy to start astrophotography – people will mention the HEQ5 Pro or the Sirius EQ-G. Part of the reason is that these mounts have been on the astrophotography market for several years now, and they have proven to be reliable mounts. Also, both mounts can carry a maximum payload capacity of 14 kg (30 lbs) which is about as much as you can ask from a beginner astrophotography mount. Another thing to like is that the motors are relatively silent, so you can slew to your favorite DSO without waking up your neighbors. Both the HEQ5 Pro and the Sirius EQ-G support computerized GoTo, Autoguiding, PEC, and ASCOM. The newer hand controllers from Synta (V5) support a USB connection to connect the mount to any PC, laptop, or MAC. Both mounts have been developed and tested in real-life throughout the years. If you have questions about the mount, you can reach out to a large community of fellow users who can help you out. What about the disadvantages? Well, there aren’t many. One thing you should take into consideration is that these mounts are the heaviest mounts, and they are also the most expensive mounts of this overview. One last thing to mention is that lots of astrophotographers use the optional rowan belt drive modification which improves the tracking accuracy of these mounts.
In conclusion
It is nice to see that so many new mounts are available on the market to start astrophotography. It shows us that our hobby is very much alive. Before giving you my two cents of thoughts I highly advise you to do your own research, as each of these mounts have their own unique advantages and disadvantages as discussed above. This being said, if I would start my astrophotography hobby today, I would either choose the Celestron Advanced VX (available in the USA, and Europe), or the Sky-Watcher HEQ5 Pro (available in the USA, and Europe) – which is also (re-)branded as the Orion Sirius EQ-G in the USA. The main reason for my choice is that these mounts have been tested in real-life over the years, and there are lots of satisfied users who can help you out if you have any questions. Moreover, the features of the mount include everything a beginning astrophotographer needs. The maximum payload capacity of these mounts at 14 kg (30 lbs) is high, the mounts all support computerized GoTo, Autoguiding, and PEC. Both Celestron and Sky-Watcher (Orion) mounts support ASCOM and the ASCOM drivers of these mounts are recognized by most – if not all – astrophotography software, and the mounts can be connected via USB. All in all, a pretty good deal. At the time of writing the Celestron Advanced VX was most favorably priced, at least in the USA at $899, as compared to S1150 for the Sky-Watcher and S1199 for the Orion Sirius EQ-G. Probably due to COVID-19, I have seen fluctuating prices and delivery times. Check the links for the latest price and information on availability and delivery times.
I do want to want to make an honorable mention of iOptron for introducing two next-gen mounts, the GEM28 (available in the USA and Europe) and the CEM26 (available in the USA and Europe), to the astrophotography market in 2021. Both mounts look very modern and promising. For example, both mounts include, periodic PEC and built-in WiFi – which are quite exceptional features for an astrophotography mount at this price range. If you are willing to become an early adopter and take the risk, these mounts are certainly worth your consideration.
I’m curious to find out what your preferences and experiences are. You are welcome to leave a comment below. I highly welcome amateur astrophotographers who have real user experiences with any of these mounts to react so we can help each other out.
Clear skies!
I have a Celestron Evolution 8″ on backorder, so I don’t have anything to work with yet. I know that the Alt-Az mount isn’t the best for astrophotography, but I have been lucky while waiting and found a wedge for my tripod. My big question is when I want to up grade from a DSLR to a dedicated astro camera, what would be a good start for a beginner, also what size of guide scope and camera would I need for the scope, Celestron says that the Star Sense camera is not large enough for deep sky photography, it’s only 20mm in dia.. Any help would be great, an keep those YouTube videos coming, they are great.
Hi Charles, coincidently, I’ll be releasing a video with seven tips to start astrophotography on my youtube channel today which covers a broad overview of setup (mount, telescope, camera, tracking gear, and how to tips).
You can also find more specific info on my “getting started page” https://astroforumspace.com/category/getting_started_astrophotography/ where I’ve shared my thoughts on cameras, telescopes, mounts etc.
And I have an overview page of Astro equipment I’ve bought over the years here: https://astroforumspace.com/my-astrophotography-gear/
Hope this is useful, I know starting astrophotography can be quite overwhelming. Clear skies!
Love your channel! How do we get in contact with you?
Hi Robert, thanks! do you have a question?
Hi Robert, sorry for the late reply. You can contact me on Instagram @astroforum, or publicly here or my yt channel
Hi I have jest purchased my Celestron AstroMaster 130 Reflector NewtonianTelescope and have seen some of your Youtube channels and wish to get into Astrophatograph and am thinking of getting the Celestron Advance VX Mount can you tell me what is the best Gide Scope and do I need to get a Polar alignment eyepiece if so which one also I am looking at getting the ZWO 1290mc camera for the telescope you help whuld be very much appreciated thanks.
Hi Philip,
I have used the Celestron Advanced VX (link: https://bit.ly/380Y01D) for several years in combination with my 80/480mm refractor which worked out very well. It is one of the cheaper beginner telescope mounts that is good enough for deep sky astrophotography. As far as I can see, the AVX doesn’t come with a polar scope unfortunately…so you’ll need to buy one separately. For instance, this is a basic polar finder you can insert in the AVX to perform visual polar alignment: https://bit.ly/3kqSzRq.
Yes, I do recommend you’ll get an additional guide scope and camera to start your AP hobby. It really helps to extend your exposure time from about 1 minute to several minutes, which really brings out the faint light some of the deep sky objects have (especially nebulae).
I’m using an Orion 50mm guidescope, this one: https://bit.ly/3h8gXUD with an older version of the asi120mc camera – I really like the compact setup.
I think both the 120mm or the 290mm mini cameras are very well suited as a secondary “guide camera”. I recently wrote my review on ZWO ASI cameras, you can find it here if you’re interested: https://astroforumspace.com/best-zwo-cameras-for-planetary-imaging-and-deep-sky-dso-astrophotography/
Hope this helps!
Clear skies,
Wido – Astroforum
, you can find reviews on my website.
Hi, I´m new to this hobby and I´m planning to buy my first mount. I will be using it in Colombia, which is very close to the equator (My latitude is 6,2 degrees north). I´m leaning towards the Celestron Advanced VX but it´s specs limit the latitude range from 7 to 77 degrees, which leaves my location outside. Will this render this mount useless in my location? The only thing I can imagine being a problem would be the counterweights hitting the tripod legs, but this could be easily fixed by changing them for a different geometry ones (Not sure). The other mount I´m considering is the EQM-35, but I don´t seem to be able to find it´s latitude range.
Hi Alejandro,
I’ve never tested this as I do not live close to the equator, but I think the main issue would be the tripod legs indeed. You might want to consider iOptron mounts, they have an EQ design that supports 0 degrees.
This is their newest GEM28: https://bit.ly/3eqL1ft
Another solution would be to replace the tripod with a pier, but you would also need some adapter kit to be able to connect a telescope mount head to that pier.
Hope this helps, clear skies!
Wido.
Hi Wido, Thank You so much for this video. I am totally new and am just moving to this world. I am totally unable to make my decision between Celestron Advanced VX (currentlt @USD 999) against Sky-Watcher HEQ5 Pro(@USD1225). I am surely unable to scale (on tighter budget) to Sky-Watcher EQ6-R Pro(@USD1675). I currently have a Redcat 51 as my primary Optic tube. Would you be able to help please.
Hi Ravi,
Given your tight budget, I think the AVX is certainly up for the job. The redcat 51 has focal length of only 250mm, so as long as your periodic error is below 2 arc seconds you’ll be fine.
The AVX – with guiding – has an average periodic error of around 1 to (max) 2, depending on polar alignment and weather conditions. The newer versions also come with a mini usb connection on the
hand controller, making it easier to connect your mount via usb to your pc or laptop and use guiding software like phd2. Good luck, clear skies!
Wido.