Here’s my attempt to answer the 10 most-often-asked questions I have received from you over the years about telescope mounts—fully updated to reflect how technology has evolved, while keeping the fundamental principles intact.
1. What is a telescope mount?
A telescope mount basically does two things. First, it holds your telescope securely, and second, it allows you to move the telescope so that it can be pointed precisely at the objects in the night sky you want to observe or photograph. Most mounts have two elements: a sturdy tripod with legs made of carbon, metal or wood, and a second element that’s known as the ‘mount head’.
The mount head is typically made of metal and usually has two axes to slew your telescope to any object in the sky.
2. What are the different types of telescope mounts?
There are two main types of telescope mounts: altitude azimuth mounts (or Alt-Az mounts) and equatorial mounts (or EQ mounts in short). Both Alt-Az and EQ mounts can track the motion of celestial objects in the sky, but they do so in completely different ways.
Alt-Az mounts track objects using simple up/down and left/right movements.
Equatorial mounts are tilted at an angle that matches the latitude of your location, which corresponds with the north celestial pole (Polaris in the north) or the south celestial pole (close to Octantis in the south).
You will probably come across lots of different names for telescope mounts such as fork mounts, Dobsonian mounts, or German equatorial mounts. Just remember that most of these mounts can be placed in the two main categories of either alt-az or eq mounts. However, a recent third category has emerged: Harmonic Drive (Strain Wave) Mounts. These can actually operate in either Alt-Az or EQ modes, but they use a completely different internal lightweight design borrowed from robotics.
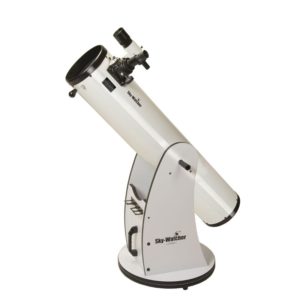
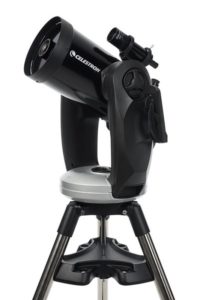
Dobsonian Mount (alt-az)Fork Mount (alt-az)German Equatorial Mount (EQ)Single Arm Mount (Alt-Az)Harmonic Drive Mount
3. Which mount is best for my goal: Moon & Planets vs. Deep-Sky?
Your astrophotography goal determines exactly which type of mount you need because the imaging processes are completely different:
For Moon and Planets: You are capturing very bright objects at high magnification. The technique here is “lucky imaging,” where you take rapid, short video frames (high FPS) to beat atmospheric turbulence. Because exposures are fractions of a second, an Alt-Az mount is perfectly fine. It keeps the planet centered in your field of view, and you don’t have to worry about field rotation.
For Deep-Sky Objects (Nebulae and Galaxies): These targets are incredibly faint, meaning you need to capture the weak light using long, multi-minute exposures. If you use an Alt-Az mount for this, the stars will appear to twist or rotate in your frame over time (field rotation). For deep-sky, you absolutely need an Equatorial mount (or a harmonic mount running in EQ mode) to track the natural curved rotation of the night sky.
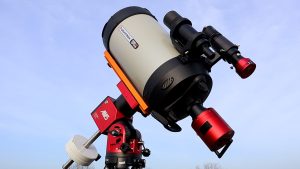
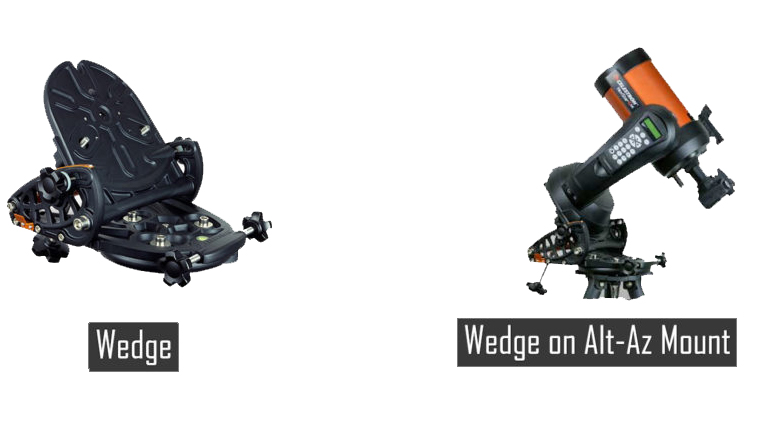
The Wedge Exception: If you already own an Alt-Az fork mount (like a classic Schmidt-Cassegrain setup) and want to do deep-sky imaging, you can place the mount on an adjustable tilted metal platform called an Equatorial Wedge. This physically tilts the Alt-Az mount head so that its azimuth axis points directly at the celestial pole, effectively turning it into an equatorial tracking system without buying a whole new mount. Still, and EQ mount, especially with auto-guiding, will almost always outpeform a wedge.
4. What features does a deep-sky astrophotography mount need?
If deep-sky imaging is your ultimate goal, your mount head needs to have three non-negotiable features:
Computerized GoTo System: Your mount should have internal motors and a hand controller (or software database) to automatically find and slew to any faint object in the sky, saving you from reading manual star charts.
A Standard Protocol Connection: This allows an external laptop or a smart hub to talk to the mount. On Windows, this runs via ASCOM drivers, while Mac/Linux systems use INDI drivers. Alternatively, you can use a dedicated smart hub like the ZWO ASIAIR—a mini-computer that mounts onto your scope so you can run the whole session from a phone or tablet.
An Autoguiding Port/Capability: Even the best gears have minor mechanical imperfections that cause tracking errors. Autoguiding uses a second guide scope and camera running software like PHD2 to monitor a single star and send tiny positional corrections to the mount during multi-minute exposures.
5. How do traditional gears compare to modern Harmonic Drive mounts?
Classic German Equatorial Mounts (GEMs)—like the Sky-Watcher EQ6-R Pro—rely on a large worm gear meshing with a rigid ring gear. Because these teeth press together, the weight must be perfectly balanced across both axes using heavy iron counterweights. If it’s unbalanced, the motors will strain or bind. Traditional gears also suffer from “backlash,” which is the tiny mechanical delay or wiggle room that happens when a gear shifts directions.
Harmonic drive mounts abandon traditional teeth entirely for “strain wave gearing.” They use an internal flexible metal cup that is smoothly deformed by a motorized elliptical plug. This creates massive torque and gear reduction ratios in a tiny footprint. Because the teeth mesh along a flexing curve, harmonic drives have virtually zero backlash and do not rely on strict balance, meaning you can often eliminate heavy counterweights completely on small-to-medium telescope rigs.
6. What are the real-world downsides of a Harmonic Drive mount?
While the lightweight design sounds perfect, it is a balanced trade-off. First is Price: strain wave gears require extreme manufacturing precision, making them more expensive than traditional entry-level mounts.
Second is Periodic Error: because the internal metal spline flexes constantly as it rotates, harmonic drives drift away from a target more aggressively over time than a heavy traditional worm-gear mount. To fix this, you must run autoguiding with rapid 1 to 1.5-second exposure loops. While traditional mounts can sometimes track smoothly, even when unguided, a harmonic drive will show trailed stars very quickly without an active guide camera and guidscope (or off-axis guider) keeping it on path.
7. How do I set up an equatorial mount step-by-step?
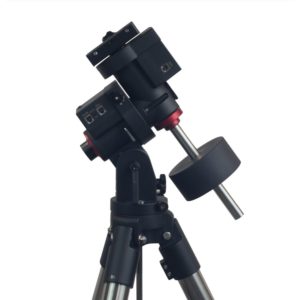
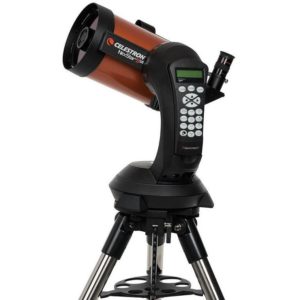
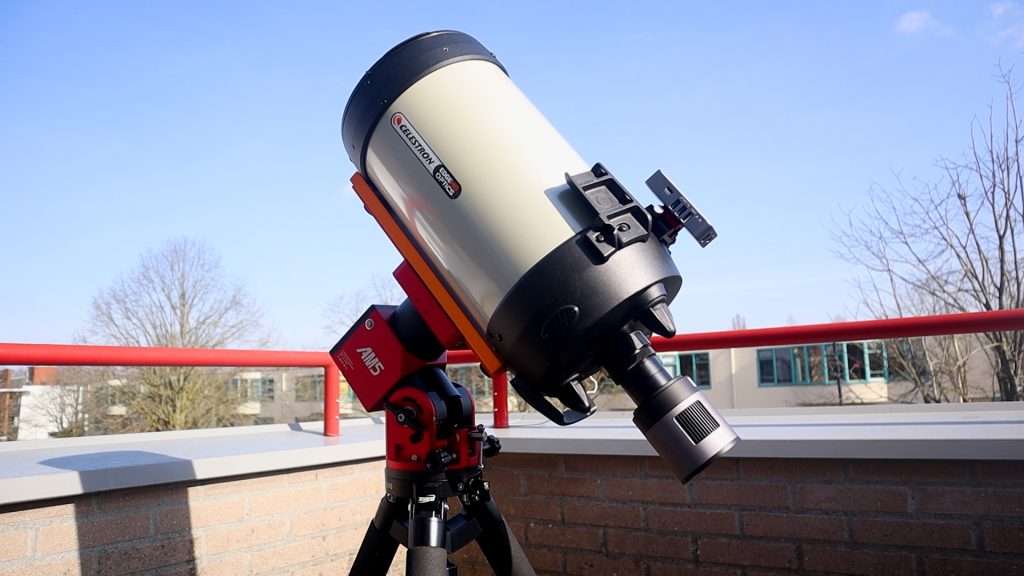
My Celestron Advanced VX (EQ) MountMy SkyWatcher EQ6R Pro (EQ) MountMy ZWO AM5 Harmonic Drive Mount
Setting up a traditional EQ mount is a careful, highly physical process that must be done in a strict order to protect your gears and get accurate tracking:
Orient North: Point the tripod roughly into the North direction (360 degrees) if you’re in the Northern Hemisphere (or South if you’re in the Southern Hemisphere) using a compass or phone app.
Level the Tripod: Ensure the tripod base is perfectly flat. Use a bubble leveler to adjust the leg heights.
Set Your Latitude: Use the altitude-azimuth bolts on your mount head to tilt the head until the scale matches the exact latitude of your current viewing location (e.g., I set mine to 52 degrees).
Add Counterweights First: Always slide your heavy iron counterweights onto the shaft before clamping your telescope on. If you put the heavy telescope on first, an accidental slip can spin the mount head freely and smash your expensive optics.
Balance the Rig: Release the clutches and physically slide the counterweights and the telescope plate until the setup balances like a perfect see-saw on both axes.
The Harmonic Drive Alternative: If you are using a modern harmonic drive mount like the ZWO AM5, this setup routine becomes radically easier because you can completely cross steps 4 and 5 off your list. Because strain wave gears rely on high-torque mechanical reduction rather than gravity, there are no clutches to release and absolutely zero balancing required. You simply drop your lightweight tripod down, bolt the mount head on, and clamp your telescope directly into the saddle. You don’t have to carry heavy iron weights just to make the gears track properly.
However, there is one catch: Because the mount head and carbon fiber tripods are so lightweight, mounting a heavy telescope can make the entire rig top-heavy. While the gears don’t need a counterweight to track, you do sometimes want to screw on a small counterweight or hang a gear bag to anchor the harmonic mount down. This isn’t for balancing the motors—it is purely a safety measure to act as a physical clamp, keeping the center of gravity low so a sudden gust of wind or an accidental bump doesn’t tip your entire expensive imaging rig over in the grass!
8. How do I nail my Polar Alignment?
Polar alignment means matching the rotational axis of your mount head perfectly with the celestial pole. If this isn’t aligned, your tracking will drift, and your long exposures will be ruined.
The Manual Way: Look through the optical polar scope built into the center of the mount head. You manually turn the mechanical altitude and azimuth knobs on the mount until the star Polaris (or the Octantis constellation group) sits perfectly in the designated clock-position circle on the glass reticle.
The Modern Way: Use software-assisted polar alignment via tools like SharpCap, NINA, or the ASIAIR. The software takes a picture of the sky through your main telescope or guide scope, calculates the alignment error using a process called plate solving, and gives you real-time directional arrows on your screen. You just turn the mechanical knobs on the mount head until the software tells you the error is down to sub-arcsecond numbers.
9. What is the “Golden Rule” for telescope and mount combinations?
When pairing a telescope with a traditional EQ mount for deep-sky imaging, you should follow the golden rule of astrophotography: never exceed 50% to 60% of your mount’s maximum advertised payload capacity.
If a traditional mount is rated to carry 20kg (44lbs) max, your imaging telescope, camera, guide scope, focal reducer, and cables should ideally weigh under 10kg to 12kg. This gives the motors and gears enough breathing room to correct for tracking errors. While modern harmonic drive mounts can safely be pushed much closer to their 100% capacity rating without losing tracking accuracy, keeping your overall payload weight under control is always best practice for tracking stability.
10. How can I control my mount remotely?
Once your mount is set up and polar aligned, you can run your entire imaging session from inside a warm room, but how you bridge that physical gap between the backyard and your couch depends entirely on your control setup:
The Laptop or Mini-PC Route (ASCOM/INDI): If you are plugging your mount, camera, and focuser directly into a laptop or a mini-PC running software like NINA, you are fundamentally tied to a physical computer out at the scope. To control this from inside your house, you either have to run a long, weather-proof USB extension cable through a window into your living room, or you have to set up remote desktop software (like TeamViewer or AnyDesk) over your home Wi-Fi network. This allows you to log into the backyard laptop from your indoor computer or phone.
The Smart Hub Route (ASIAIR): A dedicated smart hub like the ZWO ASIAIR makes remote control radically simpler because it has built-in Wi-Fi. You can configure the ASIAIR to “Station Mode,” which joins it directly to your home’s Wi-Fi network. Once linked, you don’t need any cables running into the house. You simply sit on the couch with your smartphone or tablet, open the app, and command the entire rig through your home network.
Whichever route you choose, the automation software handles the heavy lifting. It can automatically plate-solve to verify your position, execute a GoTo target command, track an object seamlessly across a meridian flip, adjust focus as the night temperature drops, and park the telescope safely when dawn breaks—allowing you to sleep soundly while your gear does the work.
The Verdict
If you are primarily interested in visual observing or quick planetary imaging sessions of the Moon and planets, a simple, lightweight Alt-Az mount is incredibly intuitive and perfectly suited for the job.
However, if you want to capture the faint, beautiful structures of deep space through multi-minute exposures, a solid tracking Equatorial mount is your single most important piece of equipment. If you are building a permanent backyard observatory and want the highest native tracking accuracy per dollar, classic heavy German Equatorial mounts remain tough to beat. But if you value your back, love to travel to dark sky sites, and want to drop the counterweights out of your routine entirely, the modern shift toward harmonic drive mounts like the ZWO AM5 is an absolute game-changer for the portable astrophotographer.
Clear skies! Wido
6 Replies to “Telescope mounts: Top 10 questions answered!”
That is somewhat helpful, but to get multi-minute sharp images with a telescope/camera combination you really need a mount with autoguiding as an option.
how can I improve the tracking of my alt-az mount. it does ok for about an hour of 30 sec. exposures. then it loses it. 30 sec’s seems to be the limit for my mount on exposures. I have a celestron 9.25″ evolution paired with a ZWO ASI 585MC-Pro
yes, alt-az mounts are not precise in tracking the night sky. For multi-minute exposures, you’ll need a computerized EQ capable mount with guiding options.
How about your thoughts on using a Wedge to achieve an Equatorial track on an Alt-Az mount. I don;t see that as an option in your discussion.
Thanks
That is somewhat helpful, but to get multi-minute sharp images with a telescope/camera combination you really need a mount with autoguiding as an option.
how can I improve the tracking of my alt-az mount. it does ok for about an hour of 30 sec. exposures. then it loses it. 30 sec’s seems to be the limit for my mount on exposures. I have a celestron 9.25″ evolution paired with a ZWO ASI 585MC-Pro
yes, alt-az mounts are not precise in tracking the night sky. For multi-minute exposures, you’ll need a computerized EQ capable mount with guiding options.