The DWARF II smart telescope is a fantastic choice for those interested in astrophotography, birdwatching, or animal photography on a budget. Its user-friendly mobile app makes it easy to use. While it may not have the very best optics, it provides an effortless way to enjoy your hobbies. With its widefield and telephoto lenses, you can easily spot and capture birds, animals, and celestial objects like the sun and the moon. For budding astrophotographers, it offers a list of popular deep-sky objects such as the Andromeda galaxy and the Orion Nebula. Once calibrated, it automatically locates and tracks these objects, positioning them in the telephoto lens’s view. Keep in mind that due to its “alt-az” design, long exposure photos are limited to 15 seconds, and field rotation will start to occur after about 45 minutes. However, its fast f/4.2 ratio allows you to capture decent images of some well-known large and bright deep-sky objects, using the built-in lucky imaging technique. While your photos may not be the absolute best, they will surely impress your family and friends. I had a great time using the DWARF II smart telescope and highly recommend it as an affordable and straightforward entry into astrophotography, birdwatching, or animal photography.
DWARF II – too good to be true?
As an experienced astrophotographer, people often ask me for advice on getting started in astrophotography. My first question is always about their budget, and most of the time, they say they have around $500 to spare. This presents a dilemma because although you can get a decent telescope within that budget, the necessity for a high-quality camera and a telescope mount for precise celestial tracking and photography often leads individuals to exceed the initial $500 budget considerably. Moreover, astrophotography can be tricky since you can’t see deep-sky objects beyond our solar system with the naked eye. Finding and photographing them can be quite a hassle. That’s where the DWARF II smart telescope comes in. It offers a solution by combining a telephoto lens and a smart telescope in one package, all within the $500 budget range. This telescope can automatically locate, track, and capture objects in the night sky. Additionally, the dual widefield and telephoto lens can serve as a spotting scope for birdwatchers and animal photographers, helping them focus on their subjects and even automatically tracking them for photos and videos. Too good to be true? Keep reading to learn more!
DWARF II – Specifications
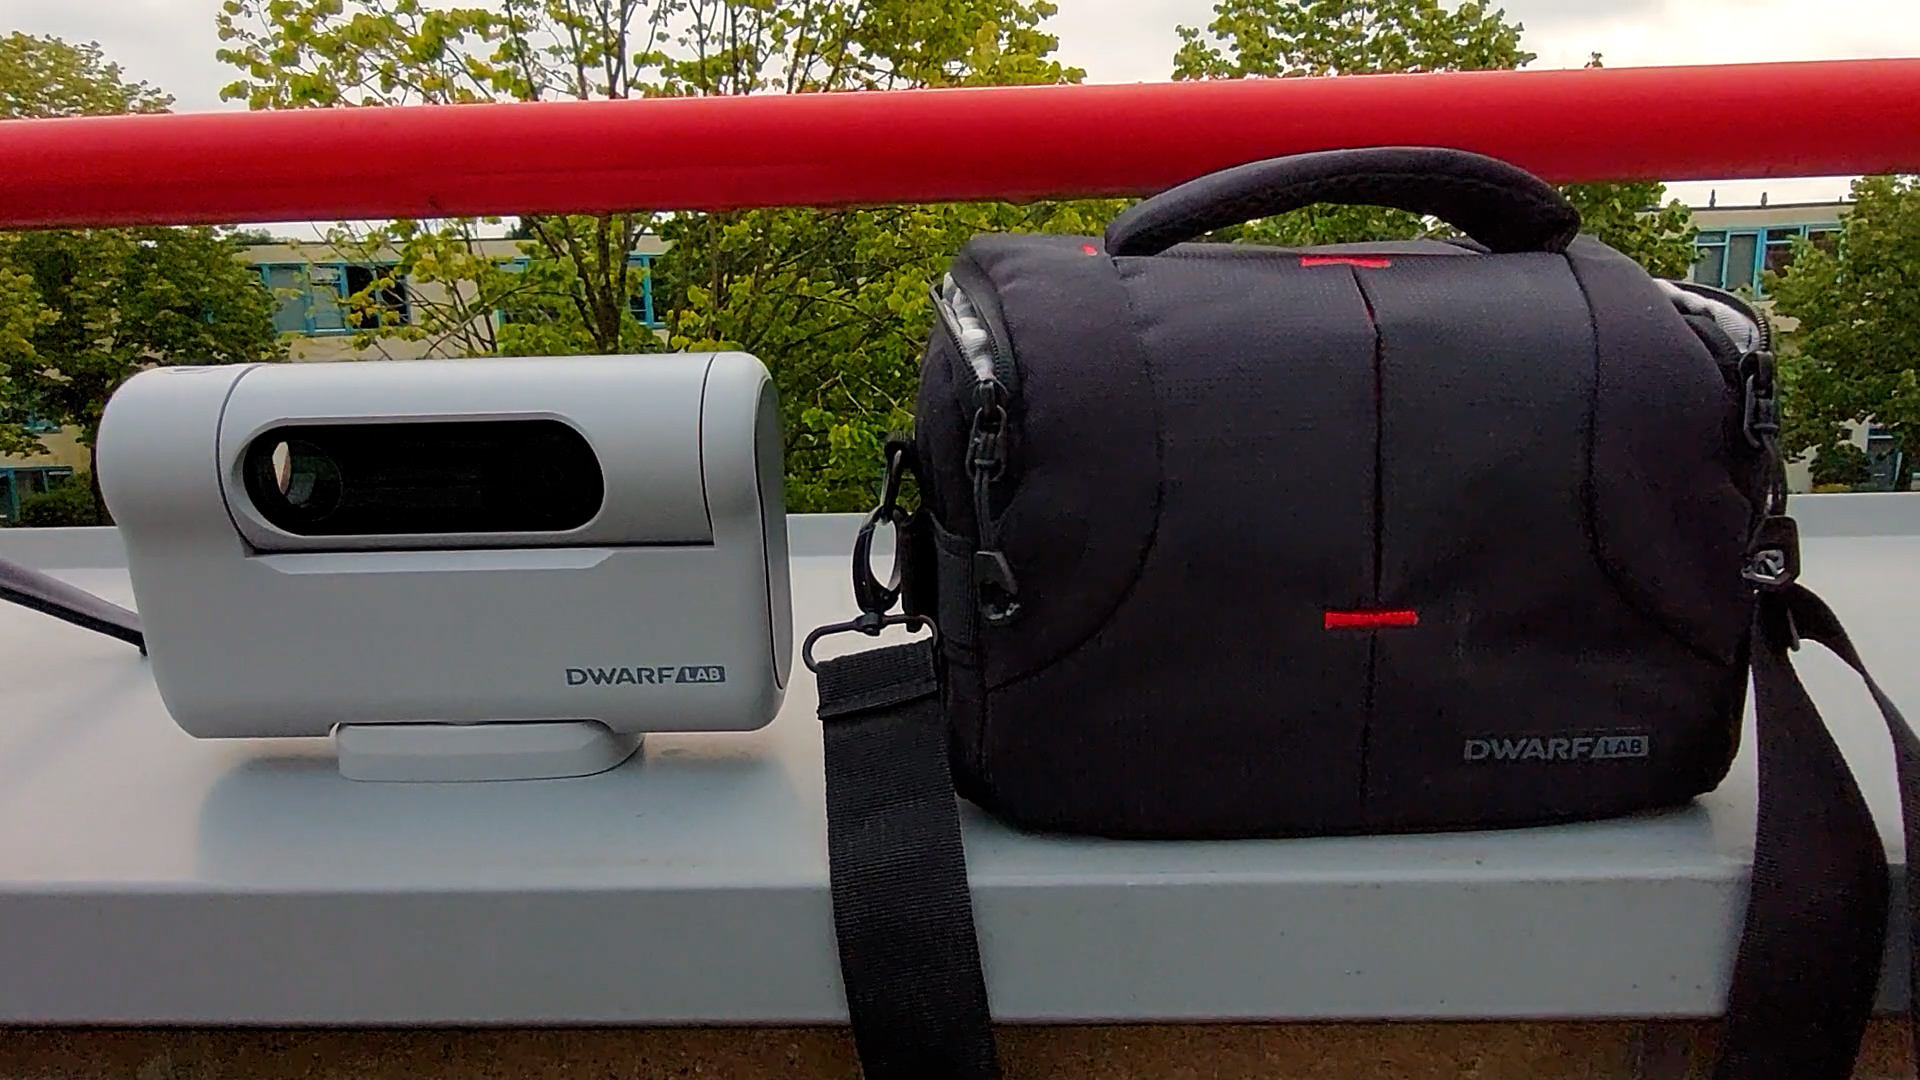
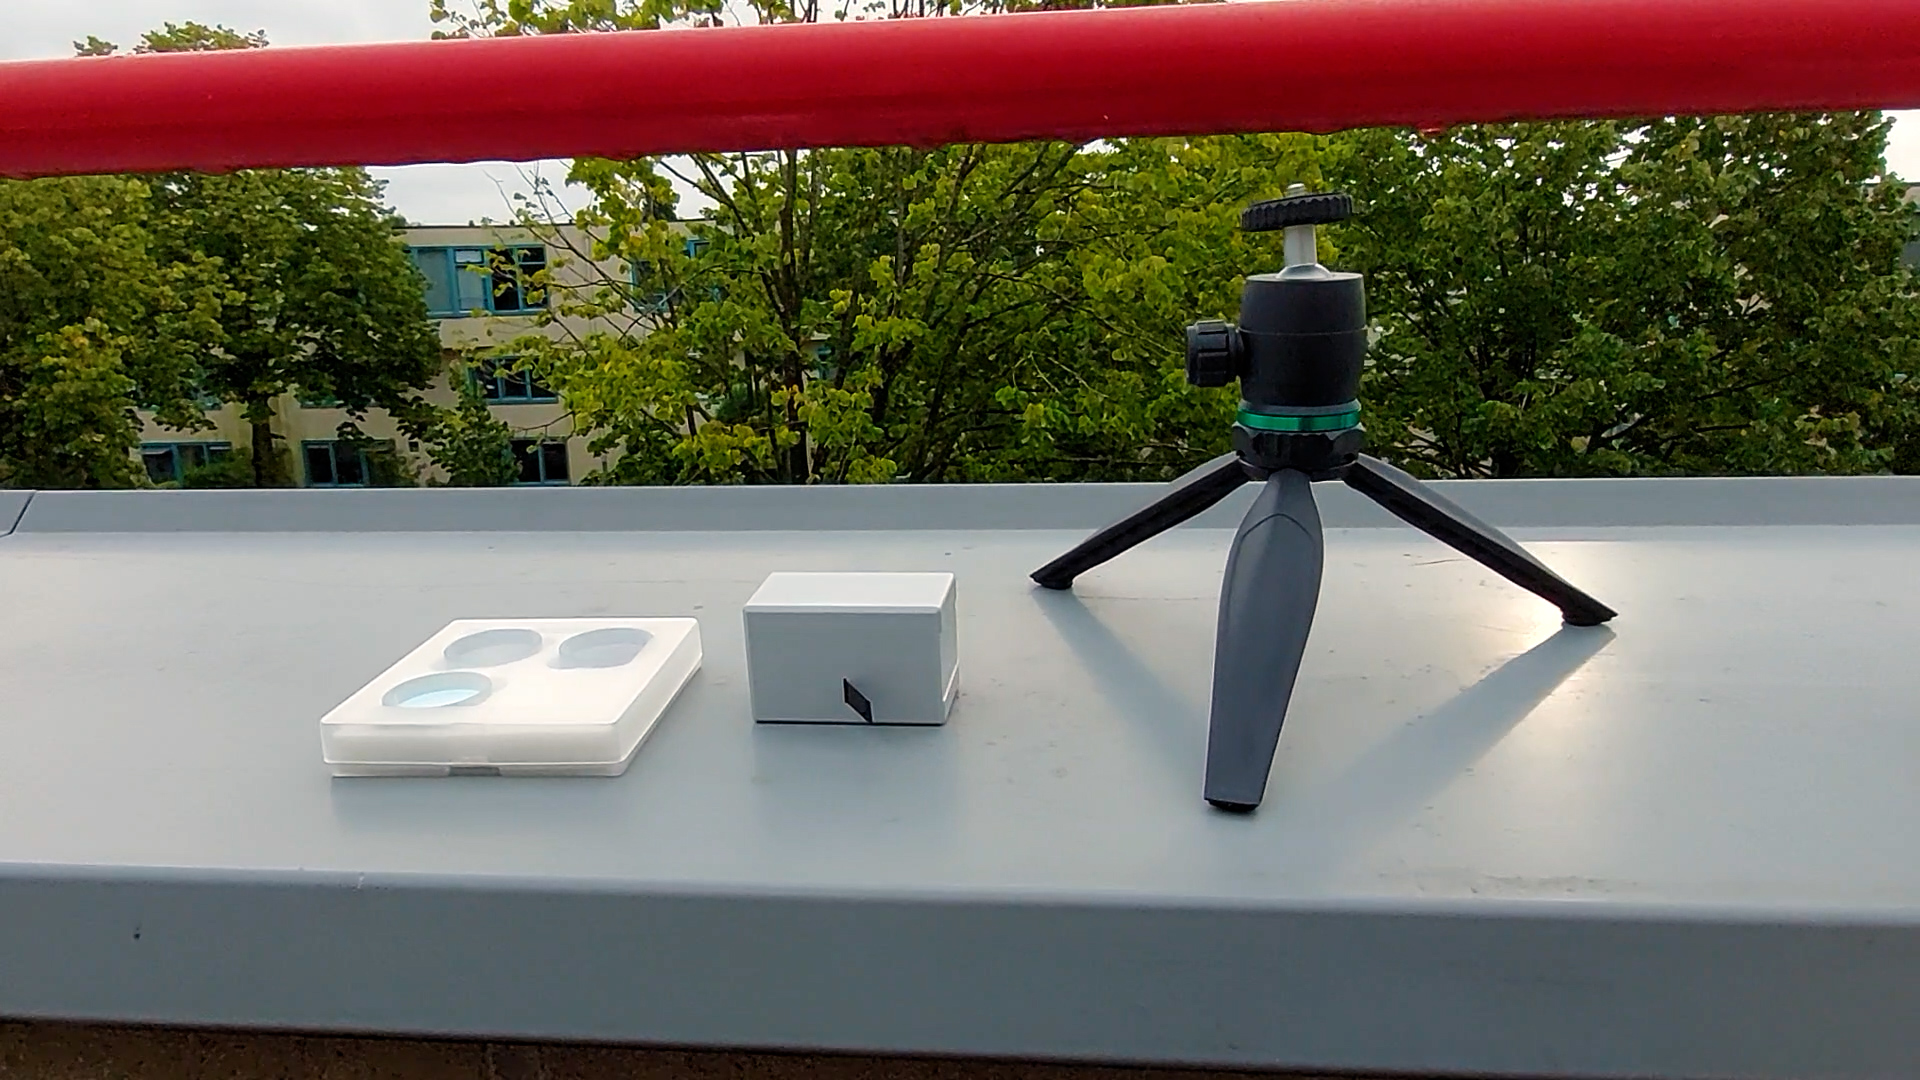
I was lucky to receive the DWARF II Smart telescope from Dwarflab, and they didn’t ask for anything in return but this review. The deluxe package I received includes the telescope, a handy carry bag, a 64GB micro SD card, two rechargeable batteries, two ND solar filters, an Ultra-High-Contrast Astrophotography filter, and a mini tripod. You can get this whole package for $539. If you prefer a simpler setup, the classic version is available for $419 at the time of writing. It includes the telescope, carry bag, one battery, and the 64GB micro SD card, but no filters. Just keep in mind that a USB-C cable for charging is not included.
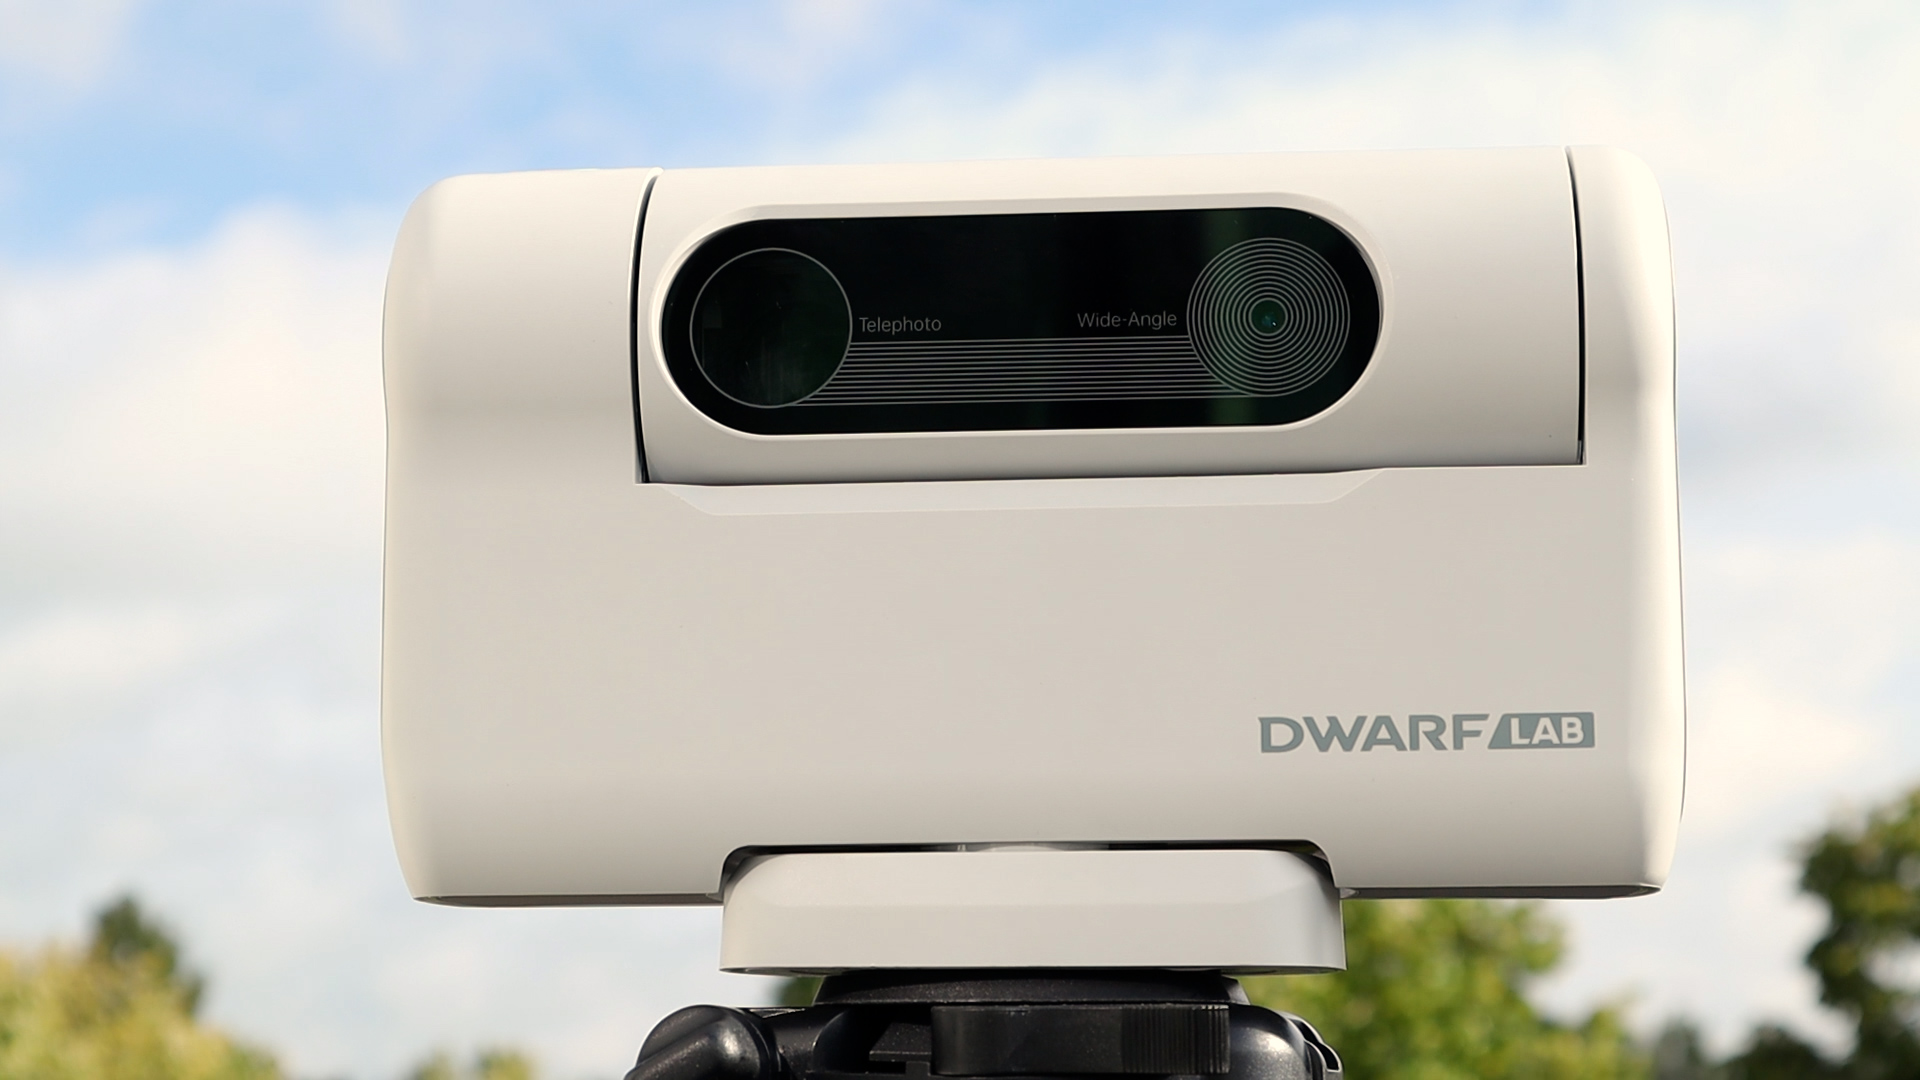
The telephoto lens of the DWARF II is 8 megapixels (3264 x 2448 pixels) with an aperture of 24mm and a focal length of 100mm, resulting in an f/ratio of 4.2. But here’s the clever part: Dwarflab combined this lens with a Sony IMX415 STARVIS sensor, a tiny pixel size sensor often used for nighttime observation, giving it a focal length equivalent to 675mm when you’d use a DSLR camera. In astrophotography terms, you get a 3-degree field of view, which is about six times (3×2) the diameter of the moon. The second, wide-angle lens has 2 megapixels (1920×1080 pixels), with a 20mm aperture and a 48mm focal length (f/2.4). The wide-angle lens provides a generous 50-degree field of view, which proves very useful for framing celestial objects or capturing animals within the telephoto lens’s field of view.
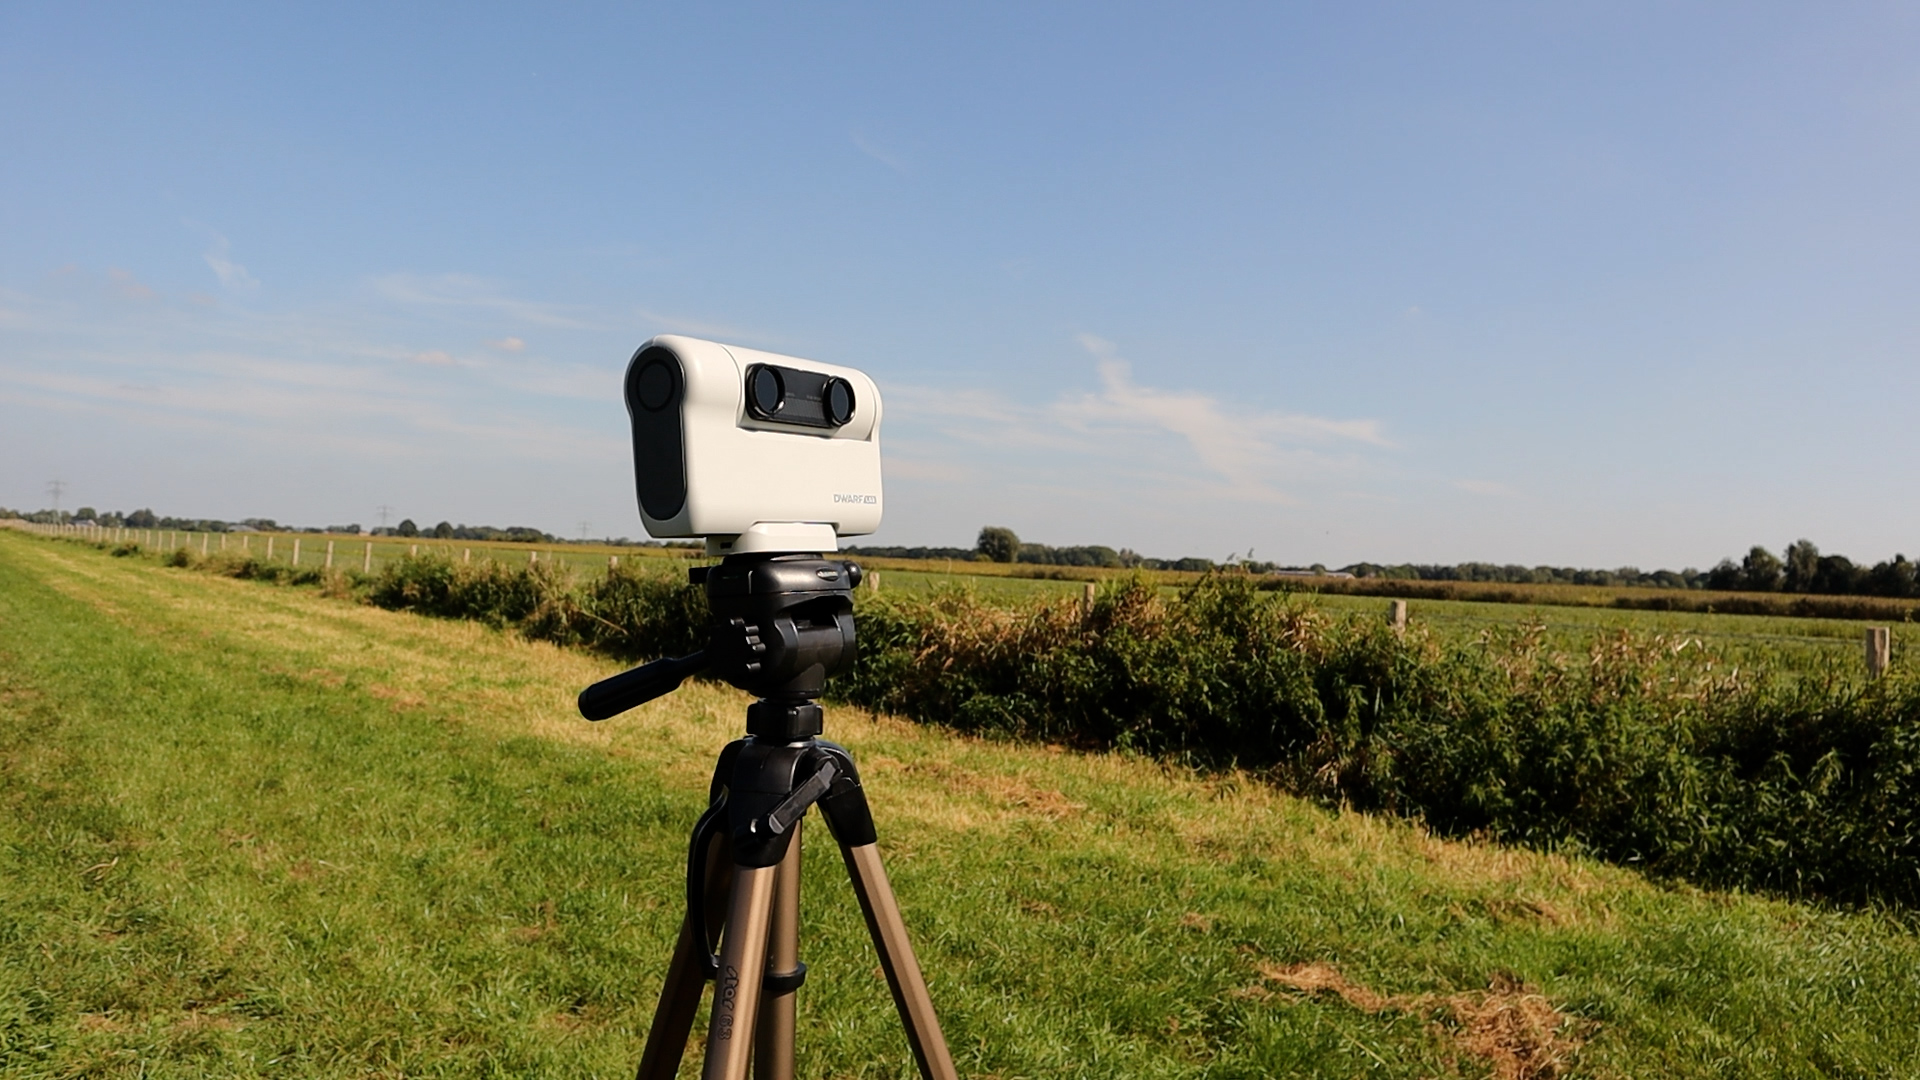
In my tests, I used a sturdy photo tripod instead of the mini tripod. I tried bird videography (even though it was noon, not the best time), some solar imaging, and an attempt to photograph the Andromeda galaxy, our nearest neighboring galaxy in space, located at about 2.5 million light years distance from Earth.
Pairing the DWARF II with the Dwarflab APP
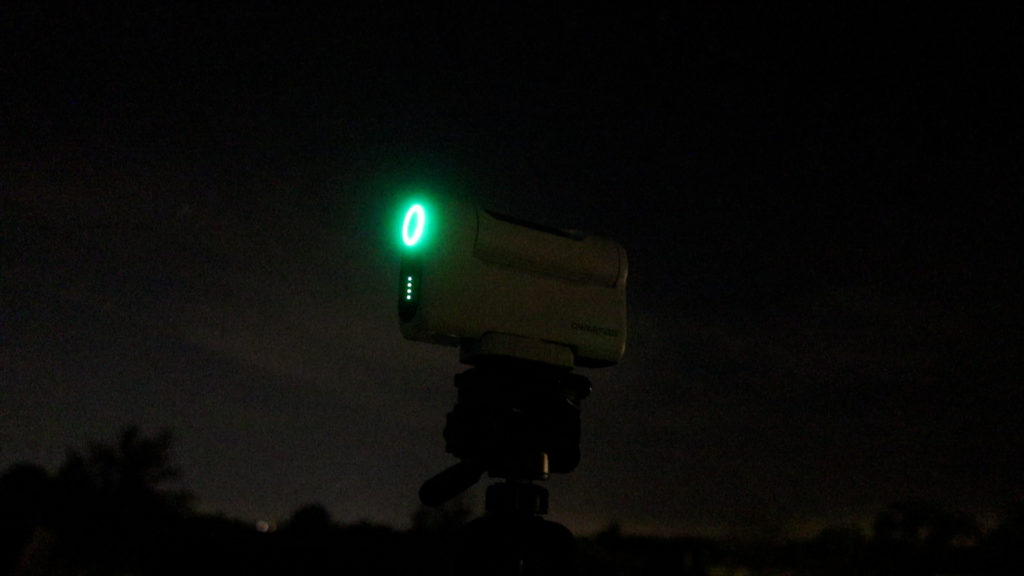
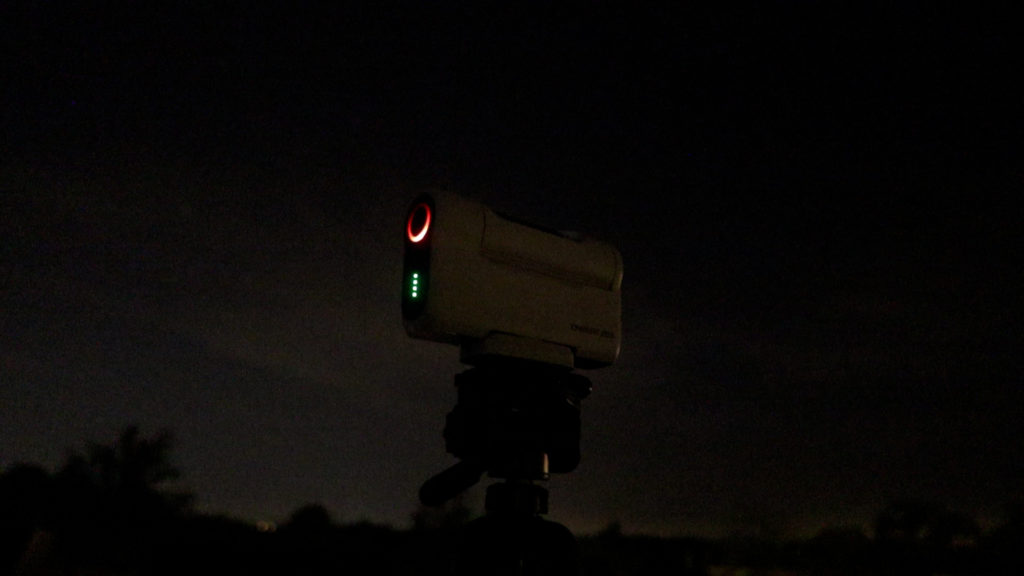
Pairing the DWARF II telescope with my smartphone was straightforward. I took the telescope to the countryside in the Netherlands for some birdwatching and photography. To control the DWARF II, you need to use the Dwarflab app, which you can download from the Play Store or App Store (I had version 1.2.1 at the time). Here’s how I did it: I placed the DWARF II smart telescope on a regular photo tripod, turned it on by pressing the green button on the top left, and then launched the app. Once the app was open, I clicked on “connection,” which displayed a unique combination of numbers and letters for the camera. Clicking on this code, the app guided me to connect my smartphone to the DWARF II’s WiFi signal, labeled as DWARF_”camera number,” and I used “12345678” as the password. After this simple setup, my smartphone was paired with the DWARF II, and I could see a live view through both the telephoto and wide-angle lenses in “Photo” mode.
Moving the DWARF II Smart Telescope
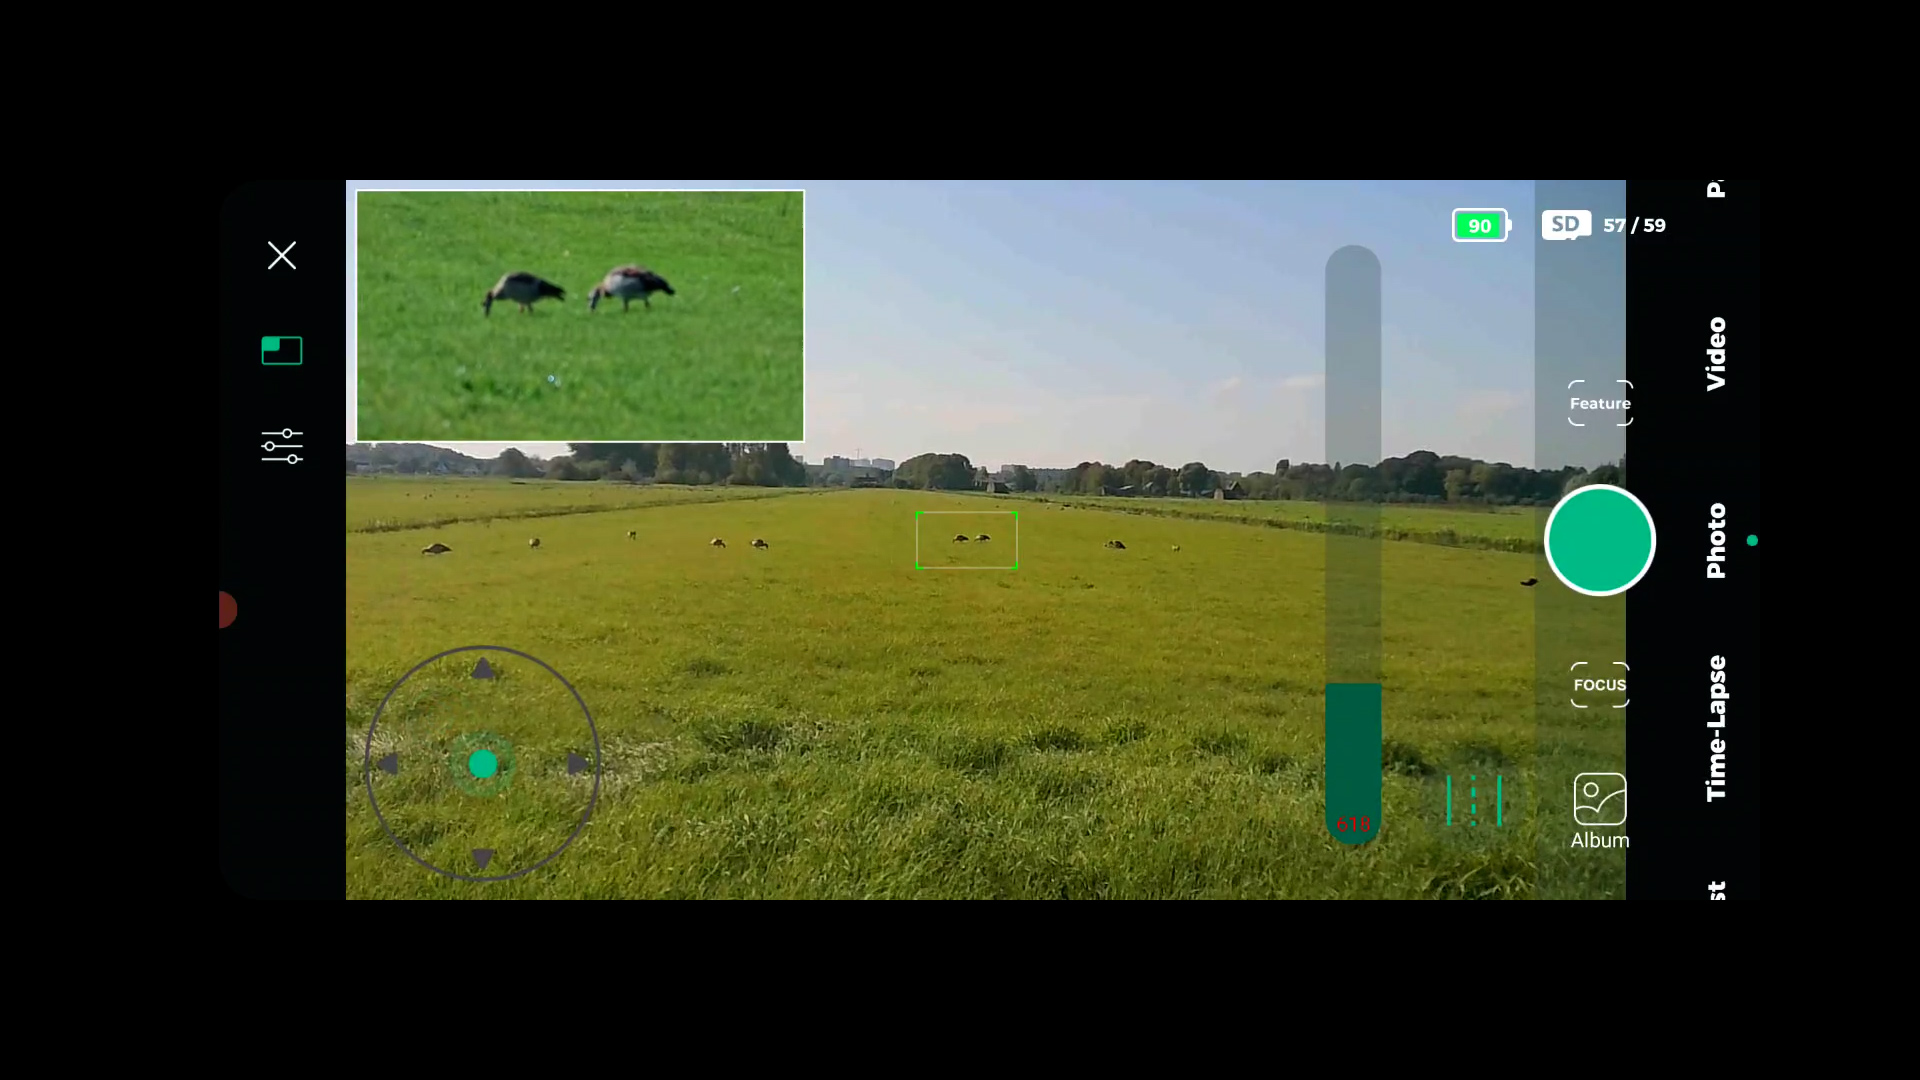
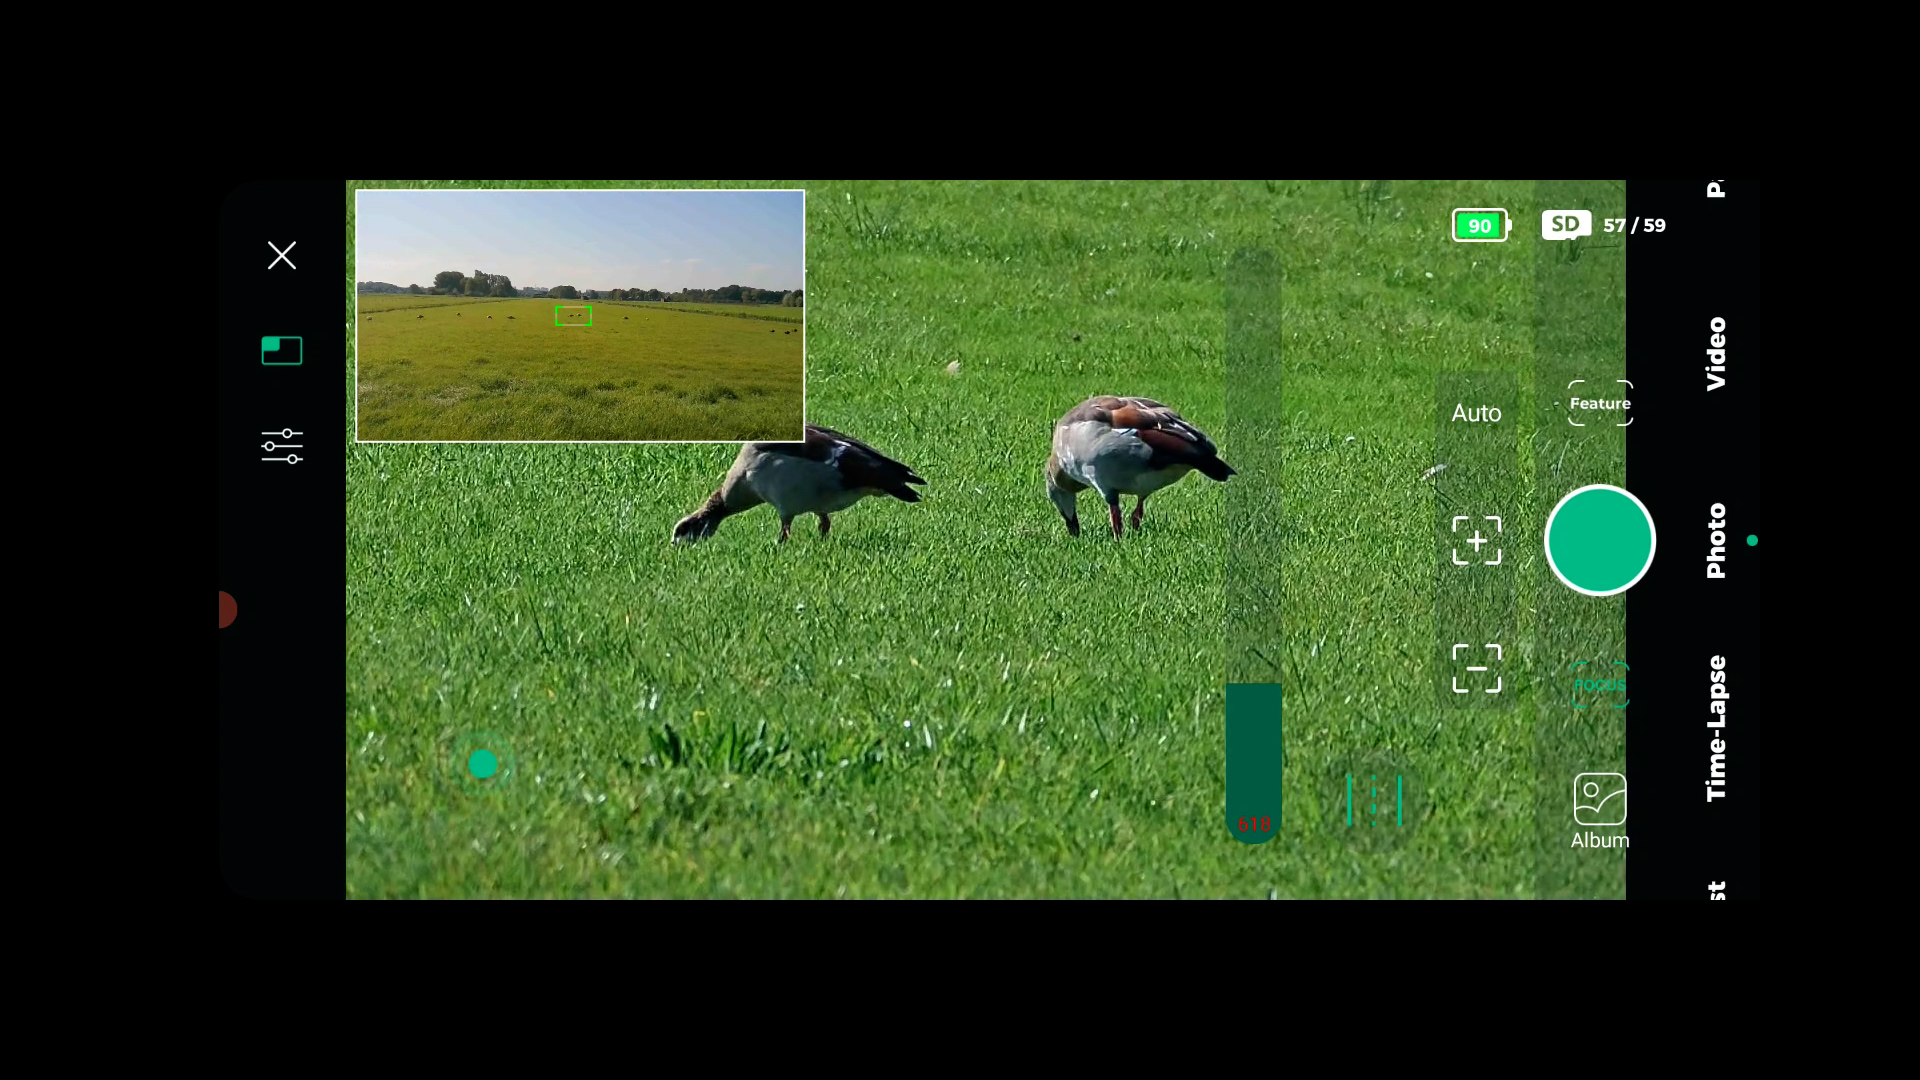
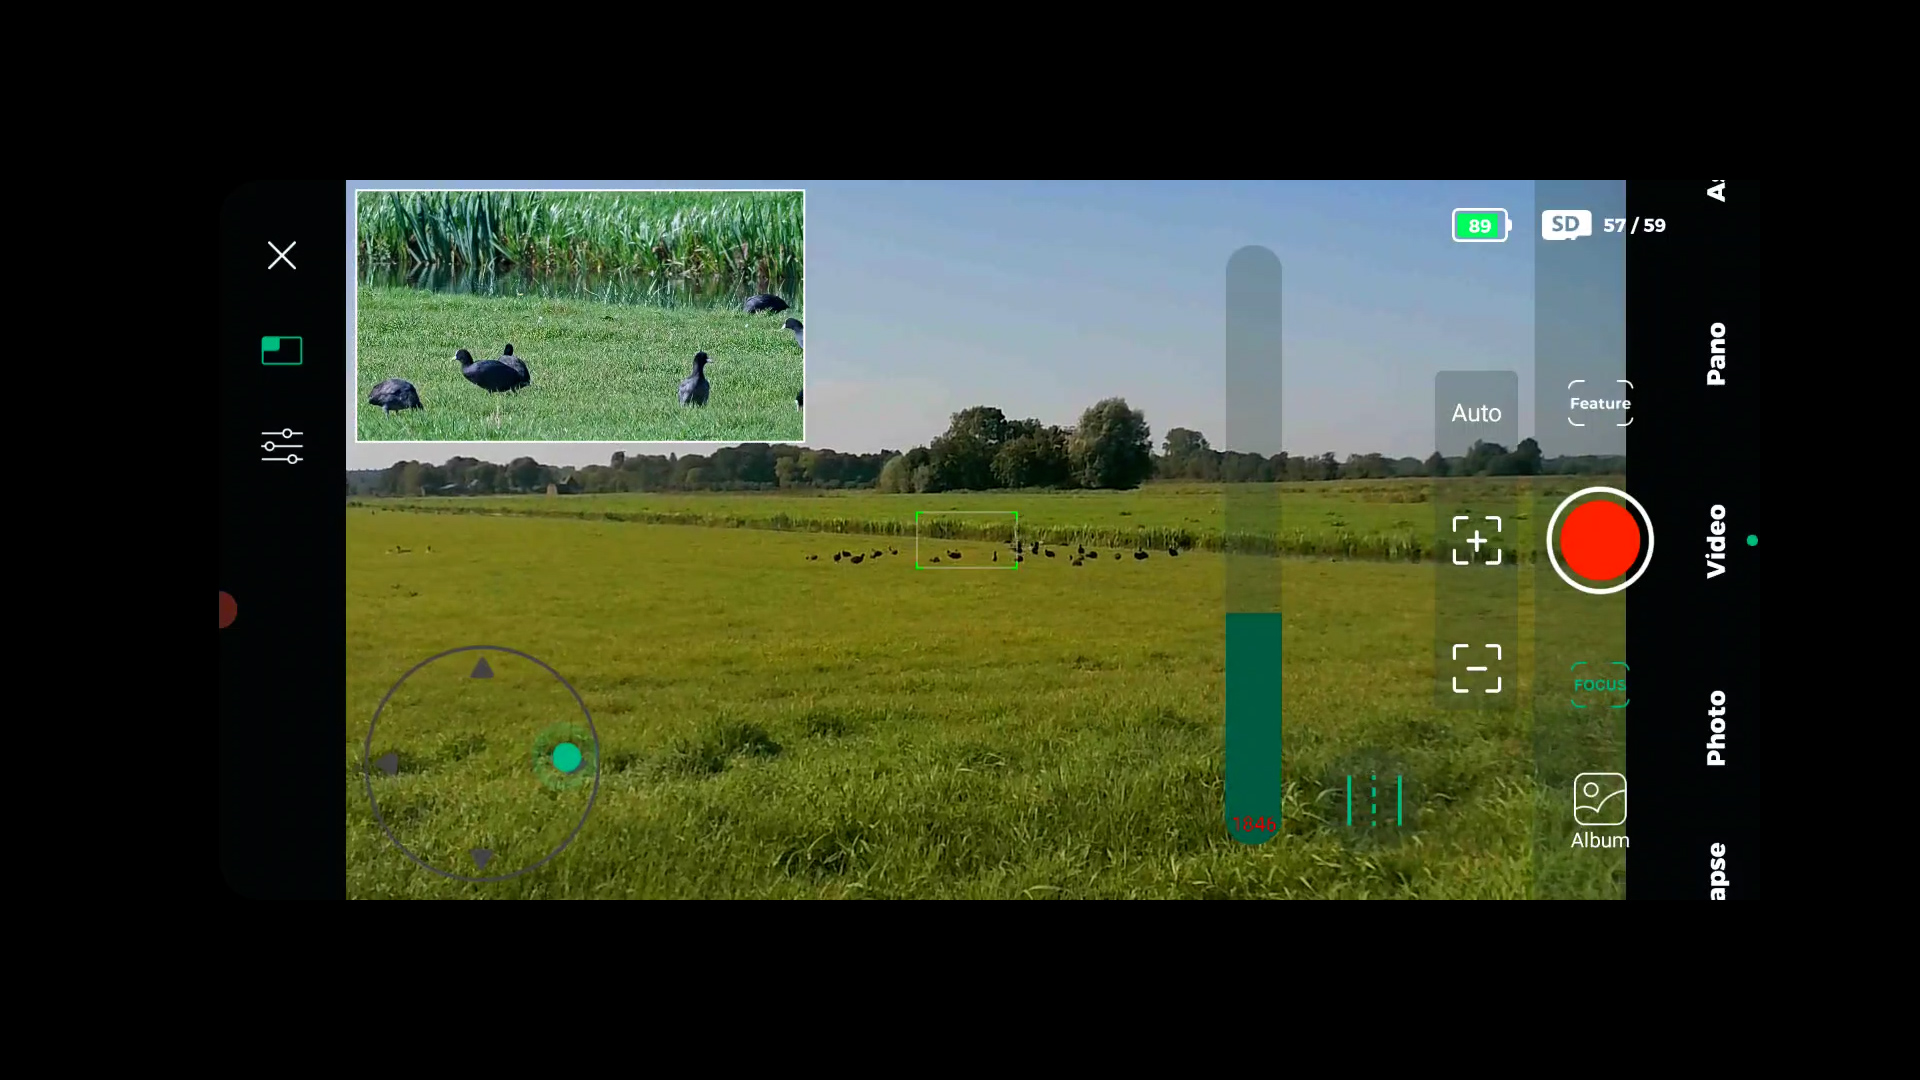
Moving the telescope was a breeze. On the top-left corner of the screen, I found a tab that allowed me to switch between the widefield and telephoto views. When in photo mode, I noticed a “track” icon at the bottom right, and tapping on it activated a virtual joystick on the bottom left of the screen, which let me move the telescope. This feature worked exceptionally well, and I could easily control the telescope’s speed by sliding a vertical bar next to the “track” icon – sliding it up made it move faster, while sliding it down made it slower. The widefield lens acted like a finder scope. In the widefield view, there was a green box in the middle of the screen, showing the field of view I would get when switching to the telephoto lens.
I used the widefield lens and the virtual joystick to align the green box with the birds I wanted to observe. Then, I switched to the telephoto lens, and it worked seamlessly. If the green box didn’t perfectly match the telephoto view, I could easily drag it in the widefield view to align with the telephoto lens. The combination of these two lenses saved me from the hassle of manually searching for birds or animals, especially since they tend to move around a lot. It made the whole experience much smoother and more enjoyable as compared to exclusively using a telephoto lens.
Focussing the DWARF II Telescope
Getting the telescope in focus is important, and the Dwarflab app had a handy focus feature at the bottom right of the screen. When you tap on this icon, you can choose between manual and automatic focus options. I found that the manual focus worked quite smoothly, but the autofocus feature sometimes failed. So, I ended up fine-tuning the focus manually. I did this by clicking on the plus or minus buttons until I got a sharp and clear view of the birds I wanted to photograph and observe. It took a bit of adjustment, but once I had it dialed in, I was able to capture some great shots of the birds.
Capturing pictures, videos, and time-lapses with the DWARF II Smart Telescope
In “Photo” mode, taking pictures is as easy as clicking the green button, just like you would on a smartphone. You can also fine-tune your photos by adjusting settings like exposure time, gain, and white balance. If you want to capture a series of shots quickly, there’s a “Burst” mode, which is similar to continuous shooting on a DSLR camera.
For panoramic photos, there’s a “Pano” mode where you can choose the number of rows and columns (the default is 3×3) the telephoto lens should capture. The DWARF II telescope smartly figures out its position, takes the specified number of pictures, and then stitches them together into one large panorama before saving it to your SD card. However, keep in mind that the pictures are saved in JPEG format, which is good for sharing online but doesn’t provide the same flexibility for post-processing as RAW files from a DSLR camera.
The video mode operates in a similar way. You can adjust settings like focus, shutter speed, gain, and white balance before recording. In video mode, you have the option to track the Sun, which I’ll explain more in the next paragraph, as well as a tracking option. When you choose tracking, you can draw a rectangle around an object, like a bird, that you want the telescope to follow. However, in my experience, this tracking feature wasn’t very successful as it tended to jump between similar objects in a group of birds.
There’s also a simple timelapse mode. The app lets you specify the interval between pictures in seconds and the total duration of the timelapse in minutes (ranging from 5 to 300 minutes). Videos captured in this mode are saved in MP4 format, which is great for sharing online but is somewhat limited in terms of extensive post-processing options.
Birding with the DWARF II – first impressions
I had a really enjoyable time birdwatching with the DWARF II telescope in the beautiful Dutch countryside. What I liked the most was the ability to easily switch between the wide-angle and telephoto lenses. This feature made it a breeze to center the birds in the telephoto lens’s view. Once the birds were in focus and centered, capturing videos and photos felt just like using a smartphone. The DWARF II app comes with some handy advanced features, such as adjusting exposure time, gain level (which is similar to selecting ISO on a regular camera), and fine-tuning the white balance. This flexibility is crucial when capturing birds in action. Birds tend to move quite a bit, so you can lower the exposure time and increase the gain to get sharp pictures. However, I did find that the auto-tracking feature had some room for improvement. It occasionally jumped from one bird to another in a flock of similar birds. Despite this minor hiccup, my birdwatching experience with the DWARF II telescope was a lot of fun.
You can get a 5% discount on the DWARF II Smart Telescope by using my coupon code: WidosAstroForum, click here.
Solar Imaging with the DWARF II Telescope
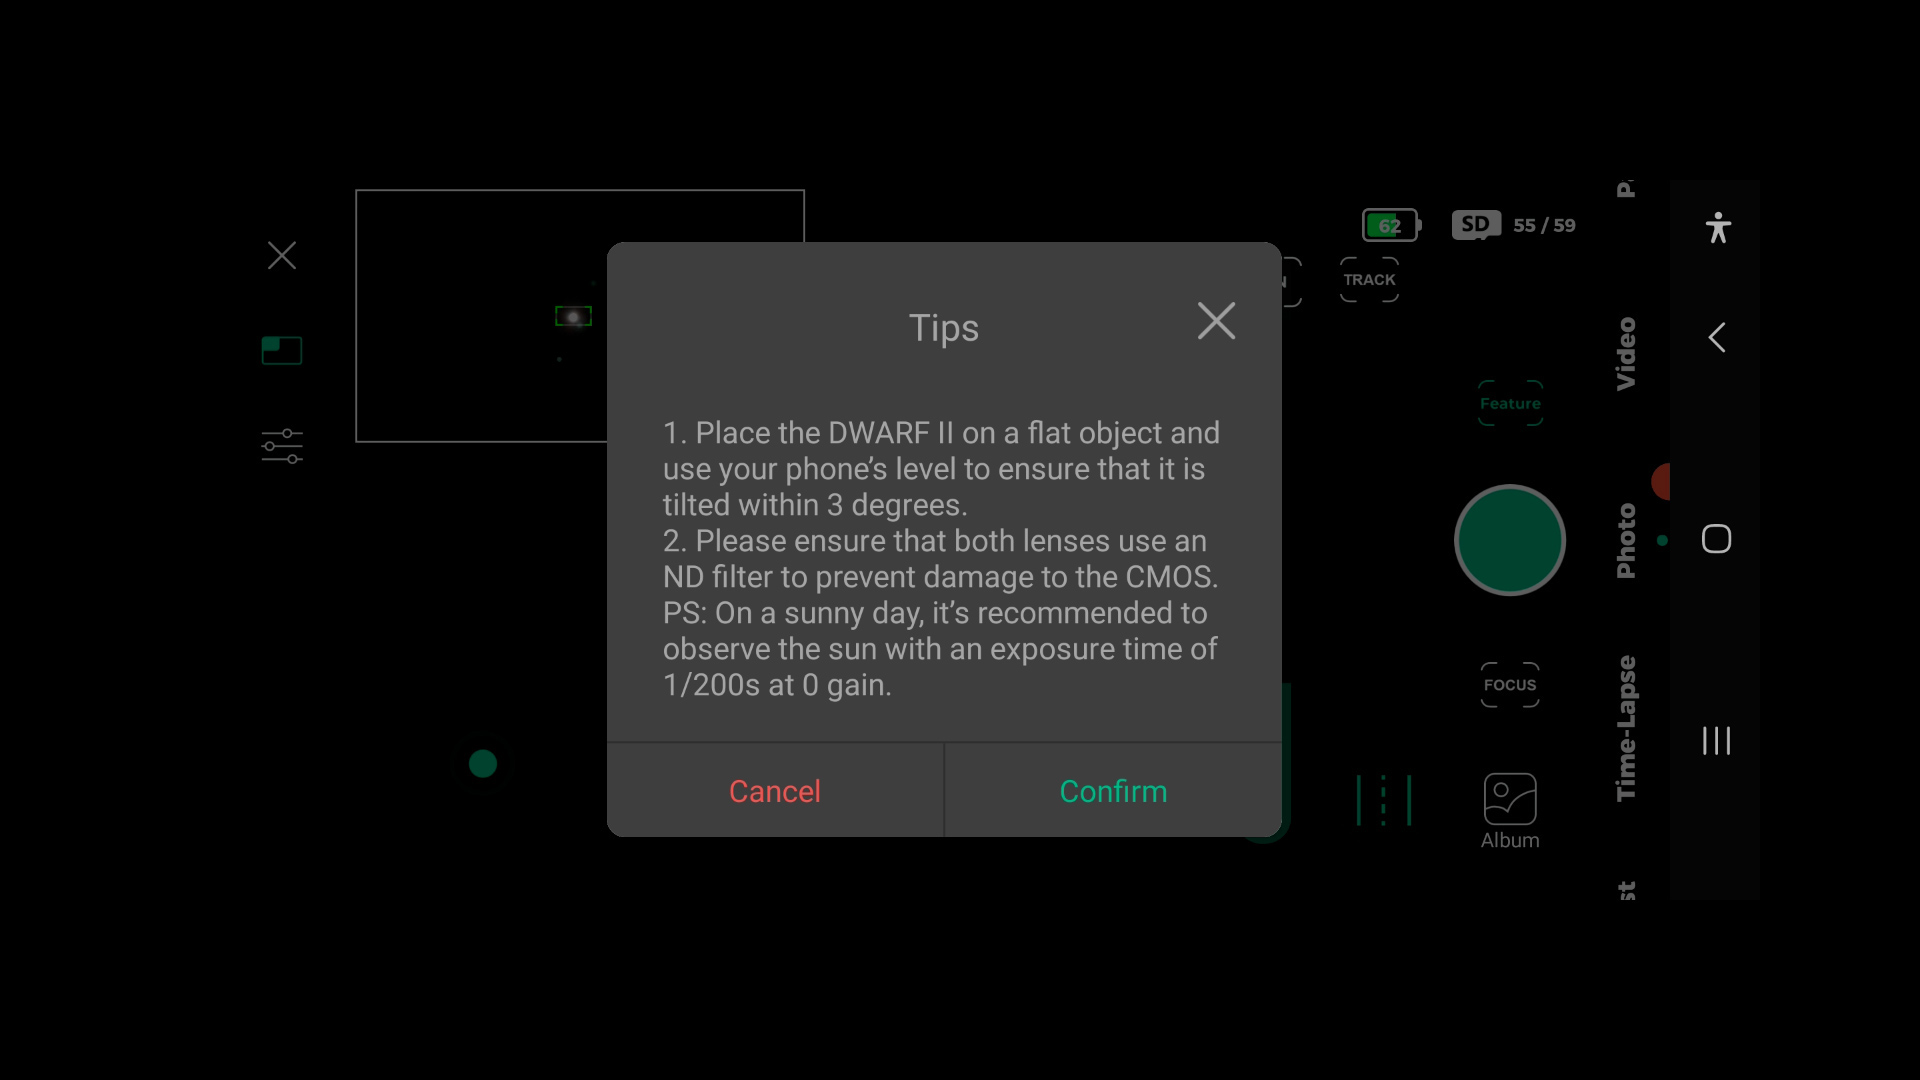
I had an interesting experience imaging the Sun with the DWARF II telescope. In video mode, there’s a special option to track the Sun. When you select this feature, you’ll see “Sun” at the top right of the screen. To safely observe the Sun, the app guides you to place the DWARF II on a flat surface and use both ND solar filters that come with the deluxe version. These filters can be attached to a magnetic holder that also comes with the deluxe package. The magnetic holder can then be placed in front of both lenses on the DWARF II telescope before starting solar observation.
During my test, I attached both ND filters with the magnetic holder to the lenses. Next, I adjusted the exposure time to 1/200s with 0 gain, and used the virtual joystick to position the telescope toward the Sun. Once the Sun was within the DWARF II’s field of view, I activated the tracking feature. I was pleasantly surprised by how well it kept the Sun centered in the telephoto lens’s field of view.
At this point, you have the option to record a video. Alternatively, you can switch to Astro mode, use the feature icon, click “more,” and capture multiple pictures of the Sun in FITS or TIFF format using the scheduling feature, which I’ll discuss below. Keep in mind that the Sun appears relatively small in the telephoto lens’s view, taking up about 1/6th of the field of view. However, you can zoom in by pinching the live view on your smartphone.
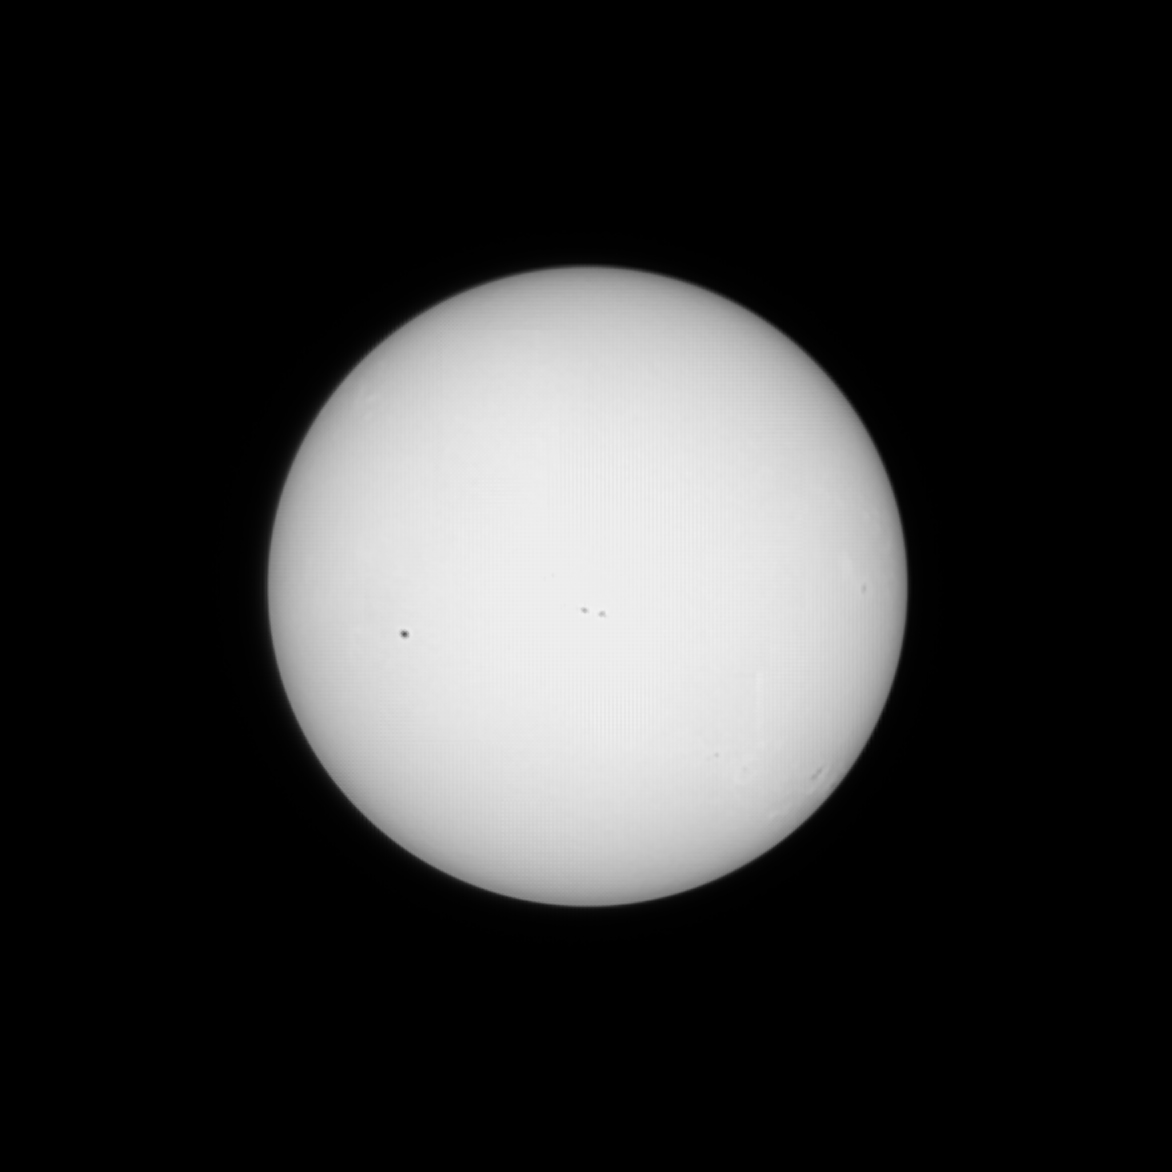
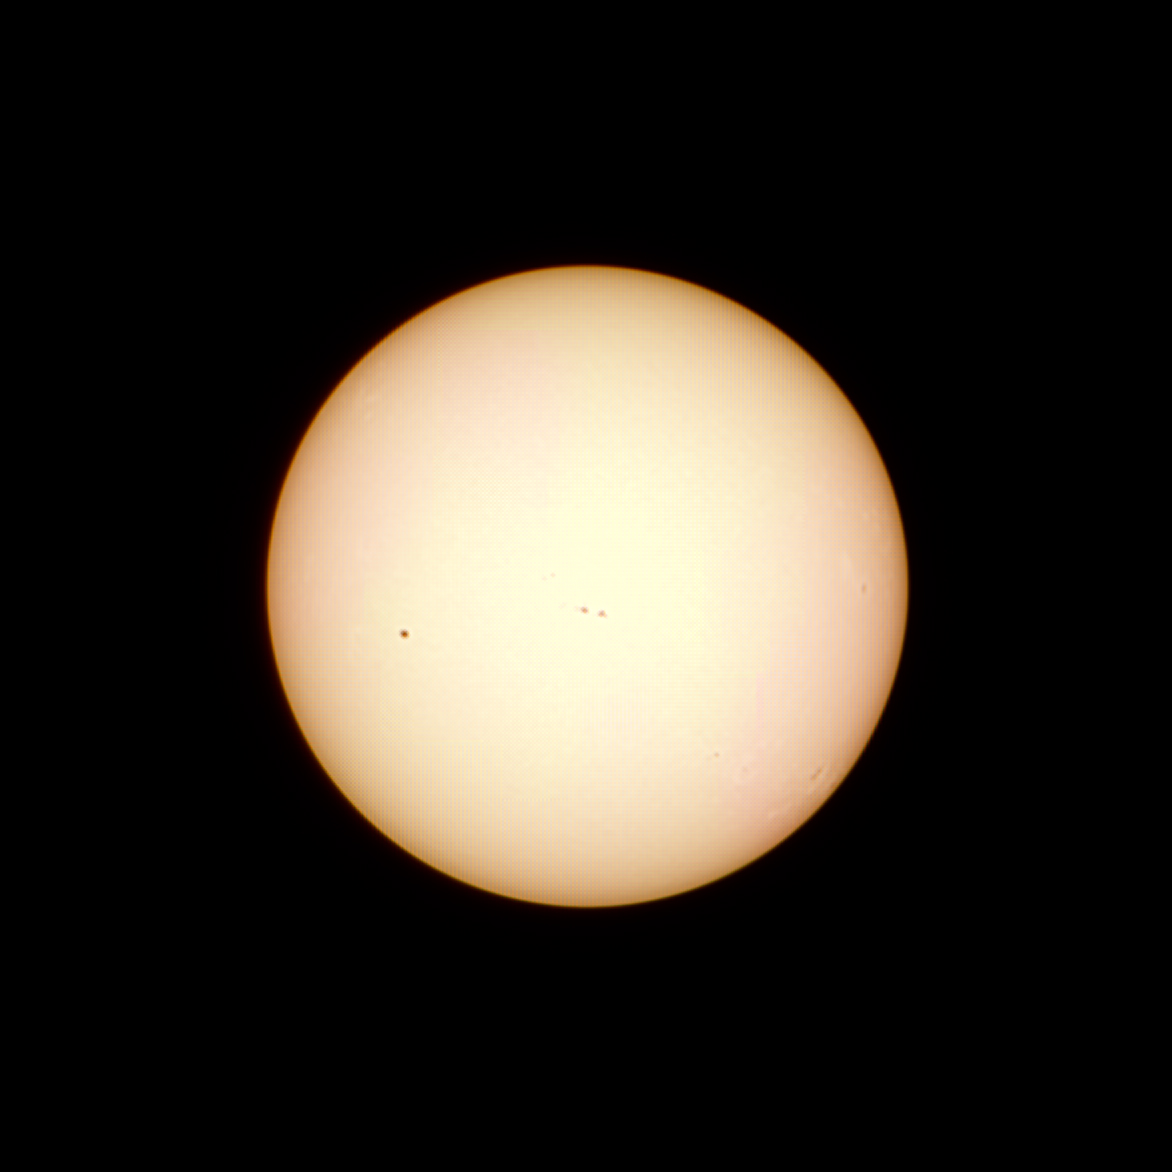
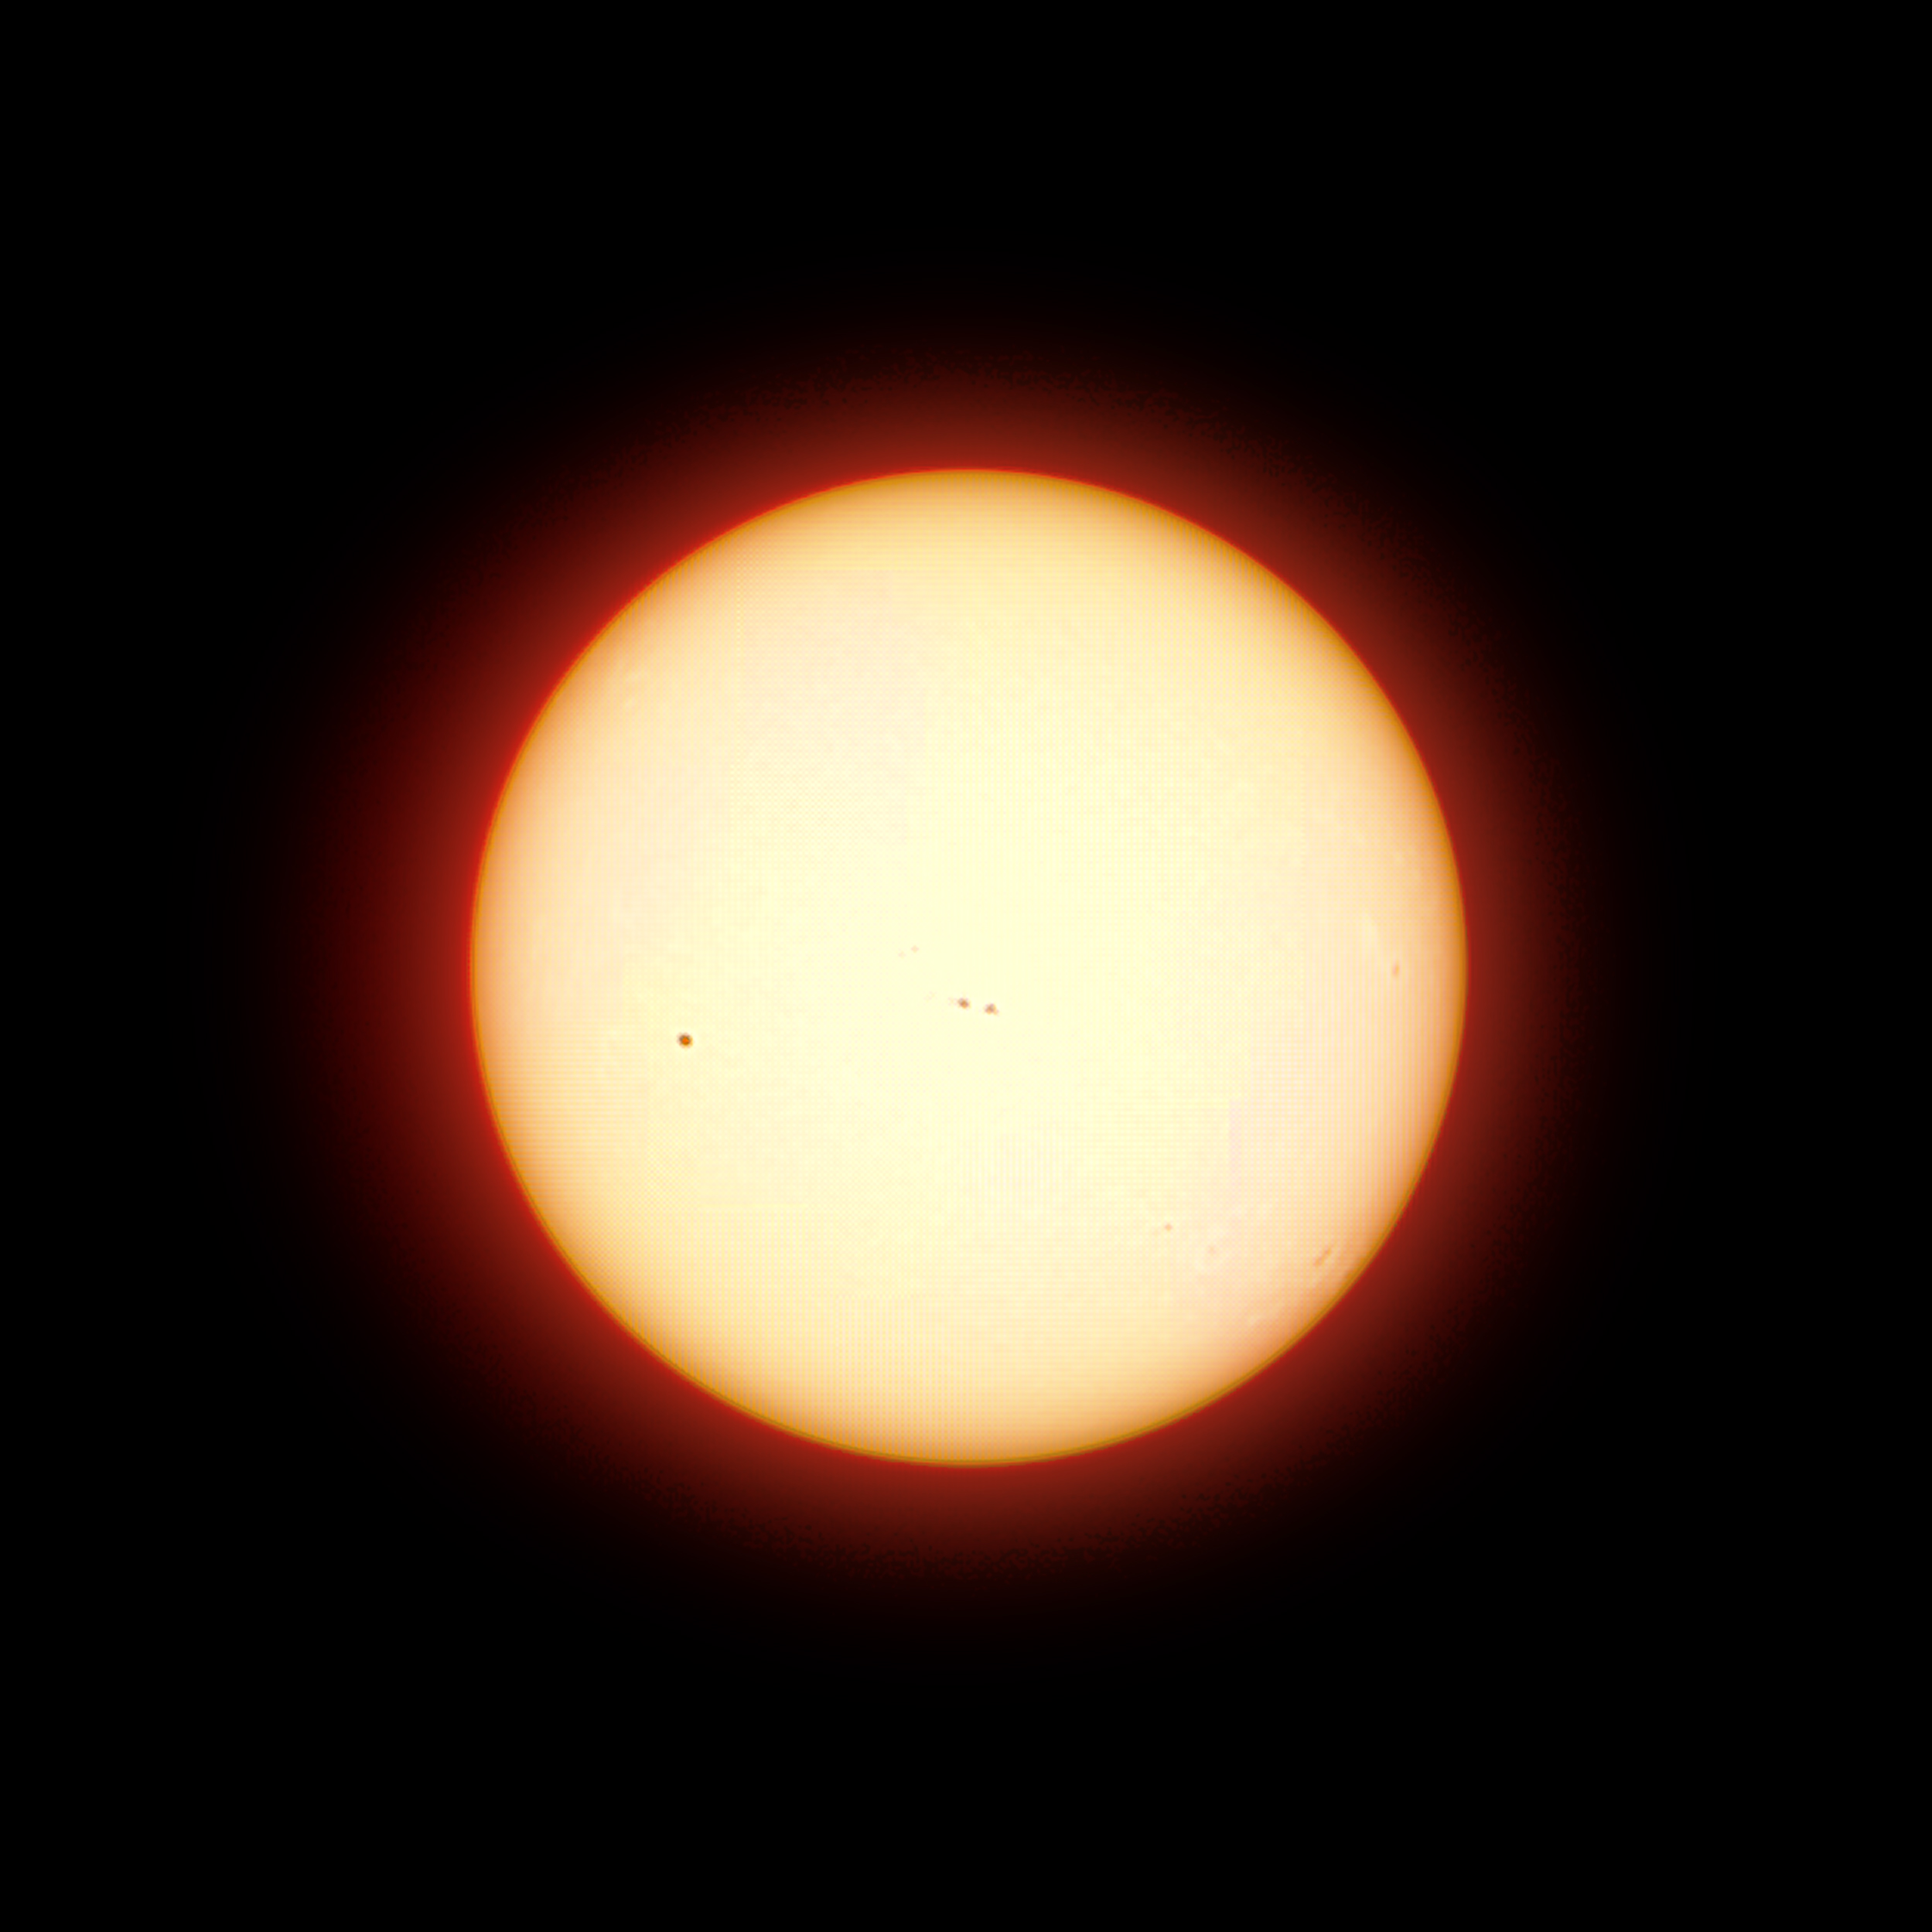
I was able to spot some sunspots on the Sun and decided to create a video and capture 100 FITS files. I later stacked these files using Autostakkert, a free post-processing tool commonly used for moon, sun, and planetary imaging. The resulting images weren’t of super high quality, but it was certainly a lot of fun and easy to capture the Sun with the Dwarf II. Here are the pictures:
Astrophotography with the DWARF II Telescope
Now, let’s explore the exciting world of astrophotography, which is one of the remarkable capabilities of the DWARF II smart telescope. Allow me to guide you through the step-by-step process of how I captured a decent photo of the Andromeda Galaxy without the use of any astrophotography filter, all from the bustling city center of Utrecht in the Netherlands. To make the most of your Astro-pictures, it’s highly recommended to start with the Astro dark mode and create a dark library.
Creating a Dark Library
Taking dark pictures is crucial for the DWARF II to correct the dark current in your astrophotos, especially when capturing deep-sky objects with long exposure times. In Astro dark mode, place the DWARF II lens facing downward and put it in its carrying bag. Then, store it in a dark place like a closet or another area with minimal light. Once it’s set up, simply click the shoot button, and the DWARF II will automatically generate a “dark library” in about 10 minutes. This dark library will be instrumental in improving the quality of your astrophotos by eliminating unwanted noise and artifacts caused by long exposures.
Calibrating the DWARF II Telescope for Astrophotography
Using the Astro mode for astrophotography is truly fascinating. To get started, here are the steps to calibrate your DWARF II telescope on the stars:
Setup: Place your DWARF II on a sturdy photo tripod and ensure it’s connected via the app.
Pointing to Stars: Aim your DWARF II telescope at a bright starry area in the sky.
Settings: Adjust your DWARF II settings to an exposure time of 1 or 2 seconds with a gain setting of 80. Ensure that the stars are in sharp focus. If needed, manually focus the telescope using the plus and minus buttons on the app since the autofocus feature can be a bit glitchy when it comes to stars.
Calibration: Click on “features” in the app and select “calibration.” The DWARF II telescope will start to move and attempt to determine its precise position automatically.
Calibration Process: It will go through at least three attempts to calibrate your telescope. After this, a message will appear indicating whether the calibration was successful or failed. If it fails, you’ll need to start over.
In most cases, calibration works smoothly, especially on clear nights. This calibration process is crucial to ensure that your telescope accurately finds and tracks celestial objects.


Finding objects in the night sky with the DWARF II Telescope
Once the calibration process is complete, you can use the DWARF II telescope to point at any celestial target in the night sky in two convenient ways:
1. Auto GOTO Function
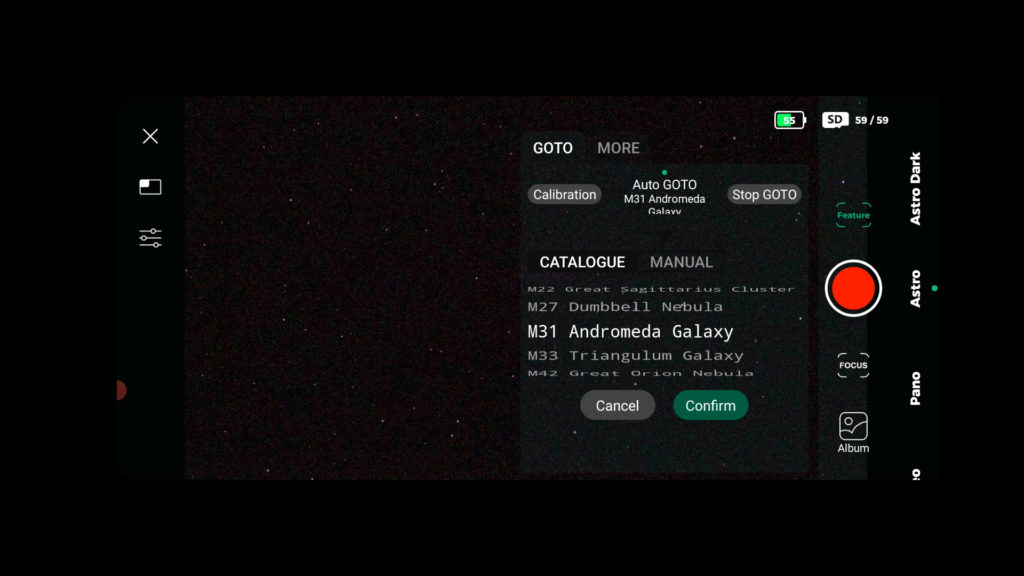
In the app’s “features” section, you’ll find the “auto goto” function. Here, you’ll discover a catalog of popular targets frequently enjoyed by amateur astrophotographers. You can browse this list and select an object you’d like to photograph.The DWARF II telescope will automatically slew (move) to that object, take a picture, and check if the chosen target is precisely within the field of view of your telephoto lens using platesolving. If the object isn’t perfectly centered, the DWARF II will automatically make slight adjustments to the telescope’s position until the target is in the center of your telephoto lens’s view.
This feature is especially fantastic for beginners because it eliminates the frustration of manually searching for objects in the night sky. The addition of platesolving at this price point is truly remarkable and makes astrophotography more accessible.
2. Manual Entry of RA and DEC Coordinates:
For more experienced users, you have the option to enter precise Right Ascension (RA) and Declination (DEC) coordinates of objects you wish to observe. This method can be handy when you want to photograph objects not found in the DWARF II’s catalog, such as a newly discovered comet.
It’s helpful to have some knowledge of when specific objects are visible above the horizon at different times of the year. If you’re unsure, you can use free apps like Stellarium to determine whether the target you want to photograph is currently visible in the night sky from your location. Tools like Stellarium can assist you in planning your astrophotography sessions effectively.
Capturing astrophotos of deep-sky objects with the DWARF II telescope
Capturing astrophotos with the DWARF II is an exciting process. Here’s my step-by-step guide to help you get the best results.
Once the DWARF II telescope has centered your desired celestial object in the telephoto lens’s field of view, it will begin tracking it automatically. First, increase your exposure time. Longer exposures allow the telescope to collect more light from faint deep-space objects. Keep in mind that due to the DWARF II telescope’s alt-az tracking method, you’re limited to a maximum exposure time of 15 seconds. Beyond this, you may start to see star trailing and elongation due to its alt-az tracking.
- Exposure Settings:
Consider using an exposure time of around 10 seconds at a gain setting of 80. A gain setting between 80 and 120 is generally recommended for imaging deep-sky objects. Higher gain settings may result in noisy images, similar to using a high ISO setting on a DSLR camera. Lower gain settings may make it challenging to distinguish the desired deep-sky object from your camera’s shot noise.
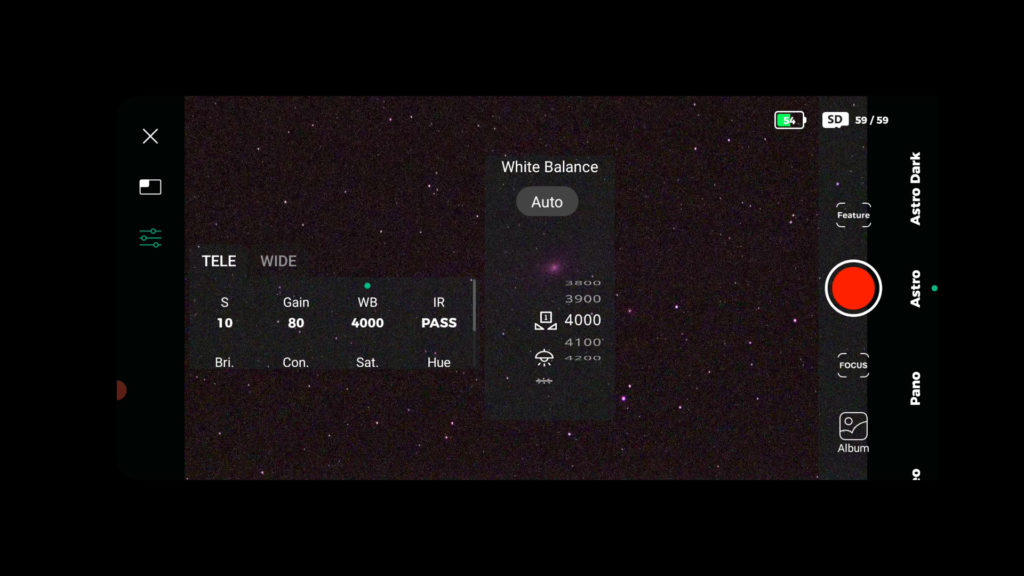
- Adjust White Balance:
Depending on your location and light pollution, you may want to adjust your white balance. Setting it to around 4000K when shooting from urban areas can help reduce the yellowish glow caused by artificial lights, giving you a more natural-looking background.
- IR Cut or IR Pass:
The telephoto lens has an infrared (IR) filter in front of it. You can choose to lower this filter to allow your camera sensor to detect infrared light. It’s highly recommended to set this to “pass” when imaging deep-sky objects like the Andromeda Galaxy, as many deep-sky objects emit infrared light.
Create an Imaging schedule:
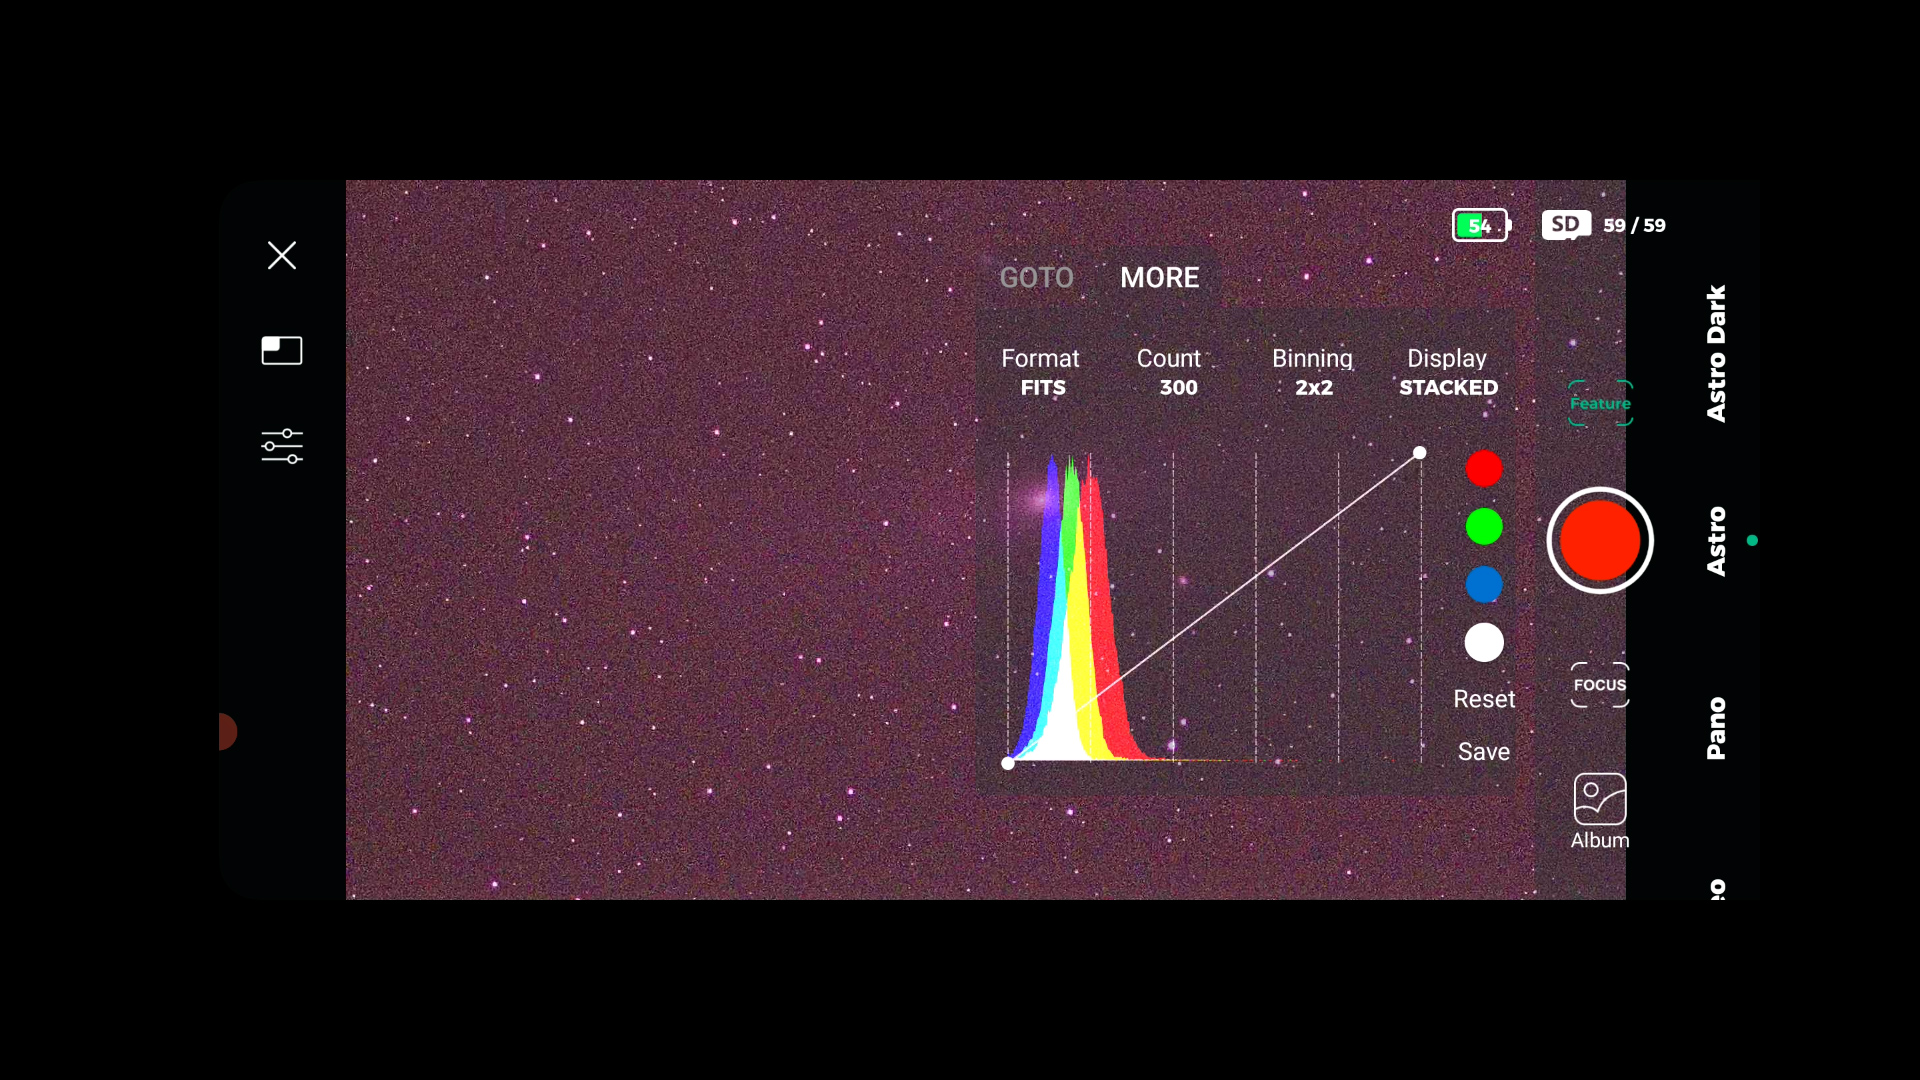
Click on “features” and then “more” to access the photo scheduling plan.
Here, you can select the format for your photos (FITS or TIFF), the number of pictures you want to take, and whether the display should show a stacked picture or single frames.To mitigate field rotation, which occurs after about 45 minutes due to the alt-az tracking mode, consider limiting your schedule plan to around 30 to 60 minutes. For the andromeda galaxy, I selected shooting 300 photos, at 10 second exposures, with a total imaging time of about 50 minutes. My DWARF II battery was empty after tacking about 250 pictures, so I recommend sticking to about 30 to 45 minutes. The 2×2 binning cannot be changed, but you can choose between getting single or stacked pictures in your mobile APP. I recommend selecting the option for stacked pictures. This way, each picture will be stacked on top of the previous one, allowing you to see the deep-sky object becoming clearer in real-time as you take more pictures. Each of the pictures are saved in a separate folder on your micro SD card.
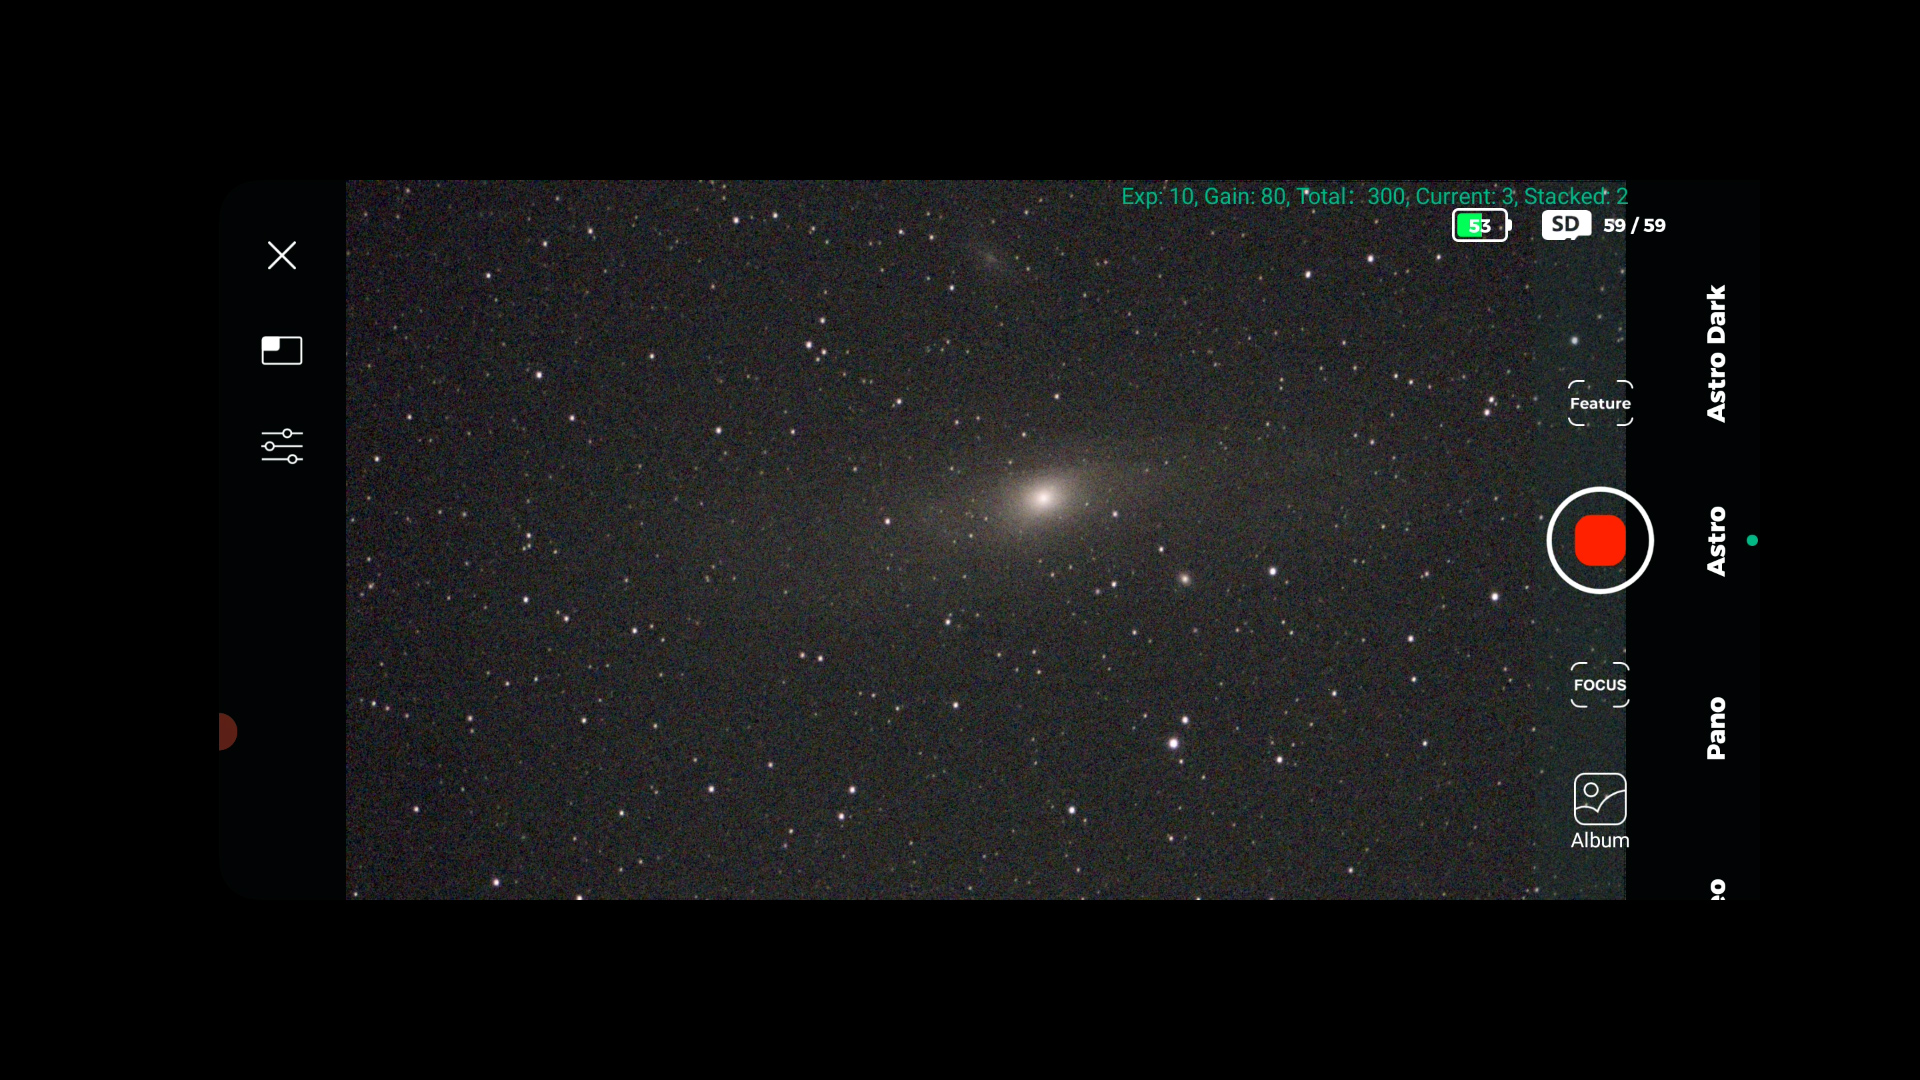
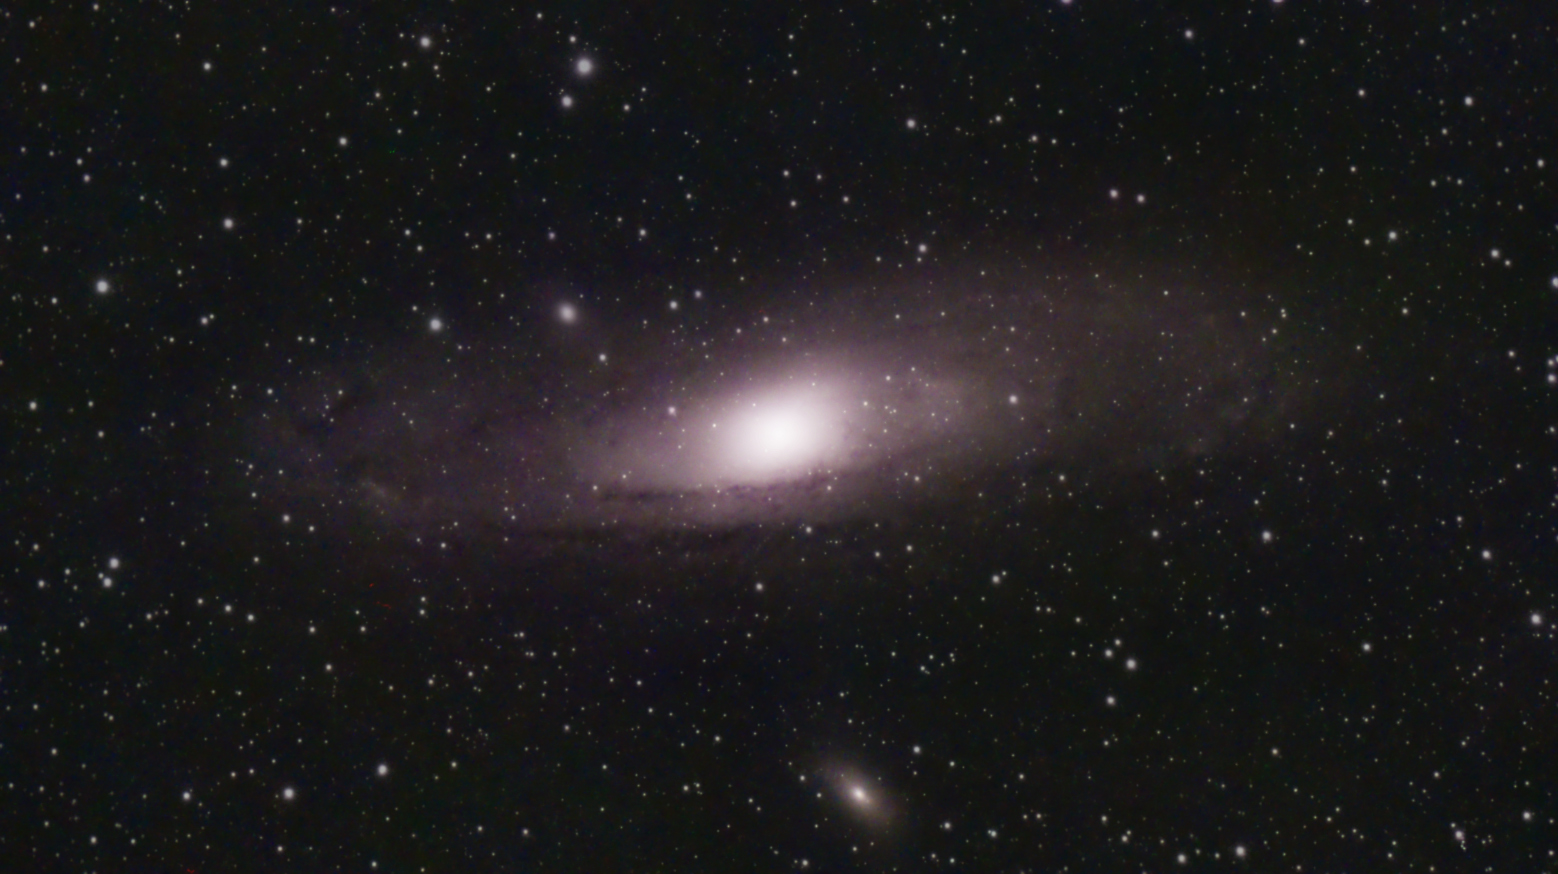
With these settings and a bit of patience, you can capture some stunning astrophotos, like this 250 x 10 second stacked image of the Andromeda Galaxy with the DWARF II from my rooftop in the city center of Utrecht – without a filter!
How to download your videos and photos from the DWARF II telescope
Downloading your files from the DWARF II telescope to your PC is a straightforward process. Here’s how to do it: Use a USB-C cable to connect your DWARF II telescope to your PC or laptop. On the first screen in the APP, look for the settings radar icon. It’s located at the top right corner. In the settings menu, you’ll find an option for “camera settings.” Within the camera settings, look for the option to switch on “MTP Mode.” This step is essential because it enables your PC to recognize the micro SD card in the DWARF II telescope. Once MTP Mode is activated, your PC should detect the telescope’s micro SD card. You can now proceed to download your videos and pictures to your PC. Following these steps will allow you to transfer your astrophotos and videos from the DWARF II telescope to your computer for further editing or sharing.
Final verdict: the DWARF II Smart Telescope
In my view, the DWARF II telescope is tailored to a particular group of people. If you’re new to astrophotography and not ready to spend a fortune on expensive equipment like telescopes, cameras, telescope mounts, or filter sets, then the DWARF II is an excellent choice to consider! Priced at just $419, you get a telescope that can automatically locate and track objects in the night sky at a reasonable level of magnification (3 degrees). This allows you to capture images of some larger deep-sky objects, the Moon and the Sun when using the appropriate solar filters.
When you set up a photo schedule, the telescope employs a technique called “lucky imaging” to automatically stack your photos. You’ll witness the object becoming clearer and brighter in real-time through the DWARFLAB smartphone app. The Moon is also a fascinating subject, and if you’re interested in sunspots, you can opt for the deluxe version, which includes extra ND solar filters for observing the Sun’s surface and detecting sunspots. Plus, you can also use the DWARF II as a nice spotting telescope to observe and capture birds and animals!
Is it flawless? Not quite. Due to its alt-az tracking mode, the maximum exposure time for each photo is around 15 seconds, and after tracking the same object for over 45 minutes you might notice some field rotation in your stacked images. Nevertheless, you can still achieve decent pictures of deep-sky objects like the Andromeda Galaxy, the Pleiades, and the Orion Nebula, which is quite impressive at this price range.
If you’re seeking the absolute best astrophotography images, then the DWARF II might not meet your expectations. However, if you’re looking for an affordable way to enter the world of deep-sky astrophotography, have fun, learn about celestial objects in the night sky, avoid the frustration of manual object searching, and produce decent deep-sky photos to share with your friends and family, then the DWARF II is definitely worth exploring. It offers an enjoyable and accessible entry into the fascinating hobby of astrophotography.
Hi and thank you for the review. How well can it see planets? I read it might be better to us a different scope or perhaps a good strong binoculars with image stabilizers. I was hoping to use this for the next solar Eclipse and simply taking off the solar filter during totality. But I have two questions: 1) Can this track and photograph Comets? 2) Can give I type in a location in the sky I’d like to photograph that’s not listed in the selections given in the applications? Thank you!
Excellent review and tutorial. It helped a lot. Question: what about Milky way photography. Is it any good. I use a Canon 60D and 35 mm lens. Will Dwarf match that image quality?
That may come close to what you’re getting wit hthe 60D, yes. There’s a new Dwarf 3 that will be released later this year with a 35mm lens.
That may come close to what you’re getting wit the 60D, yes. There’s a new Dwarf 3 that will be released later this year with a 35mm lens.