Let’s talk about how to capture stunning photographs of the Milky Way. By the end of this post, you will have a good understanding of the necessary gear, ideal conditions, planning tools, and camera settings required to photograph the Milky Way with your camera.
Let’s start by discussing the gear you’ll need for this endeavor. Here’s a list of essential equipment:
- Headlamp or smartphone with a light: These will come in handy when setting up your camera in the dark.
- Camera with interchangeable lenses: It’s best to use a camera with a full-frame sensor for a wider field of view and longer exposures without star streaks. However, if you have a crop-sensor camera, it can still work well.
- Wide and fast lens: Opt for a lens with a maximum focal length of 24mm or wider, preferably 16mm. Additionally, a fast lens with an aperture of f/2.8 or faster is recommended. I just purchased a Sigma 16mm f/1.4 lens, which allows for capturing four times more light than an f/2.8 lens. If you have a kit lens, don’t worry. Just put it to the widest f/ratio possible.
- Tripod: You’ll need a stable tripod to keep the camera absolutely still when taking long exposure shots of the Milky Way. Alternatively, you could use a table or chair to keep the camera from moving.
Pro tip: With a dedicated star tracker, you can accurately track the Milky Way, and take longer exposure photos at greater focal lengths. You can find more info about star trackers here.
Let’s move on to the conditions necessary for photographing the Milky Way:
- No moon: The moonlight will wash away the faint details of the Milky Way. You can use various smartphone apps to check the moon phase. Aim for a new moon or a time just before the moon rises or shortly after it sets.
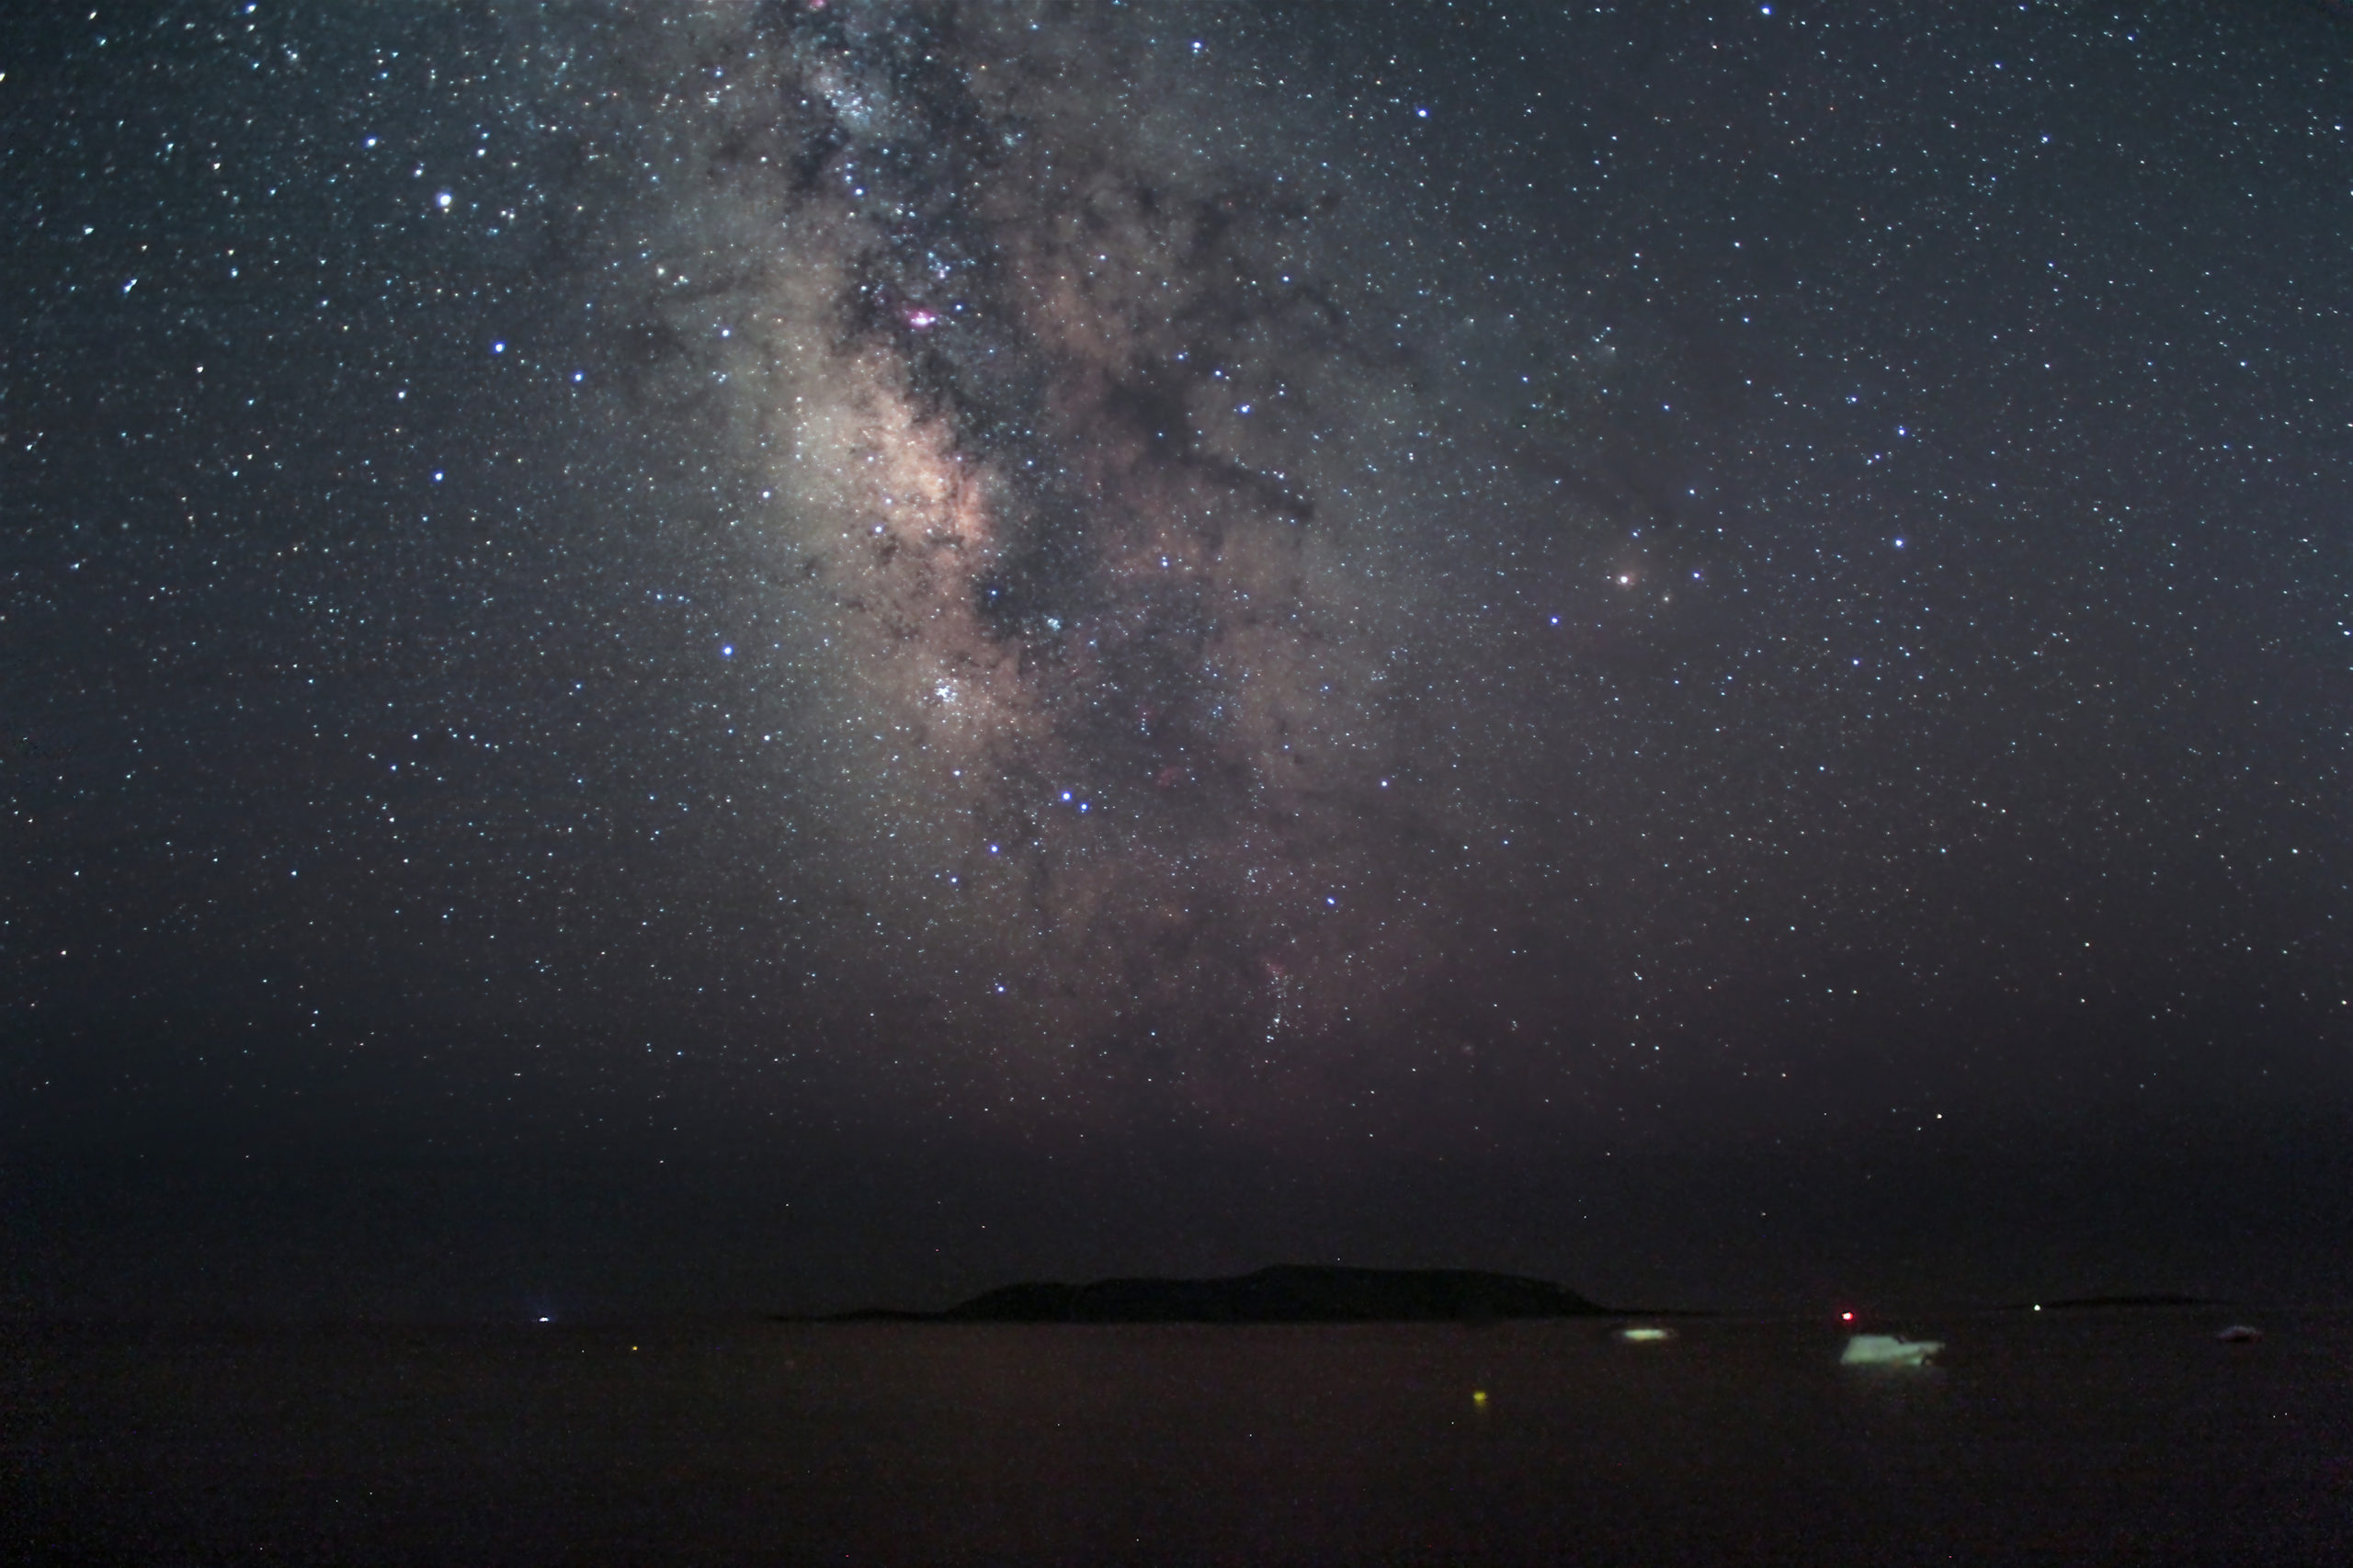
- Time of year: The prime time to photograph the Milky Way is during the spring to fall, known as the Milky Way season. While it’s still visible during winter, the core of the Milky Way is the brightest area which is visible from spring through fall. In spring, it rises in the southeast; in summer, it appears in the south, and in fall, it is visible in the southwest.
- Clear and dark sky: To capture the Milky Way’s beauty, you need a clear sky with minimal light pollution. There are two types of light pollution to consider: city-scale pollution and smaller-scale pollution caused by house lights and streetlights. Use a light pollution map to find dark sky locations away from city light pollution. Once you’re at a dark sky site, get away from local light pollution such as street and garden lights.
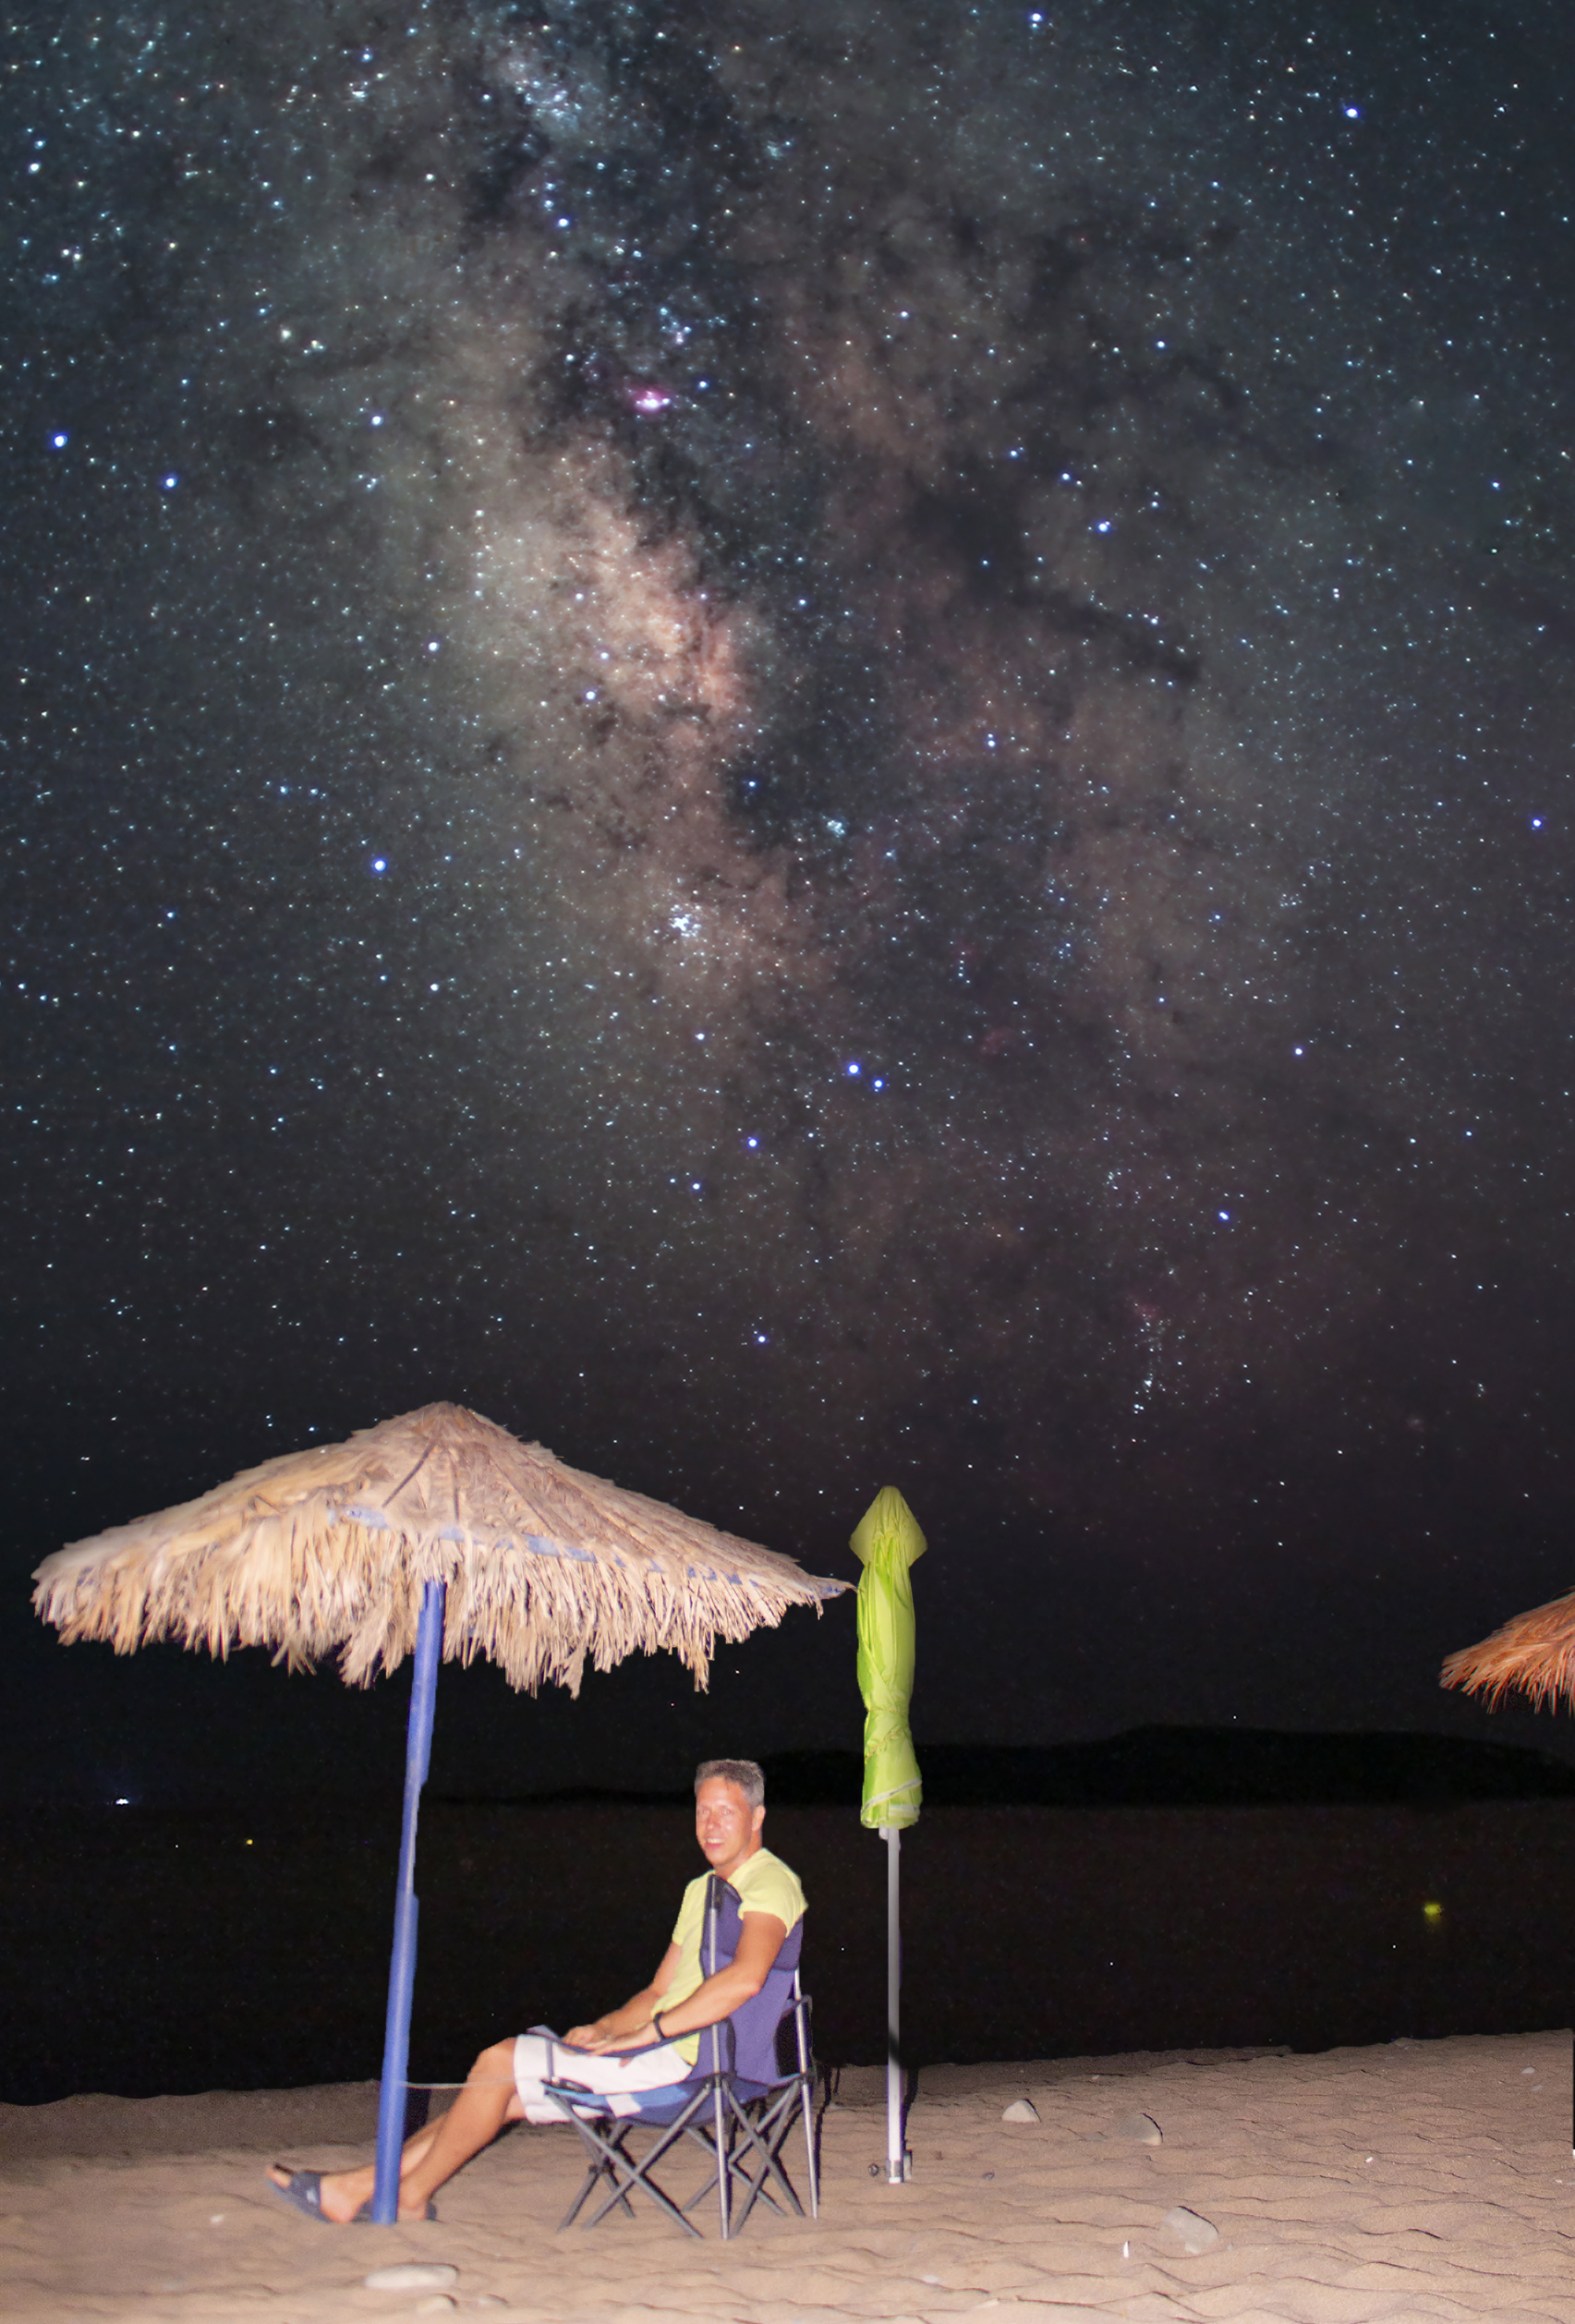
- Finding suitable subjects: Look for rustic objects like old cars, houses, trees, or lakes that can reflect the stars when the water is calm. During the day, scout for potential compositions in the area where you want to take your Milky Way picture at night.
Here are two awesome planning tools that can assist you in capturing the Milky Way:
- Photopills: This app provides valuable information such as the rising time and position of the Milky Way, as well as the moon’s position and other relevant details. Remember to face south when photographing the Milky Way. PhotoPills is your photography planning app, so you’re always at the right place at the right time to capture the best photo possible.
- Stellarium: Stellarium is a free open-source planetarium APP for your smartphone or computer. It shows a realistic sky in 3D, just like what you see with the naked eye, binoculars, or a telescope, including the position of the Milky Way.
Let’s delve into the camera settings for capturing the Milky Way:
- Adjust the brightness of the back LCD: To achieve a more realistic view of the scene, turn down the brightness of your camera’s LCD to level 2.
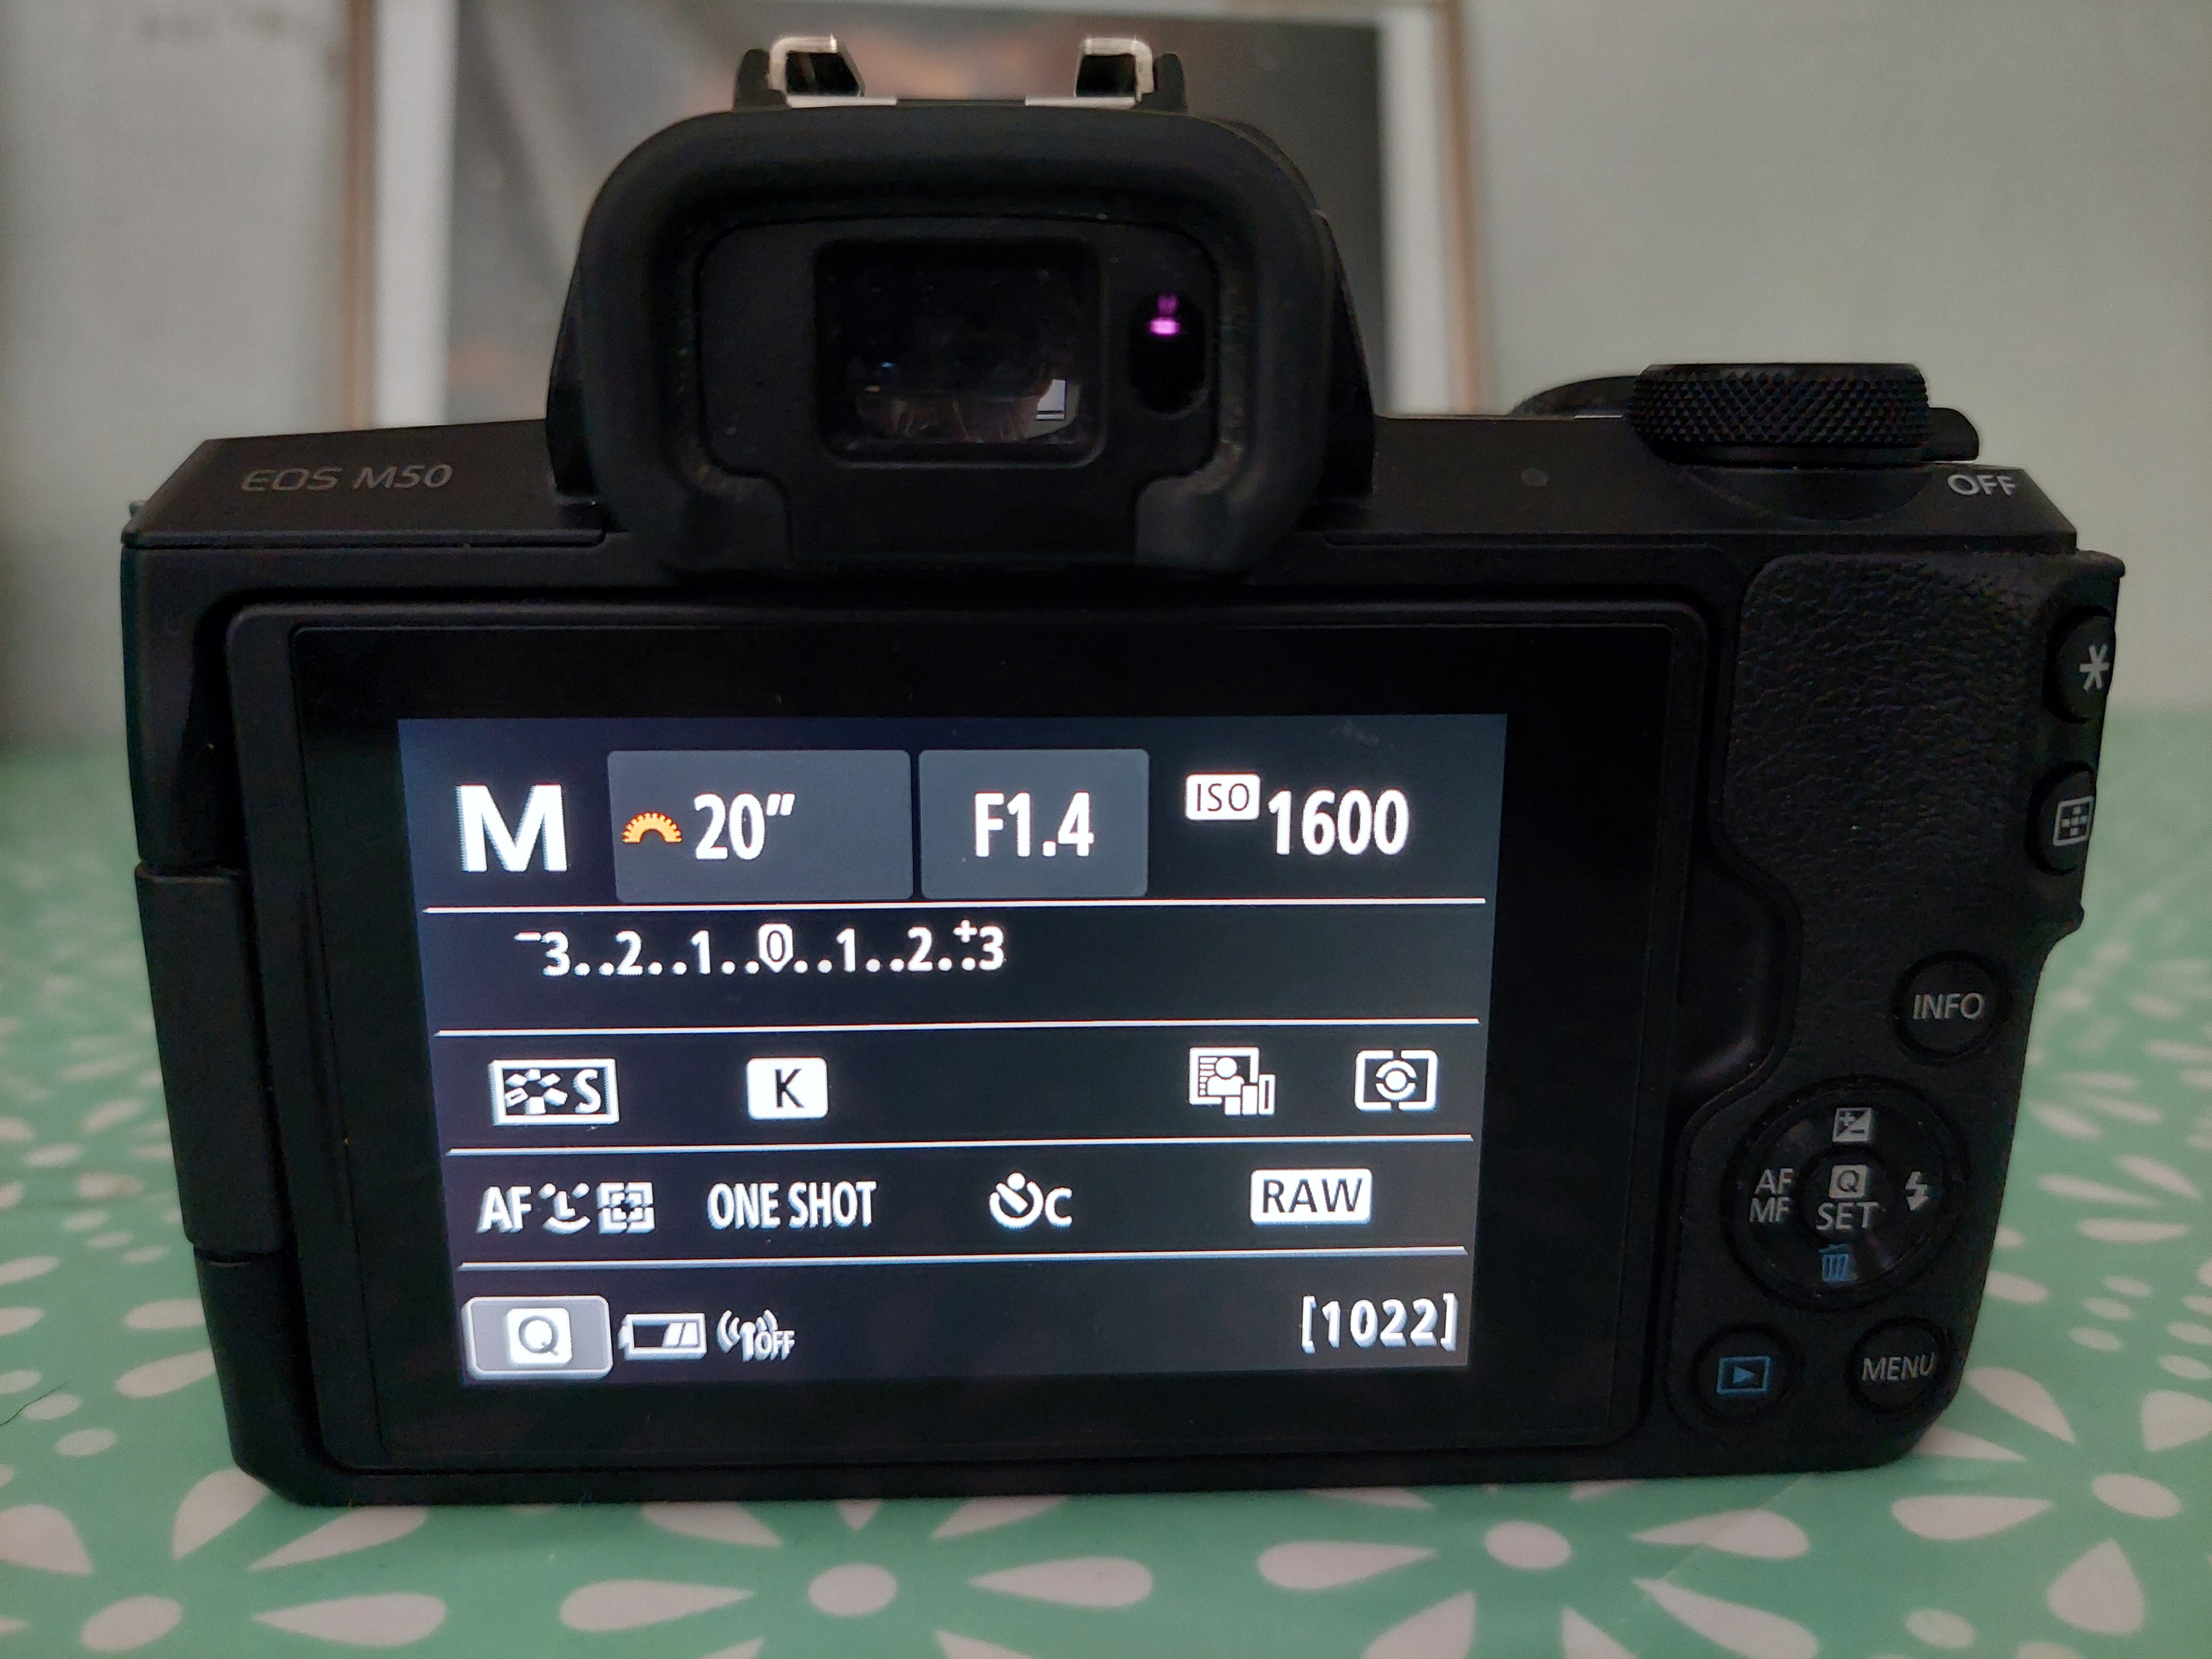
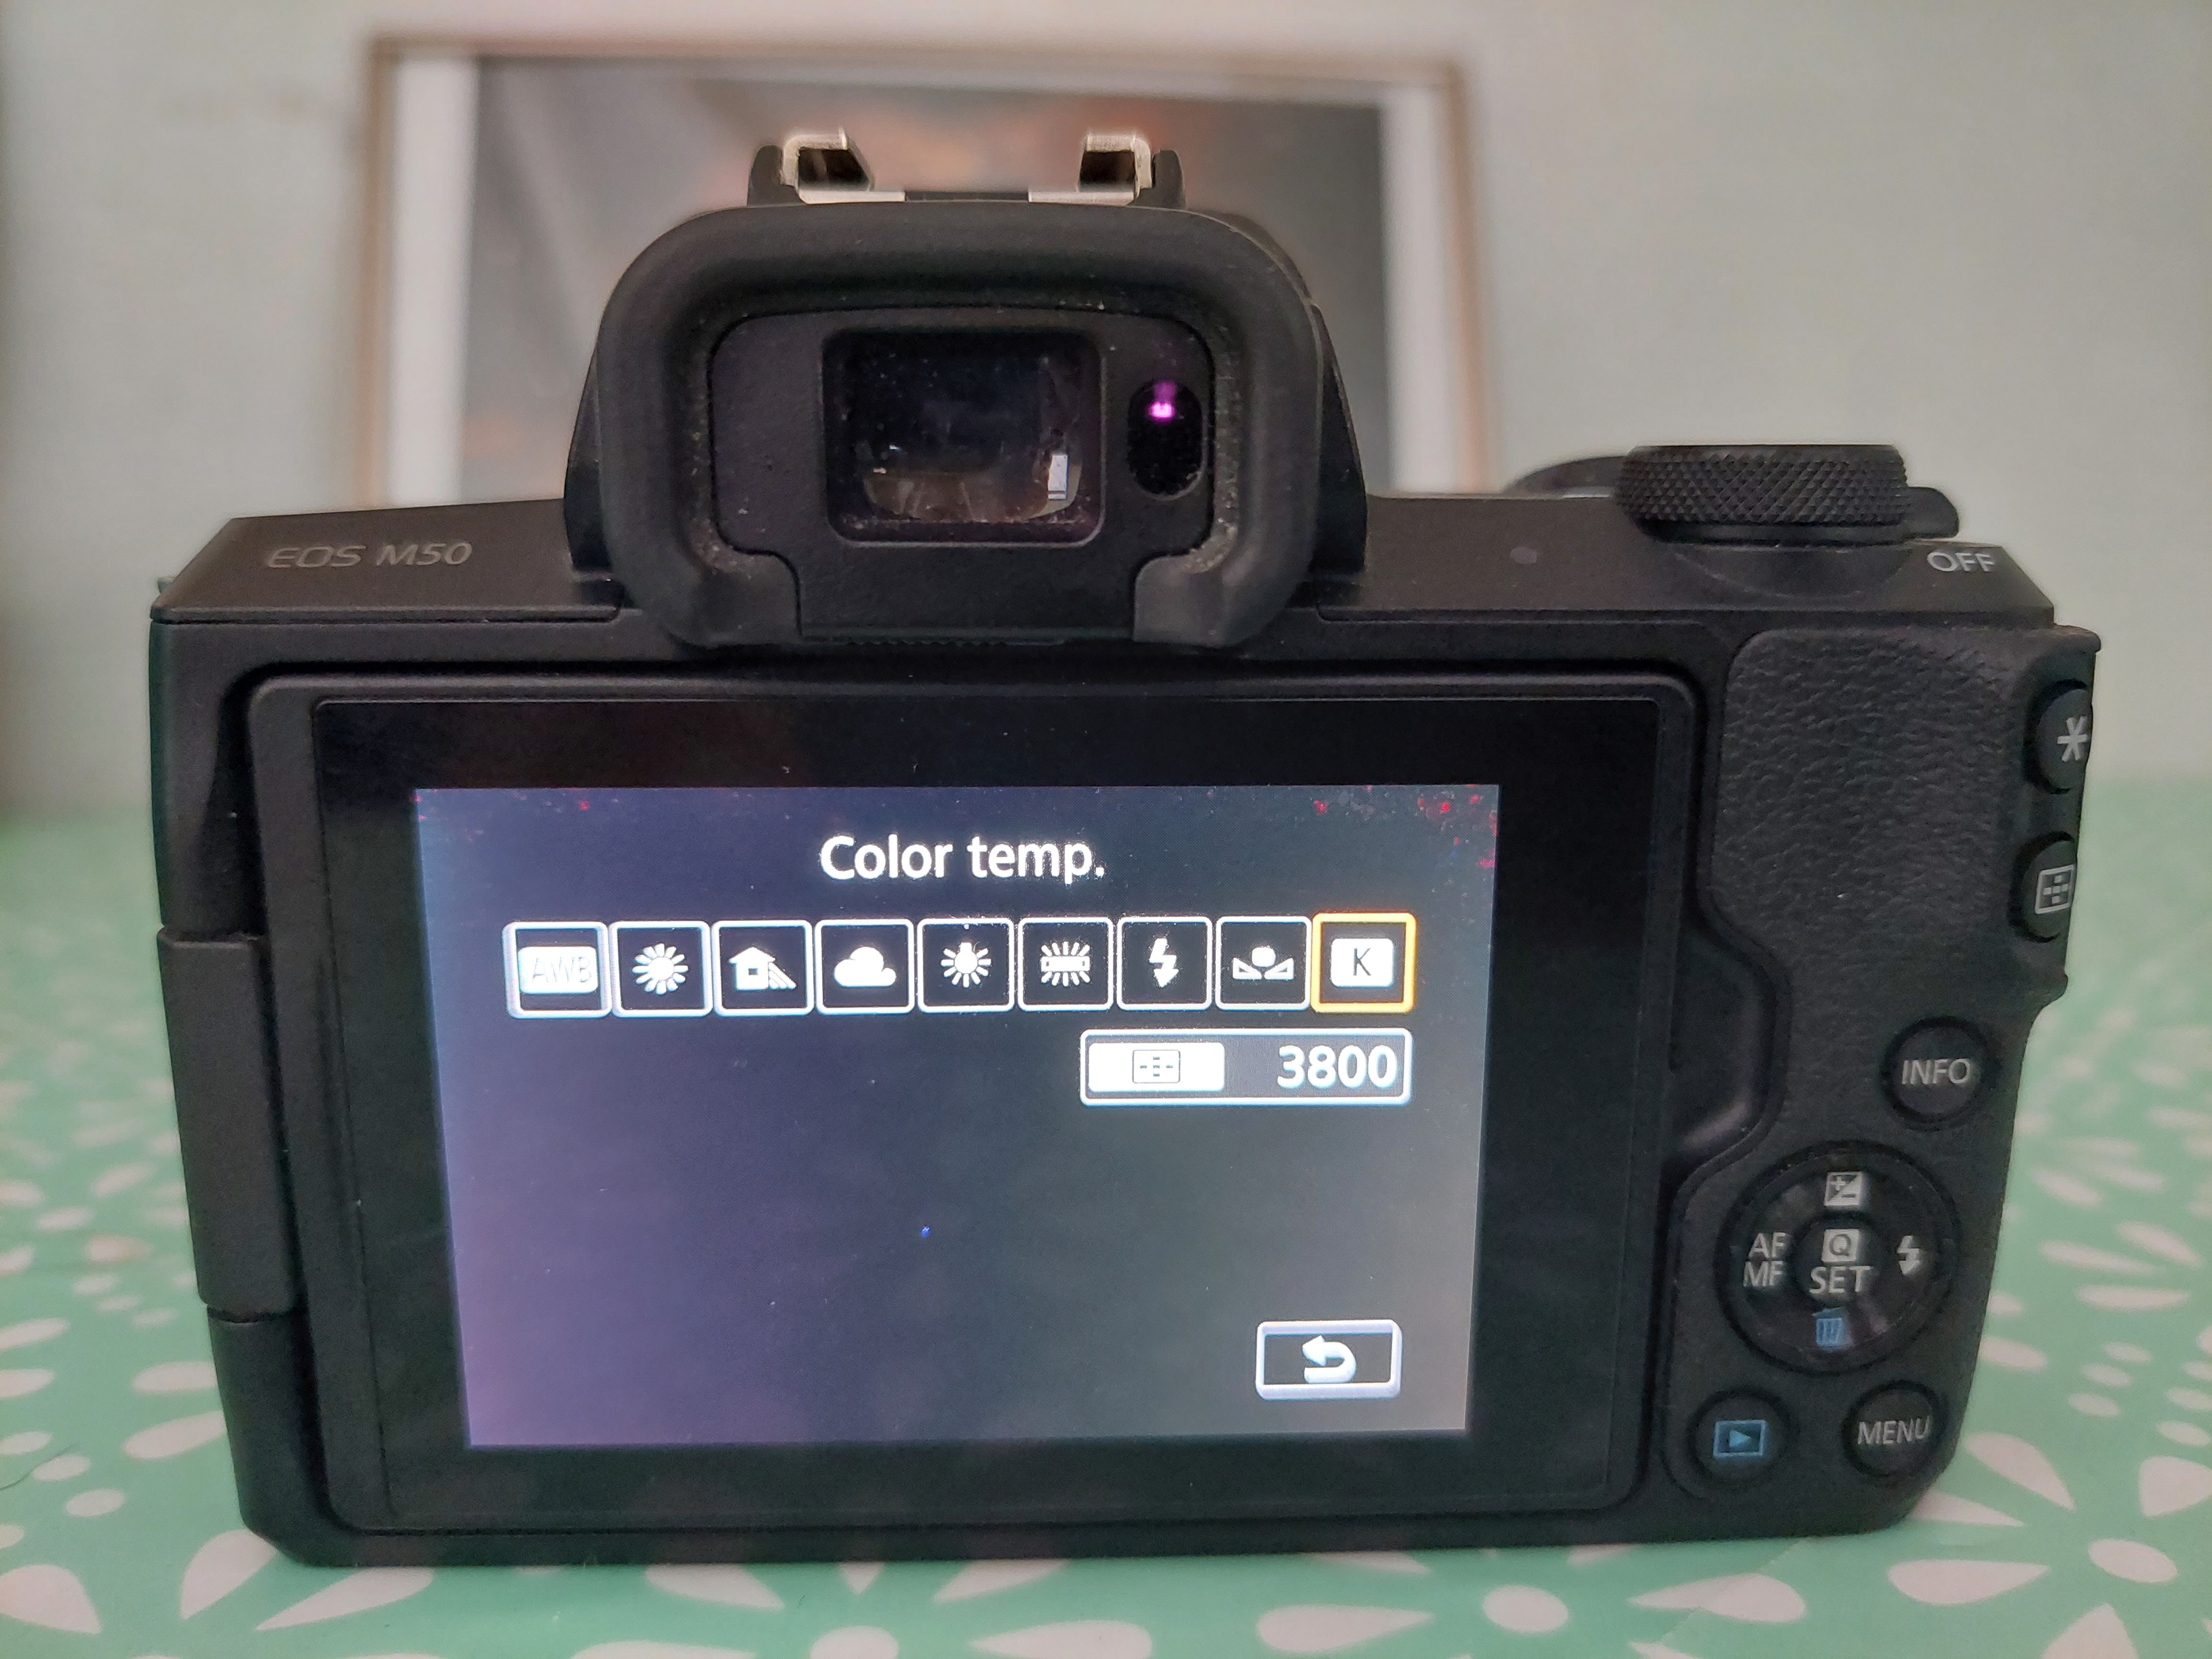
- Set the white balance manually: Choose a Kelvin value of around 3800 to capture the natural colors of the night sky.
- Use a 2-second timer or a shutter release: This helps prevent camera shake caused by pressing the shutter button.
- Shoot in RAW format: RAW files retain more information and offer greater flexibility during post-processing.
- Shoot with a wide-open aperture: Set your lens to its widest aperture (lowest f-number) to allow maximum light to enter the camera.
- Adjust ISO settings: For full-frame cameras, start with ISO 3200 or 6400. For crop-sensor cameras, use ISO 1600 or 3200. Experiment with different ISO values to find the optimal balance between exposure and noise.
- Determine the exposure length: Longer exposures gather more light but may result in star streaks. To avoid excessive streaking, use the “500 rule”: Divide 500 by the focal length of your lens to determine the maximum exposure time in seconds. However, with higher megapixel cameras, pixel peeping at high magnification might reveal streaking, so you may need to reduce the exposure time accordingly. Keep in mind that crop sensors provide more magnification, so adjust the rule accordingly (e.g., the “300 rule” for a 1.5x crop factor).
- Focus accurately: Focusing your camera at night can be challenging. The infinity mark on your lens may not be entirely accurate, so it’s best to focus during the daytime. Find a distant object and manually adjust the focus until it appears sharp. Once night falls, switch your lens to manual focus and use the magnify button to focus on a bright star. Avoid touching the focus ring after achieving sharp focus.
- Take a couple of test shots and zoom in to ensure your focus is good! Take about 15 to 30 pictures.
Pro tip: You can take multiple photos of the Milky Way, and stack those pictures together and create a stacked picture of the Milky Way with a higher signal-to-noise ratio final picture. I’ve made a short, informal video on how to stack and process such pictures, you can find that video here.
By following these guidelines, you’ll be well-prepared to capture breathtaking images of the Milky Way. Remember, practice makes perfect, so don’t hesitate to experiment with different exposures and compositions. Happy shooting!