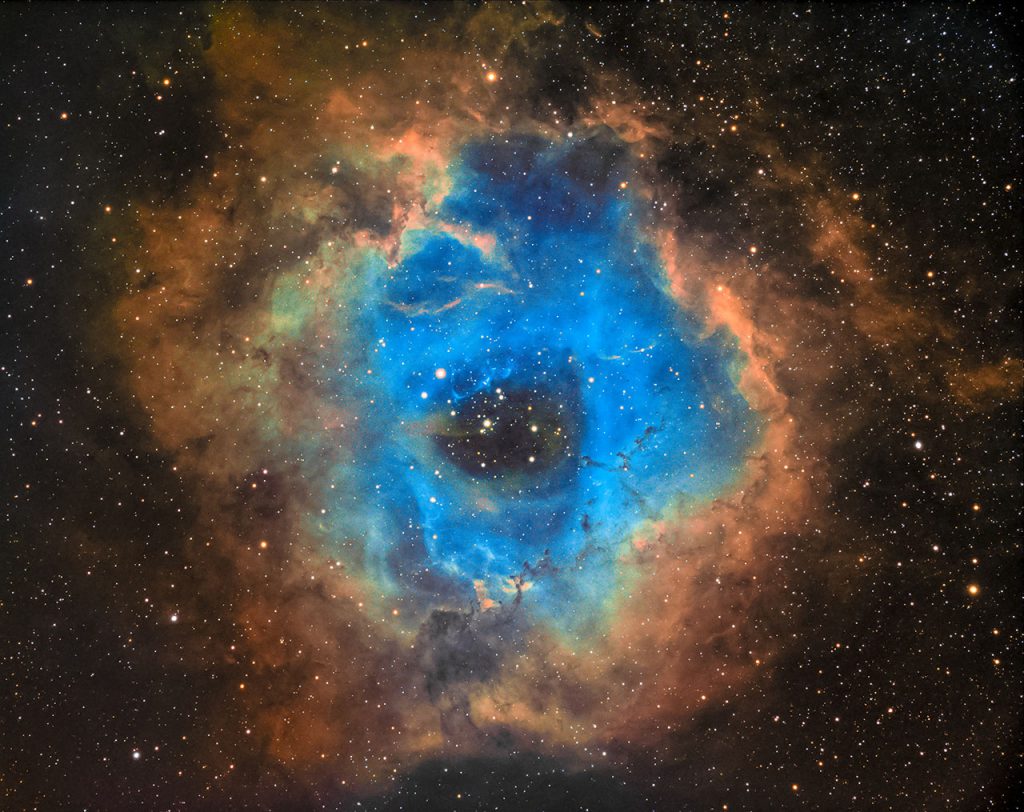
If you wonder what kind of astrophotography equipment, software and skills you need to get started in astrophotography you’ve come to the right blog! I discuss seven steps that are essential when starting your astrophotography hobby. It is my hope that this saves you some time and you’ll be able to avoid some of the mistakes that I’ve made over the years :-).
The first four steps are about the kind of astrophotography gear you would need to take breathtaking pictures of objects in space. The final three steps are about the skills you need to develop in order to capture and process these amazing pictures. Keep in mind that learning astrophotography is more like a marathon than a sprint. It takes time to learn all the steps. Don’t be discouraged by this! If you accept the fact that it will take some time and energy to master the steps mentioned below, astrophotography can become a wonderful journey. I hope the seven steps below will help you to get started.
Step 1: Get the ‘right’ telescope mount for astrophotography
The most important piece of equipment that you will need is a decent ‘beginner level’ astrophotography mount. A mount is basically a device that carries your telescope, camera and other astrogear you may have. Be aware that there are two types of mounts: Equatorial (EQ) mounts and Altitude Azimuth (Alt-Az) mounts. Whereas Alt-Az mounts are easy to setup and use, they cannot accurately track so called ‘Deep Space Objects (DSO’s). The main reason for this is that an EQ mount can be aligned with the north or south celestial pole whereas an alt-az mount cannot. You need an EQ mount that can be polar aligned for astrophotography. Please read this blog for more information on the differences between alt-az and EQ mounts.
Additionally, I would advice you to look for a computerized mount – also called a ‘goto’ mount. These mounts can automatically track objects within our own solar system (moon, planets) and DSO’s in deep space. You need automated, highly accurate tracking to take long exposure images of DSO’s.
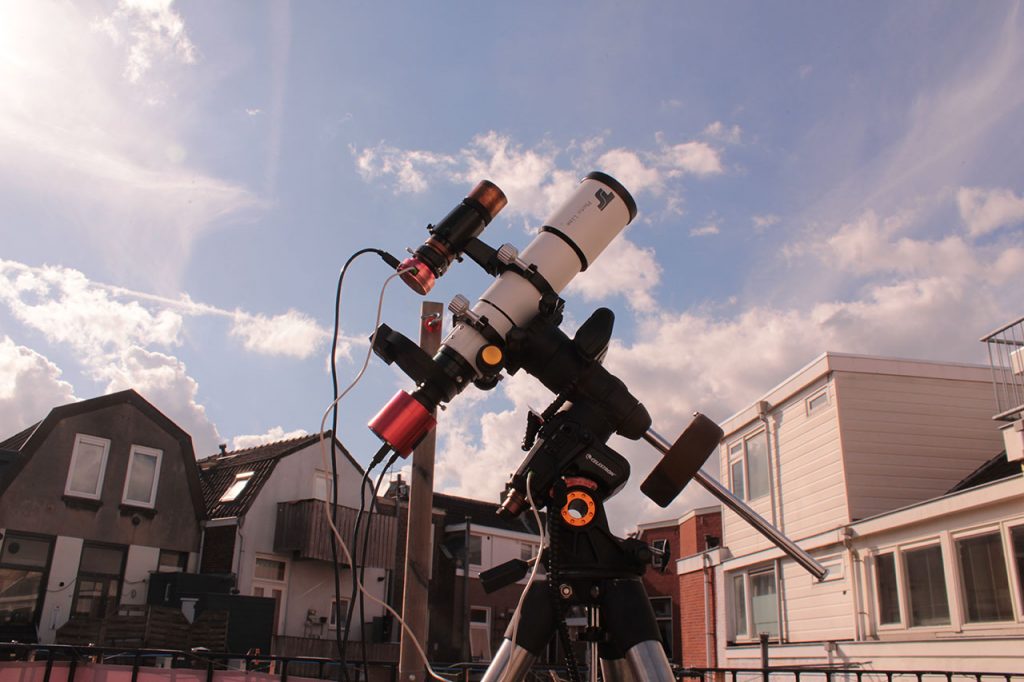
When looking for an EQ mount, I’ll also advice you to check out the maximum payload capacity of an EQ mount, if the mount supports autoguiding, and if the mount can be connected to a laptop or PC. It is too much to explain all this in this blog. Is you’re in the process of finding an EQ mount, I’ll recommend you to read my other blog on beginner level astrophotography mounts.
Step 2: Get a ‘decent’ beginner telescope for astrophotography
Of course, you would also need a ‘good’ astrophotography telescope. I advice you to start your hobby with a so called ‘widefield’ refractor telescope. More specifically, I would recommend an apochromatic (APO) refractor for several reasons. Widefield APO refractors can produce a high quality, widefield view of some of the famous astrophotography targets such as the orion nebula, the horsehead nebula, and the andromeda galaxy. An APO refractor usually has three separate lens elements (triplet) which together produce a chromatic aberration FREE image. This means the telescope will produce the correct colors of a DSO in your picture. Some of the cheaper telescopes suffer from ‘chromatic aberration’ leading to a false color images of your DSO and purple halos around your stars – you don’t want that :-)! Other advantages of widefield APO refractors are that they are relatively lightweight, they are easy to use, and they don’t require any maintenance. If you want more information I invite you to read my blog about best beginner telescopes.

Shitty horsehead nebula, combination of a cheap achromat refractor (see halos around stars) and lack of skills 
Nice horsehead nebula picture, combination of high quality 80MM APO refractor and lots of practice
Step 3: Choosing the ‘right’ camera for astrophotography
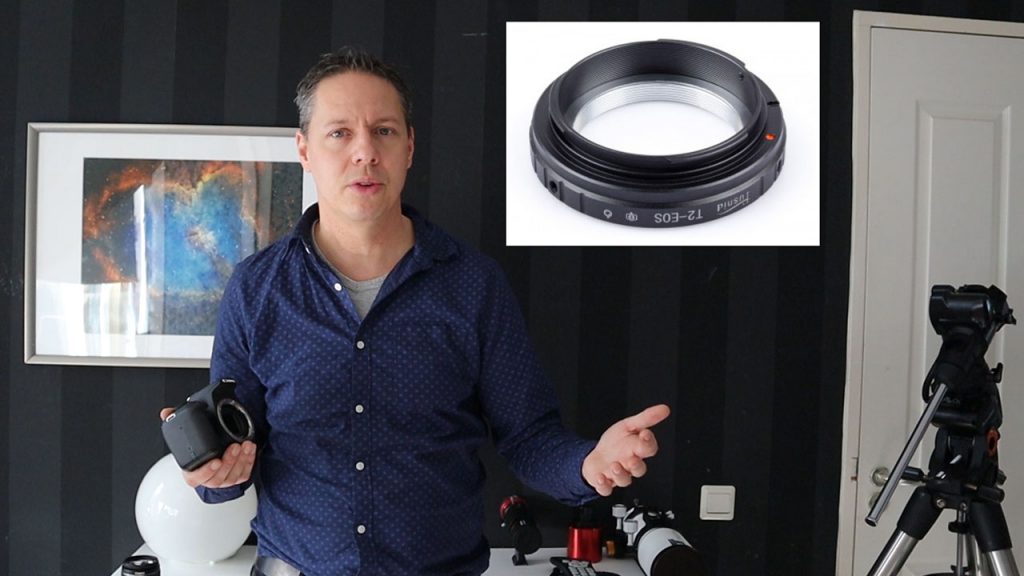
Choosing the ‘right’ kind of camera for your astrophotography hobby can be hard with the many options you have today. If you are in this process, I highly recommend you read this blog in which I explain what camera would be best suited for you, depending on your particular interests, skills and financial means. One easy way to start your astrophotography hobby is with a regular DSLR camera if you already own one. The main advantages are that (a) you can also use your DSLR for your daytime photography as well, (b) you are probably already familiar on how to use your DSLR and (c) a DSLR has a relatively large sensor in comparison to some of the dedicated astrophotography cameras that are on the market. The large sensor will produce a nice, widefield view, especially in combination with that widefield APO refractor I’ve mentioned earlier. The combination of a DSLR with a widefield APO refractor is ideal for larger DSO’s such as the horsehead nebula, the orion nebula and the famous andromeda galaxy. It is also easy to connect your DSLR camera to a telescope. All you need is a T2 adapter ring for your camera type (e.g. Canon, Nikon, Sony) which costs around $15.
After a while, you will notice that there are some disadvantages when using a DSLR for astrophotography. DSLR’s have an IR-cut filter which blocks the infrared part of the light spectrum. Lots of DSO’s emit light on these wavelengths which you are not able to capture with a DSLR. This can be remedied by taking out the IR-cut filter from you DSLR. You may want to perform this procedure yourself if you are brave enough – there are some tutorials on youtube 🙂 – or by someone who knows what he/she is doing. A second disadvantage of DSLR’s is that your long exposure images will come with ‘noise’ in your picture such as red, green and blue pixels – especially on warm summer nights. This can be partly remedied by a process called ‘dithering’, but not entirely. So at a certain point in time, you probably want to move on to a dedicated astrophotography camera with a peltier cooler. Such a camera can get a camera sensor to stable, low temperatures which lowers the ‘read noise’ produced by a CMOS sensor considerably. By that time, you may also consider a mono camera. Such a camera – in combination with various filters – will allow you to take very high quality pictures. But it also leads to a more complicated capturing and post-processing process. If you are interested in cooled mono imaging – you may want to read my blog where I review the mono camera that I currently use, the ZWO ASI 1600MM pro. However, I’m rambling as this is already advanced stuff. If you just start your hobby, I highly recommend your regular DSLR color camera to avoid the learning curves (and frustrations) that come with imaging with mono cameras.
Step 4: Consider some tracking gear
Most beginner level, computerized equatorial mounts are somewhat limited in their precise tracking capabilities. Without any additional guiding gear, you will be limited to about 30 to 60 second exposures of your favorite DSO’s – after which the imperfect tracking will lead to oval stars or even star trails in your picture. Please note that 60 seconds is enough to capture brighter DSO’s, suchs as some beautiful globular star clusters and galaxies (I personally recommend the Great Hercules Cluster – M13). However, you often need longer exposures of multiple minutes to capture some of the fainter (parts of) DSO’s. As an example, a 10 to 20 second exposure of the Orion nebula is more than enough to get a very nice, high quality image of the core of the Orion Nebula as it is very bright. However, if you also want to capture the fainter parts of the outer structure of the Orion Nebula, you will need multi minute exposures.
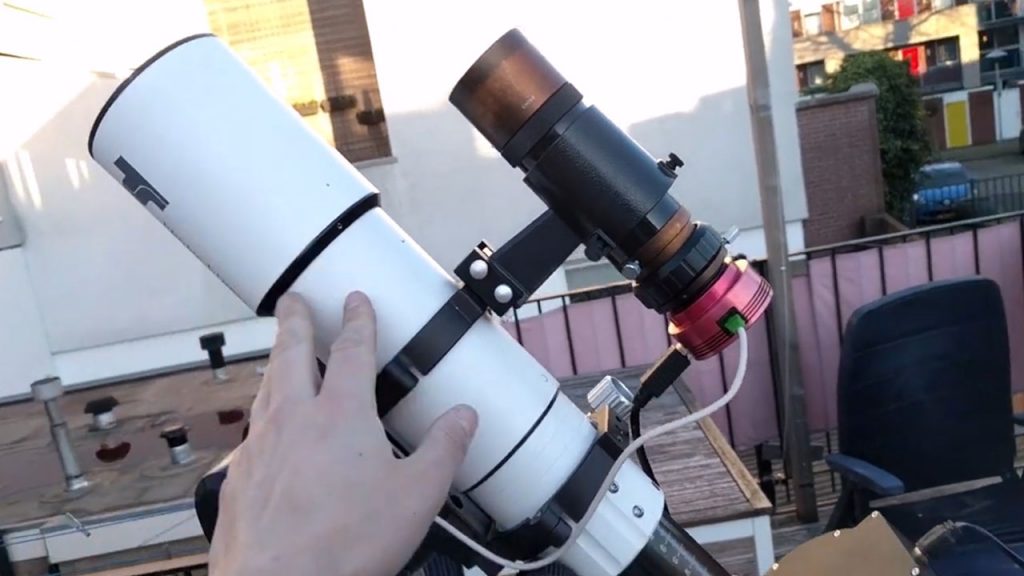
This is where tracking gear becomes important. Tracking gear usually consists of a smaller, second telescope and camera with autoguiding capabilities. Be aware that such tracking gear doesn’t have to break the bank. I’m personally using a 50mm orion guidescope (about $80) and a ZWO ASI 120MC camera (about $140) which I mount on my telescope. I then connect my ZWO camera to the auto-guide port on my mount. Consequently, I use PHD2 guiding – a free software tool. This program allows you to select and track a star with your tracking gear while your first camera (the one connected to your telescope) is capturing images of a particular DSO. When PHD2 notices some movement of the ‘guide star’, it will send corrections to your mount to maintain that star in the exact same position as compared to when you started your guiding. This miracle of modern astronomy software will allow you to take multi-minute pictures of your DSO that will amaze your friends and family.
Step 5: Learn how to polar align your Equatorial Mount
Equatorial mounts need to be ‘polar aligned’. Simply put, this process will ensure that you can accurately track DSO’s in the night sky. By aligning your telescope to the north (or south) celestial pole, your mount will follow the exact same curved paths of the stars in the night sky at your specific location. In this blog, I explain how to polar align your mount. This process is not so complicated. The main steps are to (1) put your tripod in the north (or south) position; (2) level your tripod; (3) put your mount into the correct latitude position; (4) polar align your scope manually with your polar scope and altitude-azimuth bolts on your EQ mount, or (5) use software. I’m personally using sharpcap to really nail my polar alignment.
Step 6: Learn how to capture an object in deep space from your backyard
I will mention some of the basics of capturing DSO’s below. I hope you don’t get discouraged, as this part is only meant to show you what can be done. Just take it one step at the time. I will write separate blogs on how to perform each of those steps in the future. After you have polar aligned your mount, you need to ‘slew’ your mount to the object you want to capture. If you have a computerized (goto) EQ mount, the hand controller on your mounts is actually capable of slewing to tens of thousands of objects in the night sky. Depending on the type of mount you have, you may have access to a SynScan (Sky-Watcher and Orion mounts), a Nexstar (Celestron), an Audiostar (Meade), or a GotoNova (Ioptron) controller. You can either physically use those hand controllers, but you can also connect your mount with a cable to your PC or Laptop (I prefer this) via those hand controllers. Be aware that many hand controllers of EQ mounts still have an RS232 serial output, so you would also need an adapter to convert this RS232 cable to a USB cable. In this video I show you how this actually works with my Celestron Advanced VX and NexStar. The Synscan controllers of SkyWatcher and Orion mounts can be used in combination with EQMOD. Importantly, you should check if your mount has a dedicated ASCOM driver. This driver can be installed on your PC or laptop and will enable you to directly ‘talk’ to your mount from with many software programs that are specifically developed with astrophotography in mind. Some often use software tools include Stellarium, PHD2 guiding, BackYard EOS, AstroPhotography Tool, Sequence Generator Pro and more. All these programs are useful if you want to remotely control your mount, telescope and camera.
To give you some idea, PHD2 guiding is a very popular, open-source tracking software which you can use in combination with your tracking gear. PHD2 will calibrate and track a so called ‘guidestar’ and will send corrections to your mount to keep the star in the exact same position while you are imaging your DSO with your main camera – the one that is inside your telescope. Moreover, there are many astrophotography capturing software tools on the market. For example, I personally started with Backyard EOS to capture DSO’s with a my Canon DSLR camera (Backyard EOS also supports Nikon cameras). I especially liked the simplicity and the user friendly interface of that program. The main idea is that you connect your DSLR camera that is in your telescope with your PC or laptop via a micro USB to USB cable. You can then interface with your camera using BackYard EOS. This will allow you to remotely control your DSLR. For example, you’ll have a live view of the camera on your laptop or PC which is useful for focussing your telescope, and you’ll have access to a ‘sequencer’. With a sequencer you can determine how many images you want to take, in what format, the ISO level you want to set on your DSLR, the exposure time and the f/ratio. All very useful. Don’t worry, you’ll get the hang of this. This blog is just meant as an overview, not a detailed course on how to use each of these software programs.
There are also more complex capturing software tools available. For example, astrophotography tool and sequence generator pro have the capability to ‘platesolve’. Plate solving is basically a very accurate goto system that centers your DSO perfectly in the center of your camera’s field of view. I’m currently using Sequence Generator Pro. This is an advanced software tool that allows you to control many different pieces of hardware, such as your mount and your camera. If you are interested, I have made some videos on how setup and use SGpro. I cannot mention all tools and options to capture your astrophotography pictures, but I hope you understand that with a PC or laptop connection you can automate your workflow and it opens up many possibilities to capture DSO’s from your backyard.
Step 7: Learn how to stack & post process your astrophotography pictures
The light we try to capture from Deep Sky Objects has travelled for many light years and it is faint when we collect that light with our camera sensors. As a consequence, astrophotographers have to take many pictures of the same DSO and engage in a process that is called ‘stacking’. What stacking means is that you align and combine all the individual images into one overall frame that includes the information from all the individual images. There are different software programs that you can use to stack your images. One of the best, freely available stacking programs is DeepSkyStacker. Such a program takes all of your multi-minute frames and aligns and stacks them into one picture. It increases your so called signal-to-noise ratio which will bring out your DSO better as compared to just taking one picture. Also, DeepSkyStacker can process much needed ‘calibration’ frames (bias, dark and flat frames) to further increase the quality of your stacked image. I will not get into the details on stacking in this blog, but feel free to look at my list of post processing videos where I show you how to use DeepSkyStacker.
One 5 minute picture of the Soul Nebula (IC1848) 
60×5 minute pictures stacked of the Soul Nebula (IC1848)
After you have stacked your images you usually post-process your stacked image in other software programs. Two of the most popular software tools used nowadays include Photoshop Creative Cloud and PixInsight. Most people start out using photoshop as many people are already familiar with that program. Photoshop is an intuitive program that allows the user to work a bit like a painter by keeping a history and by showing how each additional change affects your picture. If you are interested in post processing videos using photoshop, please check out this playlist on my youtube channel. Another popular program that is most often used by many advanced astrophotographers is PixInsight. I’m just getting started with PixInsight myself, and although I find it somewhat less intuitive as compared to photoshop. This being said, it has some amazing algorithms that clearly bring out beautiful details in your astrophotography images.
Main takeaway message
I hope this blog helped you a bit to take your first steps into astrophotography, whether it is in terms of buying the ‘right kind’ of astro gear, or on how to get you started with imaging the beautiful objects that are out there in deep space. Please remind yourself that this hobby is more like preparing and running a marathon than a sprint. Some night may be frustrating when – for some reason – your gear does not connect to your software, or just when you are perfectly aligned with the celestial pole you will see clouds rolling in. Not to mention the full moon that can wreak havoc on your pictures. Remain patient, there will be nights when everything comes together and you end up with beautiful images of the night sky. It is during those times that you realize why you put so much effort into astrophotography. It allows you to make beautiful pictures that tell us how big the universe is, how small we are, but at the same time that we are intrinsically bound to this beautiful universe. Clear skies!
Hi Wido,
I recently wrote on another threat about mounts and the question about how much gear you need and how expensive it can be. I’ve found in my nights out how difficult is to focus and guide all the time. Seeing this options in STEP 4, these are not too expensive! Great piece of information, as usual. Clear skies!
Hi Javier, Thank thanks! I still focus manually, you can use free software such as sharpcap. For guiding, a mini guidescope with a cheap planetary camera doesn’t break the bank and PHD2 guiding software is open source. Clear skies!
Hi Javier, what instrument do you play? Anyway, yes, it’s an expensive and complex hobby. What you could consider is using a dslr with a star tracker, such as the star adventurer pro for widescape astrophotography. As for mounts, I would like those beginner mounts to be cheaper, it is my experience that those cheaper mounts are often unstable. What you could do is look for a used setup. In the Netherlands and Belgium amateur ap-ers often sell their gear on http://www.te-les-koop.nl
As for milkyway pictures, I only succeeded in other countries (Greece, France). Cheers.
Thank you Javier, clear skies!
Hi
|You are very informed on your topics.
I must admit i am overwhelmed with all the information and choices availabe,
My main questions are , i like to study the moon and also DSO
is this possible, or must i make a choice and settle on my telescope and camera for the moon and DSO or can i have one option to suit all ?
I do not have a telescope at the moment, so this is my first step so am researching
i do not want a cheap option and also not a sky high option.
i certailny like to take detailed moon photos, then gain experience and move on to DSO, so do i then need 2 off cameras ?
what budget do you think i need to spend on the kit i need , i like the German mount and also the GOTO function
Martin
Hi Martin, great to read you are developing an interest for astrophotography.
The moon and deep-sky actually go quite well together in terms of buying gear.
If you want to go ahead and skip the cheaper options, I would recommend the following:
1) buy an adequate equatorial mount that is able to carry around 10kg max. payload, many people buy a Celestron AVX or a SkyWatcher HEQ5 mount (around 1000 euros/dollars)
2) I would start with an APO/ED refractor telescope that has about 80mm aperture and around 500mm focal length (around 900 euros/dollars). I’ve mentioned some interesting ones at the end of this blog: https://astroforumspace.com/best-affordable-telescope-to-start-astrophotography-in-2021/
3) As for a camera, you could start out with a regular DSLR (CANON, NIKON etc.) if you have one – you can buy an additional T2 ring (around 20 euros) to connect your DSLR to your telescope
4) For the moon, you won’t need anything else, but for deep-sky, I would recommend an additional guide scope and guidecamera such as the orion 50mm guidescope and a 120MC camera (both around 150 euros).
You’ll need some additional USB cables to connect your camera and mount to your laptop or desktop.
Then there is the software you’ll want to use such as Backyard EOS (particularly for canon DSLRs), Astrophotography Tool etc. to capture the objects.
And you’ll probably want to start using processing software such as deep sky stacker and photoshop.
That’s it I think…so you’ll be looking at around 2000 euro’s/dollars. If that’s too much, you can also think about buying a startracker (around 500) and put your DSLR camera on one of those to track the night sky and make some awesome widefield astropictures.
Hope this is helpful!
Best,
Wido.
Wido
I have enjoyed your reviews and tutorials and intend to listen into others that you have provided. Thank you for sharing your expertise. I want to ask for your opinion on a subject I am thinking about and researching. Back in the fall I dusted off my scope which I hadn’t used in a few years because of failures and frustration with aligning. I recently felt like I may be getting the gist of how to polar align and star align.
Now I want to take the next steps into astrophotography. My scope is the Celestron CGE Pro 1100 HD – 11″ f/10 EdgeHD. I have a background in IT and am comfortable with laptops and intend to integrate my scope usage with my laptop. I am currently using laptop for assistance in alignment. My first attempts with astro photography have been using my cell phone and photography the moon and I intend to soon try planetary photography with my cell phone.
Most of what I have read says to start with a DLSR camera. I don’t have a DLSR, but have always taken photos with either my cell phone or a digital camera. My question is: In your opinion should I purchase DSLR camera or can I go straight to dedicated astrophotography camera? I’m kind of leaning toward going straight to astrophotography camera. I am comfortable with using the laptop and the idea of integrating the dedicated astrophotography camera with the the laptop and tools. But, everything I’ve read says use DSLR first. What is your opinion?
thanks for any help with deciding
Harold
Hi Harold,
Thanks for your positive feedback. As per your question: You can absolutely start your astrophotography with a dedicated astrocamera! If you’re not into DSLR astrophotography you can skip that step. You should know that there are a couple of things to consider when taking that step. First, you’ll need to choose between a non-cooled vs. cooled astrocamera. another choice you have to make is between a color vs.a mono astrocamera. If you want to read up on this, I have this blog: https://astroforumspace.com/best-zwo-cameras-for-planetary-imaging-and-deep-sky-dso-astrophotography/ This blog is exclusively aimed at ZWO cameras which are quite popular. You should know there are also other brands like QHY which sell reliable, high quality cameras. Hope this blog will help you, if you have any additional questions, let me know. Clear skies! Wido – Astroforum.
Hi Harold,
Thanks for your positive feedback. As per your question: You can absolutely start your astrophotography with a dedicated astrocamera! If you’re not into DSLR astrophotography you can skip that step. You should know that there are a couple of things to consider when taking that step. First, you’ll need to choose between a non-cooled vs. cooled astrocamera. another choice you have to make is to for a color vs.mono astro camera. If you want to read up on this, I have this blog: https://astroforumspace.com/best-zwo-cameras-for-planetary-imaging-and-deep-sky-dso-astrophotography/ This blog is exclusively aimed at ZWO cameras which are quite popular. You should know there are also other brands like QHY which sell reliable, high-quality cameras. Hope this blog will help you, if you have any additional questions, let me know. Clear skies! Wido – Astroforum.