The Vaonis Vespera II Smart Telescope boasts an elegant design and operates wirelessly. Its user-friendliness makes astrophotography accessible even to beginners, requiring minimal learning curves. The Singularity APP enhances the experience, allowing for effortless navigation and observation of the Sun, Moon, and deep-sky objects. For those seeking a challenge, the option to process FITS and TIFF files for personalized astro-images adds depth. While not the most economical option, the Vespera 2 surpasses budget-friendly alternatives with its larger 8.3 MP Sony IMX 585 camera sensor and unique mosaic mode to create panoramic pictures. Although it may not boast the finest hardware or produce top-tier images compared to a more traditional astrophotography setup, its convenience shines through, enabling quick setup and enjoyment of celestial wonders, especially during fleeting moments of clear skies. However, it’s not suited for planetary imaging, requiring a larger telescope for such endeavors.
Vaonis graciously loaned me their Vaonis Vespera II Smart Telescope for a couple of months, without any obligations. I want to emphasize that I haven’t received payment for this review, and the content of the review reflects my personal experiences and thoughts.
Vaonis Vespera II Technical Specifications
The Vespera II represents the second generation of Vaonis Vespera smart telescopes. Functioning as an apochromatic quadruplet refractor telescope, it features a 50mm aperture and 250mm focal length, incorporating a high-quality FPL-52 extra low-dispersion glass element for a true-color, exceptional view of the night sky.
Distinguishing itself from its predecessor, the Vespera II boasts an upgraded Sony IMX585 8.3-megapixel camera sensor (3840 x 2160). The telescope’s battery provides approximately 4 hours of usage, and recharging is facilitated through a USB-C cable (not included). With a storage capacity of up to 25 GB, the Vespera II can be wirelessly controlled via the Singularity APP, compatible with IOS and Android devices.
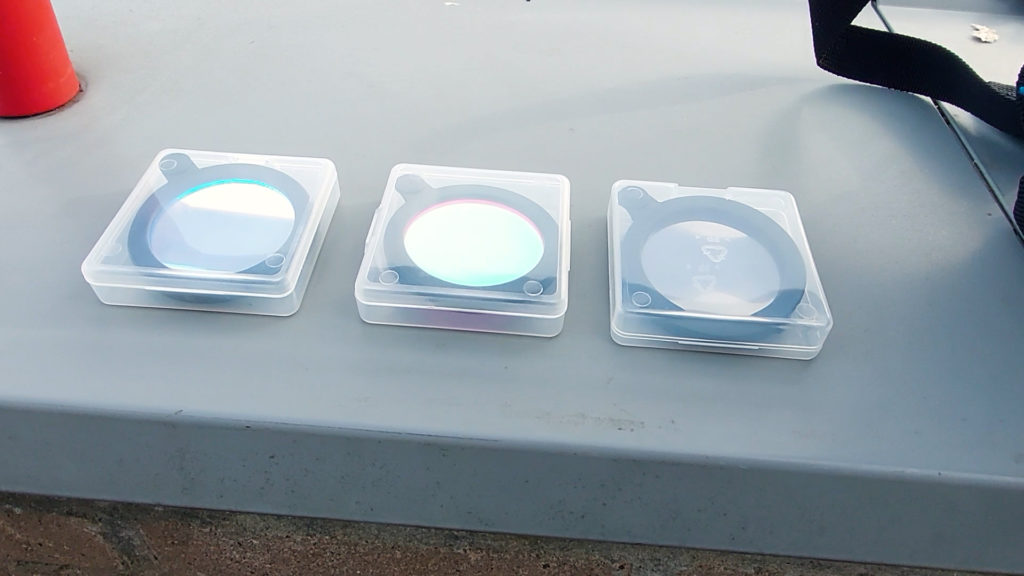
Optional extras are available for the Vaonis Vespera II at an additional cost, providing users with a range of customization possibilities. These include a backpack designed for hiking, a compact mini tripod, a sturdy carbon tripod, and a selection of astrophotography filters. The filters encompass light-pollution, solar, and dual-band variants, contributing to an enriched astrophotography experience. Specifically, the light pollution and dual-band filters prove effective in mitigating urban light pollution, ensuring clearer and higher contrast observations. Additionally, the solar filter is imperative for capturing images of the Sun through the Vespera II.
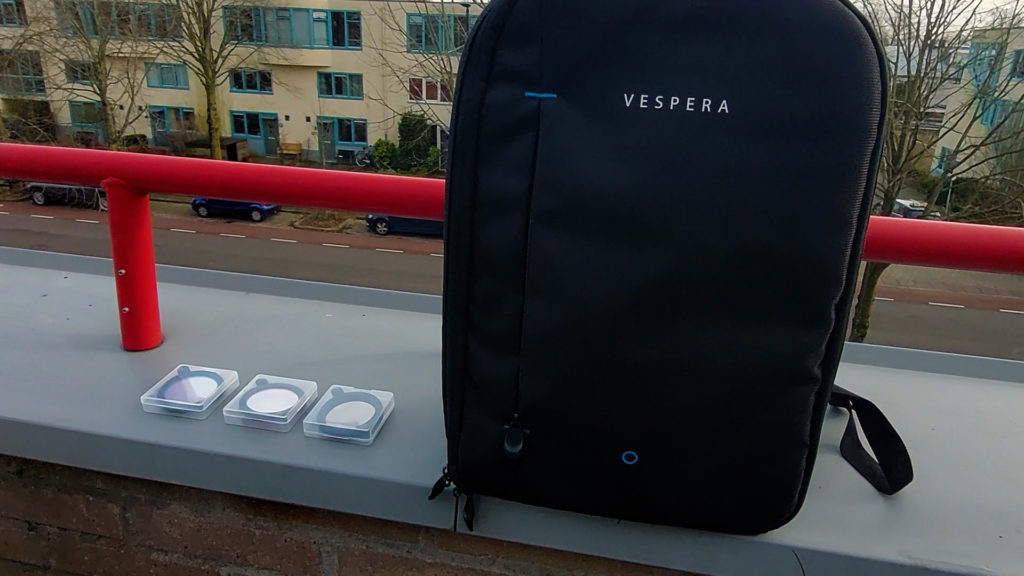
I spent approximately 40 minutes cycling around 10 kilometers with the Vespera II strapped to my back. Despite its weight of a few kilograms, carrying the Vespera II was quite manageable.
The Vaonis Vespera II is available at Agena Astro (USA/WW), High Point Scientific (USA/WW), Astroshop (EU/WW), and Vaonis (direct from vendor).
How to connect to the Vaonis Vespera II using the Singularity APP
You can wirelessly connect and control the Vaonis Vespera II with the Singularity APP, available for both iOS and Android smart devices. For a step-by-step tutorial on installing and updating the Singularity APP, please check out my earlier review of the classic Vespera here.
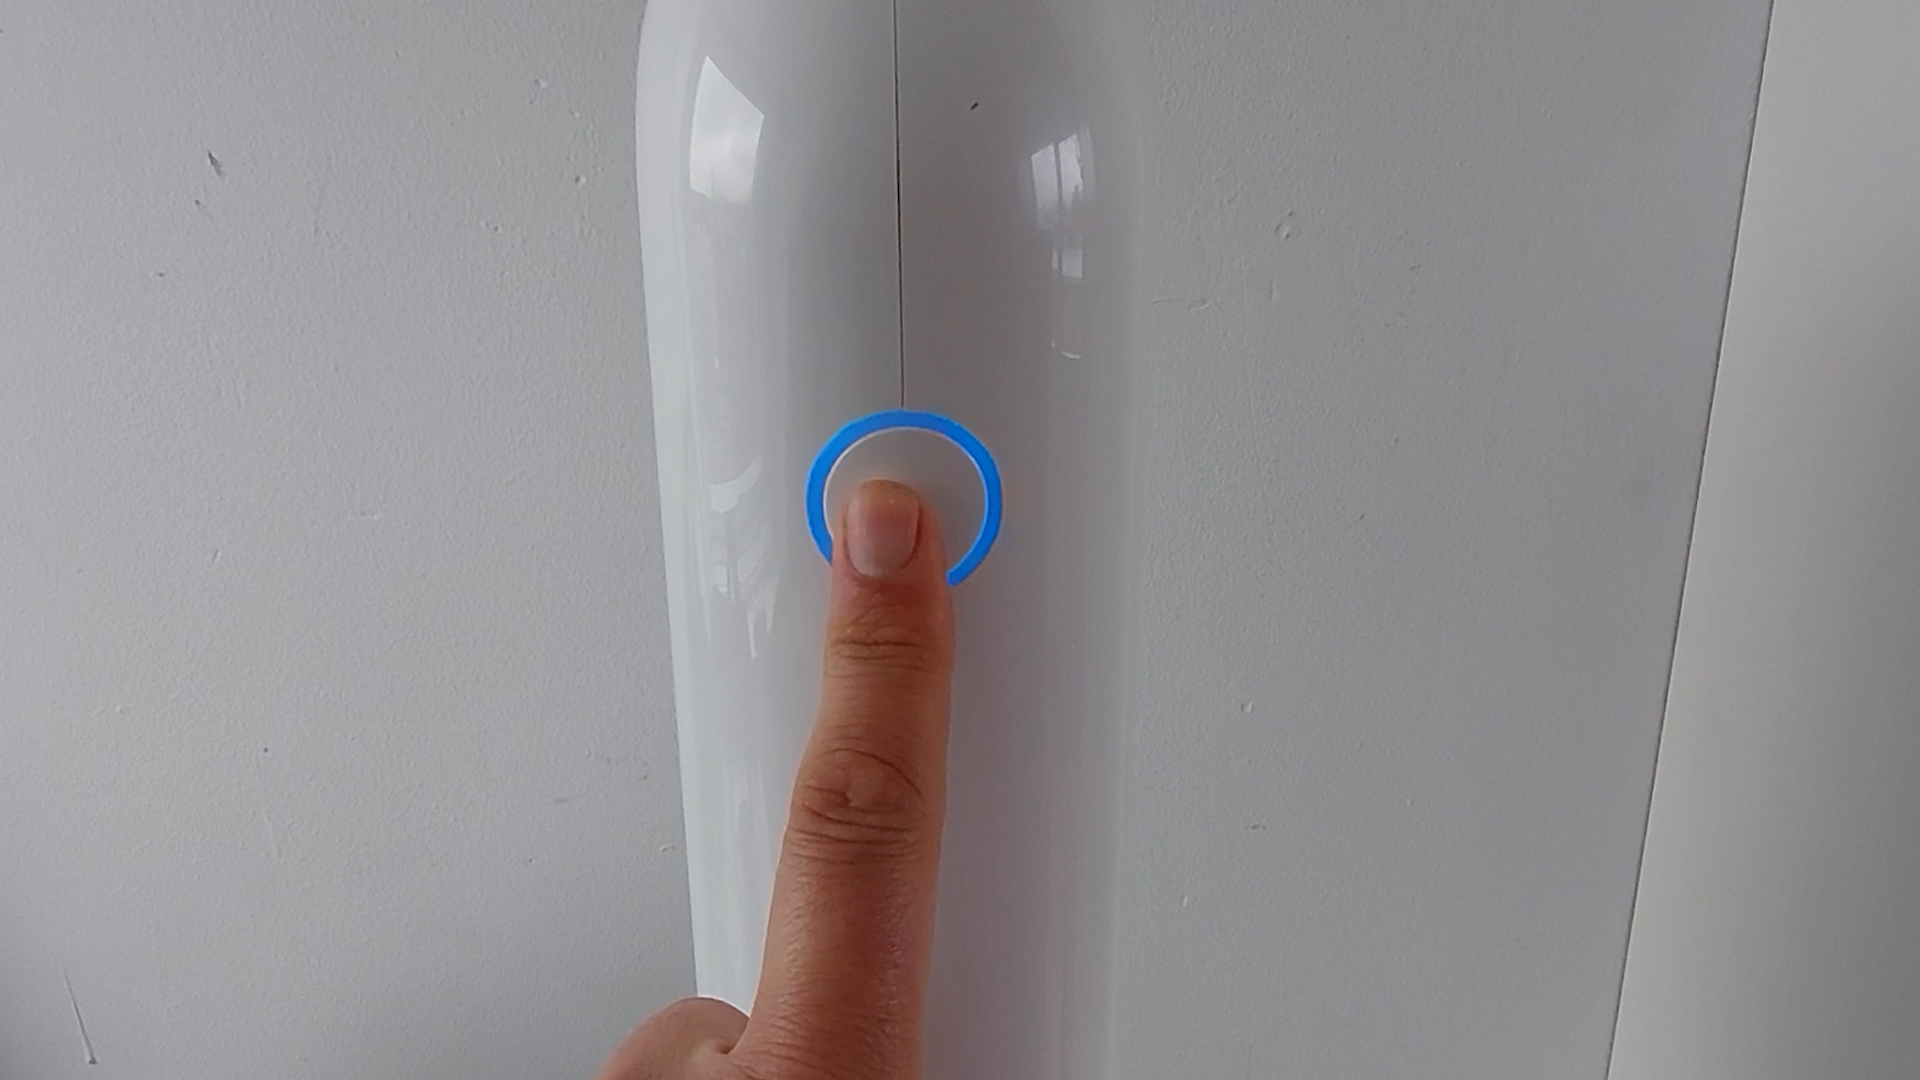
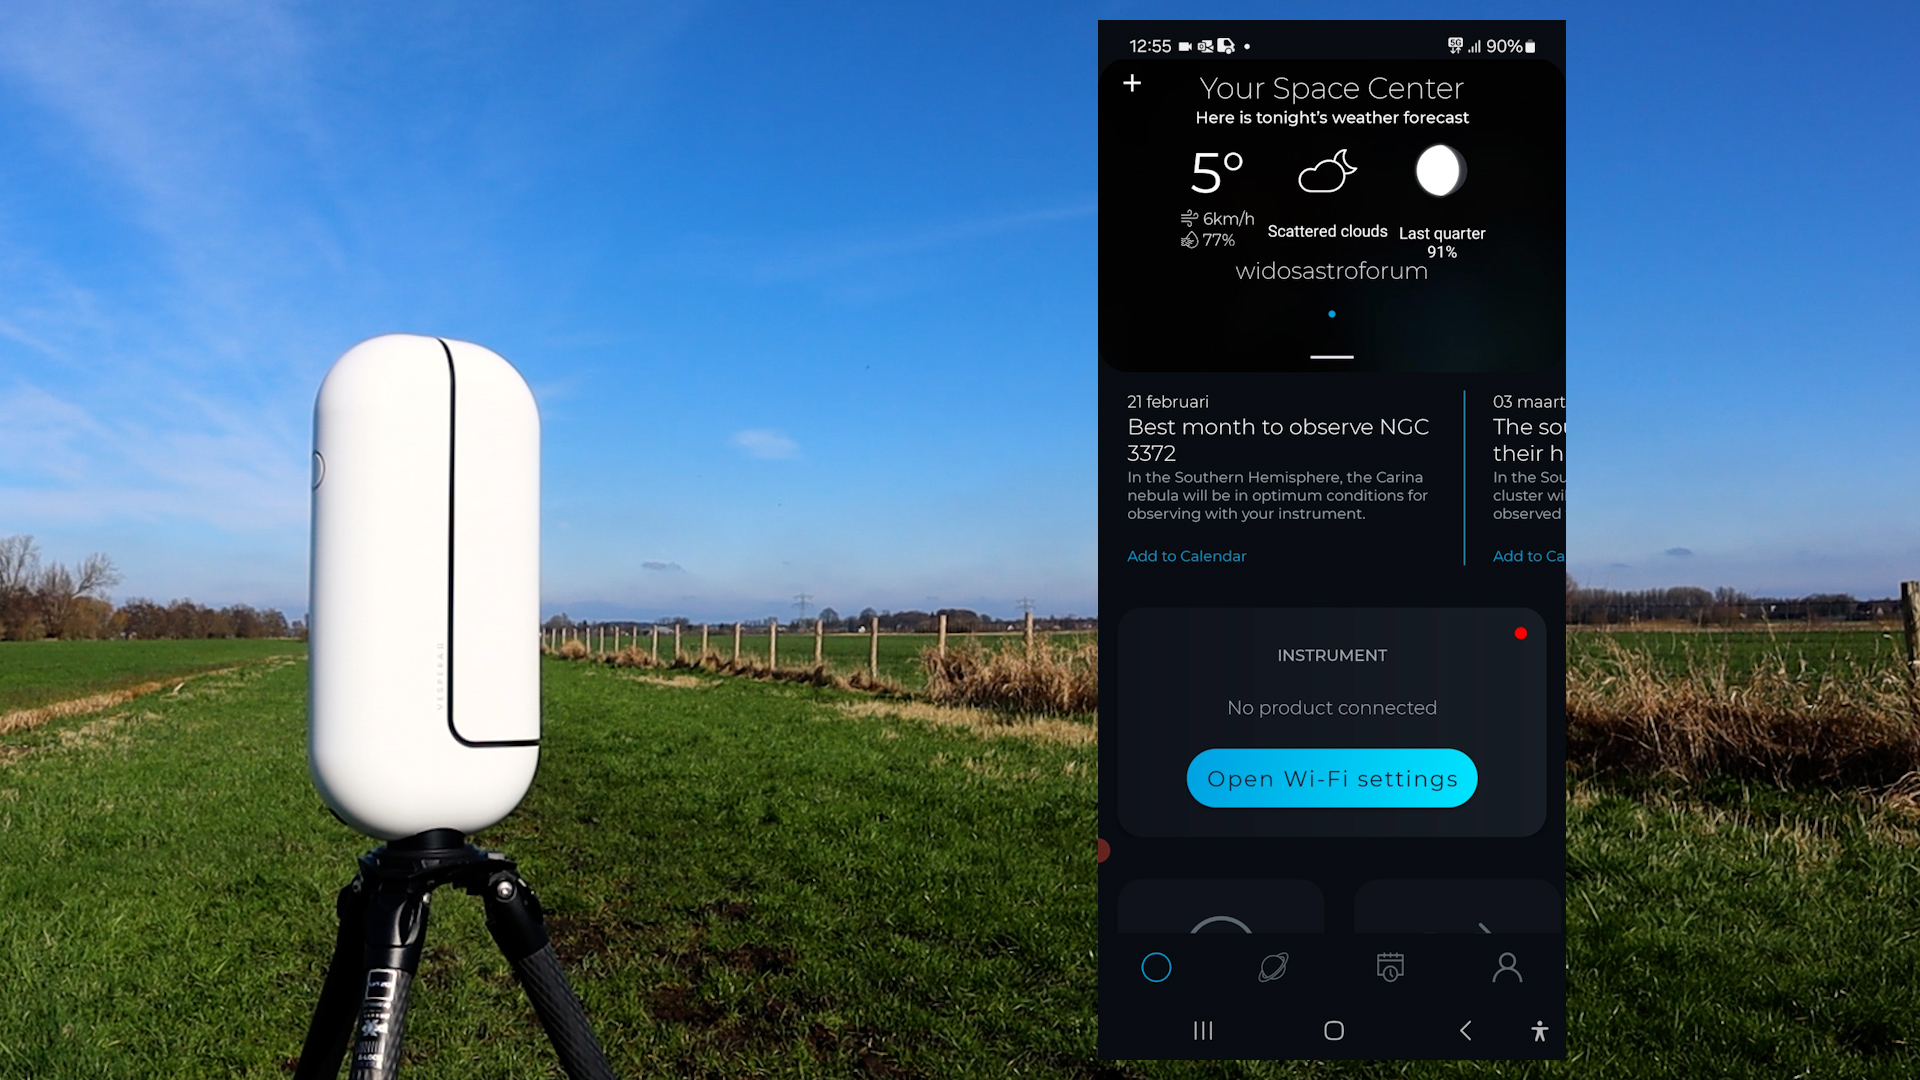
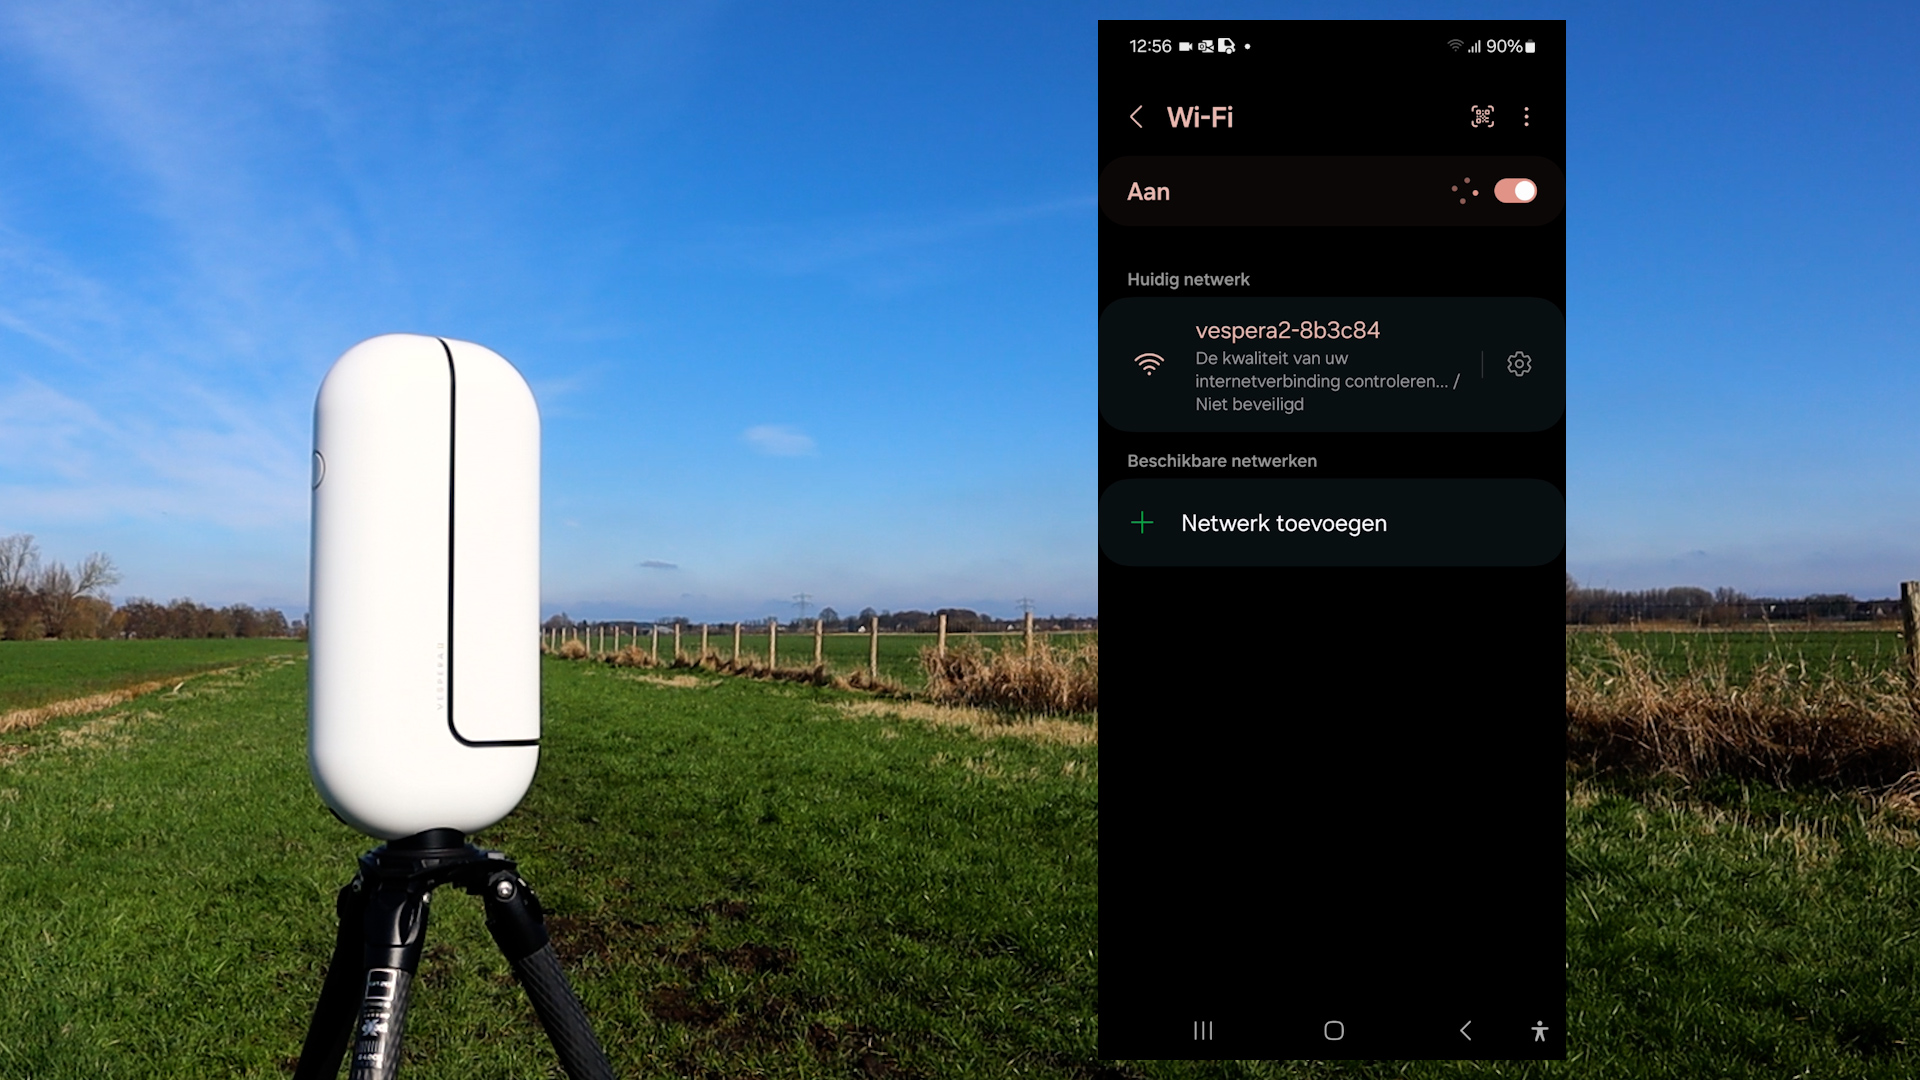
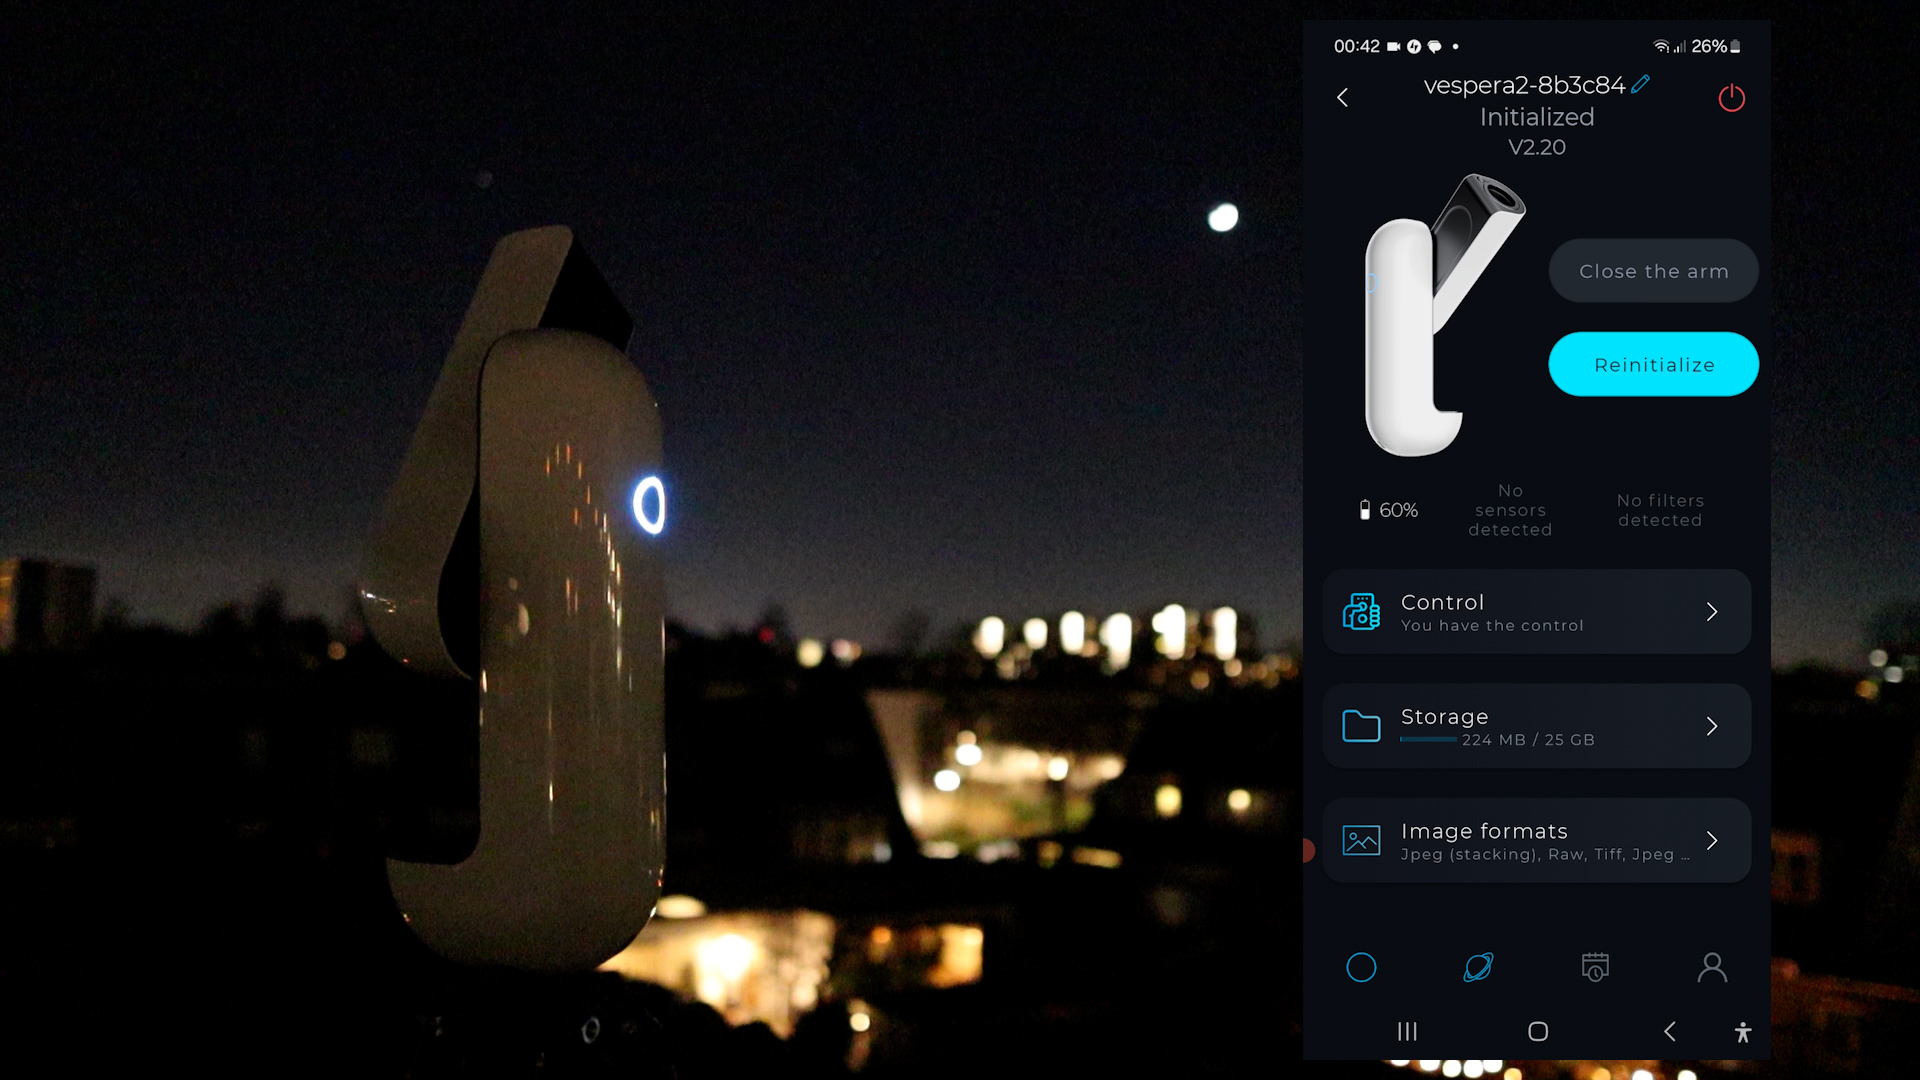
Once installed, open the APP and connect to the WiFi signal of the Vespera II to control the telescope. Simply push the large round button on the Vespera II. When it starts flashing in blue, it is ready to connect. Click on ‘Open Wi-Fi settings’ on the main screen of the APP, select the Vespera WiFi signal, and return to the APP. Once connected, the APP displays the name of the telescope.
Capturing the Sun with the Vaonis Vespera II
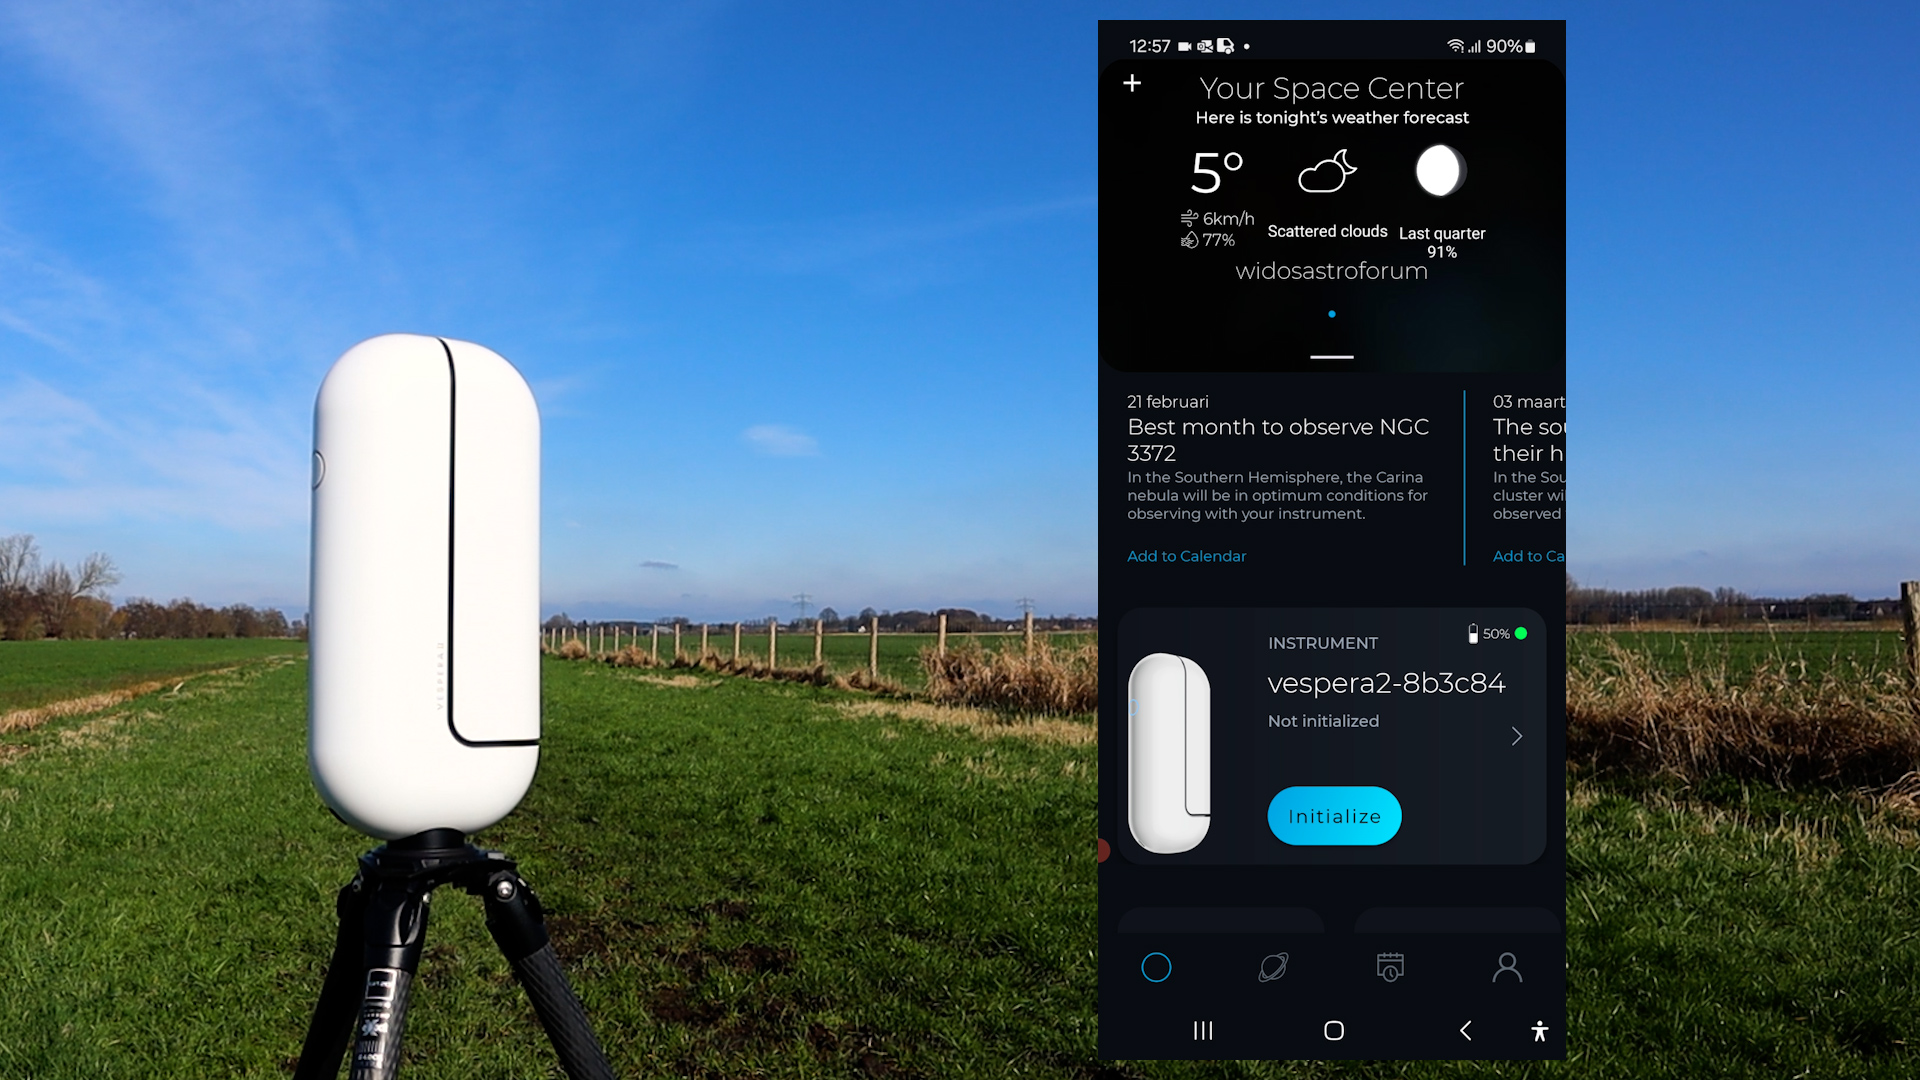
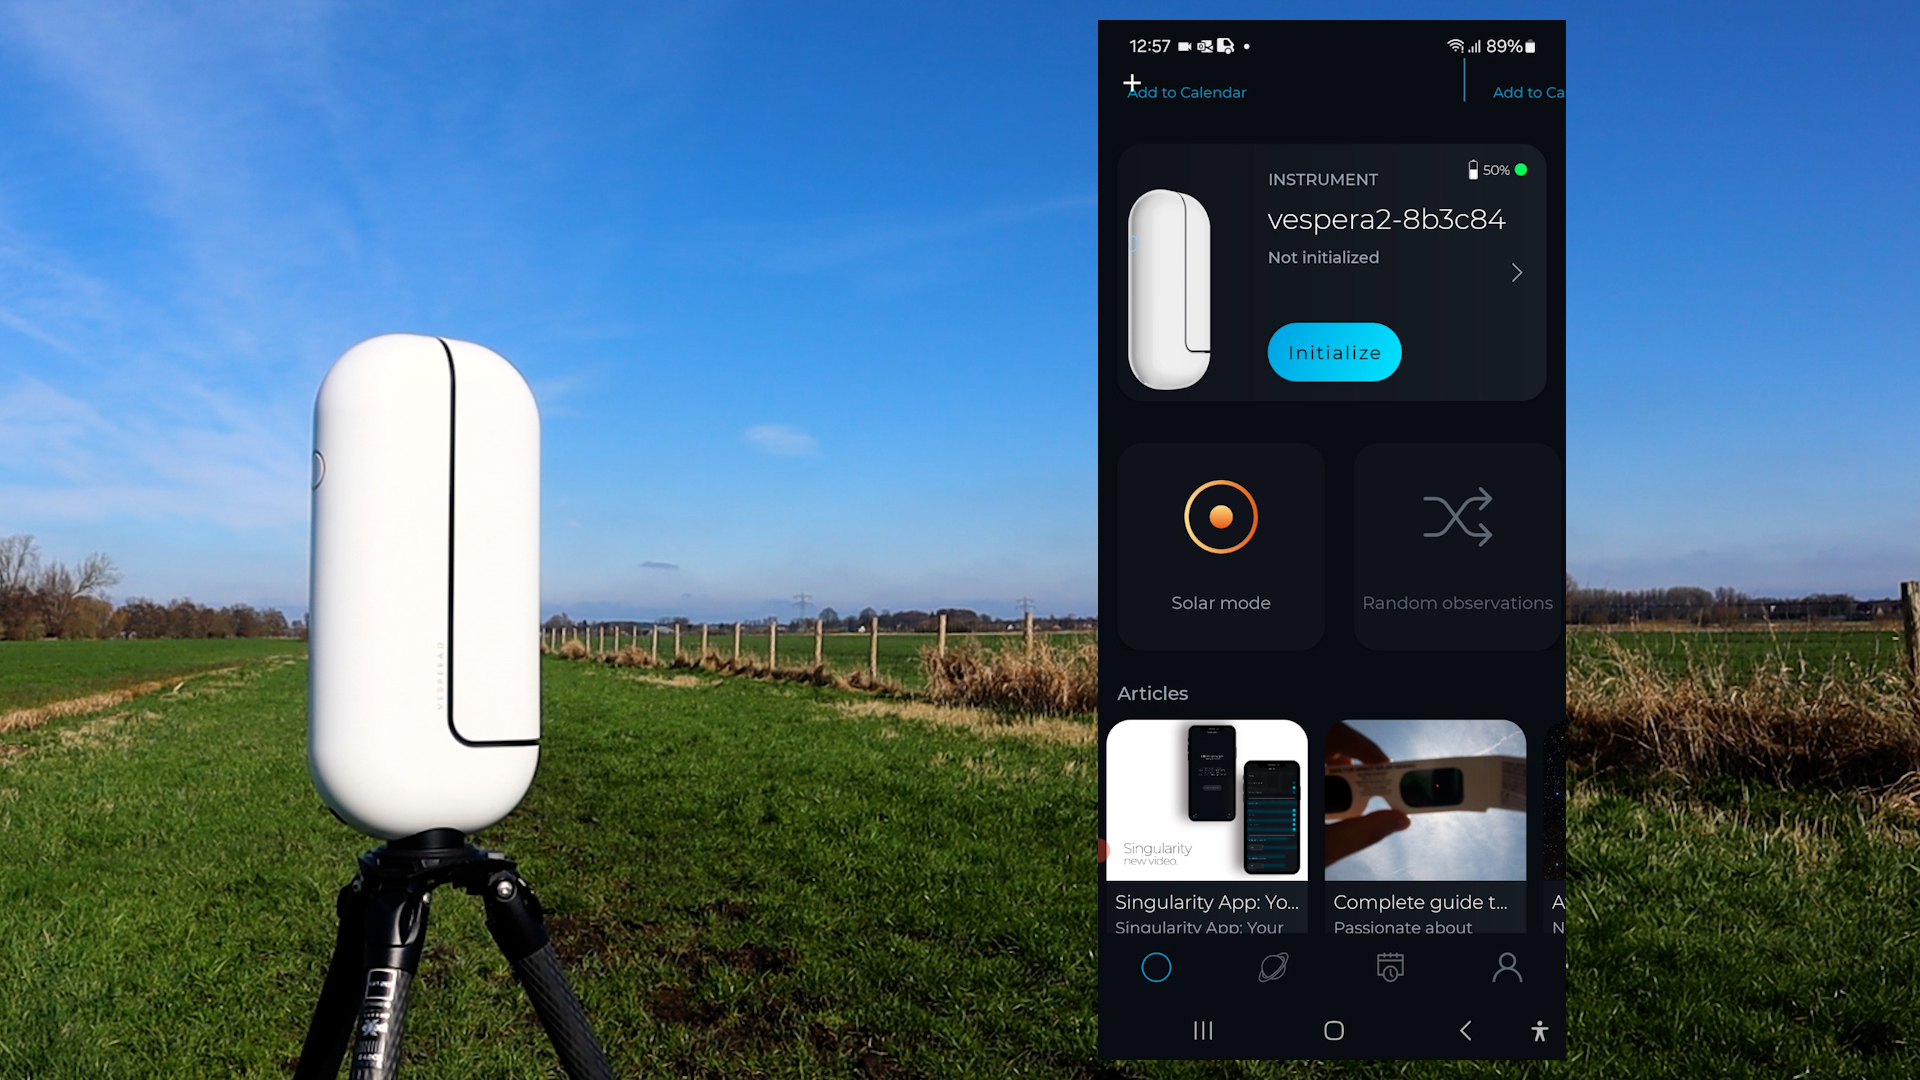
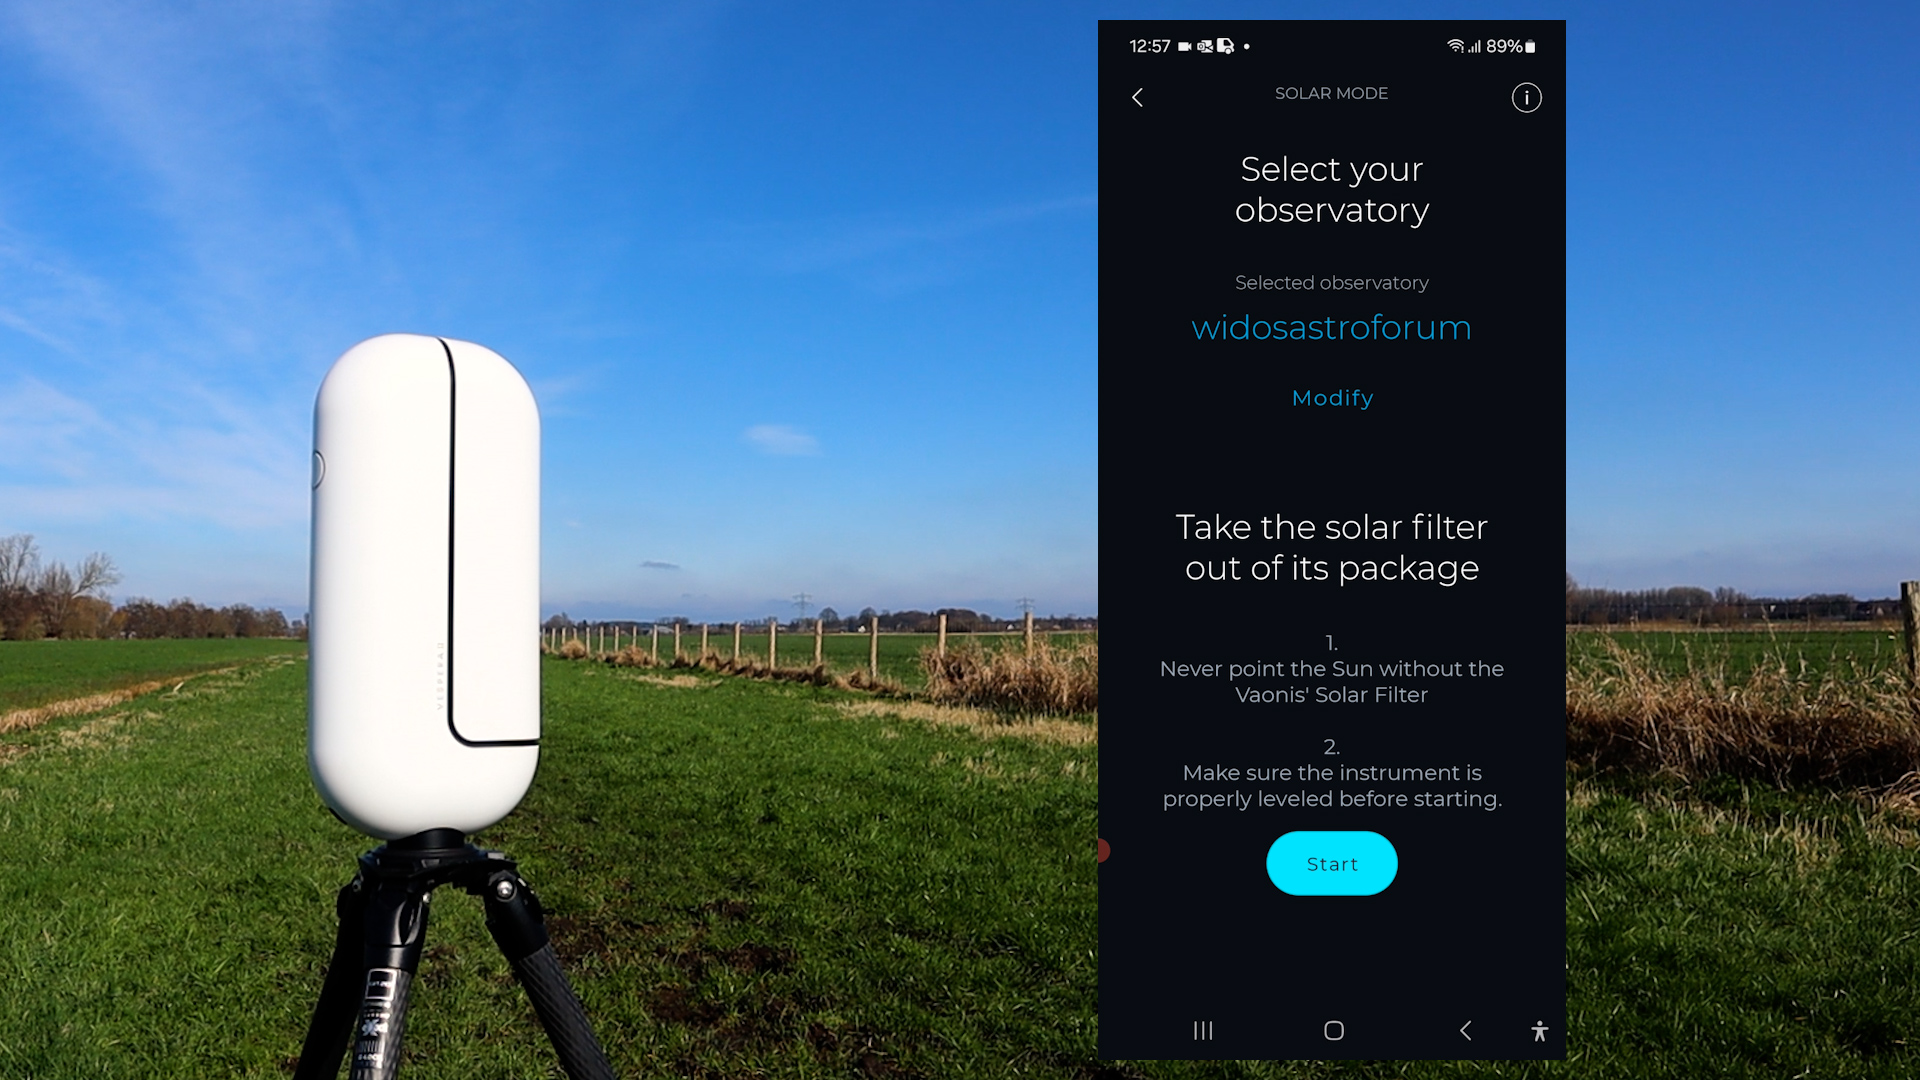
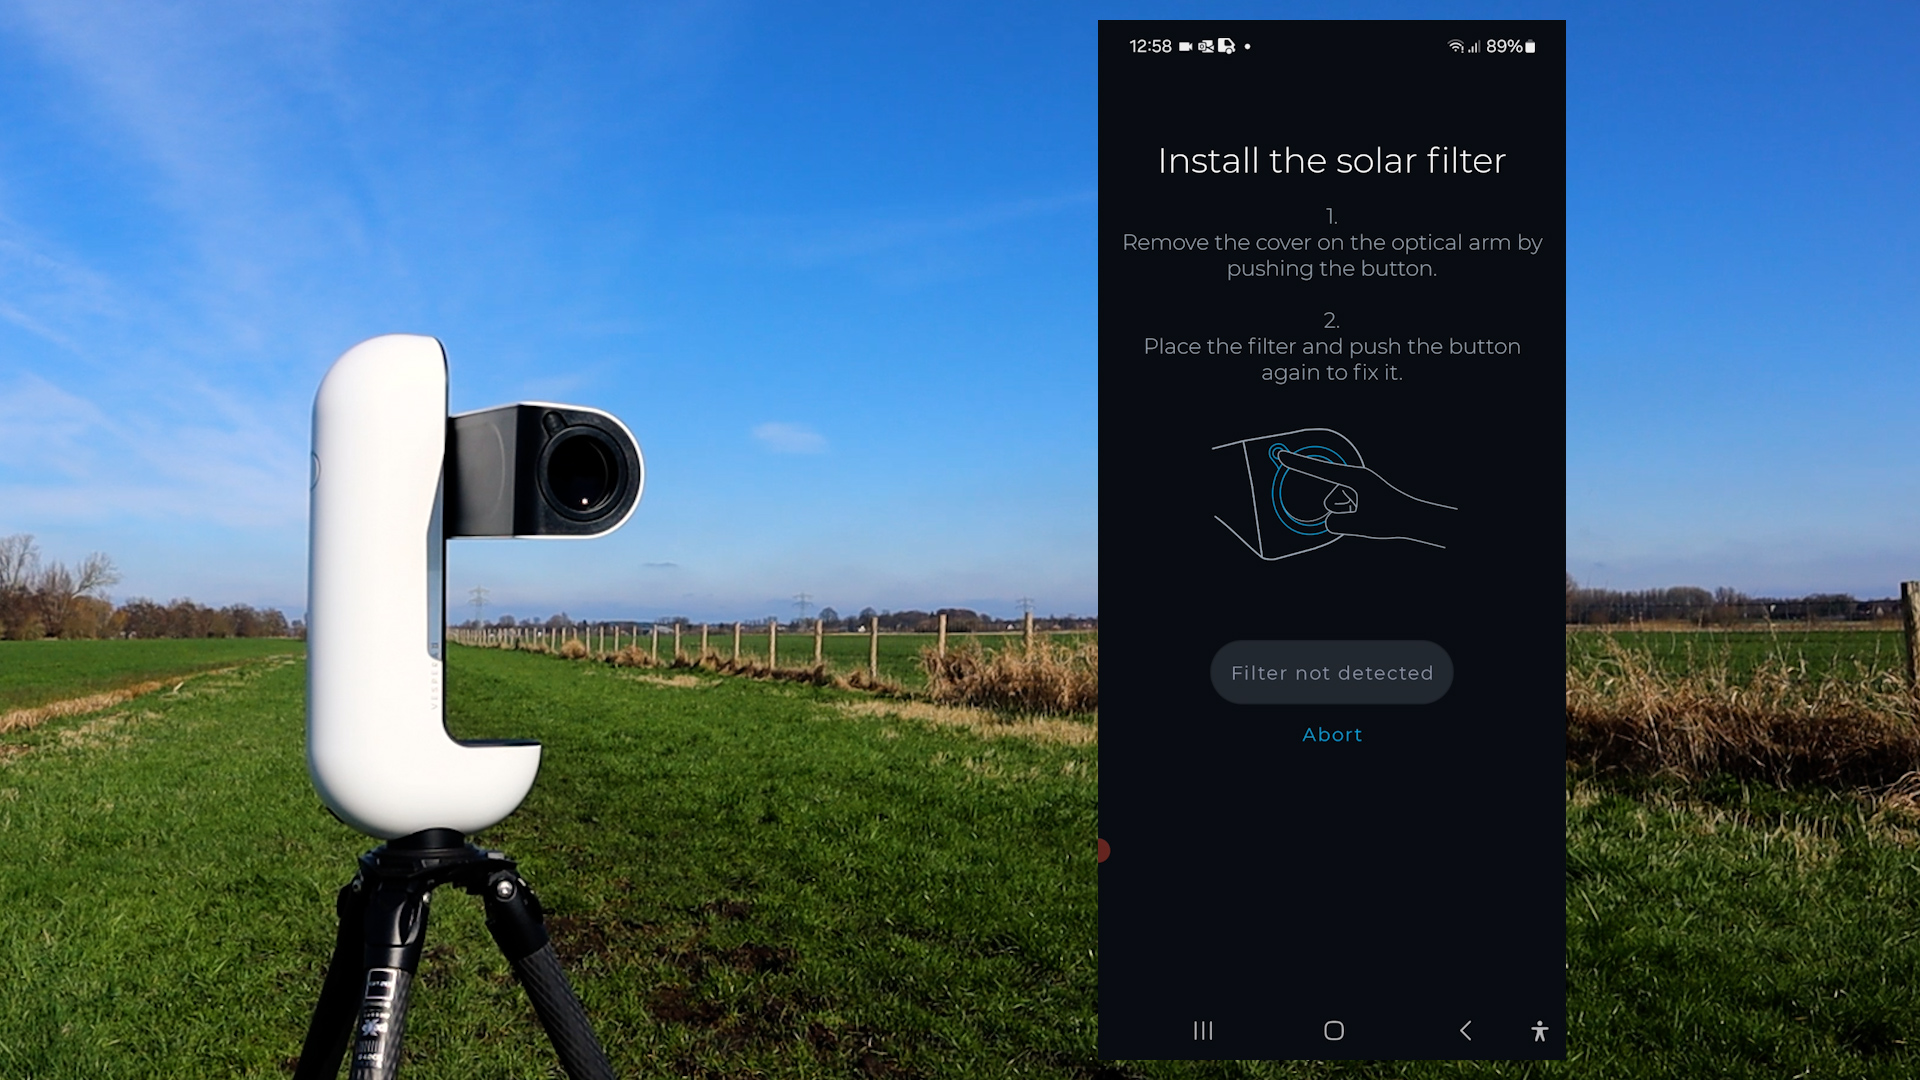
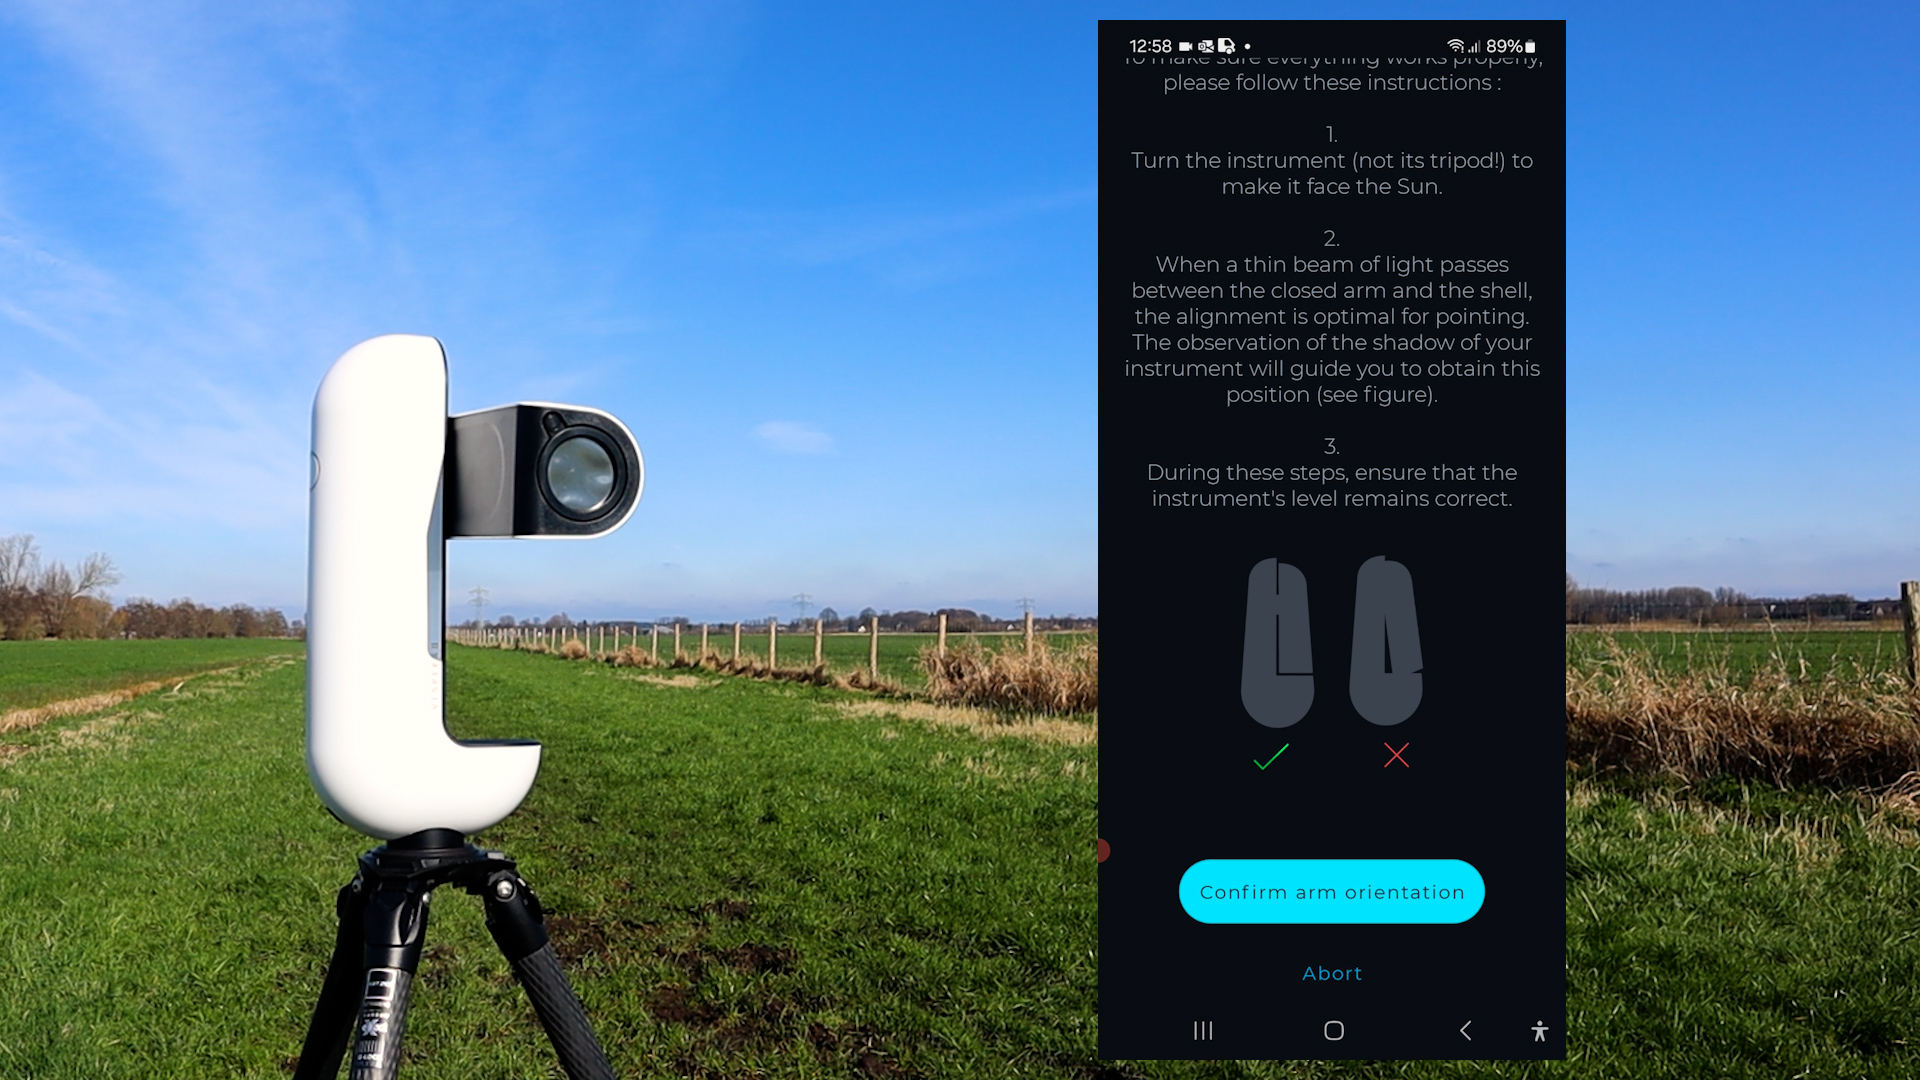
To observe the sun with the Vespera II, select the solar mode on the main screen. The Vespera II will start moving its arm to about 45 degrees, after which it will indicate that you need to install the solar filter. This is pretty easy; just remove the dummy filter by clicking on it and replace it with the solar filter. After that, make sure the Vespera II is level and facing the sun by using the info in the APP, and remember, never look directly at the Sun as it can cause blindness.
It takes the Vespera II a couple of minutes to align and autofocus on the sun, during which the APP displays interesting information about the Sun. When aligned and focused, the Vespera II will show you the characteristic blue button, after which it will display a live view of the Sun.
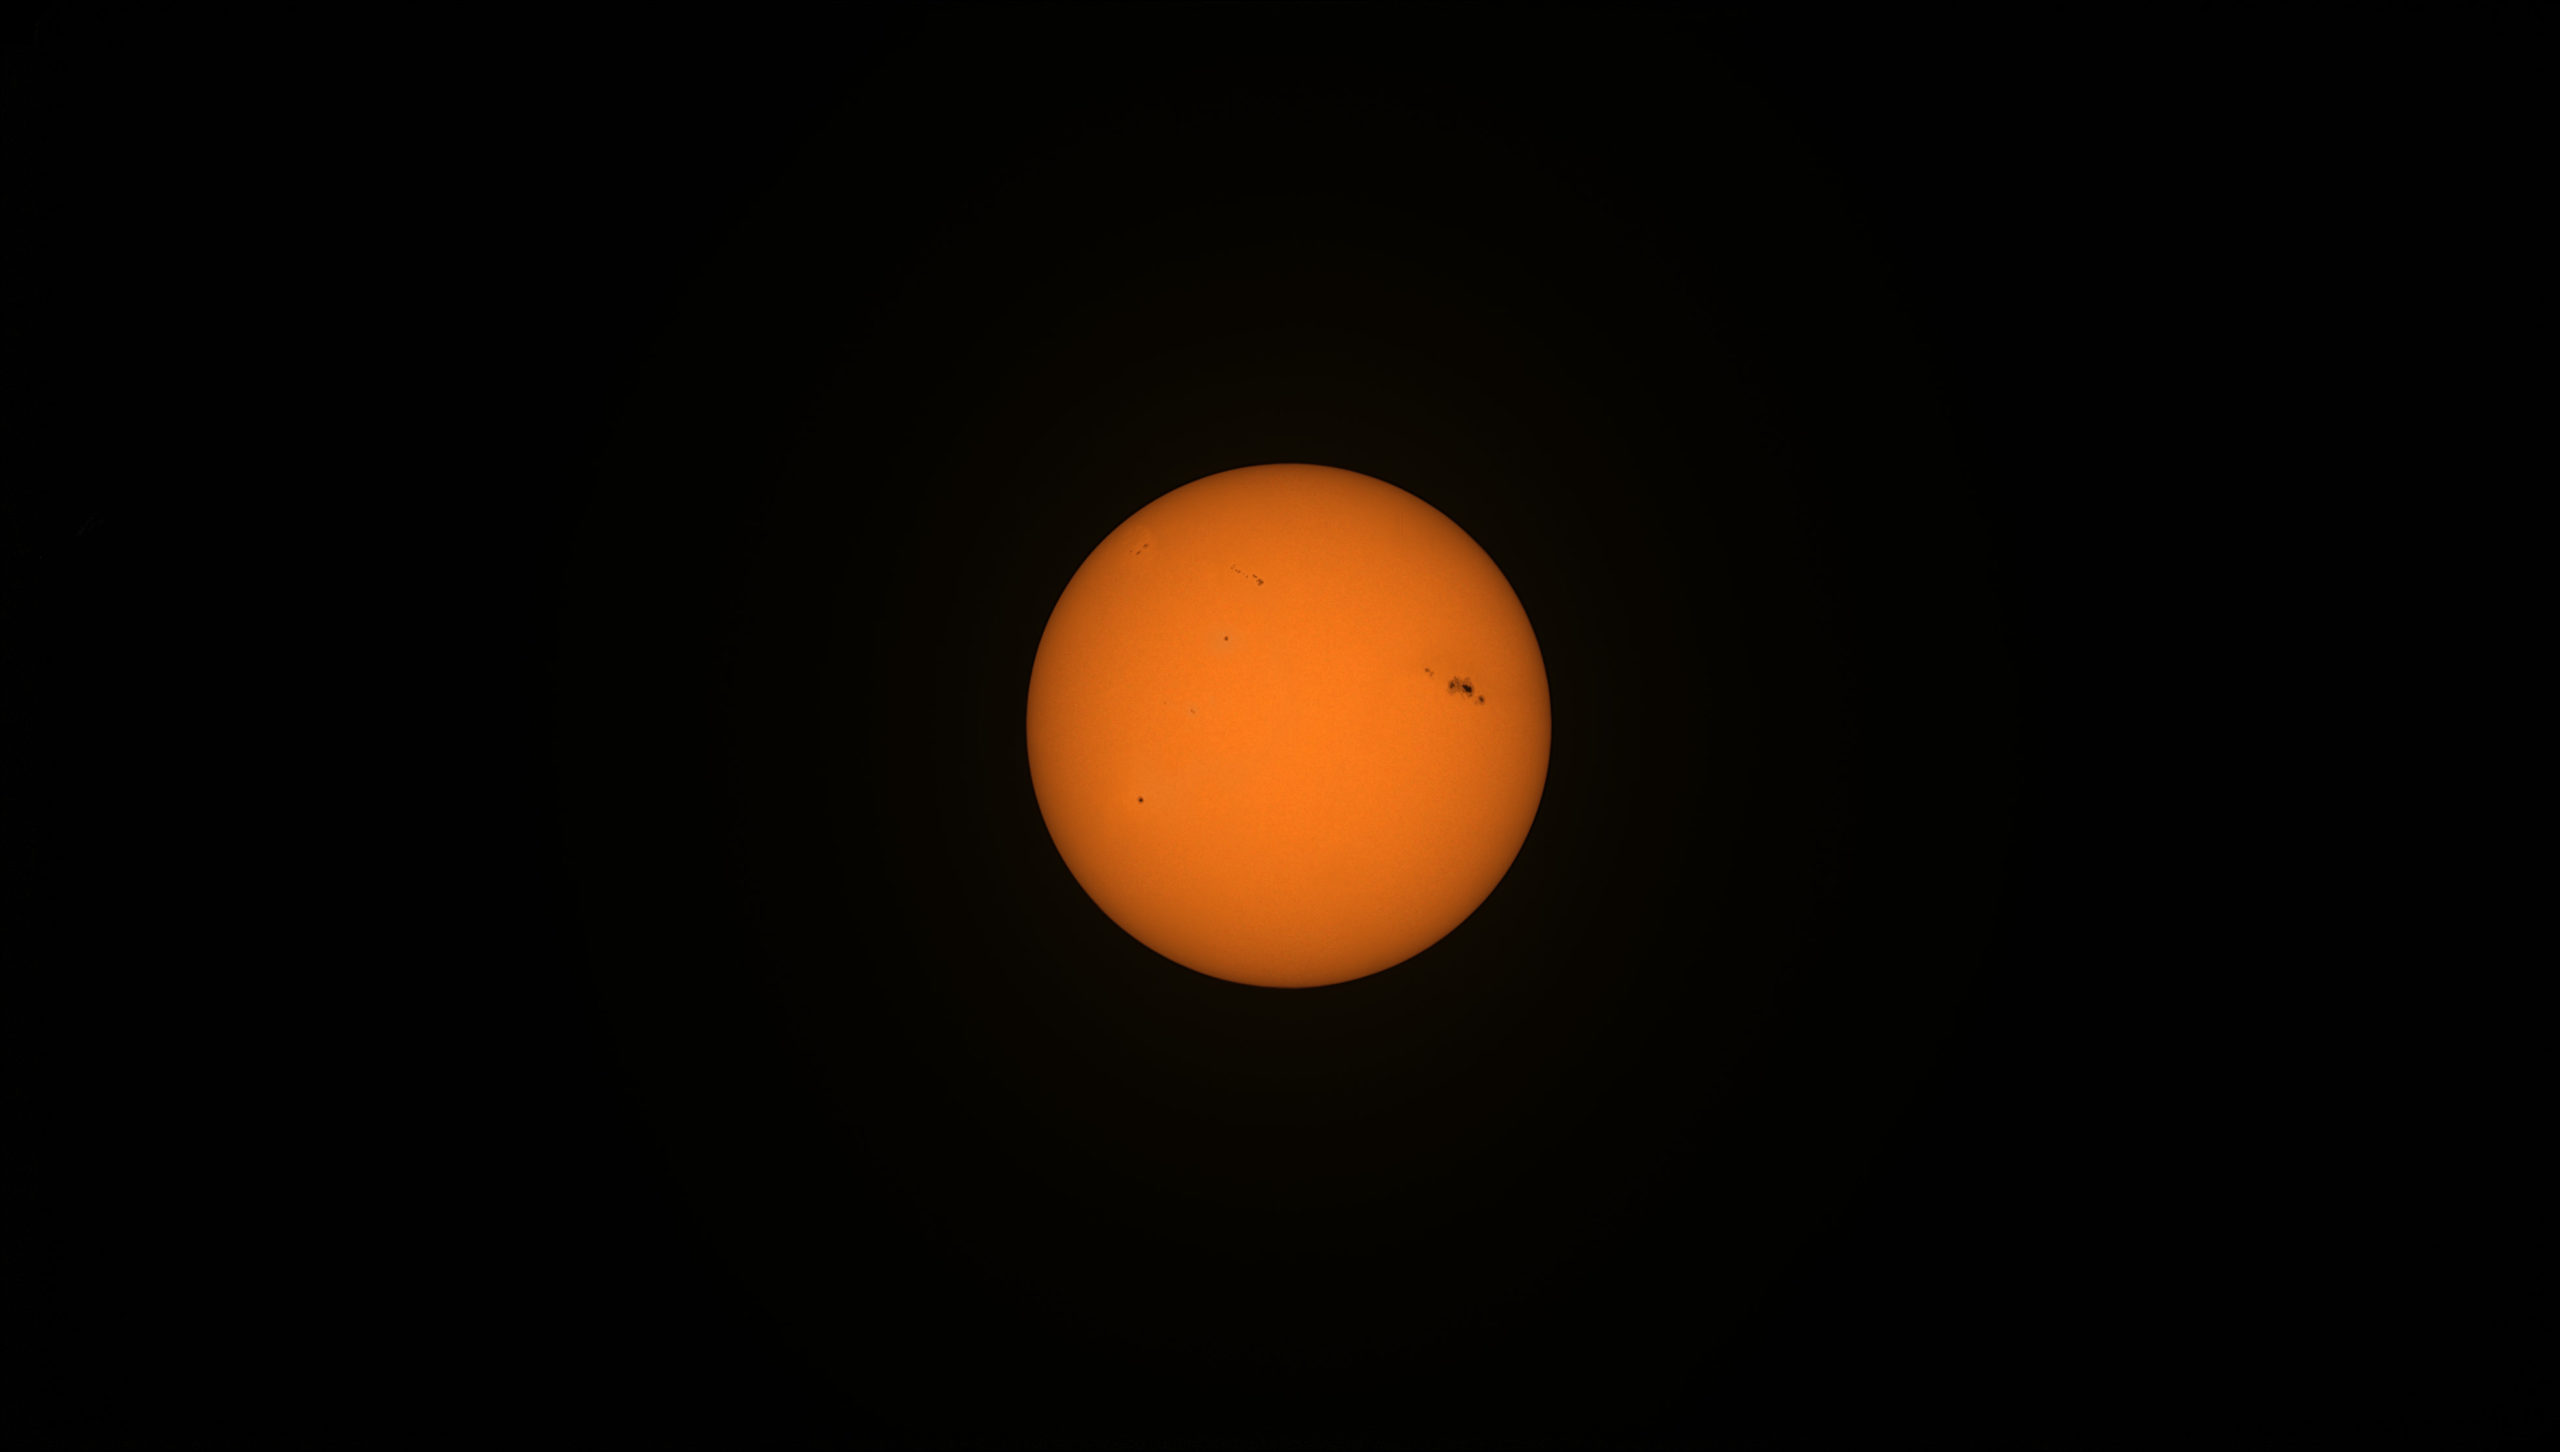
The sky was a bit hazy, but I could clearly see the sunspots in the Singularity app. There was actually a huge area of 25 sunspots, called group 3590, about 7 times the diameter of the Earth in size. We are moving towards a solar maximum in 2024, so you can see plenty of sunspots this year! You can pinch the screen of your smart device to zoom in on the sunspots in the app.
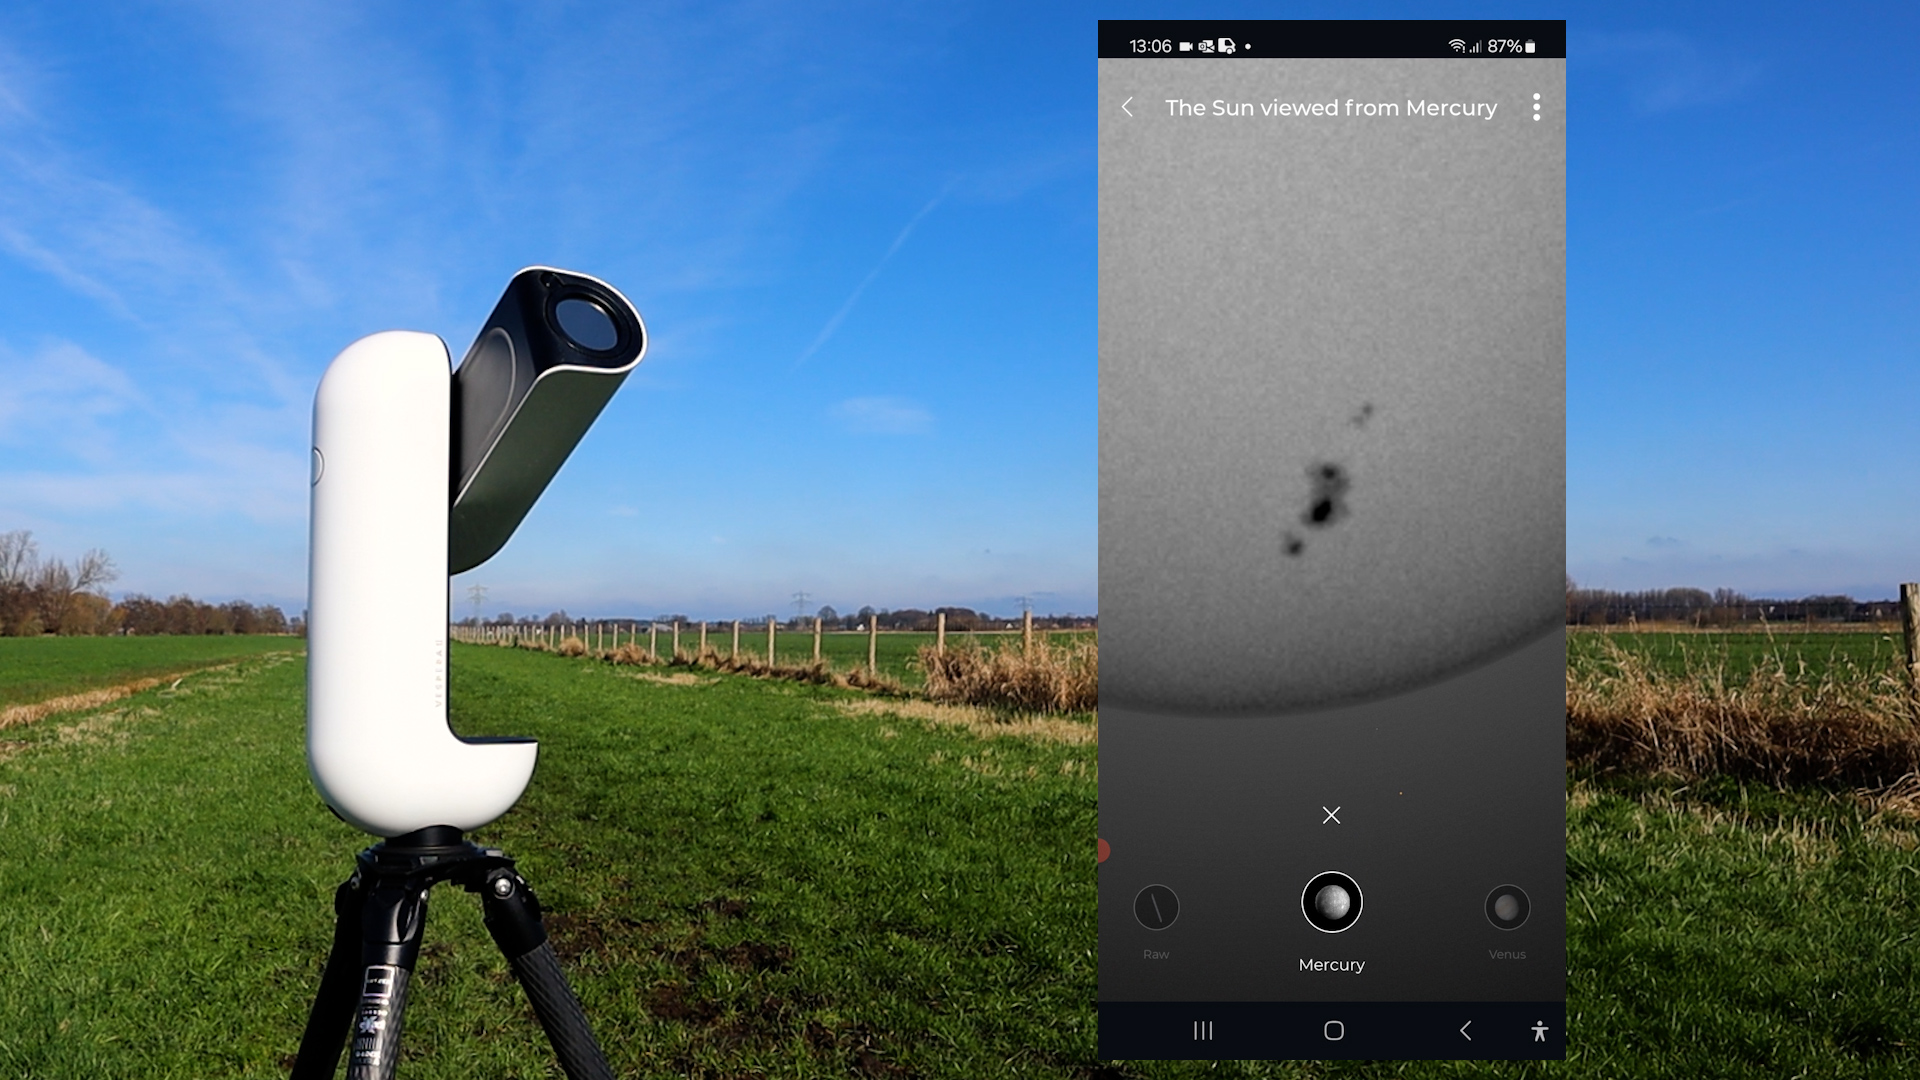
The solar mode is pretty straightforward. It contains a nice solar system option that will show you what the size of the sun would be when observed from different planets in our solar system. I’d advise you to check out the view of Mercury, which is about 3 times closer to the Sun than Earth.

You can easily take a photo of the Sun by clicking on the photo button or by clicking on ‘save photo’ in the menu on the top right. When you’re done observing, just click the red stop button, and the arm will move to 45 degrees again, after which you can remove the solar filter.
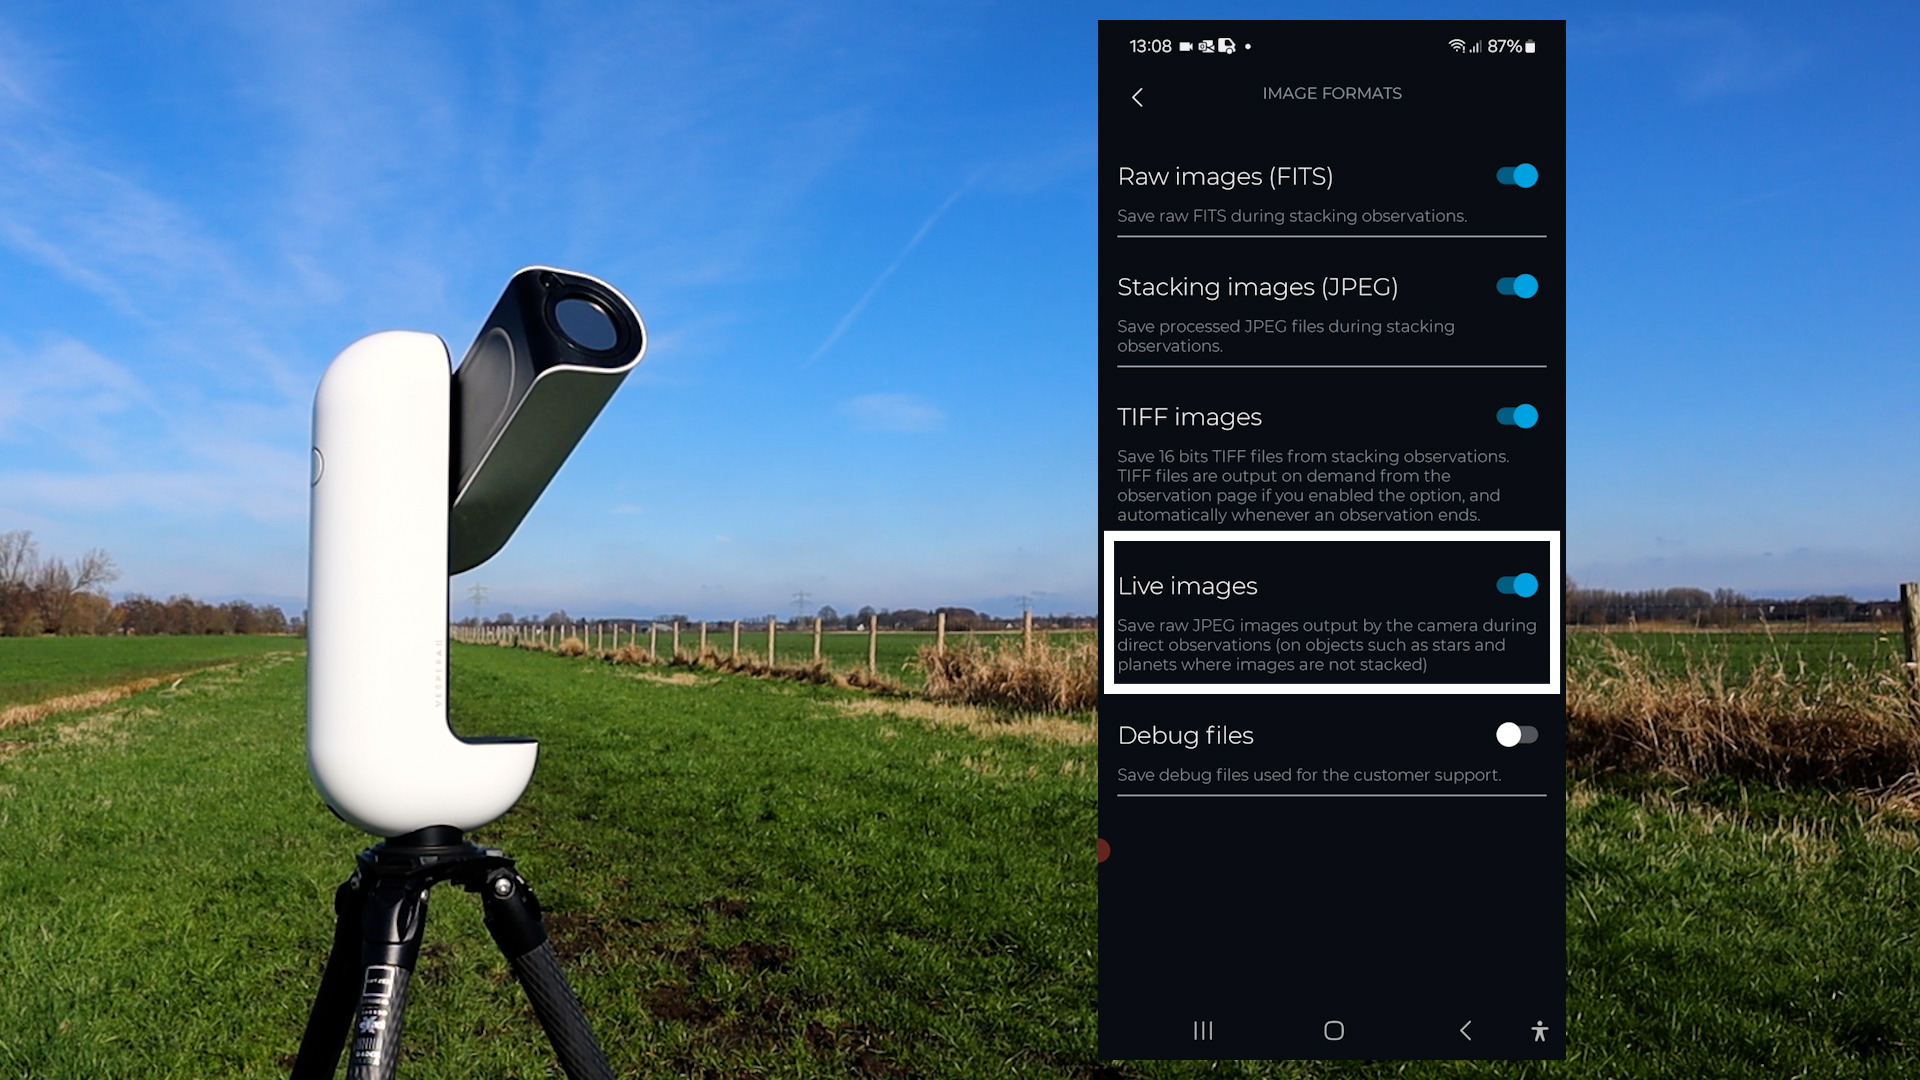
If you want to record all the pictures of a live session, go into image format mode and select live images. This mode will save every picture taken during a live observation session of the Sun, the Moon, or the planets, in JPEG format. It was pretty hazy during my observation sessions, but here’s my image of the Sun taken with the Vespera II, including that huge sunspot group.
Observing the Moon with the Vaonis Vespera II
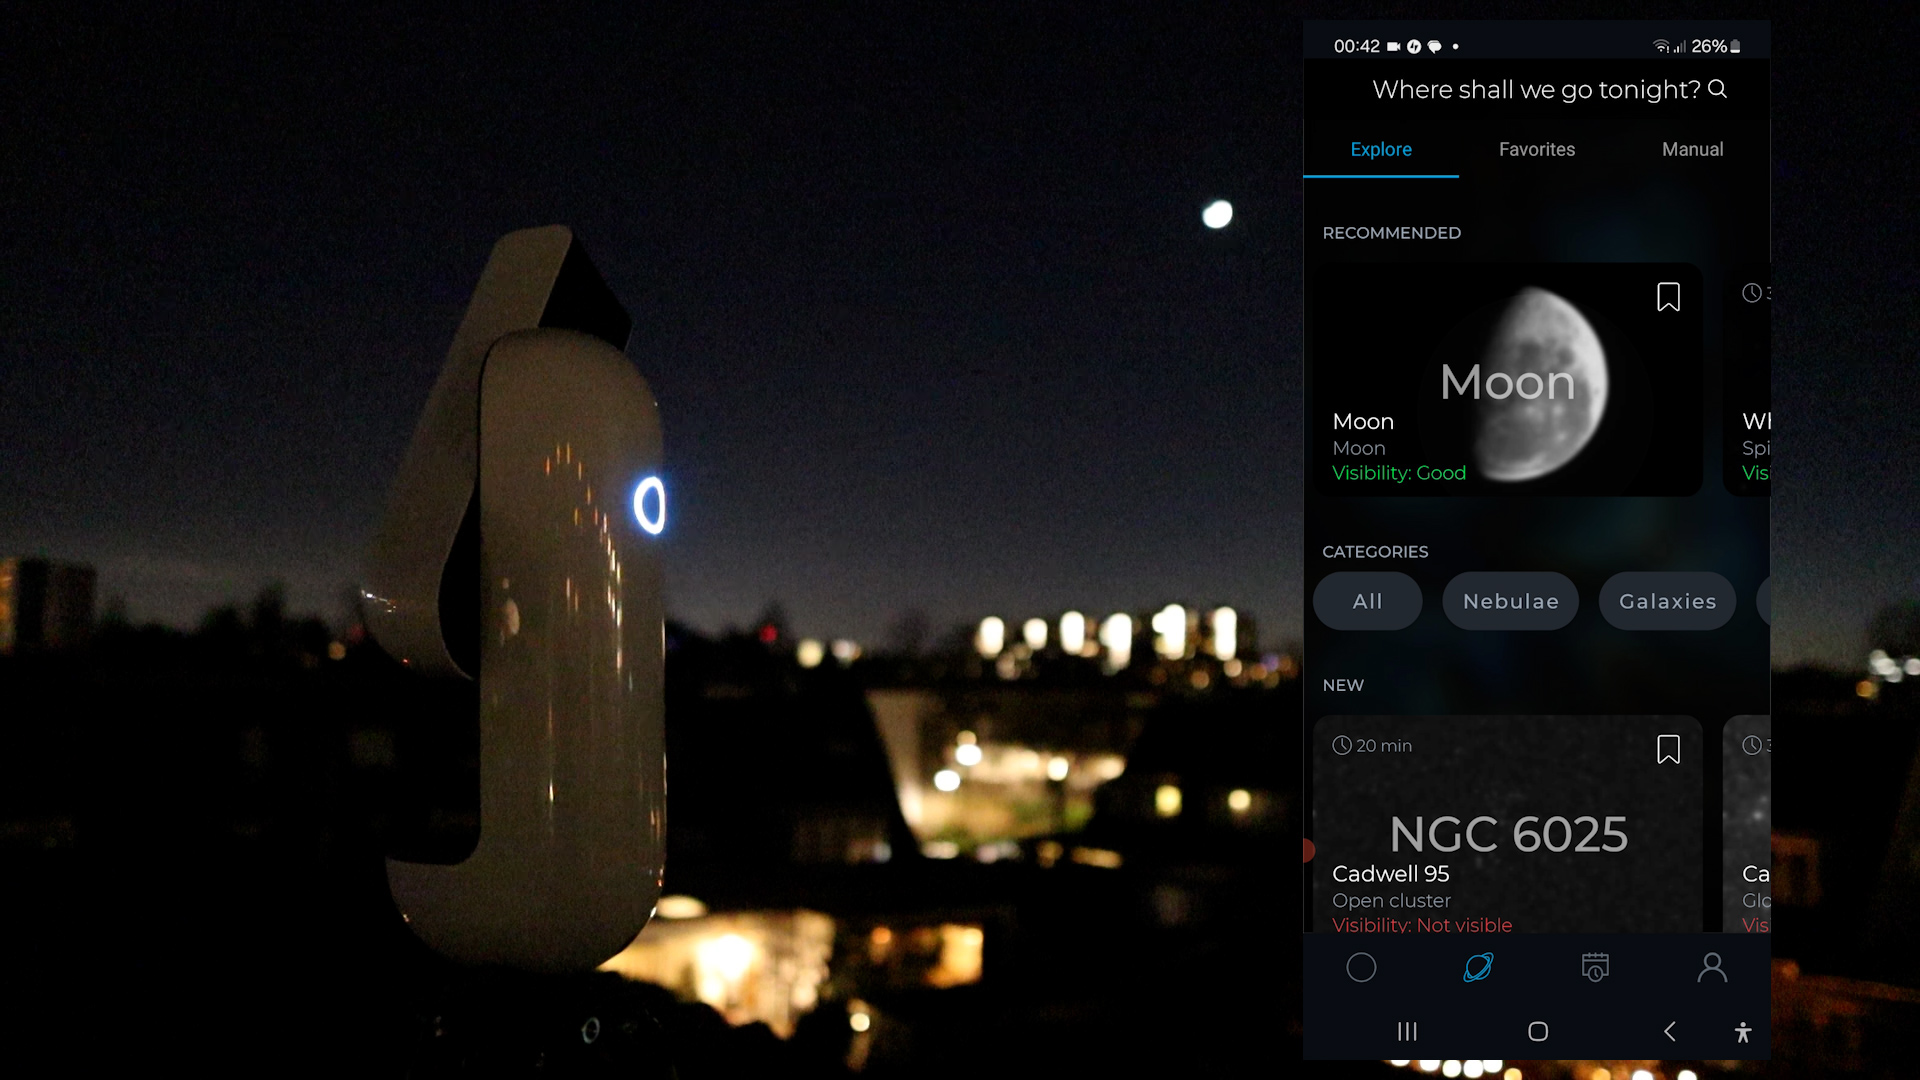
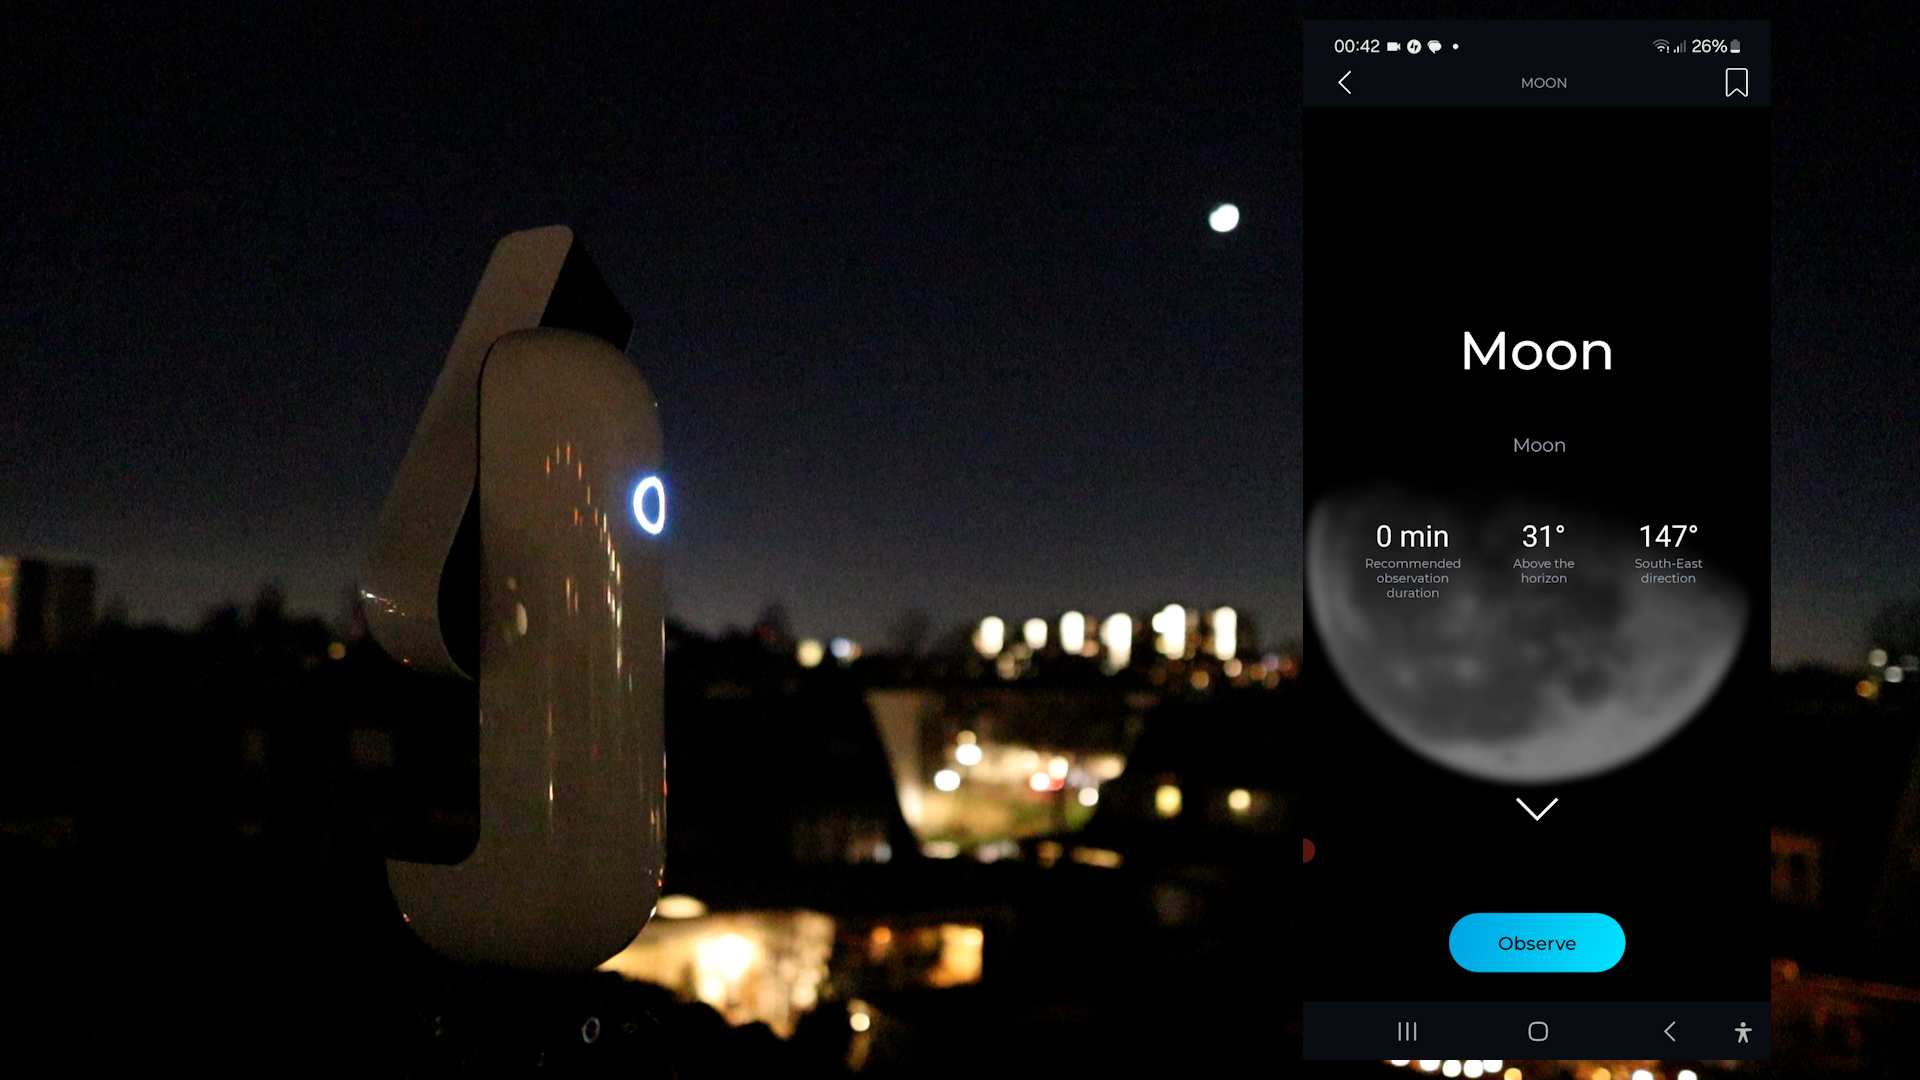
Capturing the Moon parallels the process of capturing the Sun with the Vespera 2, with one key distinction—the telescope requires initialization before Moon capture. To achieve this, wait until it’s sufficiently dark with visible stars, level the mount, and press ‘initialize’ on the main screen of the Singularity APP. The Vespera II takes a few minutes to autofocus on the stars and determine its position. Subsequently, click on the small planet icon at the screen’s bottom, granting access to a diverse database encompassing solar system entities, nebulae, galaxies, star clusters, and other observable objects. A search bar facilitates direct object searches. Choosing the Moon, the Vespera II swiftly slews and autofocuses on it within two minutes, providing a live view akin to the Sun.
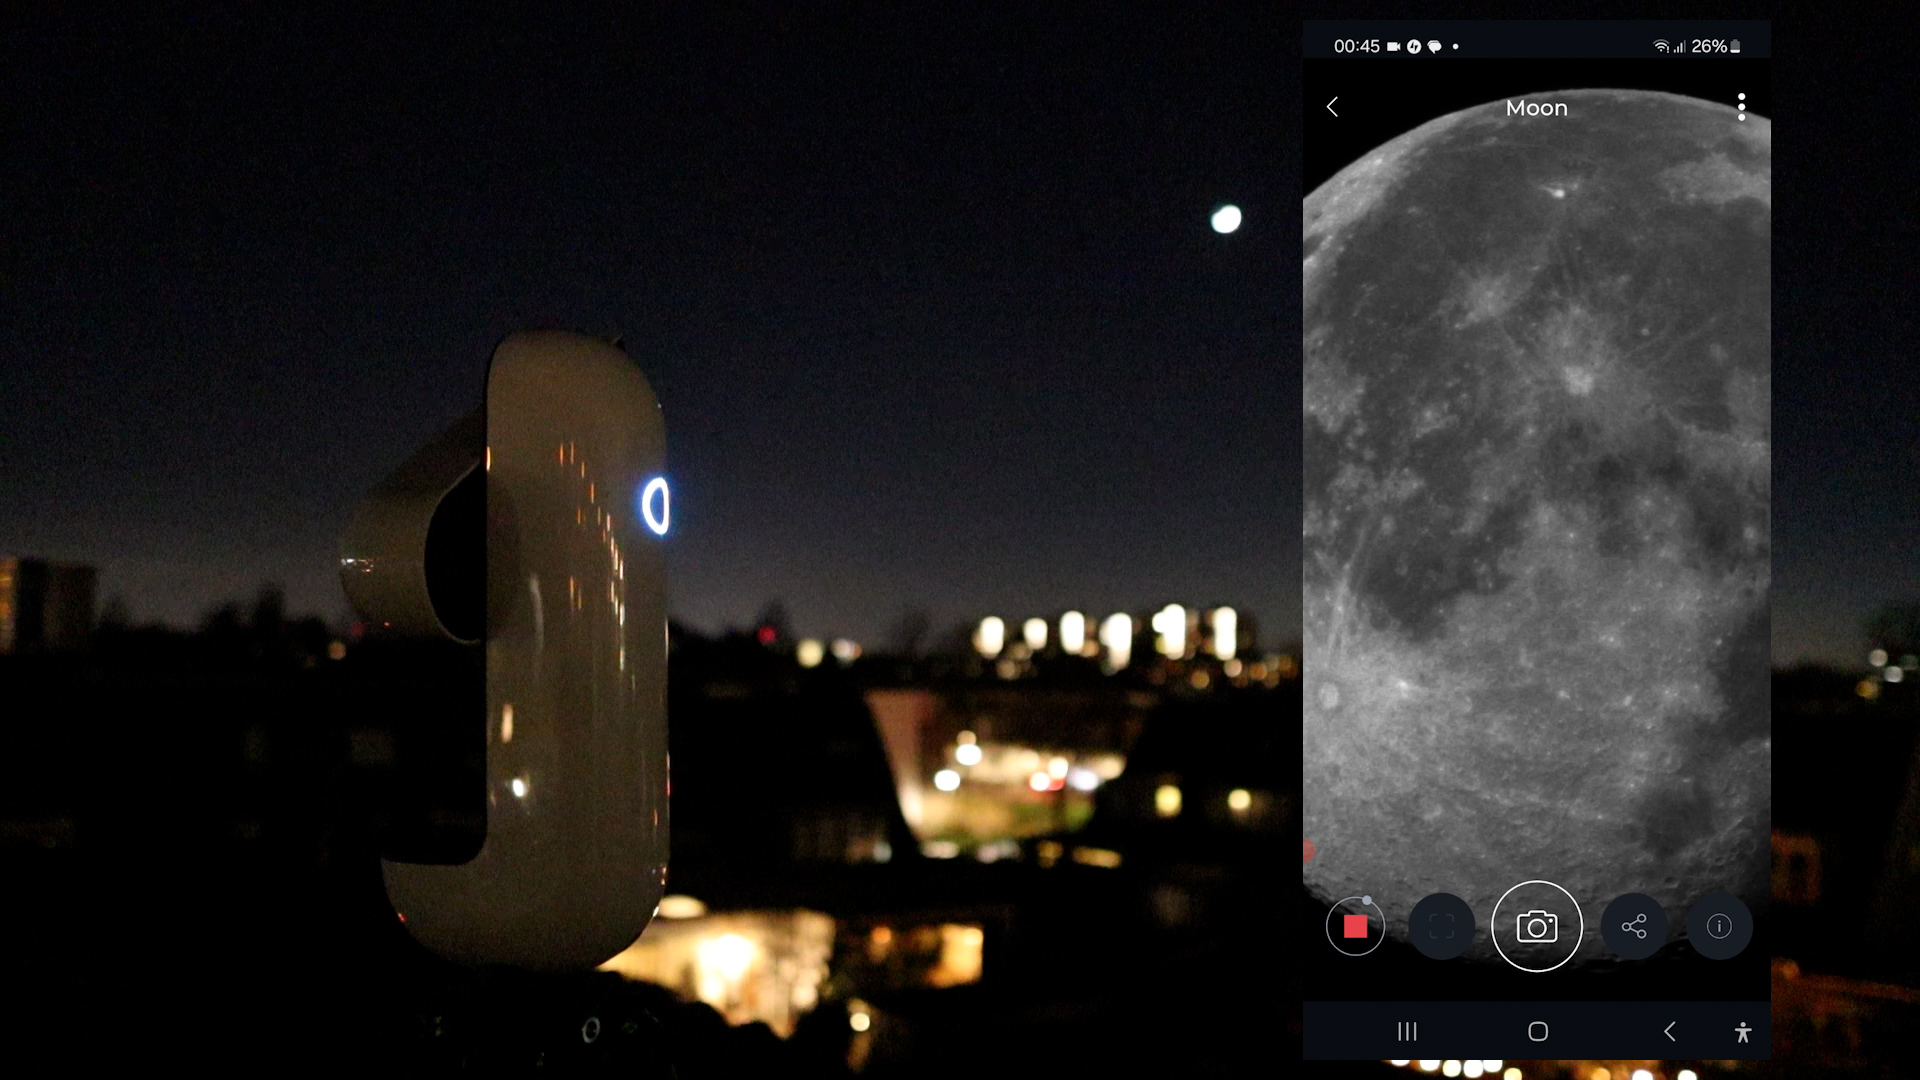
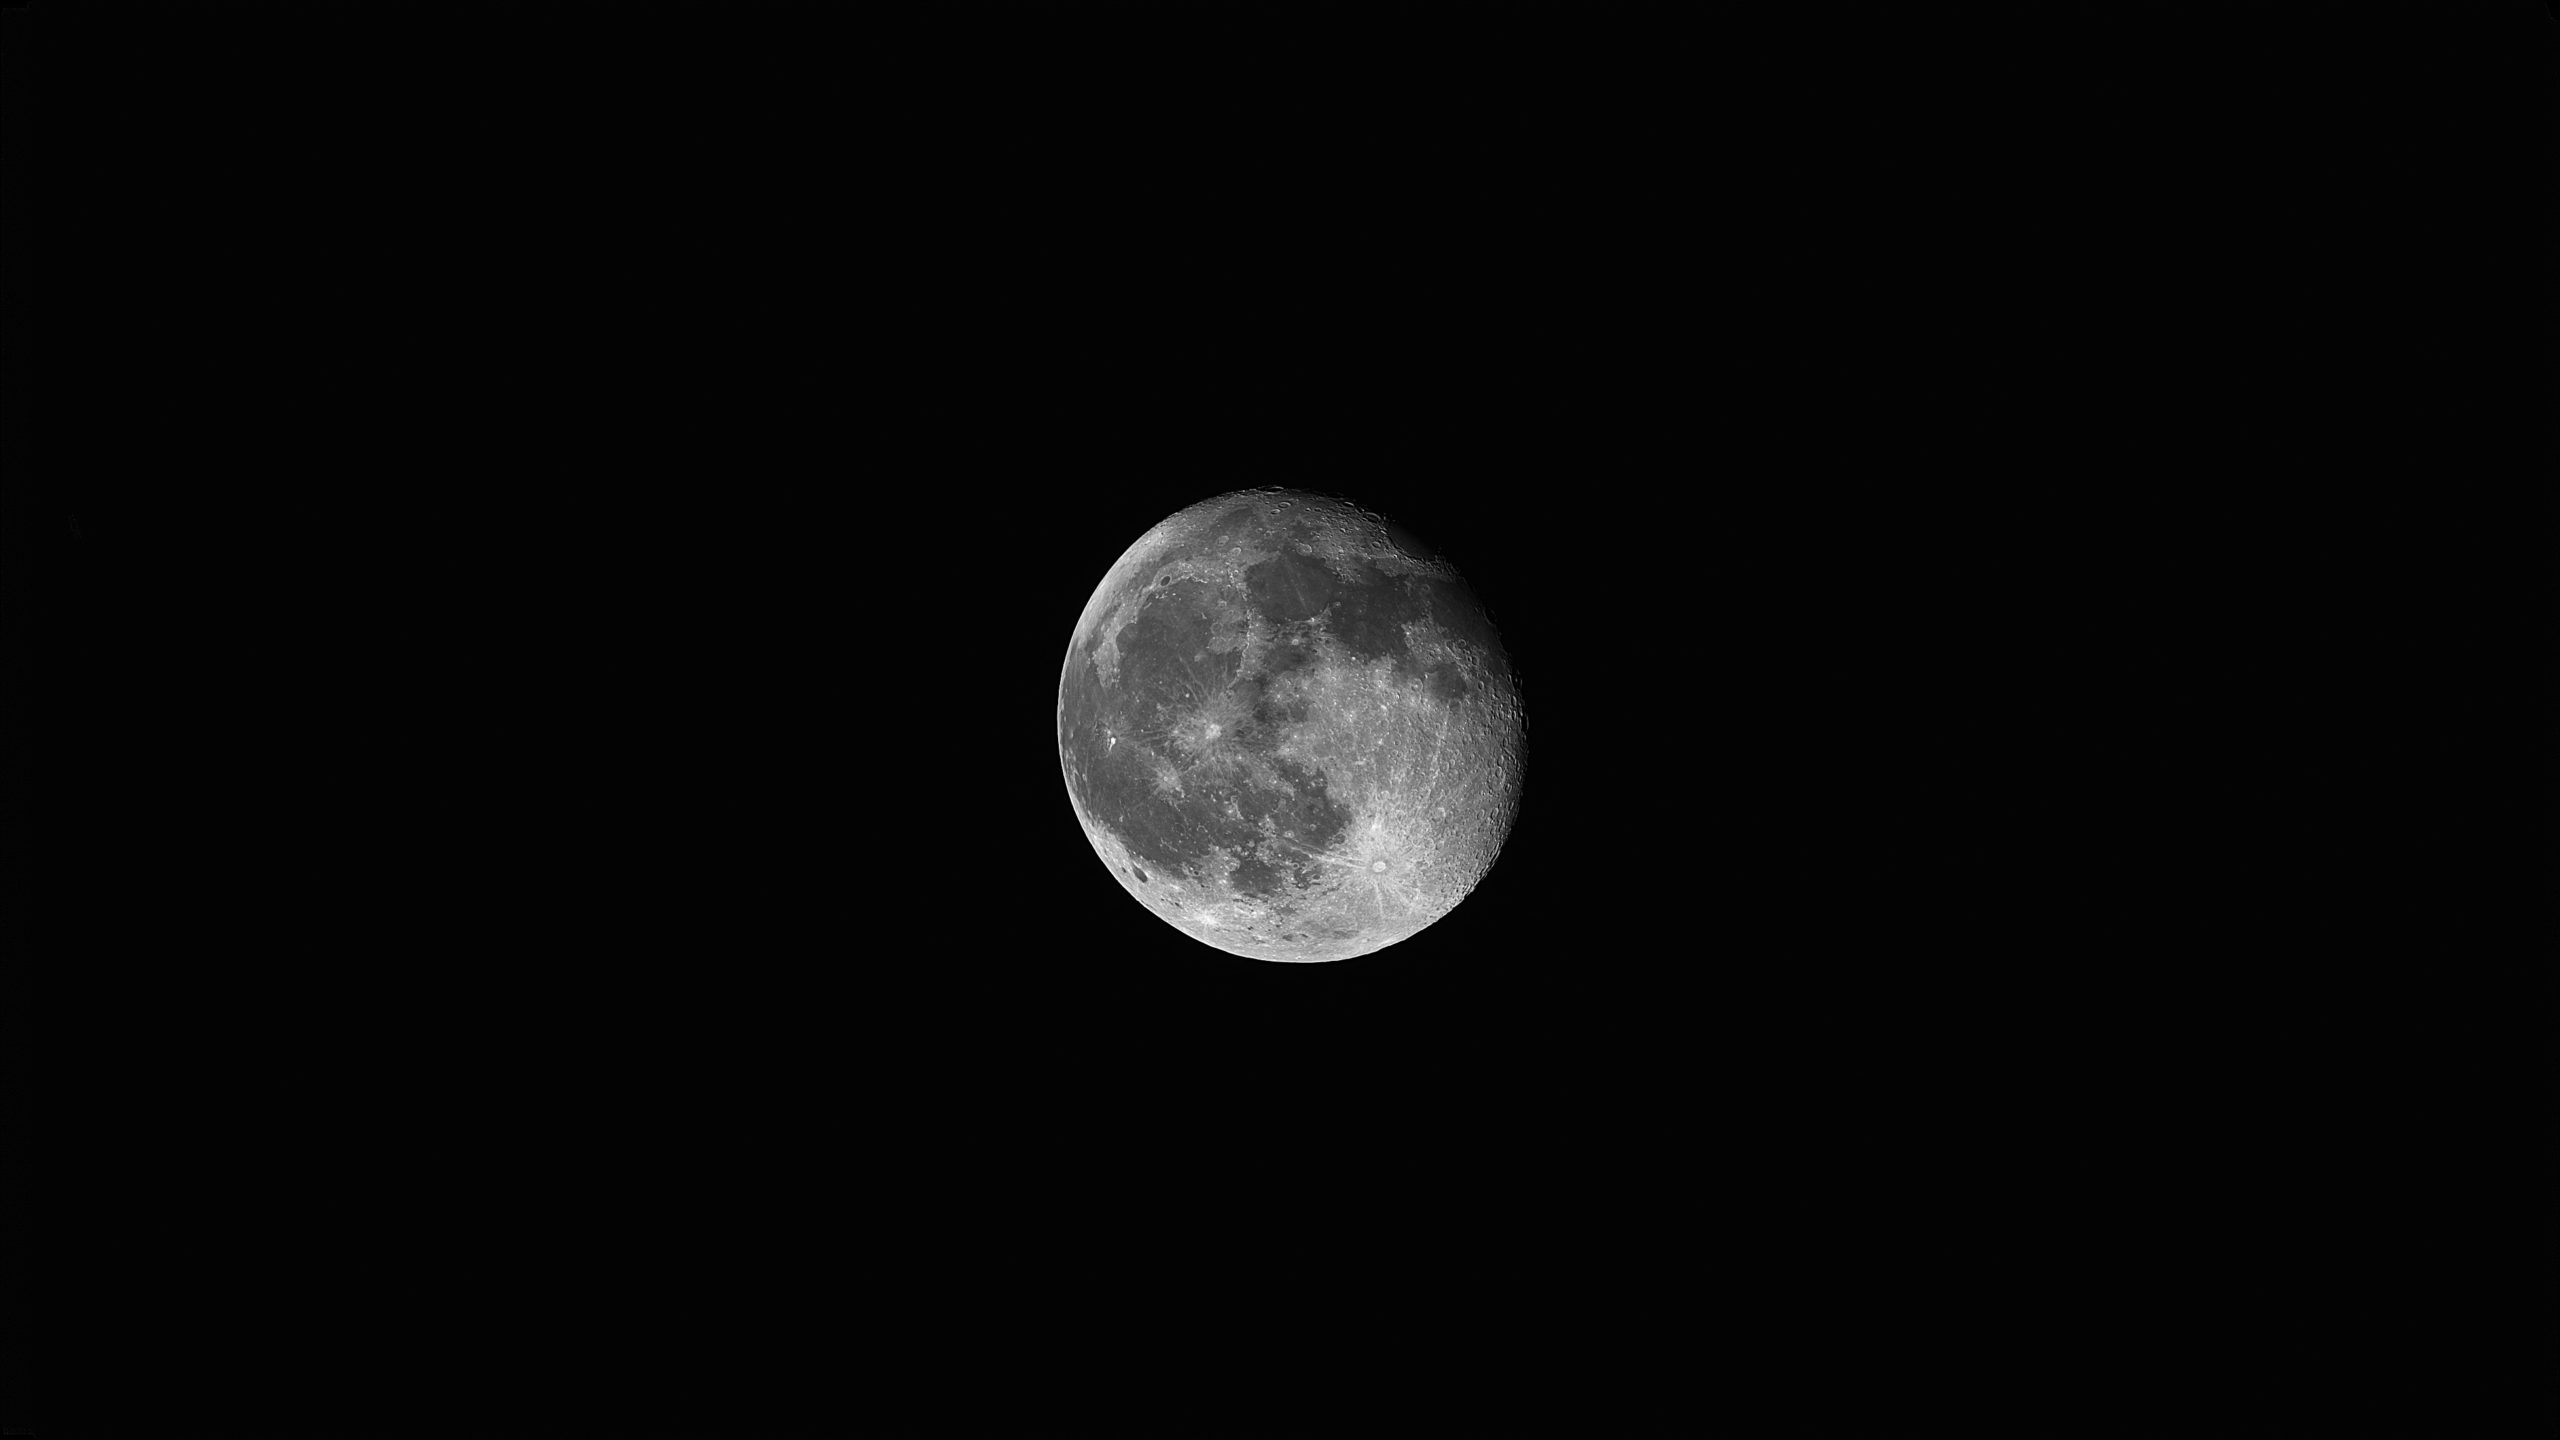
Similar to solar mode, you can zoom in on lunar craters by pinching your touchscreen. I captured images by clicking the photo icon and selecting “save in photos” from the top-right menu. Attempting to share a live moon picture was successful, but it required a switch to my home WiFi network, as I wasn’t connected to the internet while linked to the Vespera 2. Nonetheless, the Vespera continues tracking the target, allowing you to reconnect and continue the live observation session. It was still pretty hazy, but here’s my image of the 91% waning moon.
The Vaonis Vespera II is available at Agena Astro (USA/WW), High Point Scientific (USA/WW), Astroshop (EU/WW), and Vaonis (direct from vendor).
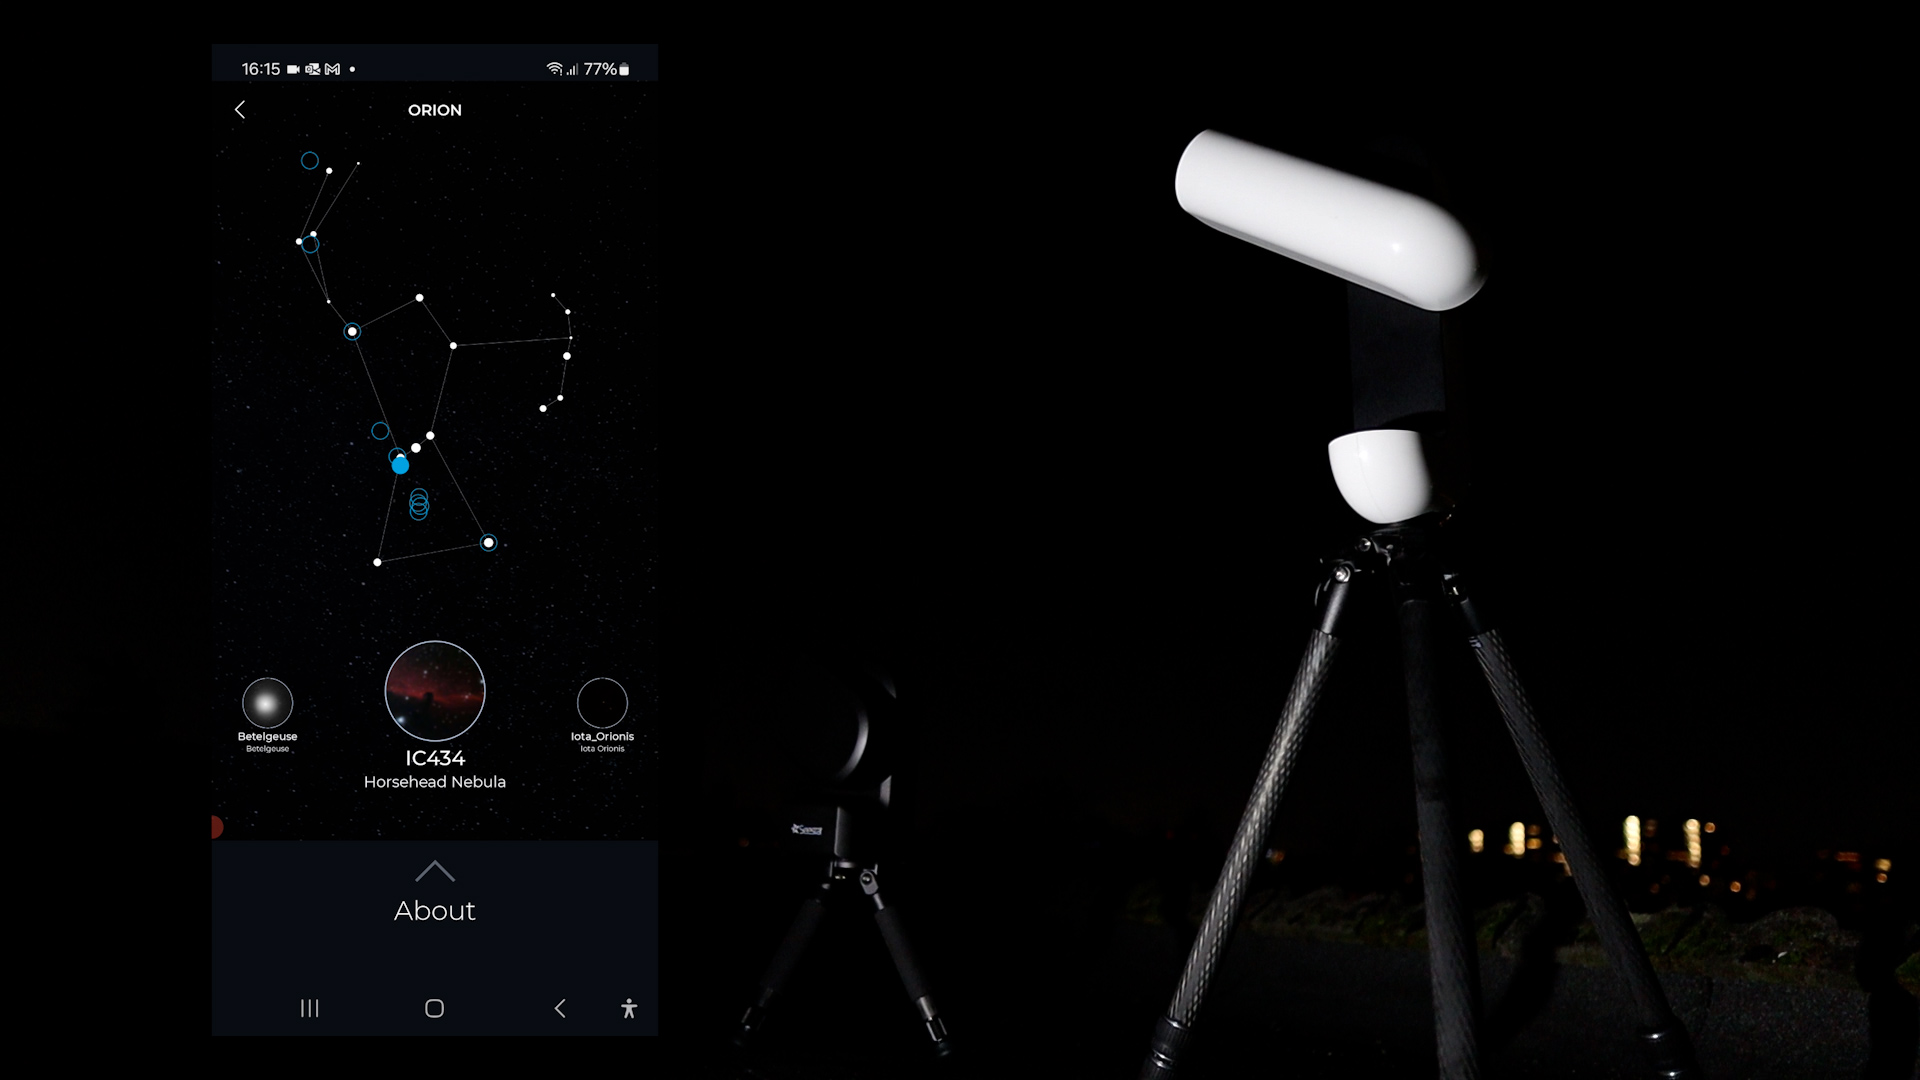
Capturing deep-sky objects with the Vaonis Vespera II
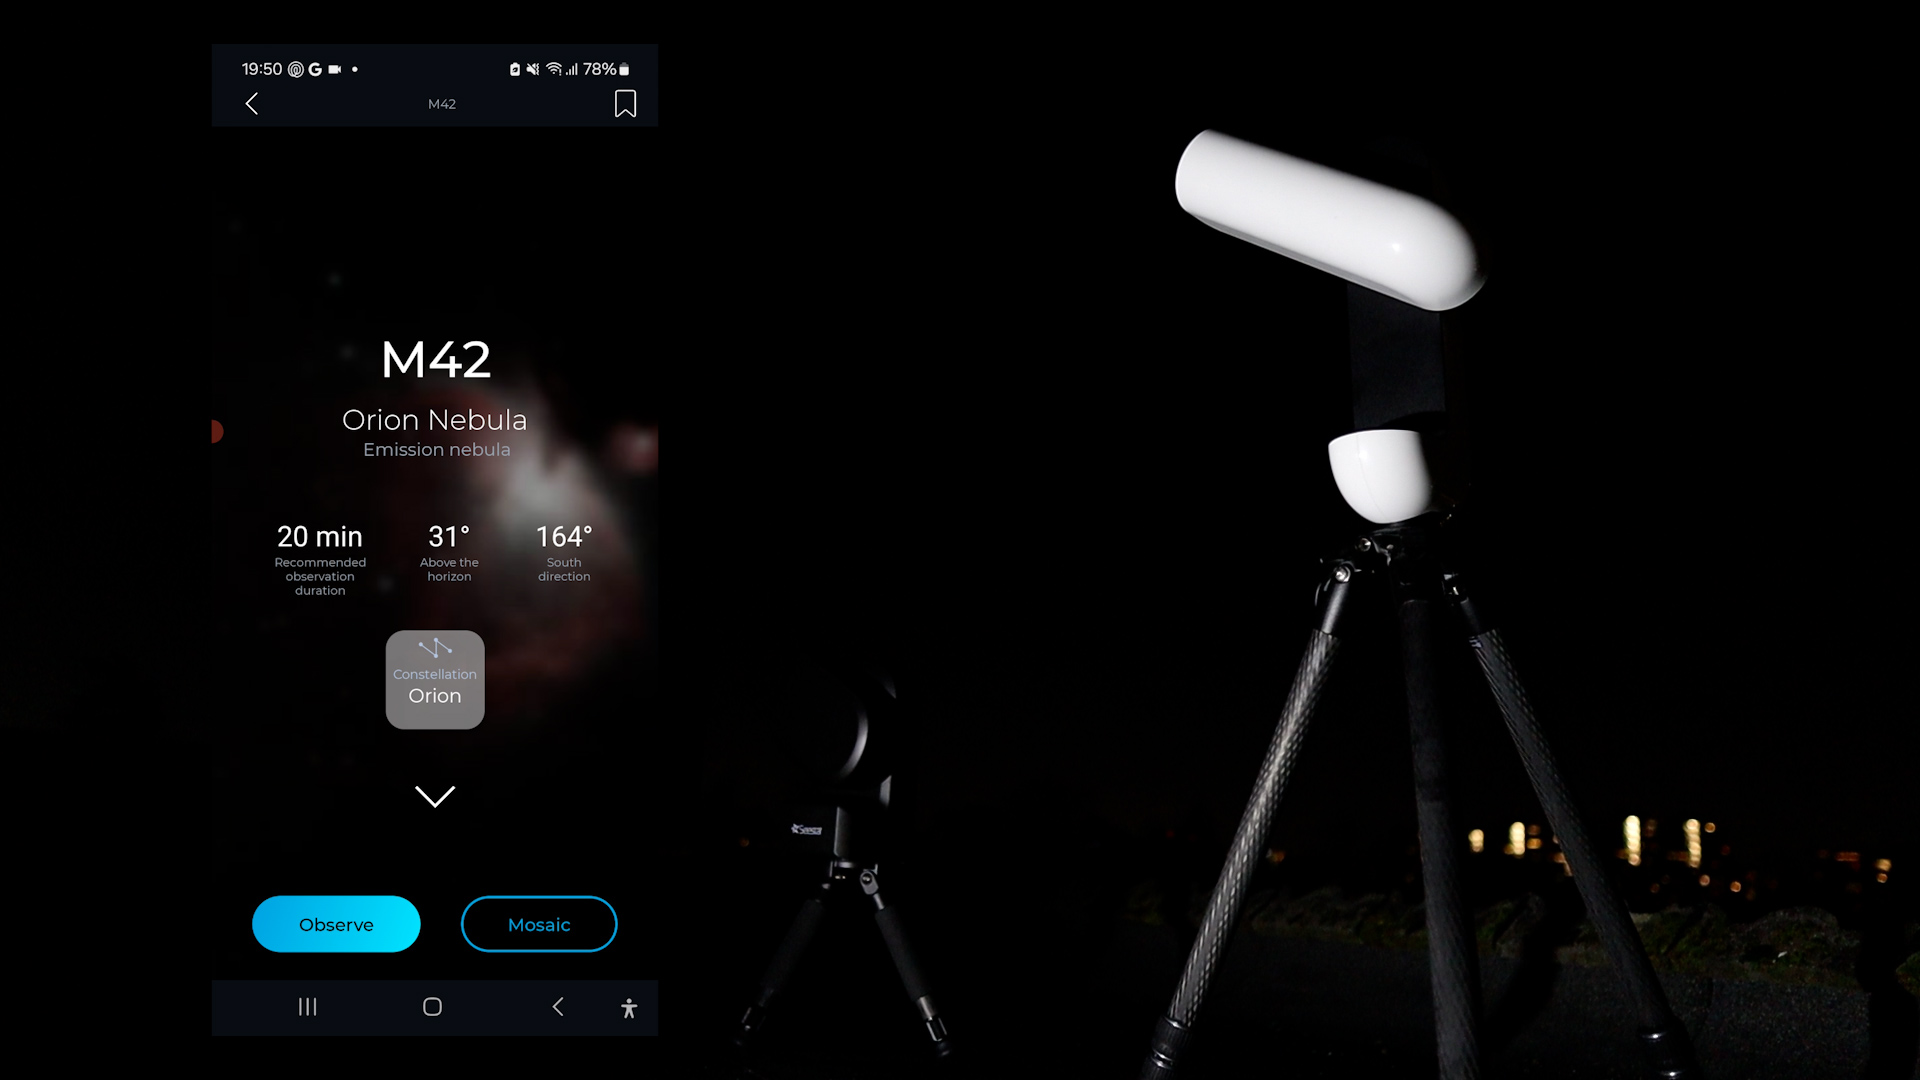
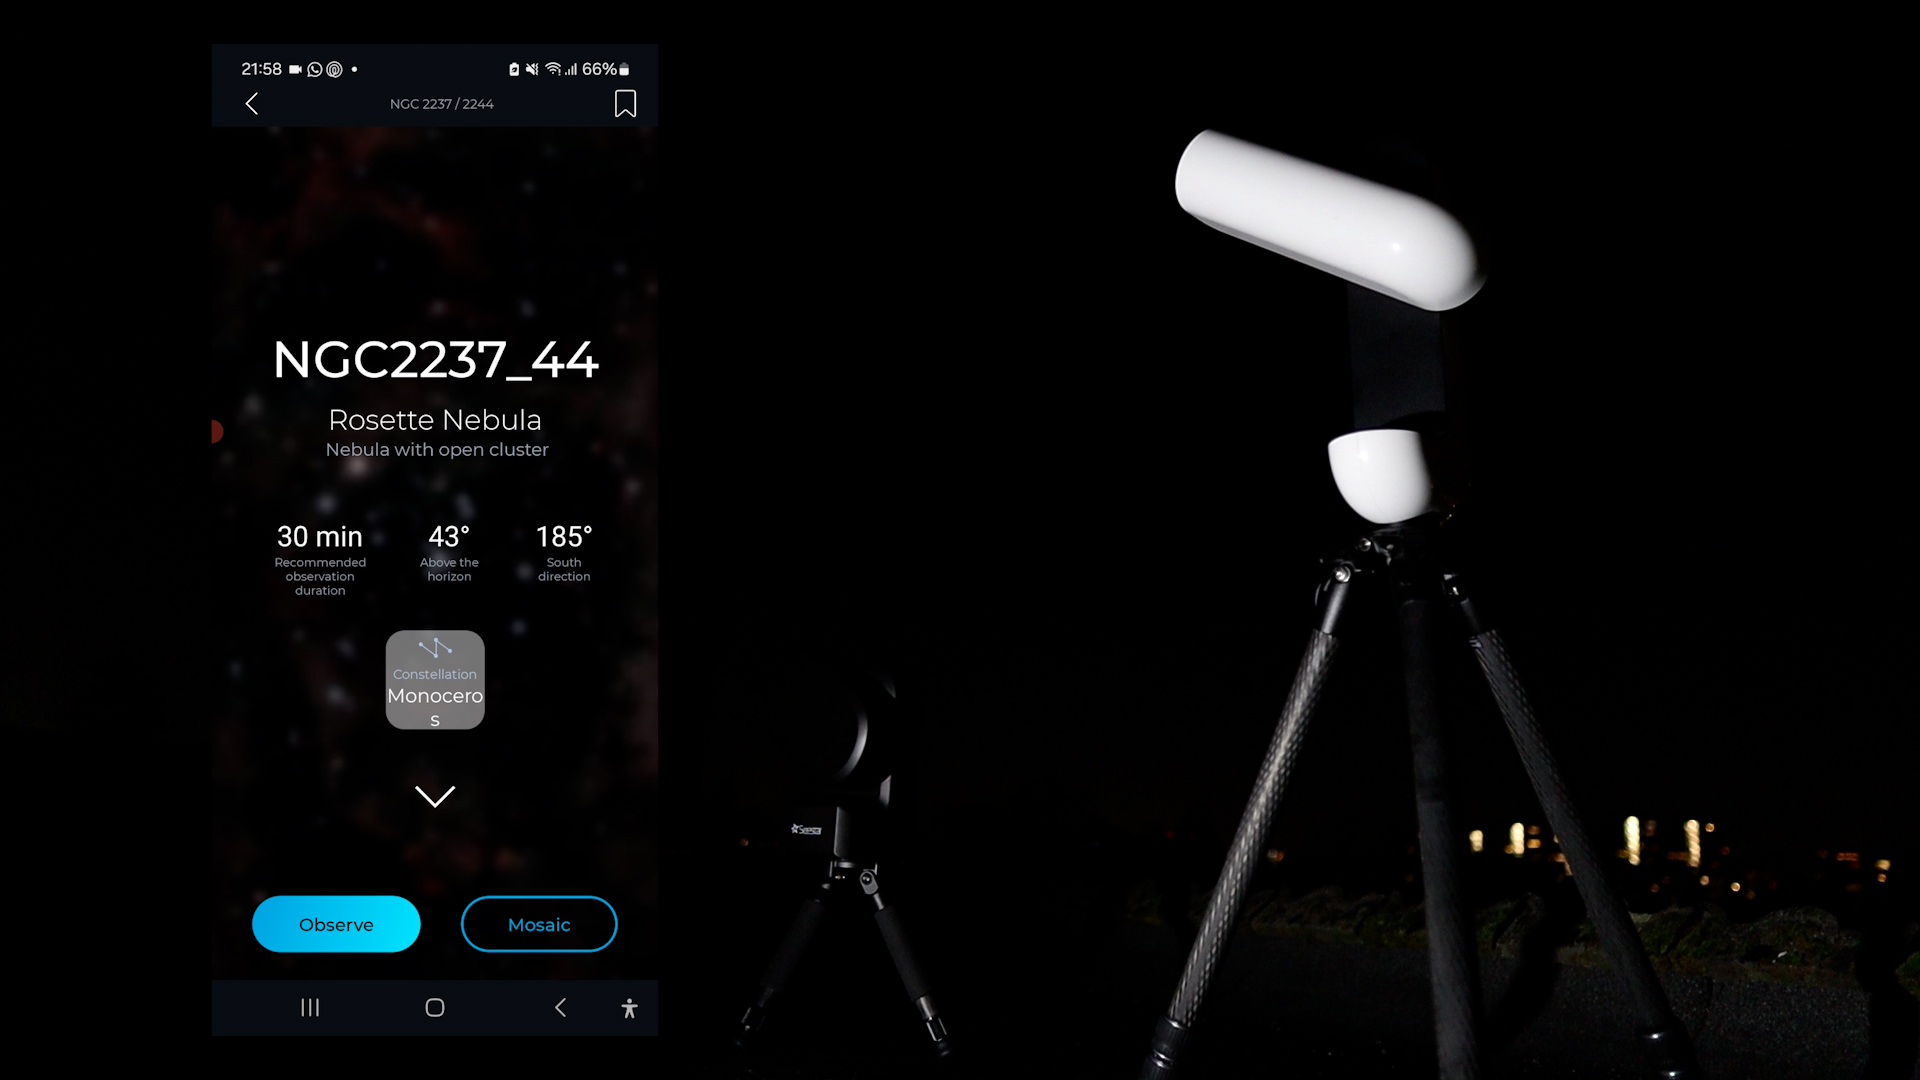
The most straightforward way to search for an object is by clicking on the planet icon at the bottom of the screen. The Singularity app categorizes objects into groups such as nebulae, galaxies, star clusters, and more. I particularly enjoyed the constellation category, showcasing notable objects within each constellation in the night sky. For instance, the Orion constellation boasts 11 deep-sky objects to explore.
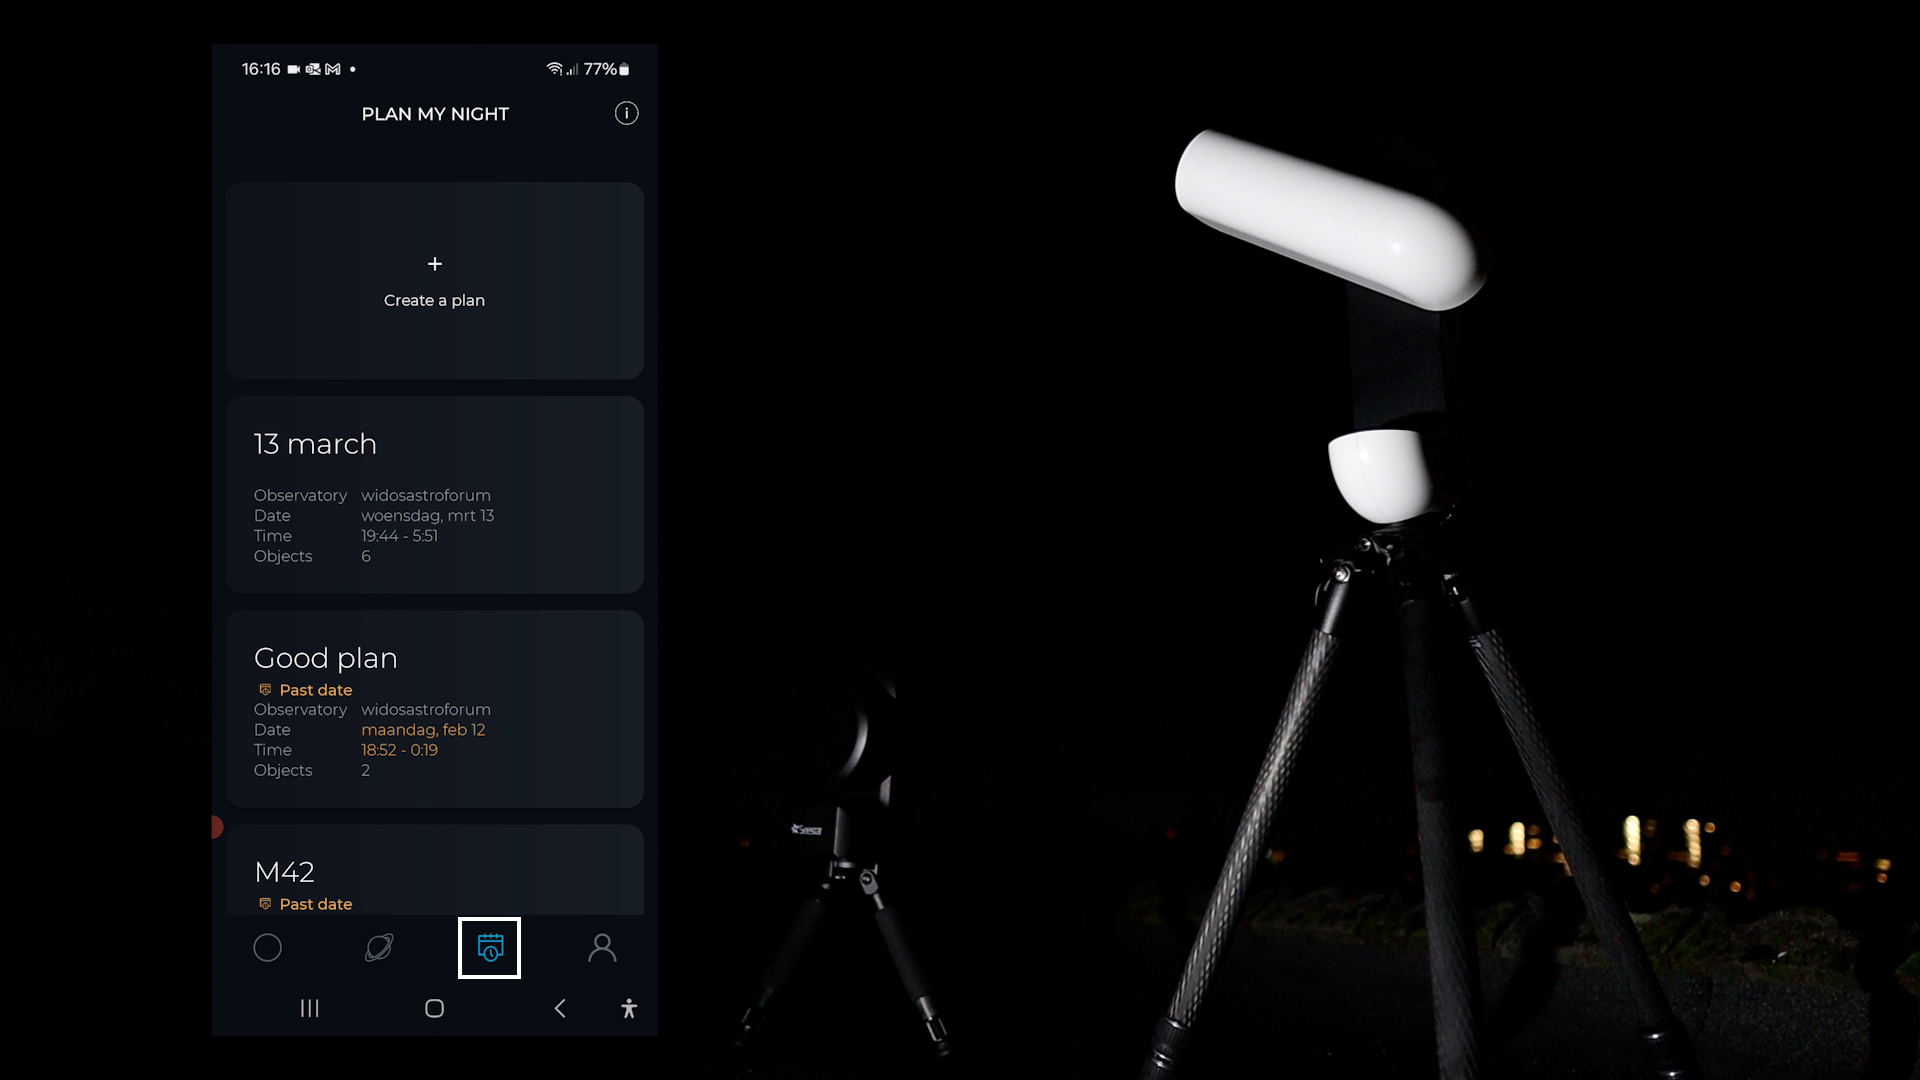
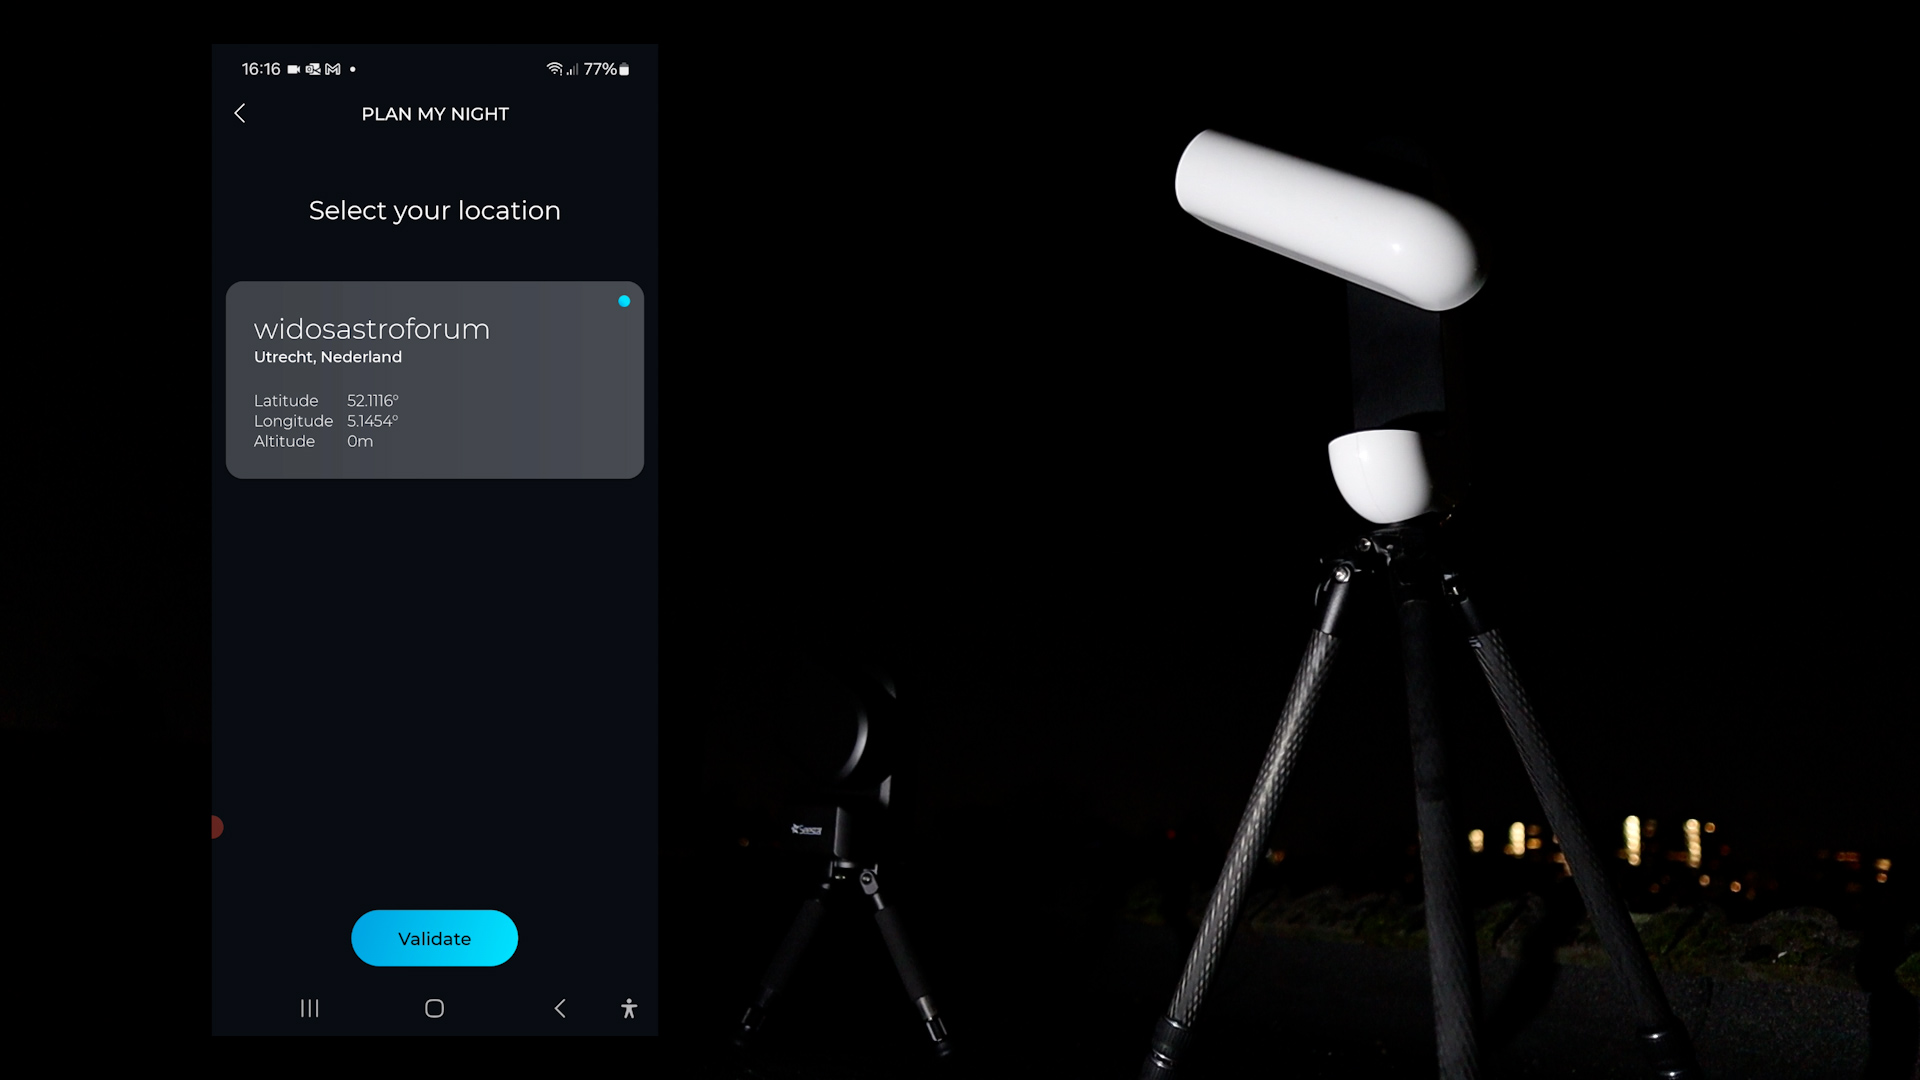
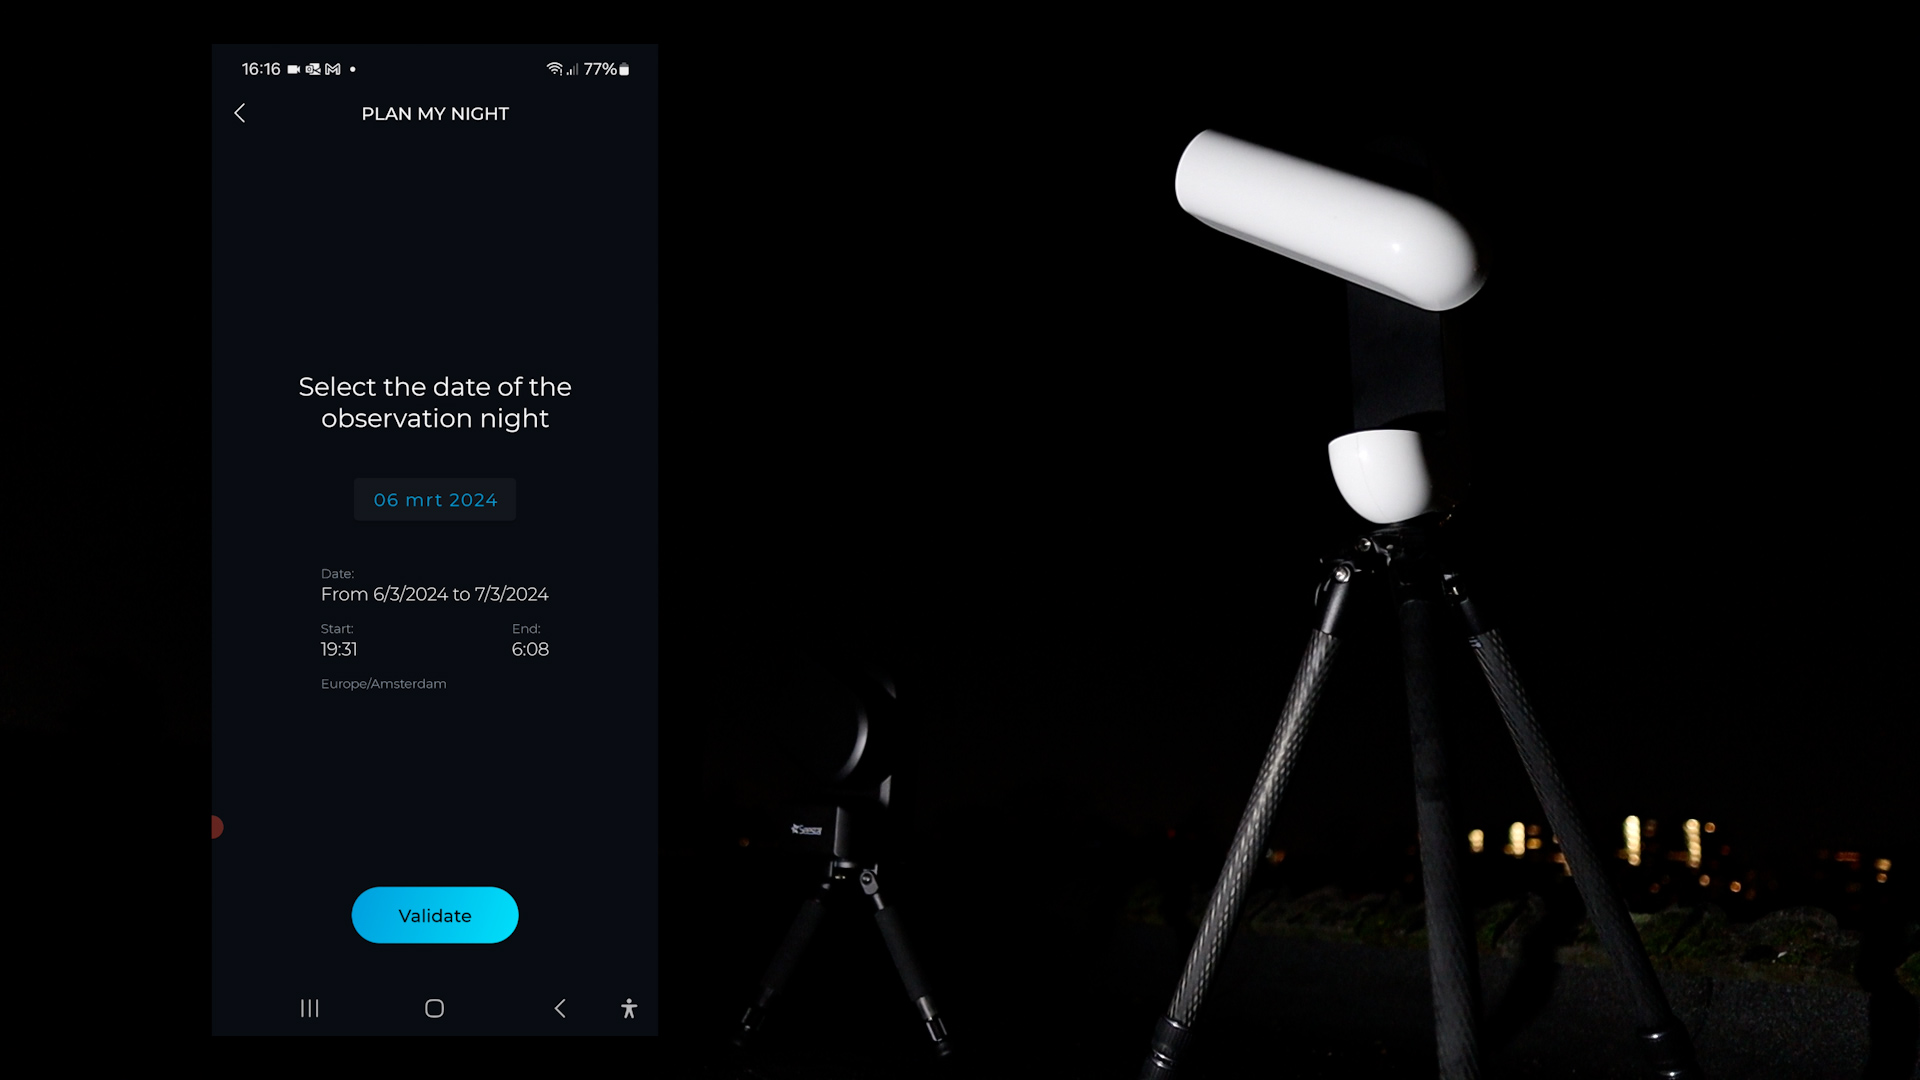
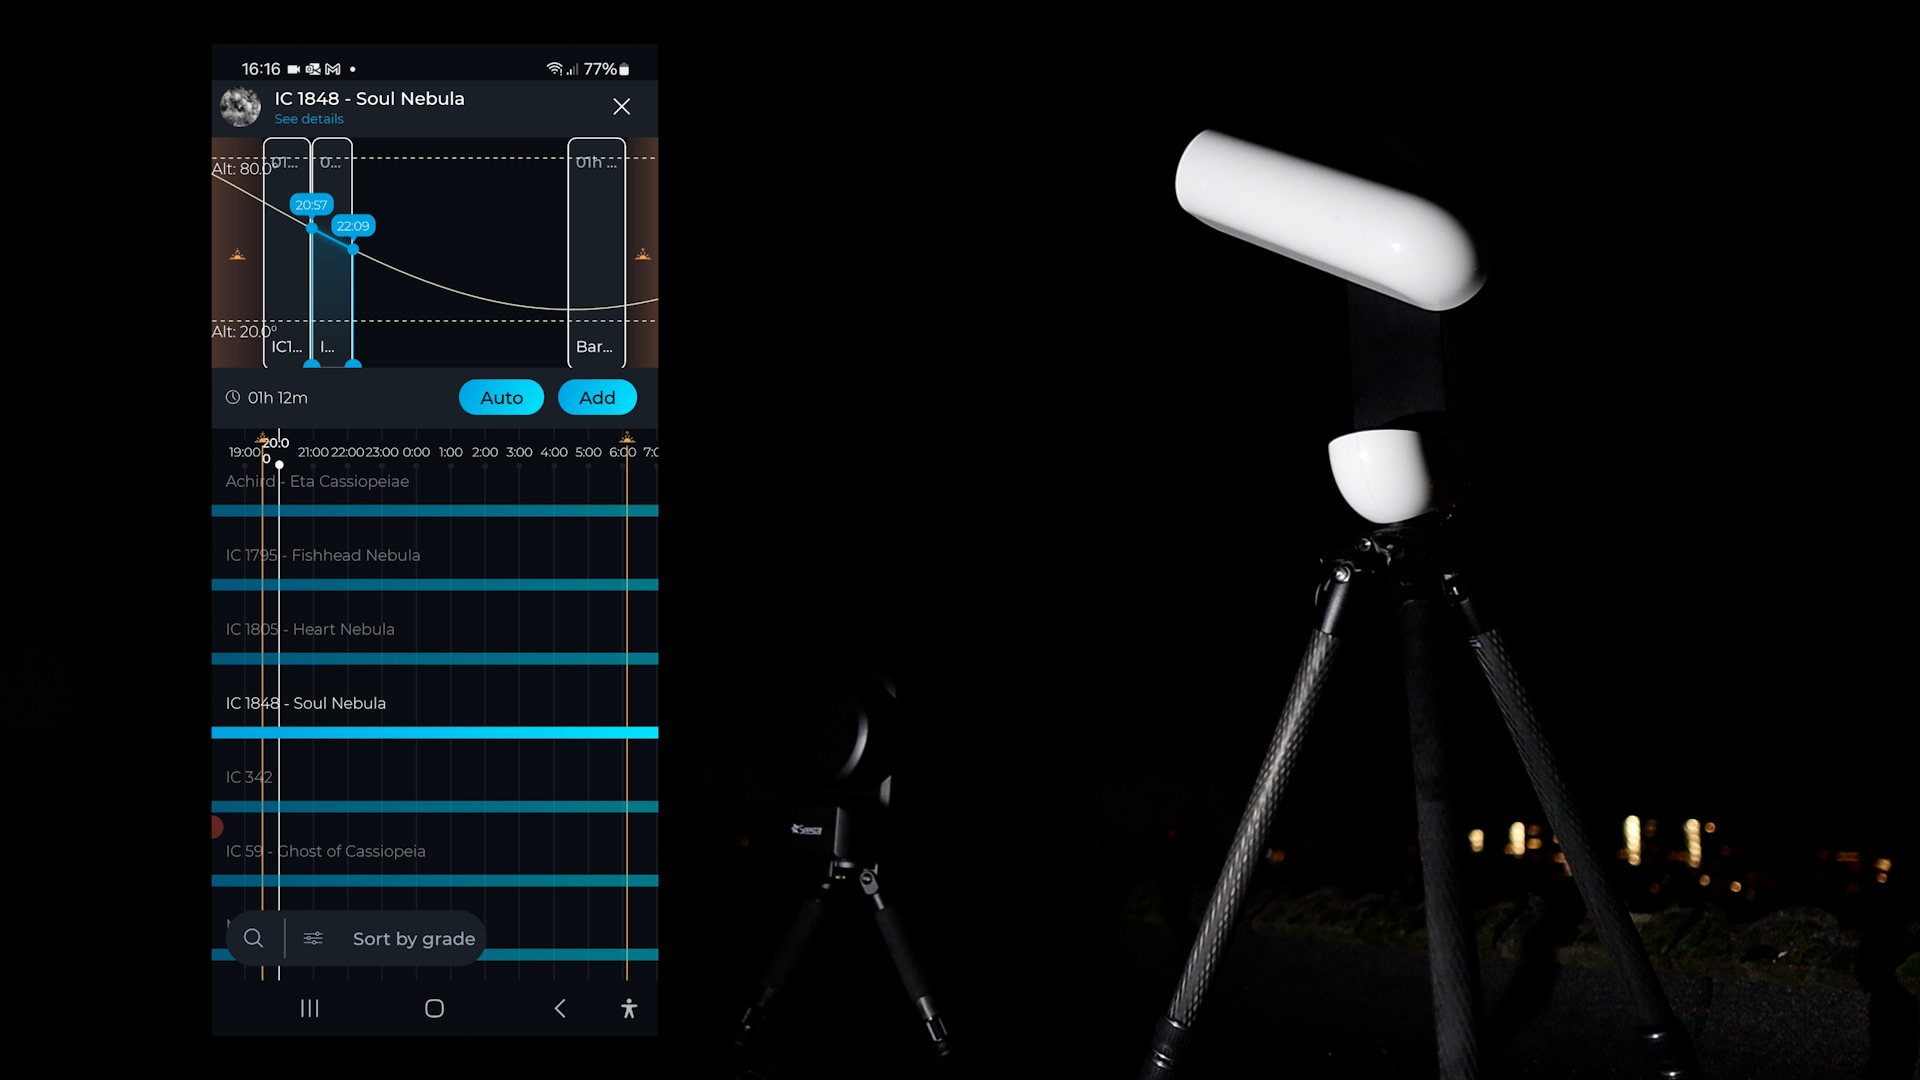
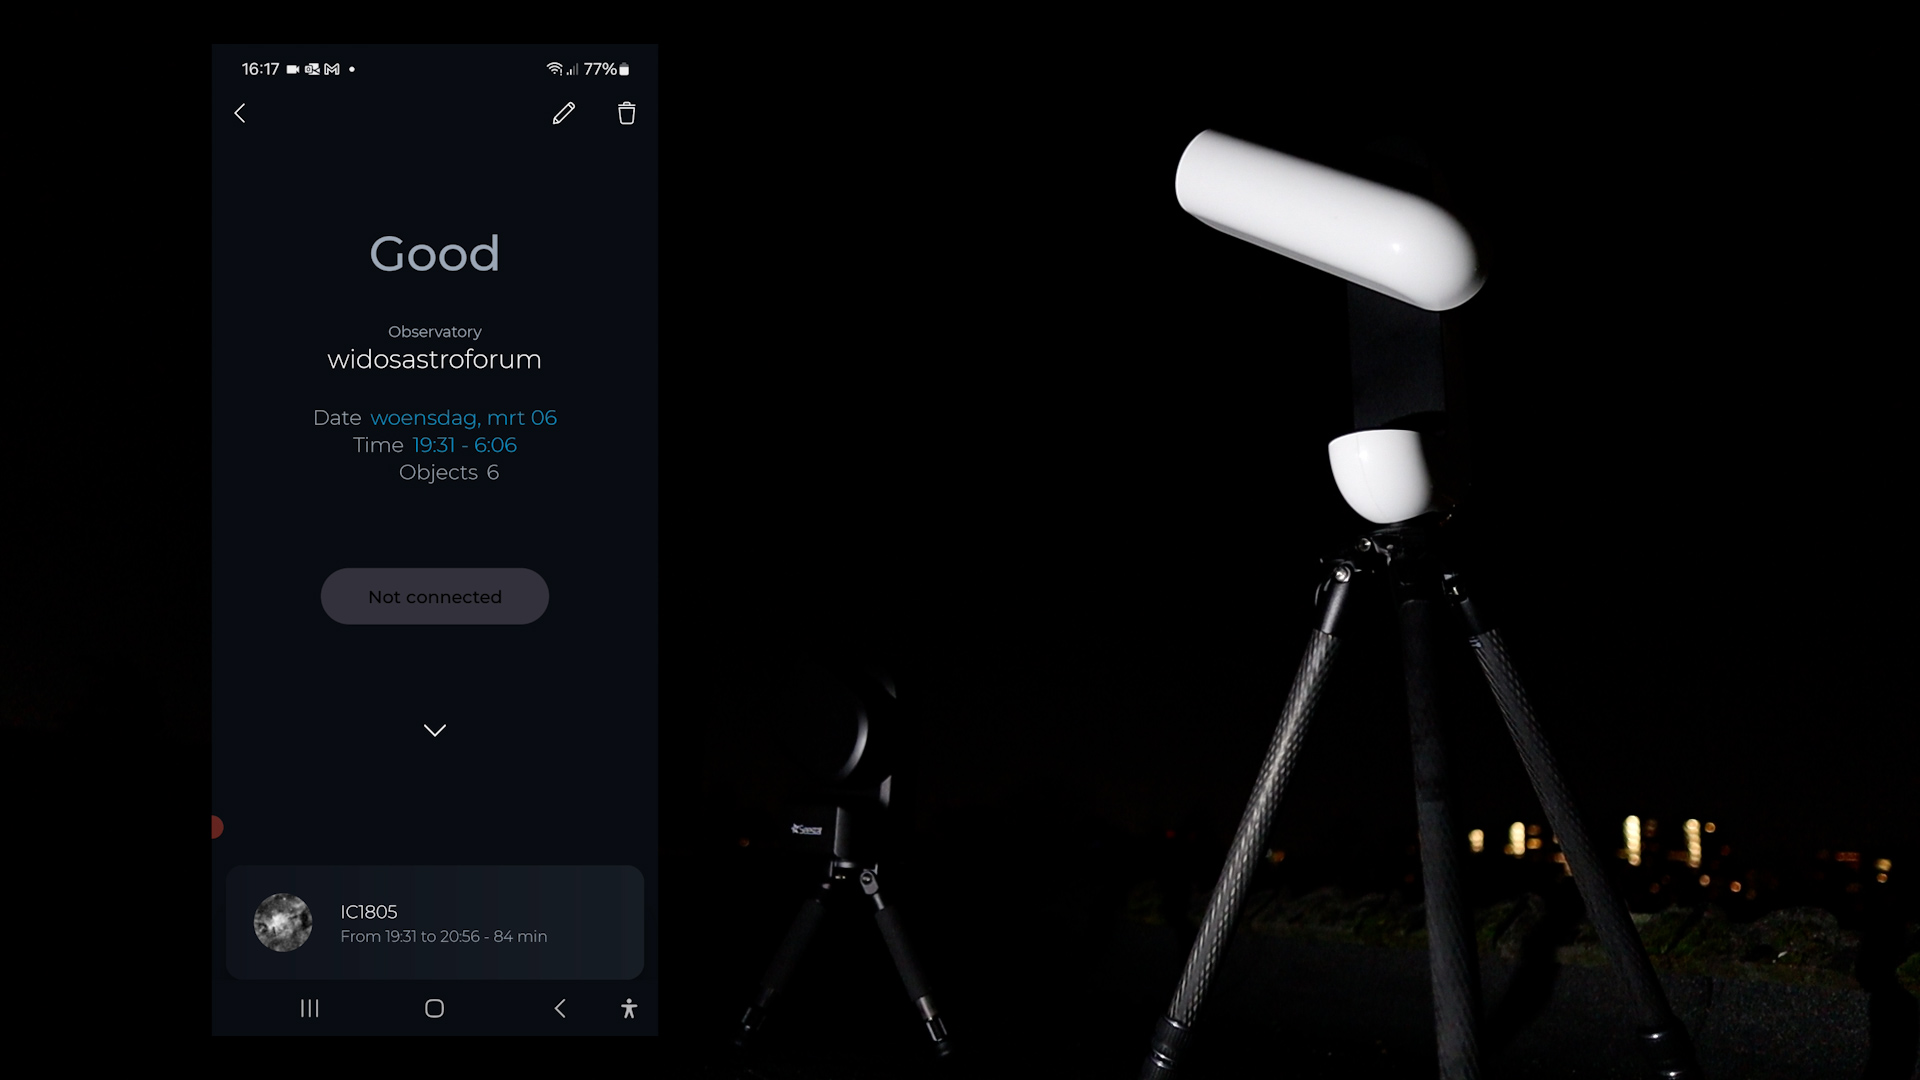
Another excellent feature is the ‘Plan My Night’ mode. Access it by clicking on the schedule icon at the screen’s bottom. After clicking the icon, add a plan by clicking the plus icon, choose a location and date, name your plan, and the Singularity app will display various visible objects that wil be in the night sky at that future date and location. The timeline is a valuable tool, indicating which objects are high in the sky at different hours during your observation session. Add these objects to your timeline to create a plan. When night falls, initialize the telescope, select your plan, and let the Vespera 2 handle the rest.
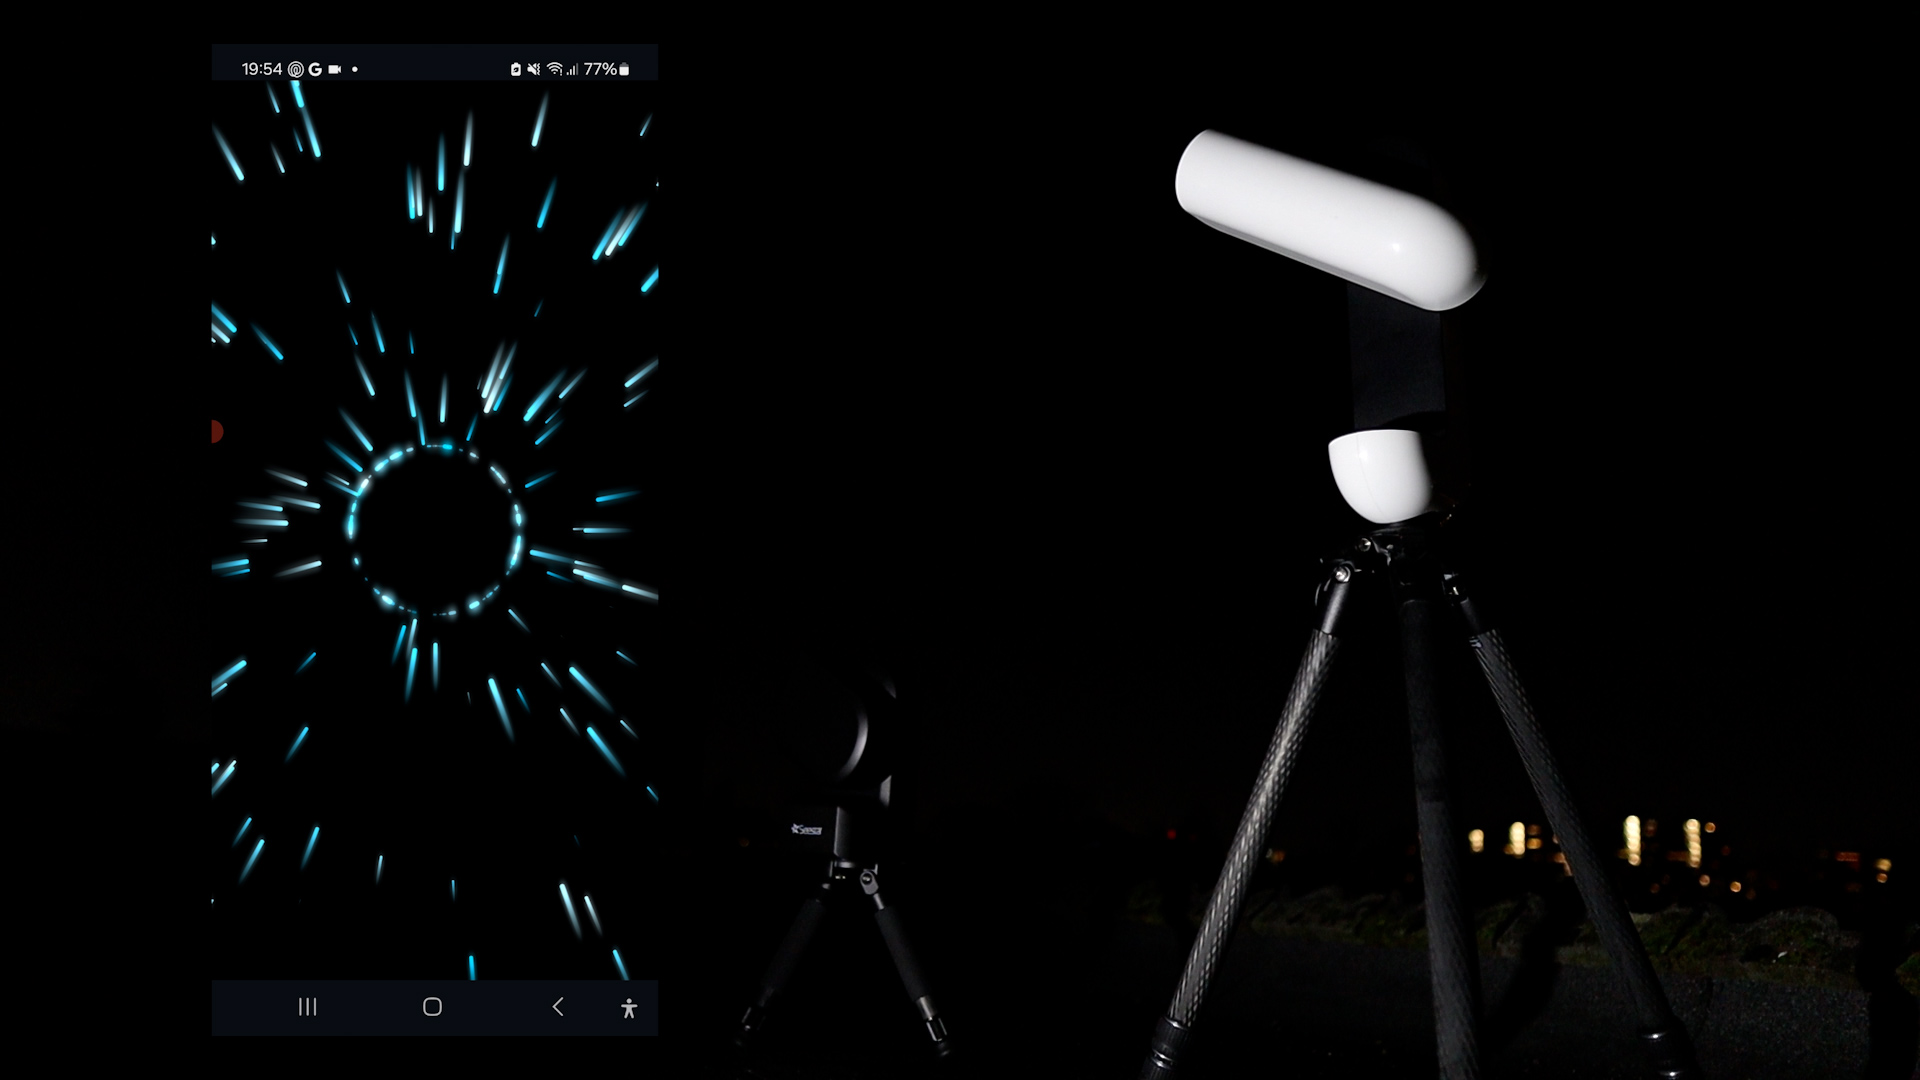
I successfully captured the Orion Nebula from my city rooftop. After selecting M42, the Vespera 2 takes about two minutes to locate and autofocus on the nebula. Subsequently, it begins capturing and stacking 10-second pictures using the lucky imaging technique. Each 10-second picture enhances the signal of the nebula while reducing noise. In image format, you can opt to save individual pictures in FITS format, cumulative stacked pictures in JPEG format, and the final stacked image in TIFF format for further processing.
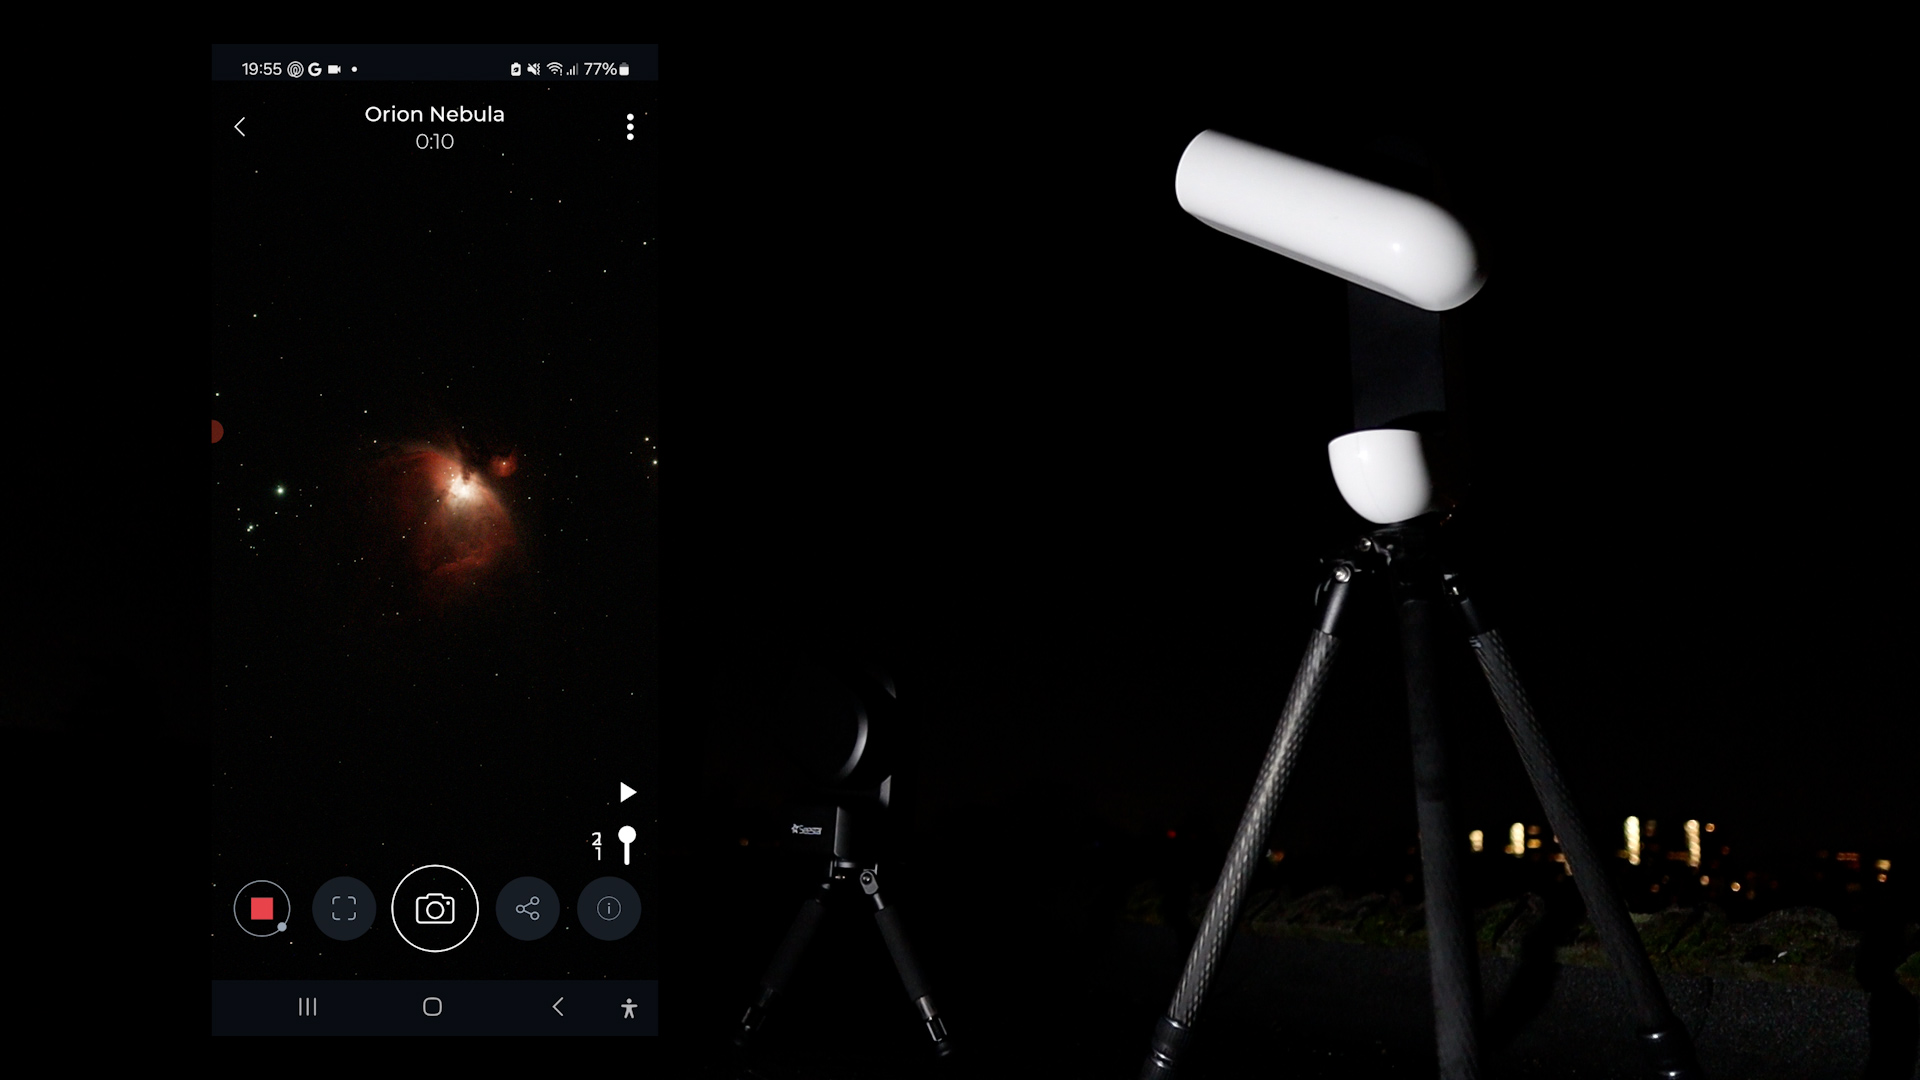
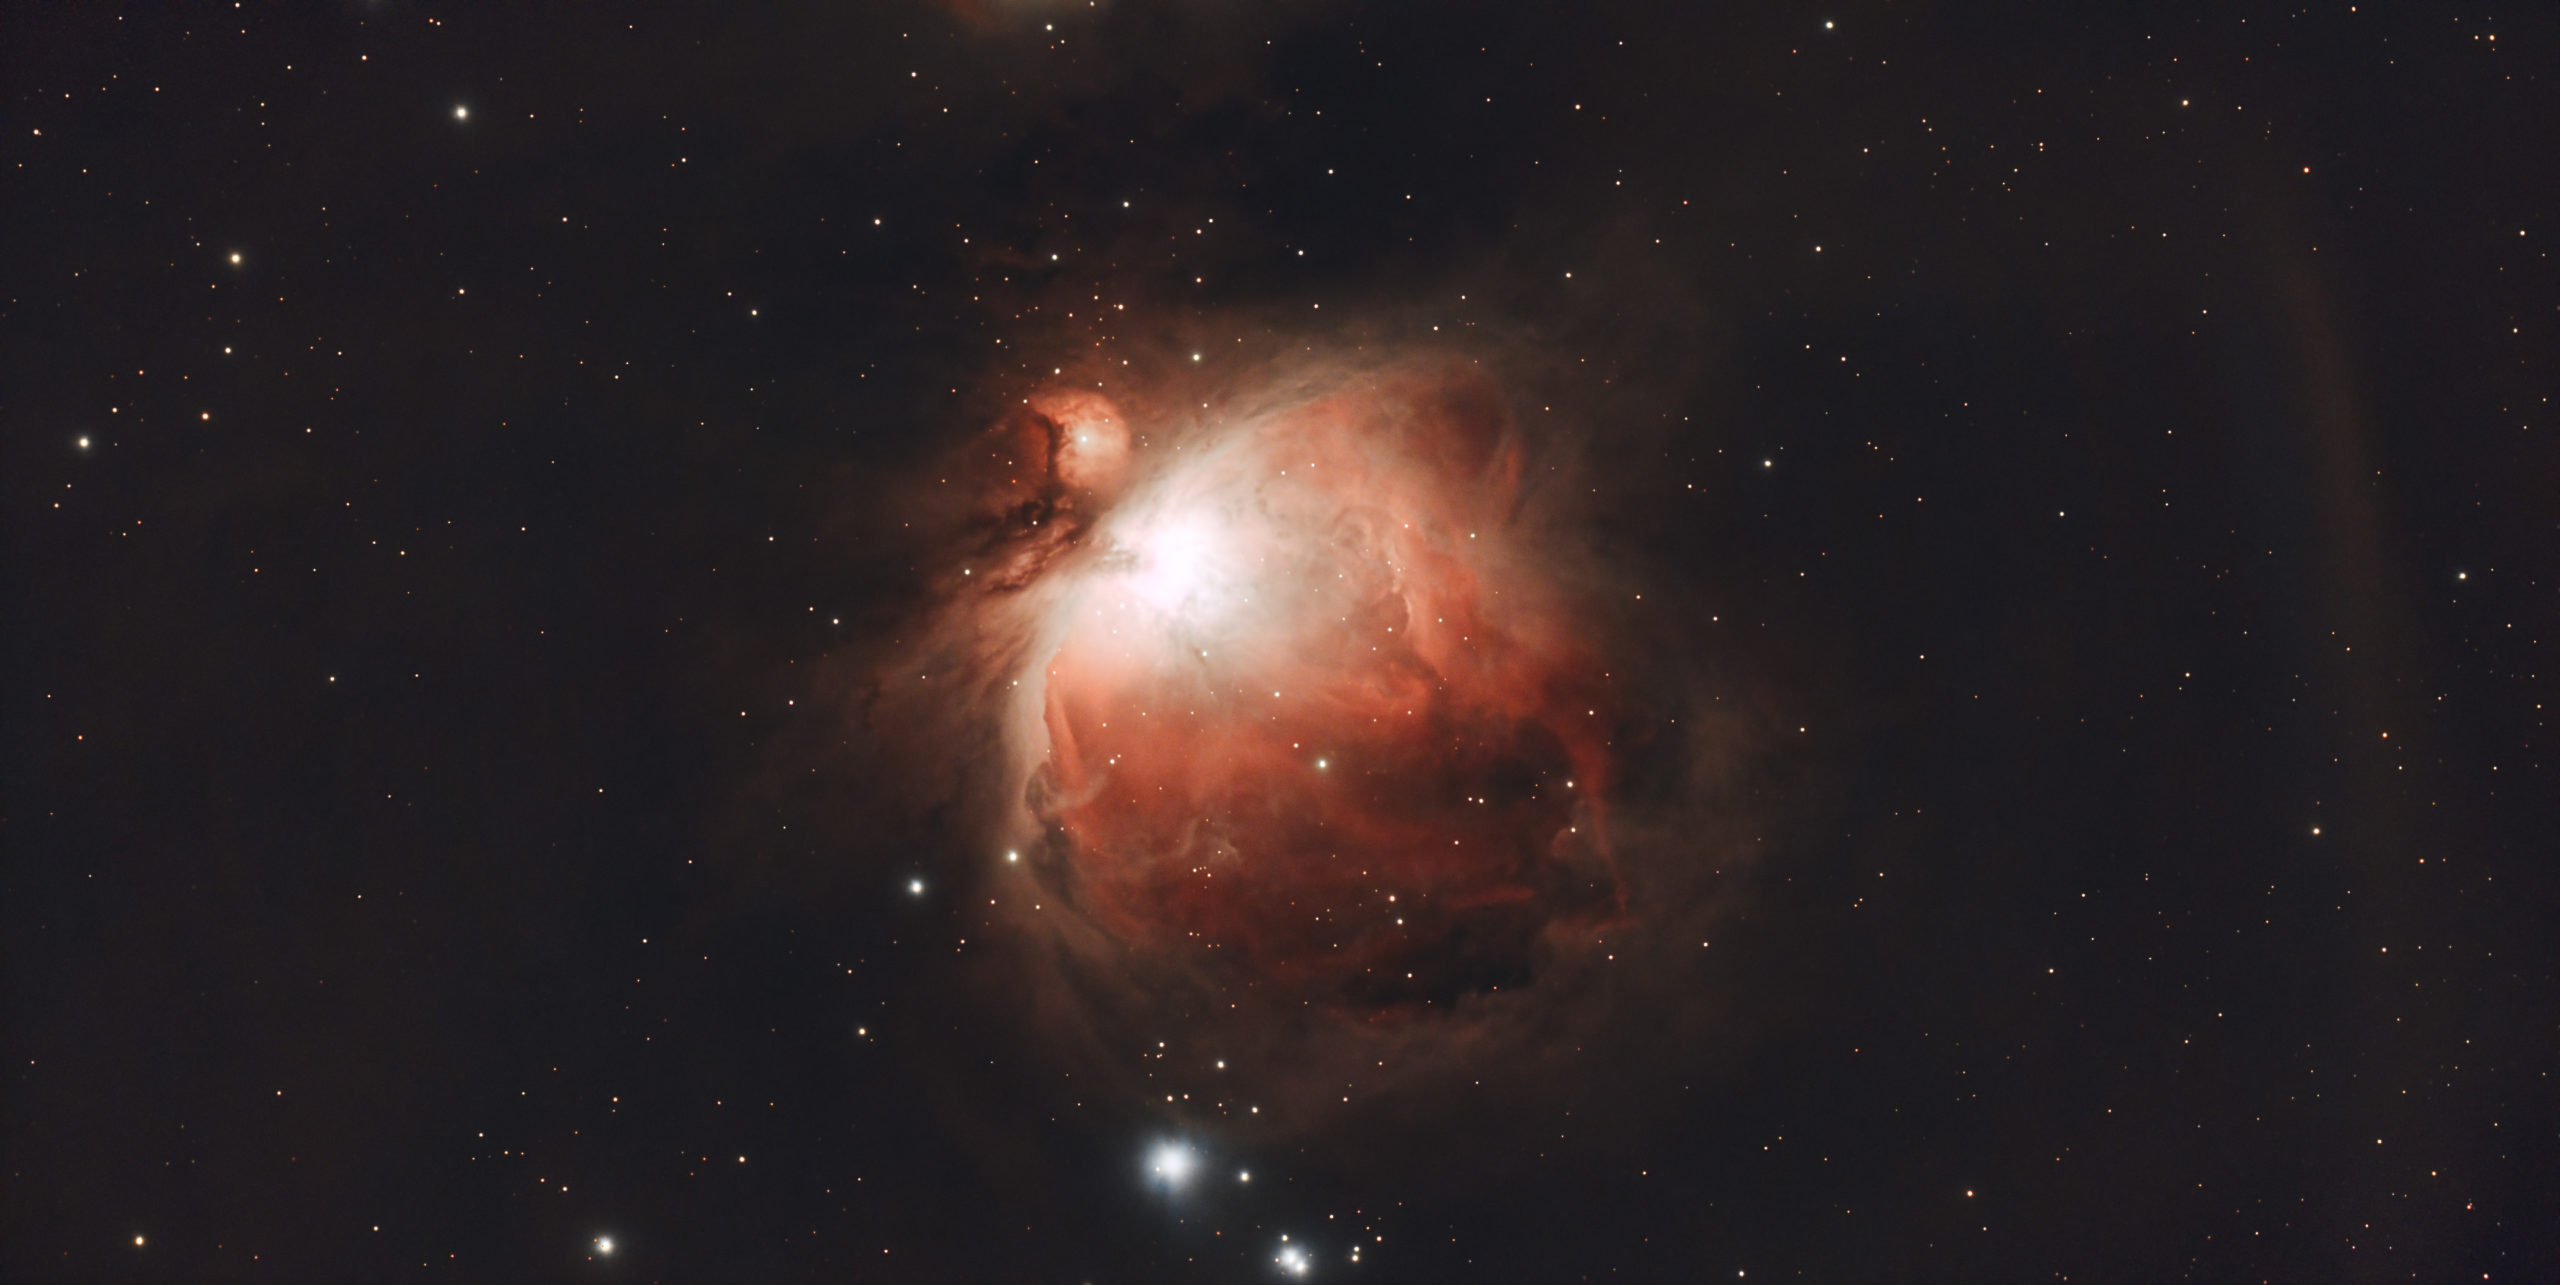
Here’s my picture of the Orion Nebula, after capturing the Orion Nebula for about one hour. Note that I used the dual-band filter to enhance the nebula’s structure and block light pollution. While I appreciate this picture, if you’re seeking a more vibrant image, I recommend traveling to a dark location and capturing the nebula without any filter or using a light pollution filter.
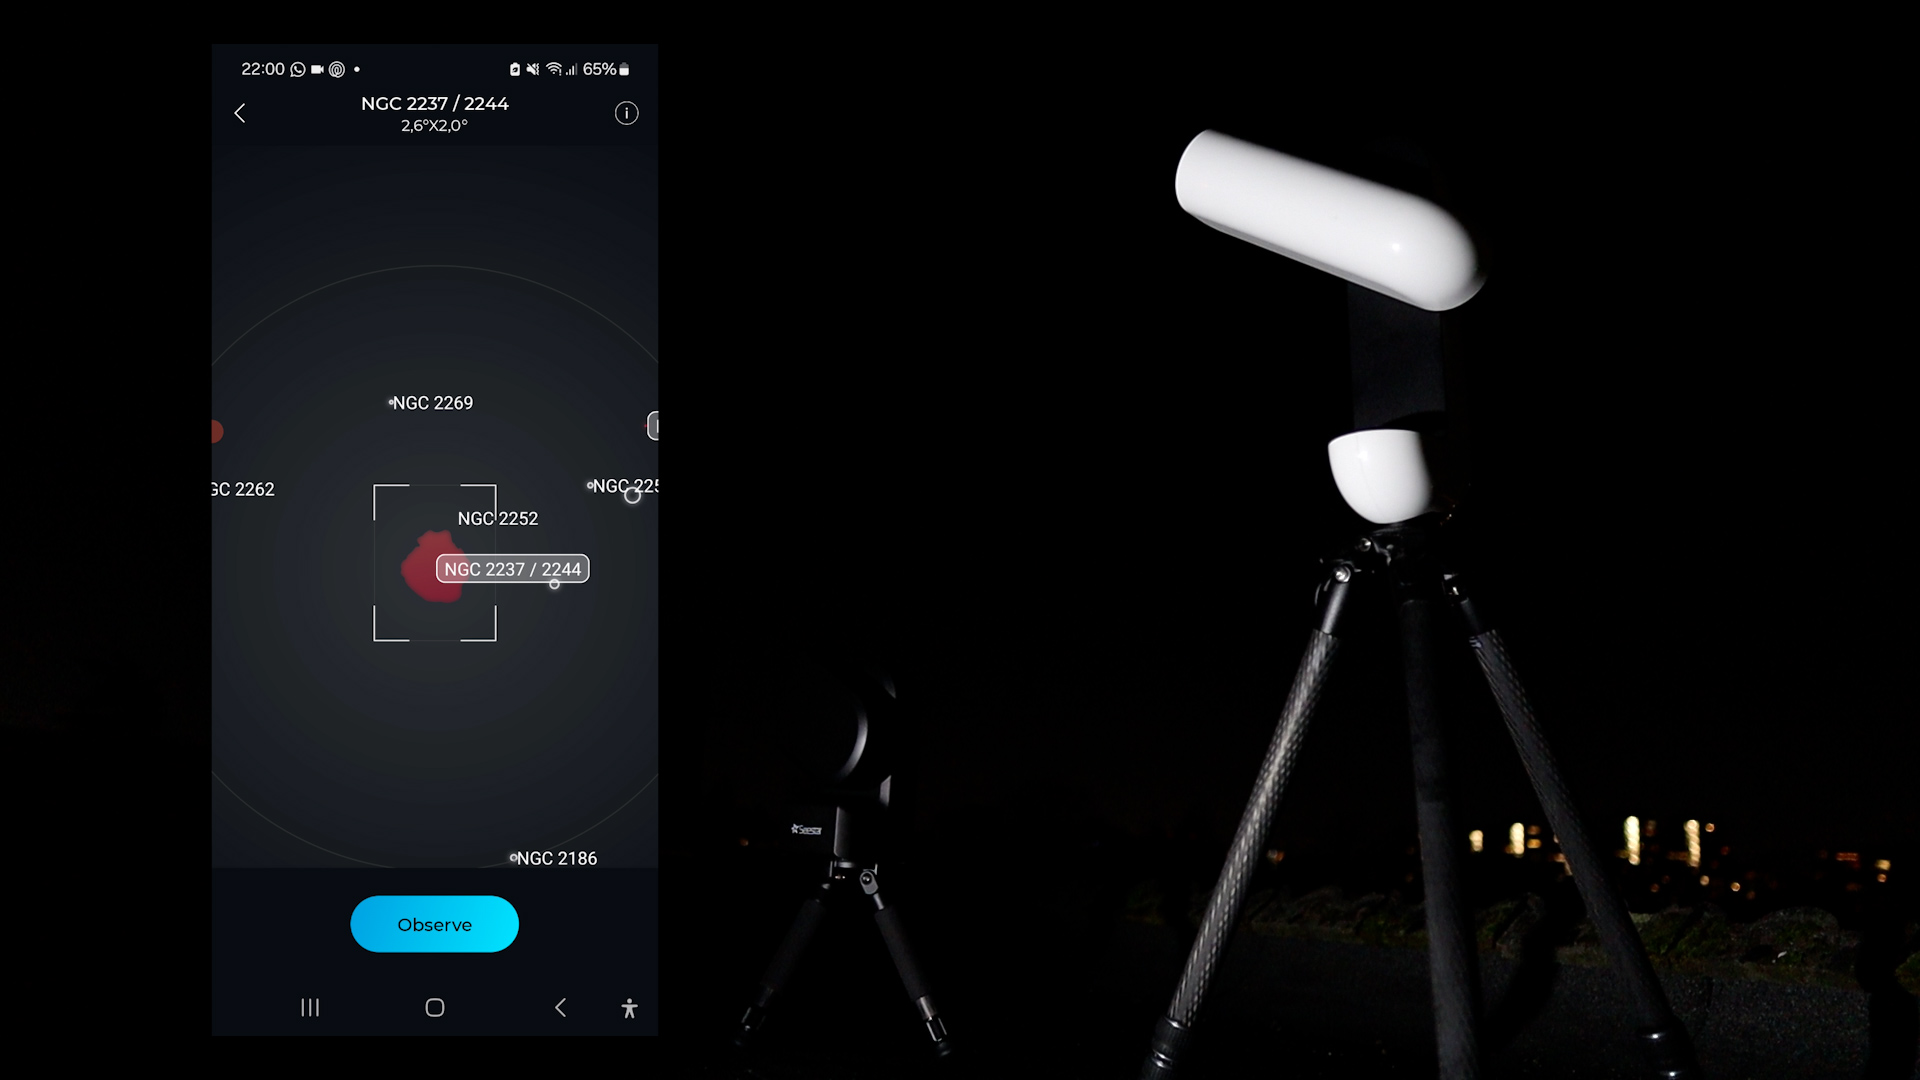
I also successfully captured the Rosette Nebula, employing the unique COVALENS technique to create a panorama picture—a feature exclusive to Vaonis at present. When choosing Mosaic mode, a graphical representation of the target is displayed. Rotate and widen your field of view on your smart screen to craft a panorama picture of your preference. Once done, the Vespera 2 automatically locates and captures different parts of the night sky you selected to create the panorama picture. Depending on the target, the mosaic mode requires at least an hour or two to adequately capture different parts of the sky for the panorama. This process unfolds automatically, allowing you to monitor progress or leave the app—the Vespera II continues creating the panorama.
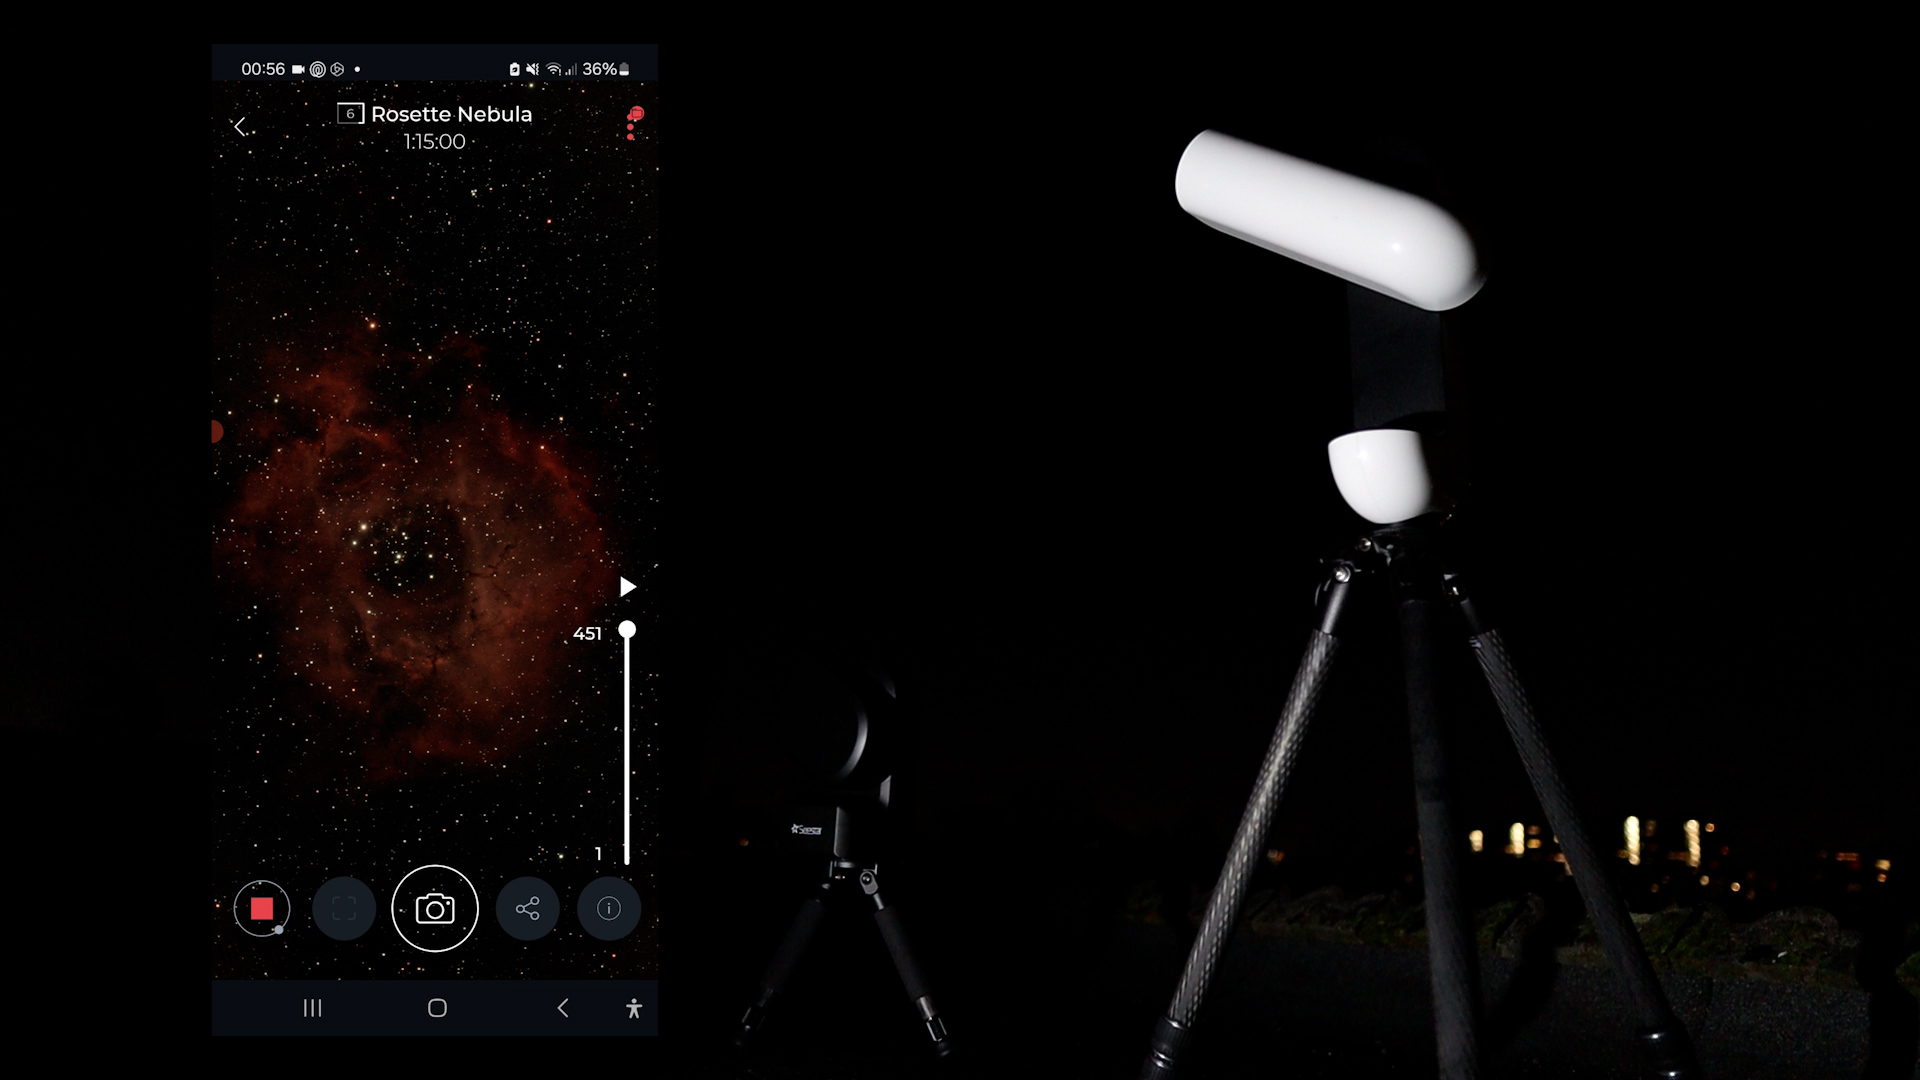
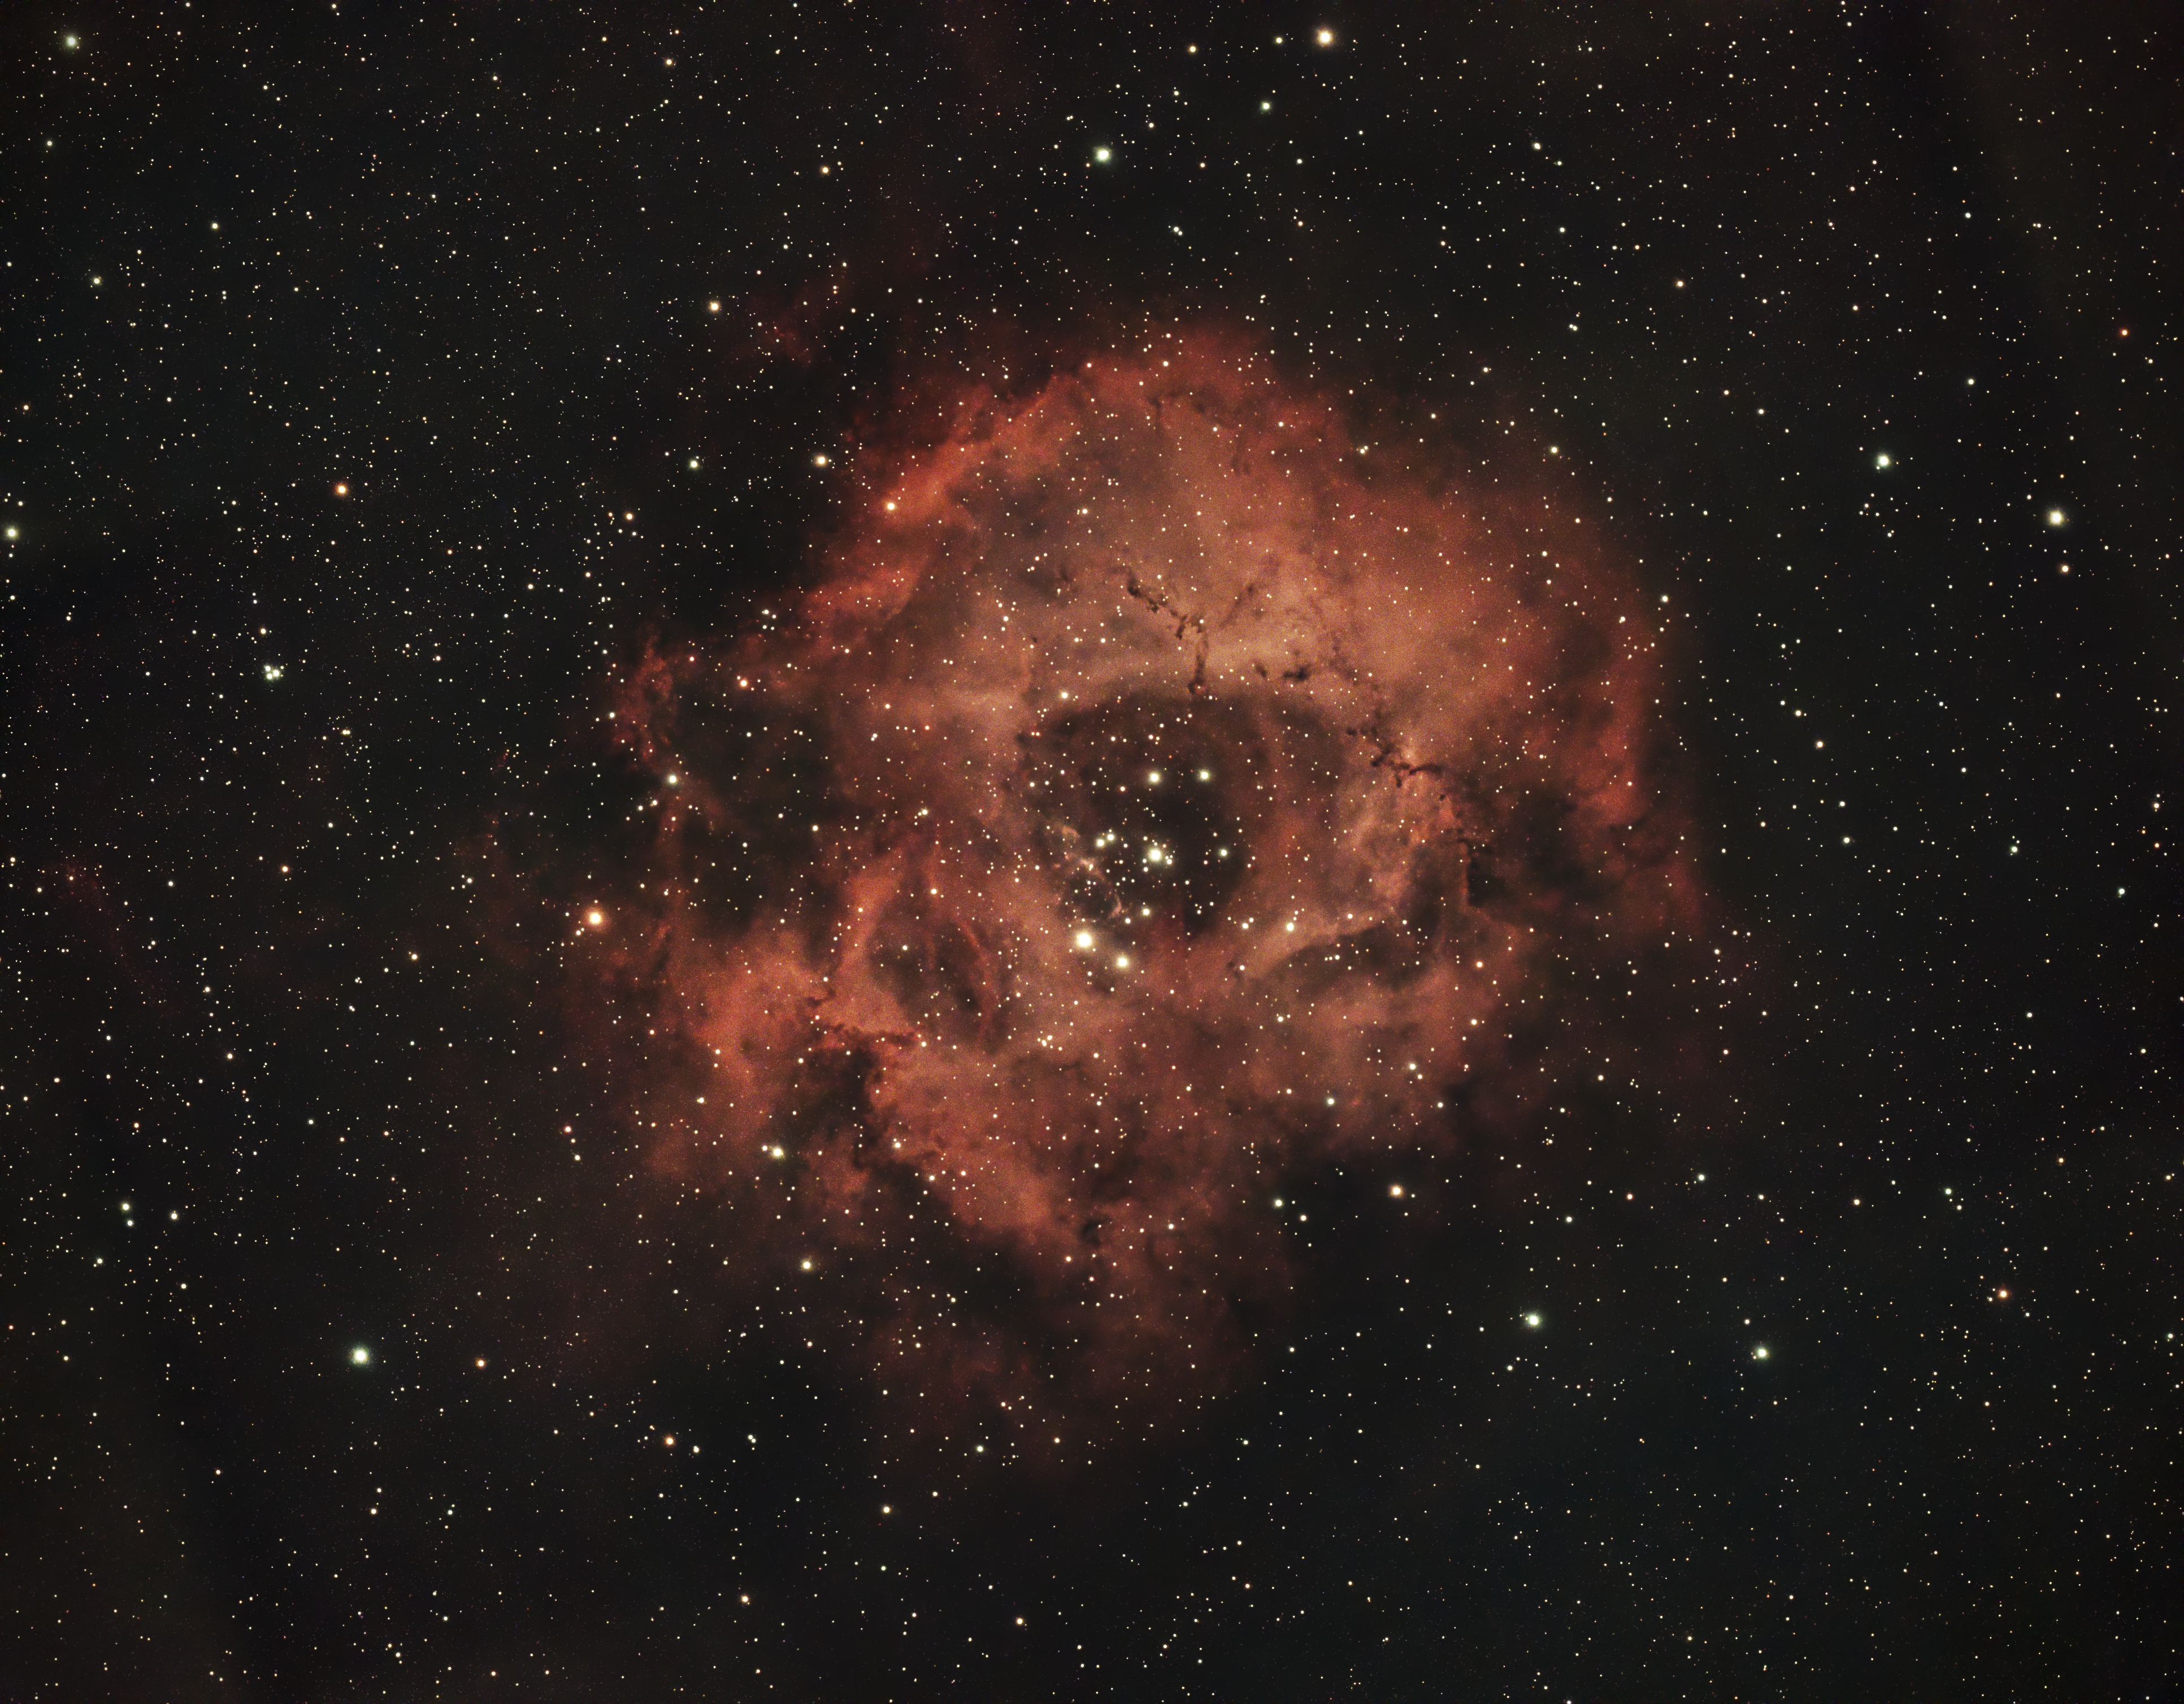
Here’s my 90-minute panorama picture of the Rosette Nebula, where I used the dual-band filter again, capturing it from my Bortle Class 7 light-polluted urban skies.
Vaonis Vespera II – Final Verdict
So, what’s my final verdict on the Vaonis Vespera 2? Well, I am quite fond of it, though I acknowledge that some of my dedicated astrophotography friends might shake their heads in disapproval. Let me explain why.
The Vespera 2 boasts a beautiful design and is completely wireless, doubling as a piece of tech art in my living room. It offers a nearly nonexistent learning curve for beginners, allowing people to effortlessly enjoy the night sky. The Singularity APP is user-friendly, and for those seeking a greater challenge, downloading and processing FITS and TIFF files opens up the possibility of post-processing and creating unique pictures.
The resulting images of the Sun, Moon, and various deep-sky objects are of good quality. The Vespera II particularly excells with larger nebulae, thanks to the Vespera 2’s newer 585 sensor and its unique mosaic mode for panoramic pictures.
Is it the most affordable option at around $1600? No. The Seestar S50 and Dwarf II are more budget-friendly but come with lower resolution and smaller camera sensors. Is it too expensive for a smart telescope? Let’s consider the alternative. A decent equatorial mount, an astrophotography telescope, guiding equipment, and a decent camera easily surpass $2K, not to mention the steep learning curve associated with mastering our beautiful astrophotography hobby.
Does it have the best hardware? No. Does it yield the best pictures compared to more traditional astrophotography setups? No. But the ability to turn on the Vespera and enjoy the night sky in under 5 minutes is a significant advantage. With almost constant rain in the Netherlands throughout the winter, I only had the chance to use my expensive astrophotography rig on a couple of clear nights in January.
Smart telescopes like the Vespera 2 shine when there’s a brief break in the clouds, offering a quick and convenient way to observe and capture celestial objects. Just refrain from using it for planetary imaging – for that, you’ll need a much larger telescope, as discussed in this overview.
Clear skies!
Wido.
Can you give a little detail on how you edit the photos with Vaonis? Do you take raw images and stack them yourself? Do you edit the tif? Or is what you’ve shown the jpeg that Vaonis software has processed?
The pictures are processed TIFF files. I take the automatically stacked TIFF file and sharpen them a bit using processing tools (Pixinsight). The original images are already quite good. I’ll make a note to add them in this post. Cheers.
Heeft u al een opvatting over de pro versie. Is het de extra investering waard.
How does this scope do looking at planets? Can we see decent detail on those or are those objects too small to get detail?
none of these smart telescopes are great for planetary imaging. I suggest you read my blog on telescopes that are good for planetary imaging:
https://astroforumspace.com/best-telescopes-to-photograph-the-planets/