With the upcoming Solar Eclipse, I’ve explored how to take pictures of the Sun using a DSLR camera and two affordable smart telescopes: the Seestar S50 and the Dwarf II. In my detailed comparison and tutorial blog, I share all the interesting details of my experiences in Sun photography. Plus, I’m giving away extra tips on how you can capture amazing shots during the upcoming solar eclipse. Will the DSLR camera be the best, or will the smart telescopes steal the spotlight? Keep reading to find out! And let’s hope for clear skies on April 8, 2024, for an unforgettable eclipse viewing!
Total Solar Eclipse, April 8 2024
The total solar eclipse will be visible in parts of Mexico, the United States, and Canada on April 8, 2024. To witness the full eclipse, make sure you position yourself in the path of totality. For detailed information, visit timeandate.com. Once you’re in the path of totality, you’ll experience a breathtaking event. The moon will gracefully advance in front of the Sun. This will take about 75 minutes and lead to a climax when the moon completely obscures the sun. At this point, the Sun’s corona will be on full display, allowing you to safely remove your solar eclipse glasses and solar filters for an immersive experience. You may see some bright planets, stars, and even a bright comet which will be close to the Sun on April 8th. After a few minutes, the moon gradually moves away from the Sun until the full disc of the Sun is restored. The entire celestial event spans about 3 hours, and it will be an unforgettable show!
Different ways to photograph the solar eclipse
You have several options for capturing the eclipse. One approach could be to create a seamless time-lapse video to document the entire event. Alternatively, you might choose to capture high-quality photos or videos of the Sun during different phases of the eclipse. Then, there are those precious few minutes during totality when you may want to remove the solar filter to capture the Sun’s corona, planets, stars, and possibly even a comet in the daytime sky. in this blog, I will delve into the time-lapse, photo, and video capabilities when using a DSLR, the Seestar S50, and the Dwarf II, highlighting the advantages and disadvantages of each option along the way. Let’s begin with the DSLR camera.
Photographing the Solar Eclipse with a DSLR Camera and Telephoto lens
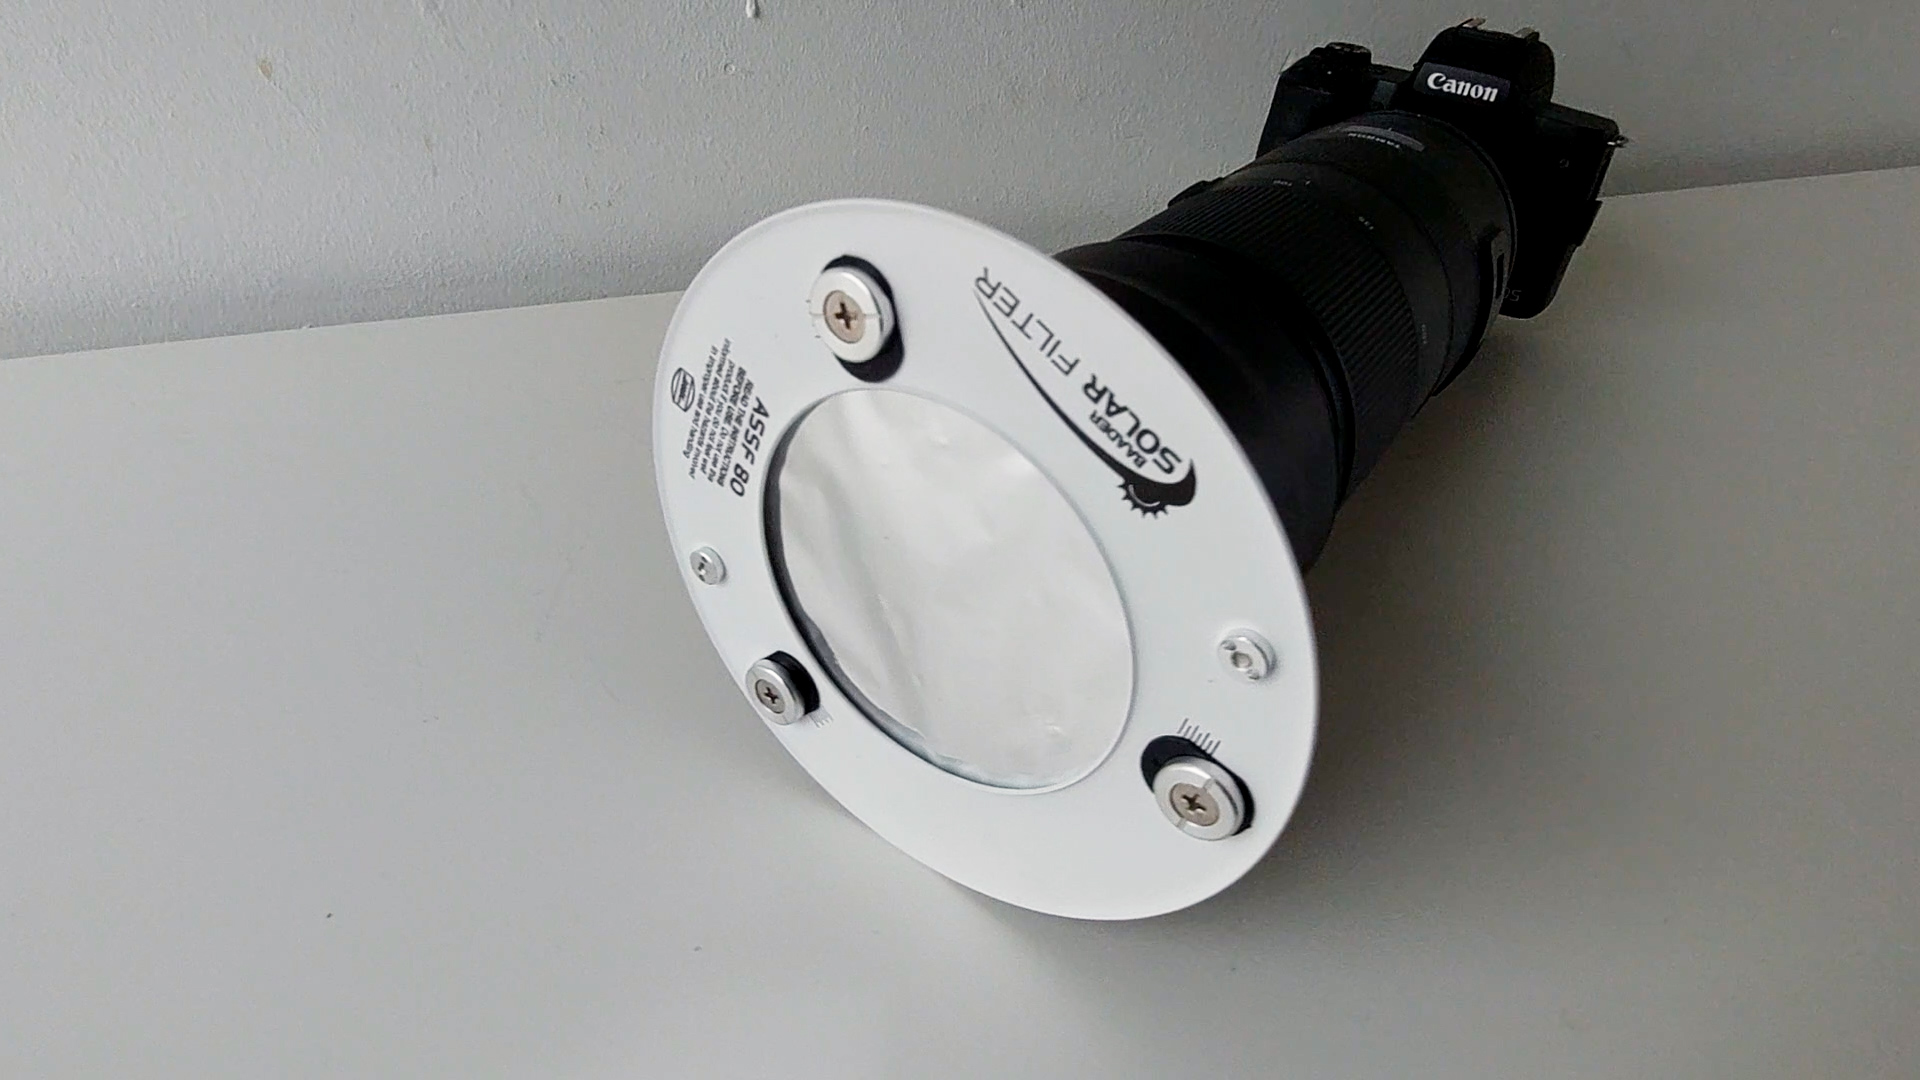
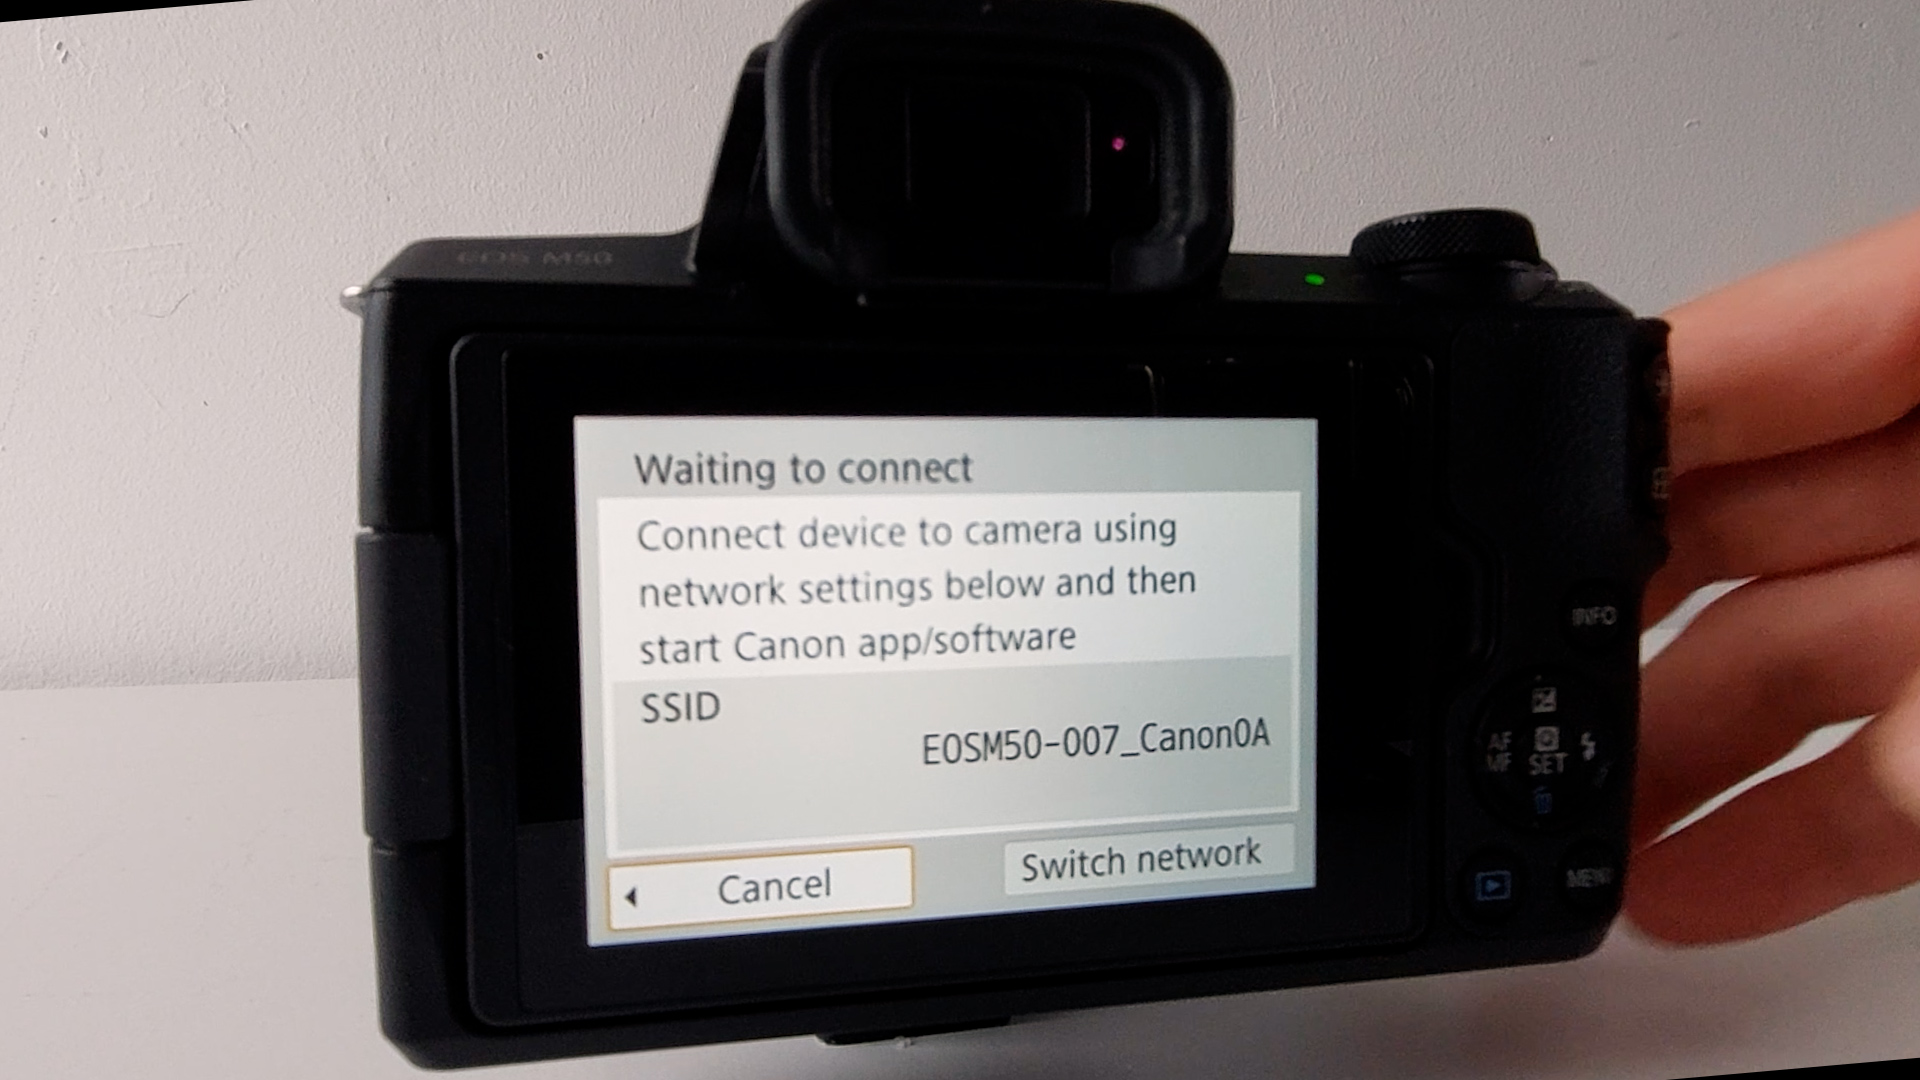
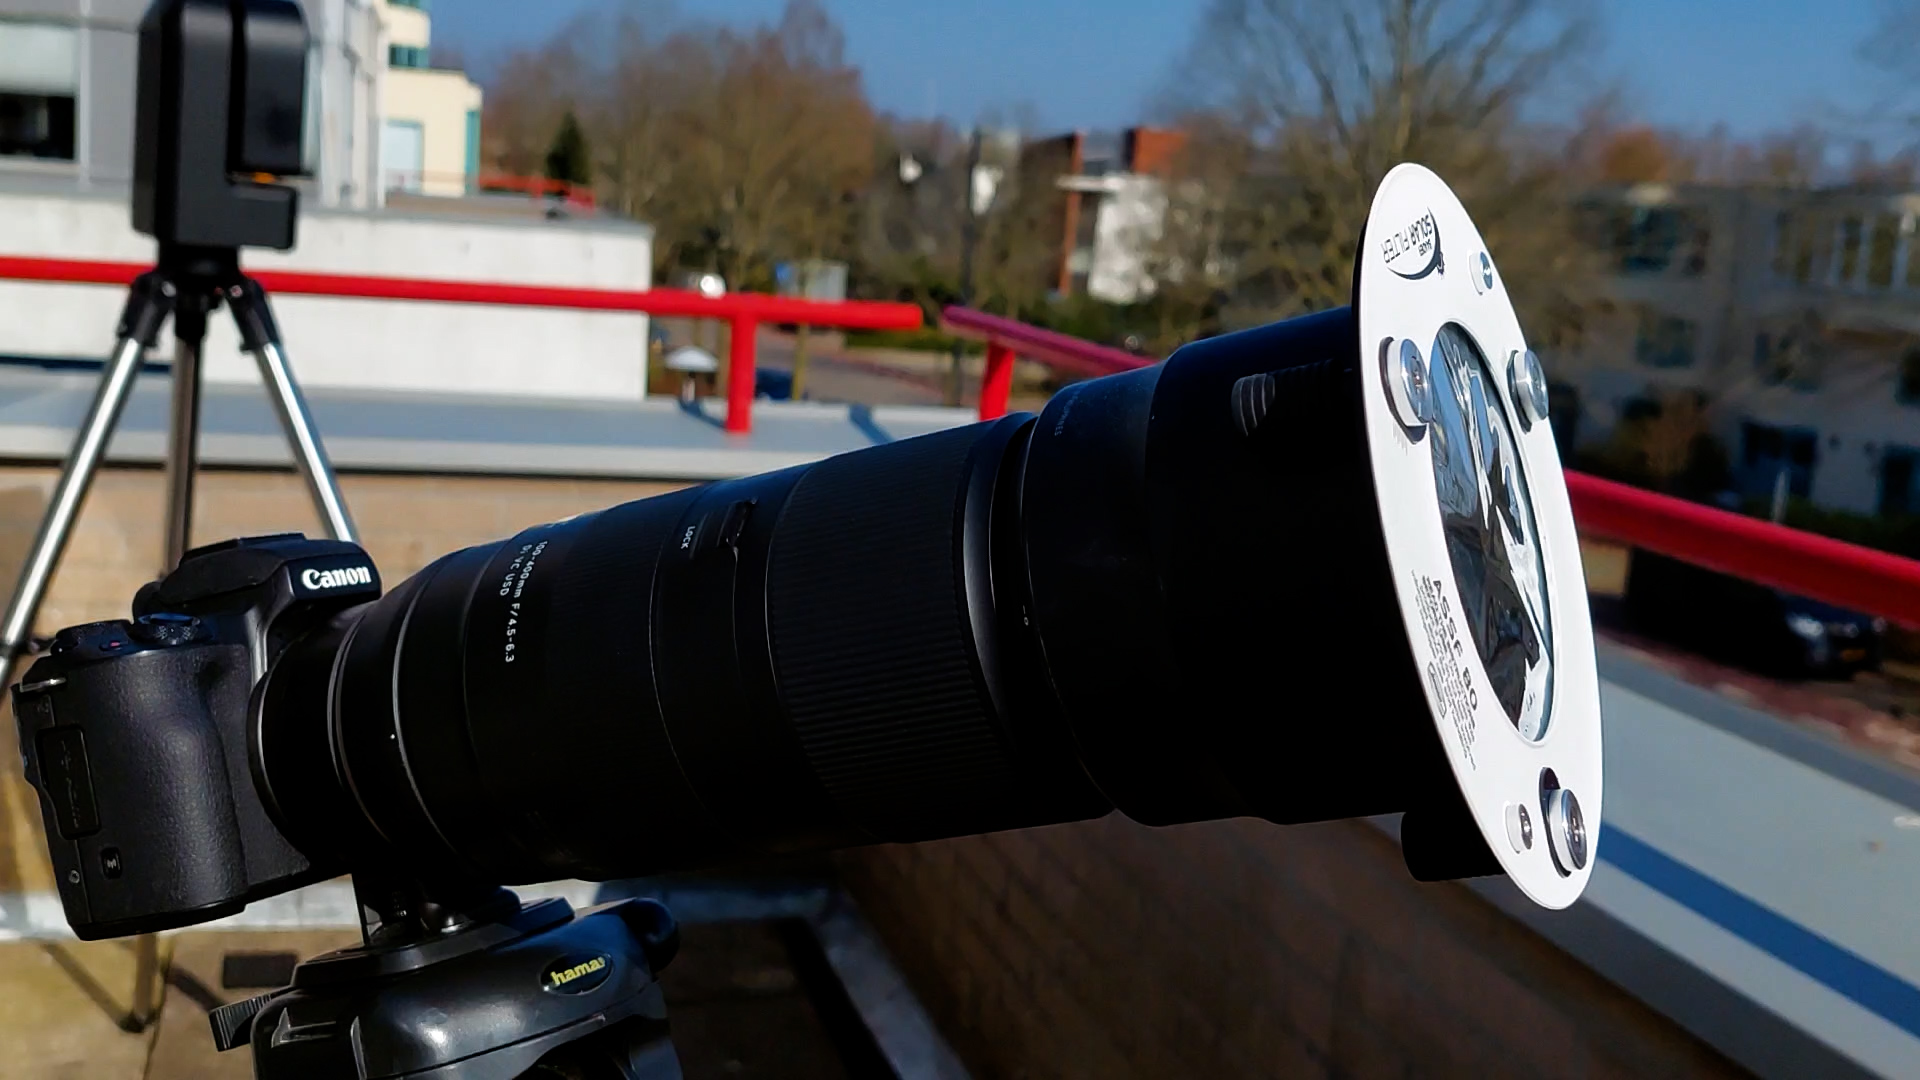
In this first test, I used my 100 to 400mm Tamron telephoto lens and an affordable tripod to capture the Sun on a windy day. I placed an 80mm Baader solar filter in front of the lens cap to safely capture the Sun. I controlled my camera using a remote camera control app on my smartphone, to avoid serious vibrations when pushing the shutter button manually at long focal lengths, which would lead to blurry pictures. A remote shutter cable is also an option, but as my Canon M50 doesn’t have a shutter release output, I’ll control it over WiFi using a remote APP. You may want to bring some extra batteries too, as you don’t want to run out of power during this event.

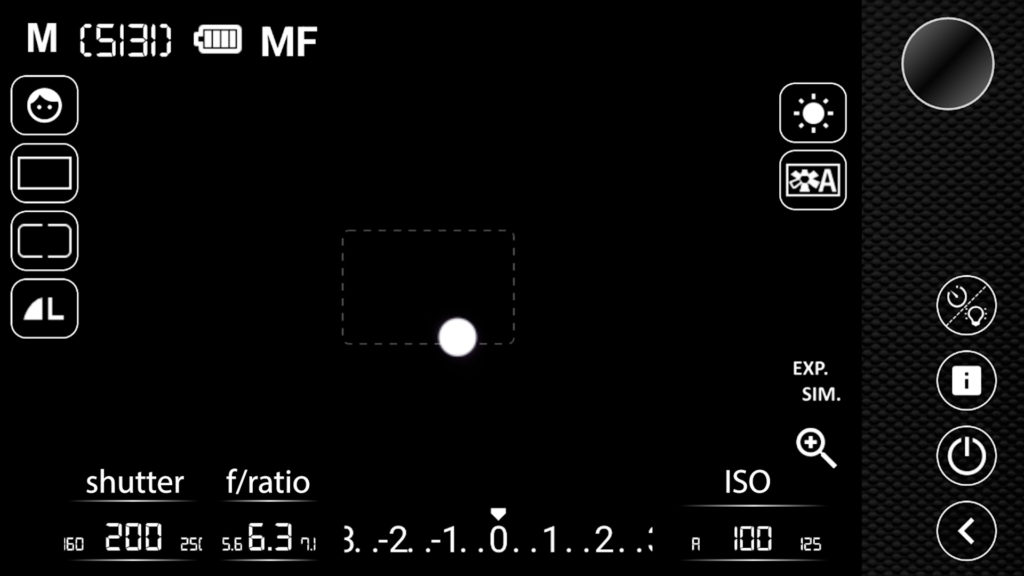
The live view of the camera control app displays the shutter speed and f/ratio on the bottom left and the ISO level at the bottom right. As a first step, I pointed my camera at the sun and moved the telephoto lens to 400mm. I set my camera dial to ‘M’ and put my focus to manual, as the autofocus option is often unstable when focusing on a bright object like the Sun. I found that a shutter speed of 1/200th of a second at the lowest ISO setting of 100, with an f/ratio of 6.3, revealed the Sun’s disc.
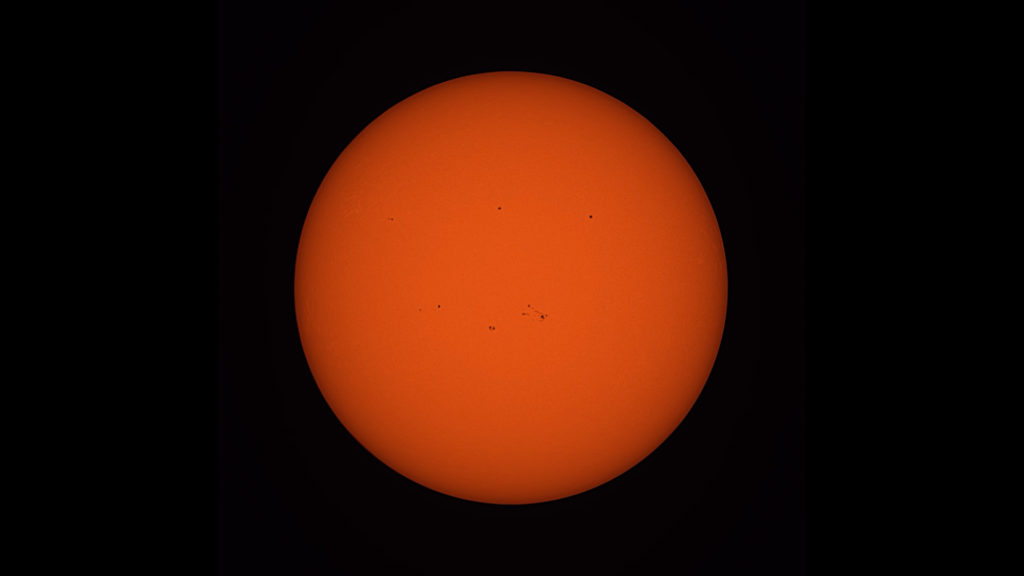
To focus the camera properly, I set the shutter speed to 1/800th which revealed some sunspot groups on the Sun. The Sun is at its solar maximum in 2024, so it is likely that there will be sunspots during the eclipse on April 8th as well. Next, I used the magnifying glass, available on most DSLR cameras in manual focus mode, to get a 5x to 10x digital zoom on the Suns disc and I tried to focus on the sunspots. This was quite challenging, as manually focusing the camera at high focal lengths leads to considerable vibrations. After I was satisfied with the focus, I started taking some test shots.
Planning your time-lapse video
Before showing you some results, let’s do some math first and consider creating a time-lapse of the full event. Let’s say you take pictures at 2 second intervals. You’ll end up with 30 photos per minute. If we take a video playback speed of 30 frames per second, every minute will equal one second in the time-lapse video. The total solar eclipse will last for about 3 hours, which includes the moon slowly moving in front of the Sun, the total eclipse, and the moon slowly leaving the sun’s disc. 180 minutes equals a time-lapse video of 180 seconds at a playback speed of 30 fps, about 3 minutes. Opting for a 4 second interval will get you to 1 minute and 30 seconds, an 8s interval will lead to a 45 second time-lapse video, and so on.
I programmed the APP to shoot 250 photos at 1-second intervals. As you can see below (left video), the Sun slowly moved out of the field of view of the camera. So when using a normal tripod, you will need to reposition your camera approximately every 5 minute minutes to keep the Sun centered. If that’s your strategy, I’d recommend you practice how to manually track the Sun in advance with your tripod, so you don’t run into any last minute surprises. A second challenge were the strong wind gusts that day. I put the 250 pictures in a movie sequence, and I ended up with a shaky time-lapse video. The good news is that we have lots of processing software available nowadays, so I aligned the photos and created a more stable video (video on the right) of that same time-lapse, which lasted approx. 5 minutes. Without going into details, I used a module called FFTregistration in Pixinsight (paid), but free software tools like PIPP can also align your frames. You can also consider buying a good quality star tracker and use it in combination with a DSLR camera. This will solve your tracking issue. In this video I show you how to I set up and track celestial objects like the Sun, using my SkyWatcher 2i Pro star tracker. What also helps is finding a spot sheltered from wind gusts, if you can.
Photo format and Total Solar Eclipse settings
Let’s delve into the photo format options. RAW files offer the greatest flexibility for processing, though they are larger and require more time for processing, especially in large quantities. On the other hand, high-quality JPEG files (L) are more compact and quicker to process en masse, albeit with fewer processing options. For creating a continuous time-lapse video, JPEG might suffice, particularly when considering that at a 400mm focal length, the sun’s details are limited to a few sunspots. However, if your priority is capturing high-quality photos throughout the eclipse phases and you’re not concerned about time-lapses, RAW is the preferable choice. The above time-lapse was captured in the highest quality JPEG format (L) on my Canon M50.
Capturing totality with a DSLR Camera
Let’s also take into account the brief window of opportunity you have to capture images during the total eclipse. During this phase, the moon completely obscures the Sun’s disc, and the faint corona becomes visible for a few minutes. At this brief moment, you can remove your solar filter and adjust your shutter speed to properly capture the Sun’s corona. Although I didn’t experience a solar eclipse on that particular day, I experimented by lowering the shutter speed on my DSLR while keeping the solar filter in place. I found that using a shutter speed of 1/15th produced satisfactory results, revealing halos around the Sun. This aligns with information from Fred Espenak’s factsheet, which suggests that at ISO 100 and approximately f/6.3, a shutter speed of 1/15th to 1/8th of a second will yield a decent corona size of 1 solar radius. I captured several high-quality RAW images of the solar halo that day. Below is an example resized to 1920×1080. For further guidance, I recommend consulting Fred’s comprehensive instructions and user-friendly spreadsheet for ISO, f/number, and shutter speed settings for solar eclipses here.
Here’s my simulation of the solar eclipse when using a DSLR and a 400mm telephoto lens. I created a moving black circle to simulate the moon, and I used the time-lapse video and RAW photos from that day to create this GIF.
Photographing the Solar Eclipse with the Seestar S50
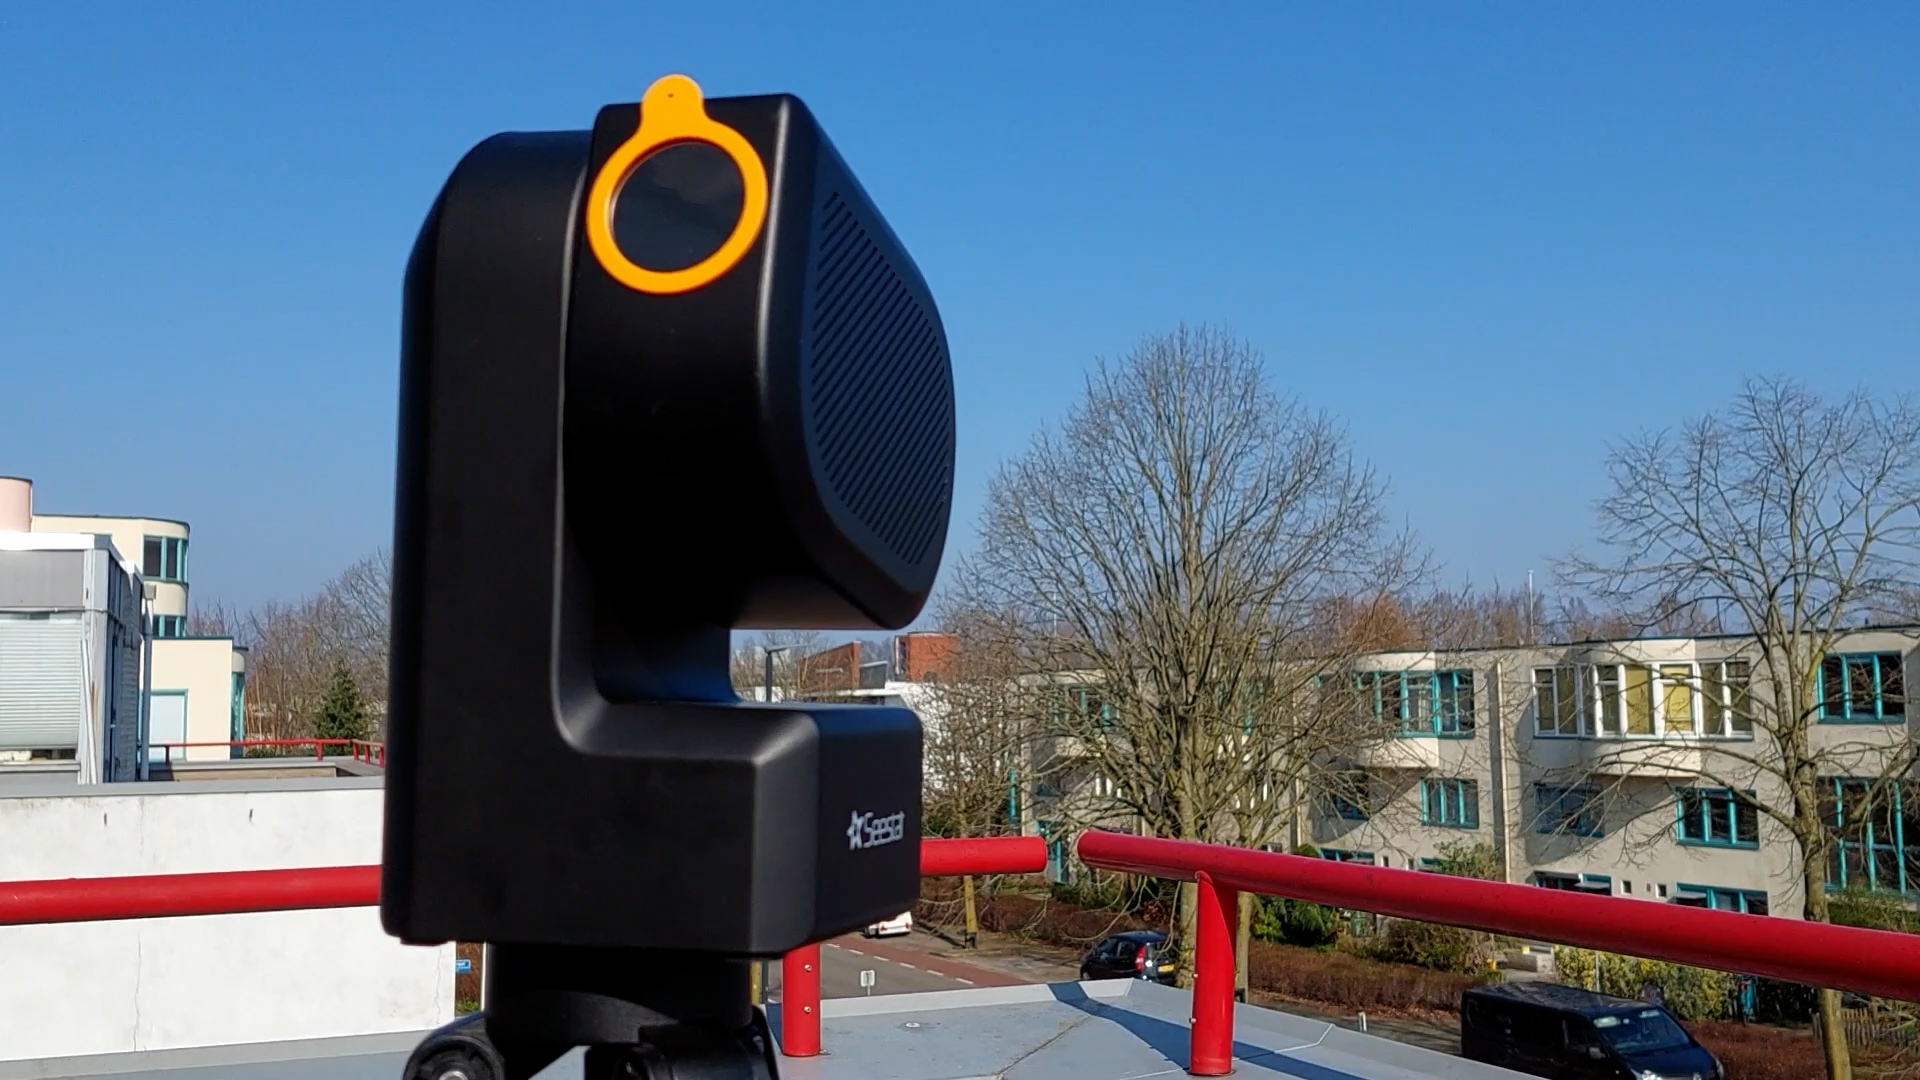
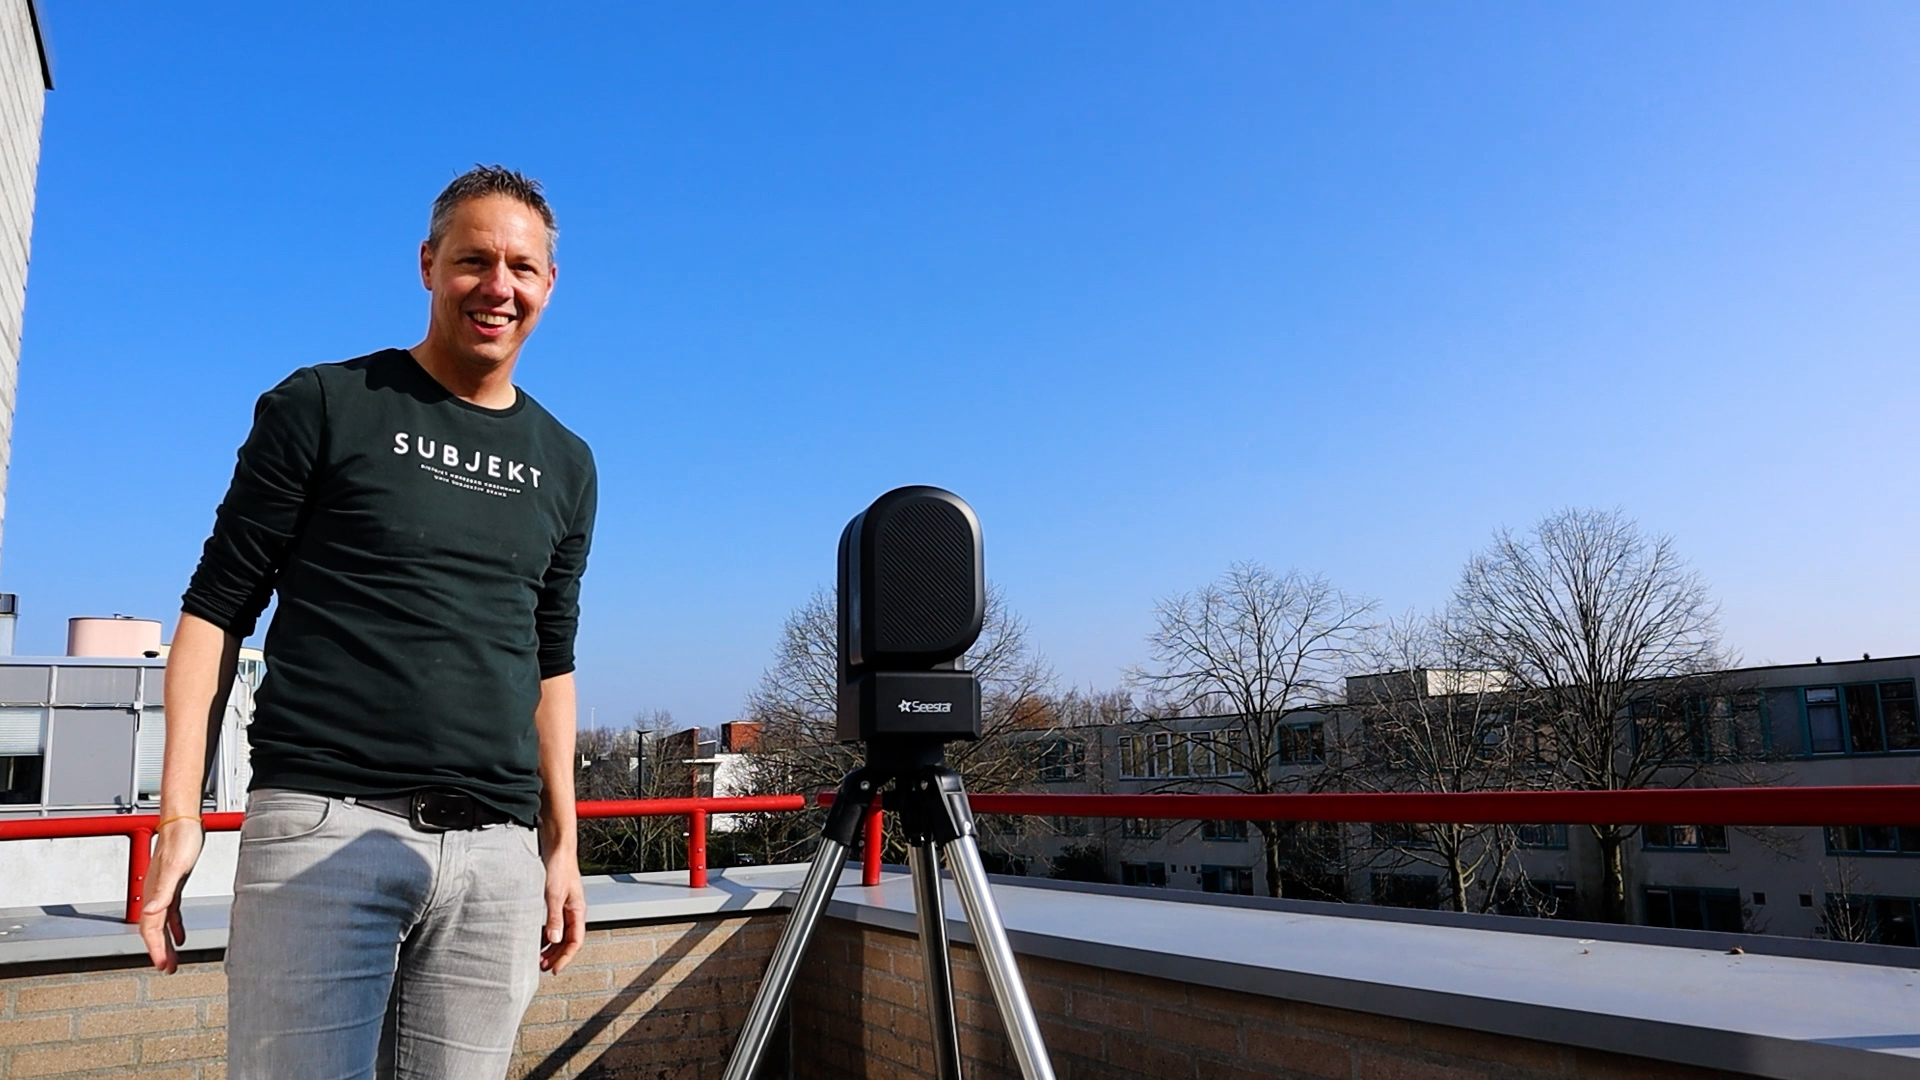
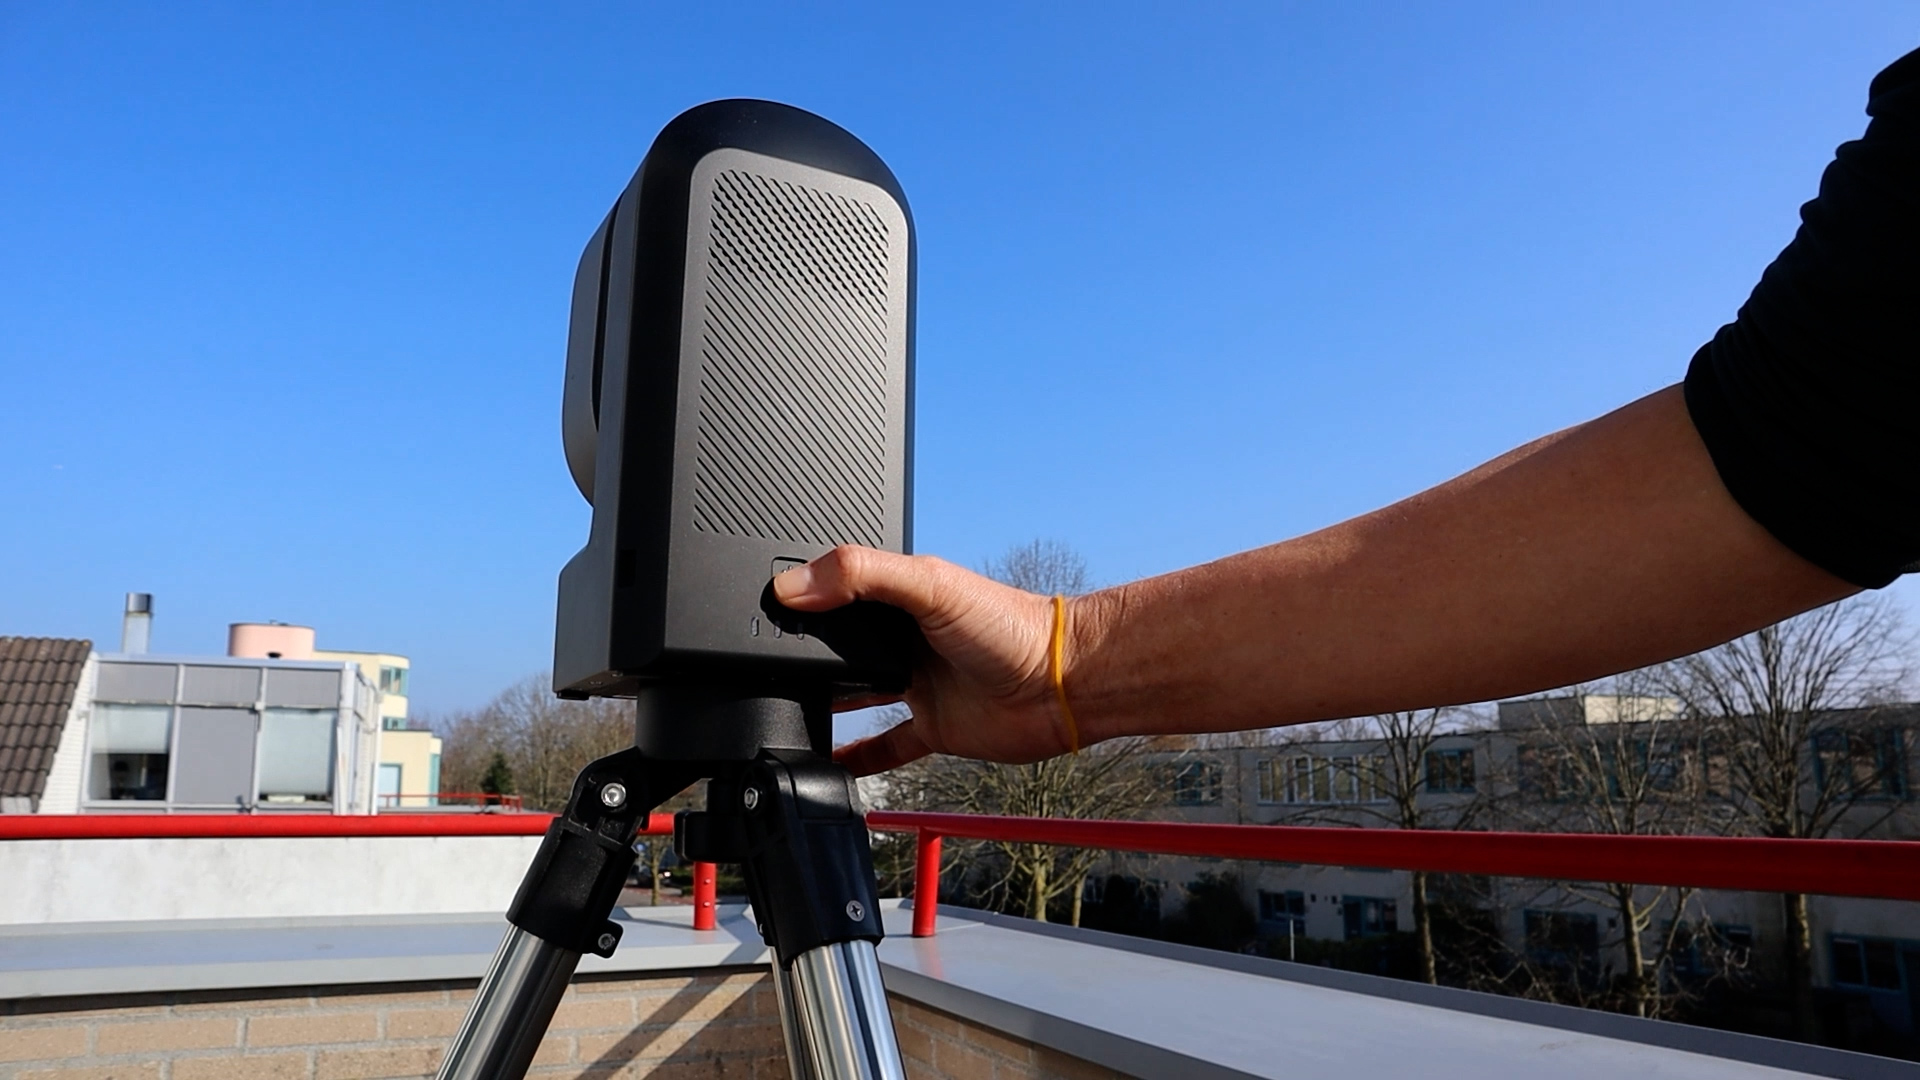
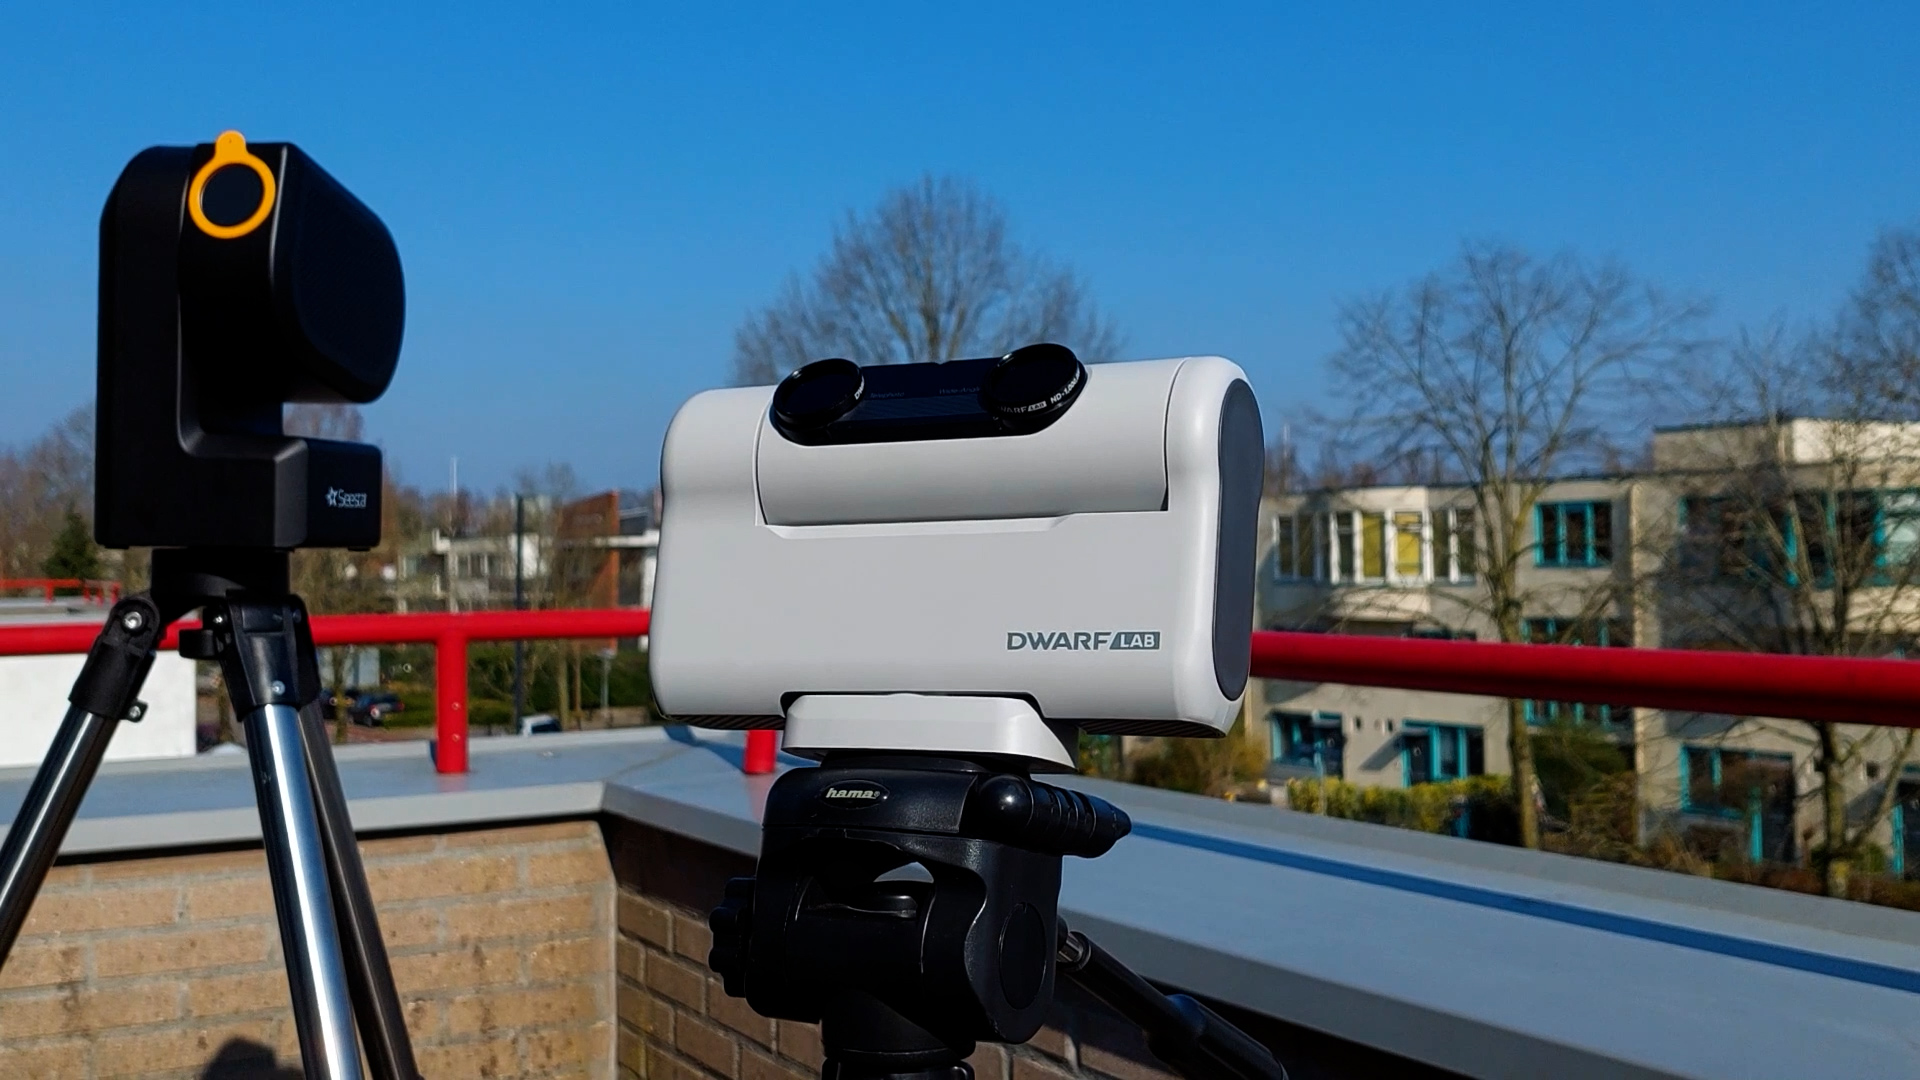
So, what about utilizing a smart telescope? On that same windy day, I conducted tests with both the Seestar S50 and the Dwarf II smart telescopes. Let’s begin with the Seestar S50. Engaging in solar imaging with the Seestar is remarkably simple. For a more comprehensive review of the Seestar, you can refer to my detailed review here. When fully charged, the Seestar can operate for up to 6 hours before requiring a recharge, providing ample time for recording the solar eclipse. Control of the Seestar S50 is facilitated through the Seestar app via WiFi, which is compatible with iOS and Android smart devices. It’s worth noting that internet connectivity is not necessary as the WiFi signal is generated by the telescope itself, allowing for usage even in remote locations.
The ZWO Seestar S50 Smart Telescope is available at ZWO, Agena Astro (USA/WW), High Point Scientific (USA/WW), and Astroshop (EU/WW)
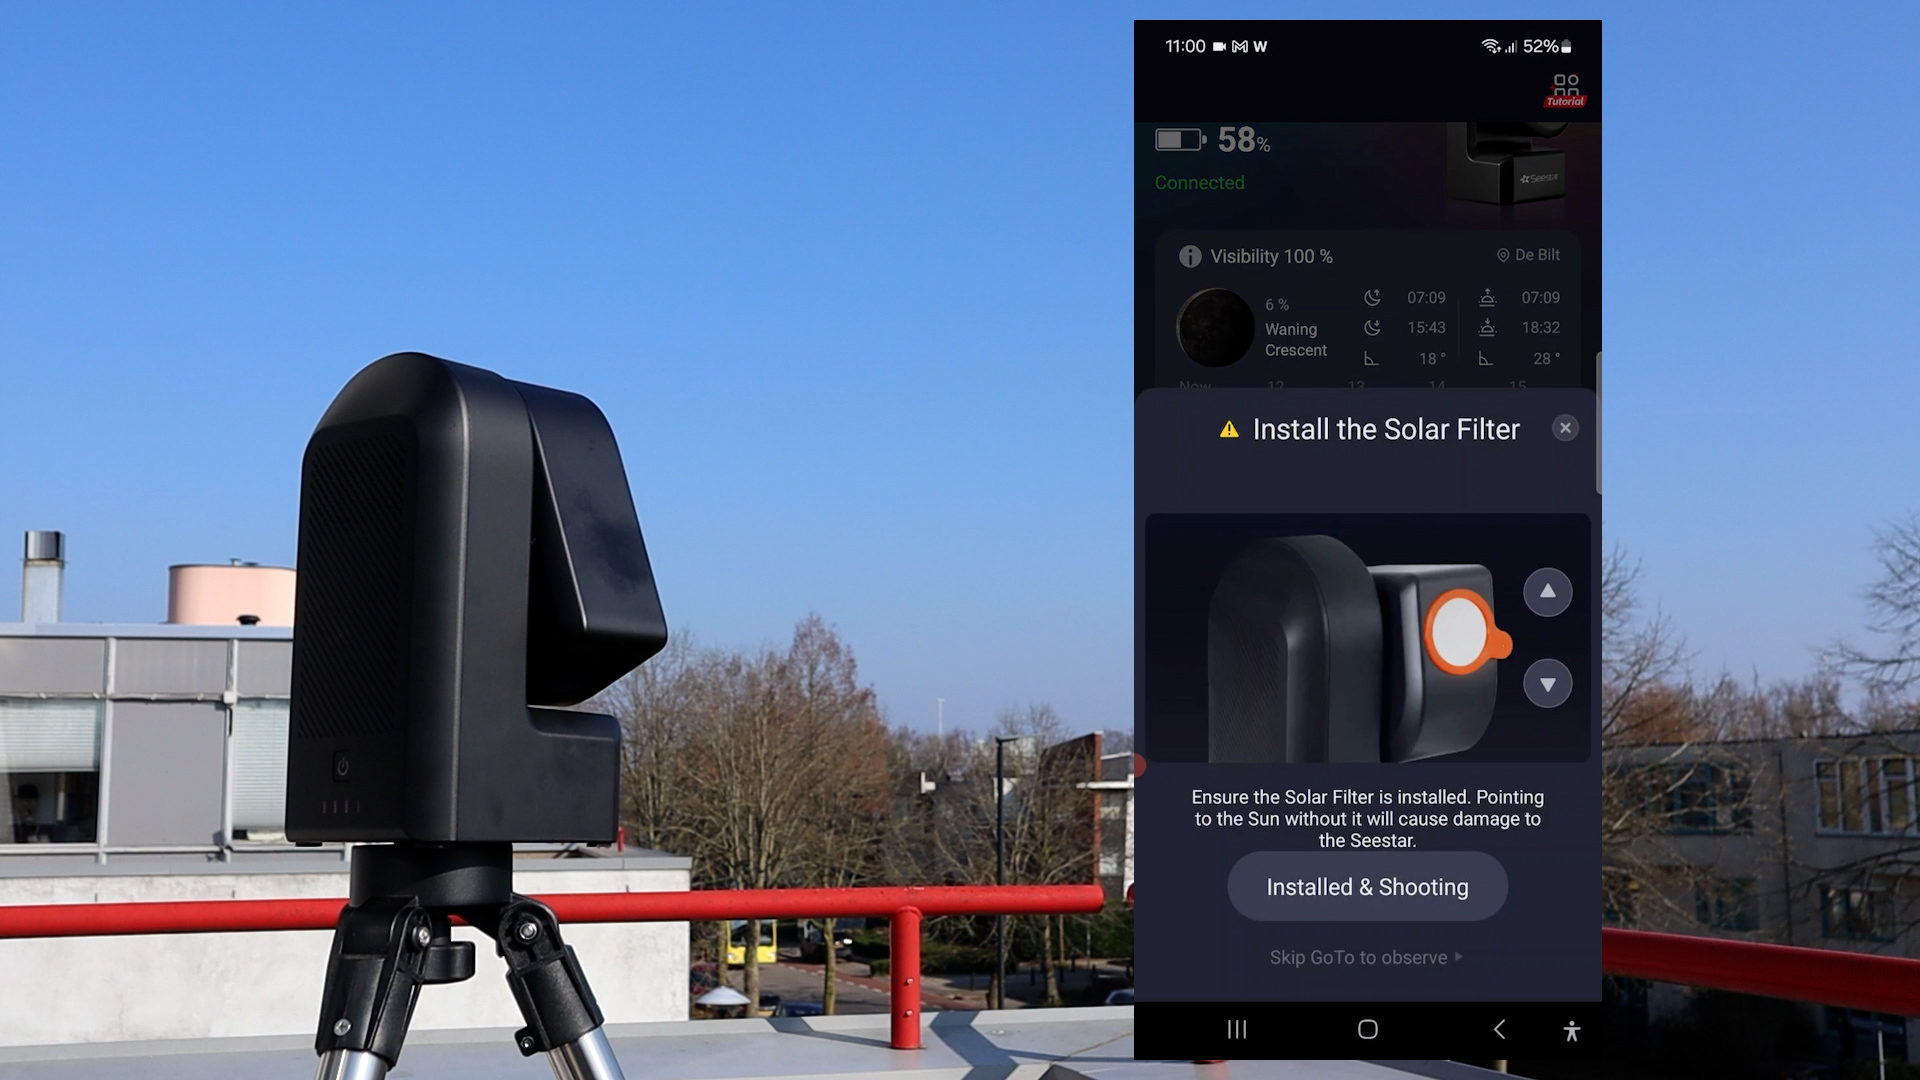
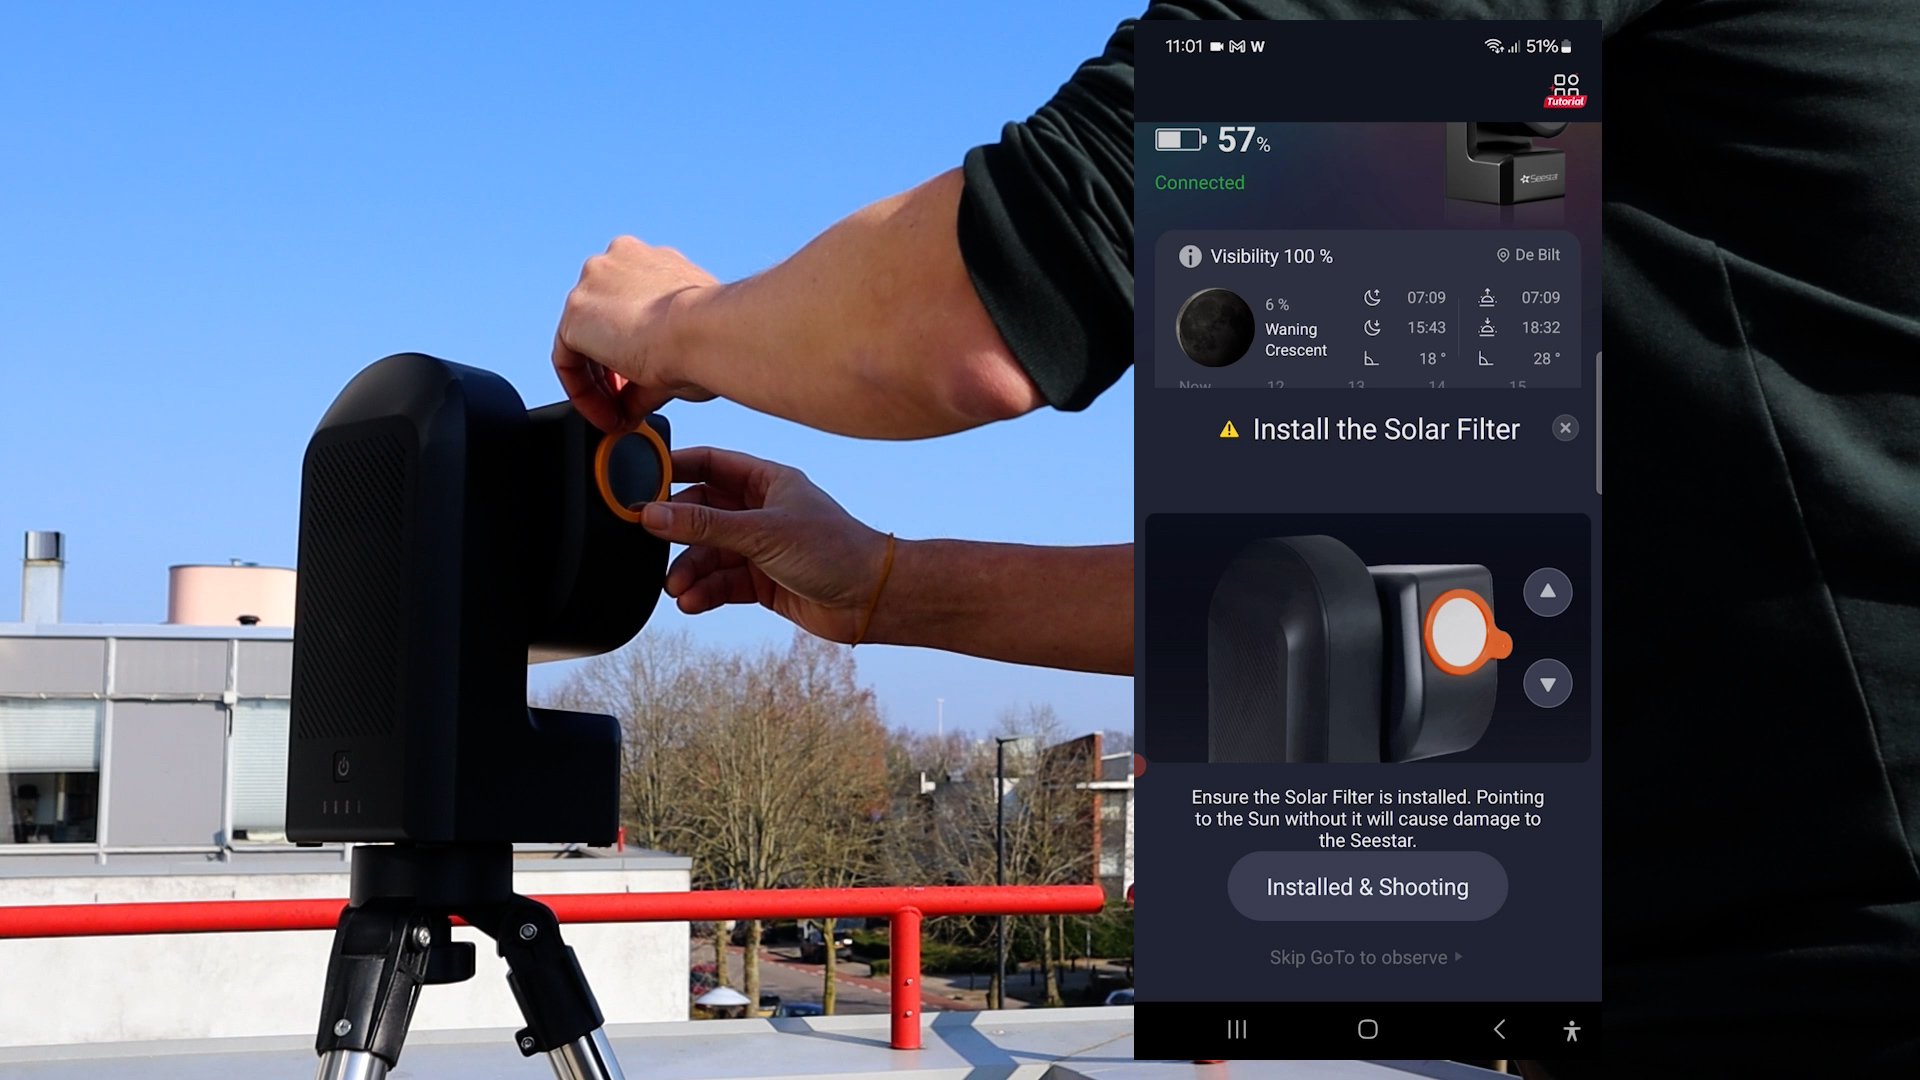
You can power on the Seestar S50 and establish a connection with the telescope via WiFi. Within the main screen of the app, you’ll discover an option for solar mode. Upon selecting this mode, the app prompts you to place the solar filter provided with the Seestar S50 in front of the telescope lens. Using the up and down arrows within the app, you can adjust the telescope’s position. Simply affix the solar filter to the telescope lens, ensure your tripod is level, and orient the Seestar towards the Sun. Once these steps are completed, press ‘install,’ and the Seestar will autonomously locate the sun in the daytime sky. The entire disc of the Sun neatly fits within the field of view of the Seestar S50. To maintain the Sun centered in the field of view, you can activate the automatic tracking feature located in the top right corner. The Seestar’s presets depict the Sun in orange, but you have the option to modify the color using basic editing tools when processing your pictures or videos.

One significant advantage of smart telescopes like the Seestar S50 is their ability to automatically track the Sun, eliminating the need for manual repositioning of the telescope. This allows you to effortlessly observe the various phases of the solar eclipse without any concerns. Additionally, the autofocus feature is remarkably straightforward. Simply activate the AF function, position the green rectangle over some sunspots, and the telescope will autofocus within seconds. You can also zoom in by either pinching your screen or selecting up to 4x zoom within the app. Concerns have been raised regarding potential heat buildup when using the Seestar for extended periods under the sun. To test this, I directed the Seestar at the sun for over two hours during my testing, and it displayed no issues.
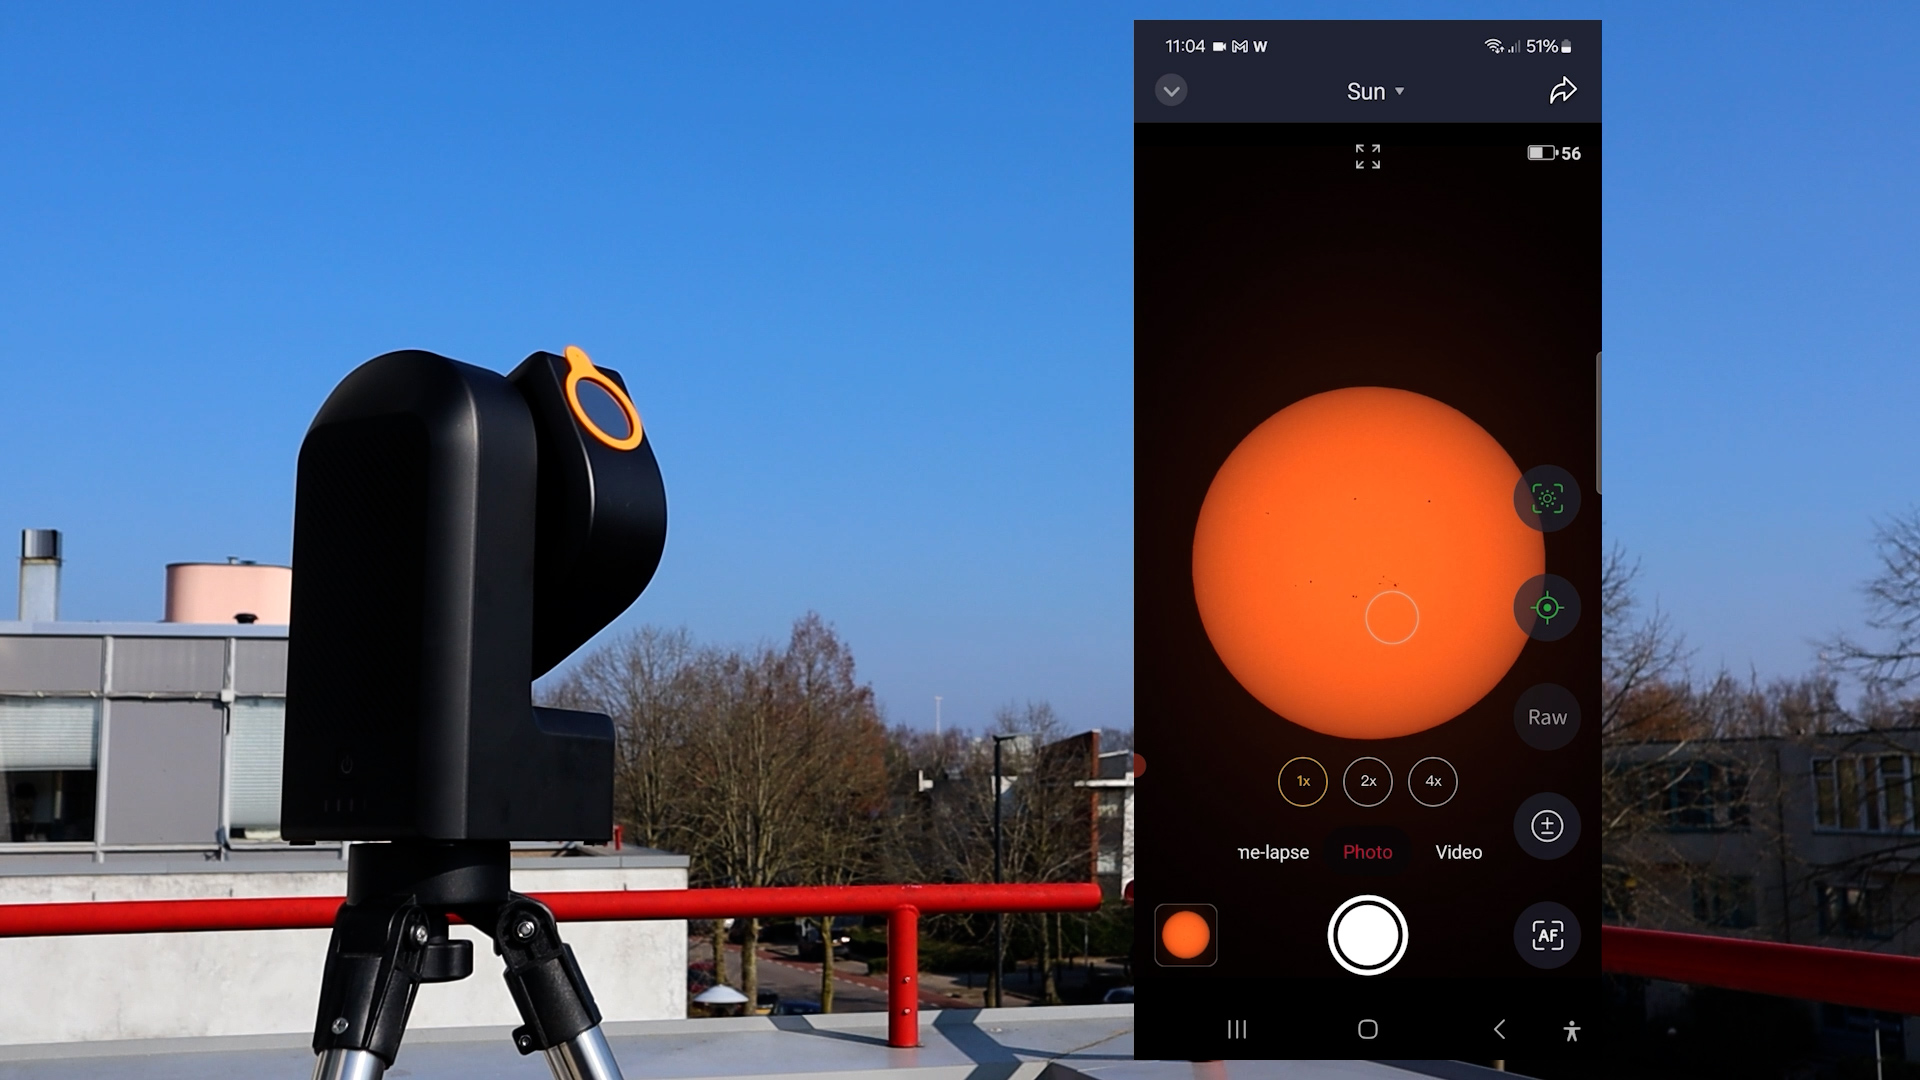
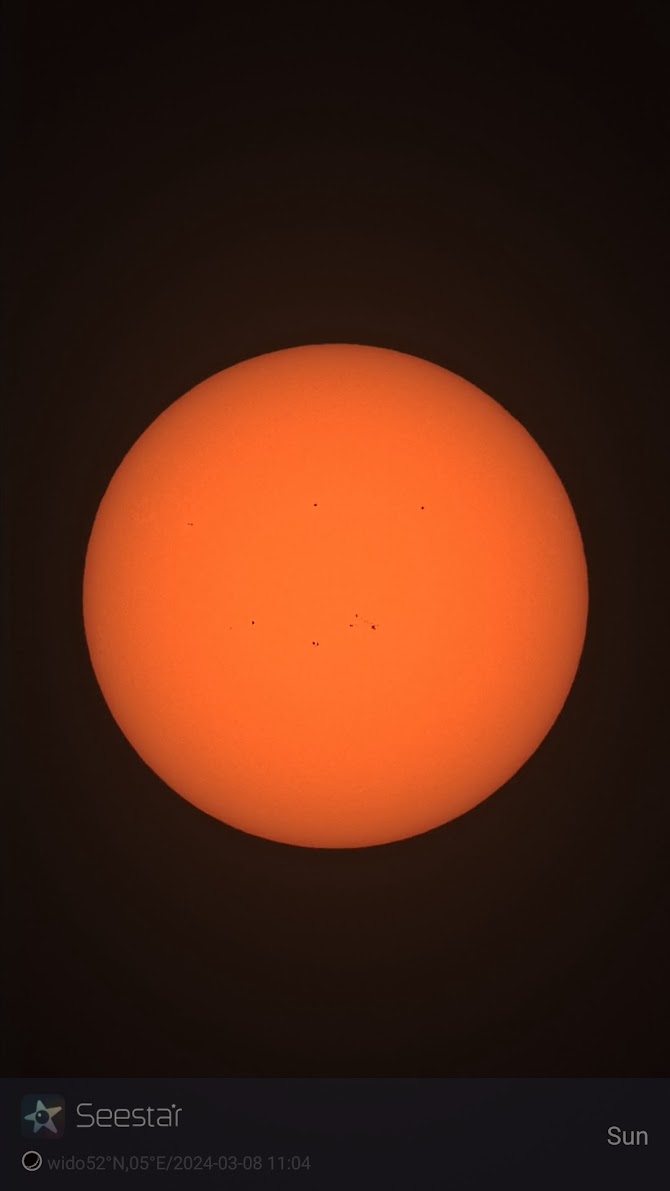
Now, let’s explore the capturing options. The simplest method to capture the Sun using the Seestar is to choose the photo mode located at the bottom of your screen and then press the record button. The Seestar will capture a JPEG image of the Sun and download it to your smart device with annotations specifying the date and location (please inform me before visiting :-)).
Creating a time-lapse video of the Solar Eclipse with the Seestar S50
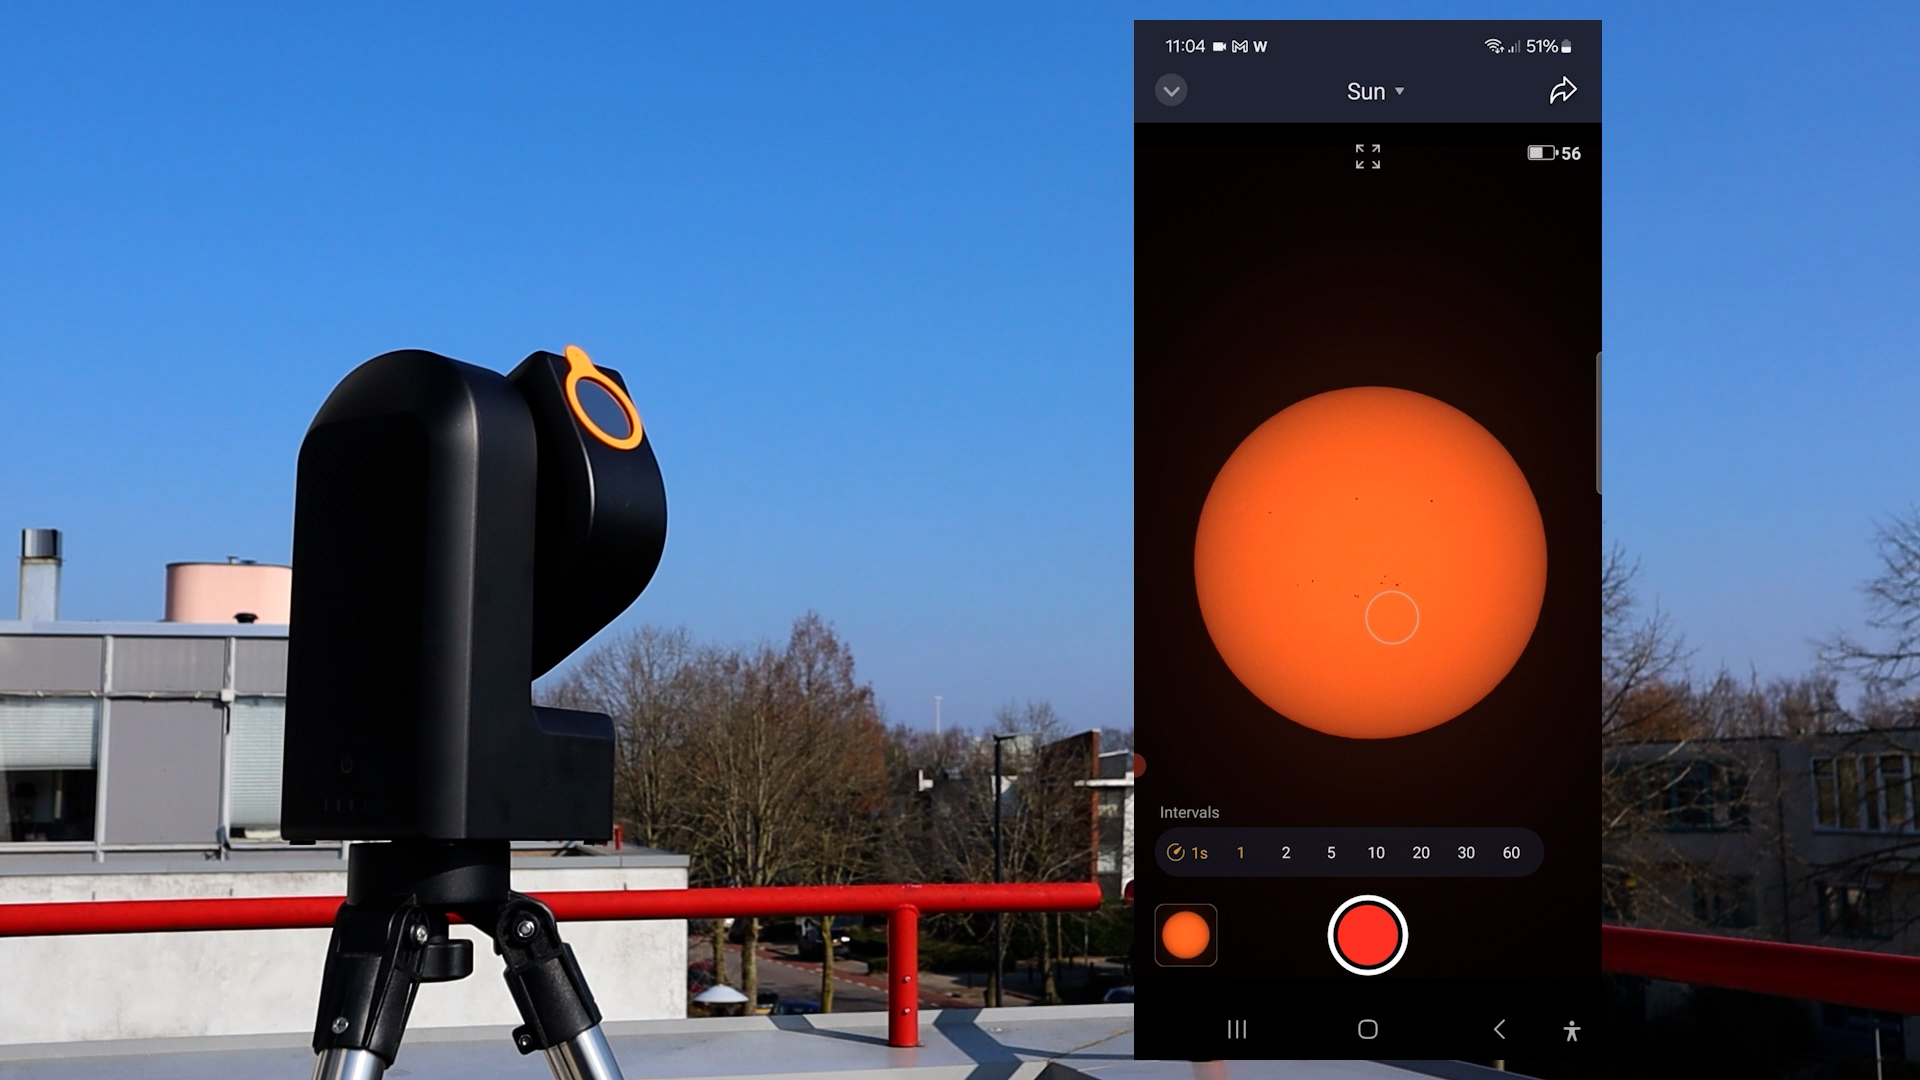
You also have the option to choose the time-lapse mode for generating a time-lapse video. Upon selecting the time-lapse mode at the bottom of the screen, the app presents interval options ranging from 1 to 60 seconds. I opted to track the sun for approximately 10 minutes with 2-second intervals. Once the recording is complete, pressing the stop button prompts the Seestar to automatically save the time-lapse video in MP4 format onto its internal memory card (64GB).
While the tracking of the Seestar S50 is generally reliable, it’s not flawless. Here’s a compressed 10-minute time-lapse video played within 10 seconds (left video). You’ll notice considerable movement of the Sun throughout. To address this, I employed various processing techniques, notably utilizing a module called FFTregistration in Pixinsight (requires payment) to align the Sun’s disc across all frames of the video (video on the right). Alternatively, you can utilize free software tools like PIPP for frame alignment. Below, you’ll find both the original and stabilized versions of the time-lapse videos. Remarkably, a 10-minute time-lapse at 2-second intervals only occupies 15MB of space, allowing you to easily capture the entire three-hour eclipse period in time-lapse format, resulting in a 270MB MP4 video file. As mentioned before, using a 2-second interval over three hours for the entire event would yield a three-minute video at 30 frames per second.
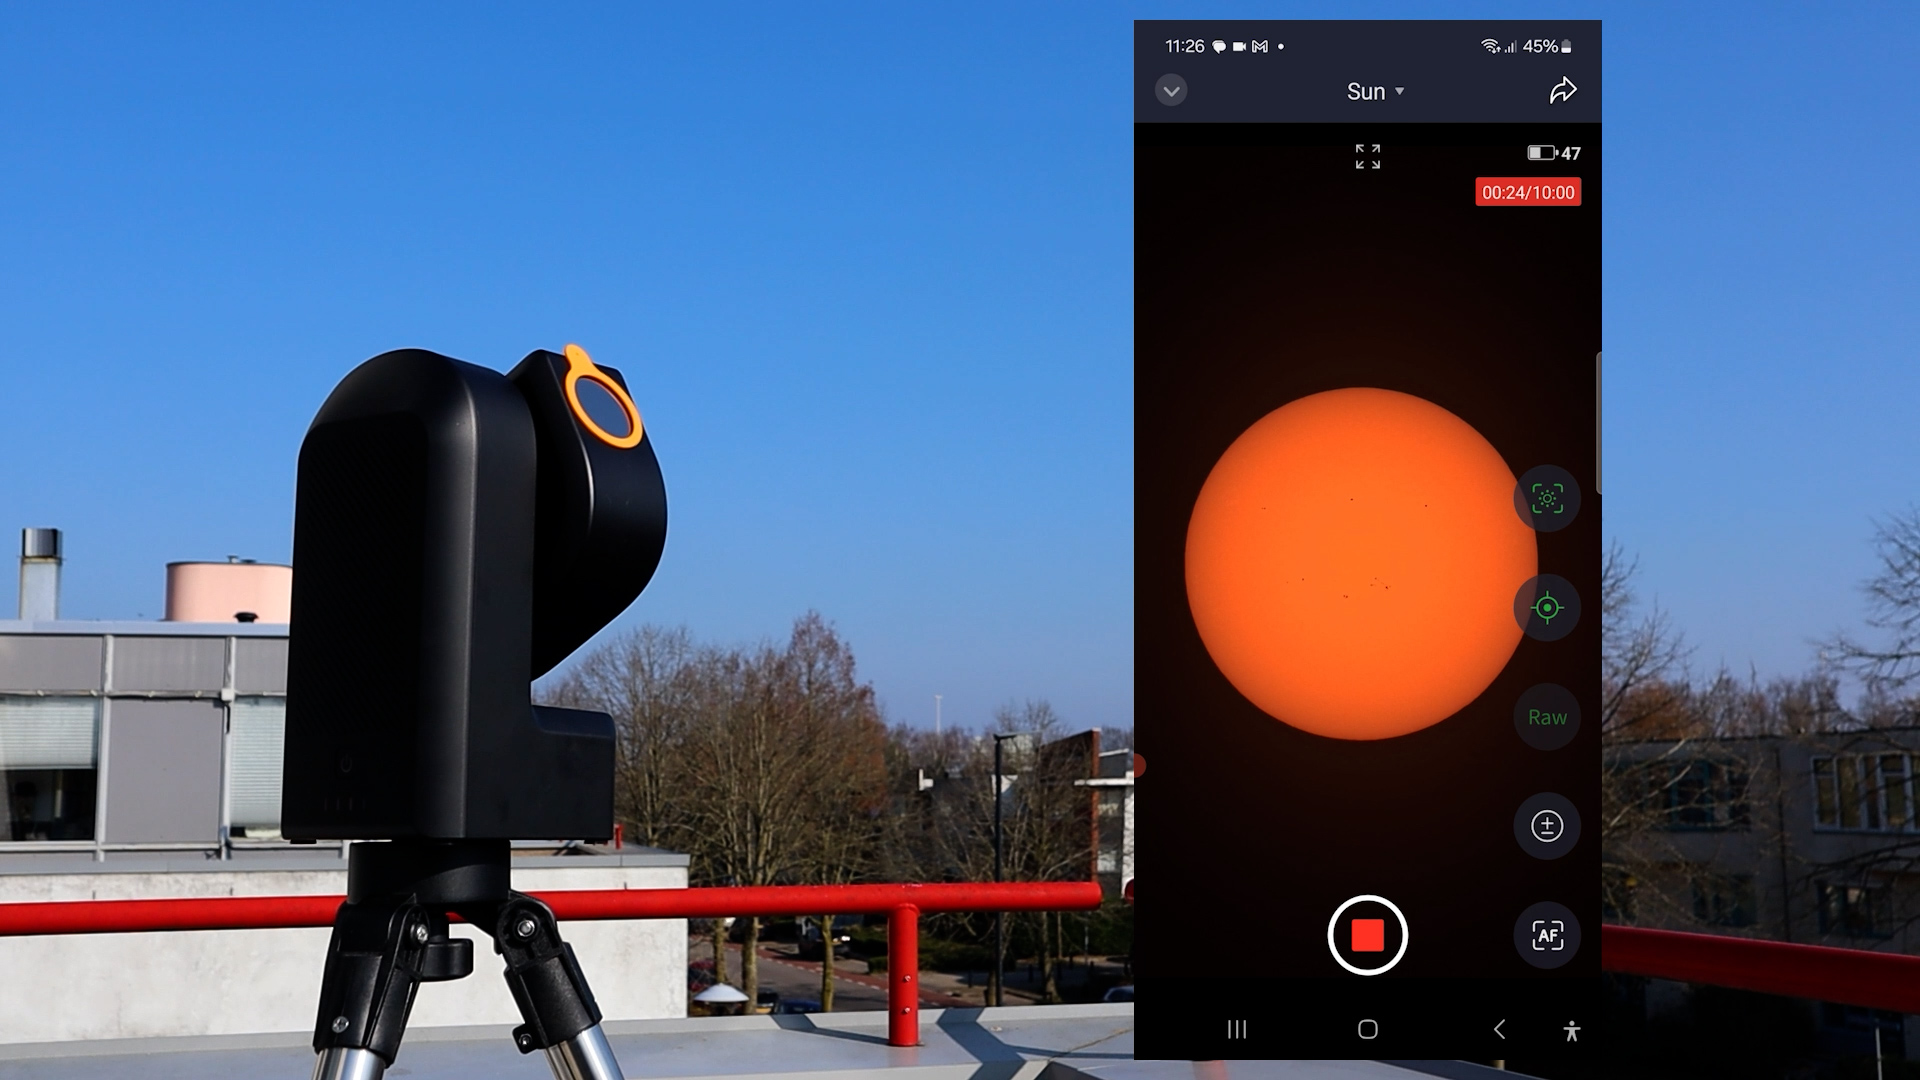
Another feature available when using the Seestar is video recording. By selecting the video mode at the bottom of the screen, I captured a 5-minute video of the Sun simply by pressing the record button. The Seestar records videos in MP4 format, which are then stored on the Seestar S50’s memory card. Transferring all videos and photos to your computer is a straightforward process using a USB-C cable. The 5-minute MP4 file occupied 75MB of storage, translating to approximately 15MB per minute of video. Therefore, recording the entire three-hour total eclipse would require approximately 2.7 GB of data, easily accommodated within the 64GB internal memory card.
There’s also the option to save videos in RAW format, tailored for avid astrophotography enthusiasts like myself, who aim to stack and process high-resolution frames of the Sun to produce detailed, sharp images. With RAW format, you can record up to a maximum of 10 minutes, with each minute of video consuming approximately 1.4 GB of space. Proficiency in various processing techniques such as debayering, stacking, and sharpening software is essential to generate a high-resolution, sharp image. However, delving into the intricacies of these techniques would exceed the scope of this video. Nonetheless, I can provide an example of a processed image of the Sun that I created using a two-minute RAW video captured on that day.
If you’re prepared to dedicate time to mastering the processing of RAW videos, or if you’re already proficient in this area, you might consider capturing several RAW videos throughout various phases of the eclipse. By processing these videos, you can produce a sequence of high-quality images depicting the solar eclipse across its different stages. If you’re curious about the process of handling RAW videos, I followed similar steps in processing the Moon, and you can refer to my workflow for processing the Moon available here.
Capturing Totality with the Seestar S50
The total eclipse phase will be brief, lasting only a couple of minutes, during which you can remove the solar filter from the Seestar S50 to capture photos or videos. However, there are a few considerations to keep in mind. The solar filter of the Seestar is firmly attached to the lens and requires considerable force to remove. This action poses a risk of inadvertently moving the telescope. It may be beneficial to practice removing the solar filter indoors or consider crafting an alternative DIY solar filter that is easier to remove from the Seestar.
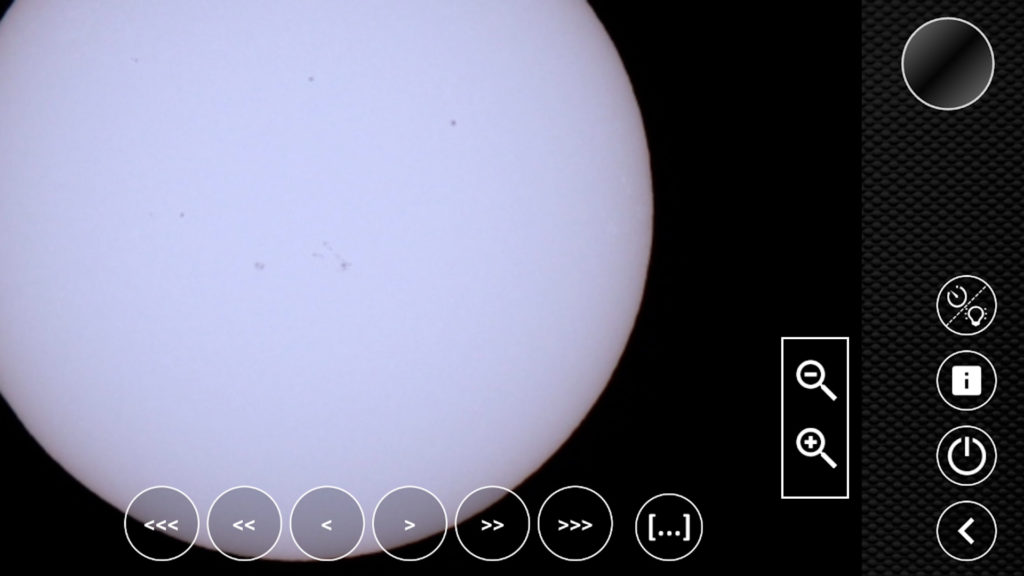
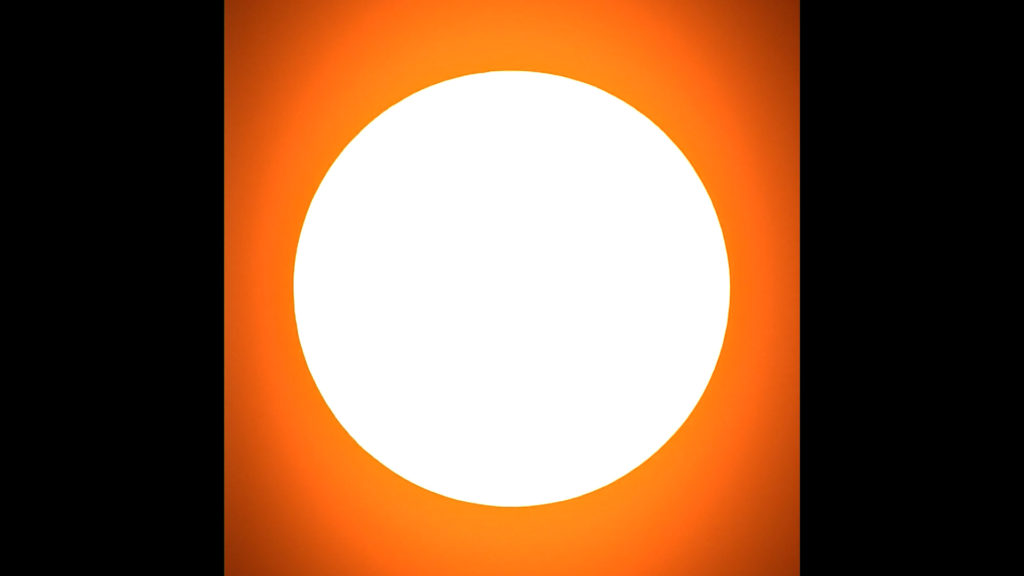
During this test, I kept the solar filter attached to the Seestar and instead experimented with adjusting the exposure settings. By pressing the +/- icon, I increased the exposure to +100 (as depicted in the picture below). While I cannot guarantee whether this adjustment is sufficient to expose some of the corona, it did result in the visibility of a halo around the Sun – with the solar filter in place. Additionally, there are alternative capturing modes available, such as the scenery or lunar mode. However, switching to one of these modes during the total eclipse, which only lasts a few minutes, carries risks as it disrupts the solar tracking.
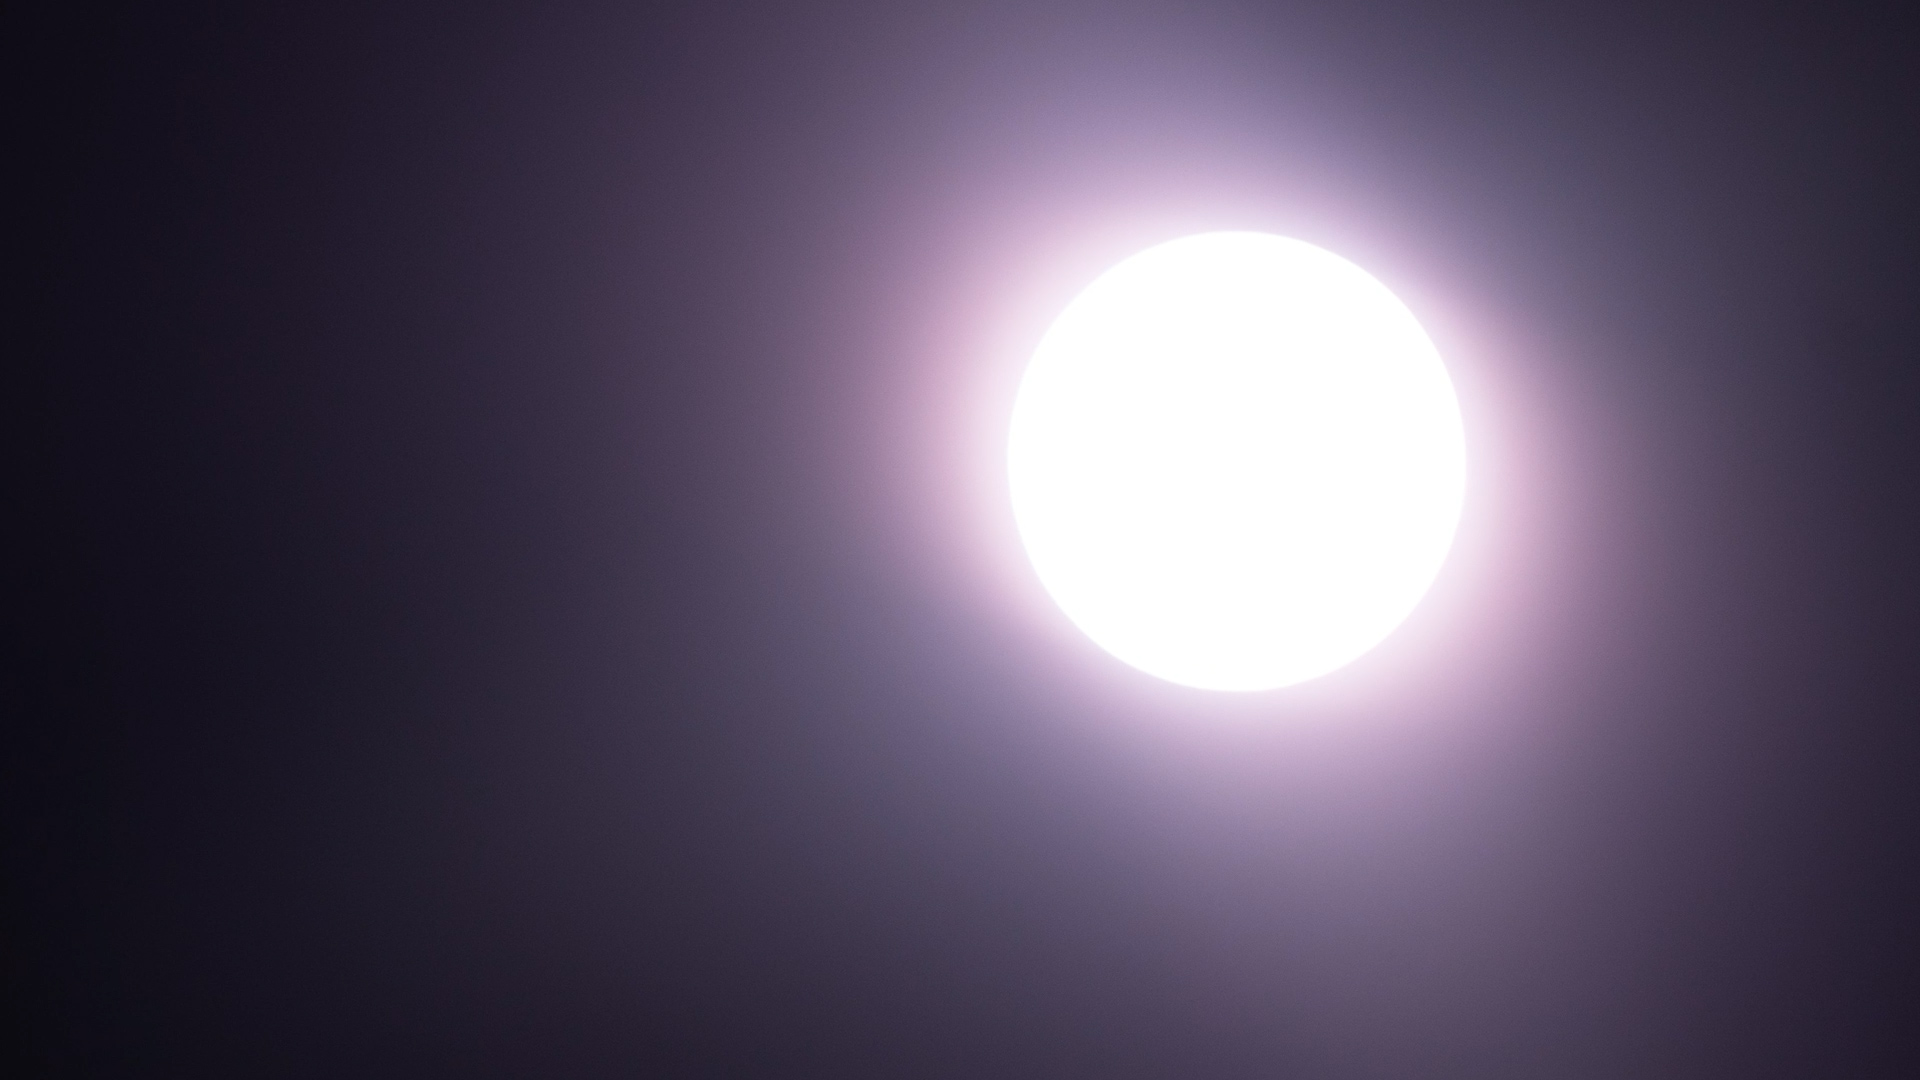
Here’s a representation of what the eclipse might resemble when observed through the Seestar S50. I generated a digitally moving black circle overlaying both the time-lapse video and the overexposed photo captured with the Seestar S50 on that day. It appears quite satisfactory, wouldn’t you agree? Now, let’s proceed to the Dwarf II test.
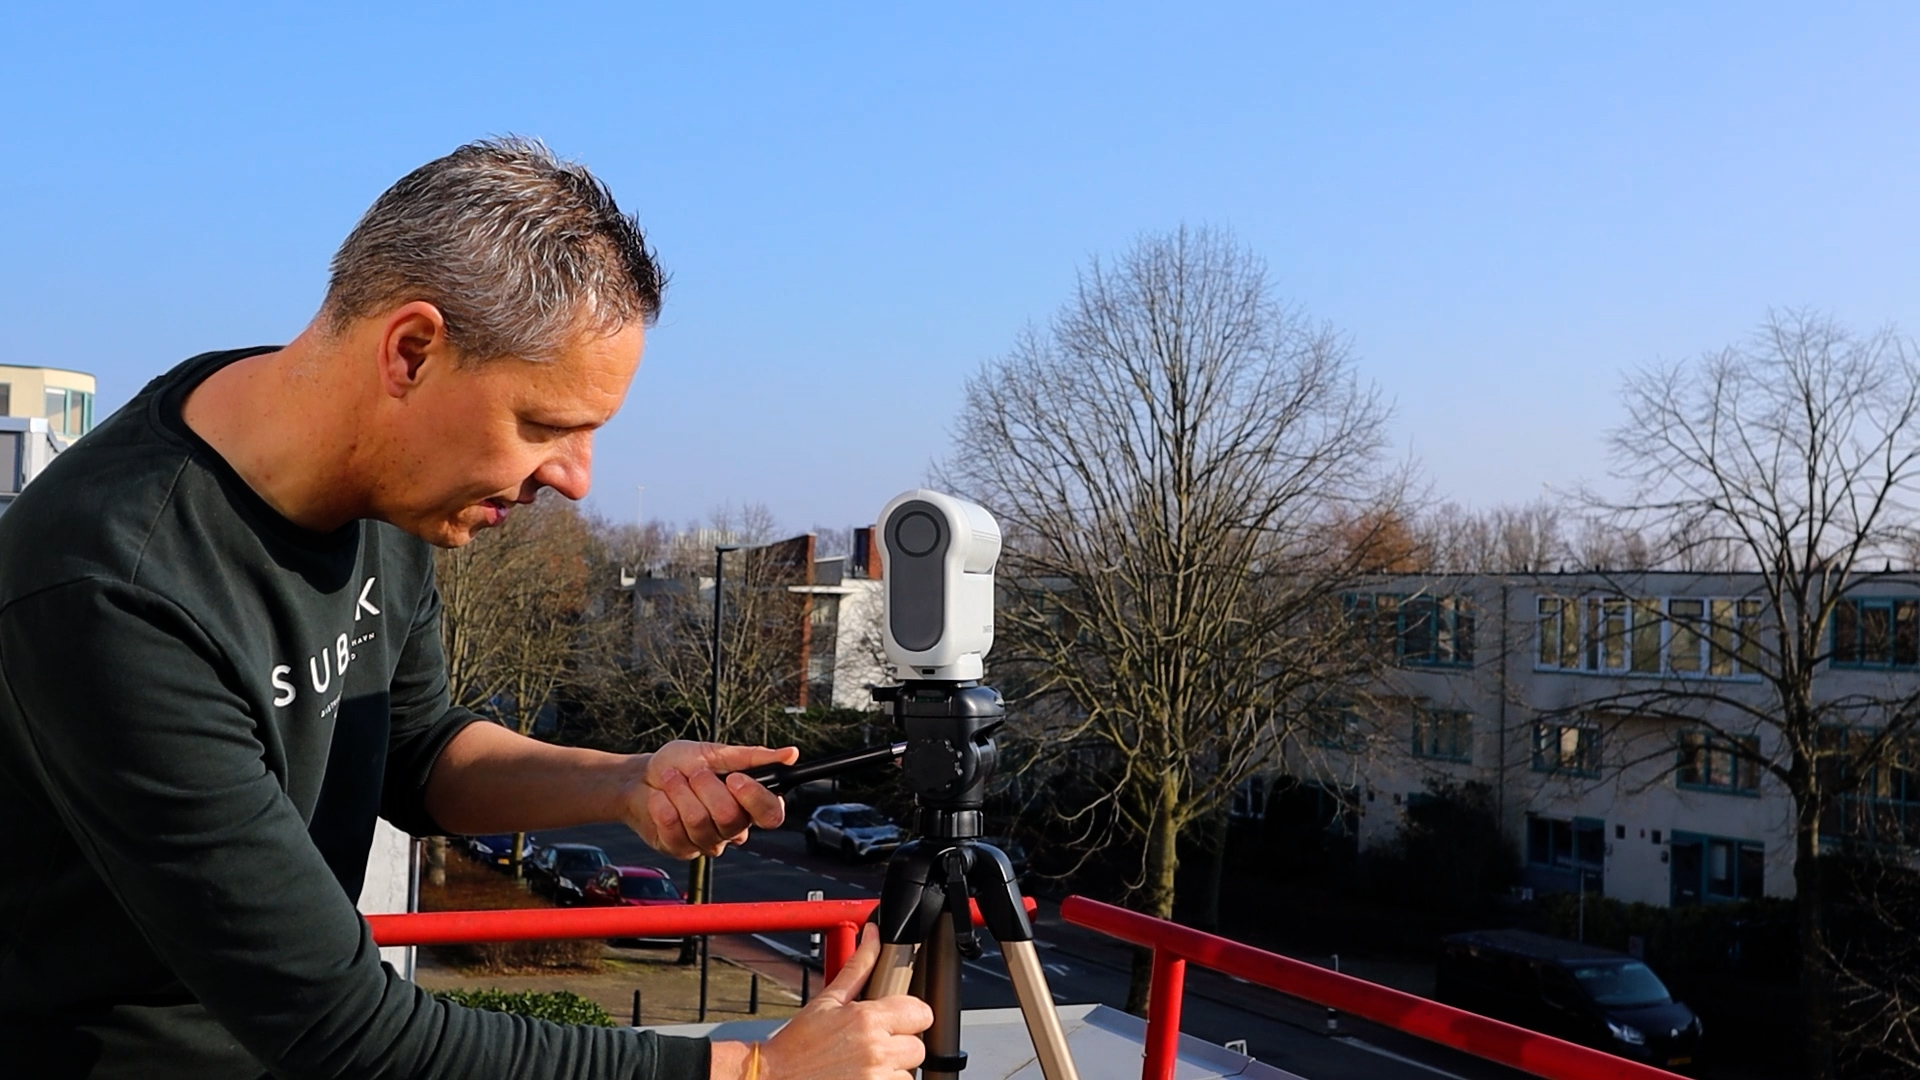
Photographing the Solar Eclipse with the Dwarf II
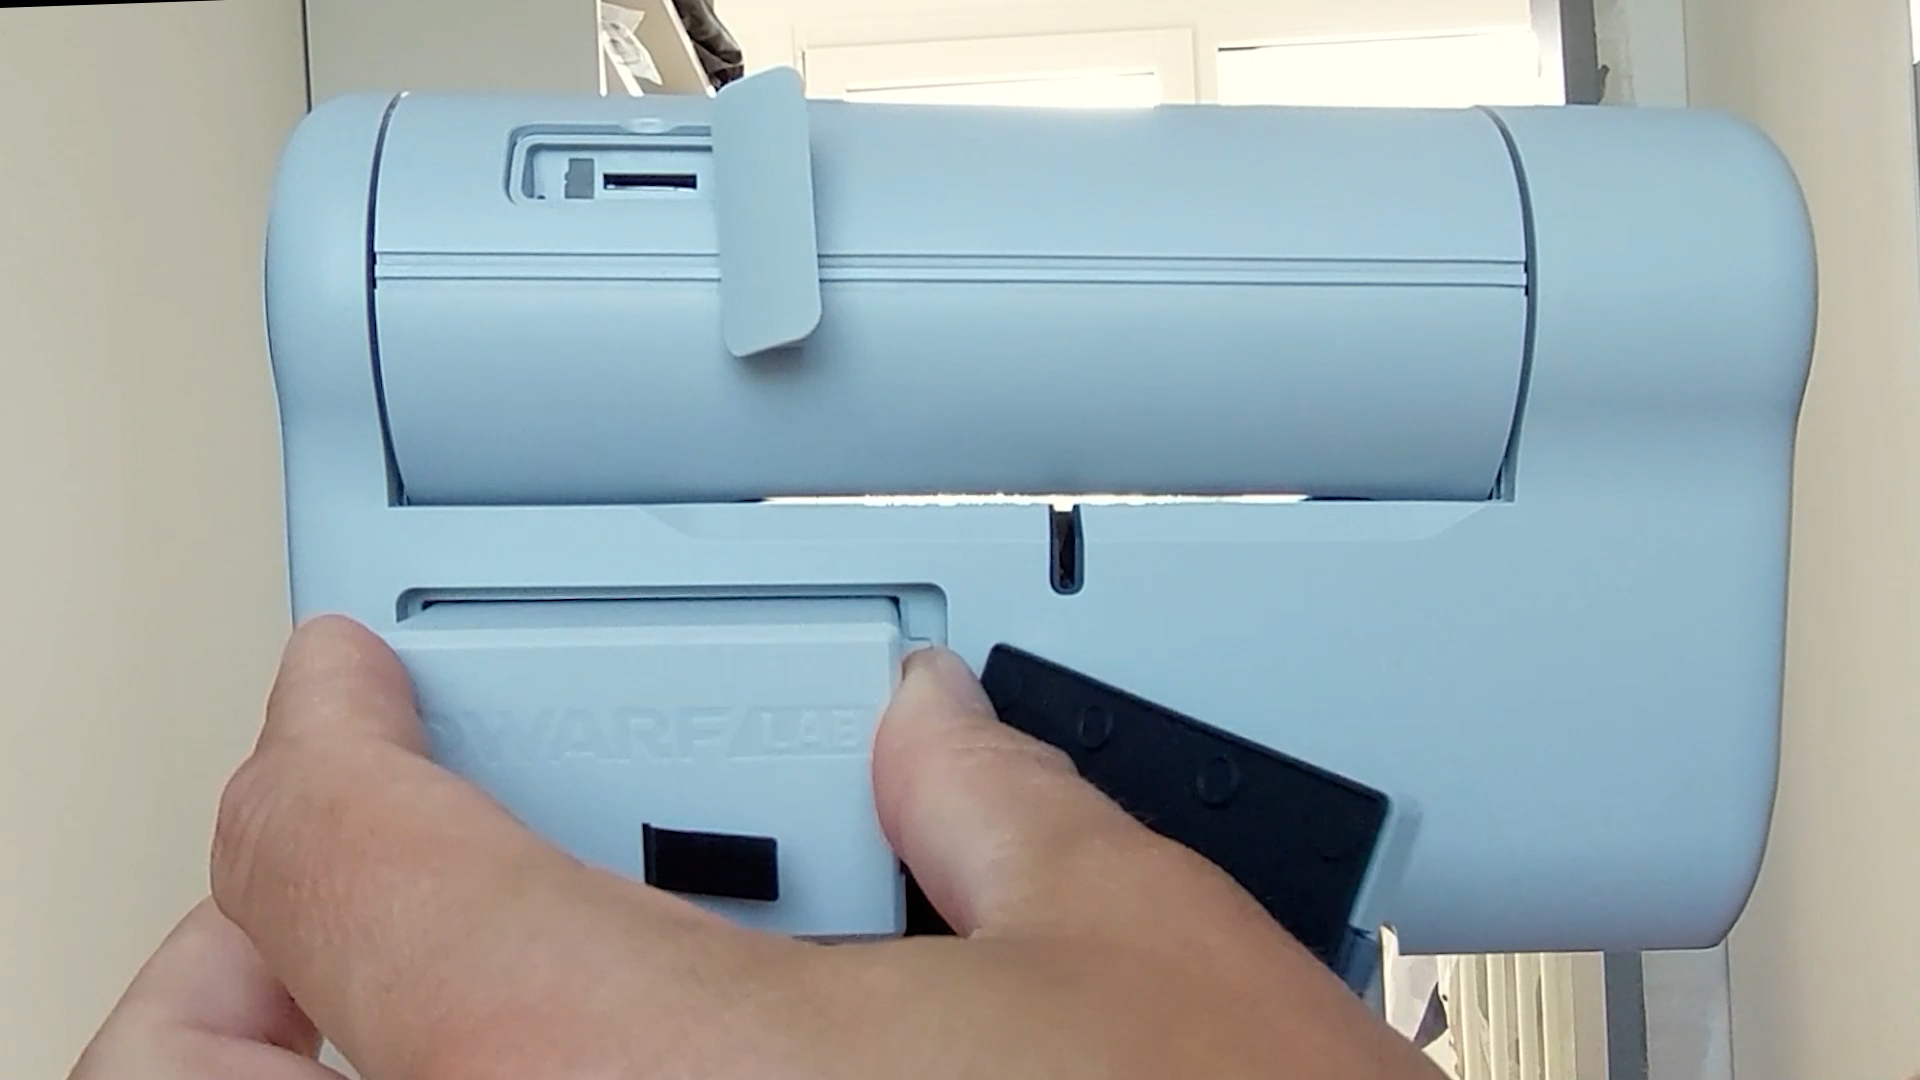
The Dwarf II is a budget-friendly device that combines both wide-field and telephoto lenses into one. It can be conveniently controlled via WiFi. Simply download and install the Dwarflab app, mount the Dwarf II on a tripod, ensure the tripod is level, power on the Dwarf II, and connect to it through the app. For additional details about the Dwarf II, here’s my review. The battery of the Dwarf II can last between three to four hours when fully charged, which may be sufficient to cover the entire duration of the solar eclipse. Additionally, you have the option to purchase an extra battery (at an additional cost), and switch batteries if necessary.
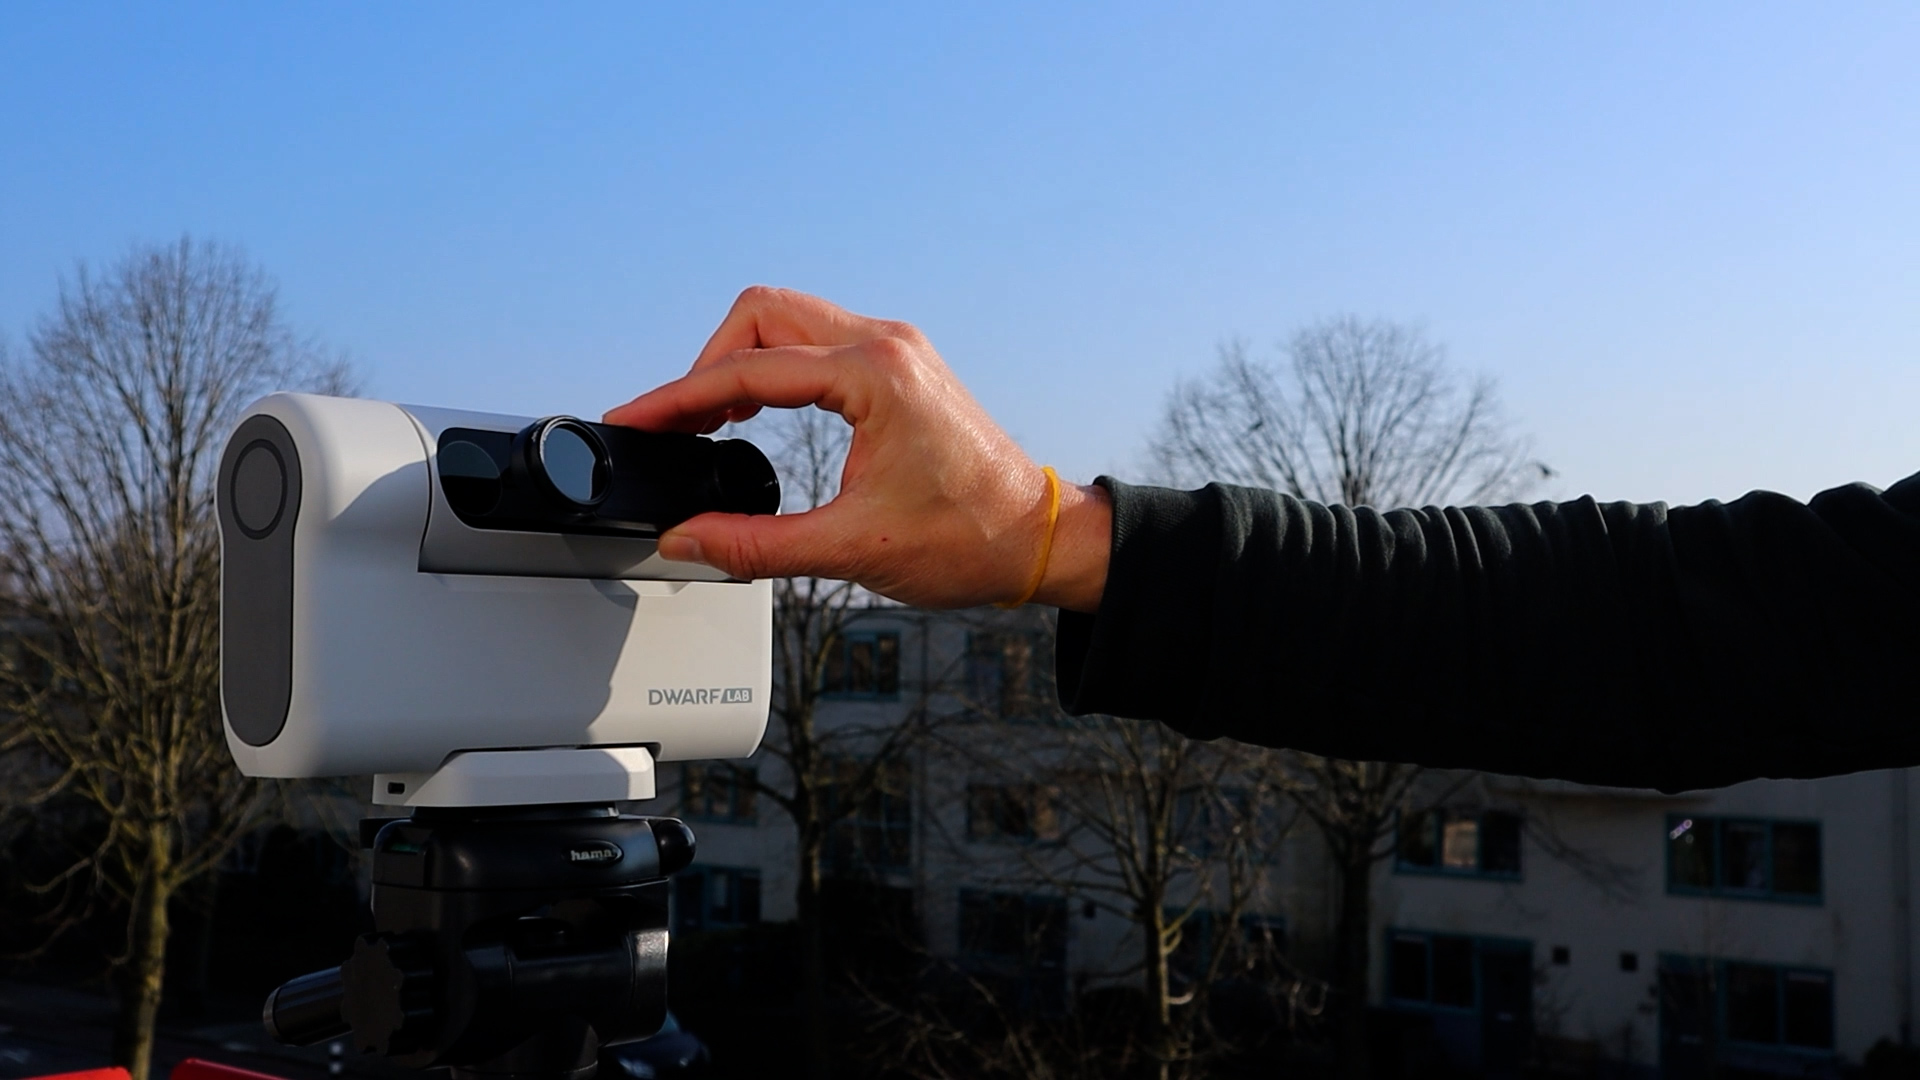
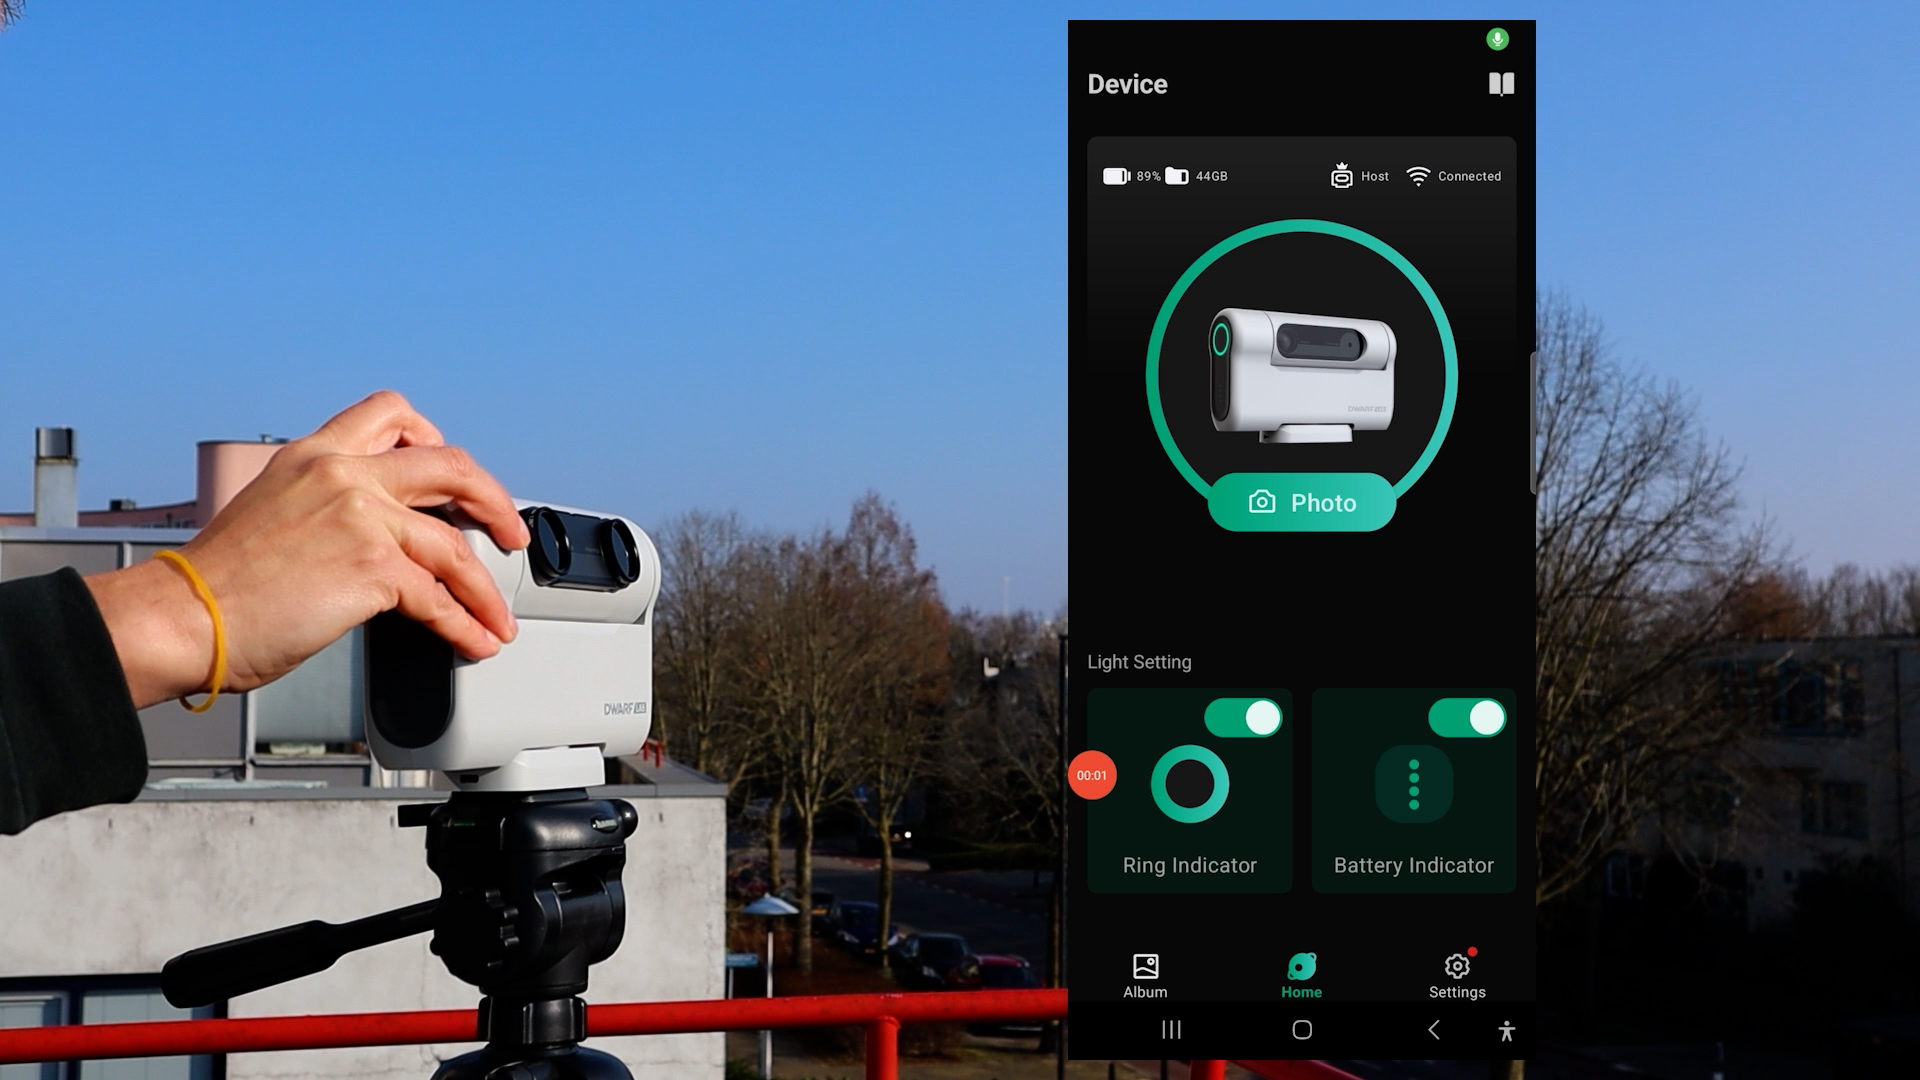
At an additional cost, you have the option to purchase two extra ND solar filters for the Dwarf II. Installing these solar filters is straightforward: simply screw them onto the magnetic holder, and position the holder in front of the two lenses as illustrated in the images below. Removing these filters during the full solar eclipse is also easy, which is convenient. Within the Dwarflab app, you can connect to the WiFi signal of the Dwarf II and select the “photo” option. The initial screen displays a live view from the wide-field lens, with a green rectangle denoting the field of view of the telephoto lens.
The Dwarf II Smart Telescope is available at a 5% discount at Dwarflab (coupon code = WidosAstroForum), High Point Scientific (USA/WW), and Astroshop (EU/WW)
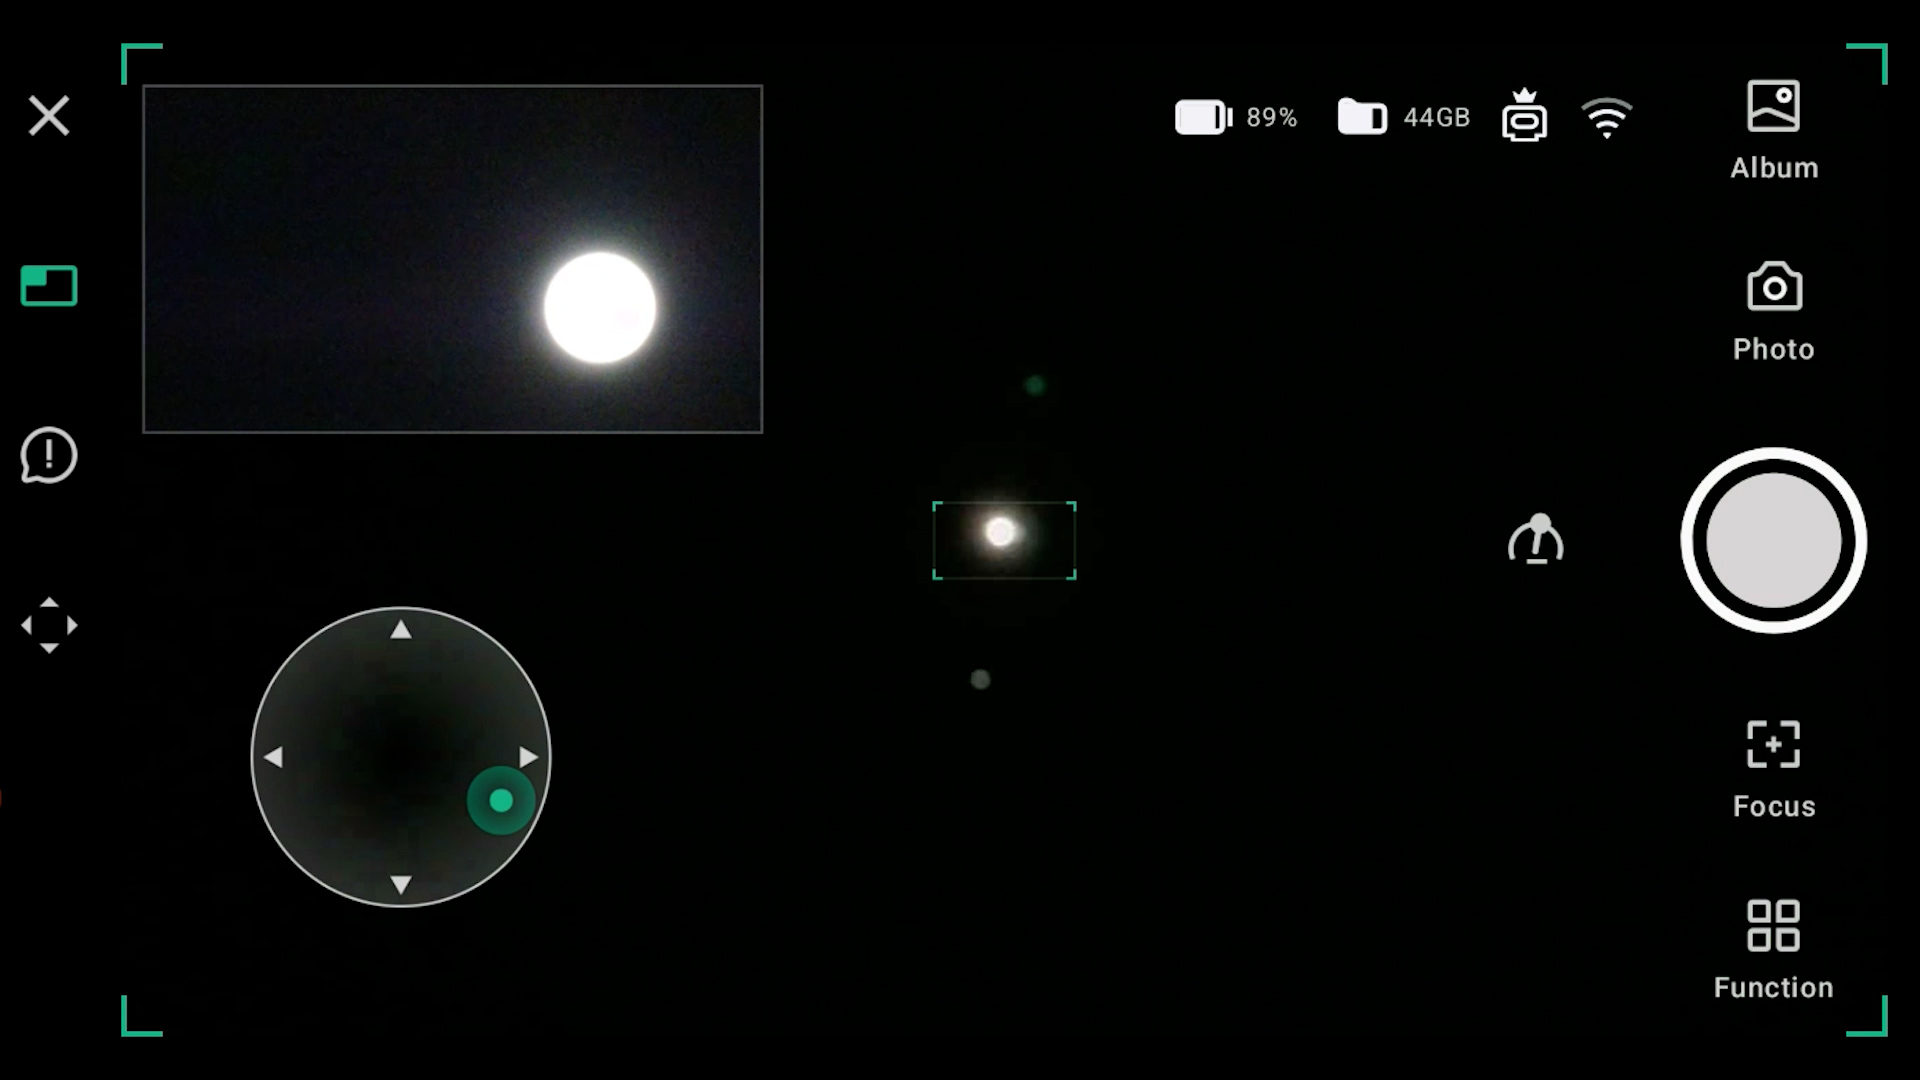
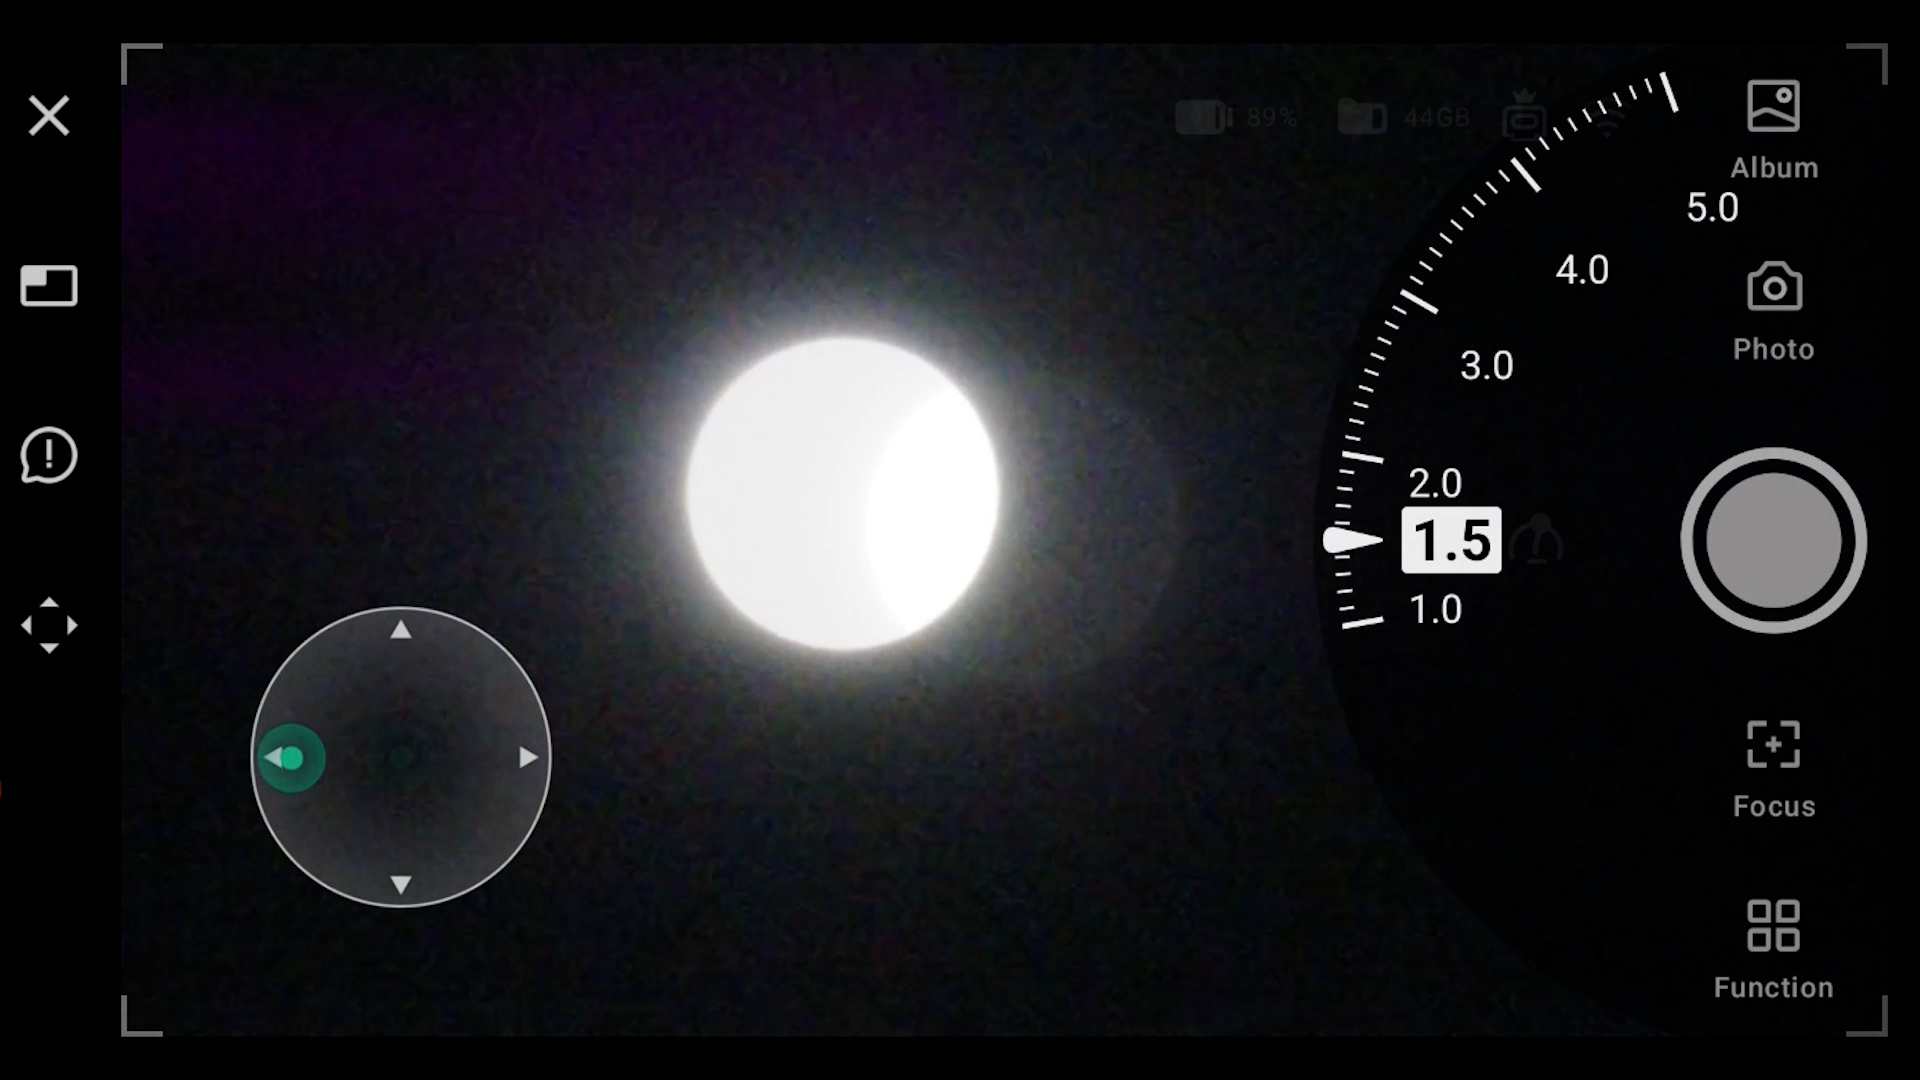
It is easy to find sun with the Dwarf II, thanks to its widefield lens. You can change the position of the Dwarf II by using the arrow keys at the bottom left of the Dwarflab app and control the speed using the speed dial on the right. The green rectangle represents the field of view of the telephoto lens. Just move the Sun to the green rectangle and switch to the telephoto lens by clicking on the small screen on the top left. In the telephoto view, you can make some minor adjustments to put the Sun in the center of the camera’s view.
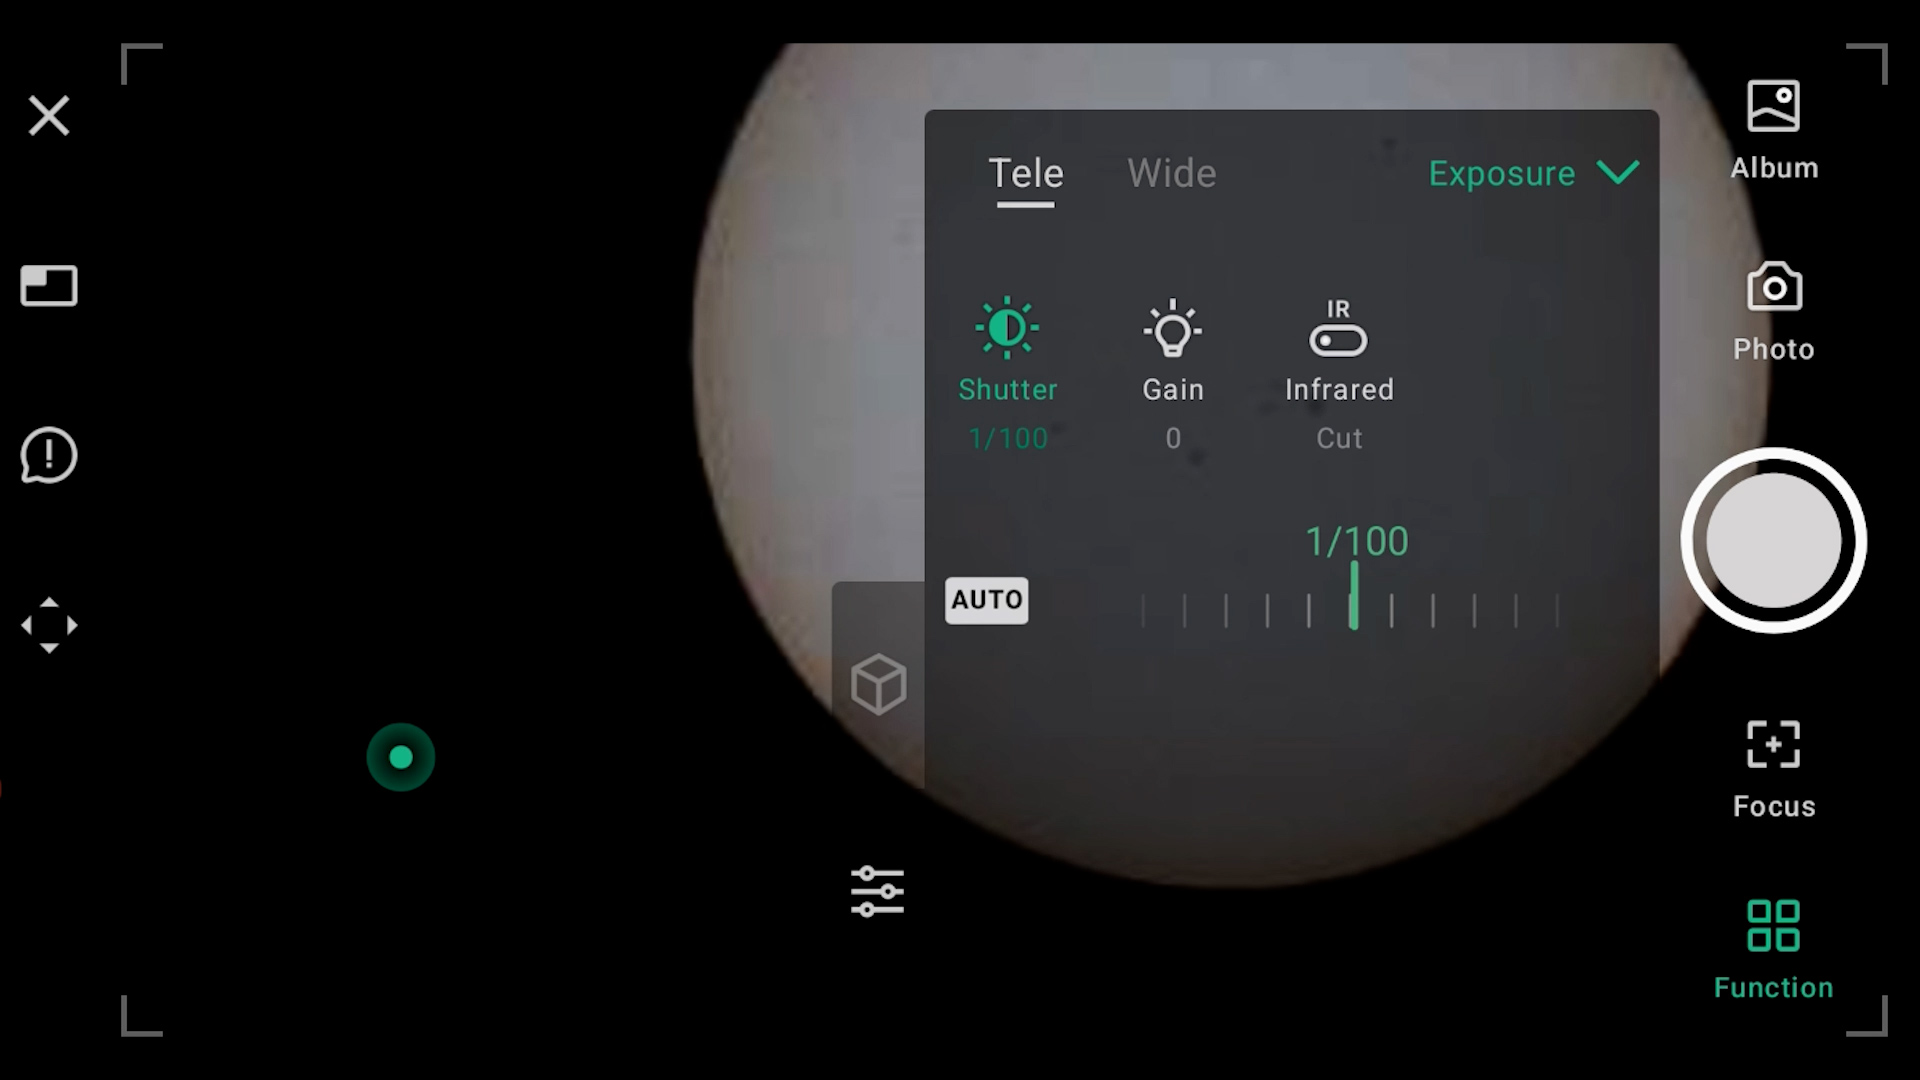
You have the option to adjust the shutter speed and gain level of the telephoto lens by pressing the settings button. During my testing, I discovered that a shutter speed ranging from approximately 1/60th to 1/100th, with 0 gain, effectively revealed the sunspots on that day. While the Dwarf II manual suggests a shutter speed of 1/200th, I recommend experimenting with different settings to find what works best for you. Additionally, you can zoom in by pinching the screen and utilize the focus icon on the right to focus on the sunspots. Autofocusing can be achieved by clicking “auto,” or you can manually adjust the focus using the plus and minus buttons.
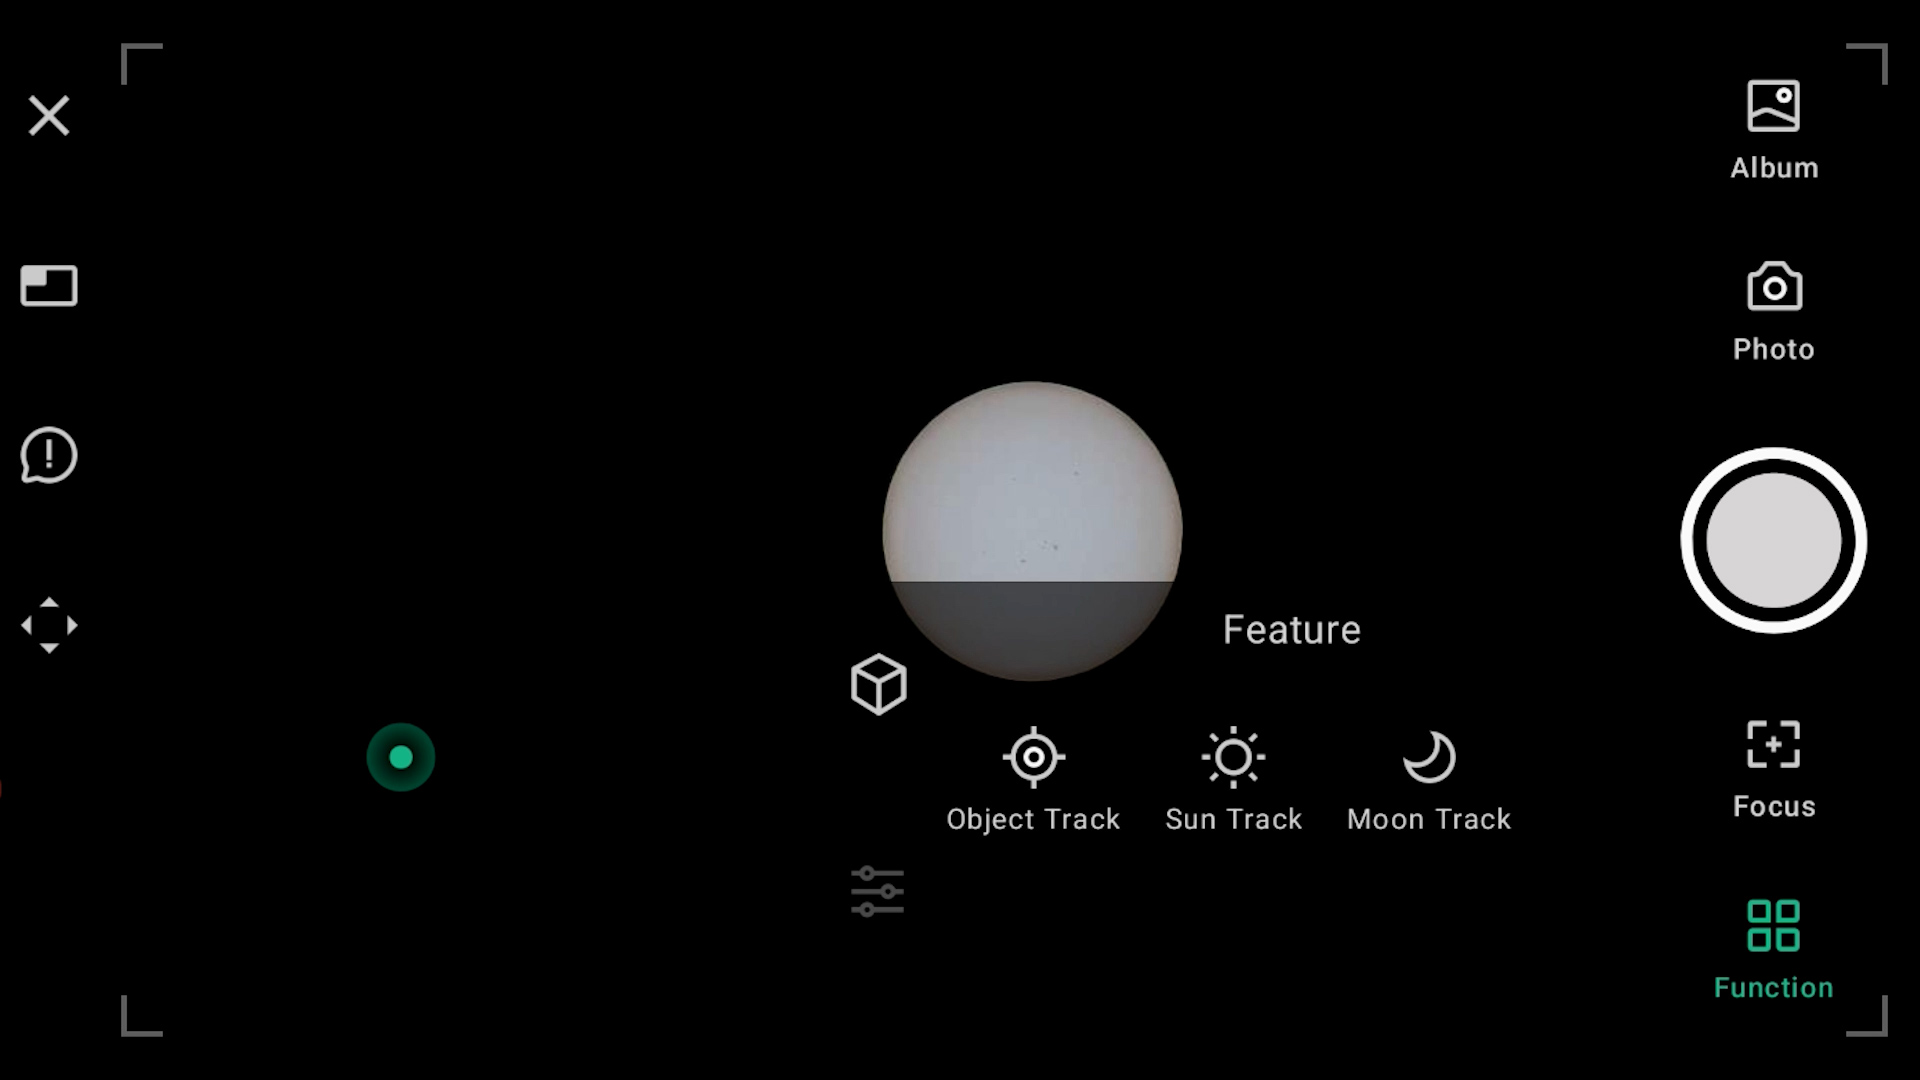
The Dwarf II features a solar tracking function accessible by clicking on the function icon located at the bottom right corner of the screen. Upon selecting this option, you’ll be presented with object, sun, and moon tracking options. Choosing the sun track option prompts a screen with a cautionary message advising users to always use solar filters, ensure the mount is leveled, and set the shutter speed to approximately 1/200th of a second with zero gain. On the morning of my testing, I received an update for the Dwarflab app. However, after confirming the update, I encountered an unexpected issue: instead of tracking the Sun, the Dwarf II moved away from it and switched to astromode settings. This was frustrating, especially considering that the solar mode had previously functioned flawlessly. Despite attempts to resolve the issue by restarting the telescope, my phone, and the app, the problem persisted. I promptly reached out to Dwarf II regarding this unexpected behavior, as it exemplifies the sporadic nature of my experiences with the Dwarf II. In my opinion, improving the reliability of their software is paramount for Dwarflab to mitigate such random occurrences. I sincerely hope that you do not encounter similar challenges and that your Dwarf II successfully tracks the Sun as mine had before the update.
Creating a Time-lapse video to capture the Solar Eclipse with the Dwarf II
Nevertheless, I opted to proceed with the test by switching the Dwarf II to video mode and capturing a two-minute untracked video of the Sun. The video consumed approximately 440MB of storage, indicating that the Dwarf II records at a rate of 220MB per minute. Should you choose to record the entire three-hour duration of the eclipse, you would generate a 40GB MP4 video file, which fits within the capacity of the 64GB SD card.
Opting for the time-lapse mode might be a more prudent choice. By selecting time-lapse and pressing the record button, the Dwarf II initiates imaging of the Sun with an automatic interval of 1 second, continuing until you stop the process. If desired, you can customize the interval and duration in the function settings located at the bottom right corner, selecting intervals ranging from 1 to 60 seconds. Time-lapse videos captured by the Dwarf II are saved in MP4 format on its micro SD card (64GB) and played back at 30 frames per second. For instance, a three-hour time-lapse recorded at a 1-second interval would replay in about 6 minutes, while a 2-second interval would replay in 3 minutes, and so forth. Utilizing the time-lapse option, I recorded the Sun for 7 and a half minutes as it gradually moved beyond the field of view of the telephoto lens, because the solar tracking not functioning. The resulting file size was approximately 50MB, indicating that a three-hour time-lapse at a 1-second interval would occupy about 1.2GB of storage—well within the capacity of the 64GB SD card used by the Dwarf II. Below is the video, with some processing using the above mentioned techniques to align the Sun’s disc across individual frames.
Capturing Totality with the Dwarf II
During totality, when the moon completely obscures the Sun’s disc, removing the solar filters from the Dwarf II is easy by simply detaching the magnetic holder from the telescope. Moreover, both the photo and video modes offer comprehensive control over shutter speed and gain settings, allowing you to experiment to capture intriguing photos or videos. Operating at f/4.2, the telephoto lens necessitates a shutter speed of approximately 1/15th or slower to capture a pleasing view of the Corona. While the 100mm focal length telephoto lens may not deliver the highest resolution images and videos, it should be easy to operate the Dwarf II during the solar eclipse on April 8th, provided the solar tracking function operates effectively.
Here’s my simulation of how the solar eclipse might appear when observed through a Dwarf II. I recreated the movement of the moon using a dynamic black circle and incorporated the time-lapse videos and photos taken with the Dwarf II on a windy day.

I hope this information proves helpful, and of course, I wish you clear skies for the incredible Total Solar Eclipse!
This is a fantastic post with great insights into capturing the solar eclipse with different equipment! I’m curious—do you think the Seestar S50 and Dwarf II can truly match the DSLR’s level of detail, especially for the Sun’s corona during totality? Also, how do you think these smart telescopes perform for other types of astrophotography beyond the eclipse?
If you’re interested in solar imaging, the Seestar S50 is likely your best choice at this price point. It features an APO triplet refractor telescope and boasts the largest aperture and focal length in this range (50/250mm). The Dwarf II is an older model and has since been replaced by the Dwarf III, which offers slightly better capabilities at 35/150mm. Compared to other 250mm telephoto lens options, the Seestar S50 holds its own—or even outperforms them—for lunar and solar imaging, as it’s a compact yet fully capable telescope. I’ve put together a full guide to smart telescopes, including photos I’ve taken of the moon, sun, and deep-sky objects. Just search for “smart telescope” on my website, and you’ll find it.
Clear skies!