The Vaonis Vespera Smart Telescope emerges as a celestial delight for astronomy enthusiasts, skillfully blending aesthetics and functionality. Crafted with an exquisite design, it surpasses competitors in visual appeal, making it a potential living room centerpiece. The high-quality quadruplet lens and Sony’s IMX462 sensor capture the glory of the night sky, complemented by optional filters for a great stargazing experience. The Singularity APP simplifies the operation and control of the telescope, while the mosaic function offers a unique and extensive view of the night sky. Despite limitations, such as a 10-second exposure cap and the absence of manual refocusing, the Vespera impresses with its two-year warranty and confidence-boosting return policy. Notably, it’s not the most budget-friendly option, but for those prioritizing style and design, this futuristic smart telescope stands out. Whether exploring deep-sky objects or observing the Moon, the Vaonis Vespera shines, promising celestial wonders beyond the naked eye for enthusiasts willing to invest.
NOTE: The Vespera has been succeeded by the Vespera II (review here) and the Vespera Pro (review here).
Vaonis graciously provided me with their latest Vespera smart telescope for evaluation, and that’s precisely what we’ll be delving into. This comprehensive review and tutorial will cover the setup process of the telescope, along with a demonstration of my experiences using the Vespera with supplementary filters to observe celestial bodies such as the Sun, Moon, planets, and deep sky objects like the renowned Orion Nebula. It’s crucial to note that Vaonis did not compensate me for this review, ensuring that I have the freedom to express my unbiased personal opinion.
Price and Technical Specifications
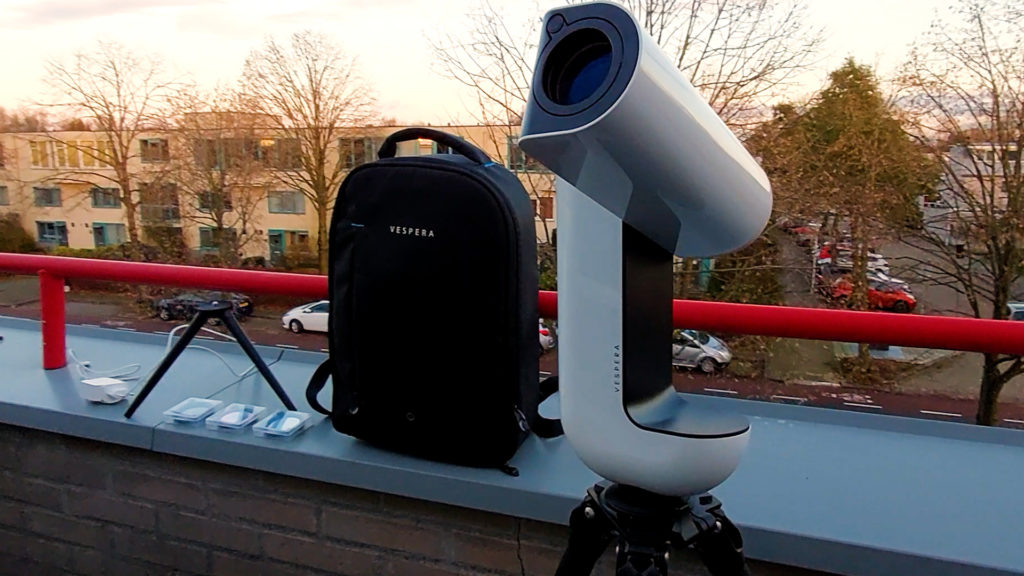
At the time of writing, the Vespera is priced at $1499 or euros. This includes a two-year warranty and a convenient free return policy. This initial package includes the telescope itself along with a compact tripod. Additionally, Vaonis provided me with optional accessories, such as a stylish backpack designed to accommodate the Vespera, an extra-large carbon tripod for mounting, and supplementary solar, light pollution, and dual-band filters designed to enhance the viewing capabilities of the smart telescope—all available at an additional cost.

The Vaonis Vespera (plus optional accessories) is available at Agena Astro (USA/WW), High Point Scientific (USA/WW), and Astroshop (EU/WW)
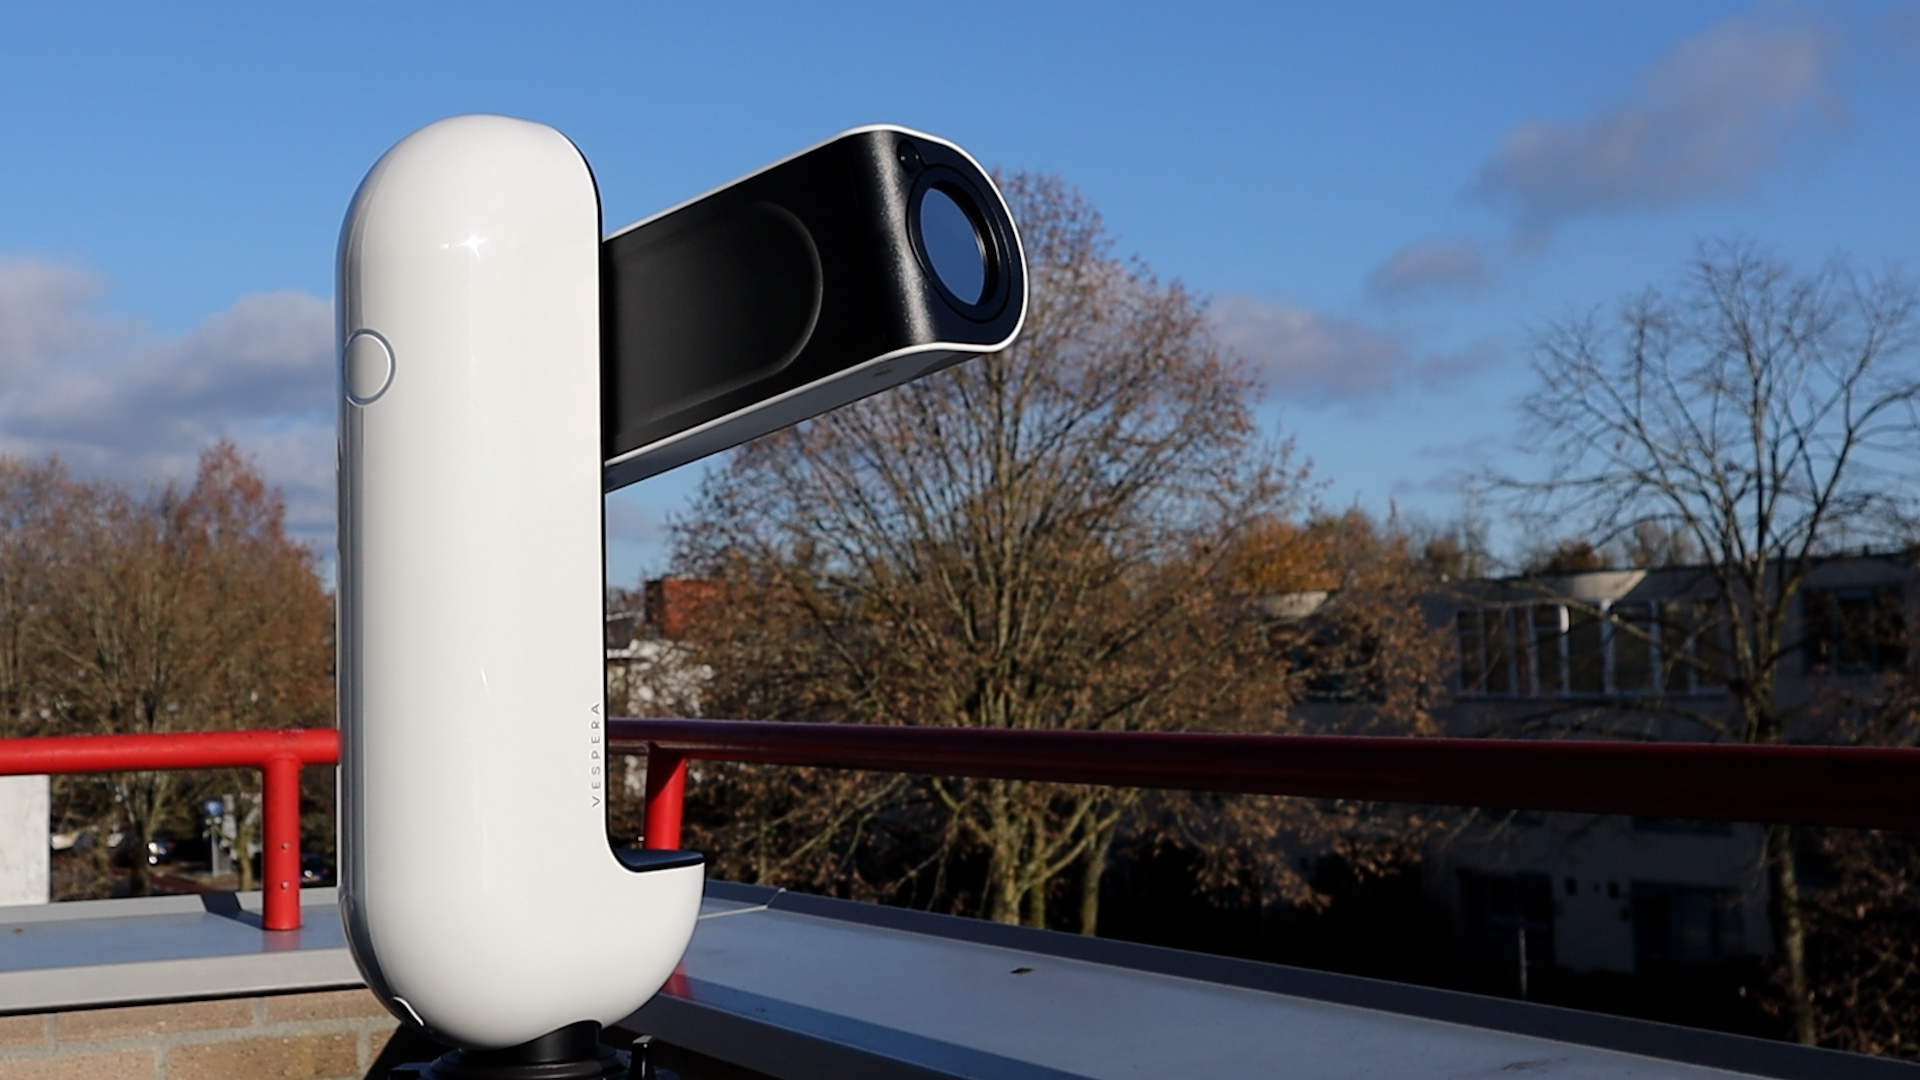
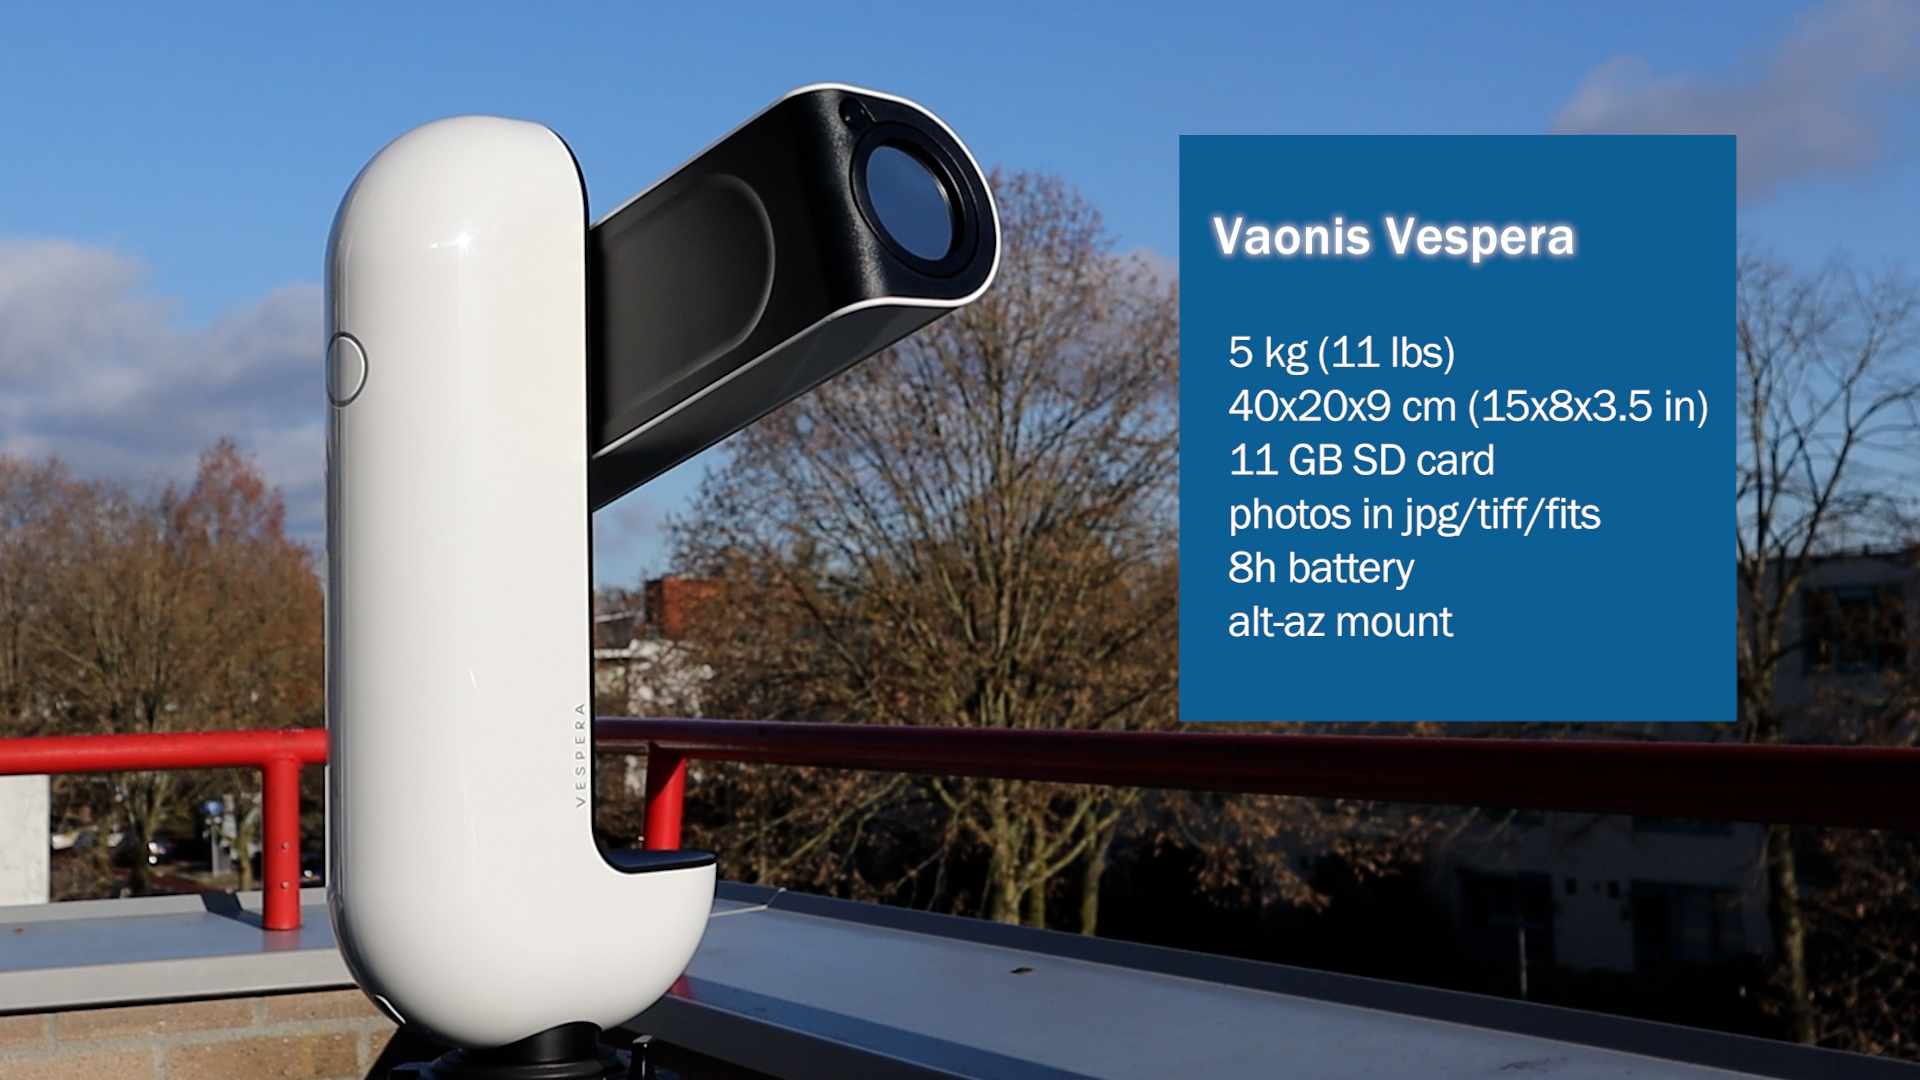
The Vespera refractor telescope boasts a high-quality apochromatic quadruplet lens, featuring a 50mm aperture and a 200mm focal length. Additionally, it is equipped with a Sony IMX 462 STARVIS sensor, featuring a pixel size of 2.9 micrometers. The Vespera provides a field of view measuring 1.6 x 0.9 degrees, with an imaging scale of 3 arcseconds per pixel. To put that into perspective, the sensor’s width accommodates approximately three times the diameter of the moon, and a full moon spans about 600 pixels in diameter. The Vespera itself is compact, weighing a mere 5 kilograms and measuring 40x20x9cm (15x8x3.5 inches). The Vespera’s SD memory card can store up to 11GB of data, supporting jpeg, as well as 16-bit Fits and Tiff image formats. With a fully charged battery, the Vespera offers an impressive 8-hour operational span. Its altitude-azimuth mount enables two-axis rotation, allowing for both vertical and horizontal movements, to locate and track celestial objects in the sky.

Installing the Singularity APP to control the Vaonis Vespera Smart Telescope
You can wirelessly control the Vespera through WiFi using the Singularity APP, available on both IOS and Android smart devices. Let me walk you through my experience of installing the Singularity app on my smartphone and establishing a connection with the telescope for the first time, as this takes some effort. You can download the Singularity APP from the App Store or Google Play, and at the time of writing, it was approximately 361MB. Upon downloading and launching the app for the first time, I needed to create an account by providing my email address, last and first name, username, and password. Accepting the terms of service and privacy policy was also a prerequisite for signing up.
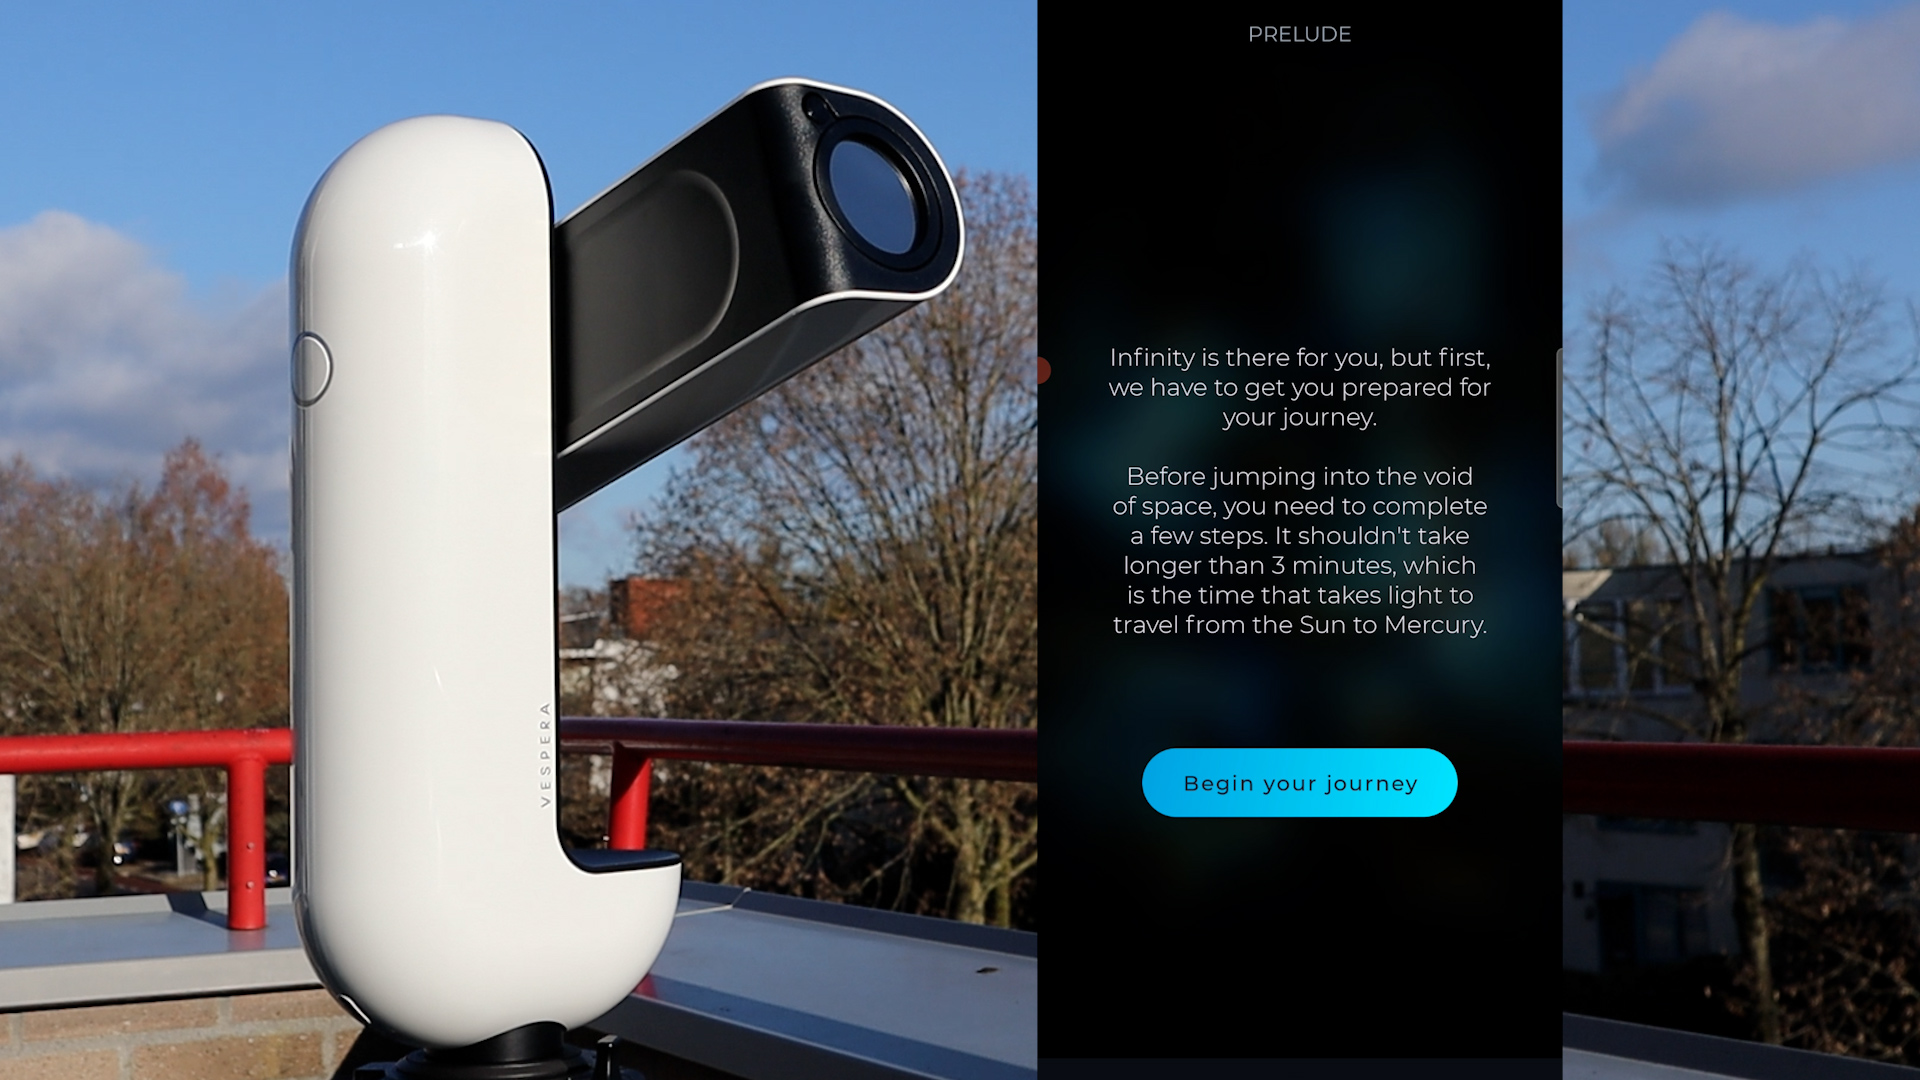
Following this, the app displayed a screen indicating that the installation process would take about 3 minutes – roughly the time it takes sunlight to travel from the Sun to Mercury. While this comparison may not be entirely accurate due to the complex and long journey of photons from the sun’s core to its surface, I opted not to delve into a debate with the app and chose to click “Begin your Journey.” In the subsequent step, the app prompted me to create my observatory while connected to the internet. This is crucial for the Singularity APP to provide accurate information about weather conditions and the observable objects from your location with the Vespera telescope. I entered my address, city, and zip code, and after tapping “confirm,” I received confirmation of my latitude and longitude positions.

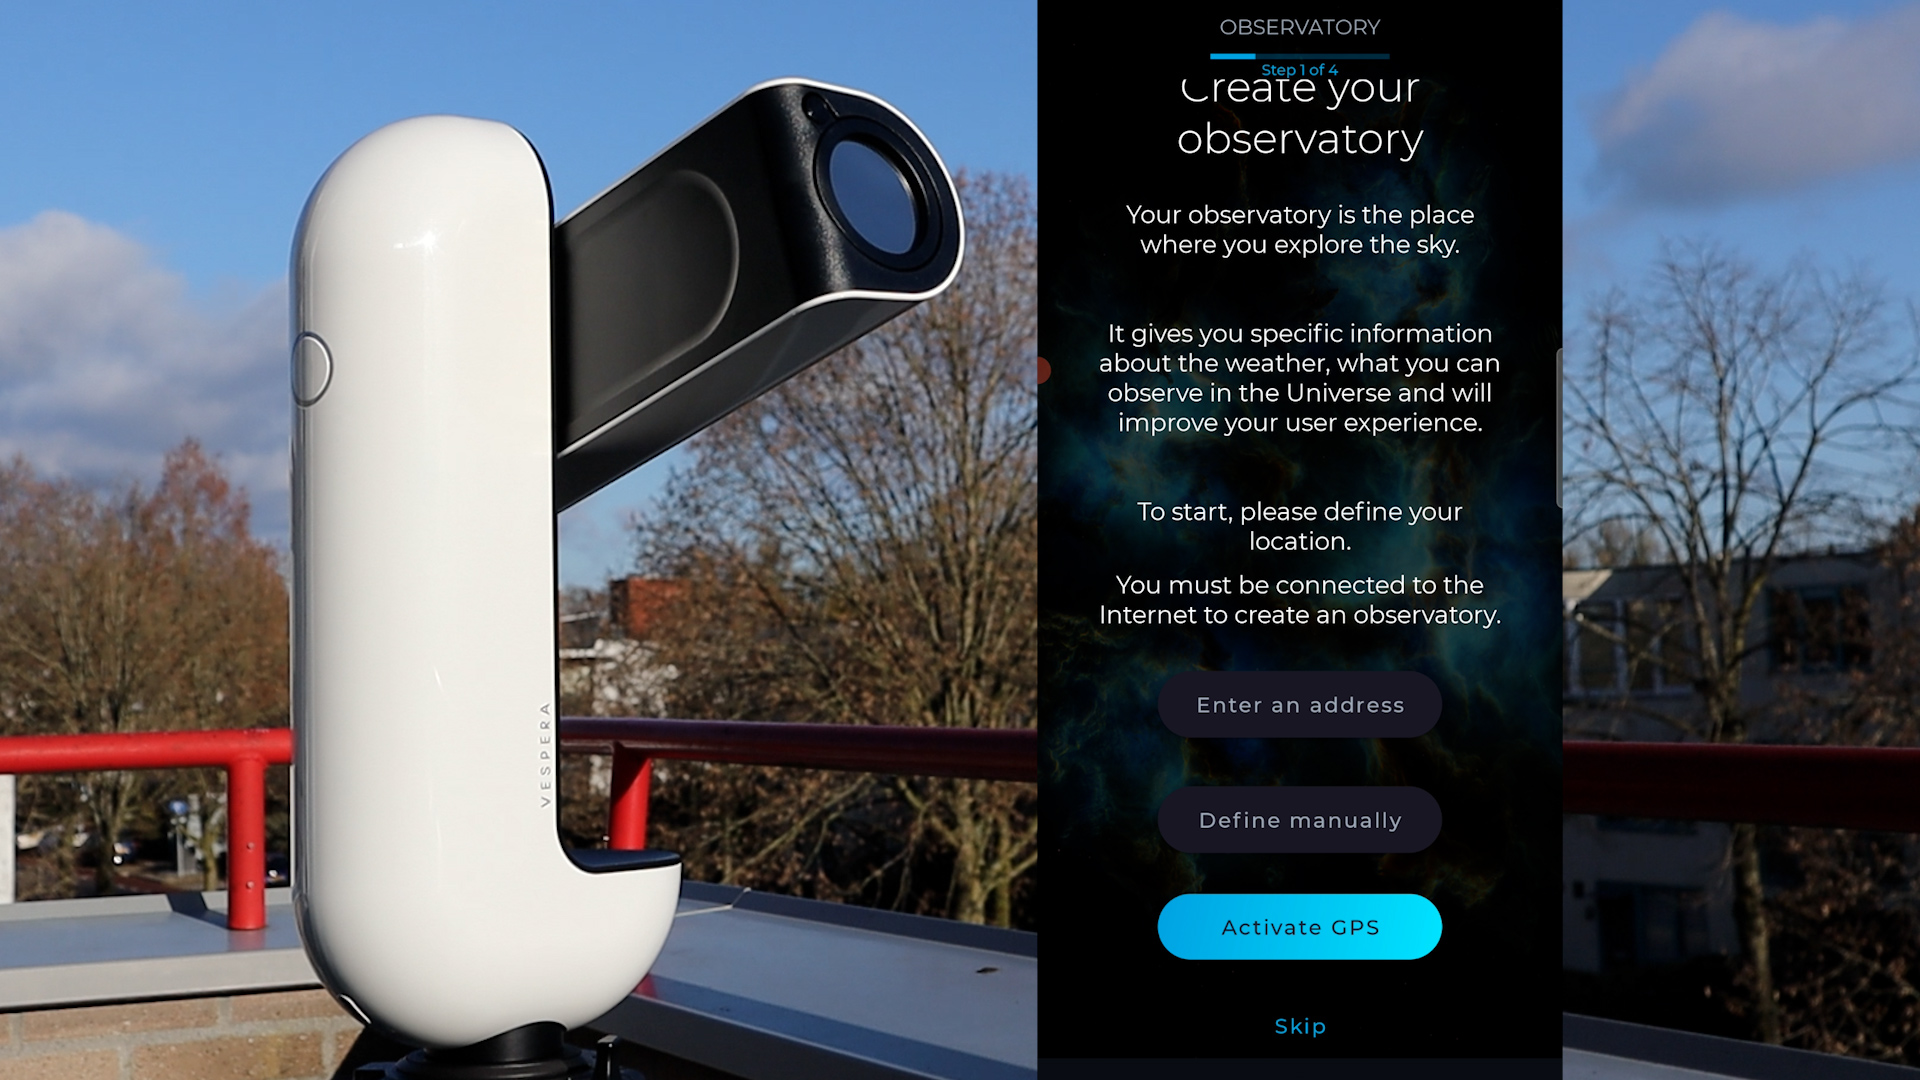
Clicking “next,” I reached a screen where I named my observatory – essentially the location from which I would be using the telescope. After naming it, I clicked “validate.” Surprisingly, the app then inquired about my interests to tailor a more personalized experience. I selected a few categories and proceeded. The app presented a screen with a play button, offering optional videos on how to set up the instrument, presumably referring to the telescope. Opting to explore WiFi settings, I pressed the on/off button on the Vespera, causing the telescope button to flash in blue. Subsequently, I connected to the Vespera WiFi signal on my smartphone and received a message confirming the completion of the setup process.


Tapping the start button, the app requested access to the GPS location of my smartphone, and I chose to grant it only when using the app. The main menu of the Singularity APP appeared, but it indicated that no instrument was connected. After some time, I decided to toggle my WiFi off and on, reselected the Vespera WiFi signal, and reopened the app. This proved effective, as the Vespera was now successfully connected to the app.
Updating the Vaonis Vespera Smart Telescope
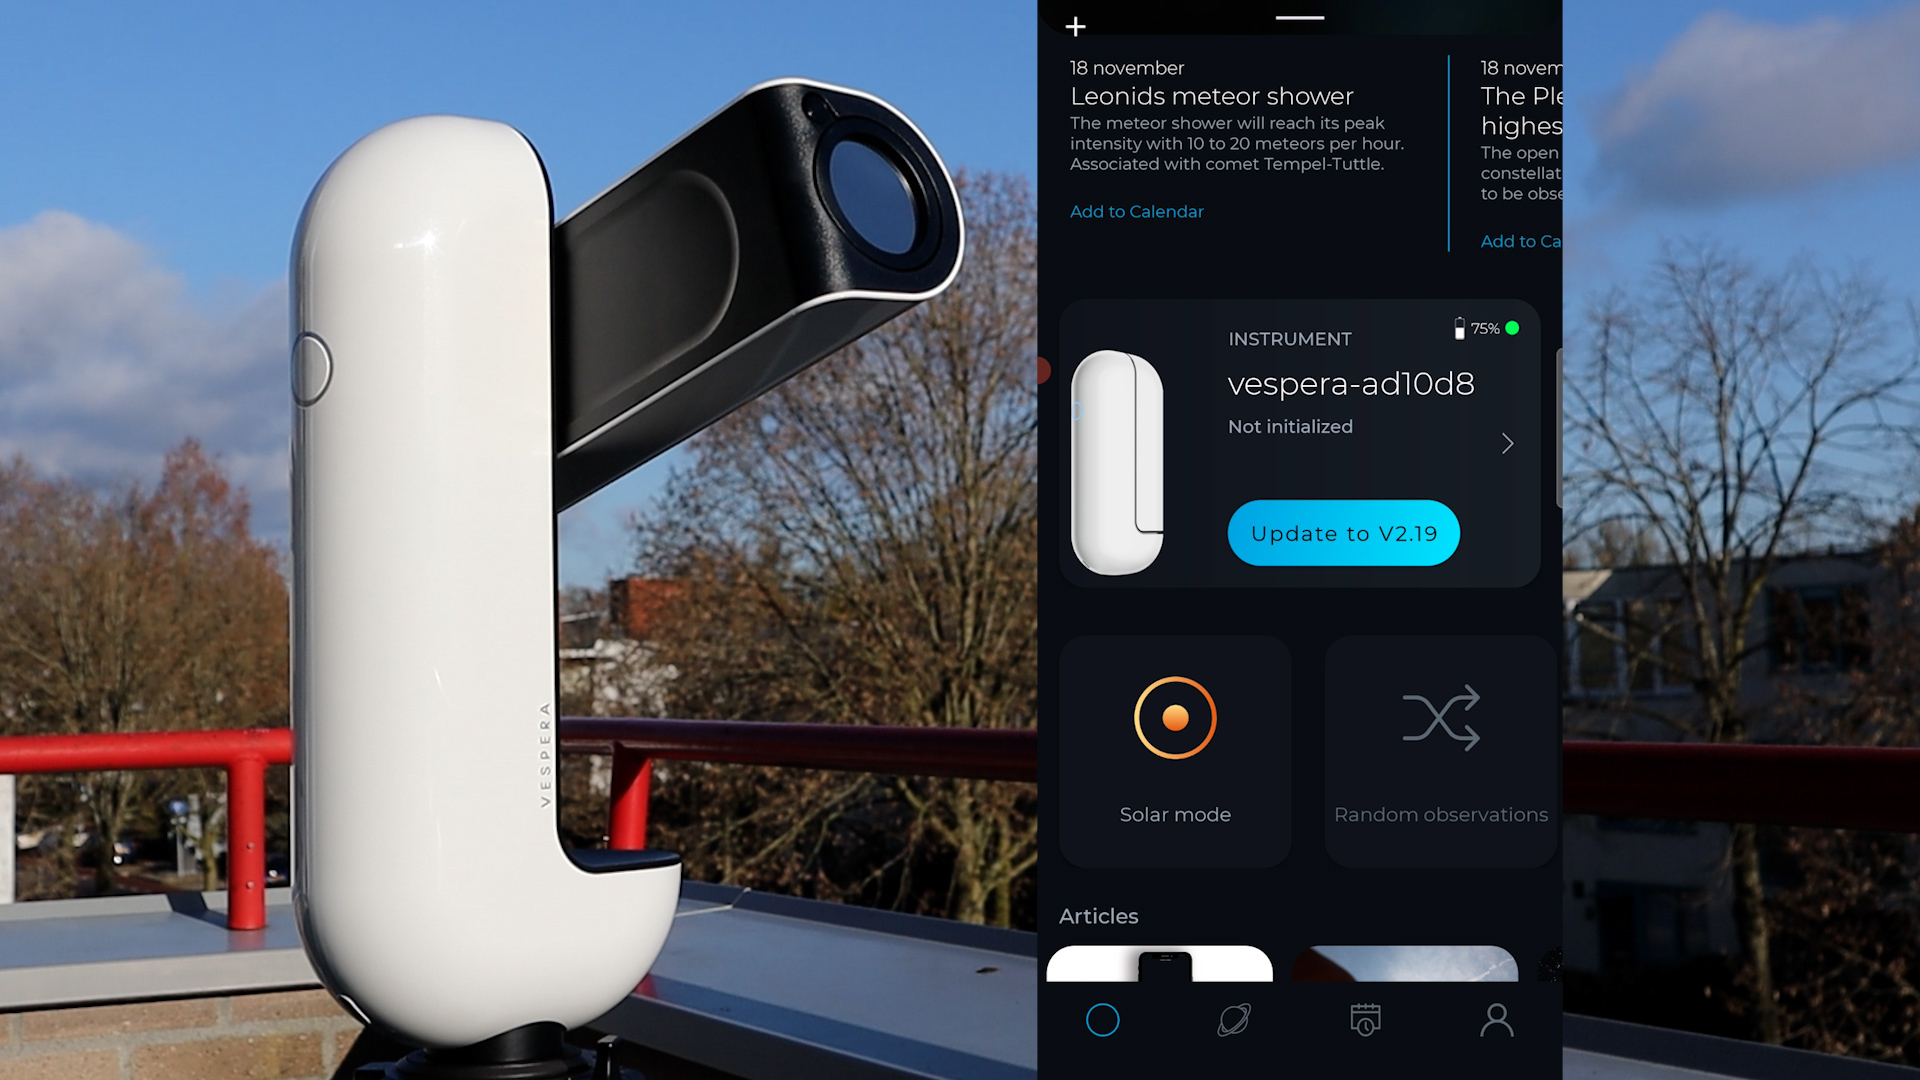
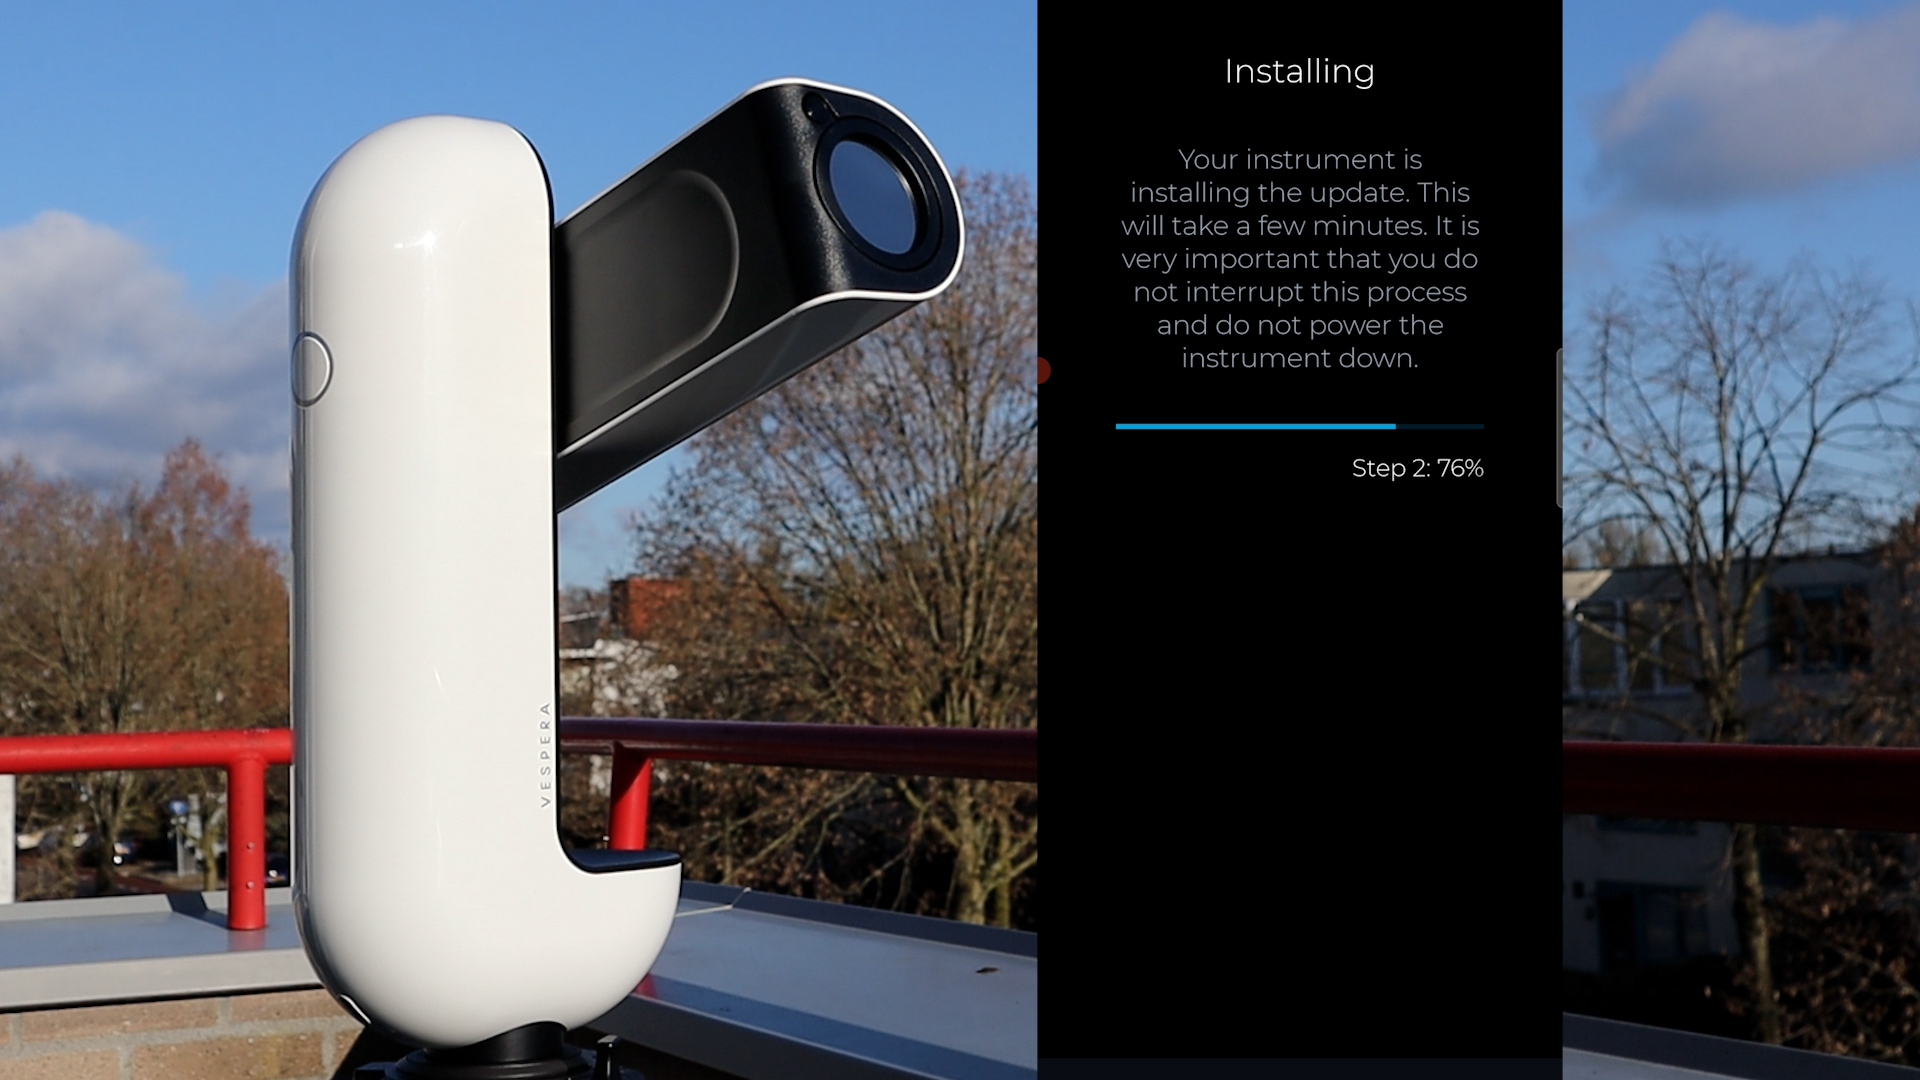
Upon connecting my telescope to the Singularity APP, an option to update the firmware to version 2.19 appeared. Opting for the update, the app advised me that the process would take several minutes and emphasized the need for a sufficiently charged battery. It also cautioned against turning off the device during the update. Clicking on “update now,” I patiently observed multiple screens detailing the updating and installation progress, with the app instructing me to stay in proximity to the telescope.
After around 5 minutes, the update was completed, and a screen indicated the successful installation, along with a message stating that the Vespera would automatically restart. The app reminded me to wait for the blue light on the Vespera before reconnecting to the telescope’s WiFi signal. Once the telescope restarted and illuminated, I selected Vespera’s WiFi signal, though it took some time for the app to fully reconnect. Initially displaying as disconnected, it eventually linked with the telescope, presenting the option to initialize. However, the telescope cautioned that the initialization process only works at night, prompting me to skip initialization.

Opting for the arrow key, I discovered the option to extend the telescope’s arm. Selecting this option, the arm indeed ascended, confirming the telescope’s successful connection and responsiveness to the Singularity APP. The entire installation and update process consumed approximately 15 minutes, equivalent to photons traveling from the Sun’s surface to Mars. After the installation and update procedure, all I needed to do was turn on the telescope, connect to its WiFi signal, and launch the app to control the telescope. The WiFi connection remained stable throughout all my tests.
Observing the Sun with the Vaonis Vespera Smart Telescope
Let me show you how I observed the Sun with the Vaonis Vespera Smart Telescope. Remember, never look directly into the Sun with the naked eye as you will severely damage your eyesight. For telescopes like the Vespera, always use the Vaonis solar filter can be ordered as an optional extra.
In the Singularity APP, I opted for the solar mode. A cautionary message appeared, advising against pointing the telescope directly at the Sun without the Vaonis Solar Filter. Upon hitting the start button, the app displayed a message indicating “moving arm into position”. Once the Vespera’s arm faced forward, another prompt directed me to install the solar filter and ensure the telescope was properly leveled. Attaching the solar filter involved a straightforward process of mounting it in front of the Vespera’s lens. The filter securely clicked into position, prompting the app to instruct me to verify the telescope’s levelness and alignment with the Sun. This precision was crucial for the Vespera to locate the Sun accurately in the daytime sky.
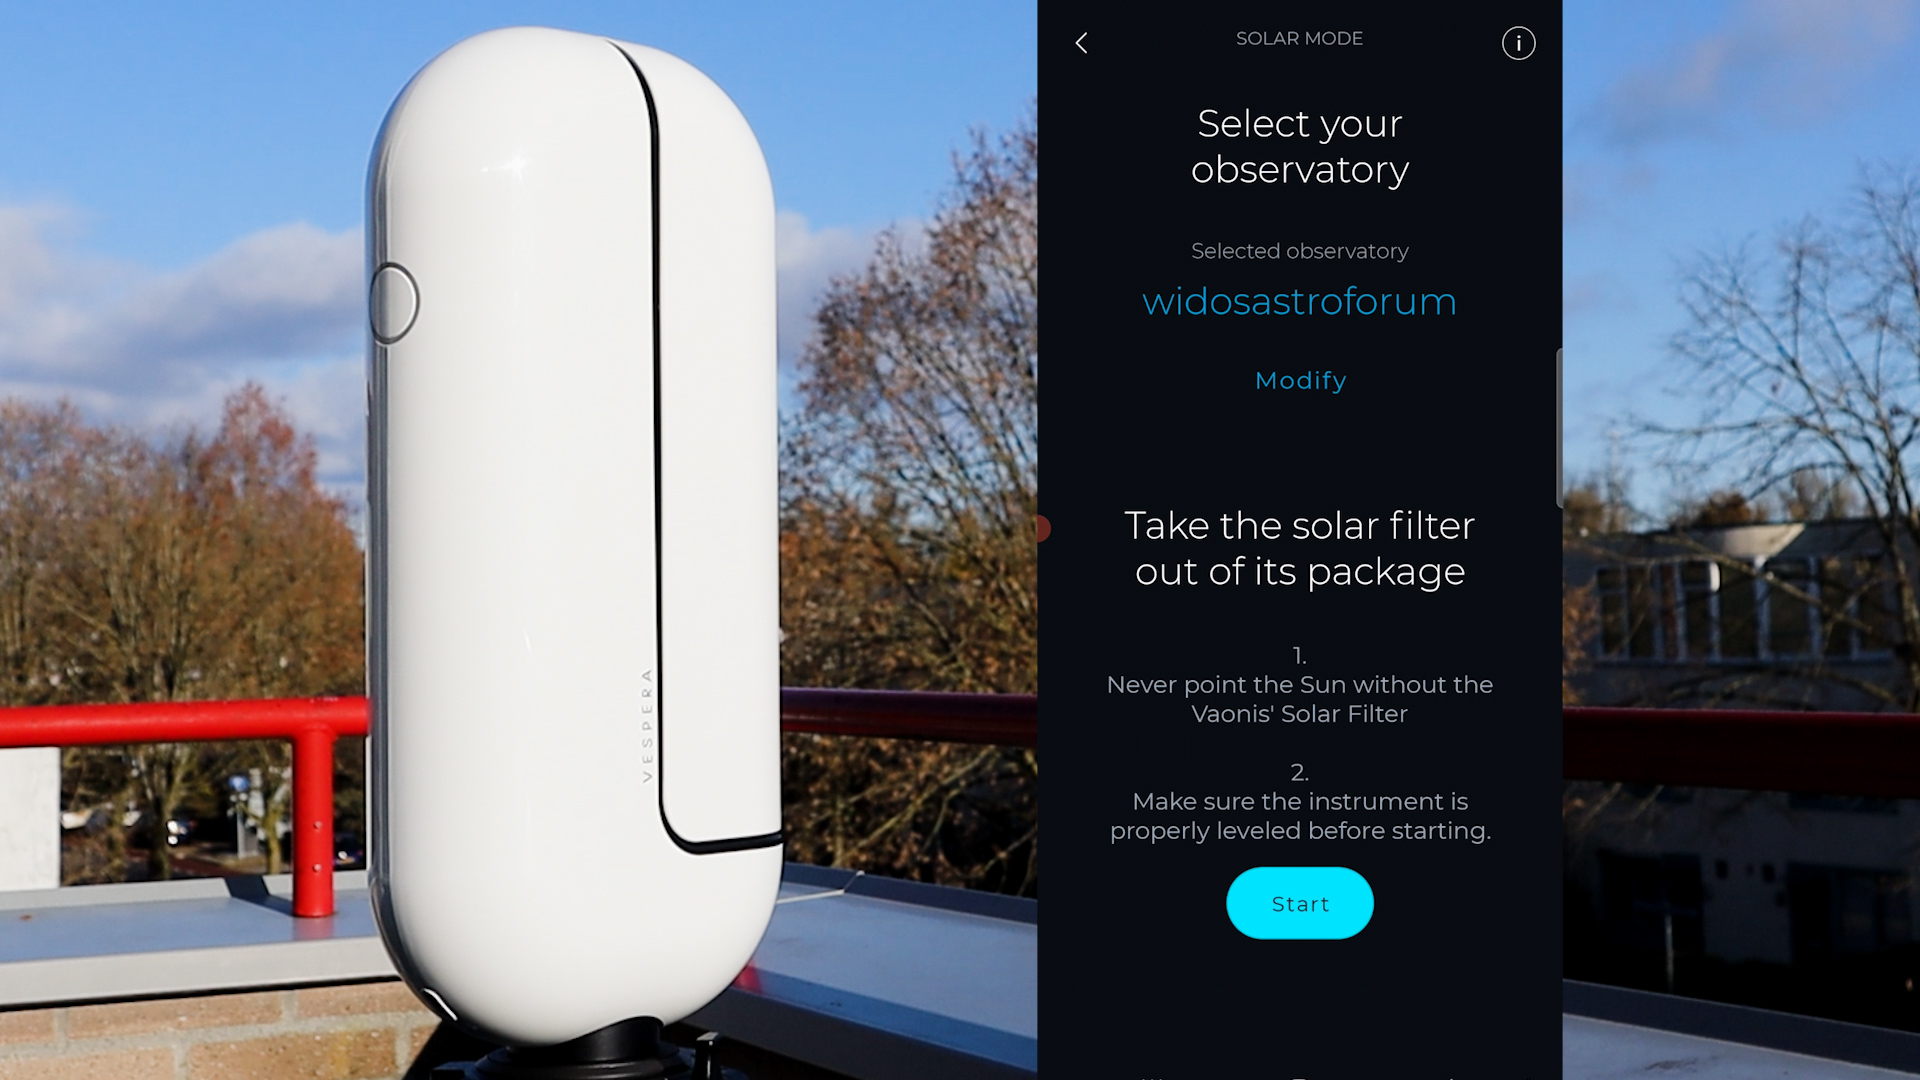

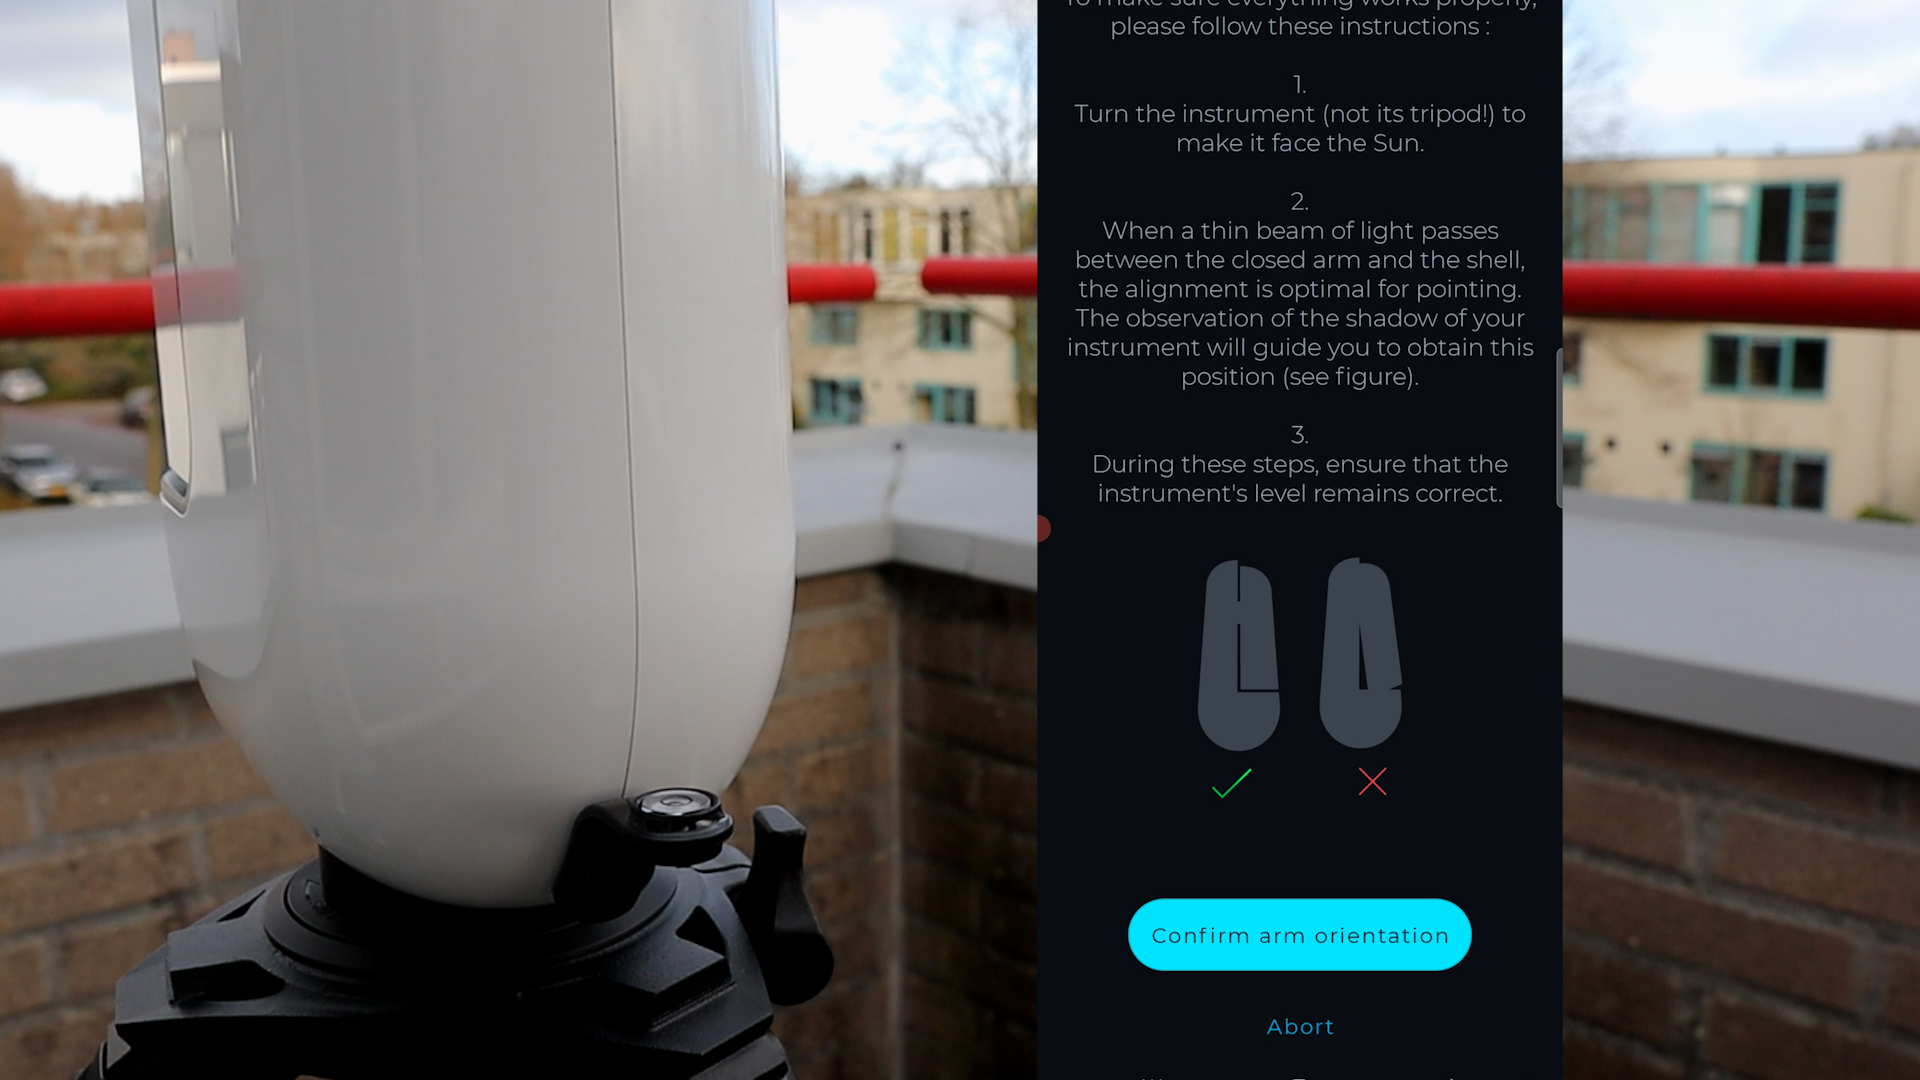
The Vaonis Vespera comes equipped with a bubble leveler, conveniently fitting into the telescope’s charging connection to confirm its levelness. After ensuring the telescope was properly aligned and level, I pressed “confirm arm orientation.” This initiated the retraction and subsequent extension of the Vespera’s arm to locate the Sun in the daytime sky. It took a few minutes for the Vespera to autofocus on the Sun. Meanwhile, the app provided engaging facts about the Sun based on my previously selected interests during the initial setup.
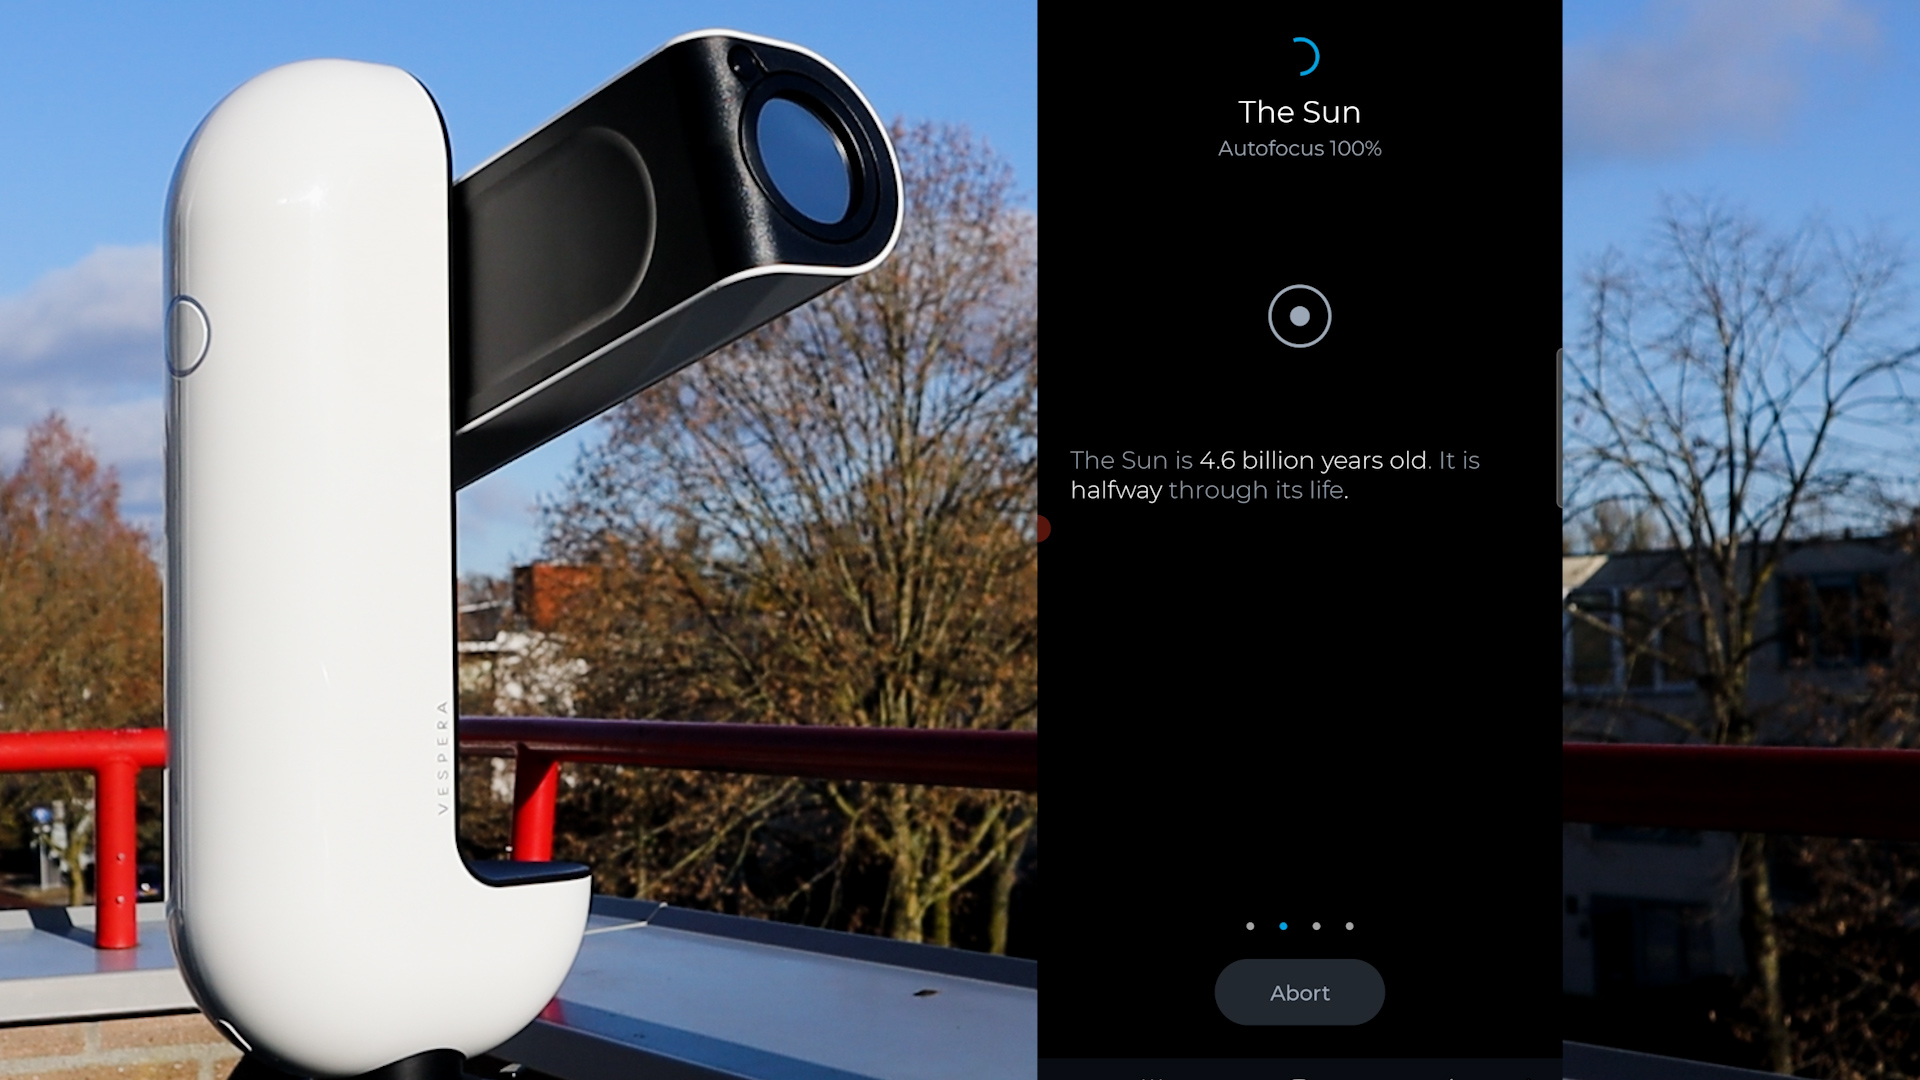


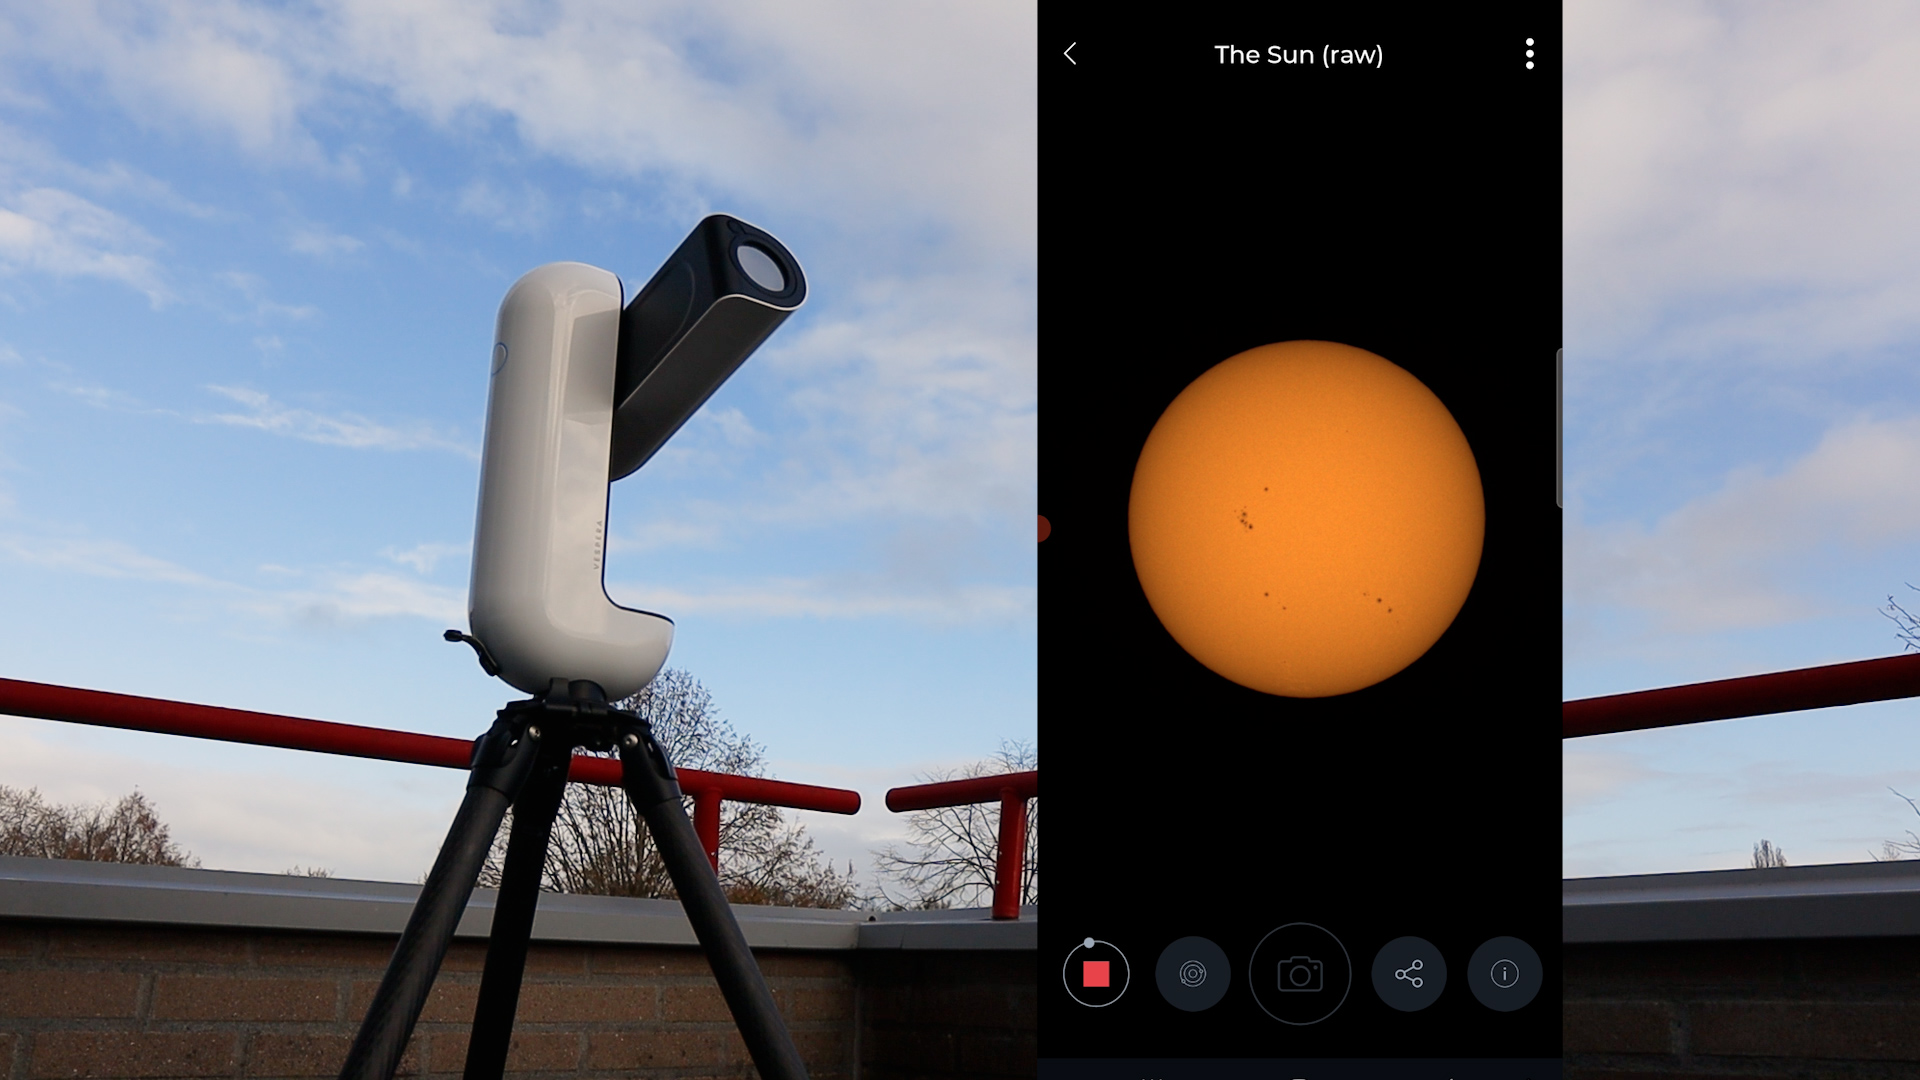
Following autofocus completion, the app displayed a brief video of blue rays converging towards the Vespera logo, followed by a LIVE RAW feed of the Sun on my smartphone screen. The Vespera automatically tracked the Sun, presenting a captivating view with a yellow tint, thanks to the installed solar filter. Initially, the view was slightly blurry, prompting me to redo the autofocus to get a sharper image of the Sun. I clicked on the three dots at the top right of the screen and selected the “redo autofocus” option. This took about 1 and a half minutes after which the Sun and the many sunspots visible that day appeared a lot sharper on my smartphone screen.
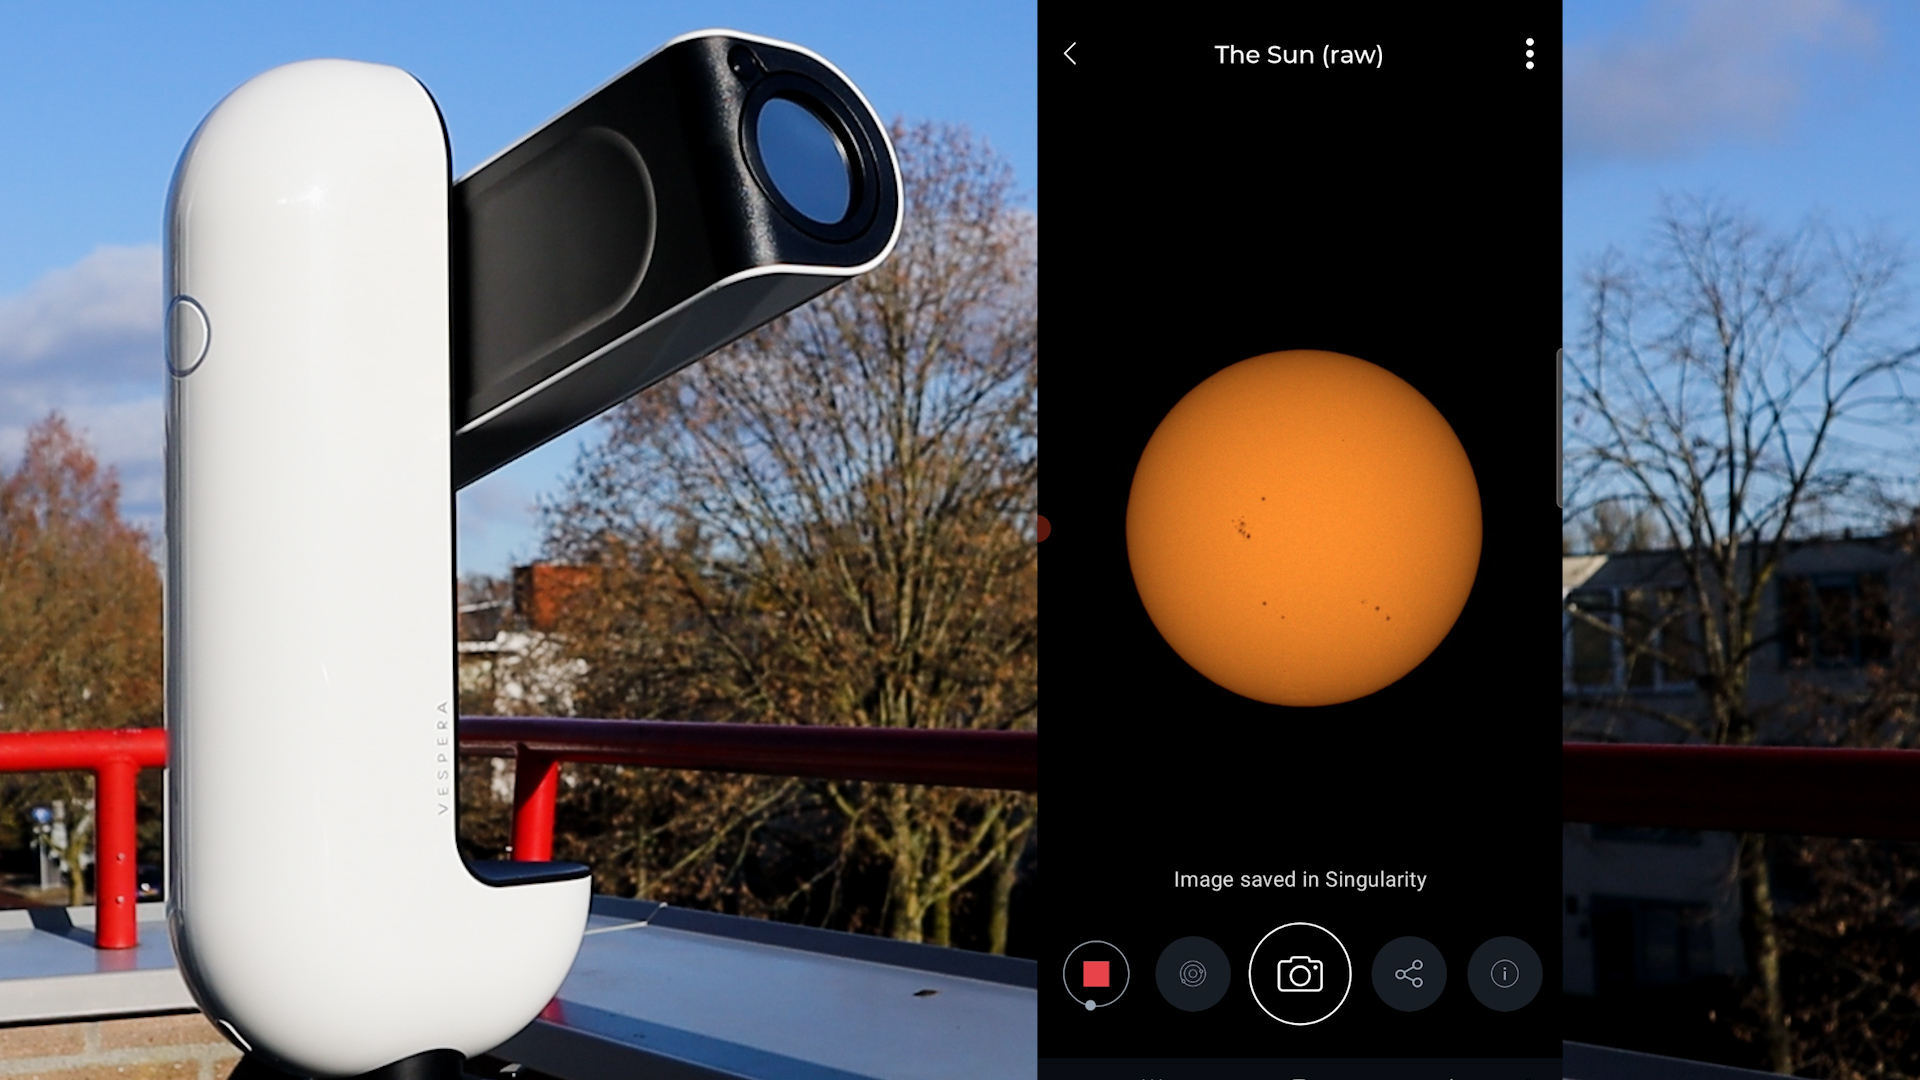
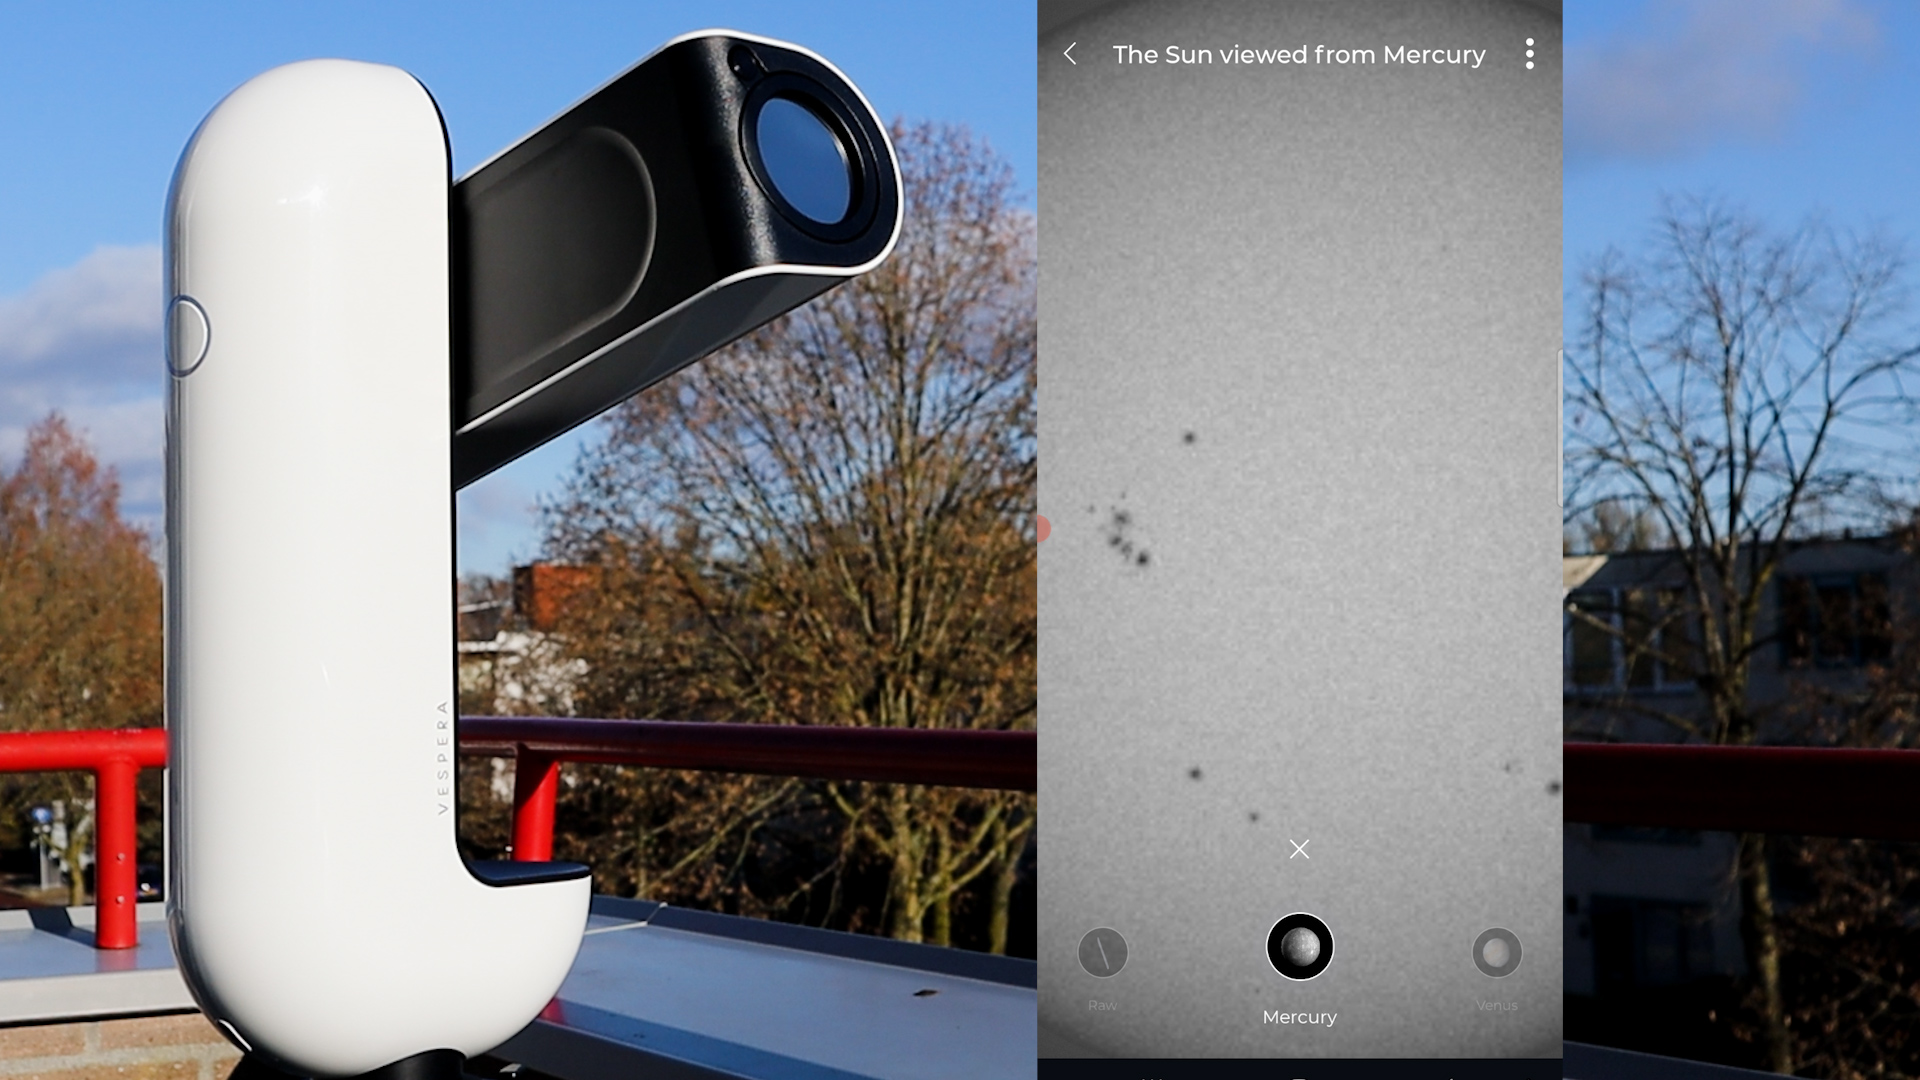

The app allowed me to capture a photo of the Sun by clicking the photo icon at the bottom, and saving it as a jpeg within the Singularity APP. Additionally, the solar system icon provided a feature displaying a live observation of the Sun from different planets. This educational tool demonstrated the varying sizes of the Sun as observed from different planets.
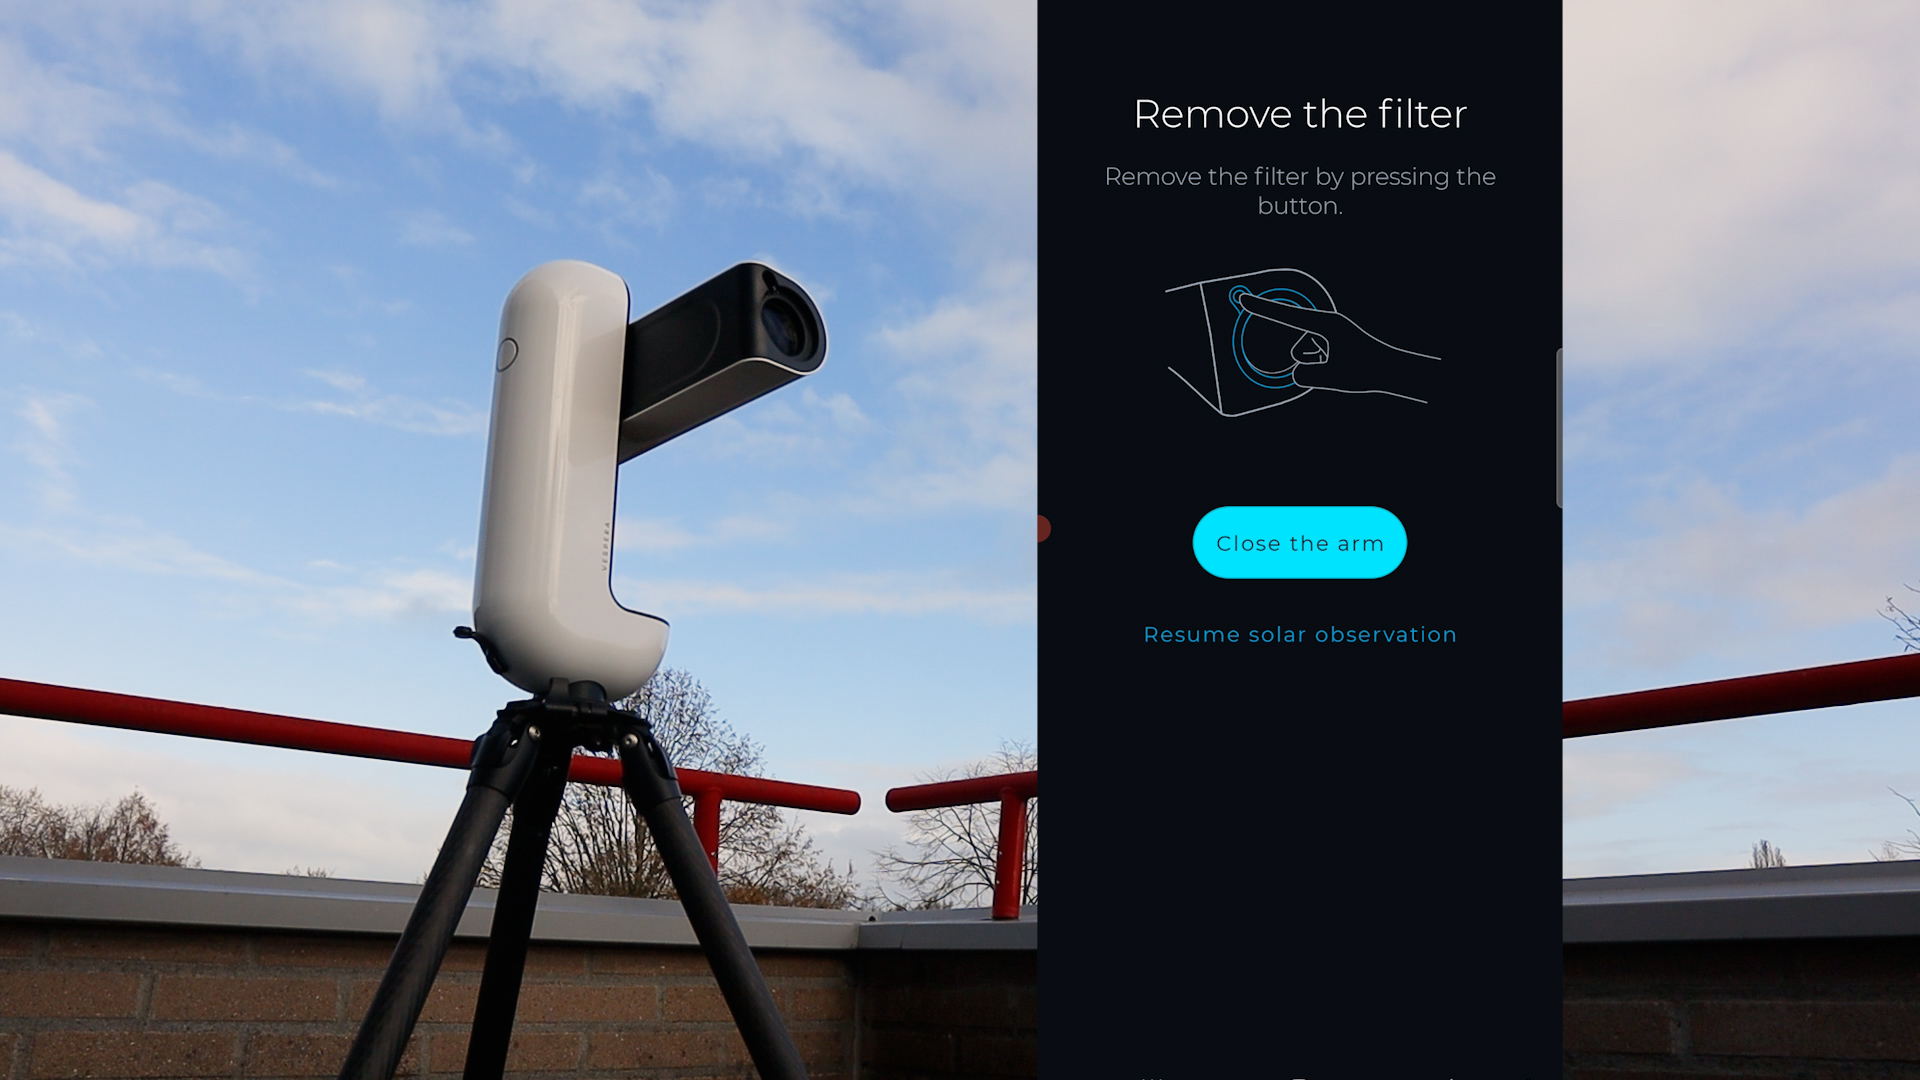
Unfortunately, there is no option to manually adjust the direction and focus of the telescope in the app, but I appreciated the snapshot feature and the unique solar system observation mode. After concluding the Sun-watching session, pressing the stop button prompted the Vespera arm to move away from the Sun, signaling the safe removal of the solar filter. The Vespera then retracted its arm entirely.

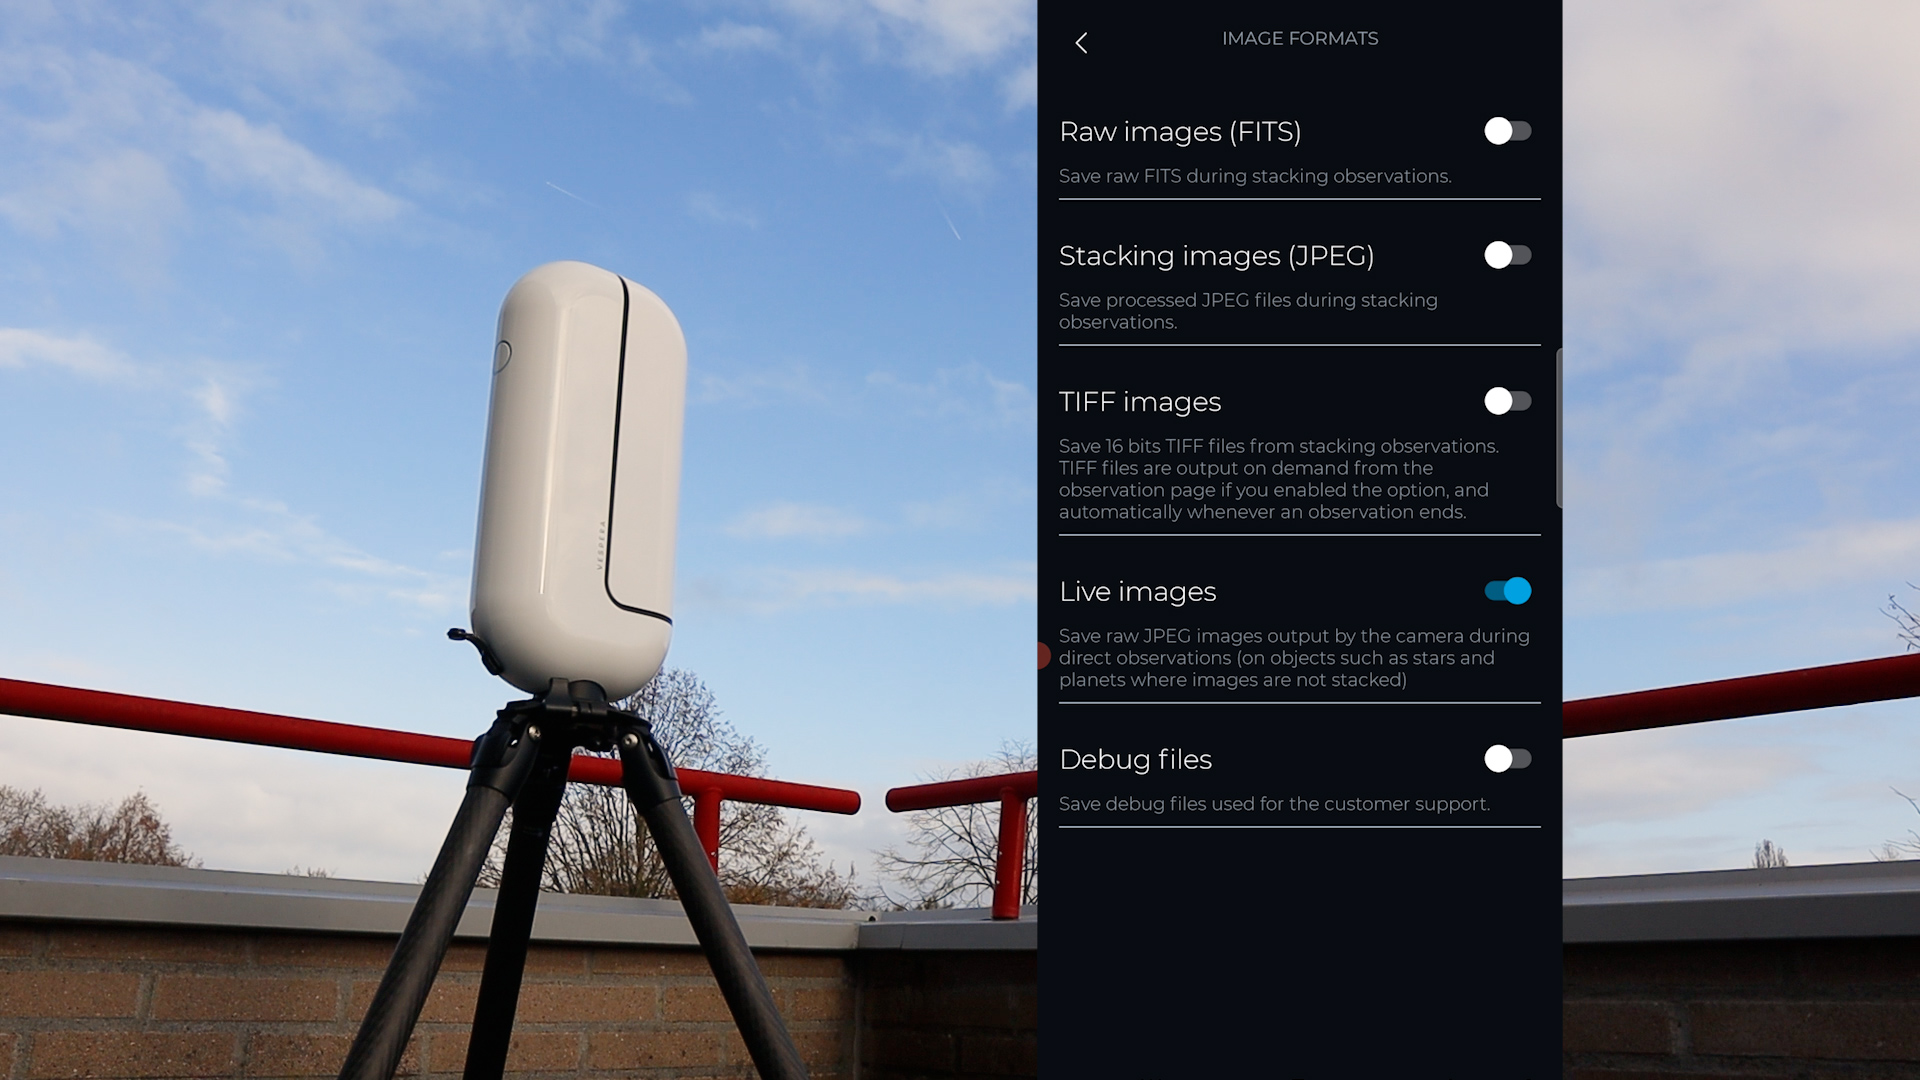
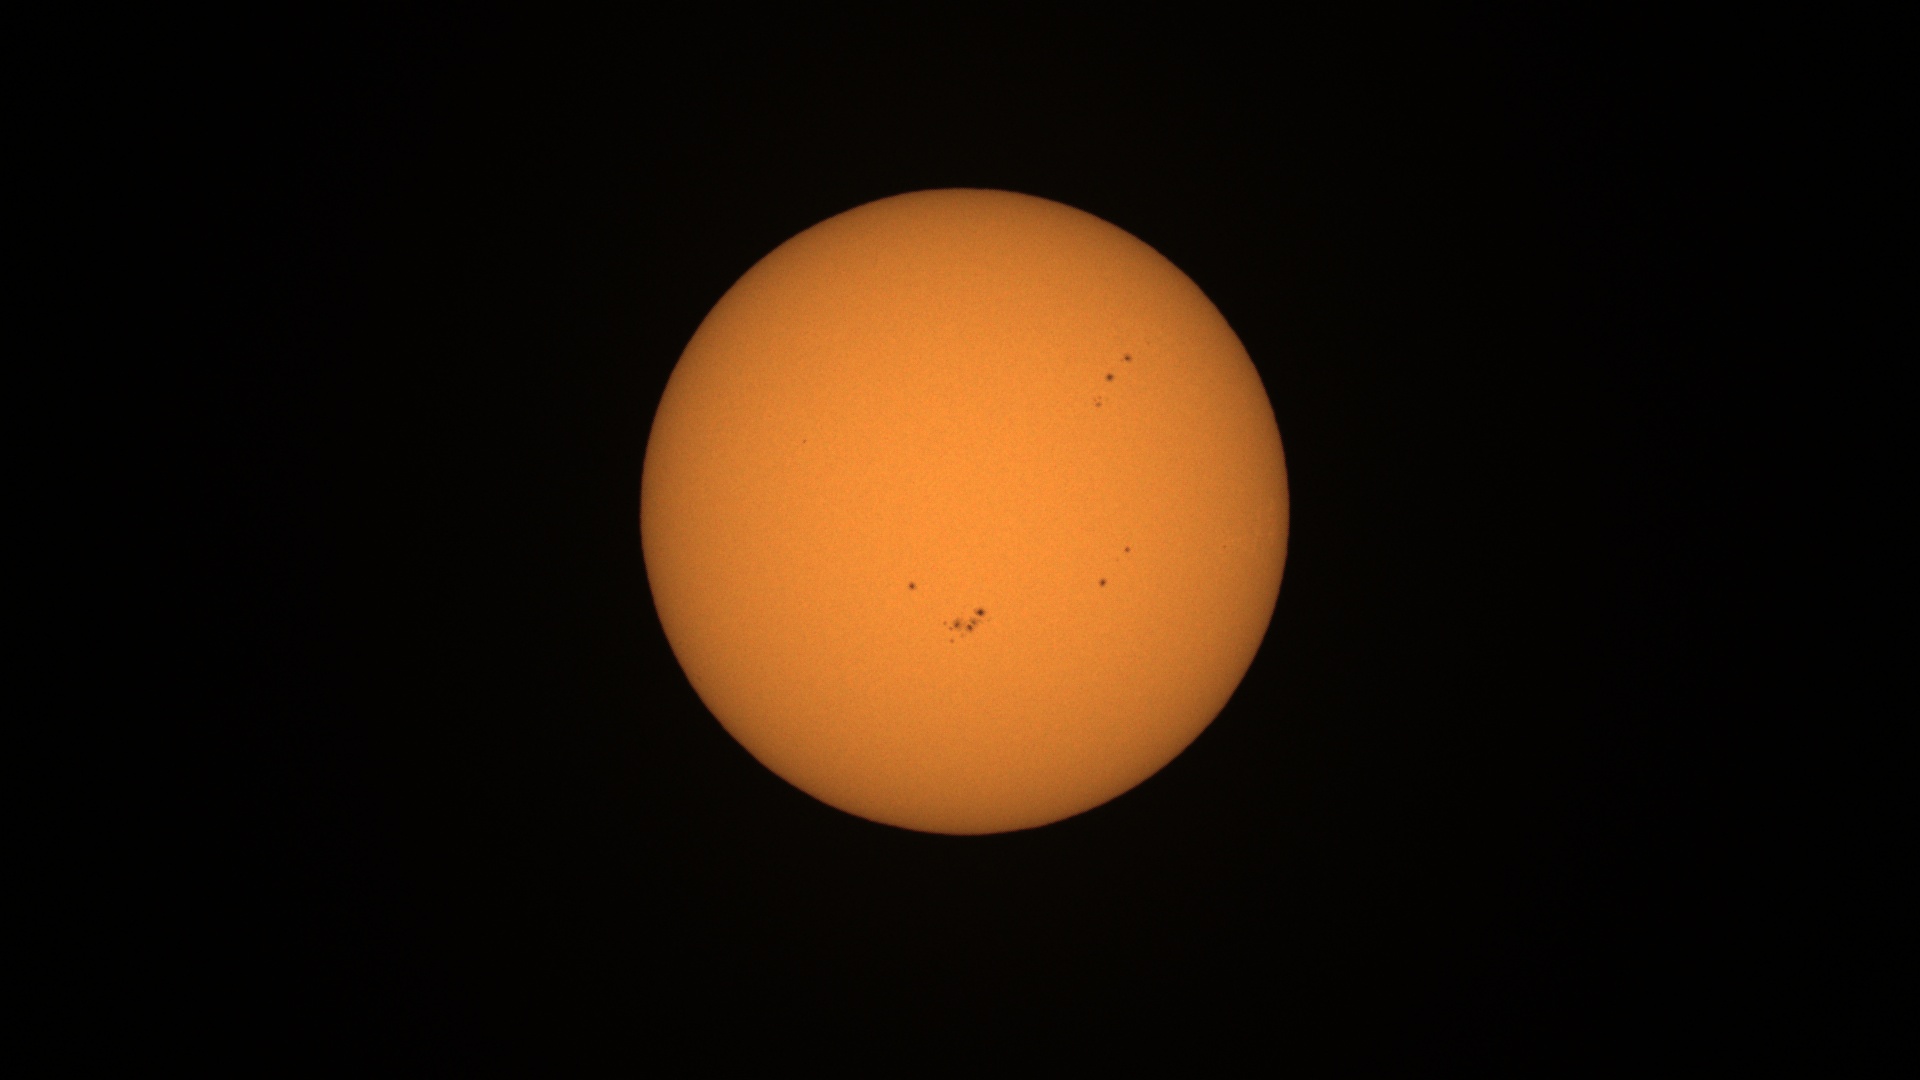
There is an intriguing option to automatically store all images from live observations of solar system objects. By selecting the Vespera picture on the Singularity app’s main screen, choosing image formats, and enabling “live images”, all photos from solar, lunar, and planetary sessions are automatically stored in jpg format on the Vespera’s memory card. Enabling this feature is valuable for users who want to engage in some more advanced processing. For example, here’s a single image of the Sun without any processing, and a stacked picture of the Sun and the sunspots present that day, after stacking the individual jpg pictures using Autostakkert and Registax as more advanced processing tools. All in all, the Vespera provided a very nice view of the full disc of the Sun and its sunspots.

The Vaonis Vespera (+ optional accessories) is available at Agena Astro (USA/WW), High Point Scientific (USA/WW), and Astroshop (EU/WW)
Observing the Moon with the Vaonis Vespera Smart Telescope
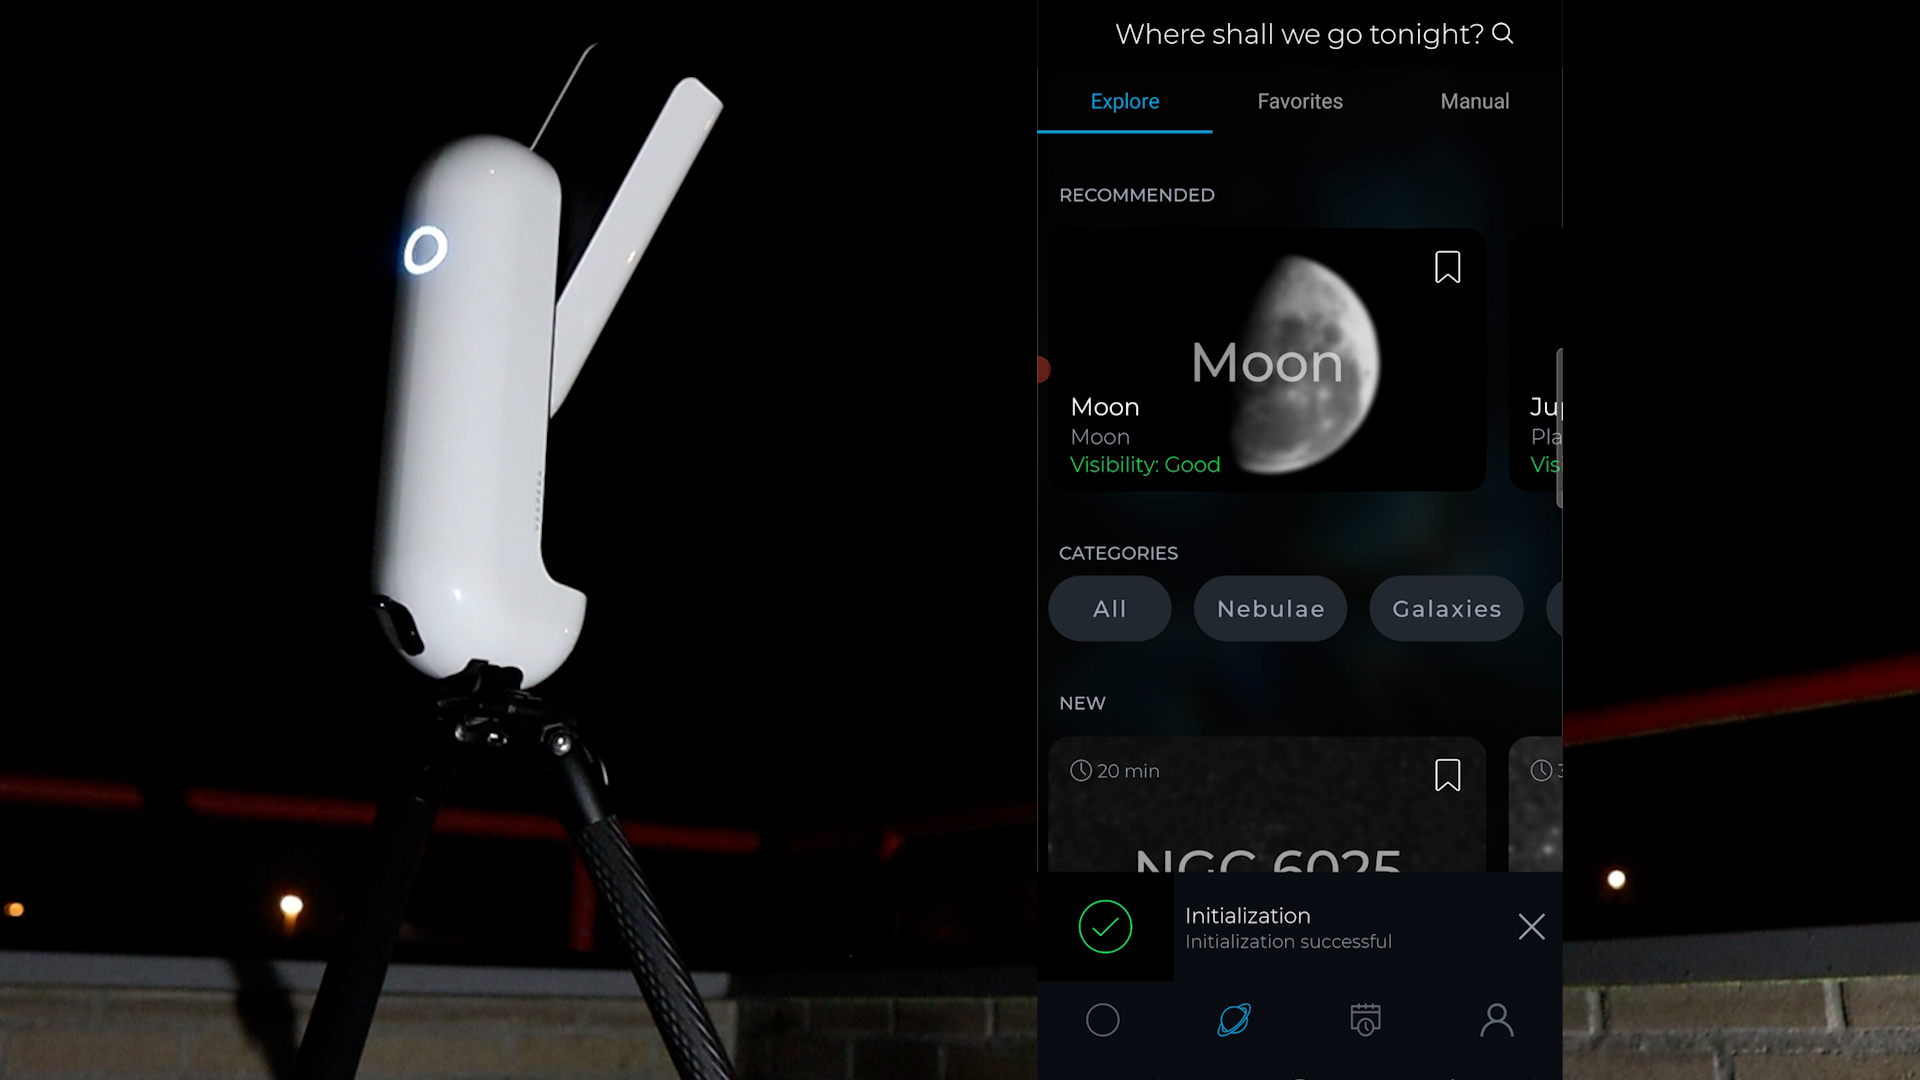
At night, I set up the Vespera and reconnected it to the WiFi signal. My first task was to choose “initialize” on the main screen. The Vespera’s arm automatically pointed upward, determining its position in the night sky through “star zone search” and “star pattern analyses.” This process took about one and a half minutes. Following that, the telescope entered autofocus mode, which lasted approximately two minutes. After completing the initialization procedure, I could press the “look for a target” button on the main screen, revealing a variety of objects categorized as “recommended” for the night, Nebulae, Galaxies, and more.


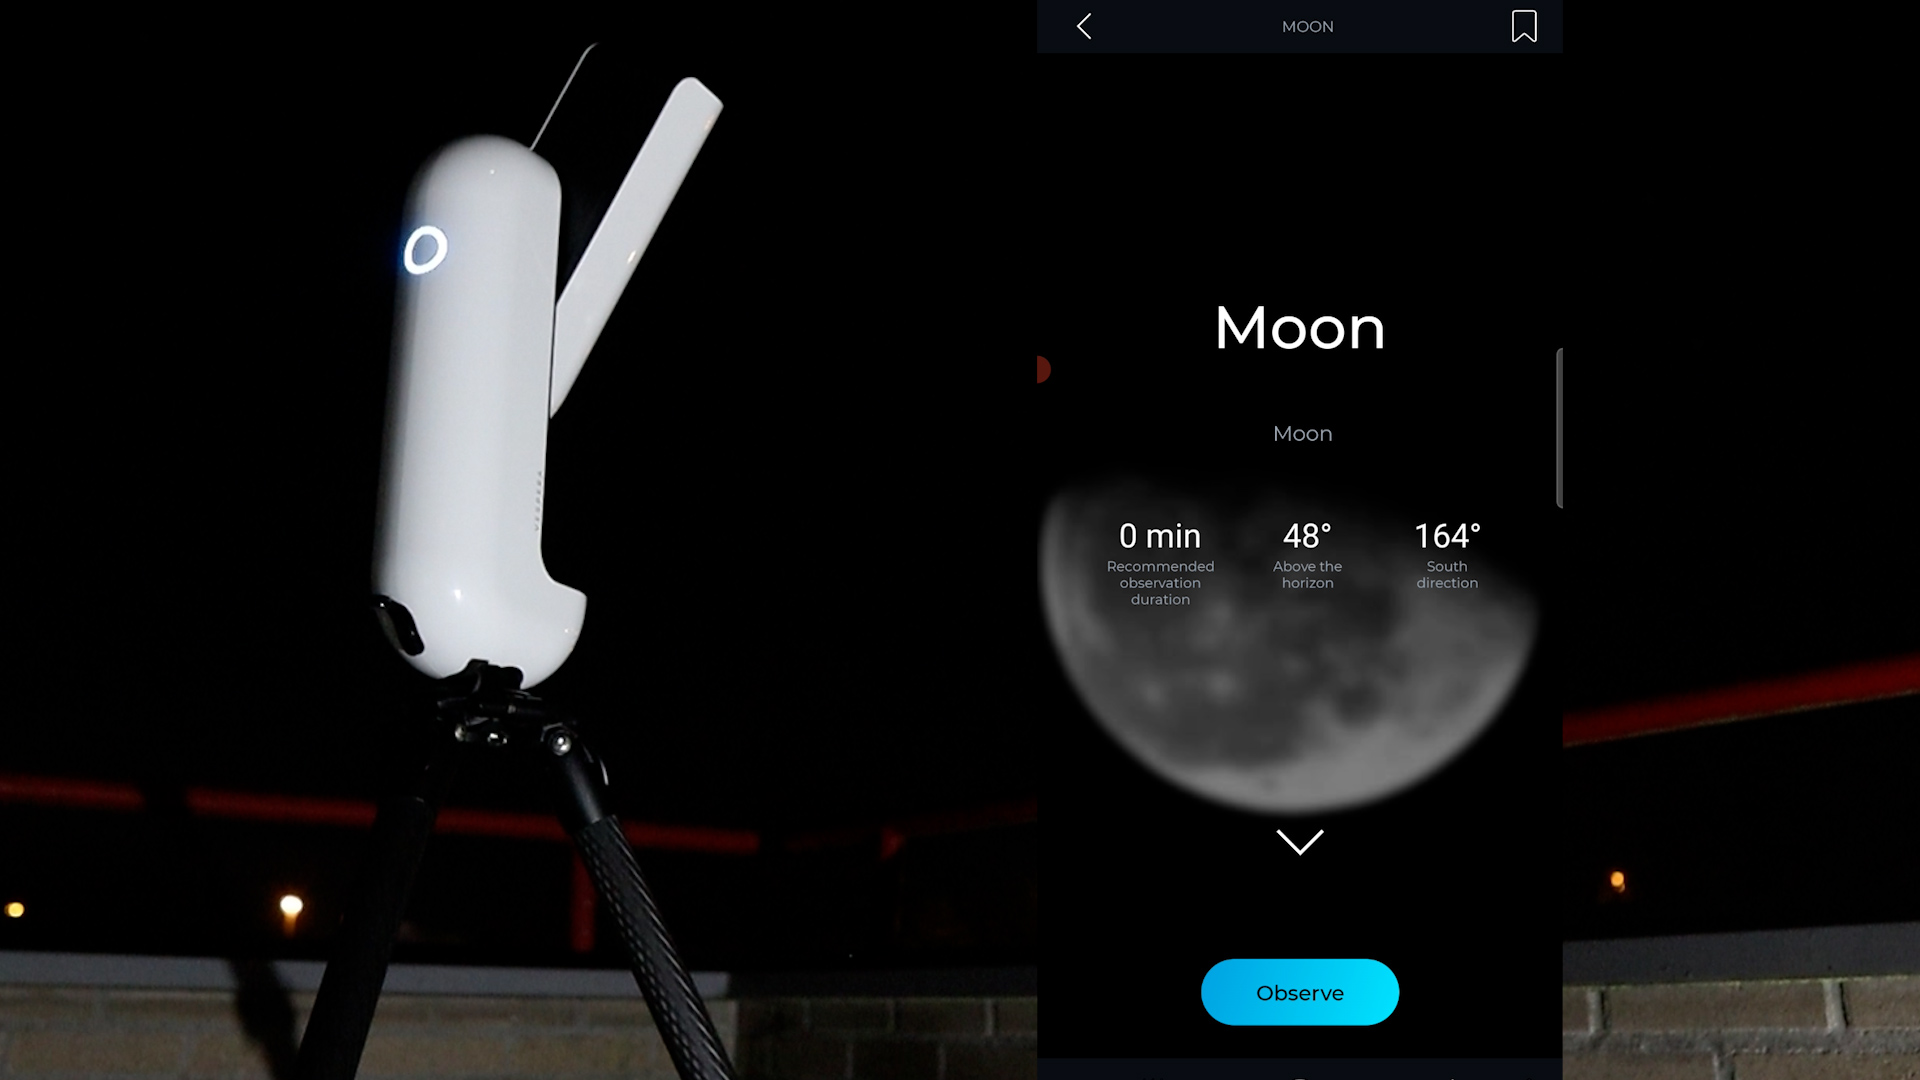
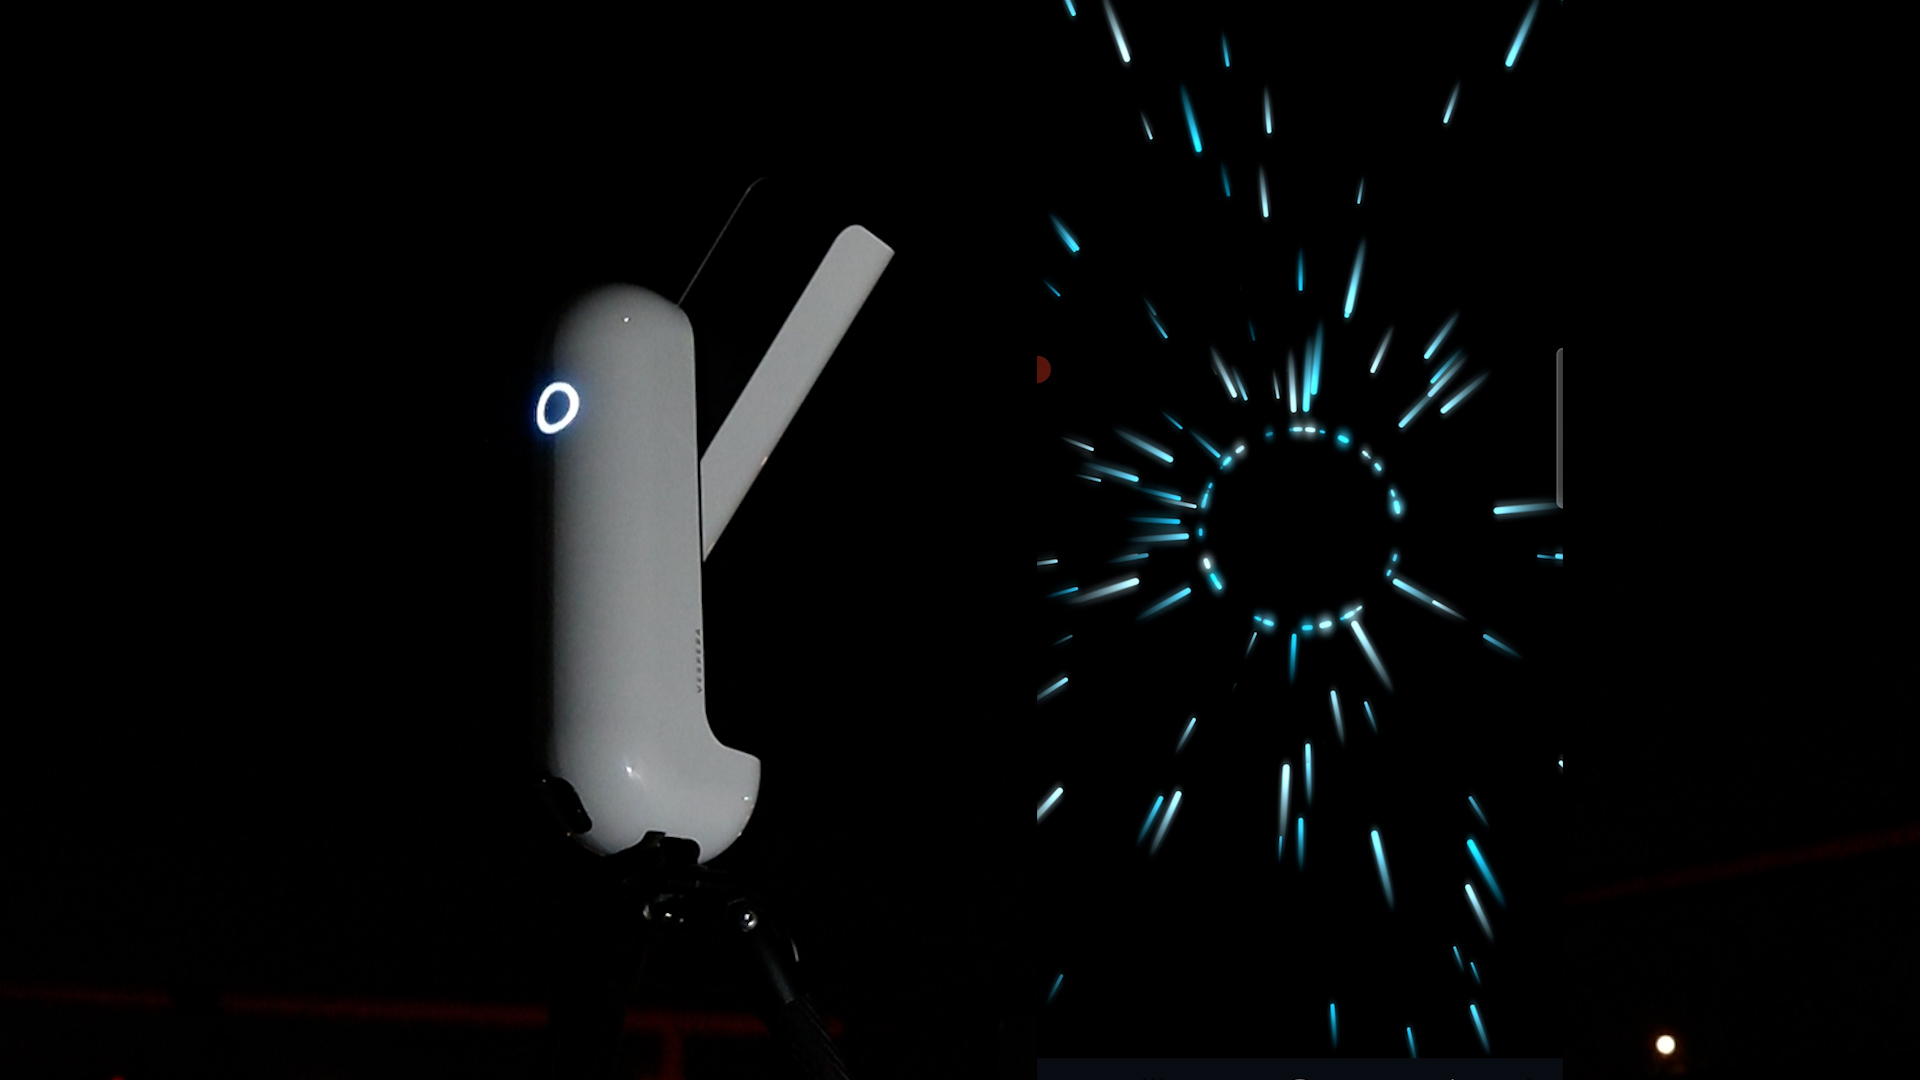
Opting for the Moon, I tapped the observe button. The Vespera swiftly slewed to the Moon, verified its position accuracy, and initiated tracking. During the wait for the live view, I learned intriguing facts about the Moon. After a minute, the Vespera displayed its characteristic logo, depicting the on/off switch and blue rays moving toward that button, then presented a live view of the Moon through the telescope.
Pinching my screen to zoom in, I observed that the Moon was sharply in focus. I switched my phone to landscape mode, as this view resembled the live Moon I observed with the naked eye from my balcony. Though it wasn’t the clearest night, I saw its craters and mares on my smartphone. After snapping a photo, I selected autofocus again in the top right corner of the app to ensure the best focus, which took another 1 and a half minutes.
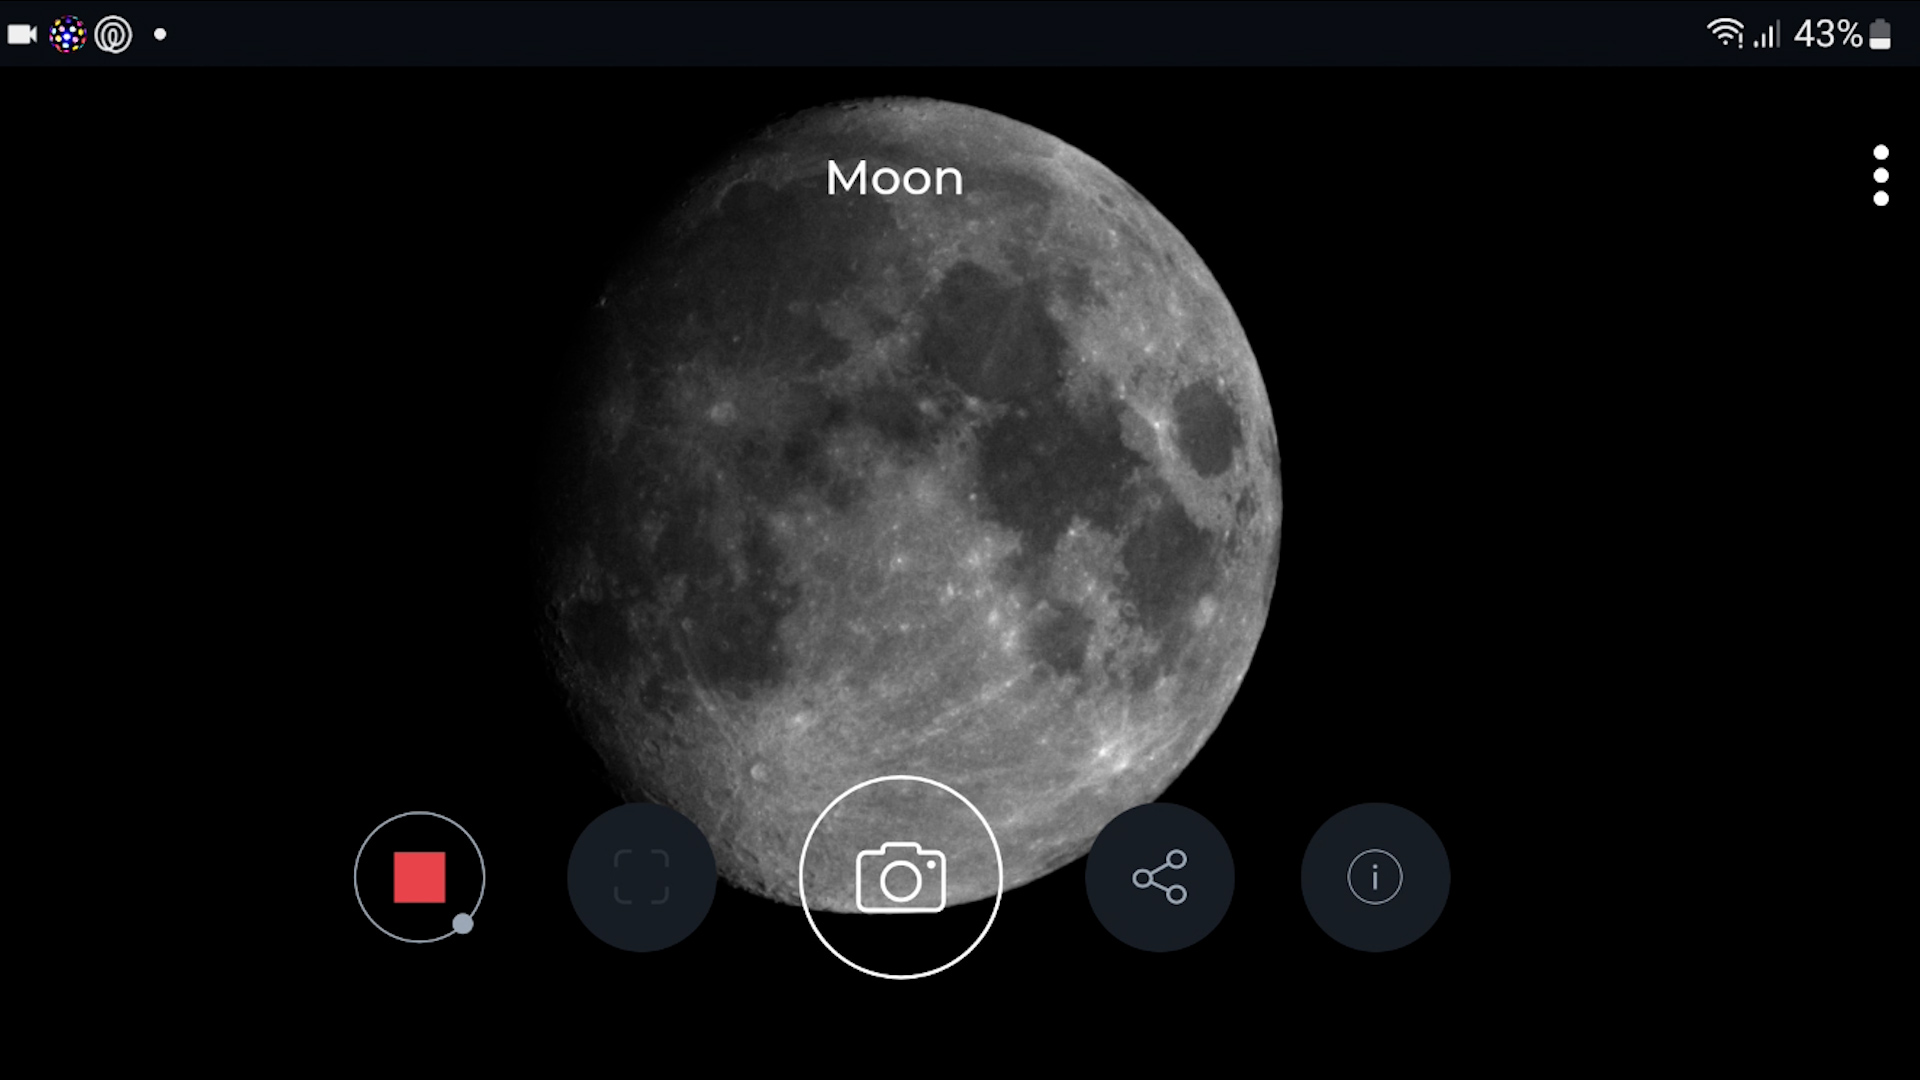
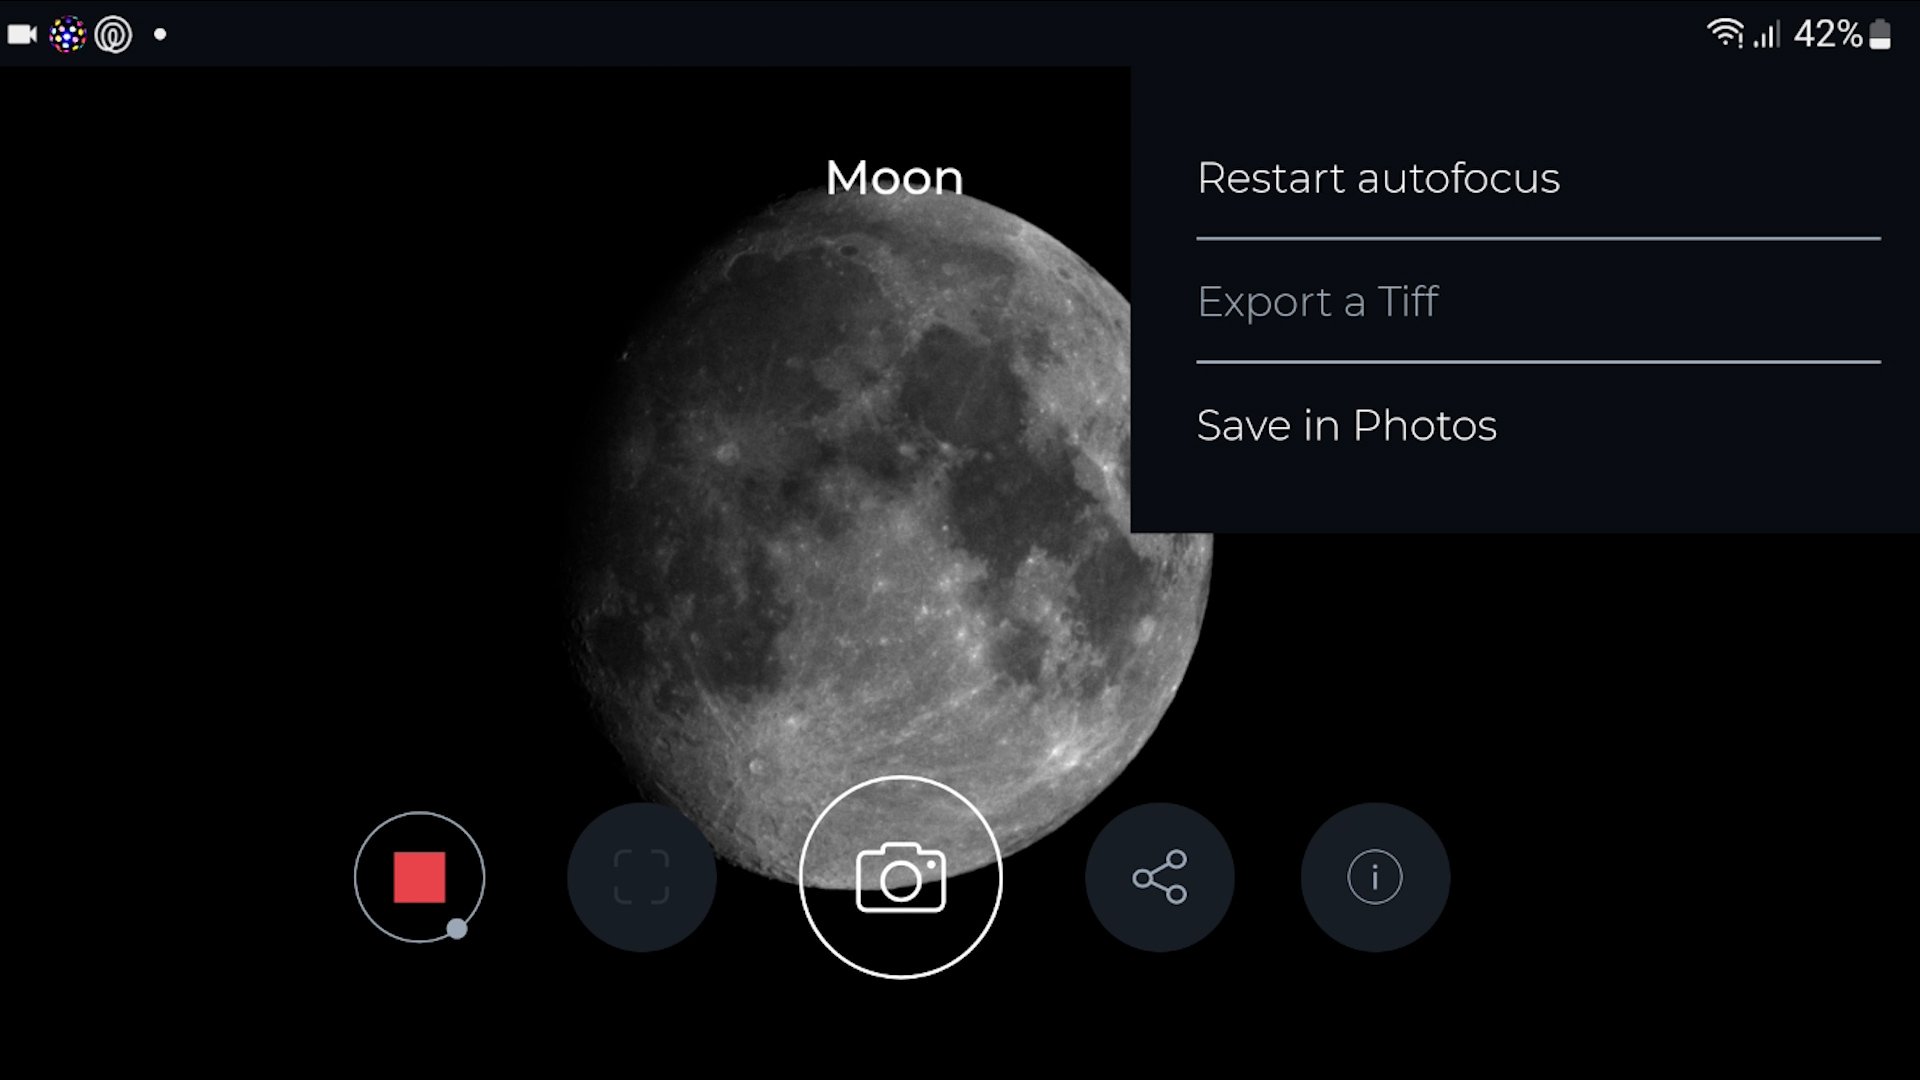
The Vaonis Vespera has the autofocus option, but it doesn’t have a manual focus option in the app itself, which I missed. Nonetheless, the live view remained consistent. I gazed at the Moon for another minute or two and captured another photo using the “save in photos” option. Also, pressing the info button provided additional information about the Moon. Eventually, I chose to conclude the observation by clicking on the stop button, prompting a warning message to ensure the intention to stop the observation. This feature safeguards against accidental stops, serving as a helpful way to undo such choices.
How to access and download the Vaonis Vepera files on the SD card…
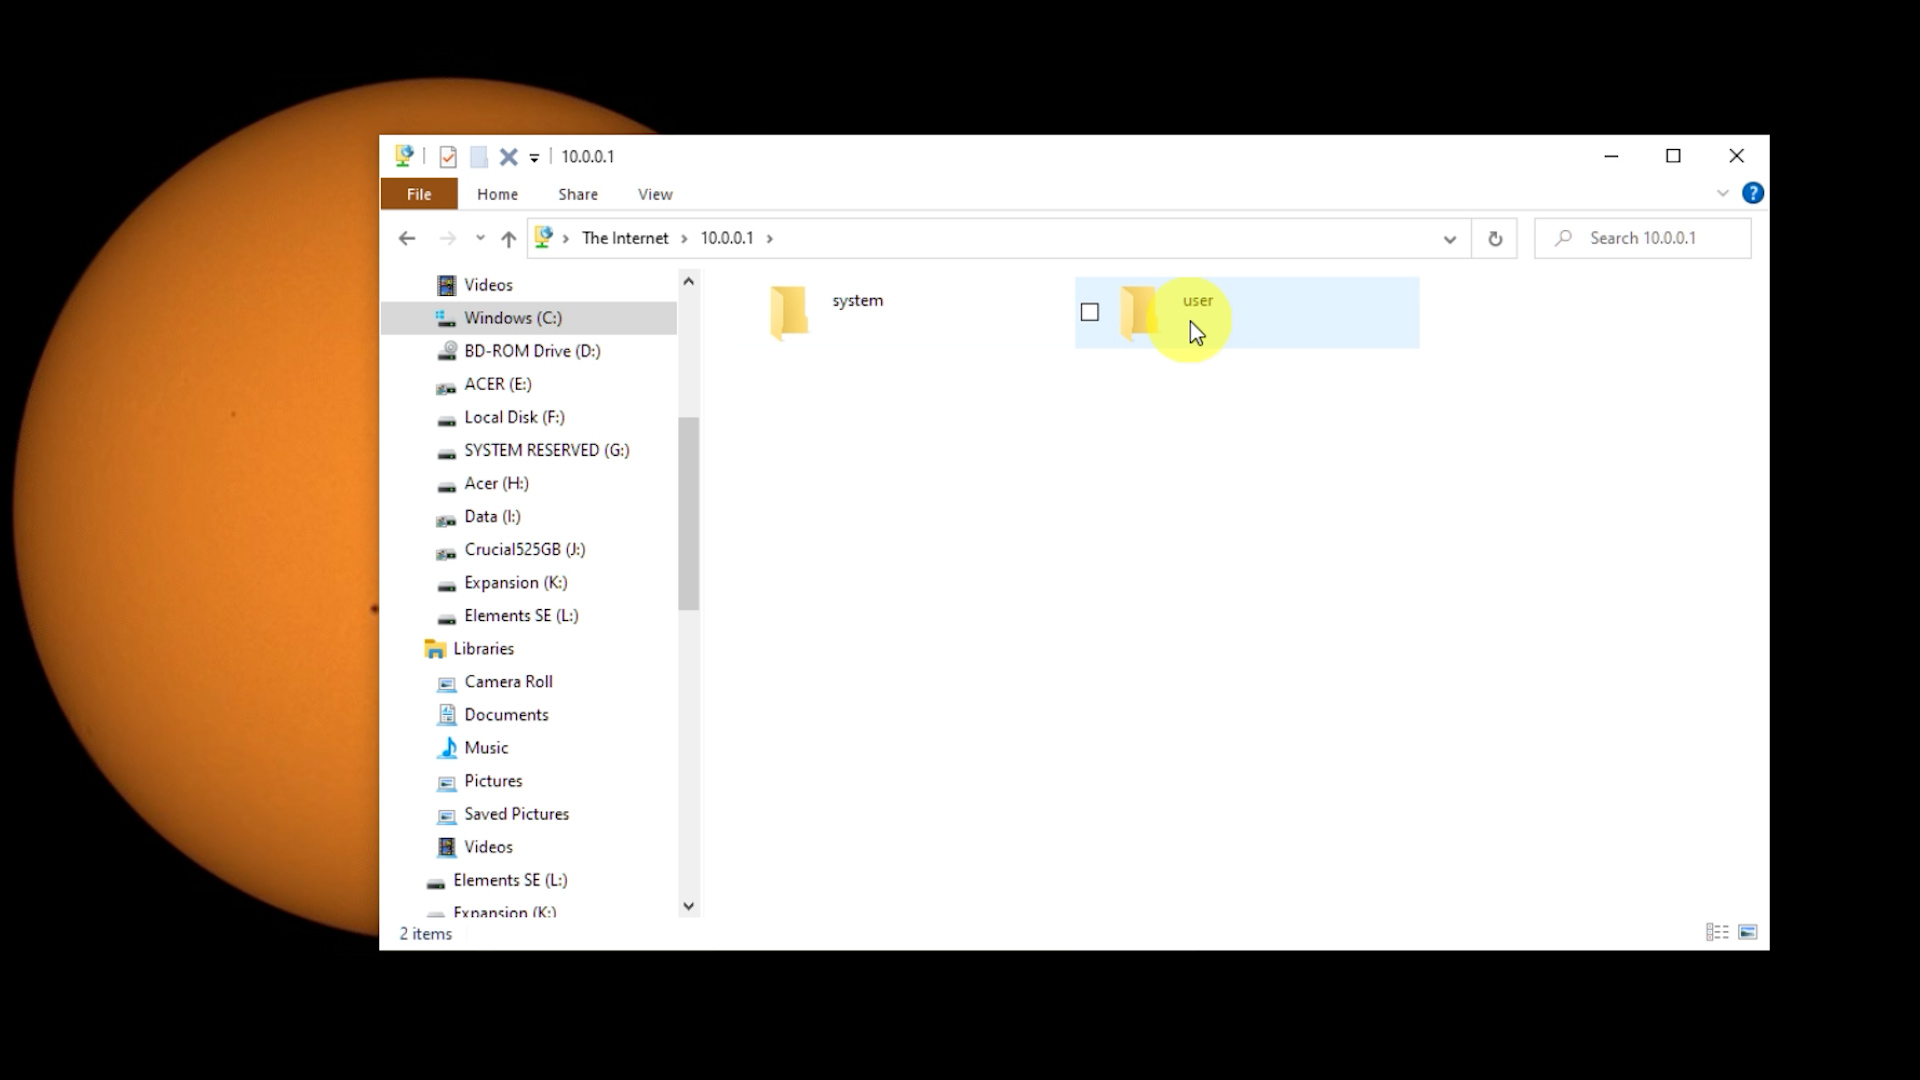
As I activated the feature to record all real-time images in the app, all the images of the observation session were stored on the Vespera’s memory card. To access these files, simply connect to the Vespera’s WiFi signal using your laptop or PC, open your file explorer, and type ftp://10.0.0.1 in the search bar. This will unveil all the stored files in two main folders: systems and user folder. The live images can be located in the user folder, organized by date, observation details, and the object’s name.
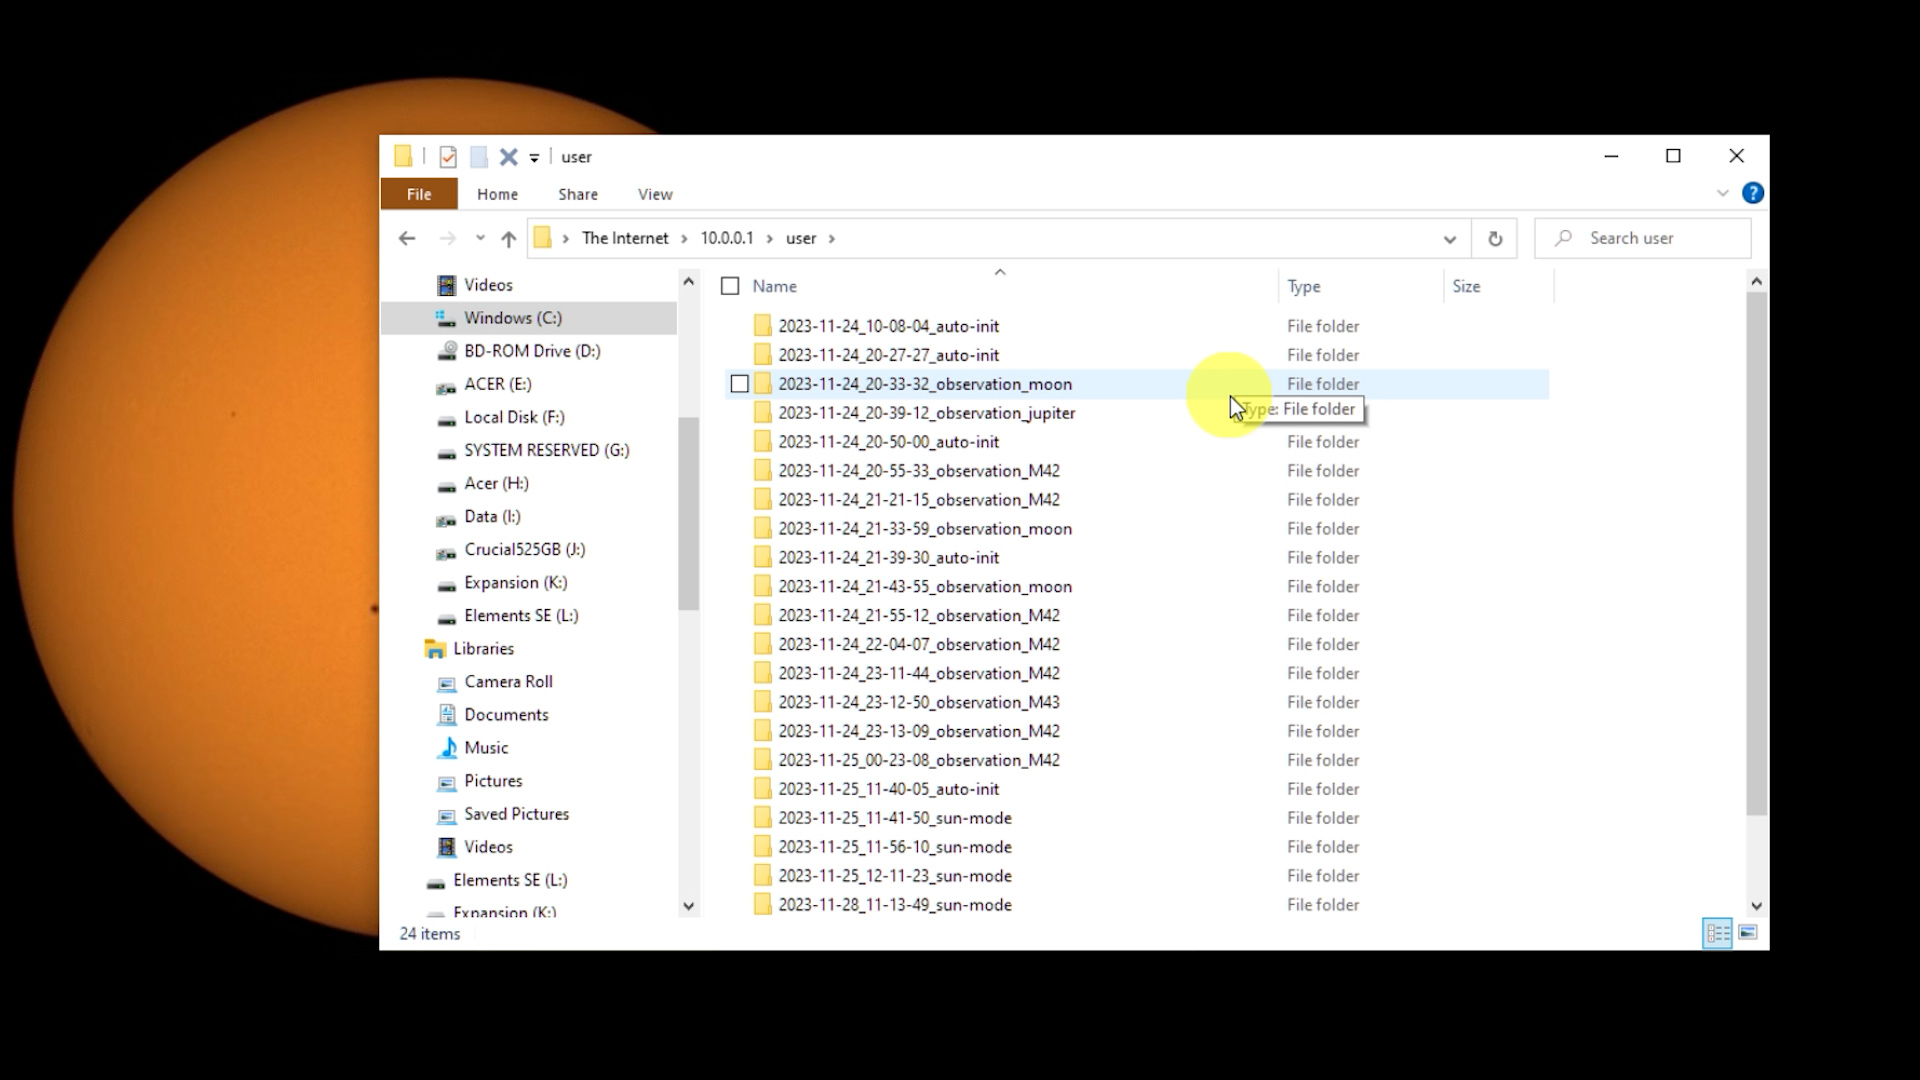

Within these folders, there’s a subfolder named “initial images” where all the live images are stored in JPG format. Here is a single picture of the moon, as well as a processed, stacked image of the Moon I created by using free processing tools like Autostakkert and Registax.
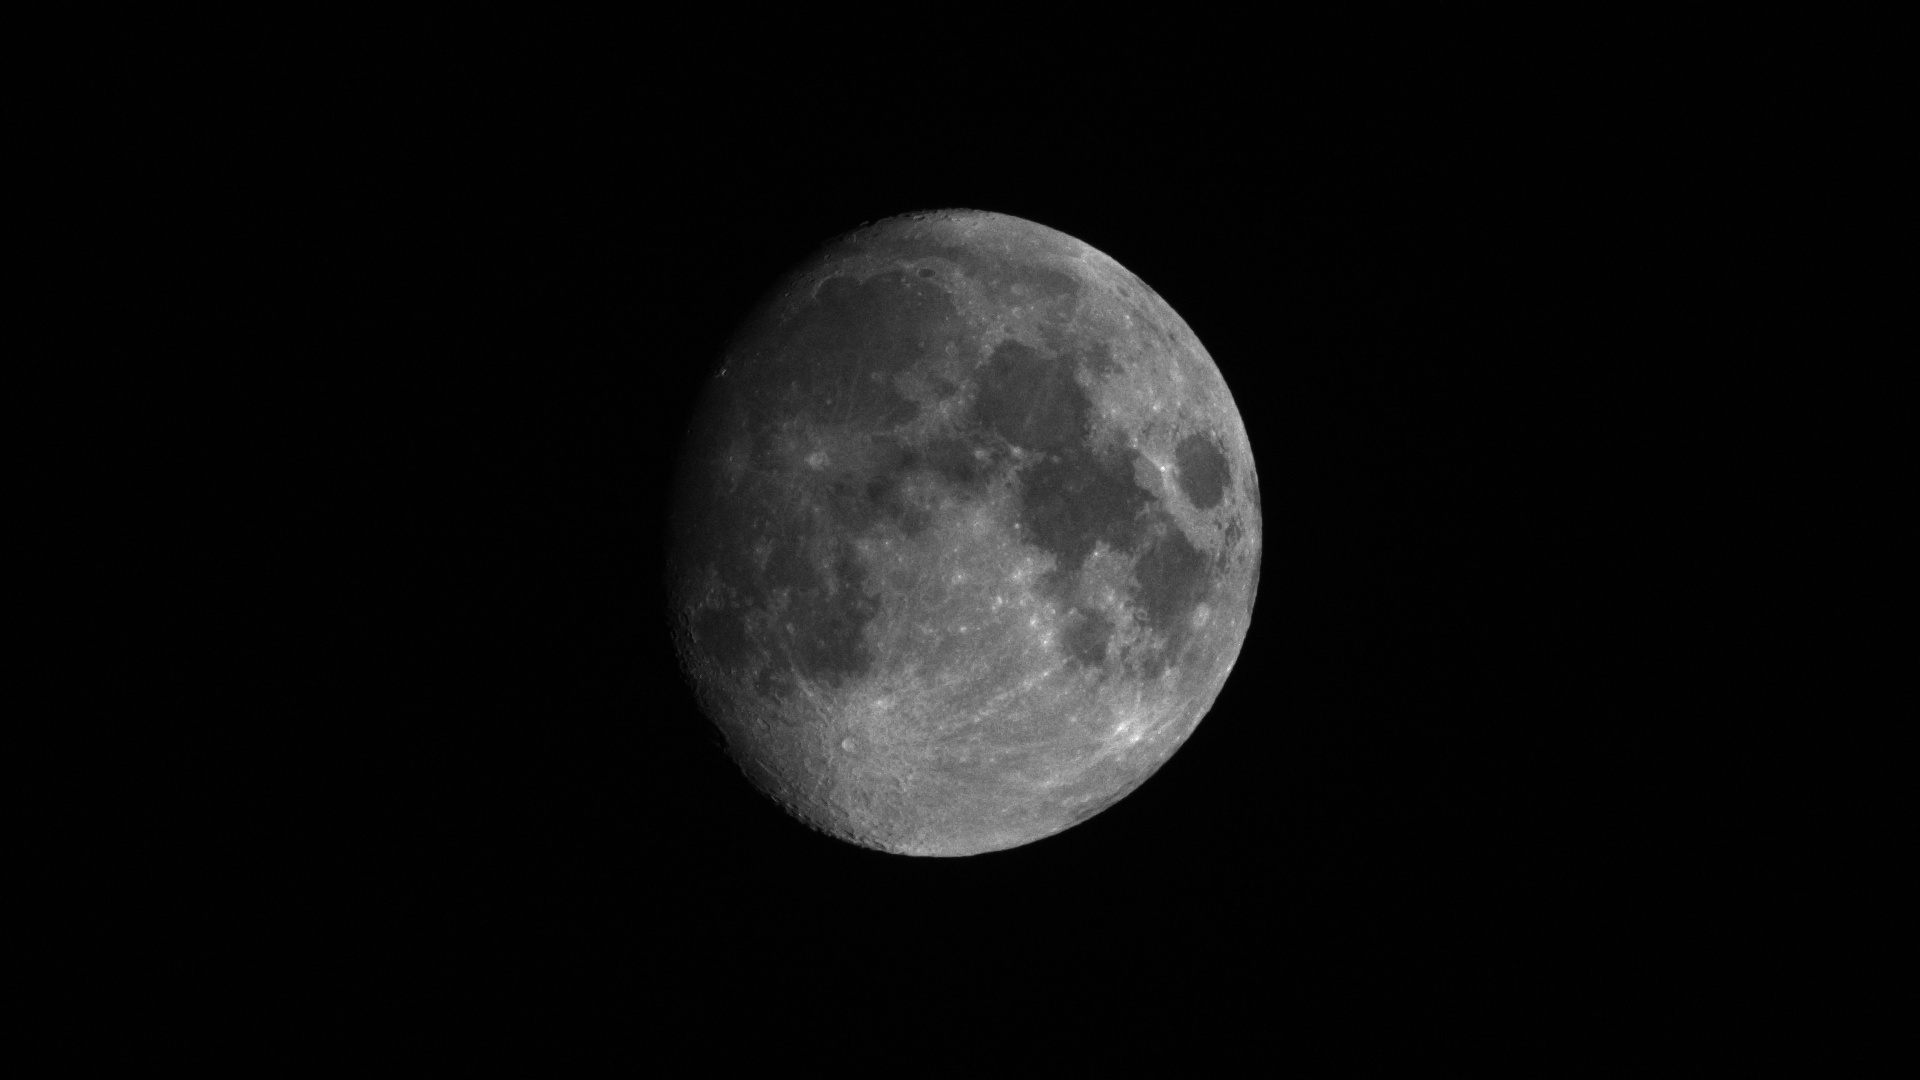

For those who are interested in post-processing images of the Moon, here’s a link to one of my free tutorials on how to image and process the Moon. Overall, with an imaging scale of approximately 3 arcseconds per pixel, the 93% illuminated Moon appeared very captivating, definitely suitable for a desktop background or sharing online with friends and family.
Observing the Orion Nebula with the Vaonis Vespera Smart Telescope
I tested the Vespera in late November when the captivating winter constellation Orion was ascending in the eastern sky. Although it hadn’t reached its zenith, I was eager to witness the renowned Orion Nebula through the Vespera smart telescope. Opting for the dual-band filter to combat artificial light pollution and accentuate the nebulosity of emission nebulae like Orion, I embarked on this fascinating journey.

In the image format menu, I activated “Raw Images,” “stacking images,” and “TIFF images.” As I will demonstrate in a minute, Raw Images saves each photo in high-quality 16-bit FITS files, suitable for advanced post-processing. The option “Stacking images” saves each consecutively stacked image in JPEG format, and by selecting “TIFF images,” the final stacked photo is saved in a superior 16-bit TIFF format on the Vespera, when ending an observation session.
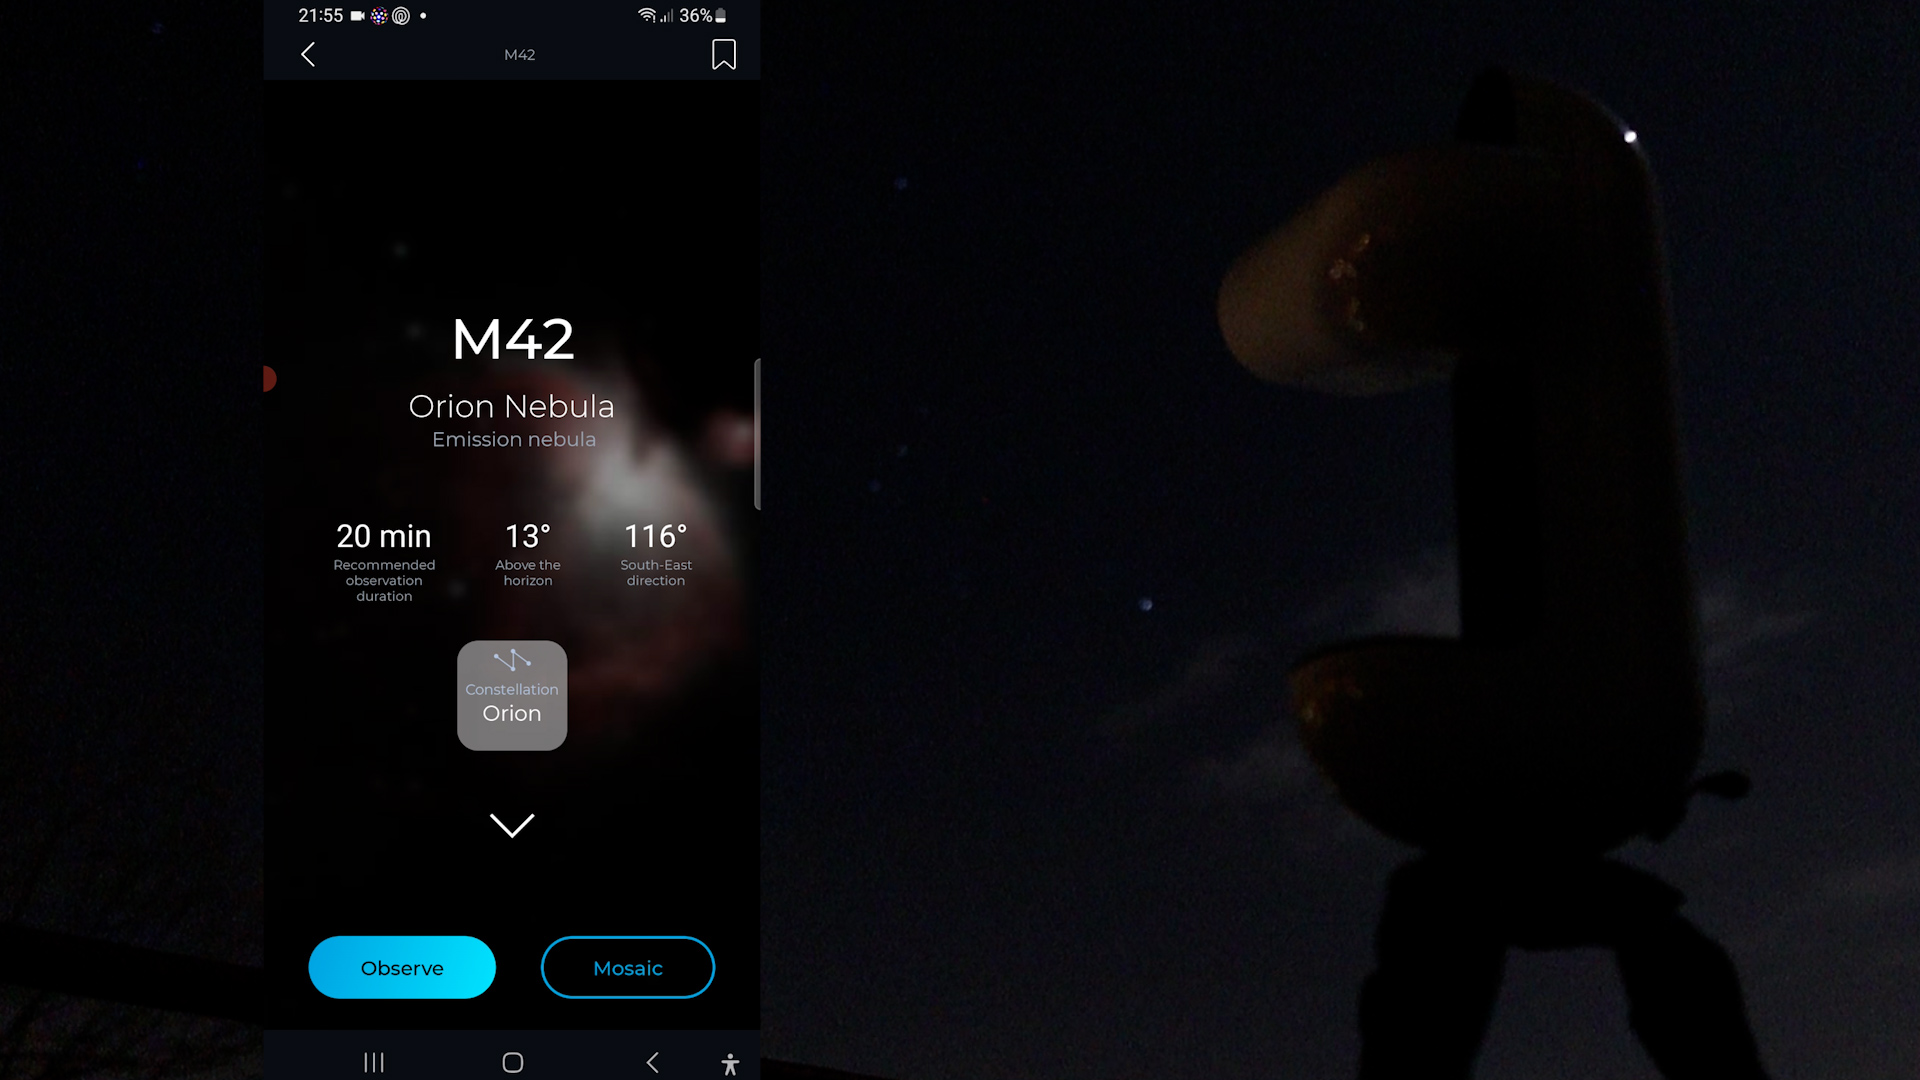
Navigating the app, I chose “look for target” and sought the Orion Nebula in the Emission Nebula category. The app indicated that M42 was visible, albeit with suboptimal visibility at only 13 degrees above the horizon early in the evening. The APP recommended an observation time of around 20 minutes to get a decent view, and I decided to proceed by clicking on “observe.” The Vespera smoothly slewed towards the Orion Nebula, tracked its position, and initiated the capture. This entire process, from alignment to capturing the first image, took less than 2 minutes.


The initial image of M42 exhibited sharp focus, and the Vespera seamlessly transitioned to taking 10-second exposures, employing a stacking technique known as lucky imaging. This method, geared towards improving the signal-to-noise ratio, involves stacking consecutive images to enhance the consistent signal from the nebula while mitigating inconsistent noise from factors like light pollution and passing planes. Vespera automatically assessed the contribution of each image before including it in the stack, displaying the total integration time at the top of the app.

Within a few minutes of integration, a remarkably clear live view of the nebula emerged. After about 15 minutes, I decided to end the session and wait until midnight when Orion would reach greater heights in the night sky. I dedicated an hour to observing the nebula with the Vespera, capturing approximately 365 images. Let me show the results.
To start, I’d like to present a brief time-lapse video that I crafted using the saved JPG photos on the Vespera. It vividly illustrates how the view of the nebula progressively improves with each consecutive photo stacked onto the previous one, thereby enhancing the signal-to-noise ratio. As the number of stacked pictures increases, you’ll also observe a reduction in background noise, resulting in a strikingly well-stacked image of the Orion Nebula. It’s worth noting that all of this is accomplished automatically with the Vespera, allowing you to effortlessly save and share this stacked JPG image without the need for additional processing, which is pretty cool.
For those with a keen interest in advanced processing, let’s delve a bit deeper. Upon closer inspection, you’ll notice that each successive picture appears to zoom in on the Orion Nebula, with the largest star at the bottom slowly drifting out of view. This effect is due to what astrophotographers refer to as field rotation.
Now, I’d like to showcase a second video created from the individual and unstacked RAW FITS files saved on the Vespera. These are unprocessed 16-bit RAW pictures. As you observe, the Orion Nebula undergoes a subtle rotation when tracked for an hour in the night sky. Additionally, the Vespera seems to reposition the nebula to the center of the camera’s view every few minutes. This is beneficial, as it introduces some random motion between each picture, contributing to a smoother stacked image.
In this video, I’ve aligned the Orion Nebula and the stars across the 16-bit FITS photos. Examining the photo edges reveals that while the nebula and stars are aligned, the picture edges change due to the object’s rotation. Moreover, the shot noise from the camera sensor is still traversing the field, introducing rotation in the background noise of the stacked pictures.
The reason for this lies in the fact that the Vespera, like all smart telescopes I’m familiar with, utilizes altitude-azimuth tracking, which comes with its own set of advantages and disadvantages. One major advantage is the flexibility to set up the Vespera and start tracking objects anywhere, as long as the telescope is level. However, the downside is that it can’t precisely follow the movement of objects in the night sky because it isn’t aligned with the celestial pole. This limitation imposes a 10-second exposure time on the Vespera and results in the field rotation I’ve just demonstrated.
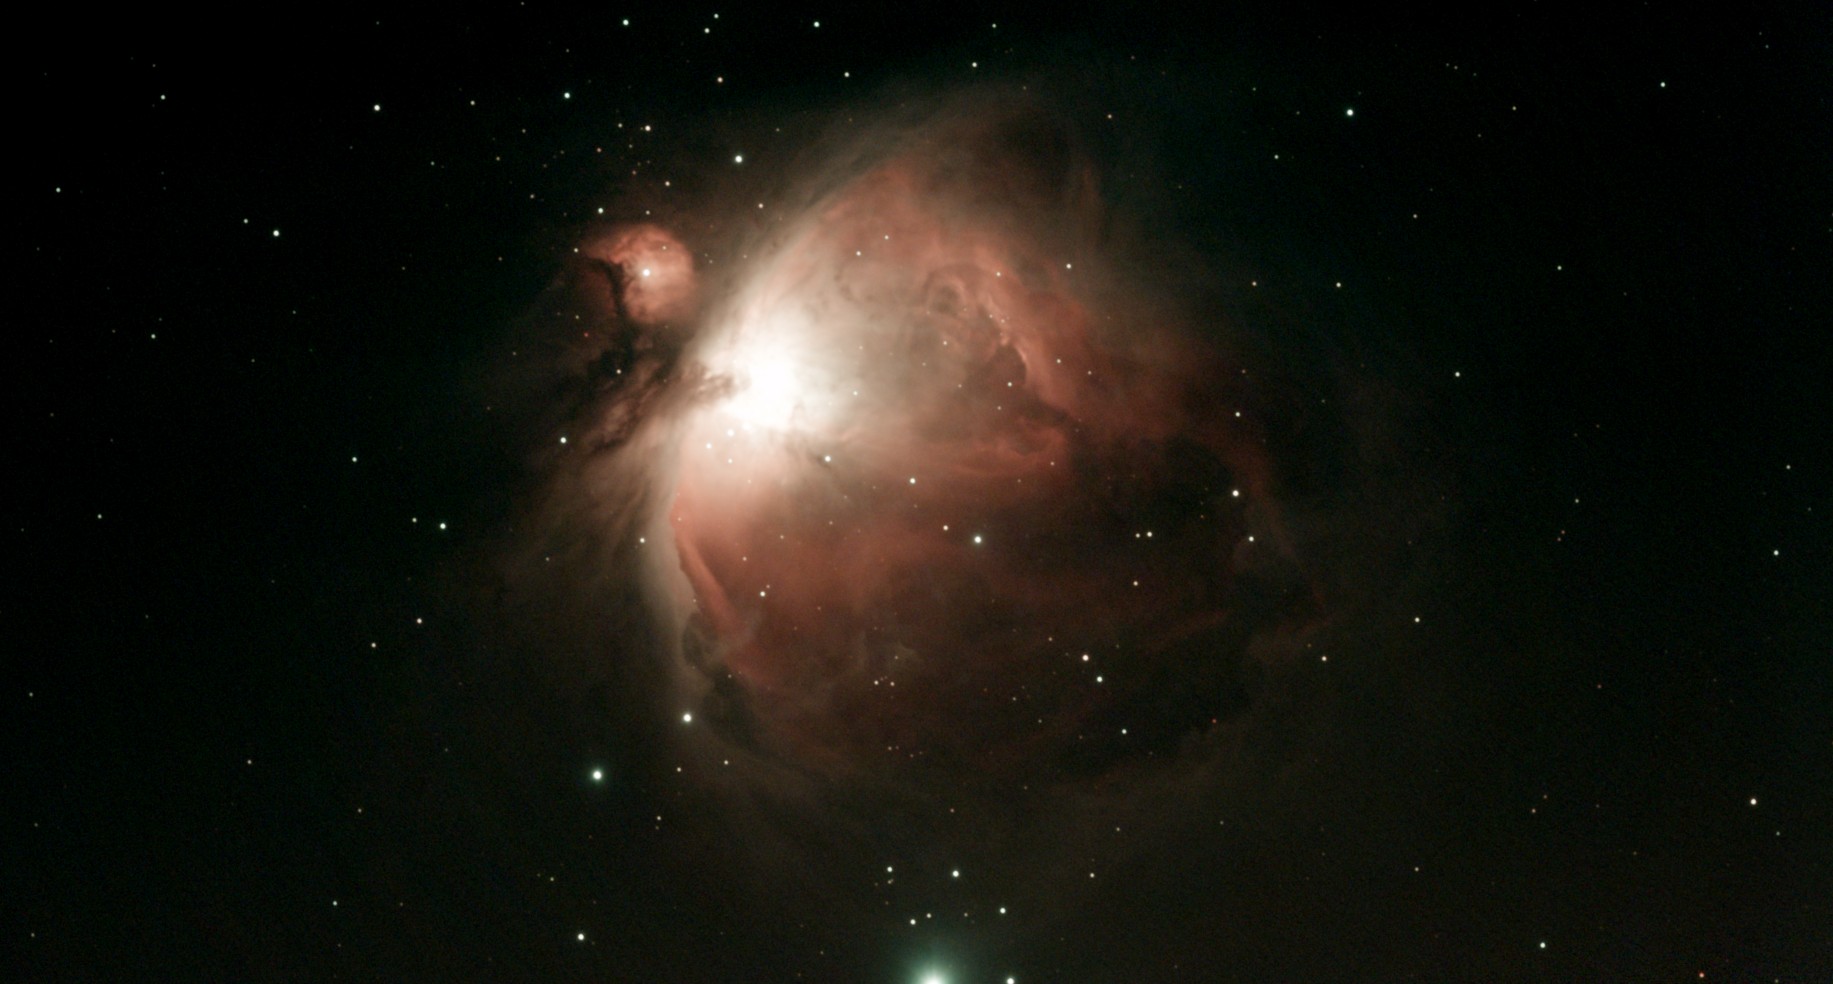
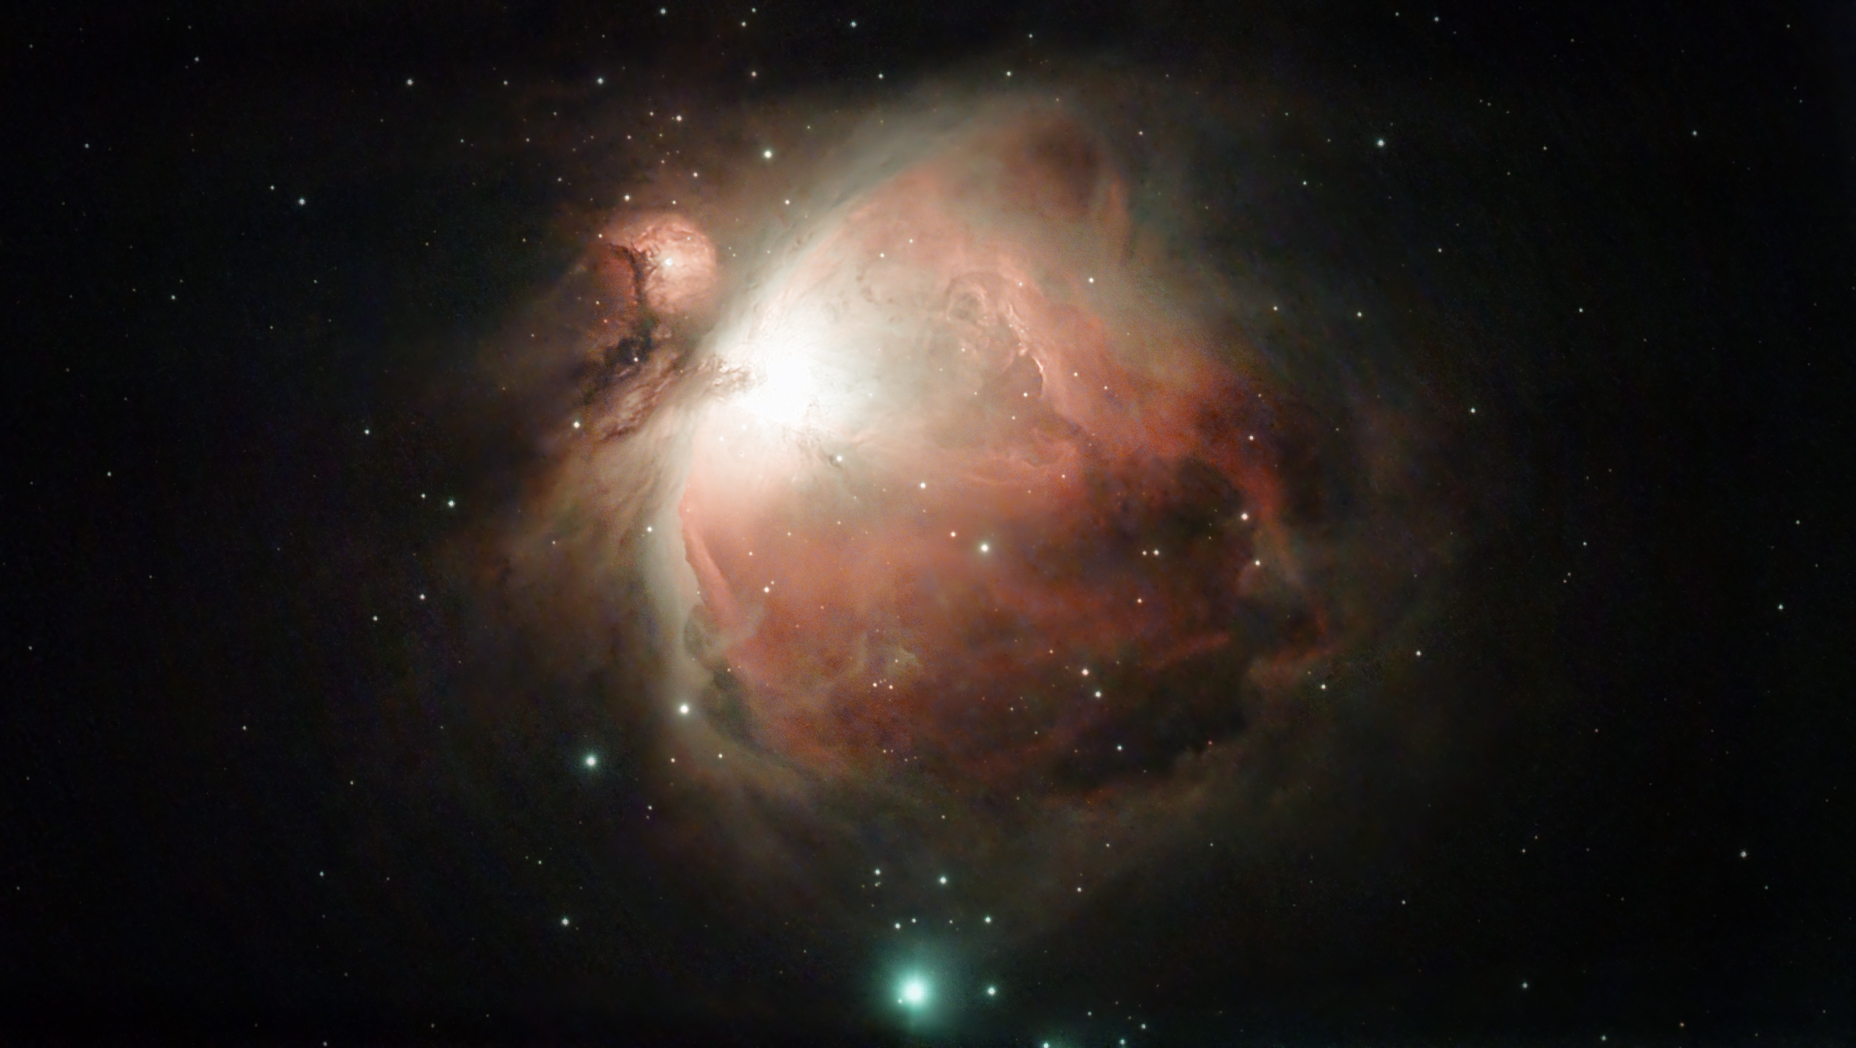
Nevertheless, the Vespera excels in automatically stacking the 10-second images of the object and cropping the stacked picture to reveal overlapping parts. I’d like to share with you the automatic one-hour stacked picture of the Orion Nebula with the Vaonis Vespera, using the dual-band filter, without any manual processing. I find this automatically created picture quite appealing. Let me also present a final processed image of the Orion Nebula that I created by stacking individual FITS files and using advanced photo processing tools like Pixinsight and Photoshop. I aimed to enhance and sharpen the nebulosity of the Orion Nebula, while also incorporating the brightest star, Iota Orionis. All in all, capturing Orion was a lot of fun with the Vaonis Vespera, and I genuinely appreciate each of these images.
The Vaonis Vespera (+ optional accessories) is available at Agena Astro (USA/WW), High Point Scientific (USA/WW), and Astroshop (EU/WW)
Repositioning the Vaonis Vespera Smart Telescope (reframing)
Tapping on the brackets icon located at the app’s bottom reveals a real-time display of the Orion Nebula, allowing the flexibility to adjust the view according to your preference by a straightforward touch-and-drag method. The app gave a heads-up that the observation would recommence after repositioning the telescope. After making the adjustments, the Vespera seamlessly readjusted its position to align with the updated view. Subsequently, it initiated tracking and re-started imaging of the Orion Nebula.

Using the Mosaic function with the Vaonis Vespera Smart Telescope
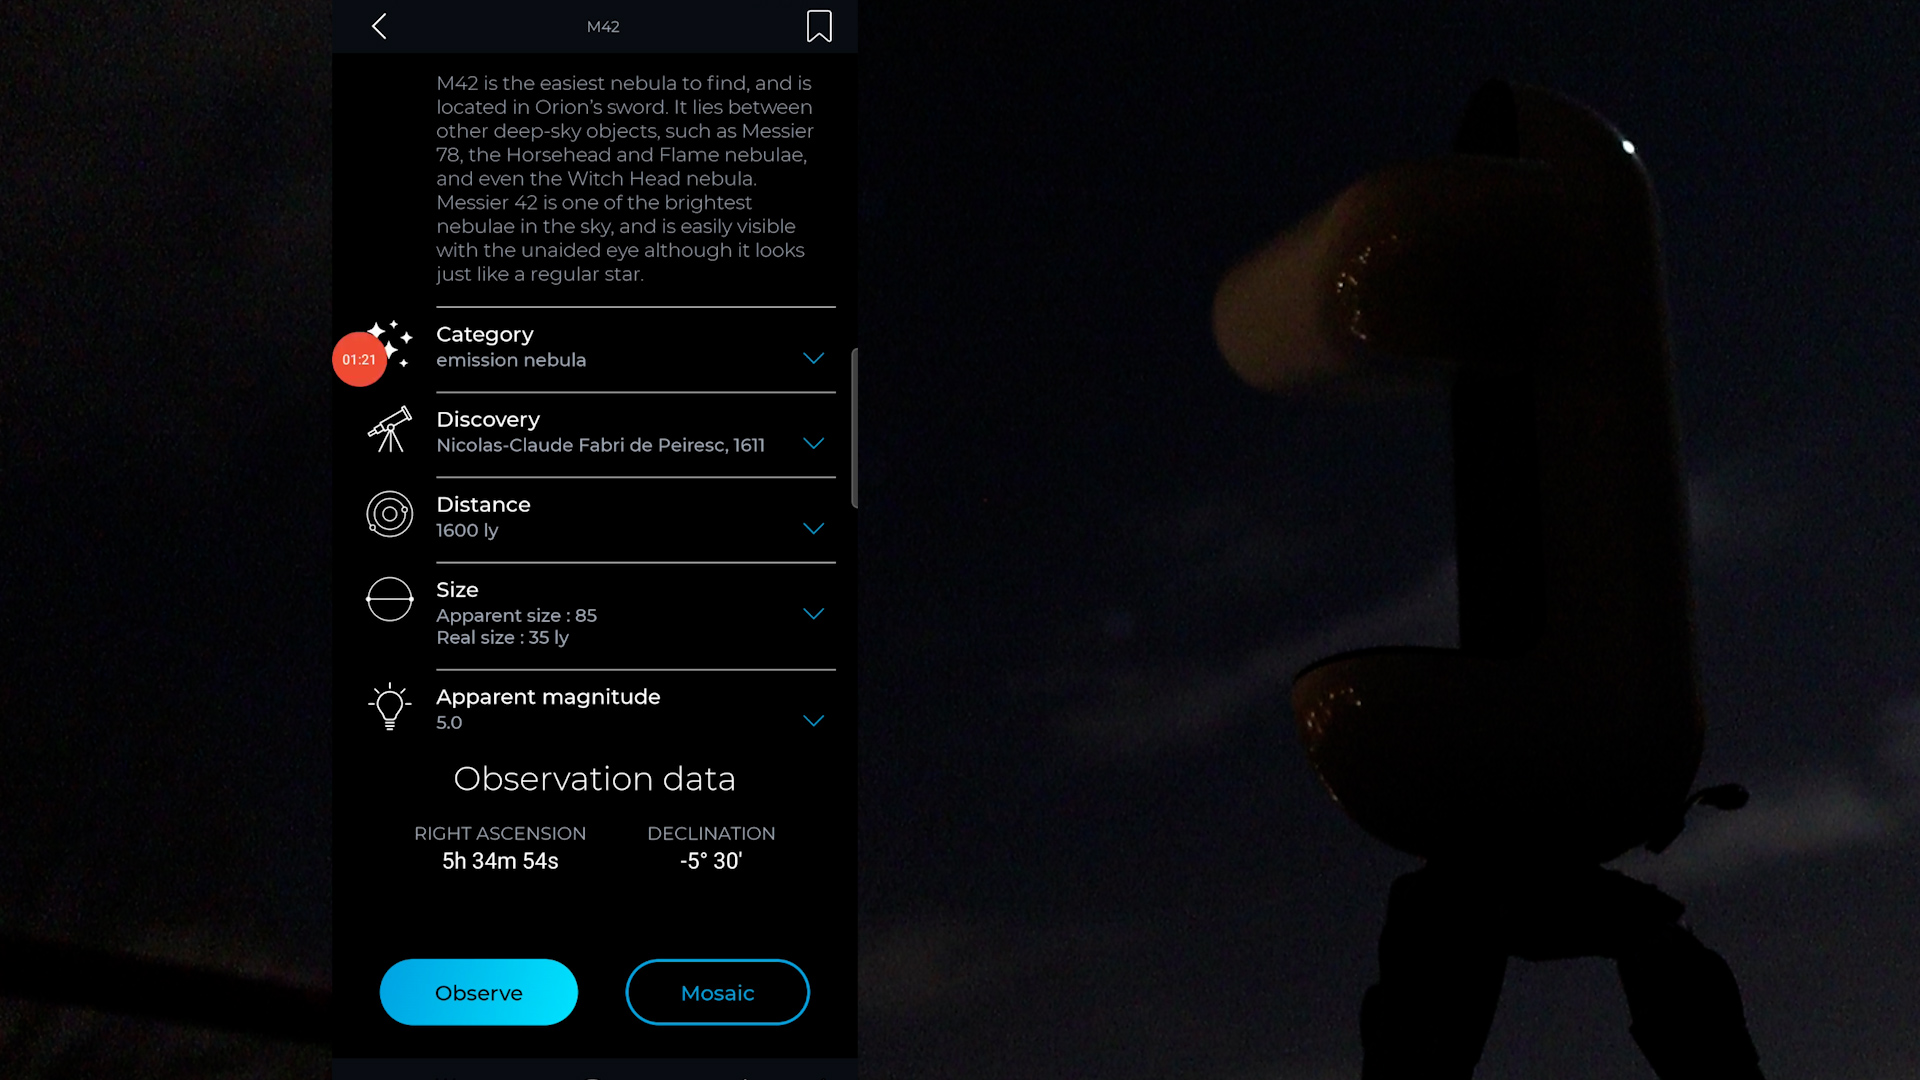
Upon clicking the information icon located at the bottom of the capturing screen, the application presented a wealth of information regarding the nebula. Intriguingly, it also featured a mosaic option. Upon opting for mosaic mode, the application displayed the capability to adjust the field size up to four times the field of view provided by the Vespera smart telescope. Following the selection of “next,” the application guided me to navigate the sky map by dragging a single finger, and altering the view’s rotation using two fingers.
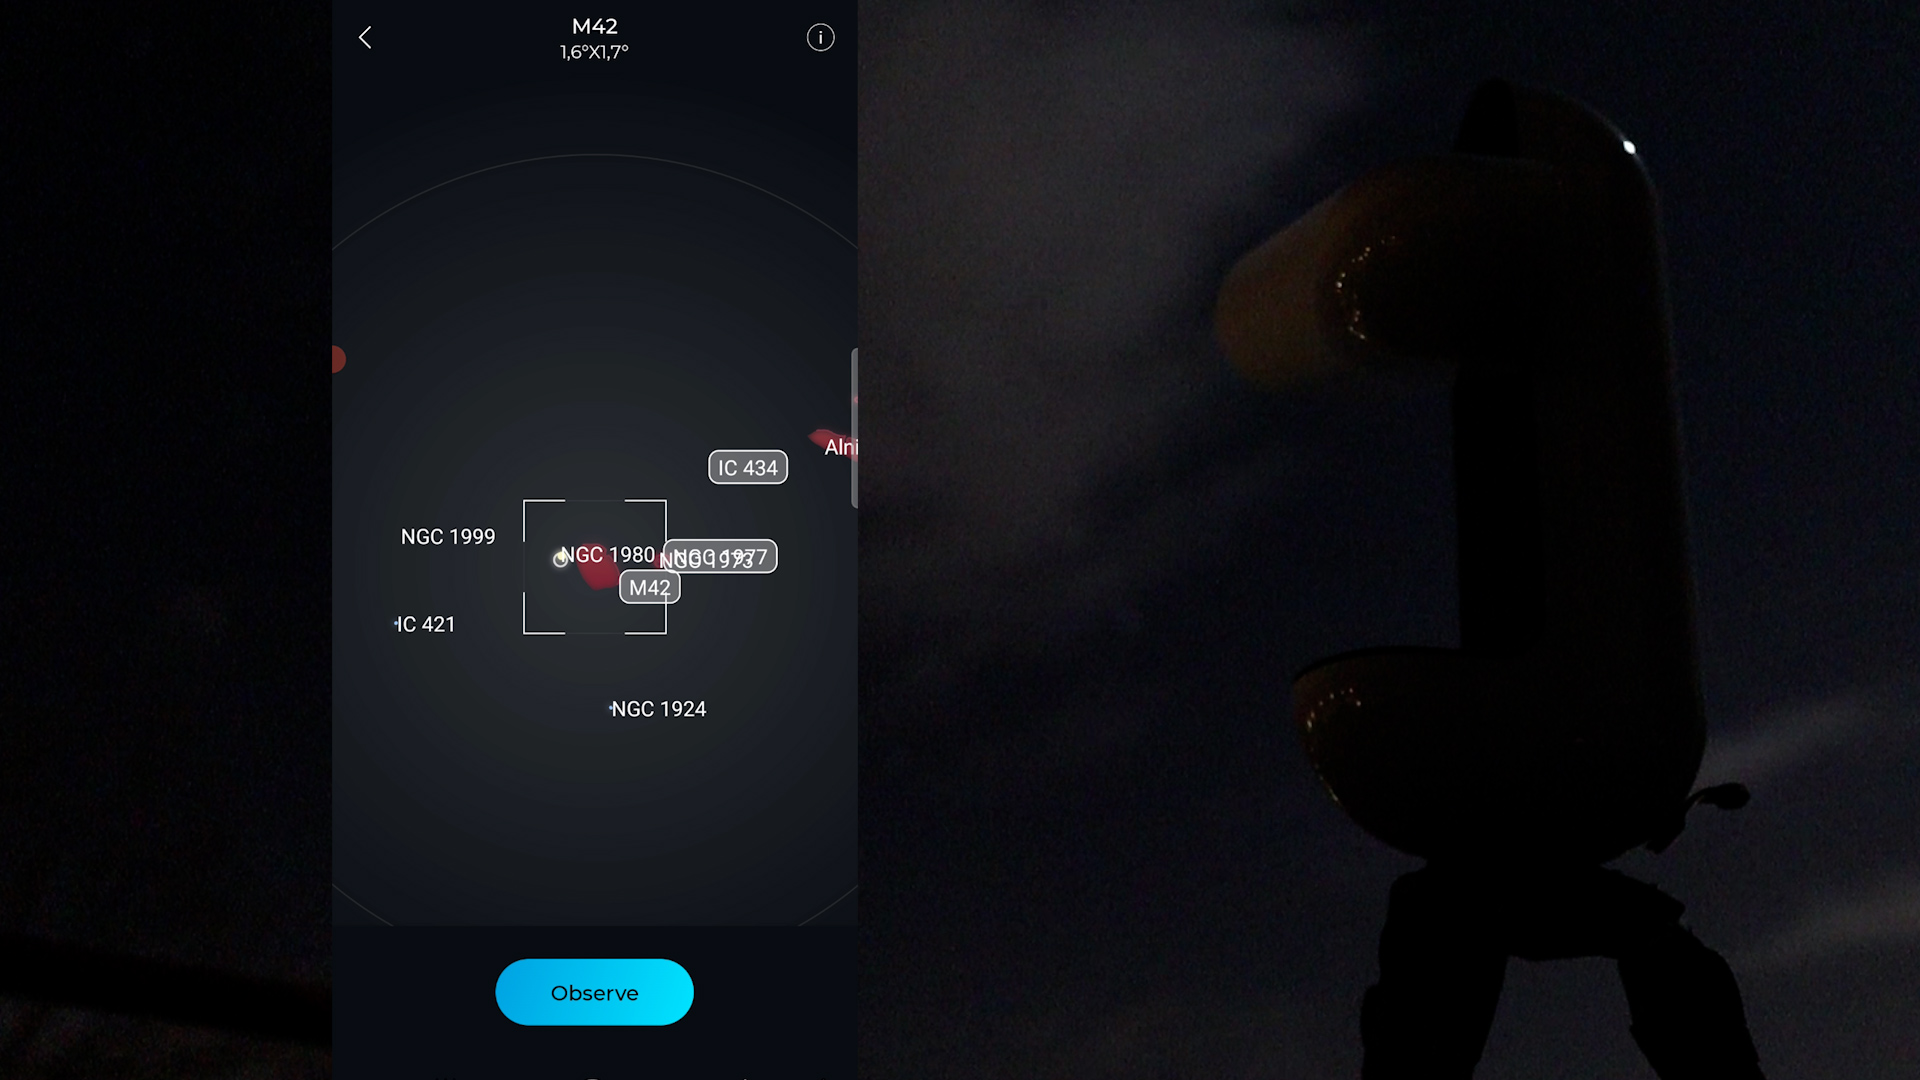
Furthermore, the application issued a cautionary note, alerting me that creating image mosaics could be a time-consuming process, requiring several hours for the Vespera to capture and integrate various images of the field. After pressing “next” again, I was presented with a visual representation of the Orion constellation and its constituent objects. Notably, I could manipulate both the position and rotation of the field as desired.
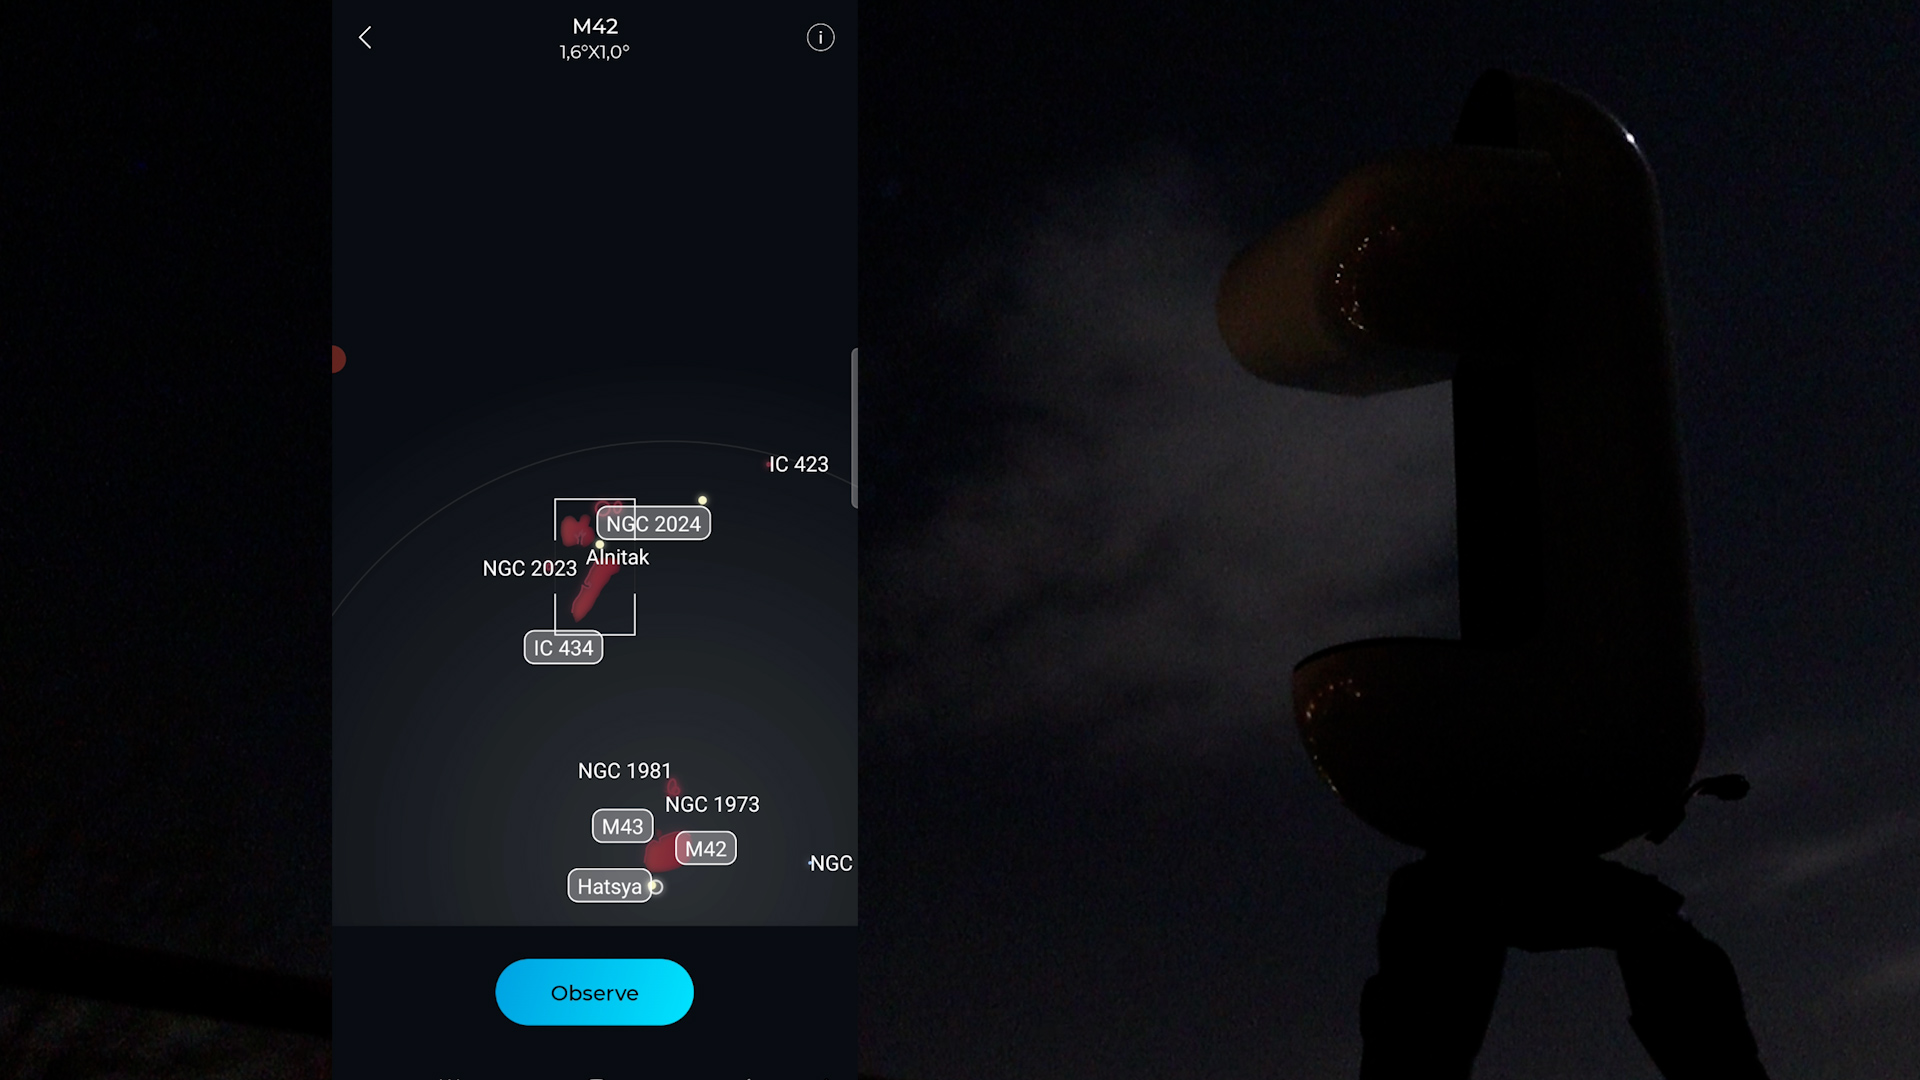
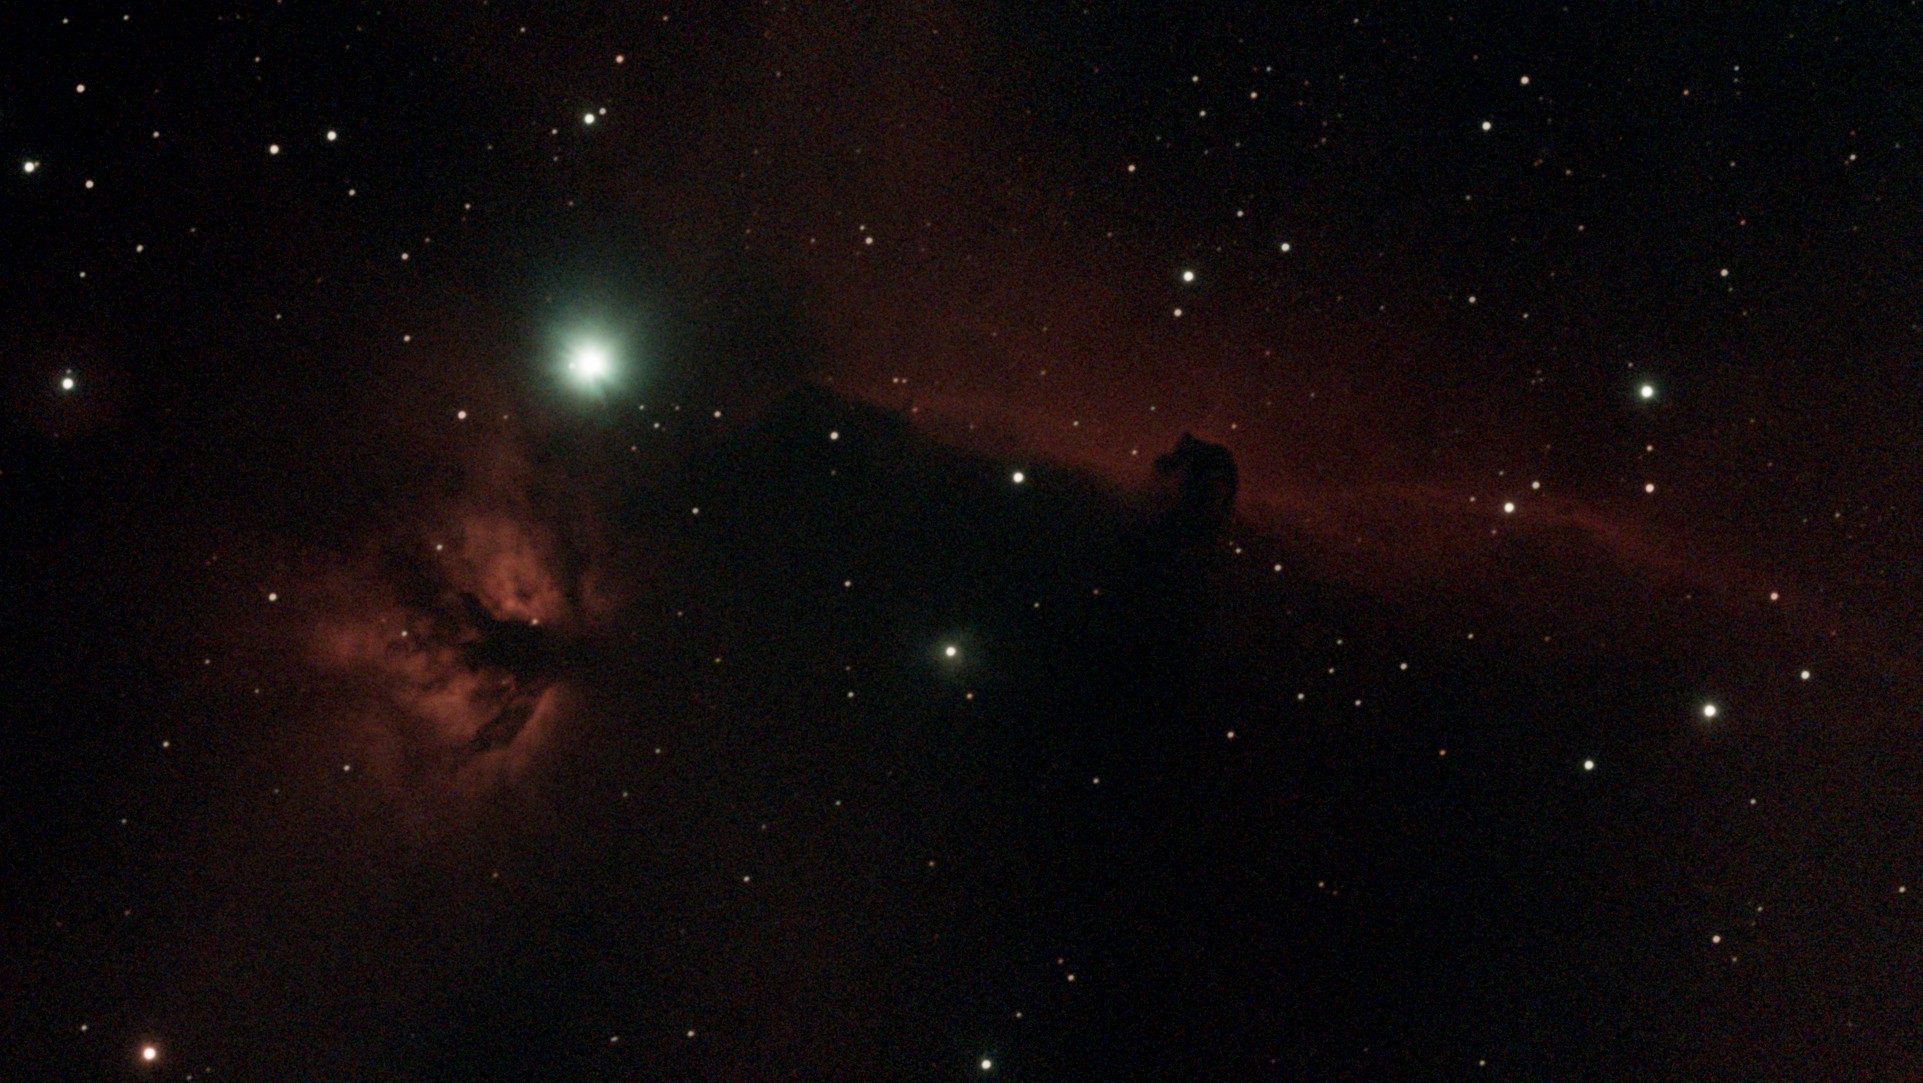
I chose to observe the Horsehead and Flame Nebulae, identified as IC434 and NGC2024 in the sky map. These nebulae are situated near Alnitak, a bright star in Orion’s belt. I carefully adjusted the observation field to include both nebulae and initiated the observation process. The Vespera telescope repositioned itself, tracking the designated objects. The initial 10-second photo captured Alnitak precisely as I had positioned it during field selection. However, while using the dual-band filter to enhance the nebulae, the Horsehead and Flame Nebulae did not immediately appear in the field due to their lower brightness compared to the Orion Nebula.
With patience, I observed the Vespera imaging different parts of the field, automatically integrating views with earlier photos. On the APP screen, I noticed a rectangle with a growing white line and the number 1, denoting the captured portion of the field. Approximately every minute, the Vespera subtly adjusted its position to capture various parts of the chosen observation field. After around 20 minutes, the number 2 appeared in the rectangle, suggesting that the entire field had been integrated at least once. The Vespera was set to initiate a second integration attempt to enhance the overall view.

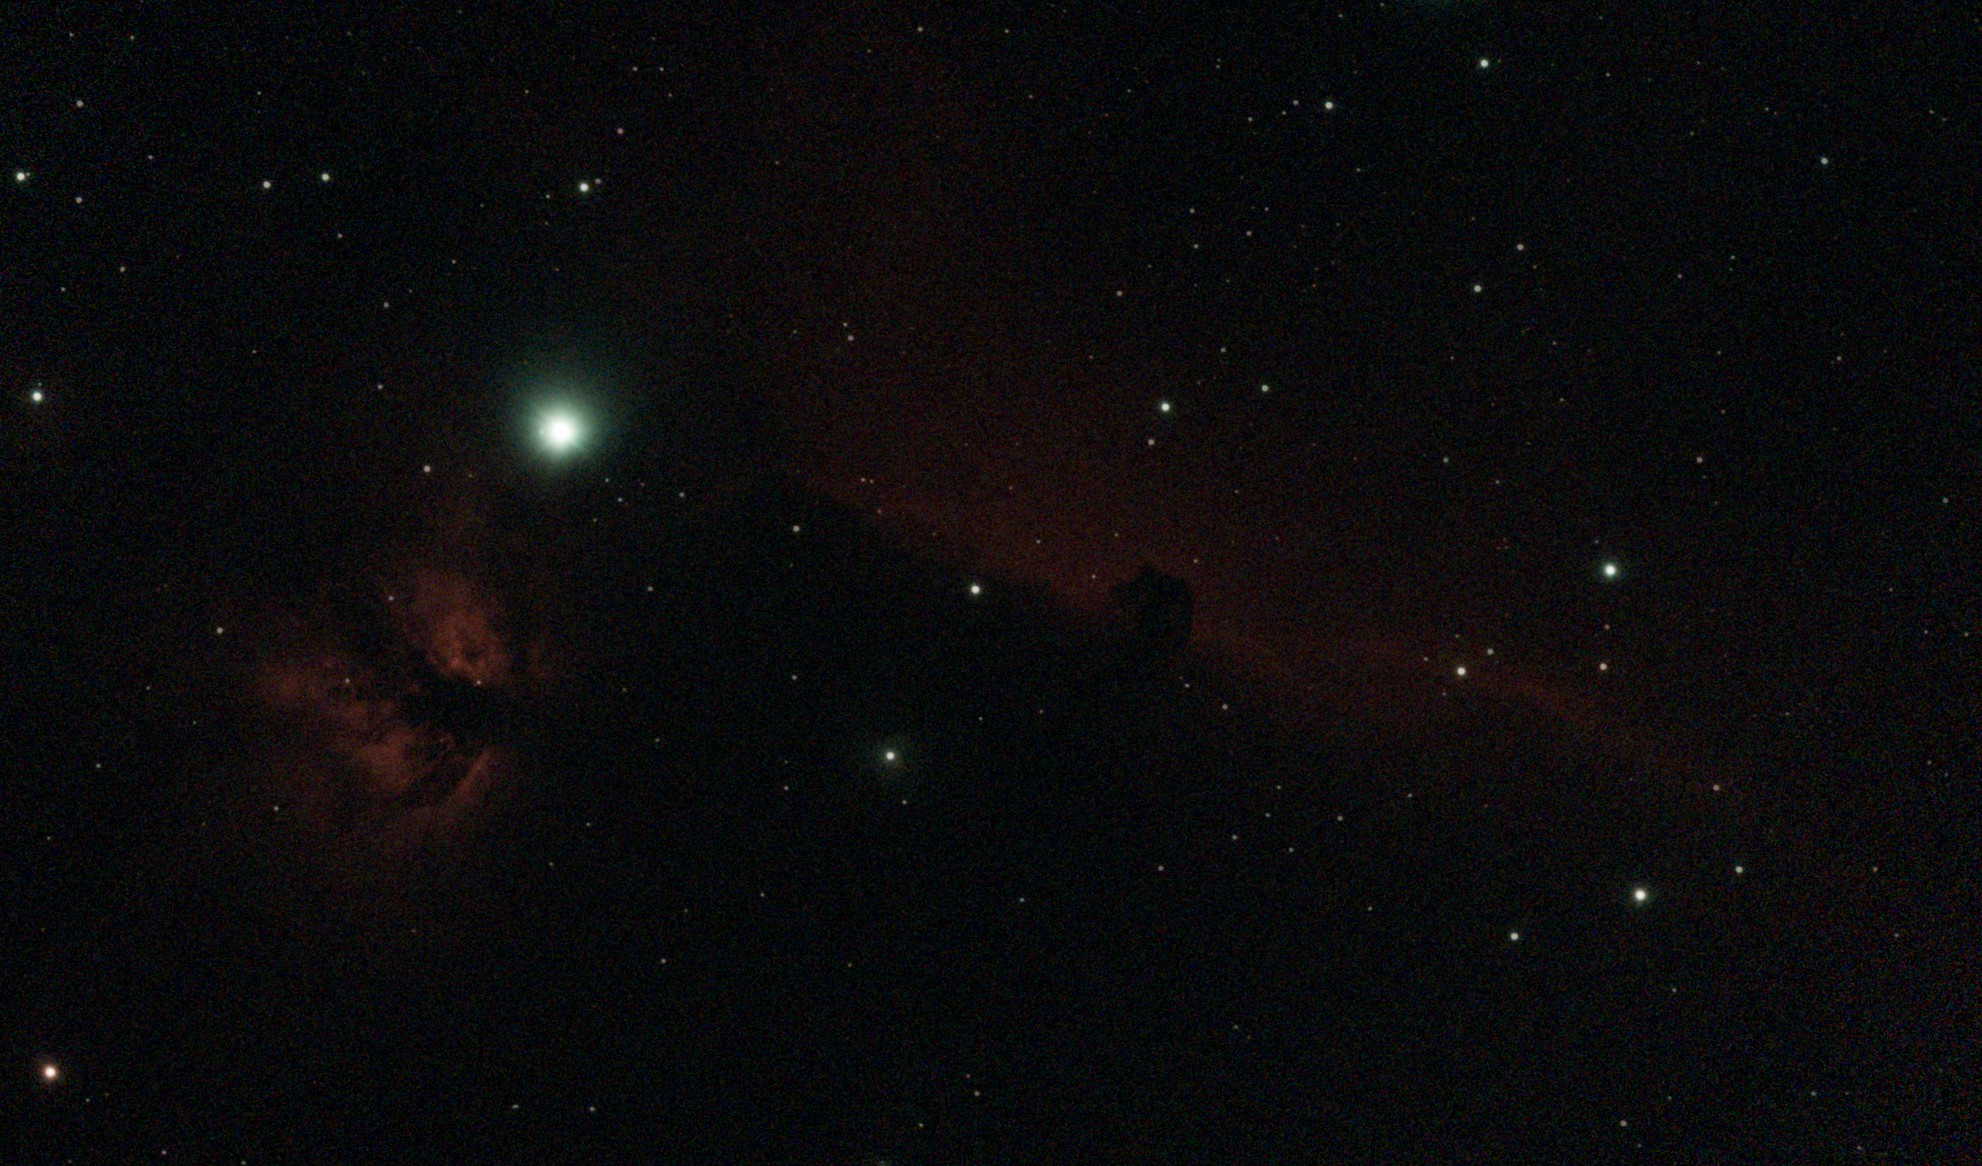
At this point, the Vespera ceased taking pictures, due to incoming clouds. Despite my attempts, I couldn’t re-initialize the mosaic after the clouds passed, prompting me to conclude the integration. Here’s the automatic JPG picture after 20 minutes of capturing the mosaic which revealed a surprise: the Horsehead and Flame Nebulae were already visible. Intrigued by this automated picture, I used some advanced processing tools in PixInsight and Photoshop on the saved 16-bit TIFF file in an attempt to further enhance the image. Here’s the result. All in all, the quick success within 20 minutes of observing gave me confidence that a more extended period under clear skies could yield an impressive mosaic. This unique mosaic option sets the Vespera apart from other smart telescopes. This is the only smart telescope I’ve tested so far that offers this feature, at least, at this point.
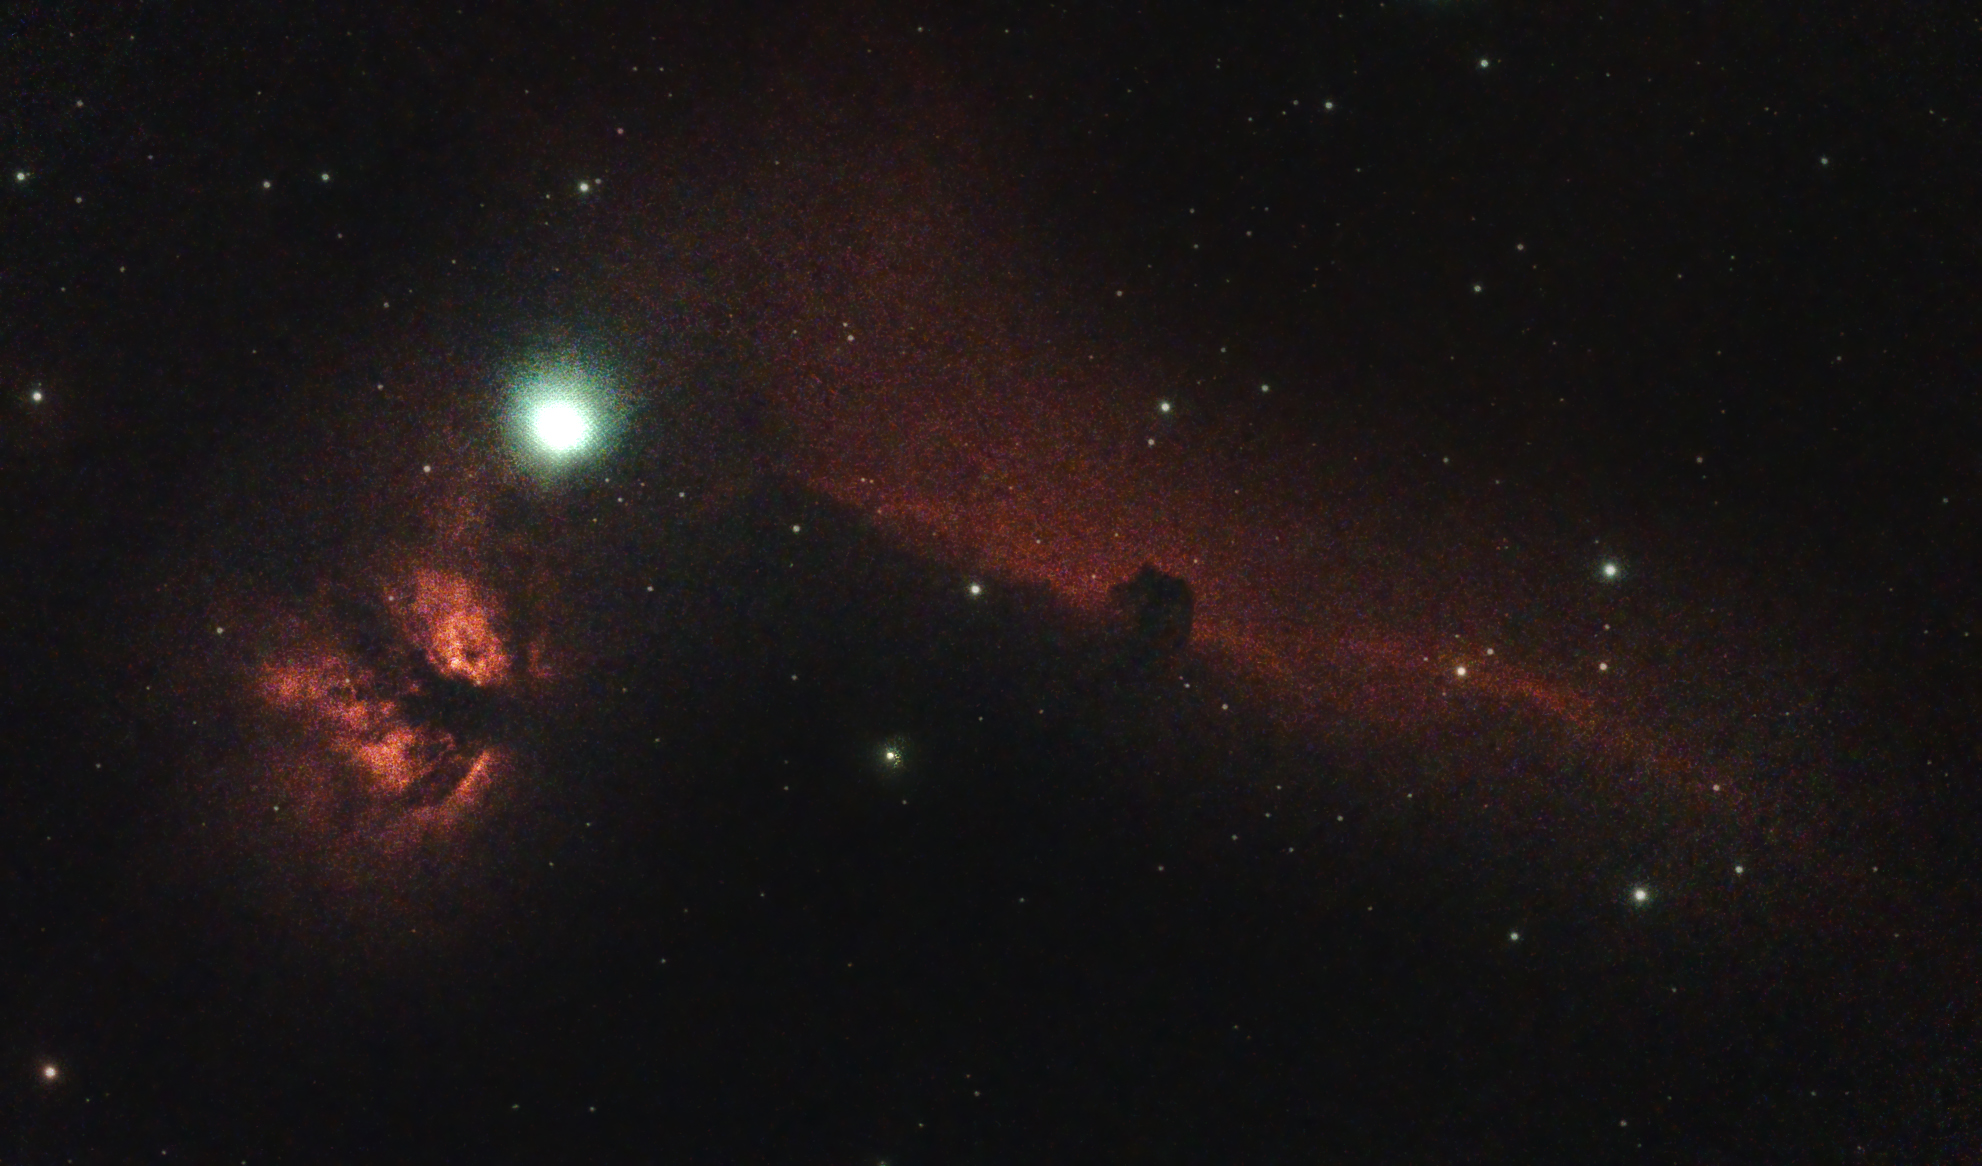
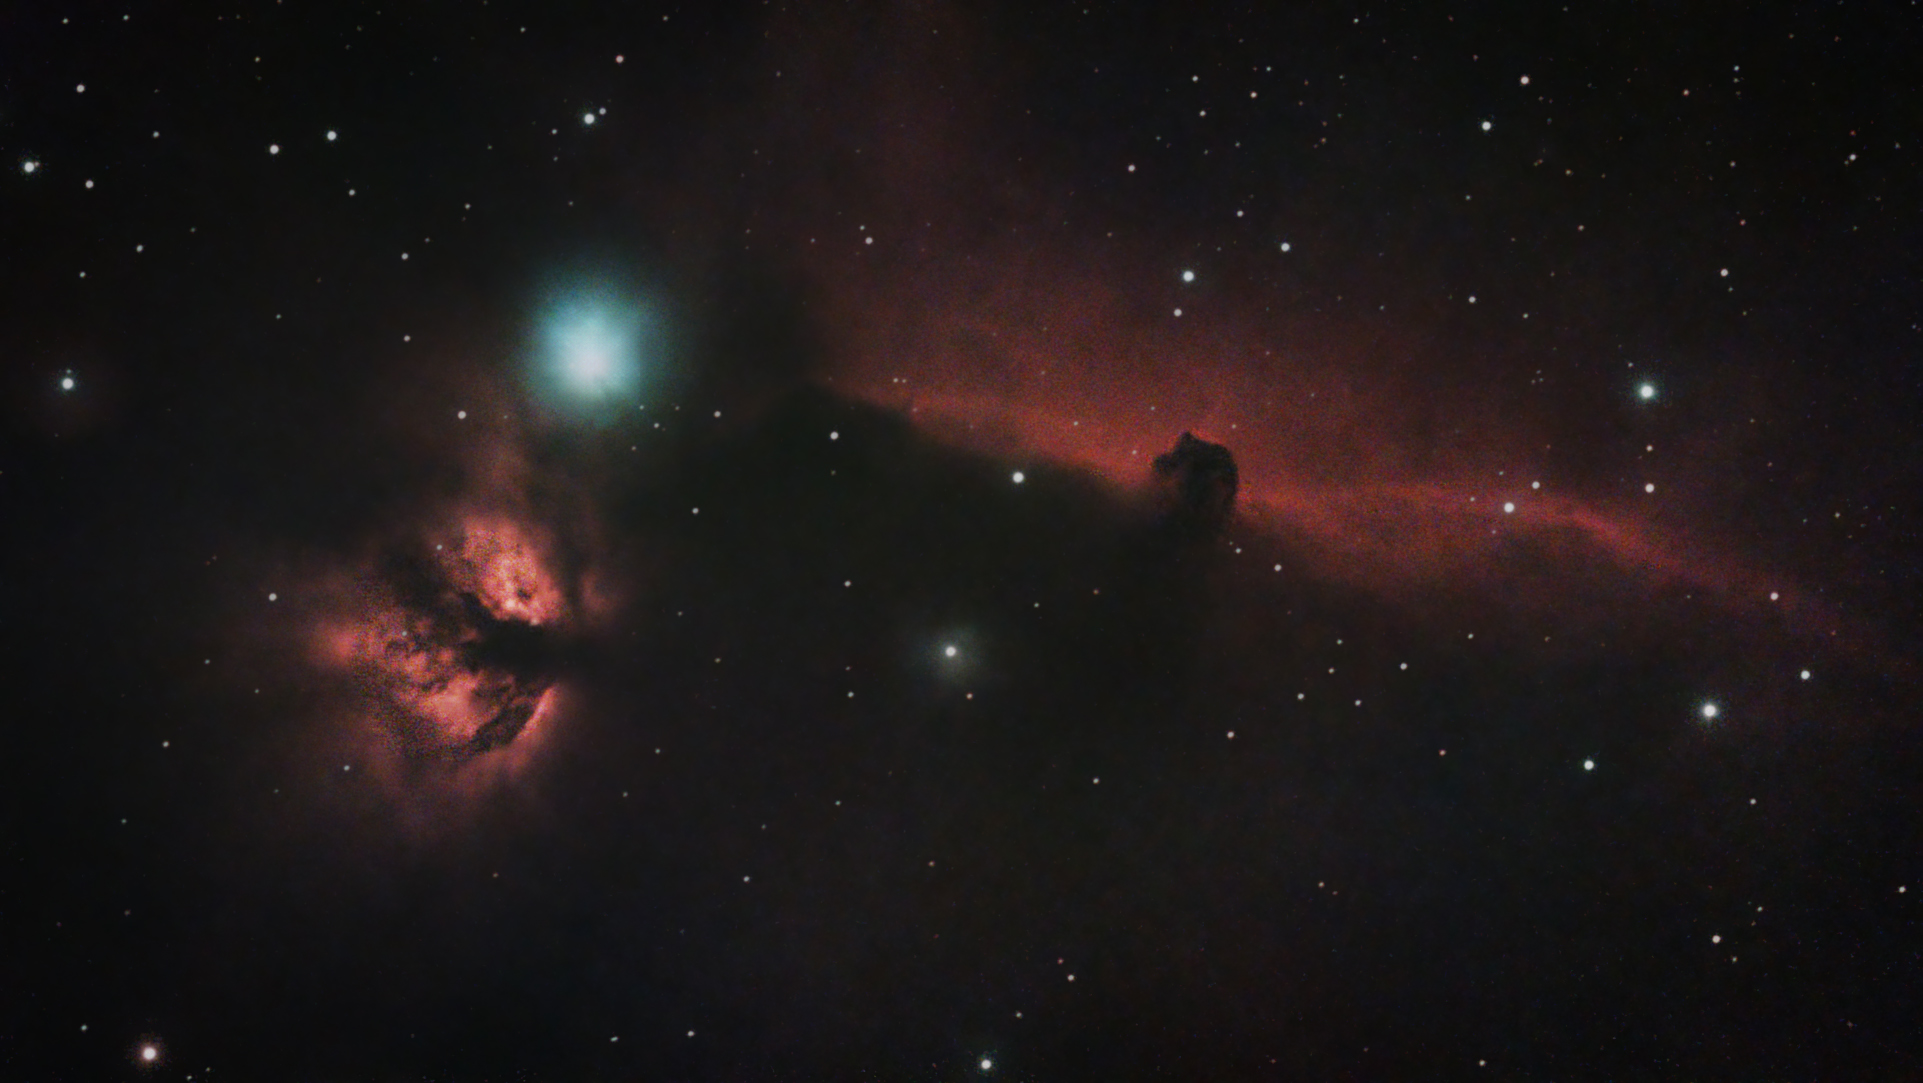
After two weeks, a break in the cloud cover presented me with the chance to create another mosaic of the Horsehead and Flame Nebulae, with a cumulative exposure time of approximately 90 minutes. Here’s the automatically generated, unprocessed image, as well as the TIFF file I edited in Pixinsight and Photoshop. Overall, the mosaic feature in the Vespera offers an excellent opportunity to photograph subjects up to four times the size of the camera’s sensor, enabling users to integrate images of larger objects or combinations, such as capturing both the Horsehead and Flame Nebula in a single frame.
Constellation overview in the Vaonis Vesperas’ Singularity APP
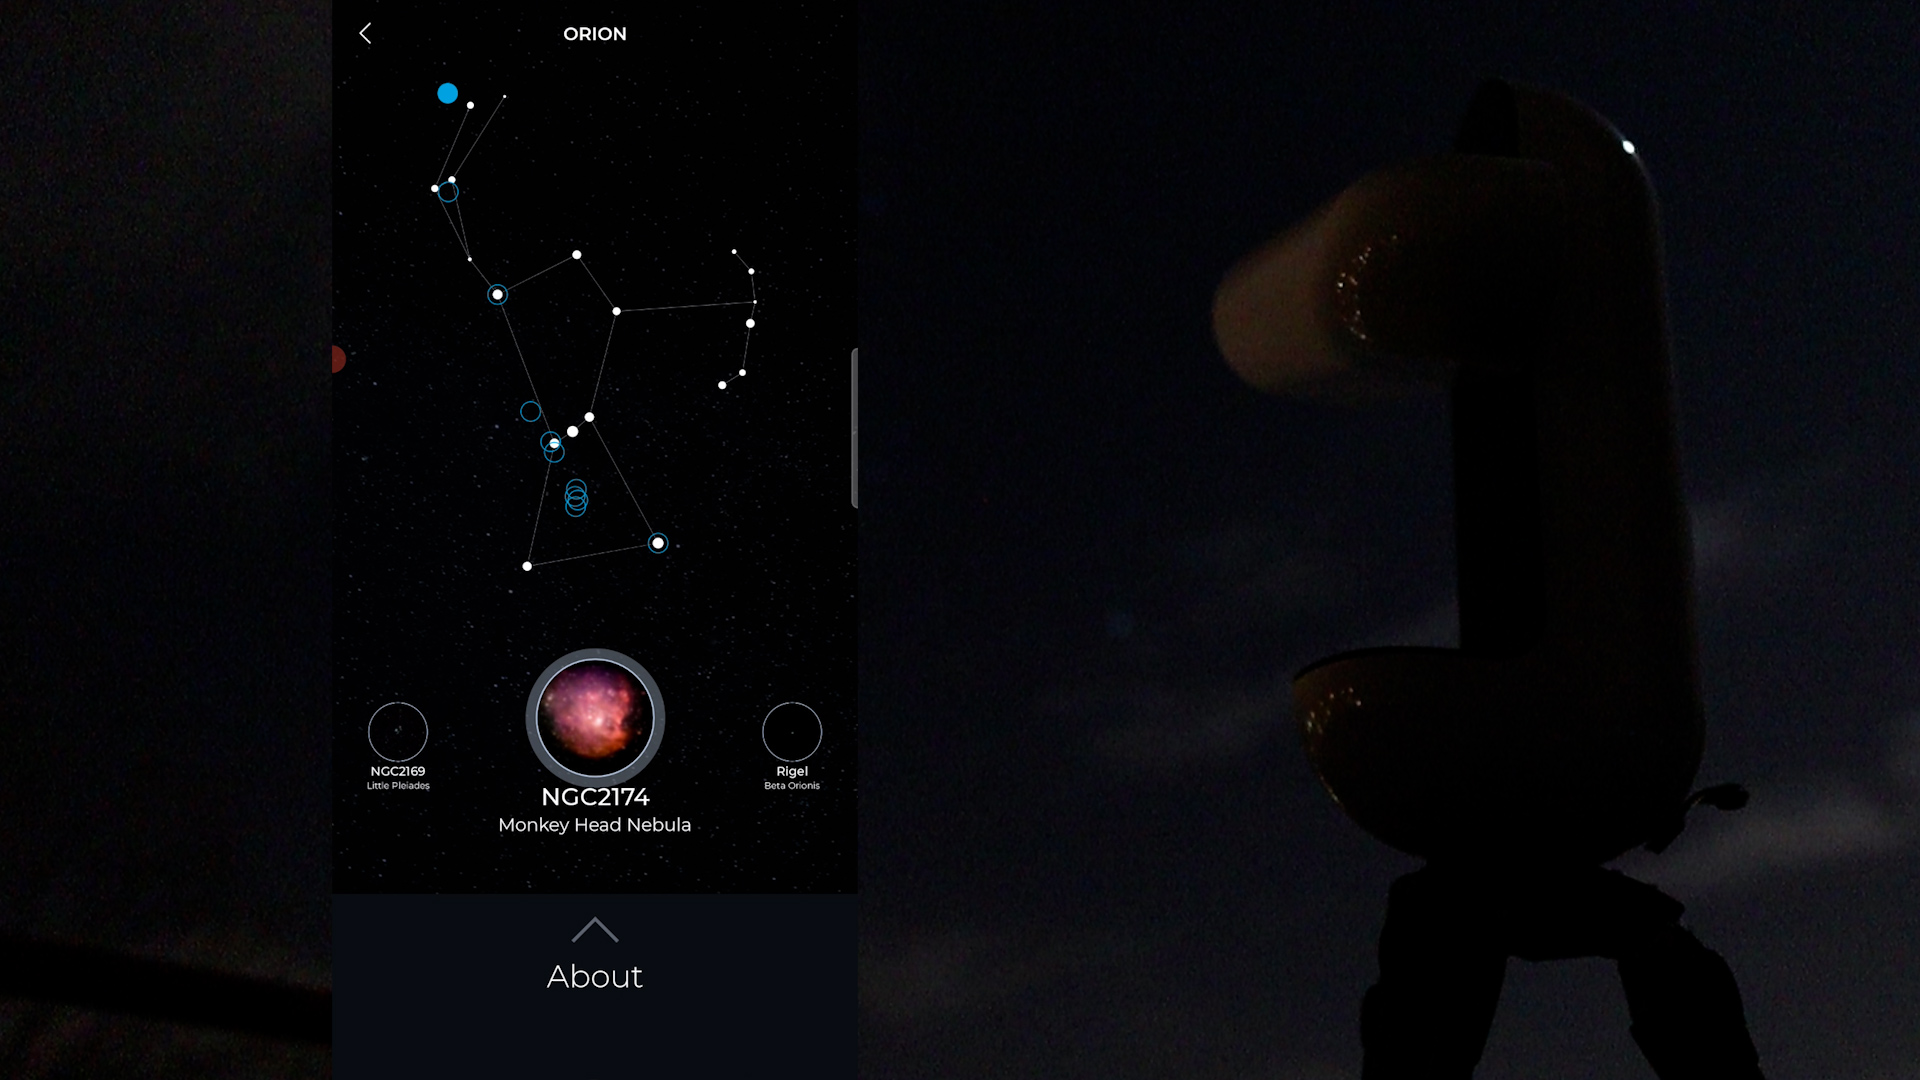
Another fascinating feature lies in the ability to not only choose an individual celestial object but also to opt for the selection of the constellation housing that object. To illustrate, I selected M42, the Orion Nebula, and subsequently clicked on the constellation Orion. This action provided me with a comprehensive overview of all captivating celestial entities within the constellation. A visually intuitive representation depicted the positions of various objects, including the Horsehead Nebula, Orion Nebula, Running Man Nebula, Monkey Head Nebula, and Flame Nebula, along with prominent stars such as Betelgeuse and Rigel. This unique functionality encourages people to explore beyond the well-known celestial wonders, uncovering lesser-known yet captivating opportunities to marvel at the night sky through the Vaonis Vespera.
Observing the planets with the Vaonis Vespera Smart Telescope
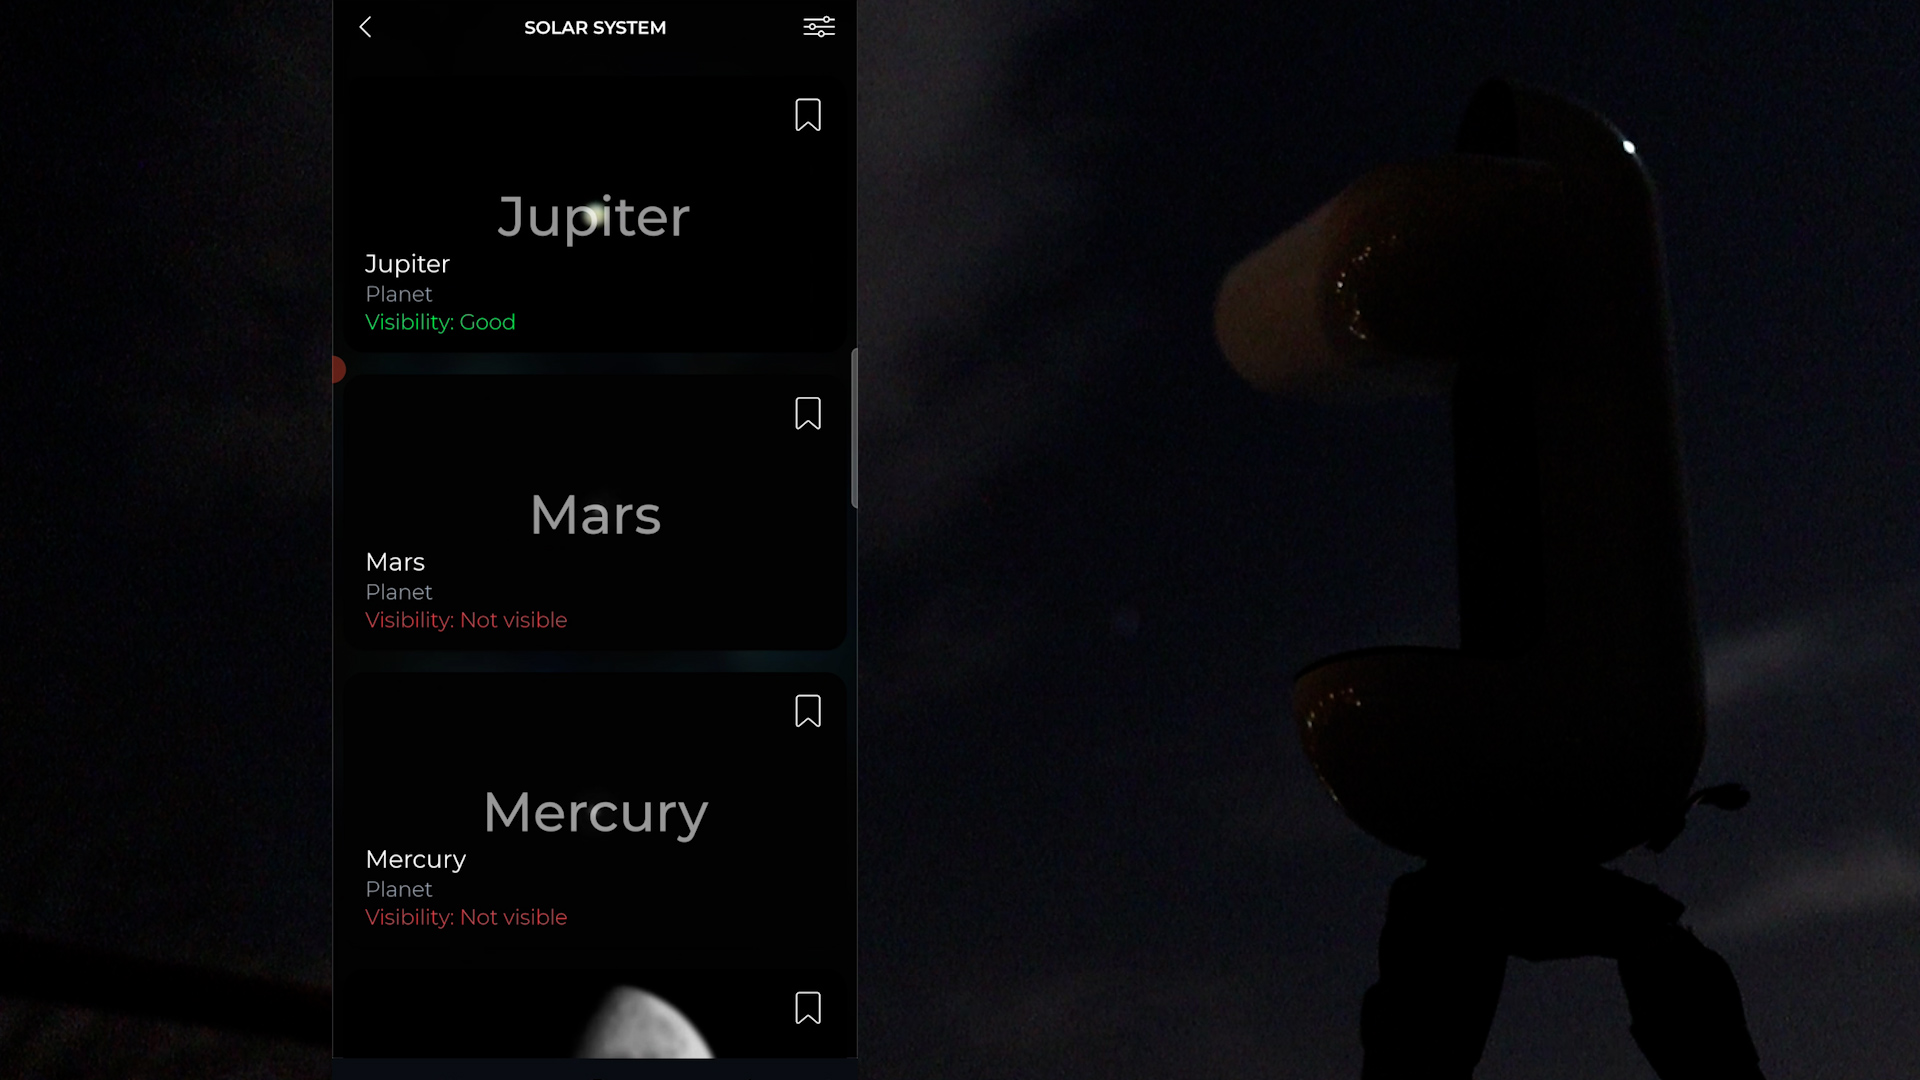
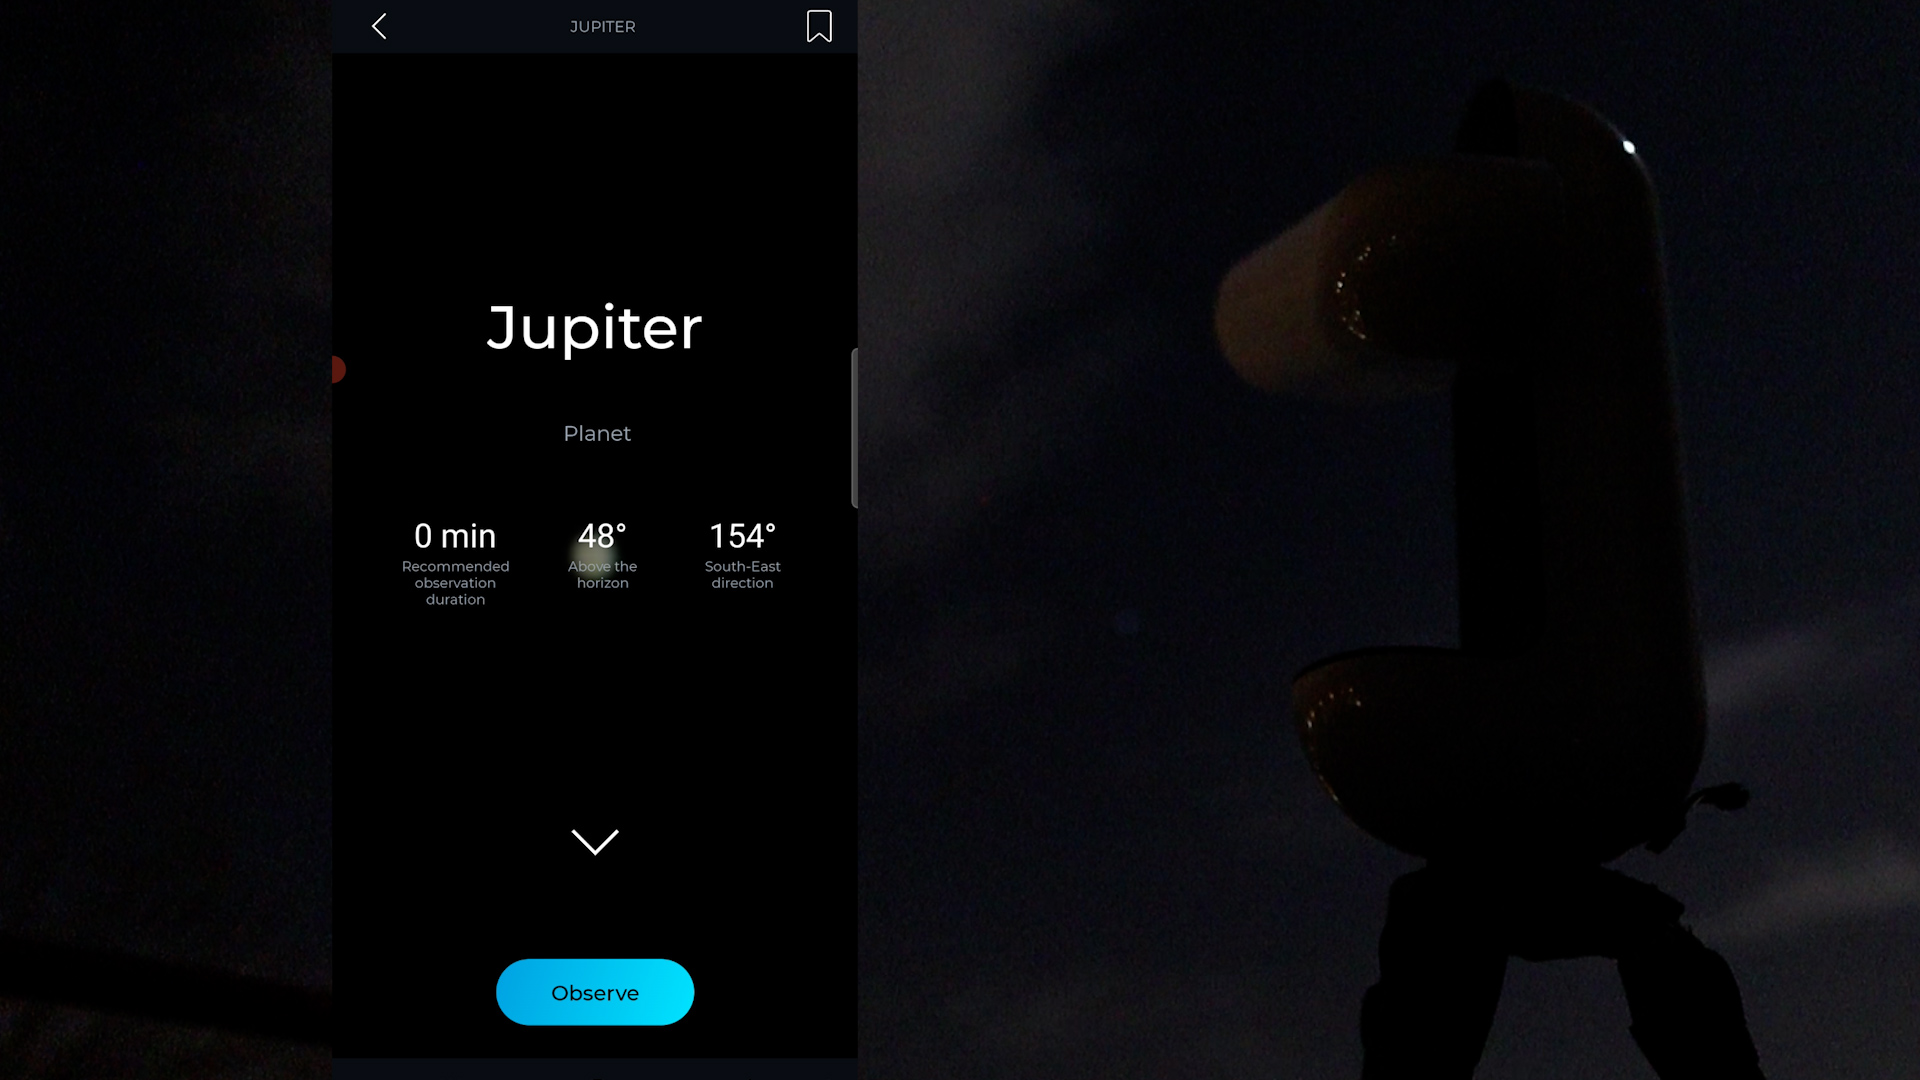
I also directed the Vaonis Vespera towards Jupiter, the largest planet in our solar system. However, due to the limited focal length of 200mm, surface details of the planets are not visible. Jupiter appeared as a small, luminous dot in the telescope’s field of view, as demonstrated here. If you’re interested in delving into planetary imaging, you’ll need a different telescope with a longer focal length and a larger aperture. I’ve developed a three-hour introductory course on planetary imaging, accessible by joining my channel for $2.99 a month. I would be extremely grateful for your support, as it enables me to sustain my website and YT channel to continue creating reviews and tutorial videos on astrophotography. Your support is greatly appreciated! Thank you.

Final verdict: Main advantages and disadvantages
Now, let’s proceed to my final verdict and delve into the advantages and disadvantages of the Vaonis Vespera Smart Telescope.
Vaonis Vespera’s main advantages
First of all, I must commend Vaonis for crafting a remarkable product tailored for enthusiasts eager to explore and capture the wonders of the night sky. For individuals keen on expanding their knowledge of astronomy and gaining a real-time perspective beyond what the naked eye can perceive, the Vaonis Vespera stands out as an appealing choice. It caters specifically to those who wish to avoid the intricate nuances of astrophotography, allowing users to effortlessly activate the Vespera and utilize the Singularity APP for locating, tracking, observing, and photographing celestial objects. What captivated me about the Vespera was its exquisite design, surpassing the aesthetics of most other smart telescopes I’ve assessed. Depending on personal taste, one could proudly display it as a captivating visual centerpiece in their living room.

Equipped with a high-quality quadruplet lens, the Vaonis Vespera provides a compelling view of the night sky, encompassing the full discs of the Sun and Moon, along with various deep-sky objects. Vaonis enhances the overall experience by offering optional solar, light pollution, and dual-band filters, as well as an extended tripod and a backpack for portability, albeit at an additional cost. Once the Singularity APP is installed, operating and navigating the Vespera becomes a straightforward task, allowing users to effortlessly control the telescope and marvel at the celestial wonders. Another noteworthy feature is the mosaic function, enabling users to observe and capture up to four times the field of view of the telescope —a distinctive trait not yet observed in other smart telescopes, at least as of the time of this presentation.
The Vespera, along with its optional add-ons, exudes a sense of quality, reinforced by the two-year warranty and complimentary return shipping which showcases Vaonis’s confidence in their products. Additionally, the ability to save and download individual pictures in JPG, high-quality TIFF, and FITS formats enhances opportunities for post-processing. This capability appeals to individuals willing to invest more time in utilizing advanced astrophotography processing tools to elevate their images beyond the automatically generated ones.
Vaonis Vespera’s main disadvantages
In discussing the Vaonis Vespera, it’s crucial to acknowledge both its merits and drawbacks. Like any telescope, it has its disadvantages. The utilization of altitude azimuth tracking imposes a limitation on photo exposures, capping them at 10 seconds. Furthermore, when stacking images over extended periods, field rotation is an issue. Another absence in the accompanying APP is the manual refocusing and repositioning option, a feature present in other smart telescope applications. It’s likely a deliberate choice by the designers, emphasizing the telescope’s automatic functionality.
The Vespera is not ideal for obtaining detailed views of planets in our solar system. Additionally, as the market sees an influx of smart telescopes, it’s worth noting that the Vaonis Vespera isn’t the most budget-friendly option available. For a comprehensive overview of smart telescopes, I invite you to explore my YouTube channel and my smart telescopes section on my website.

The Vaonis Vespera (+ optional accessories) is available at: Agena Astro (USA/WW), High Point Scientific (USA/WW), and Astroshop (EU/WW)
Conclusion
If budget constraints are secondary, and you seek a stylish smart telescope that seamlessly complements your living space, the futuristic Vespera might just be the perfect choice. You can click on the above links to reputable telescope shops that sell the Vaonis Vespera smart telescope in the USA and Europe. If you found this review and tutorial helpful, remember to subscribe to my Youtube channel and feel free to explore the rest of my website. I wish you clear skies ahead!
2 Replies to “Vaonis Vespera Smart Telescope Review + Tutorial”