In this blog, I compare the well-known Seestar S50 by ZWO and the recently released Vespera II by Vaonis. I demonstrate my imaging process for the Sun, Moon, Deep Sky Objects, and Jupiter using both telescopes. Additionally, I provide a detailed review highlighting the advantages and drawbacks I experienced while utilizing these smart telescopes for advanced stargazing and astrophotography. While the ZWO Seestar S50 offers more options to view and record the Sun and the Moon, the Vaonis Vespera II shines at deep-sky astrophotography, with its larger Sony IMX585 sensor and unique CovaLENS mode.
Price and Technical details
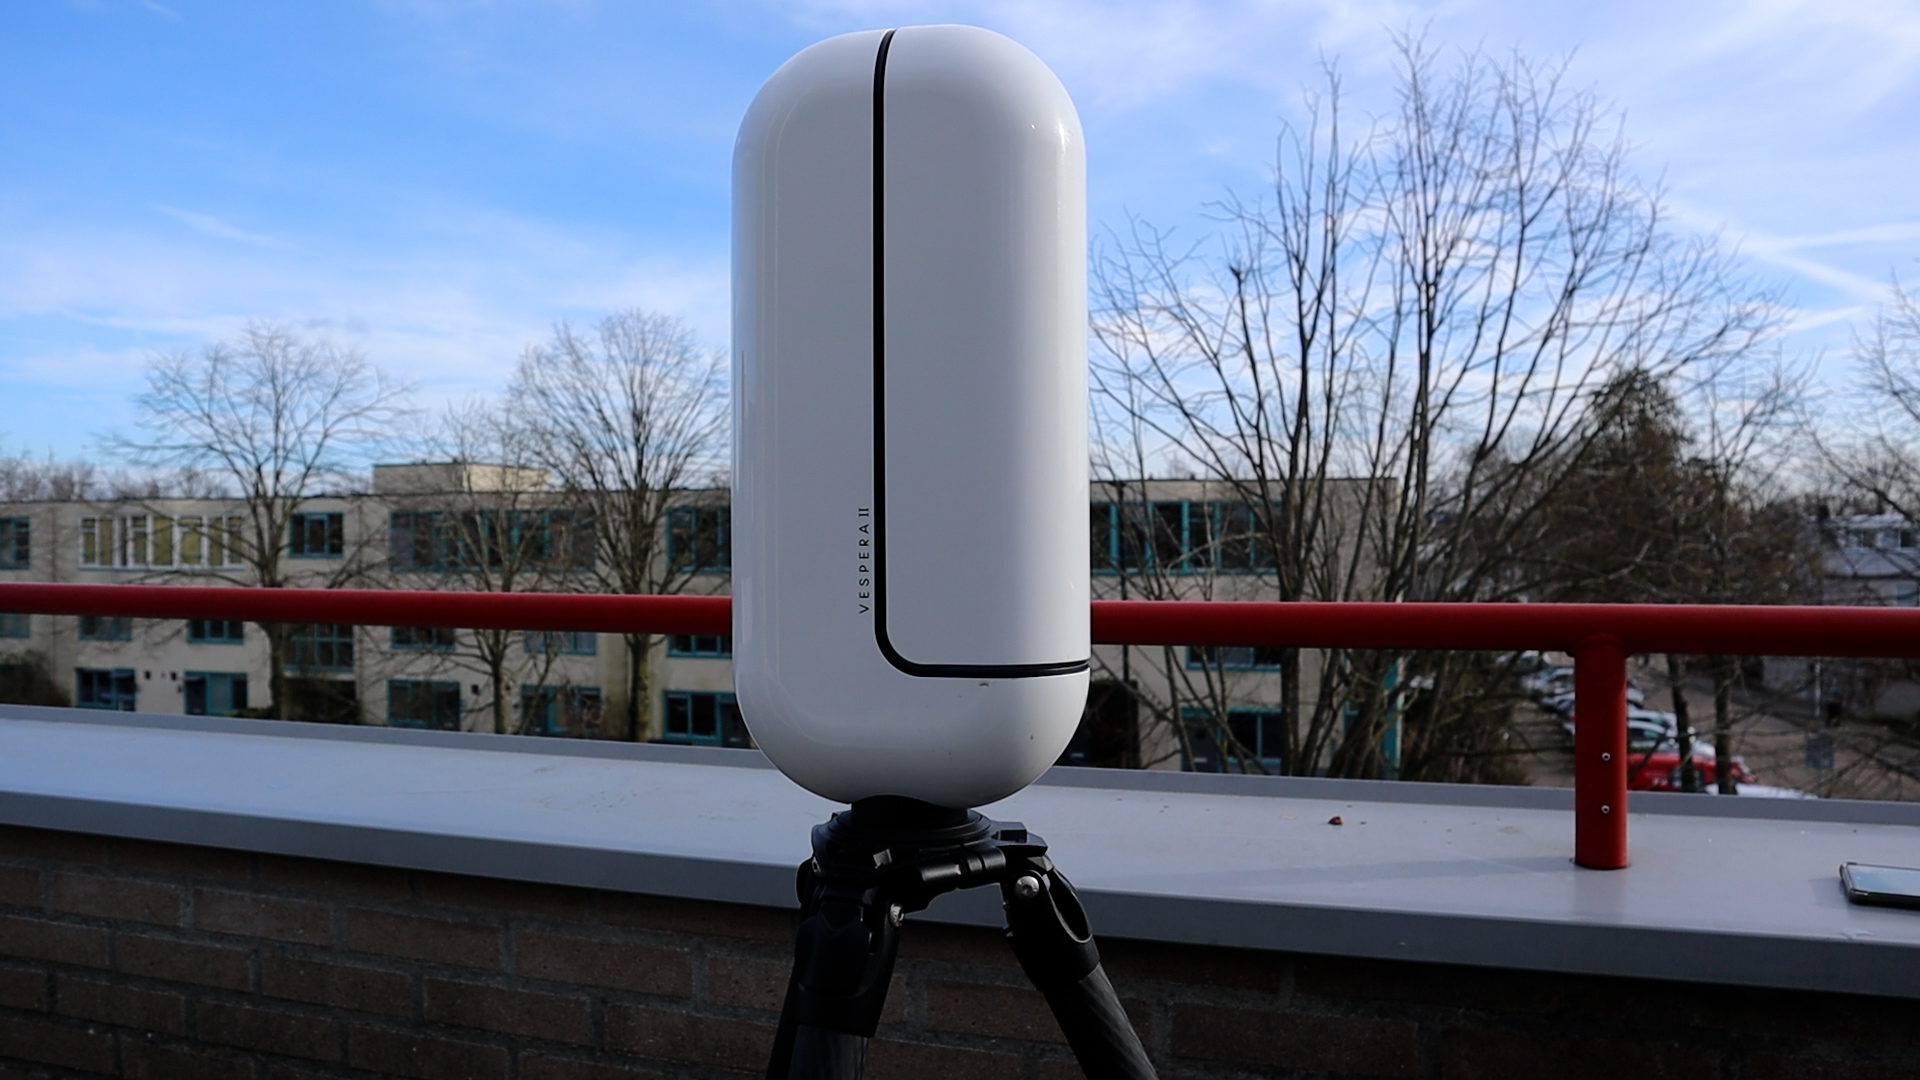
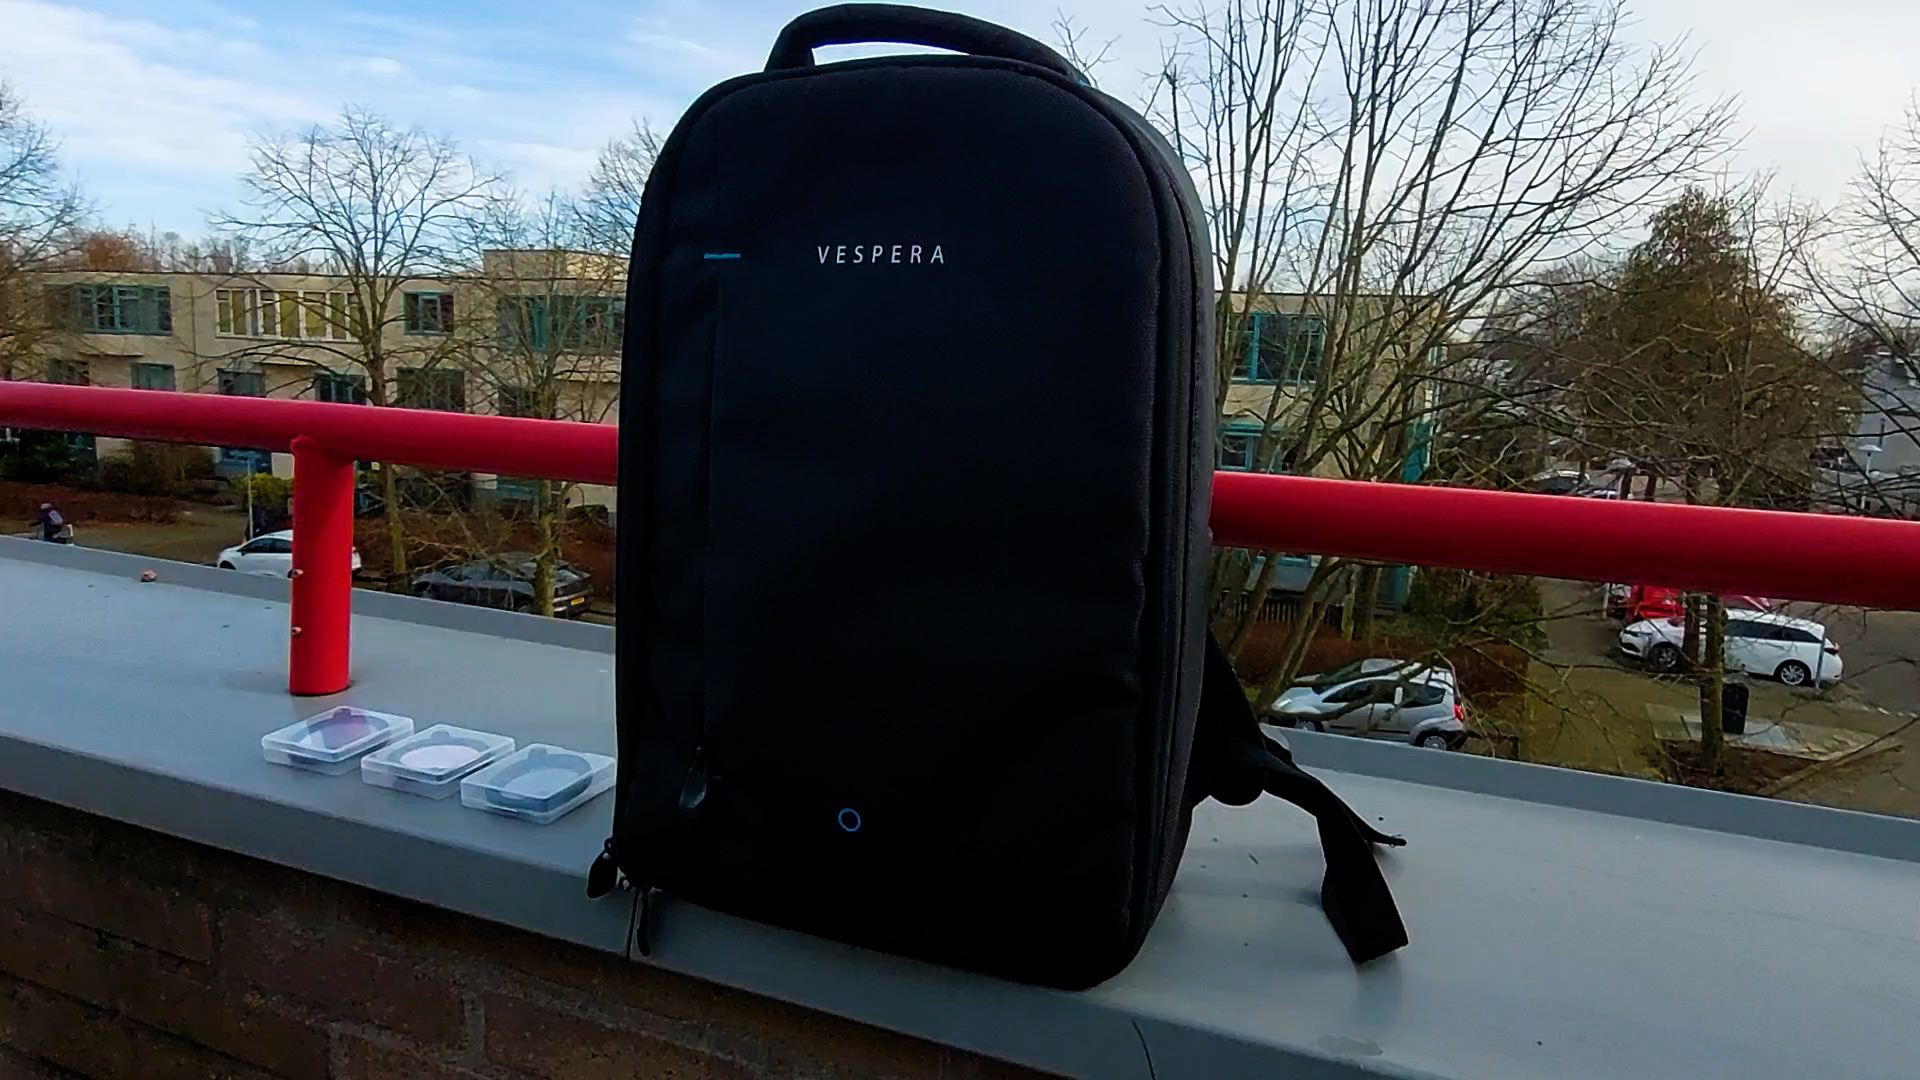
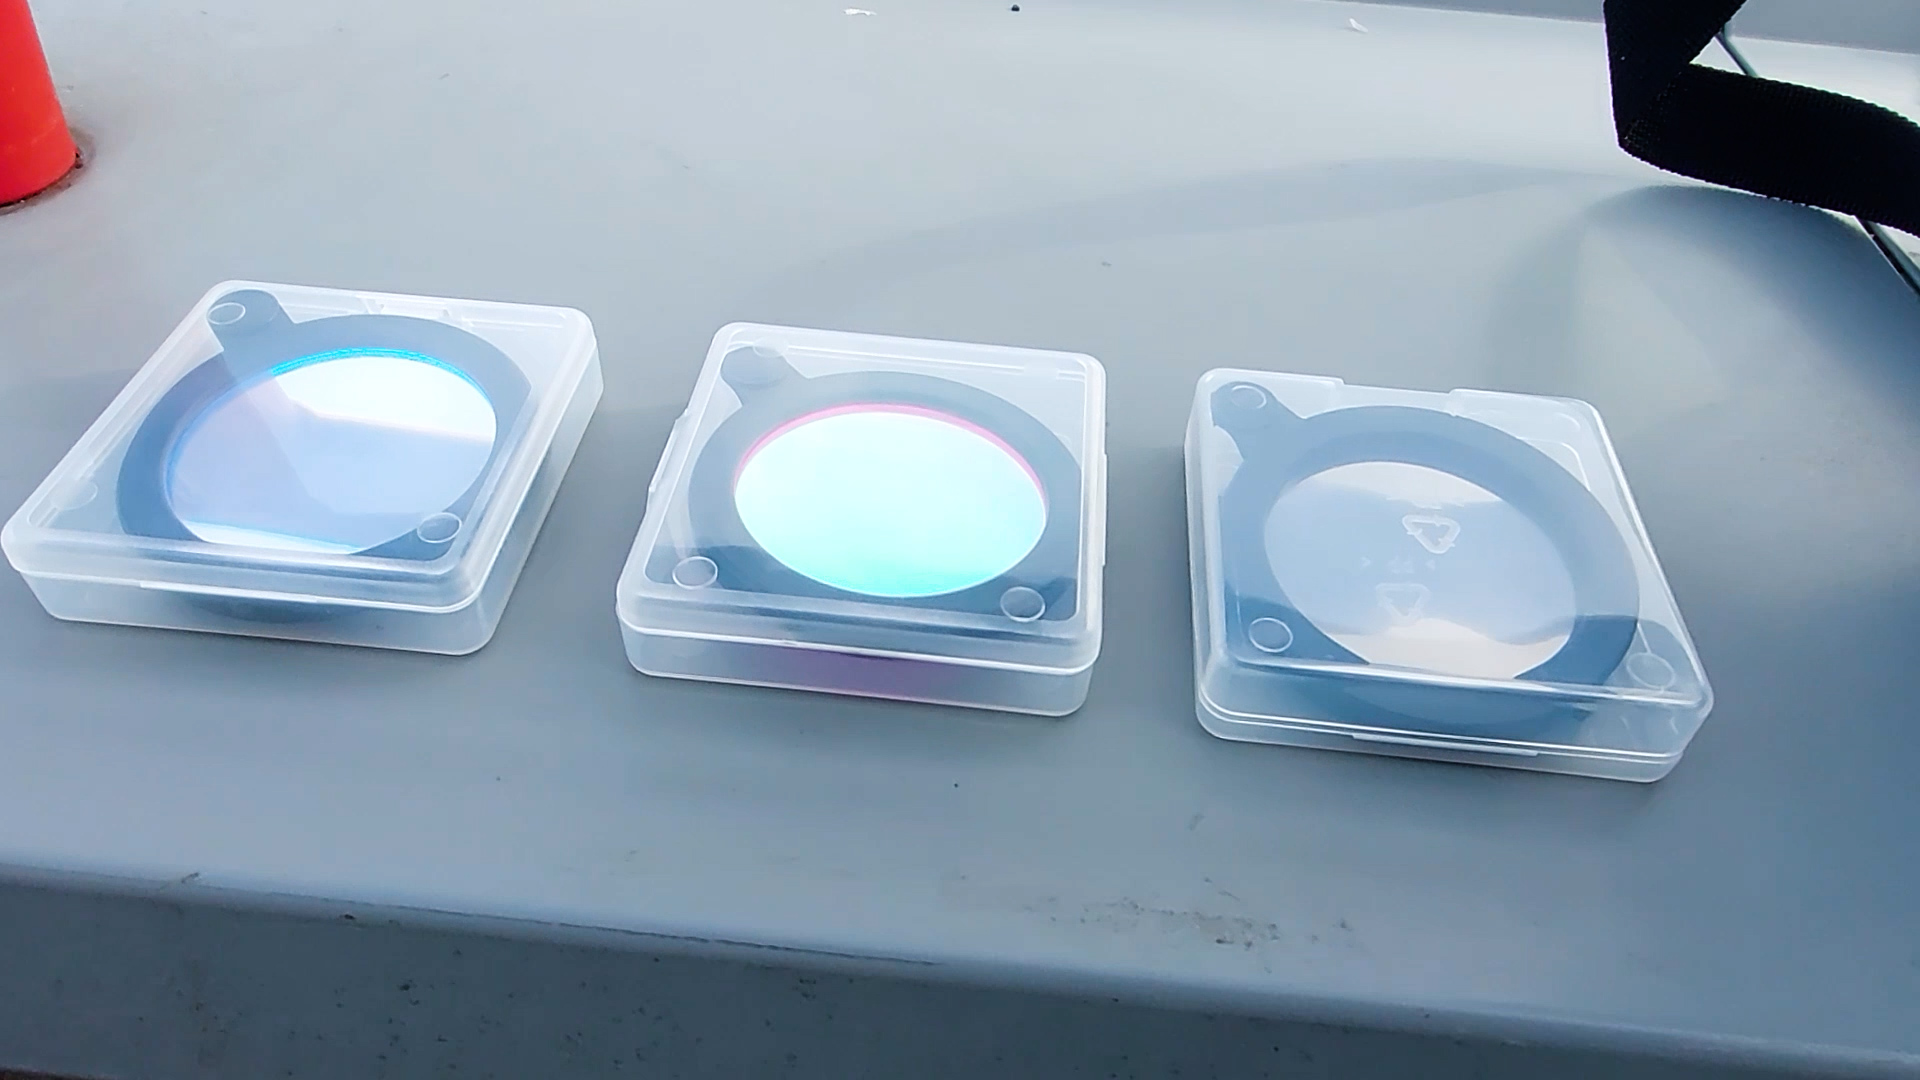
Vaonis was kind enough to send me their new Vespera II for testing, currently available for $1590. I’m not being paid for reviewing this telescope, and Vaonis assured me I can voice my honest opinion, which I will do throughout this review. The Vespera II comes without a tripod or USB-C cable needed to recharge the telescope. Optional extras include a small and large carbon tripod for the telescope, a Vespera backpack, and additional solar, light pollution, and dual-band filters, all available at an extra cost.
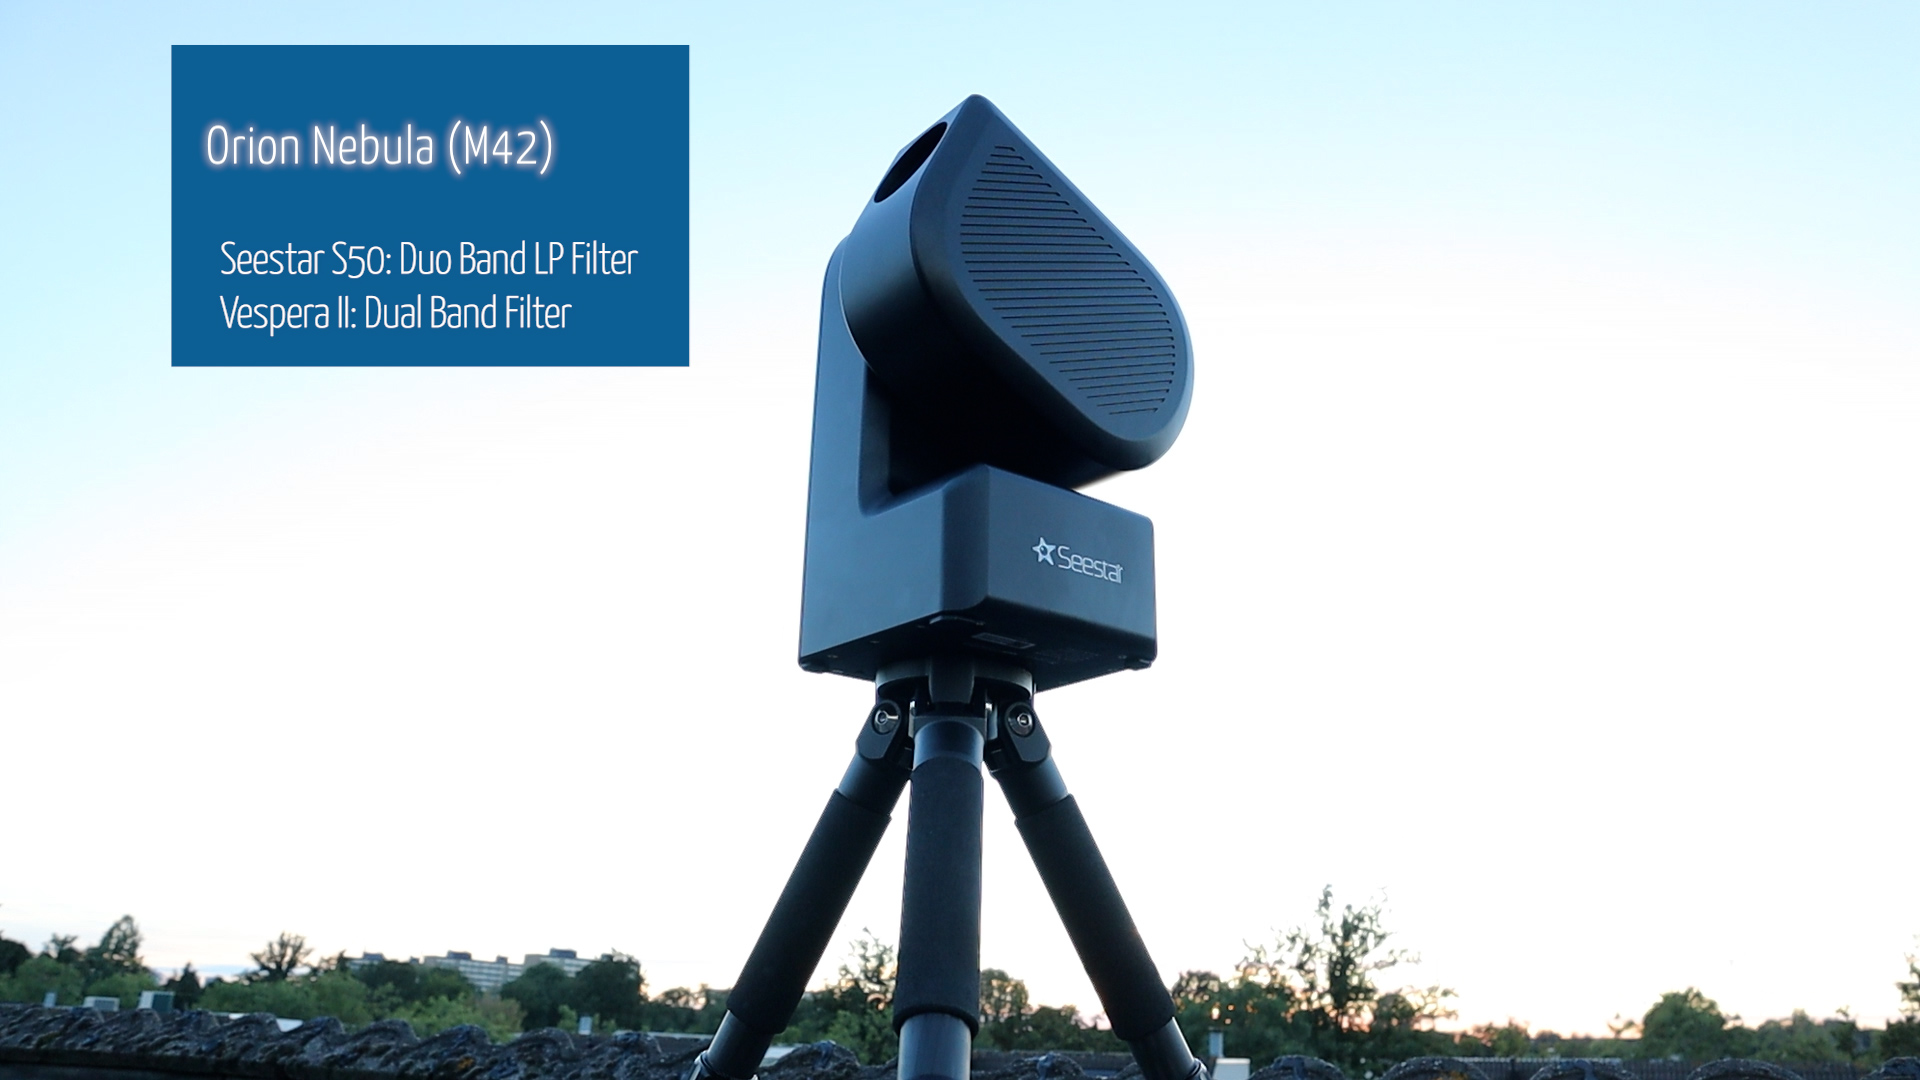
After testing the ZWO Seestar S50 a couple of months ago, I decided to buy and keep it. It is currently one of the most popular and affordable smart telescopes, available for about $500. The Seestar S50 comes with a nice, sturdy, lightweight black case, a small tripod, and a USB-C cable to recharge the telescope. The S50 has a built-in duoband light pollution filter, and the standard package includes a solar filter without additional costs.
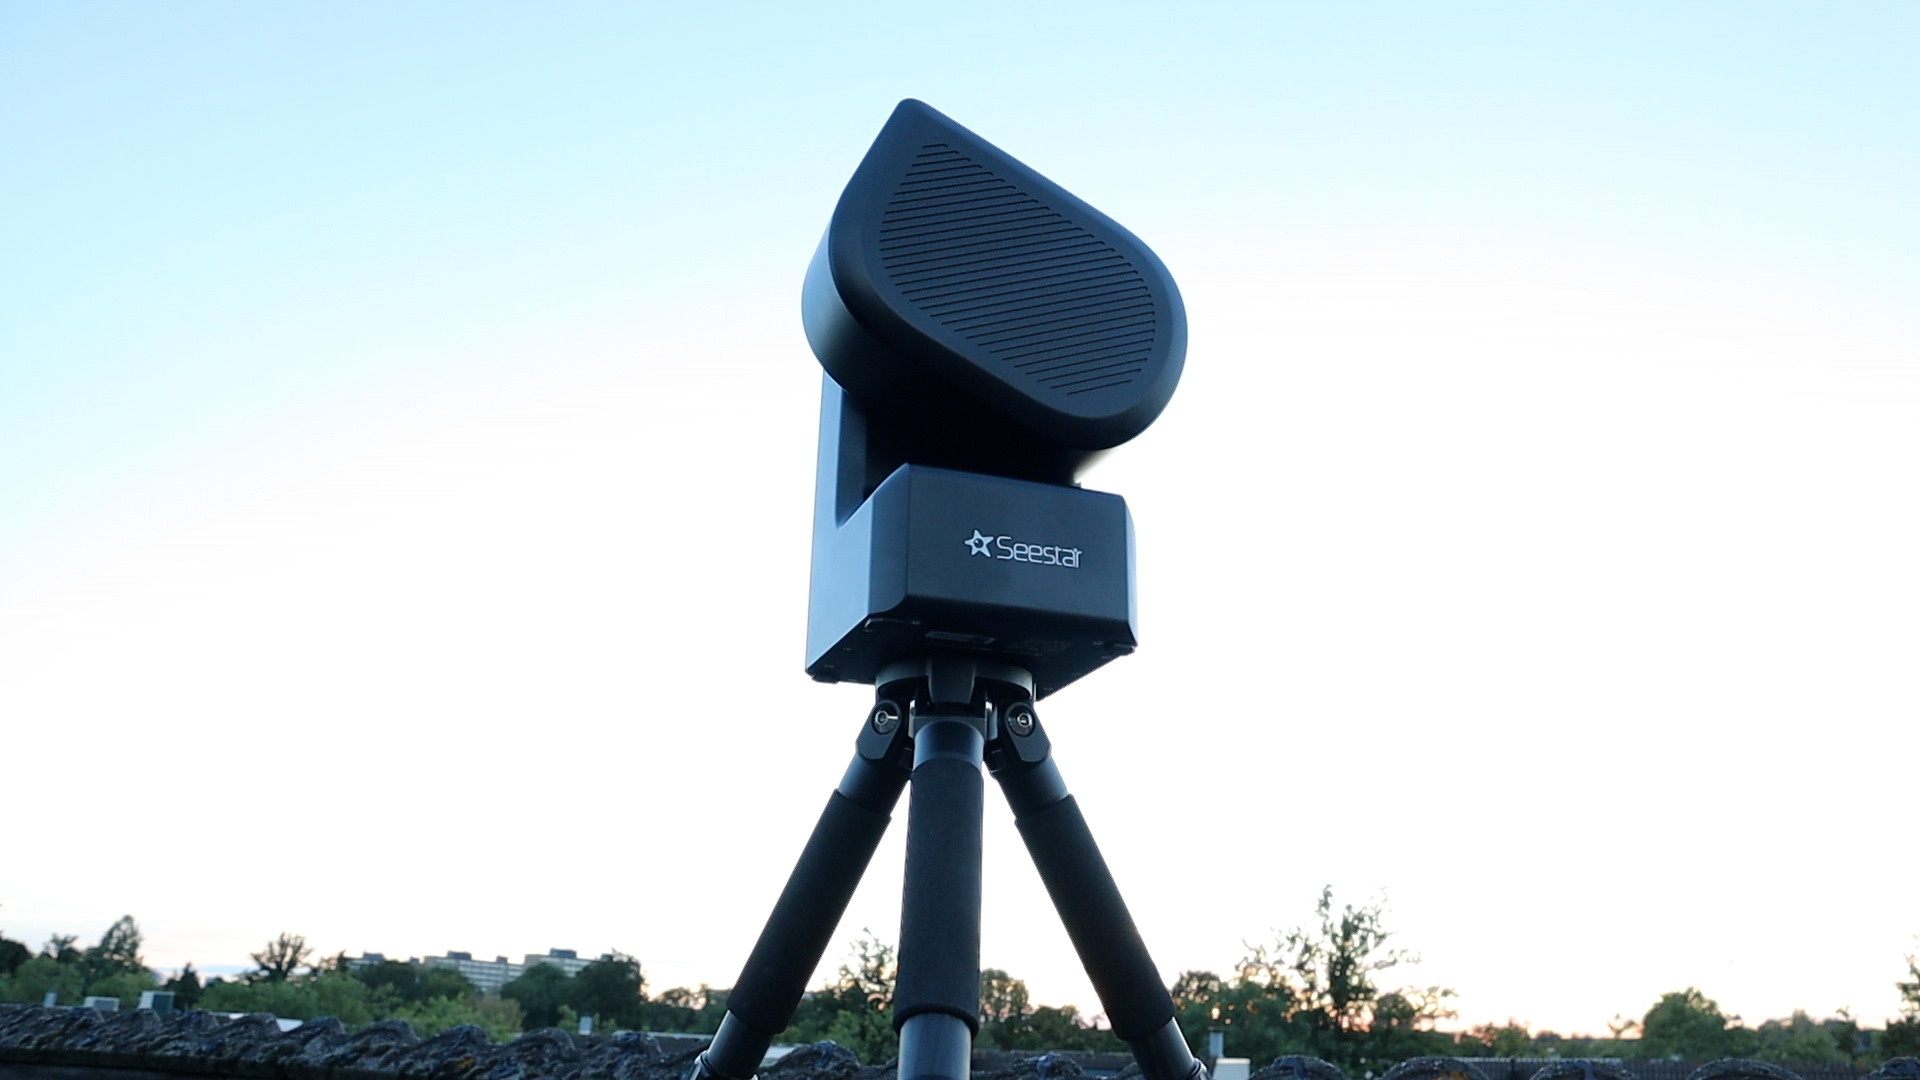
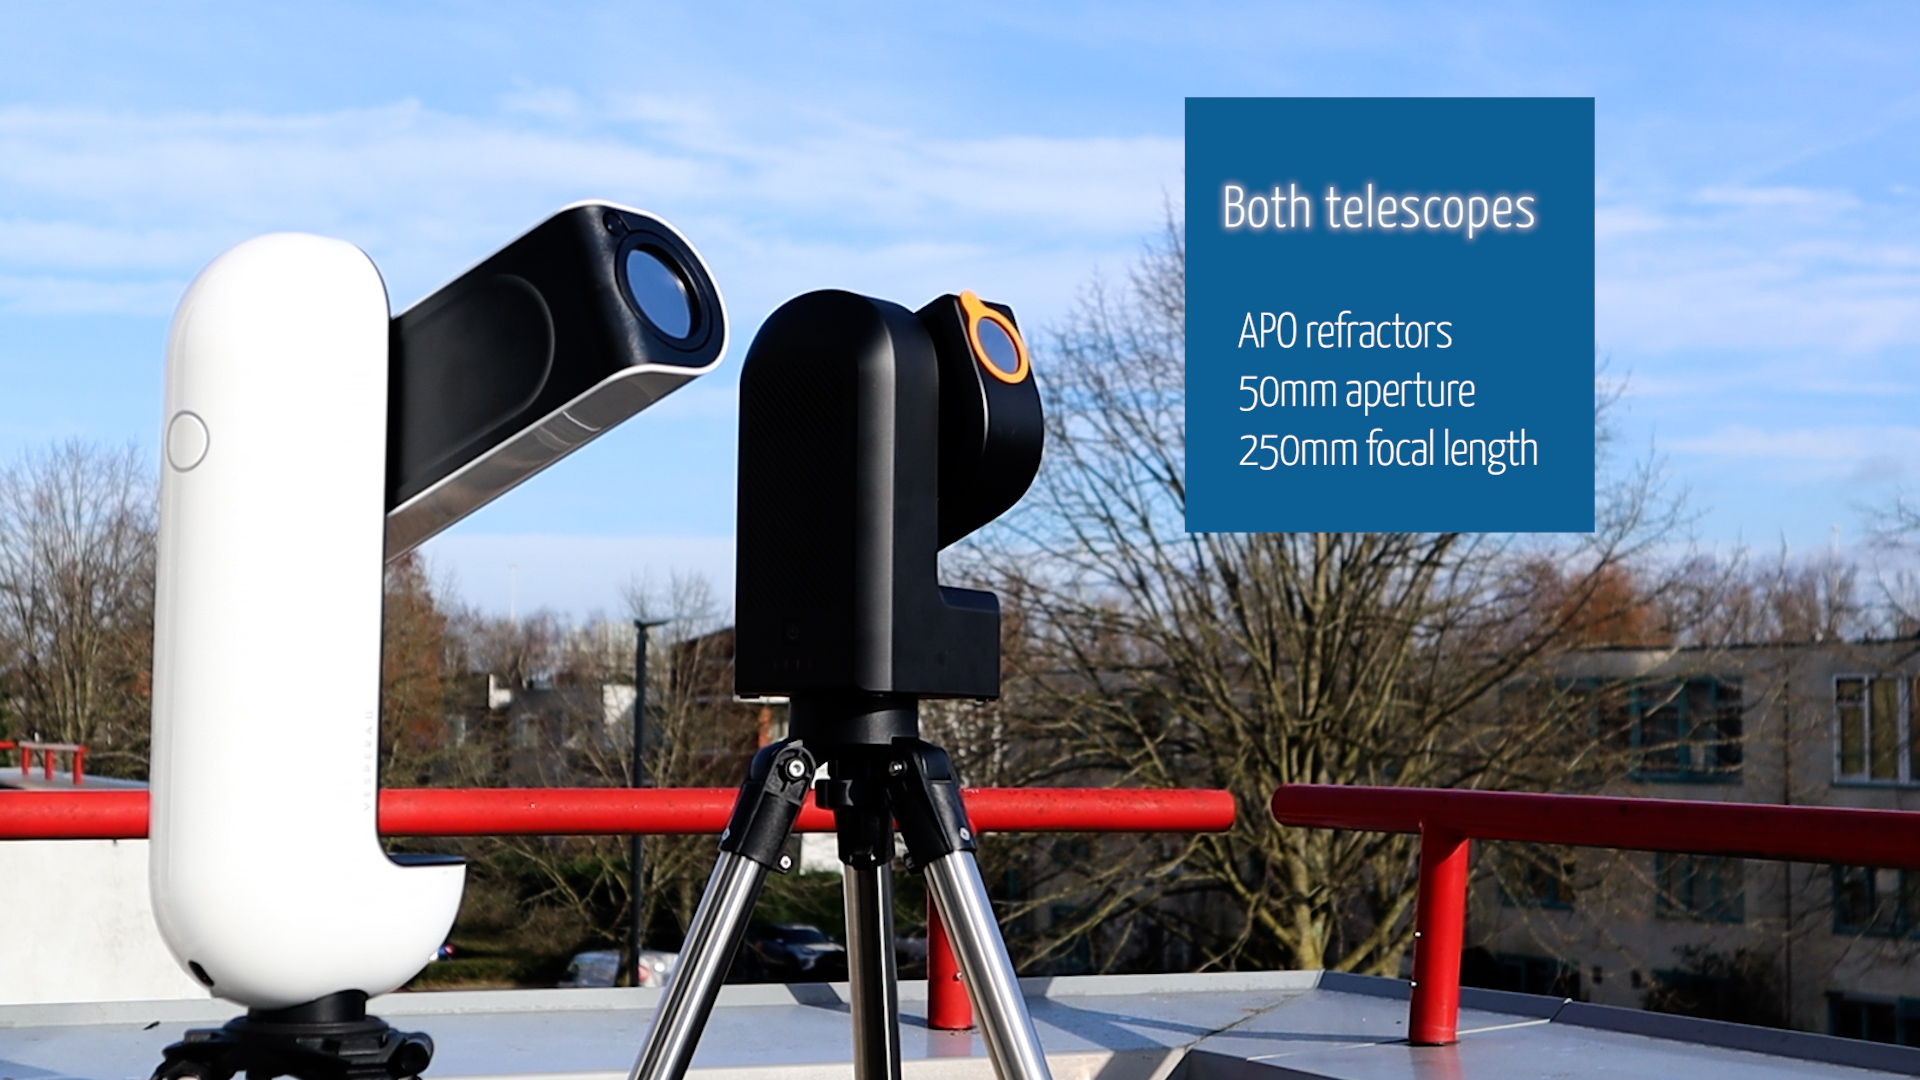
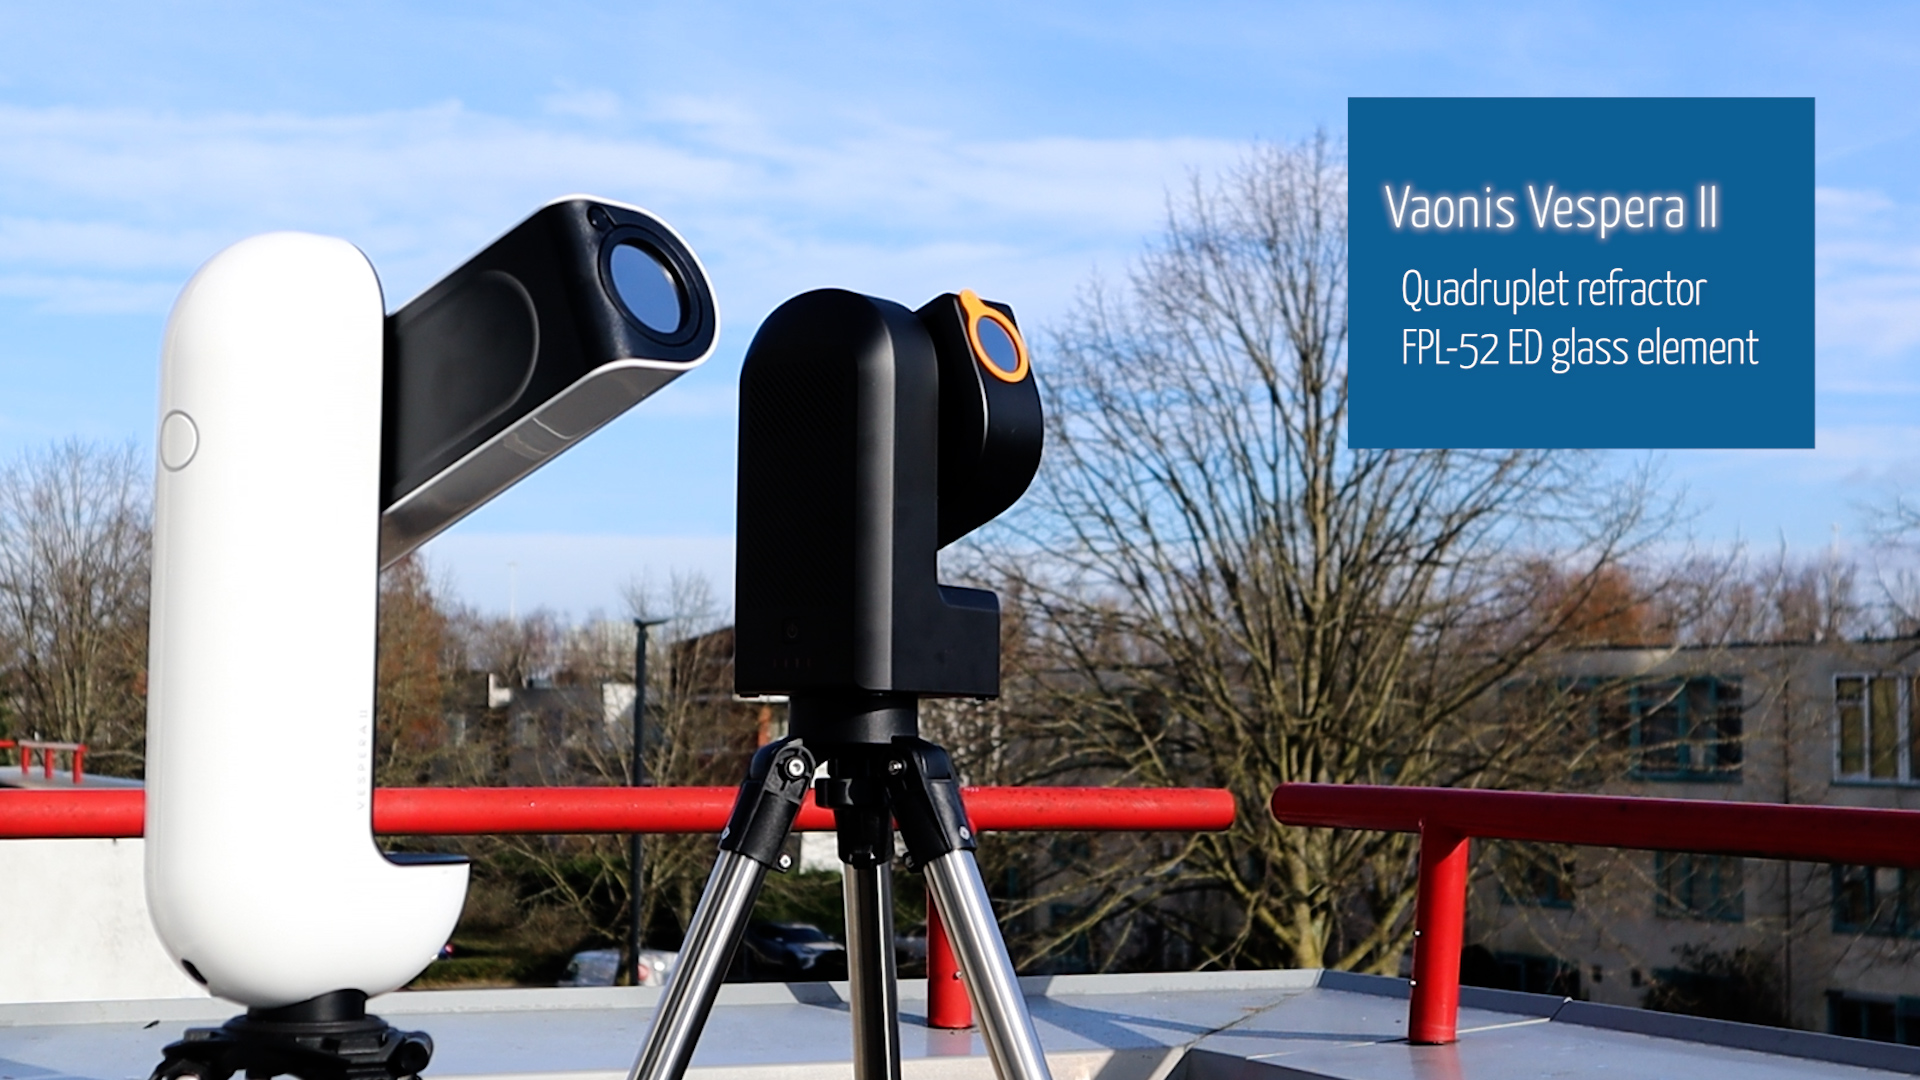
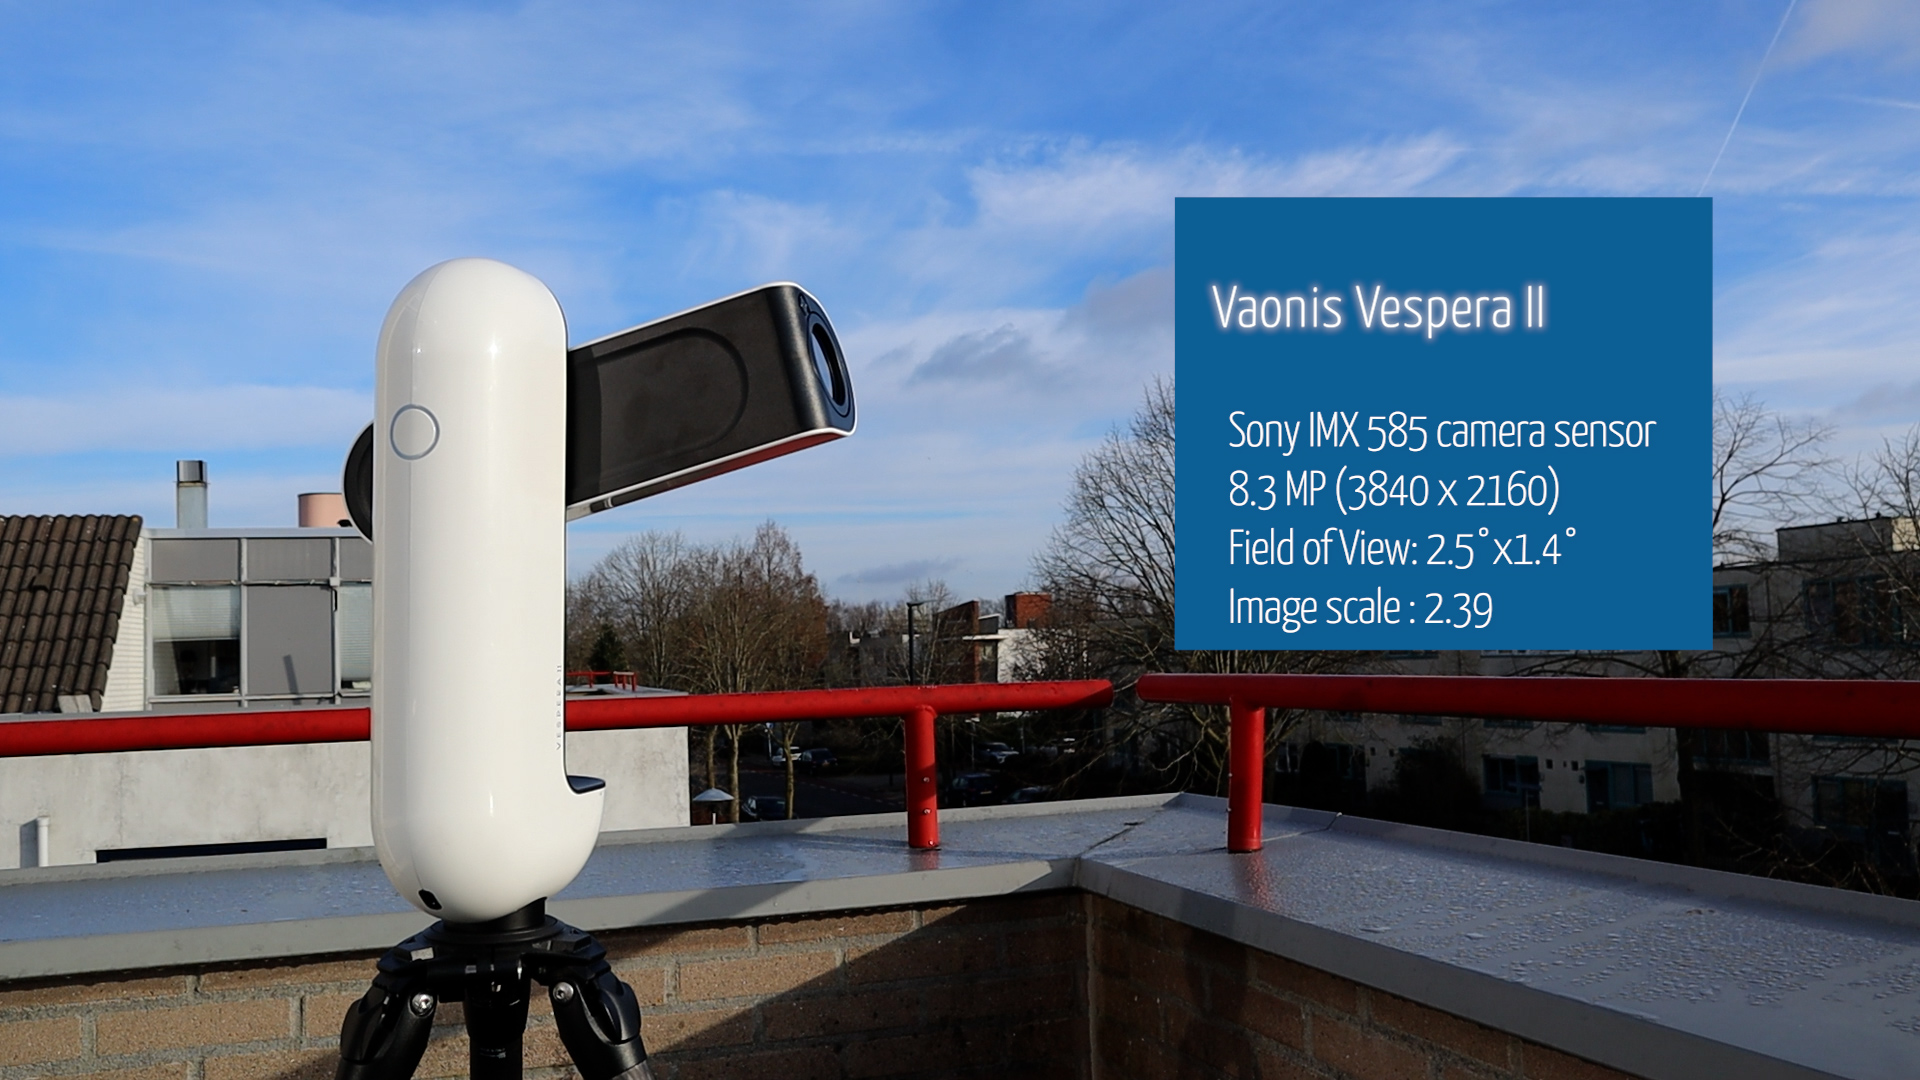
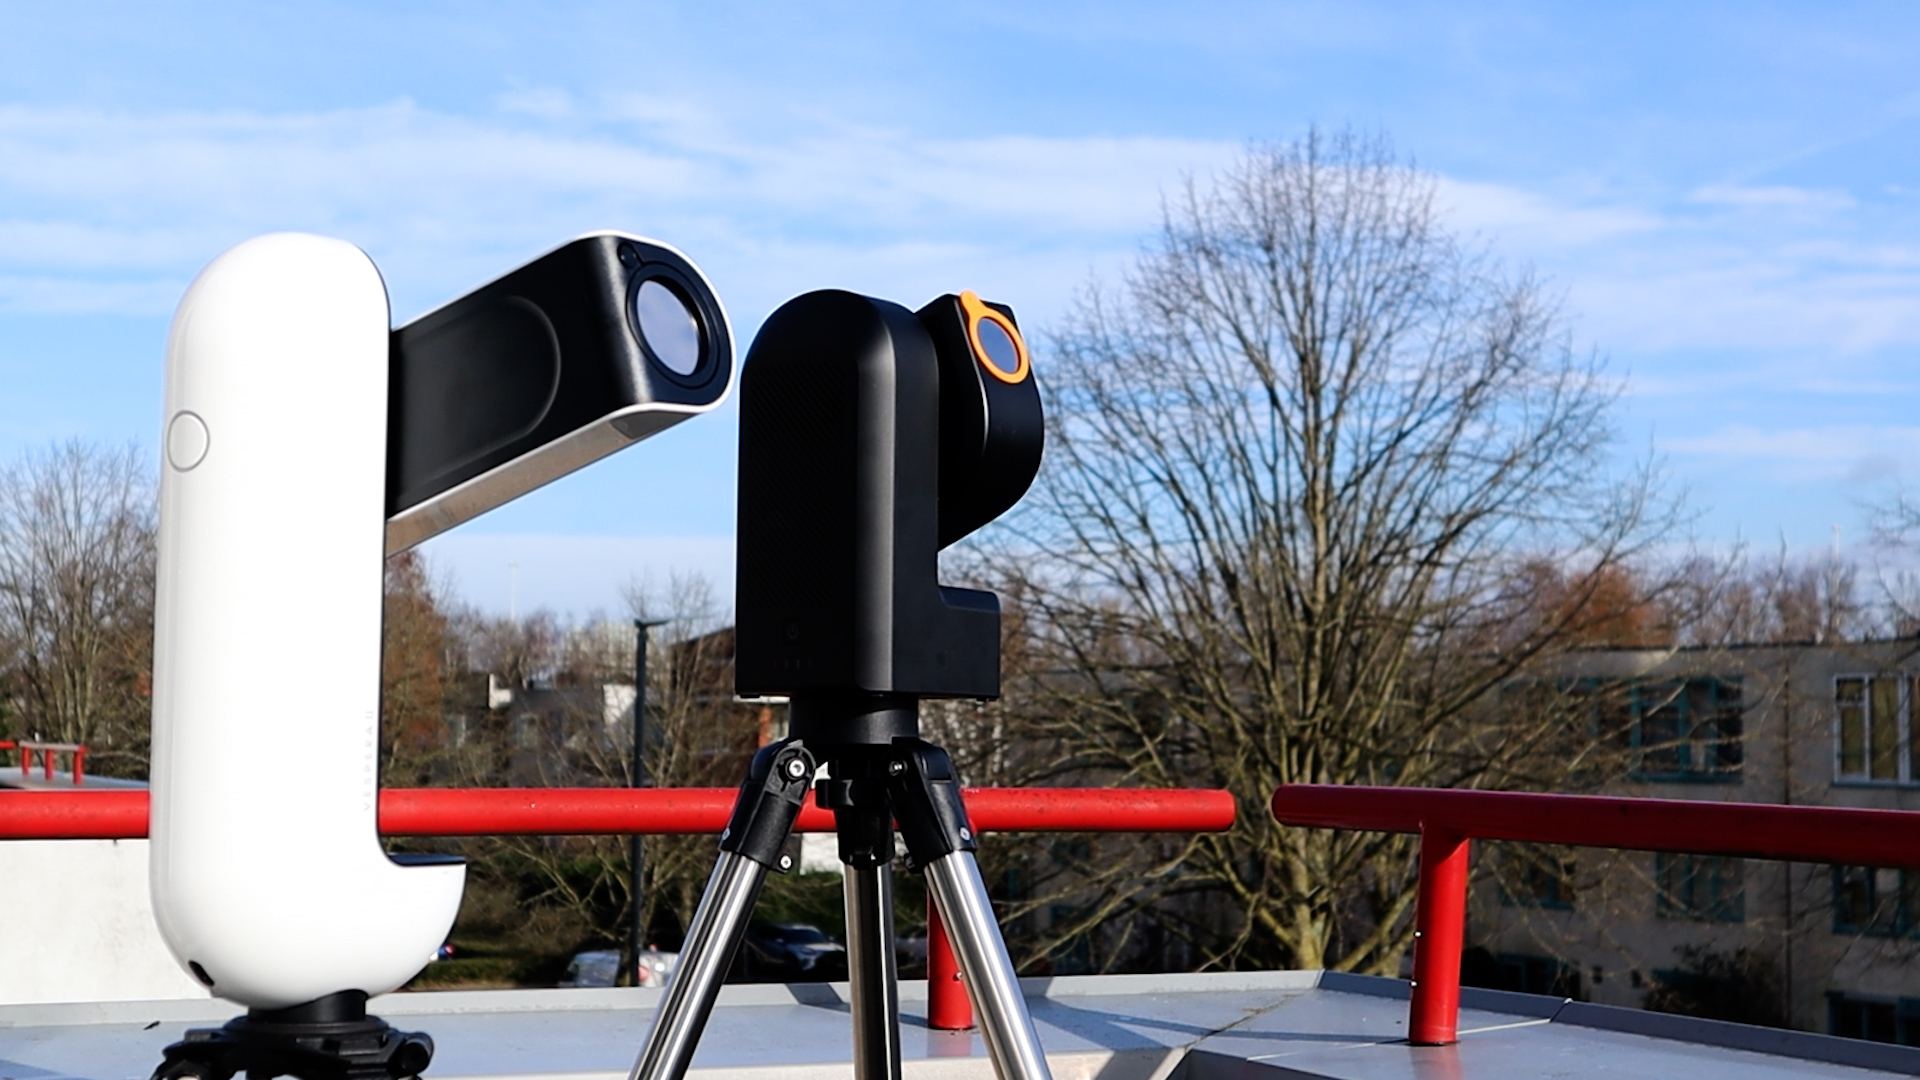
Looking at the telescope optics – both the Seestar S50 and the Vespera II are apochromatic refractors with a 50mm aperture and 250mm focal length. The Seestar is a triplet reflector with an extra-low dispersion glass element, which should provide us with good color-corrected views of the night sky. The Vaonis Vespera II is a quadruplet apochromatic refractor telescope with a high-quality FPL-52 low-dispersion glass element, which should provide us with an excellent, colorful view of the night sky.

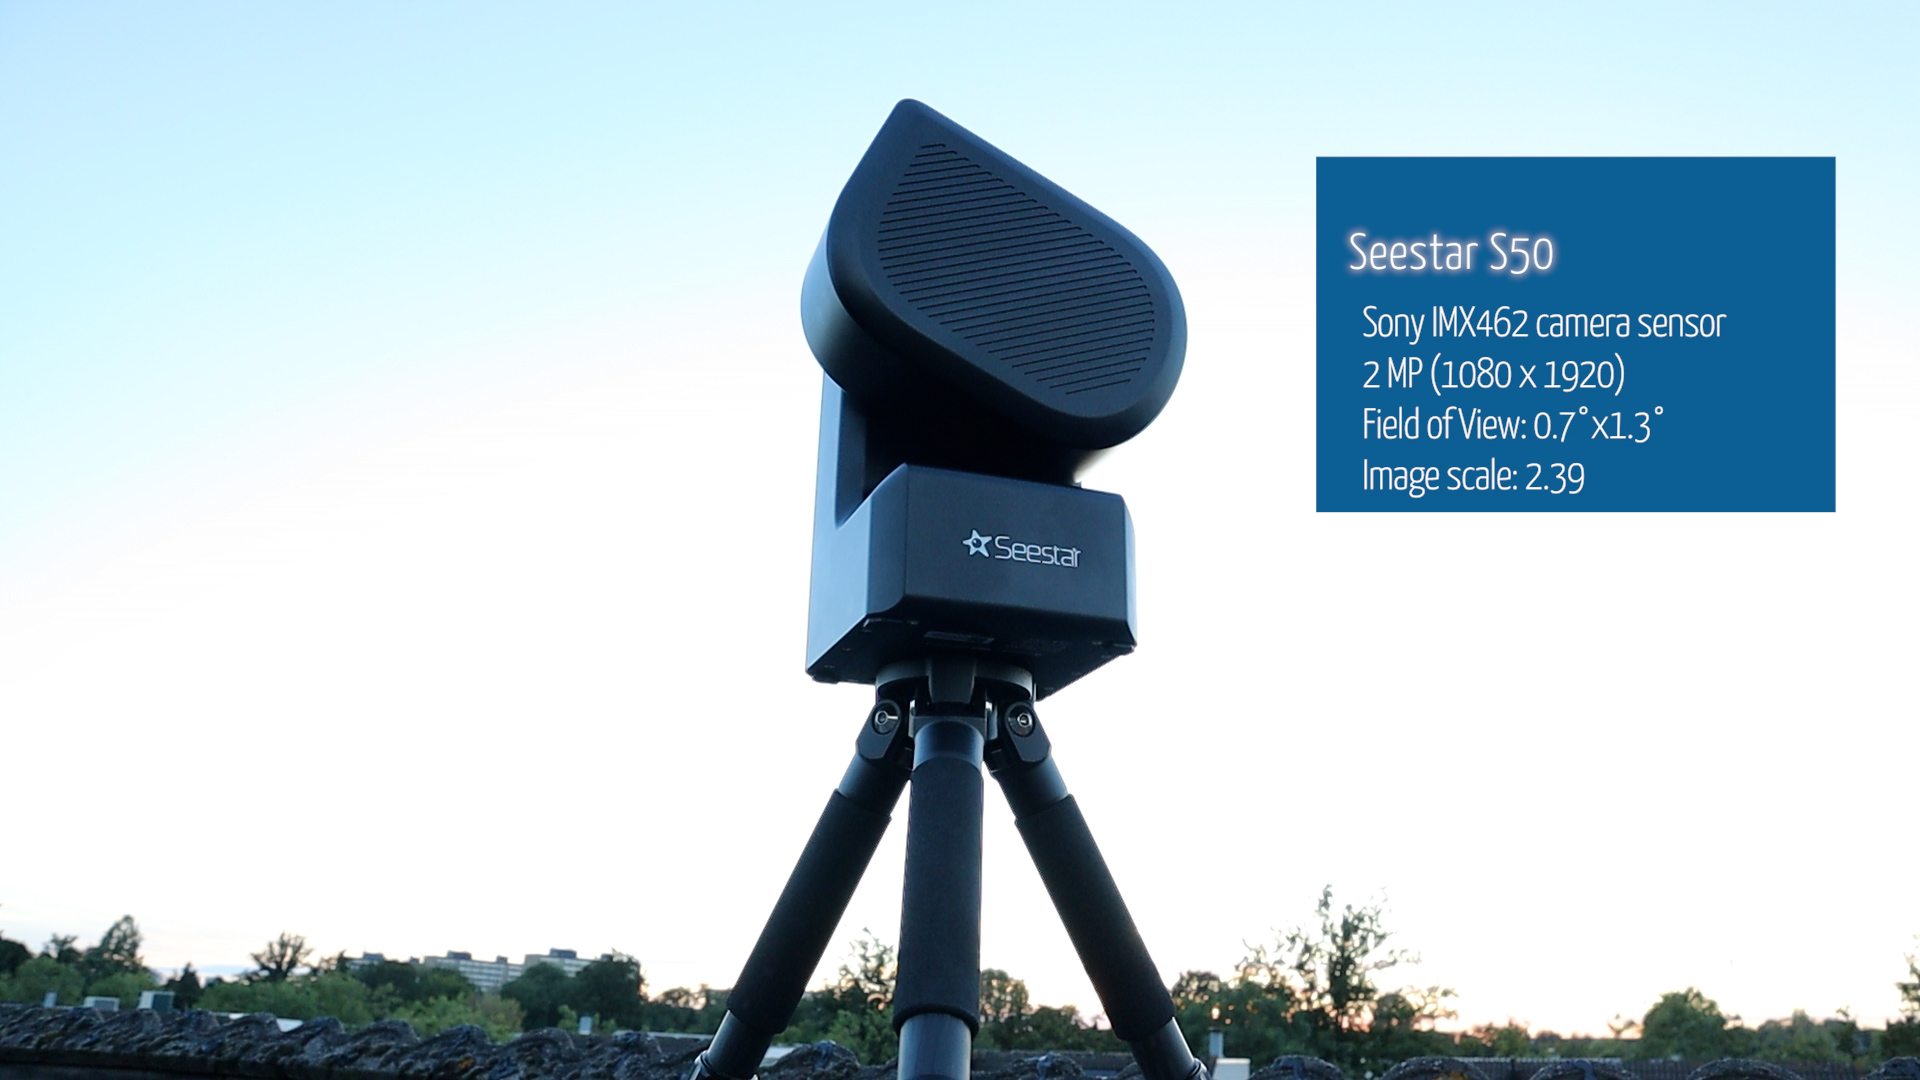
The biggest difference between the two telescopes is the camera sensor. Seestar S50 boasts a 2-megapixel Sony IMX462 camera sensor (1080×1920), whereas the Vaonis Vespera boasts a newer and larger Sony IMX585 8.3-megapixel camera sensor (3840 x 2160). The Seestar S50 can run for about 6 hours before the battery needs to be recharged, whereas the Vaonis Vespera II only lasts for about 4 hours. Also, the Seestar S50 has 64GB internal storage capacity, whereas the Vaonis Vespera can store 25 GB. Both telescopes can be controlled over WiFi with the Seestar APP developed by ZWO to control the Seestar S50 and the Singularity APP by Vaonis to control the Vespera II. What do all these differences mean in practice? Let’s test these two telescopes to find out!
The ZWO Seestar S50 can be purchased directly at ZWO, and at Agena Astro (USA/WW), High Point Scientific (USA/WW), and Astroshop (EU/WW).
The Vaonis Vespera II is available at Vaonis, Agena Astro (USA/WW), High Point Scientific (USA/WW), and Astroshop (EU/WW).
The Sun: Seestar S50 versus Vaonis Vespera II
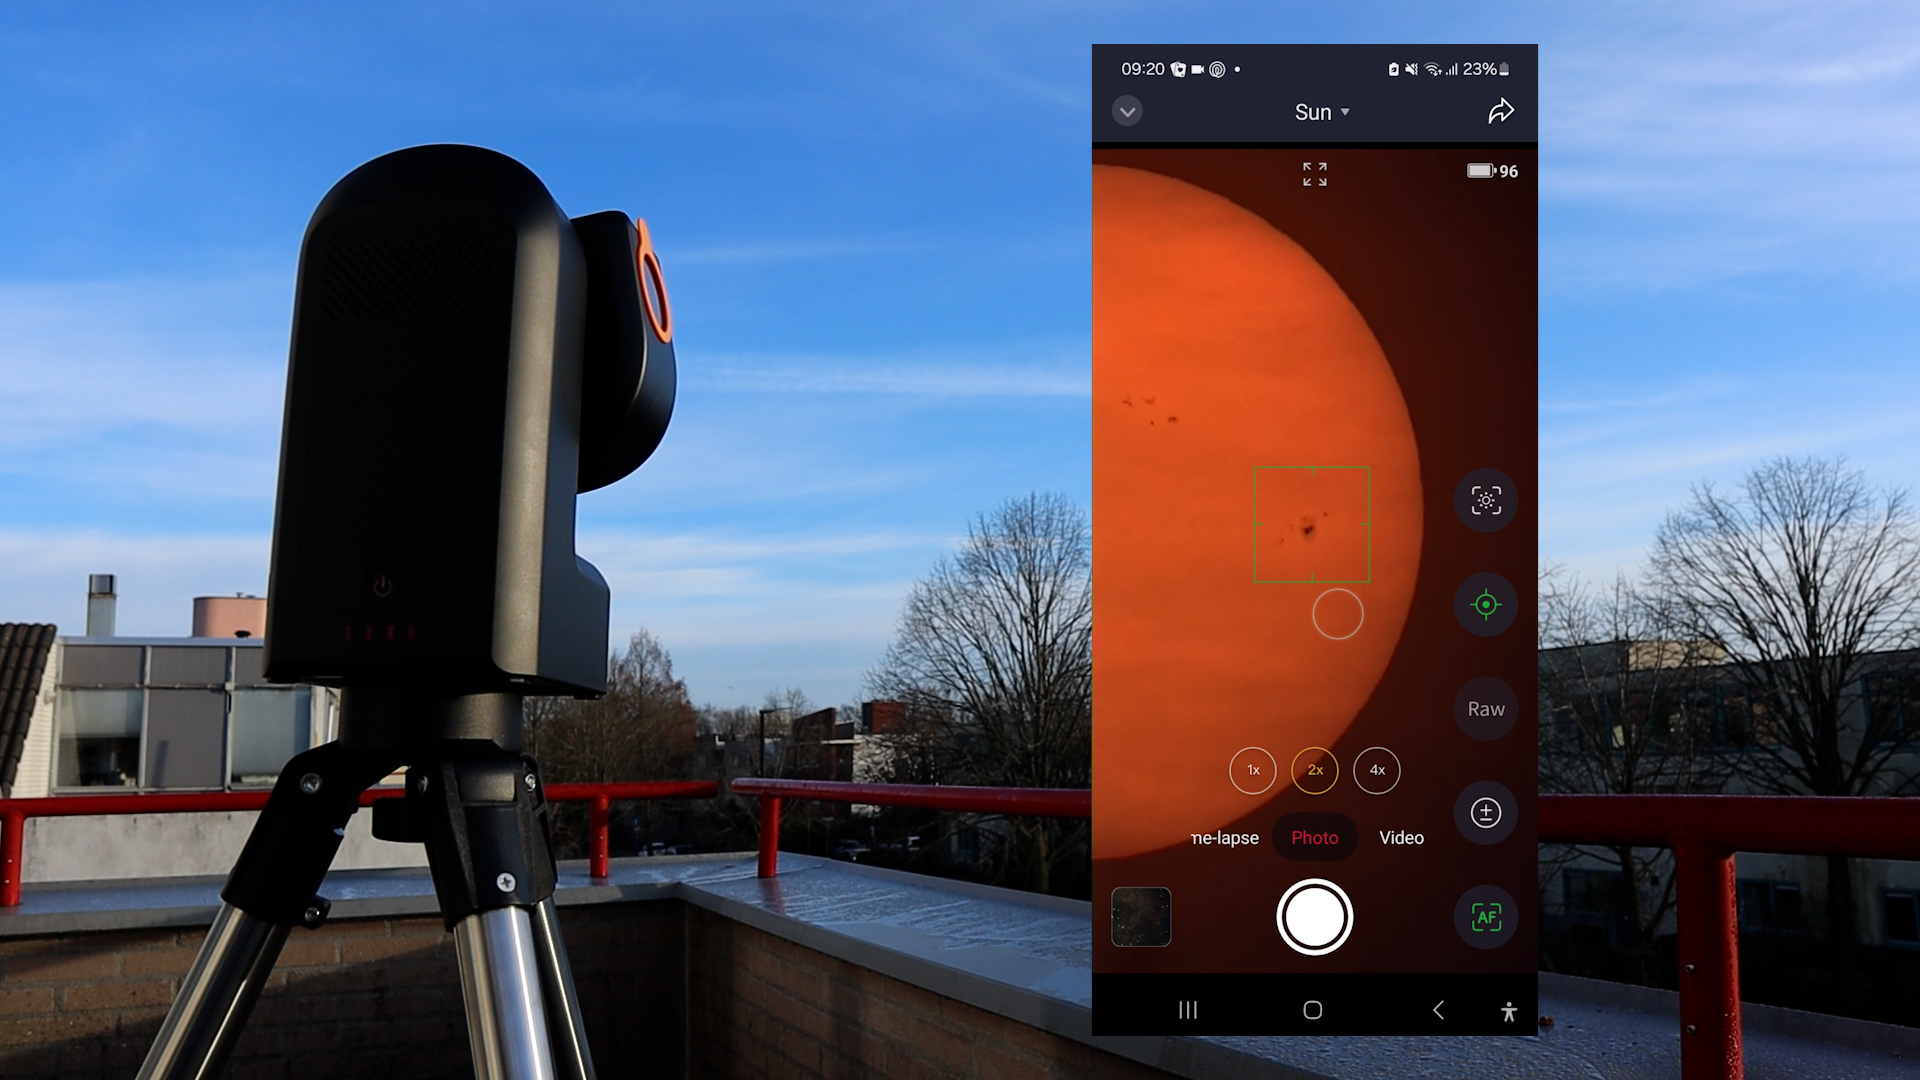
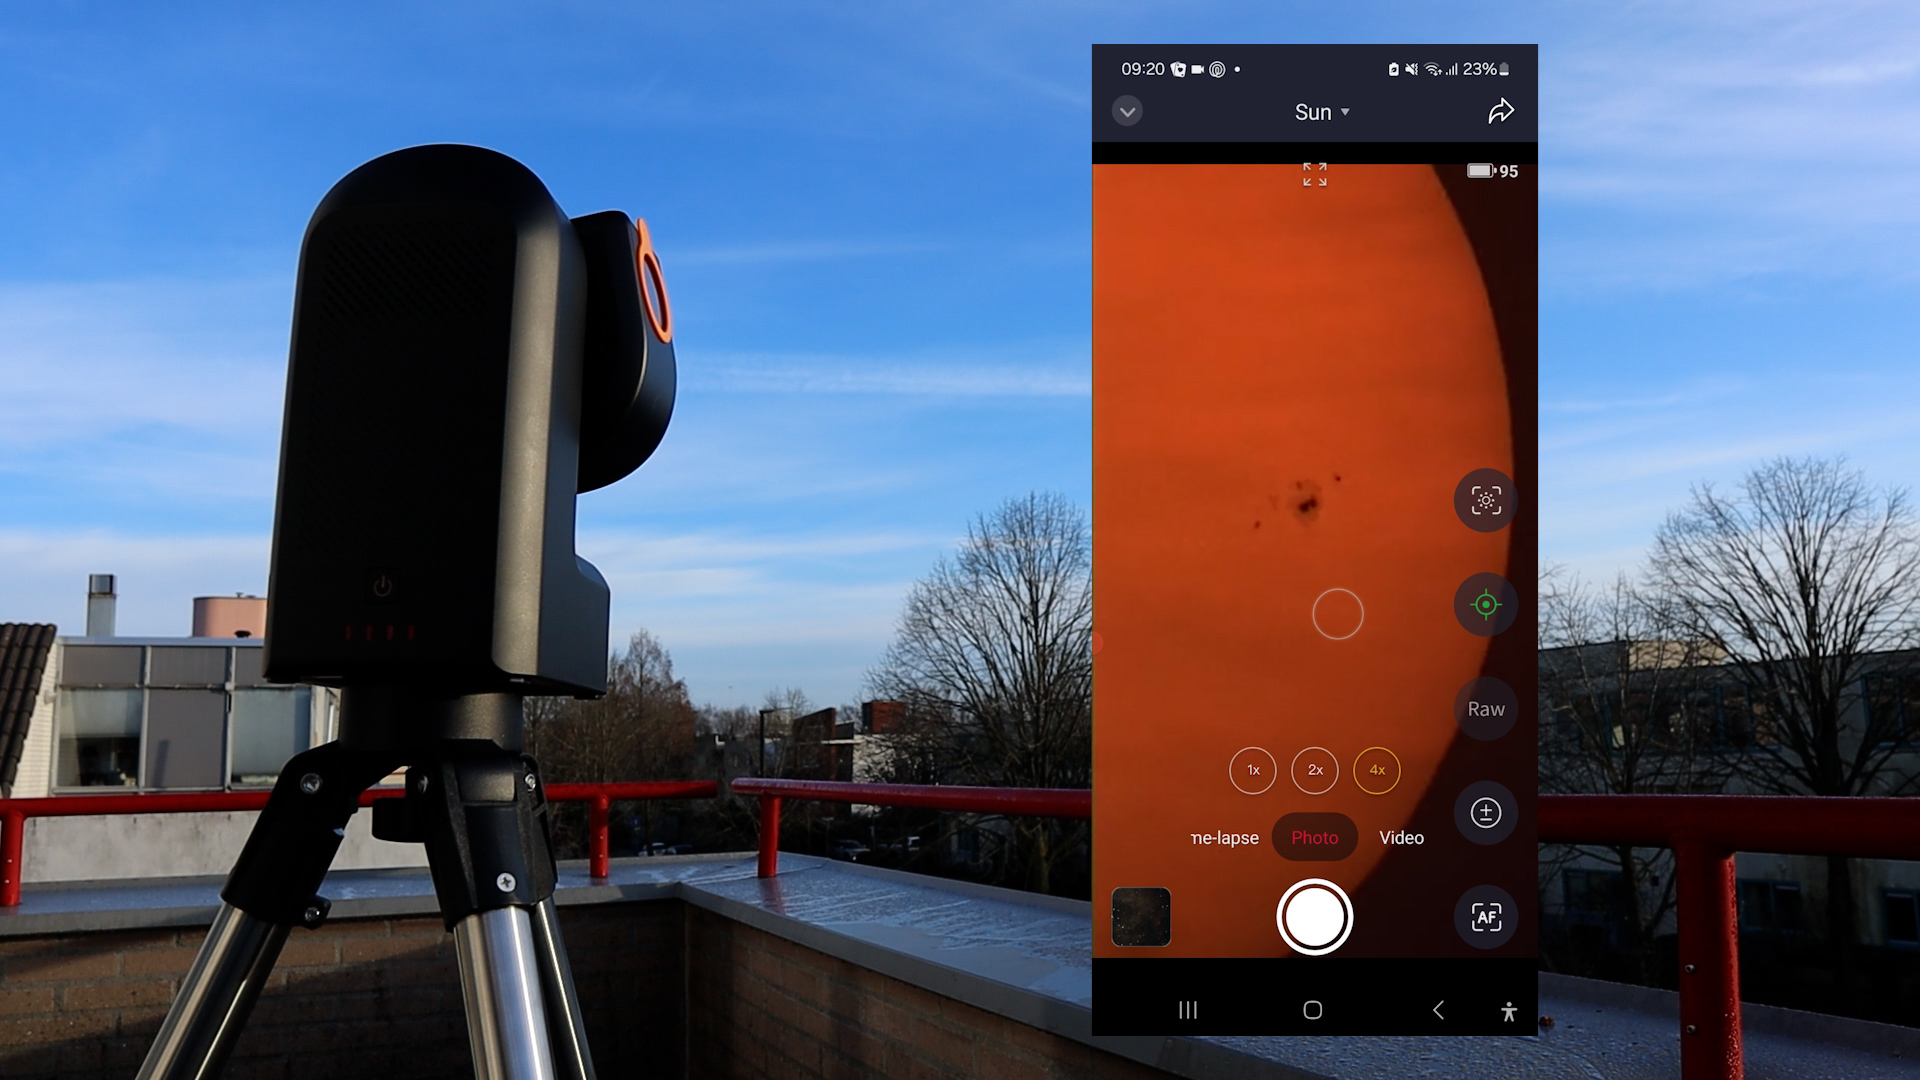
Let’s compare my solar imaging experience with the Seestar S50 to the Vaonis Vespera II. Let’s start with the Seestar S50. The installation of the solar filter on the Seestar S50 is easy. Press the rubber filter in front of the telescope’s lens, and you’re good to go. The Seestar APP includes a unique solar mode, which can be used to observe the sun. After installing the solar filter, it took the Seestar less than a minute to automatically find the Sun and center it on the screen. As you can see, there were quite some clouds in front of the Sun that day, giving an interesting and mysterious look. The auto settings of the camera are excellent, providing you with an instant, high-quality view of the Sun. The most recent update of the Seestar APP includes an auto track button that will keep the Sun in the center of your screen. The latest version of the Seestar APP includes a 4x digital zoom, which I used to check out the largest sunspot that day. I used the manual slew buttons to center the sunspot and zoomed in. According to spaceweatherlive.com, this sunspot region was about 4x the diameter of Earth. Pretty amazing, isn’t it? The zoom is, of course, digital and does not provide a higher resolution. Still, it was lots of fun to use this feature.

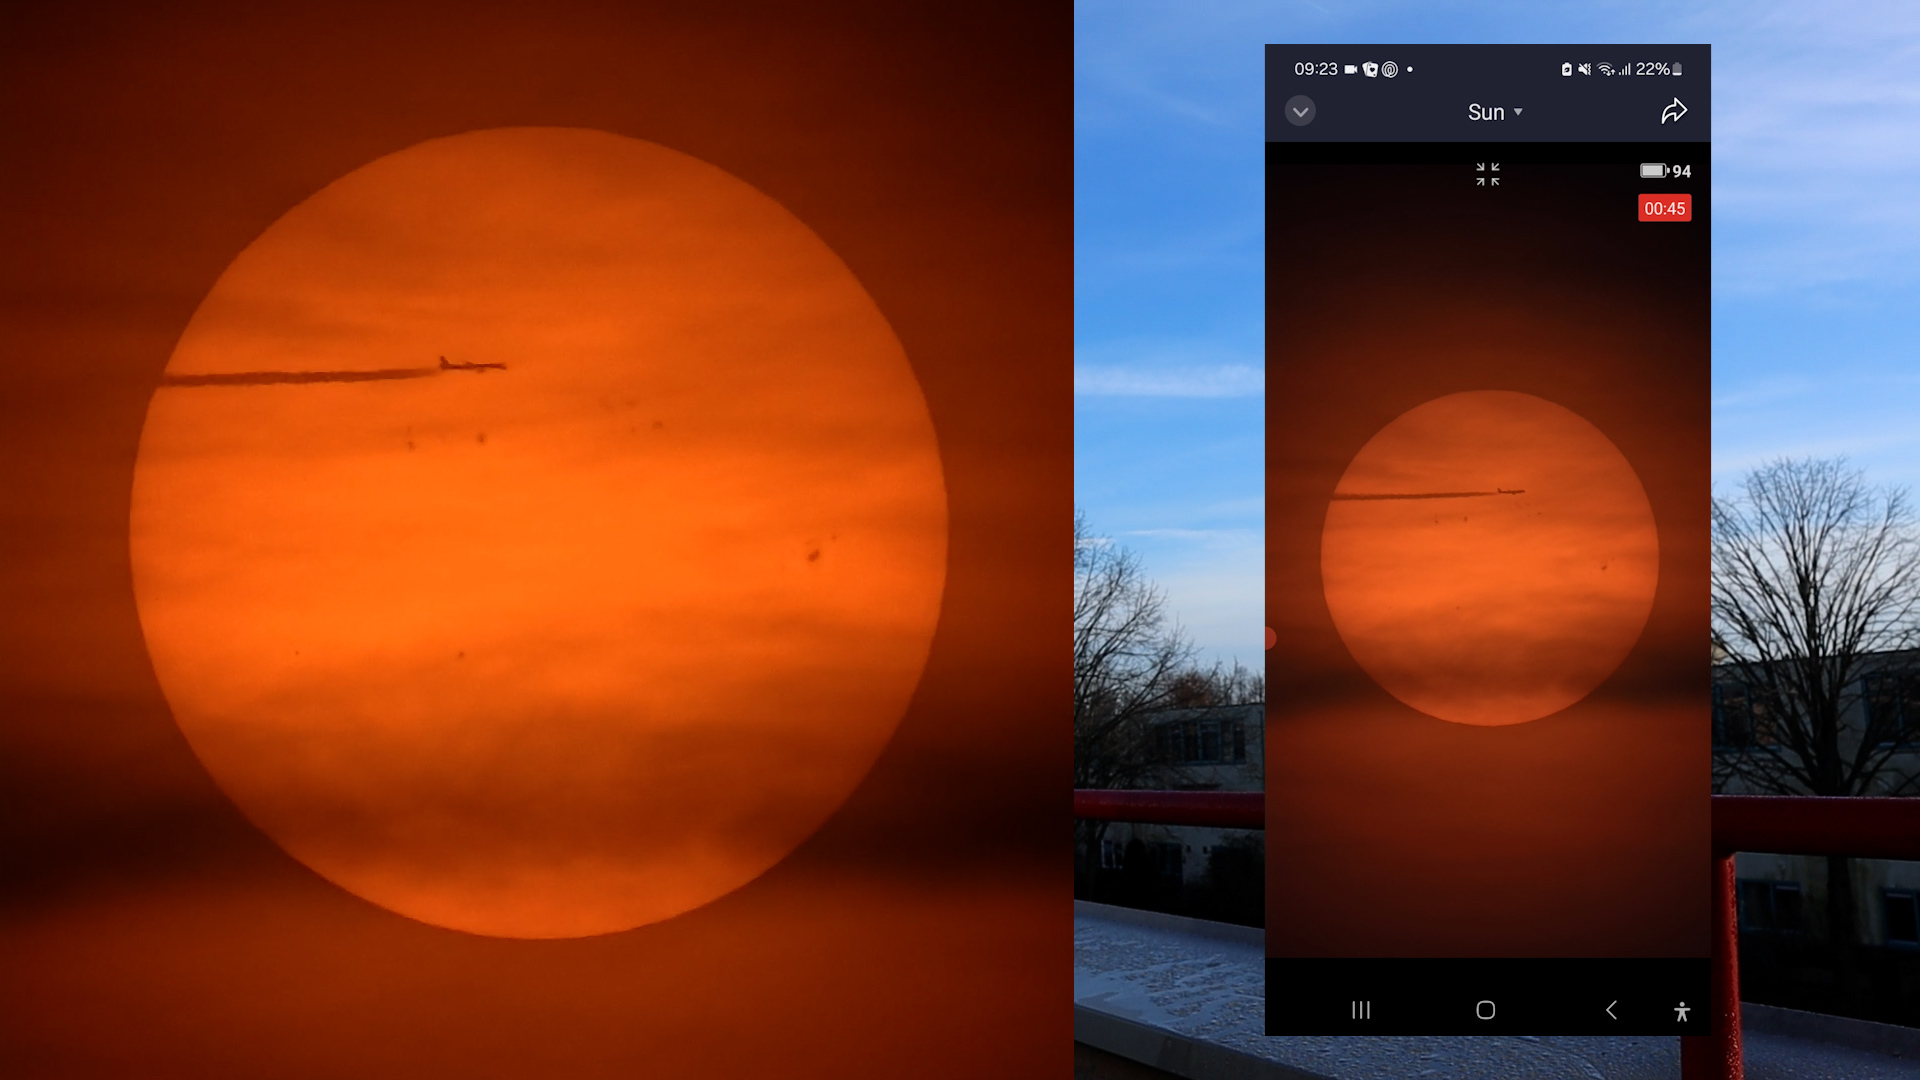
The auto-focus feature is also excellent and fast. Just select the AF function on the right of your screen and use the green square box to select your point of focus, and the Seestar S50 will auto-focus within seconds. Taking photos is easy; just select ‘photo’ at the bottom of the screen and hit the button to shoot a quick picture. The new solar mode also features a timelapse mode, which I didn’t use, but this feature will be excellent for capturing upcoming solar eclipses. I used the video mode to take a one-minute recording in MP4 of the mysterious Sun, shrouded in clouds. While I was recording, a plane passed in front of the Sun’s disc, which was awesome to watch. I decided to take another video using the 16-bit AVI/RAW format, by clicking on the RAW button and pressing record. These 16-bit RAW videos take up about 1.4 gigabytes per minute and are excellent for people like me who love using post-processing tools on a computer to enhance the image.
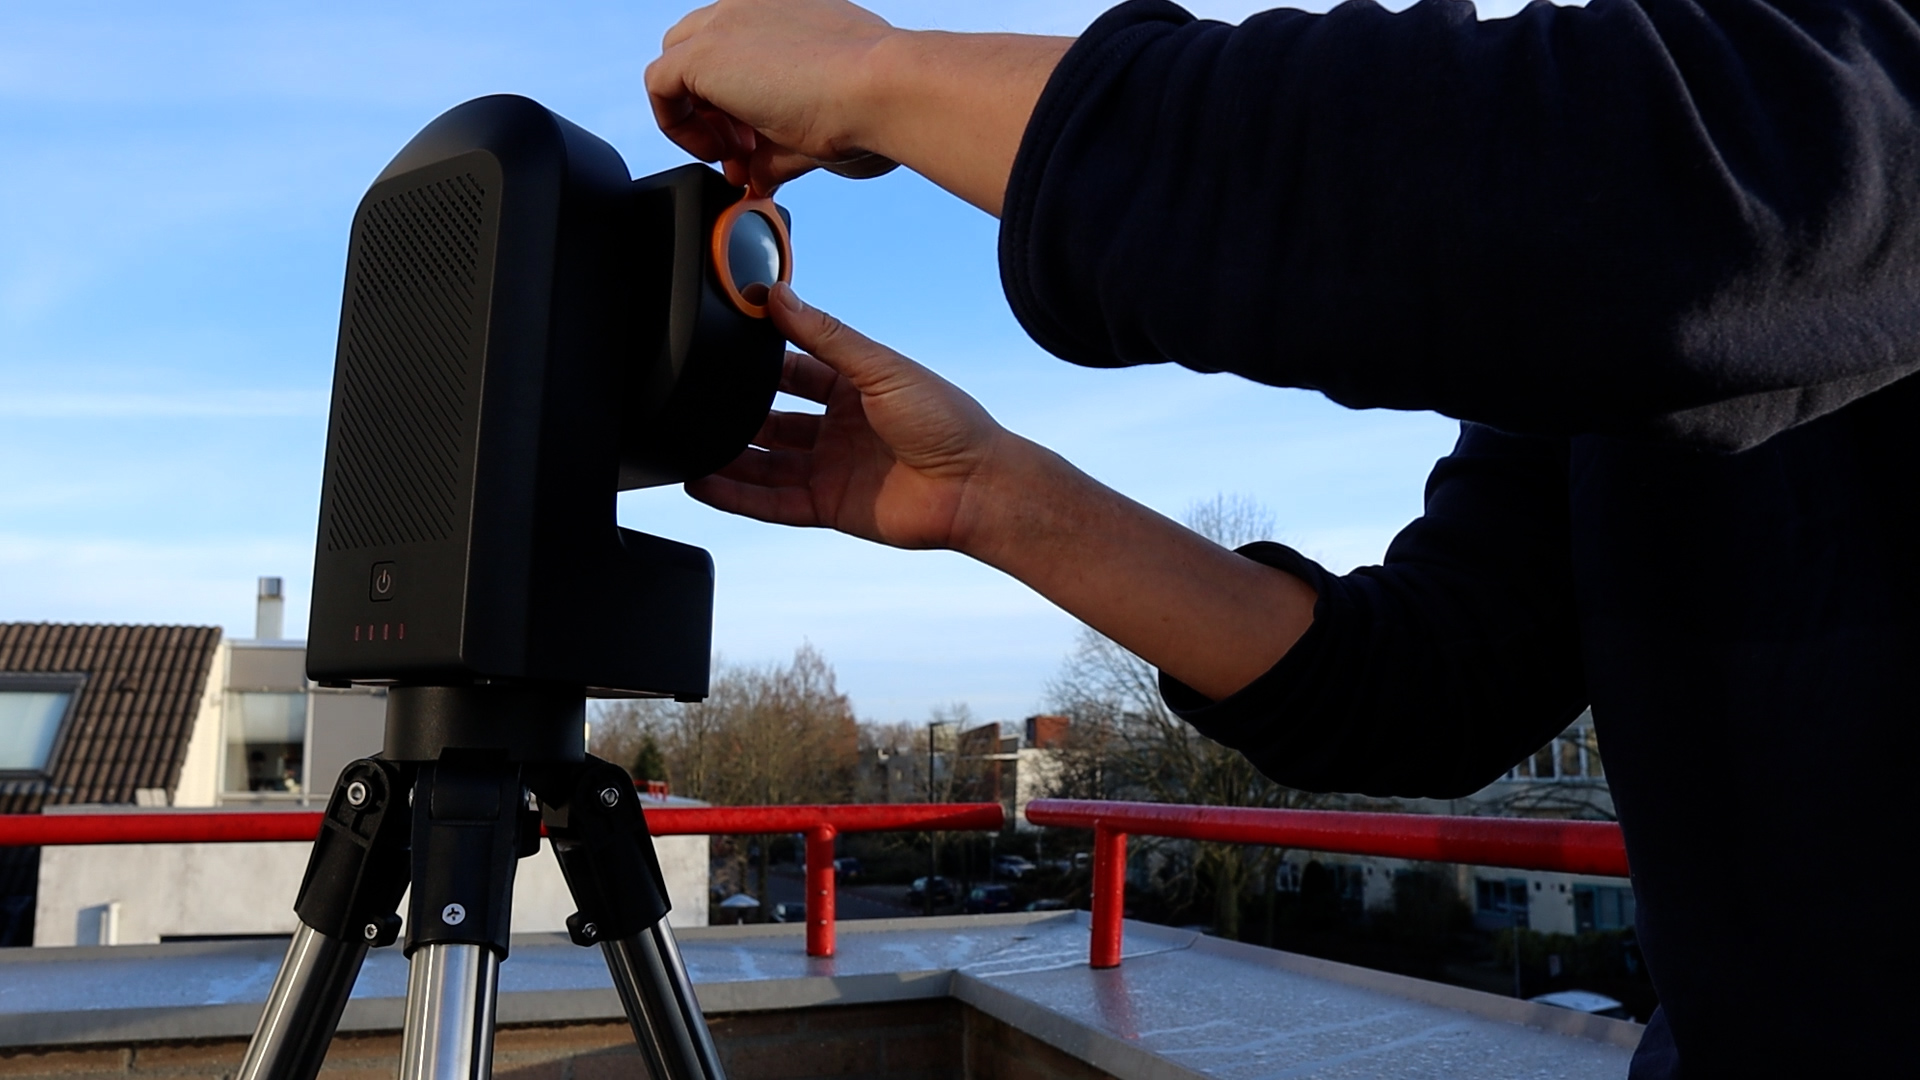
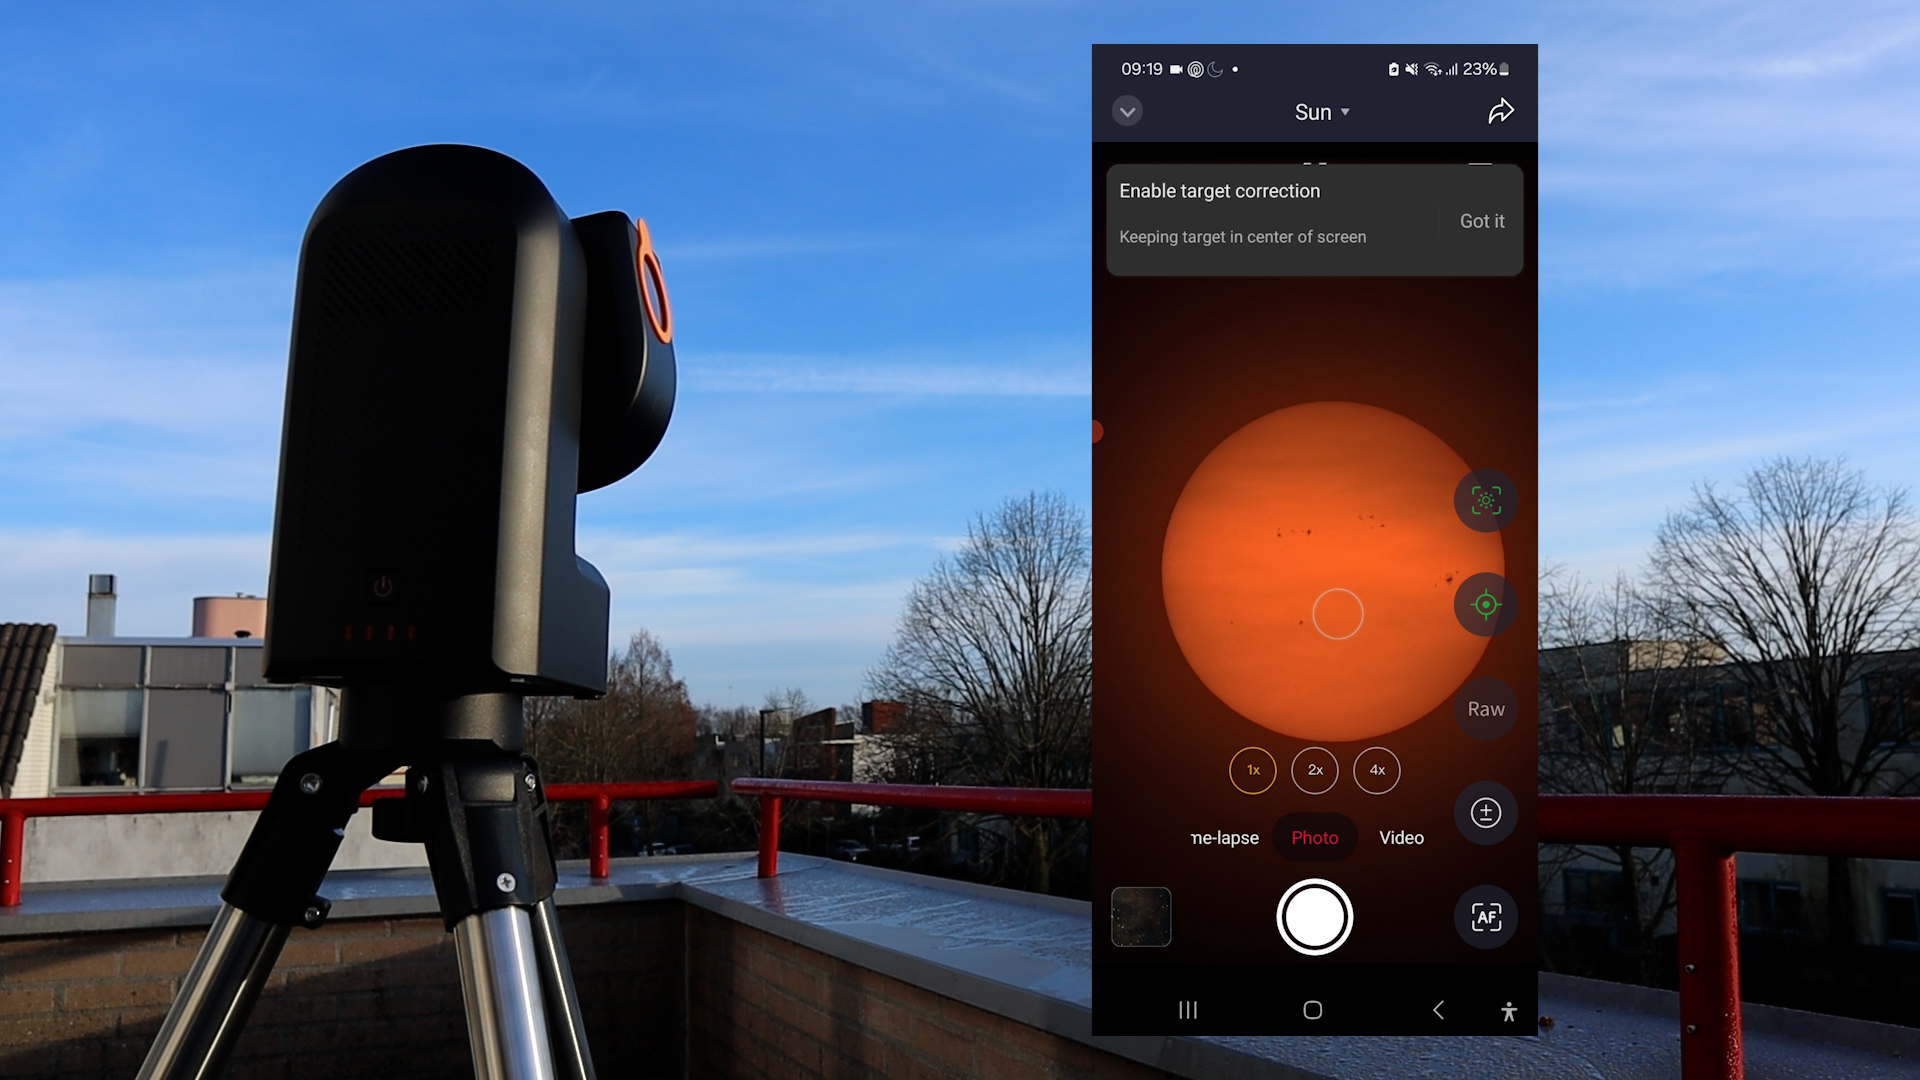
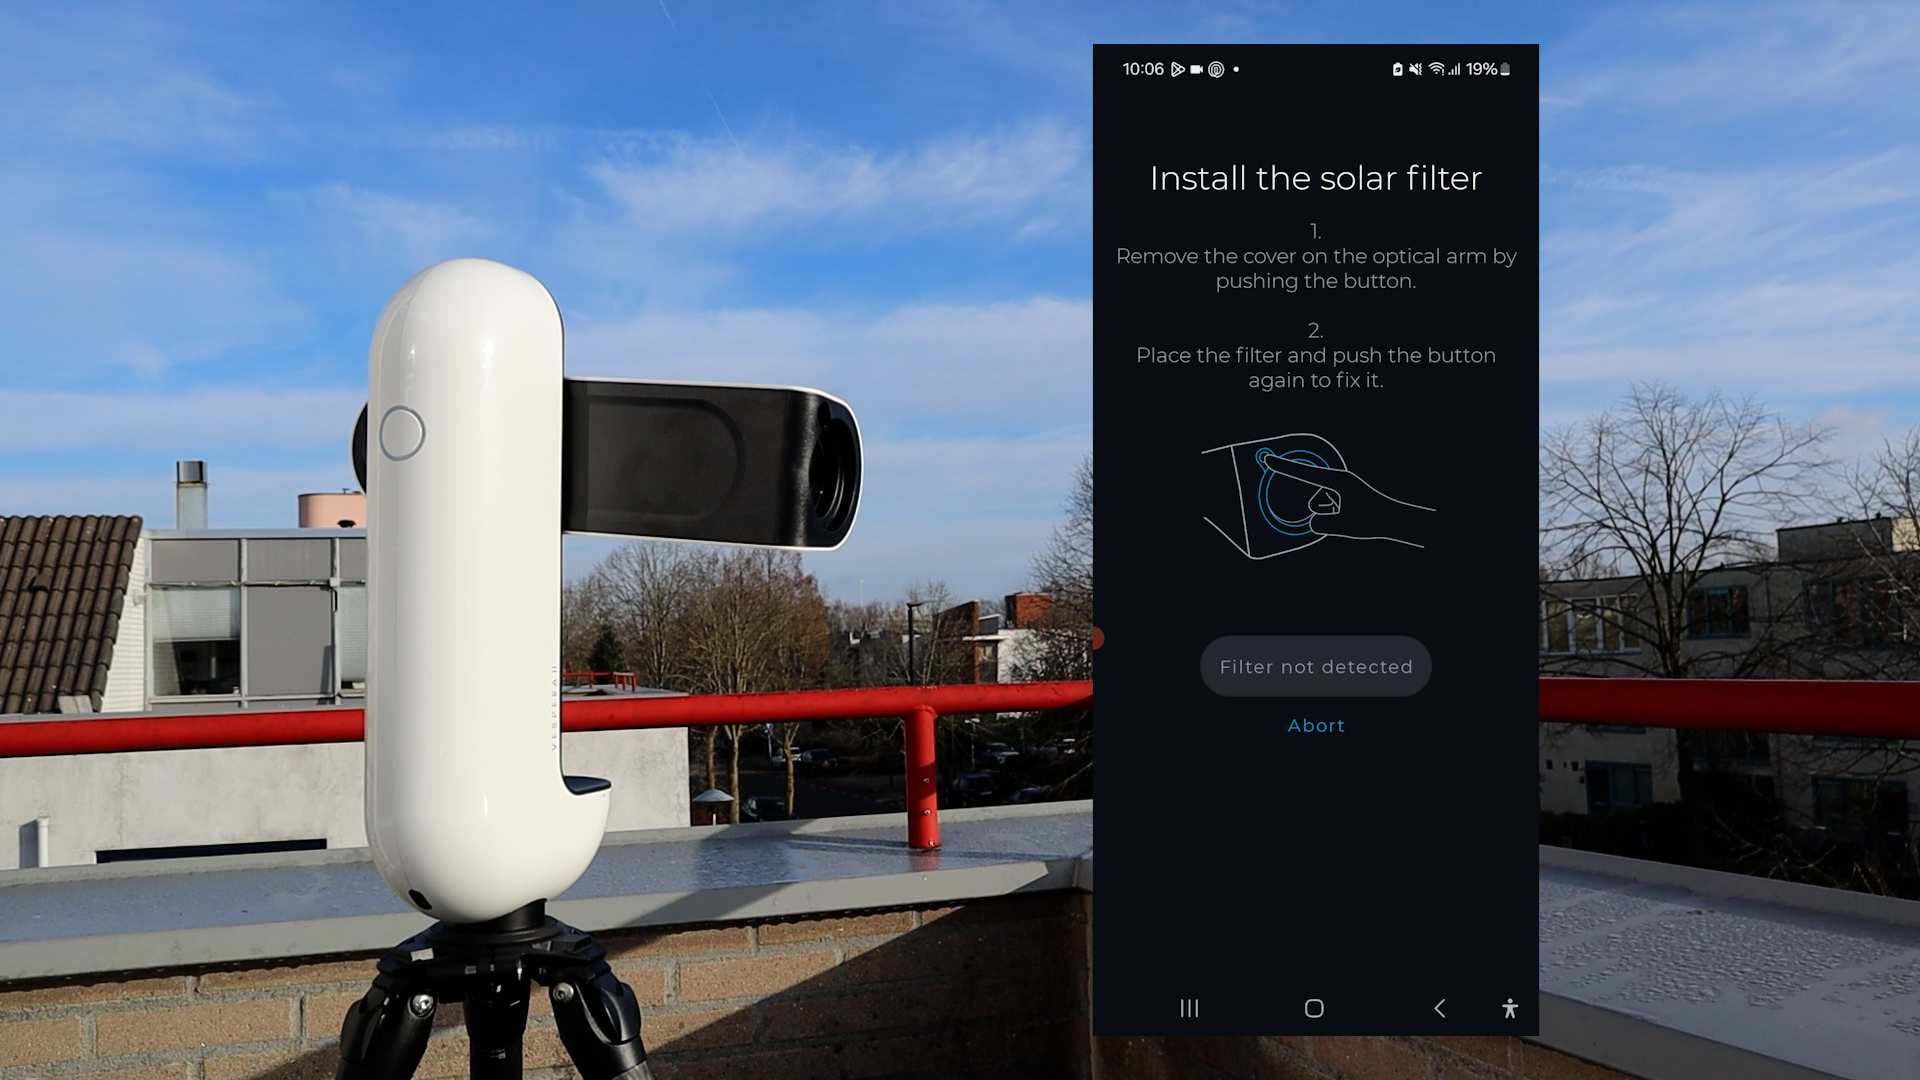
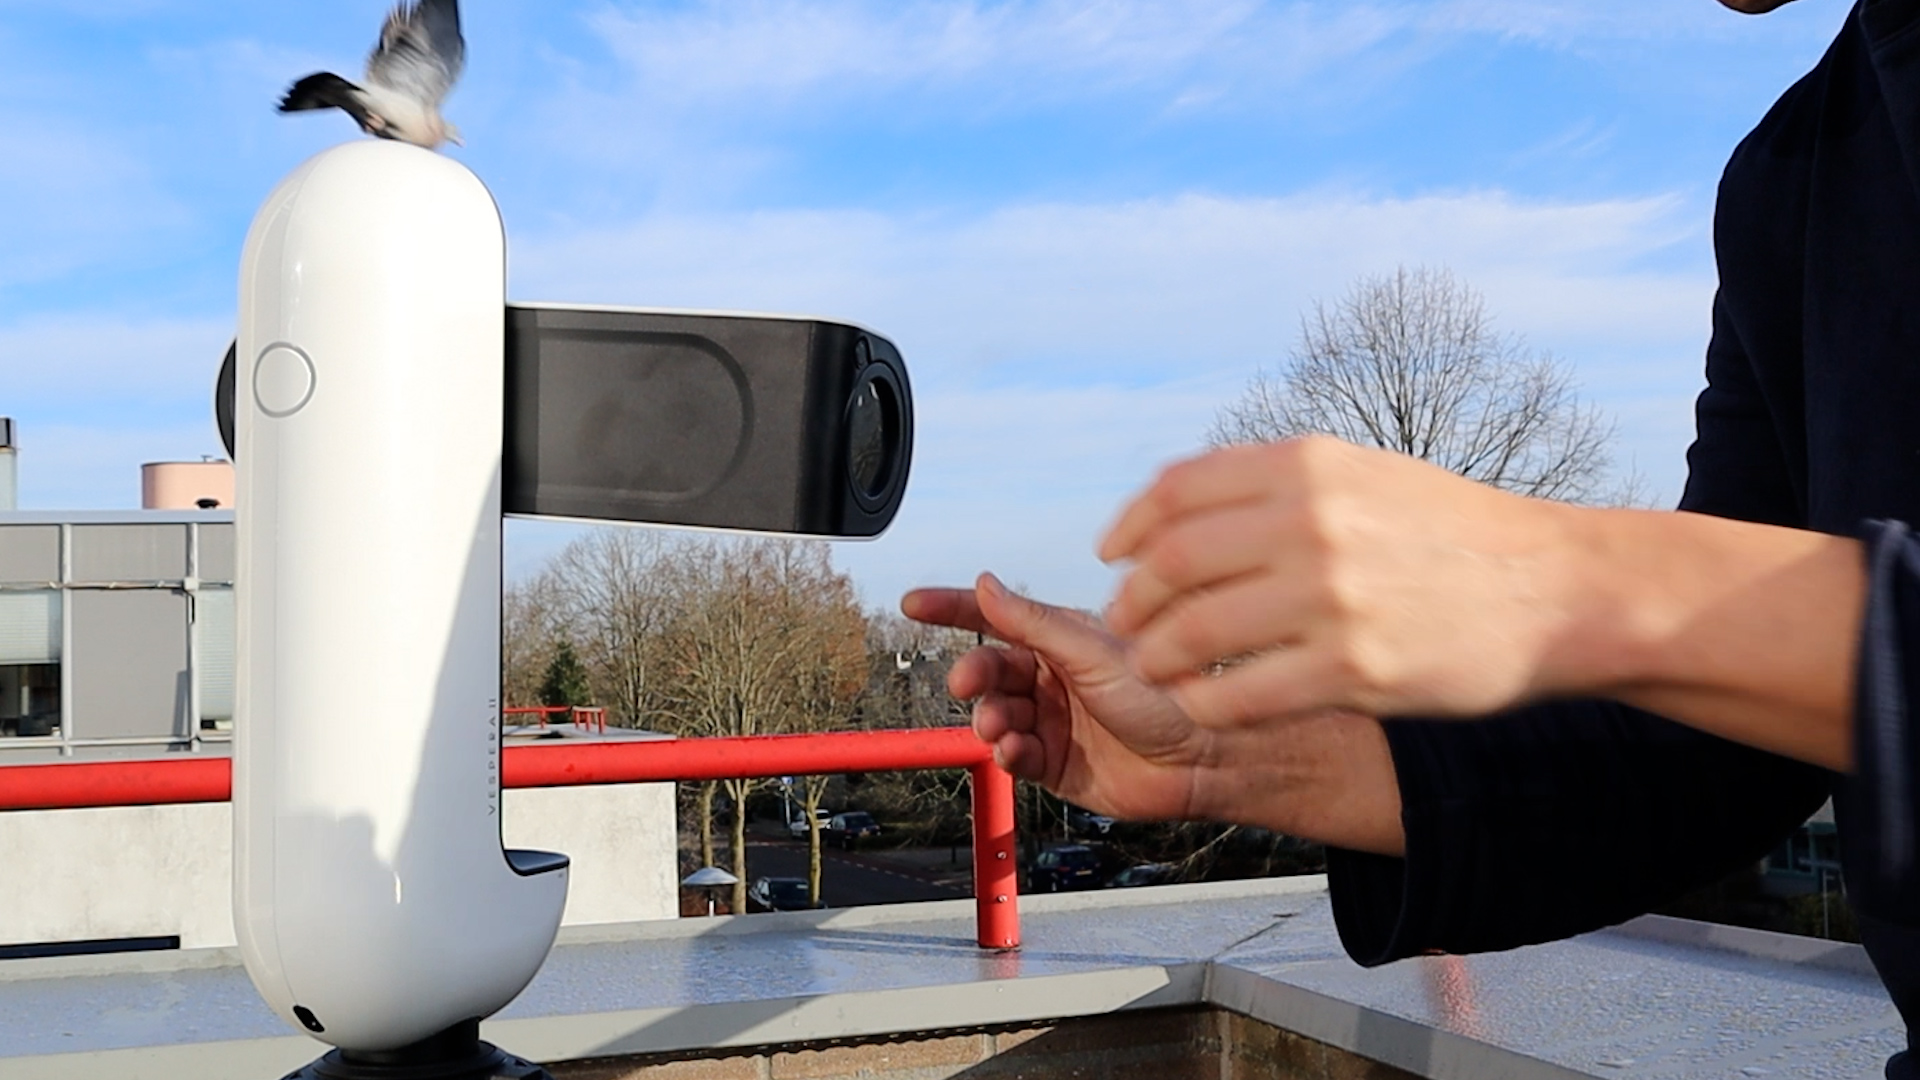
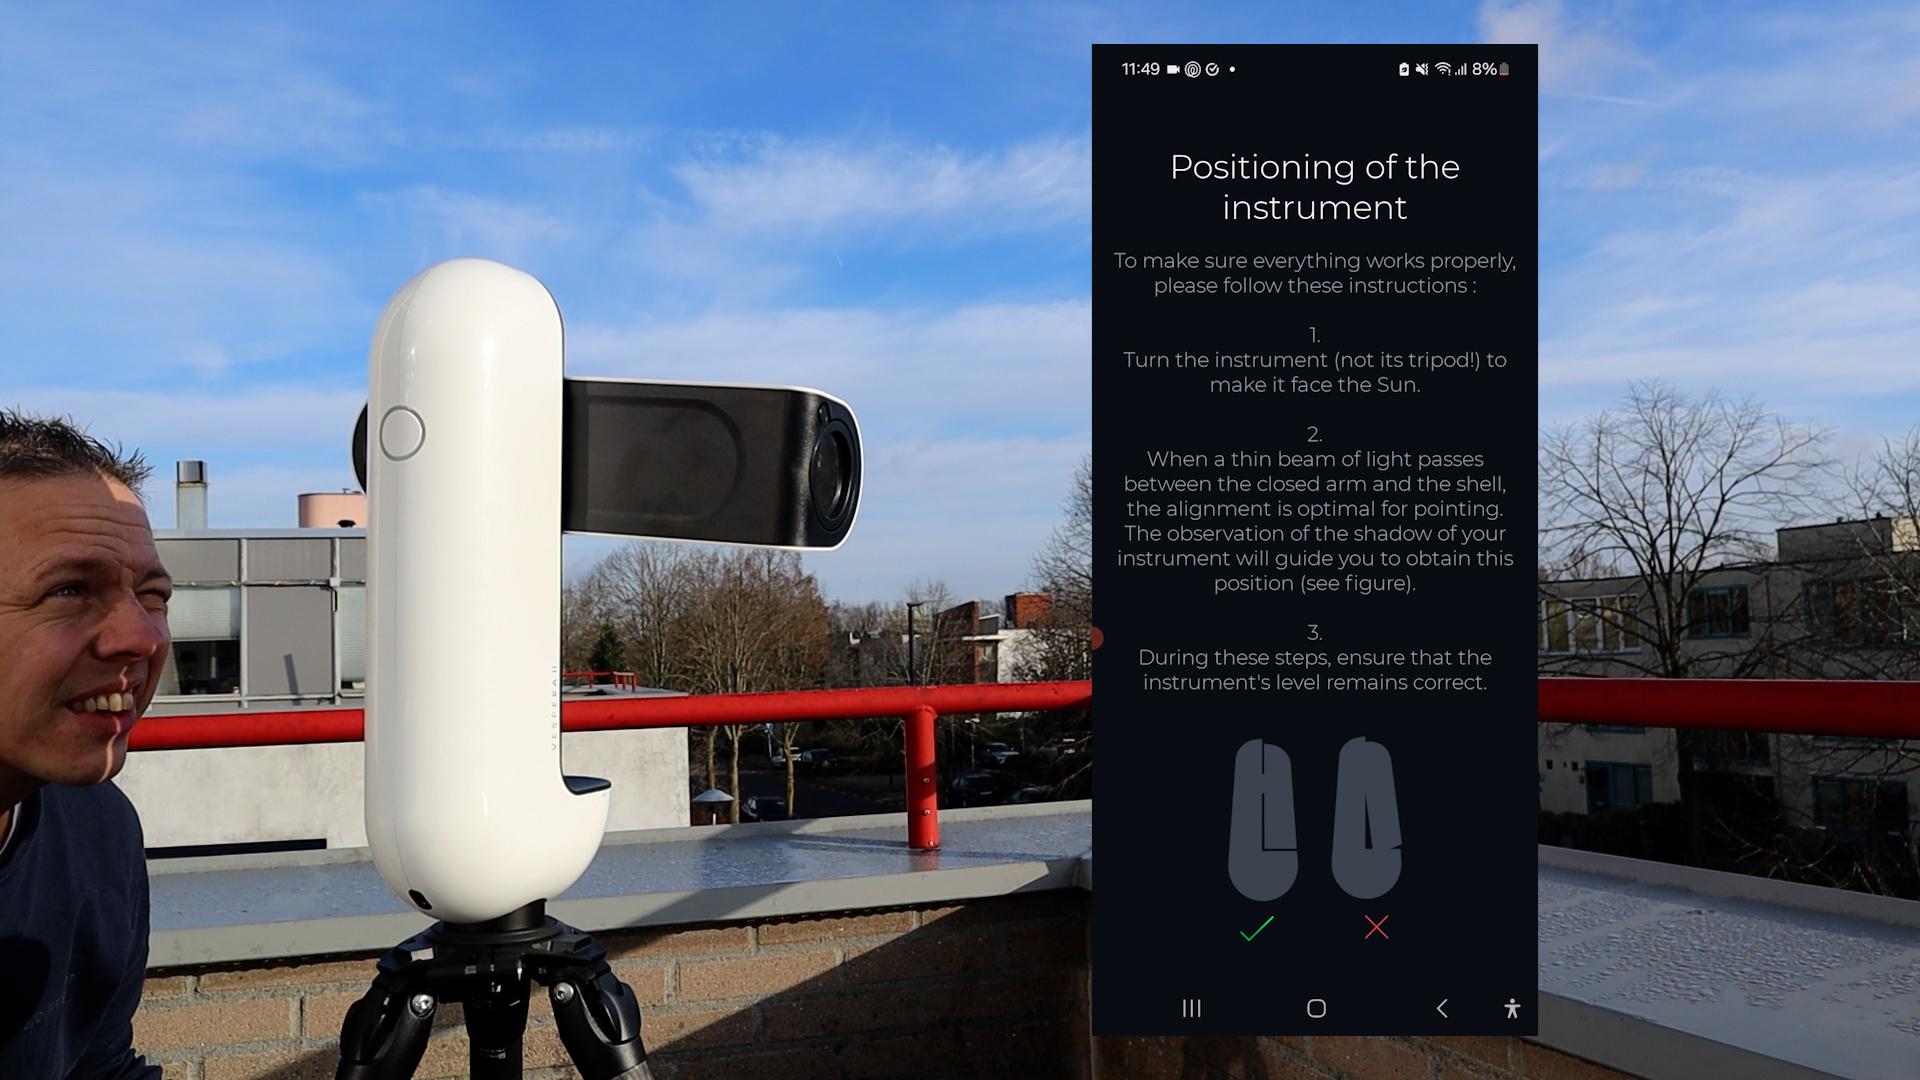
Let’s move on to the Vespera II. I used the special solar mode in the Singularity APP to watch the Sun. Before observation, make sure your tripod is level, the Vaonis Vespera II is facing the Sun, and you’ve installed the solar filter. The Vespera II has a nice click system in front of the telescope’s lens to install filters which felt a bit more secure as compared to using the rubber solar filter ring with the Seestar S50. It took the Vespera II about 4 minutes to find and autofocus on the Sun, which is slower than the Seestar S50. The Singularity app does display all kinds of interesting facts about the Sun while you’re waiting for the live view.
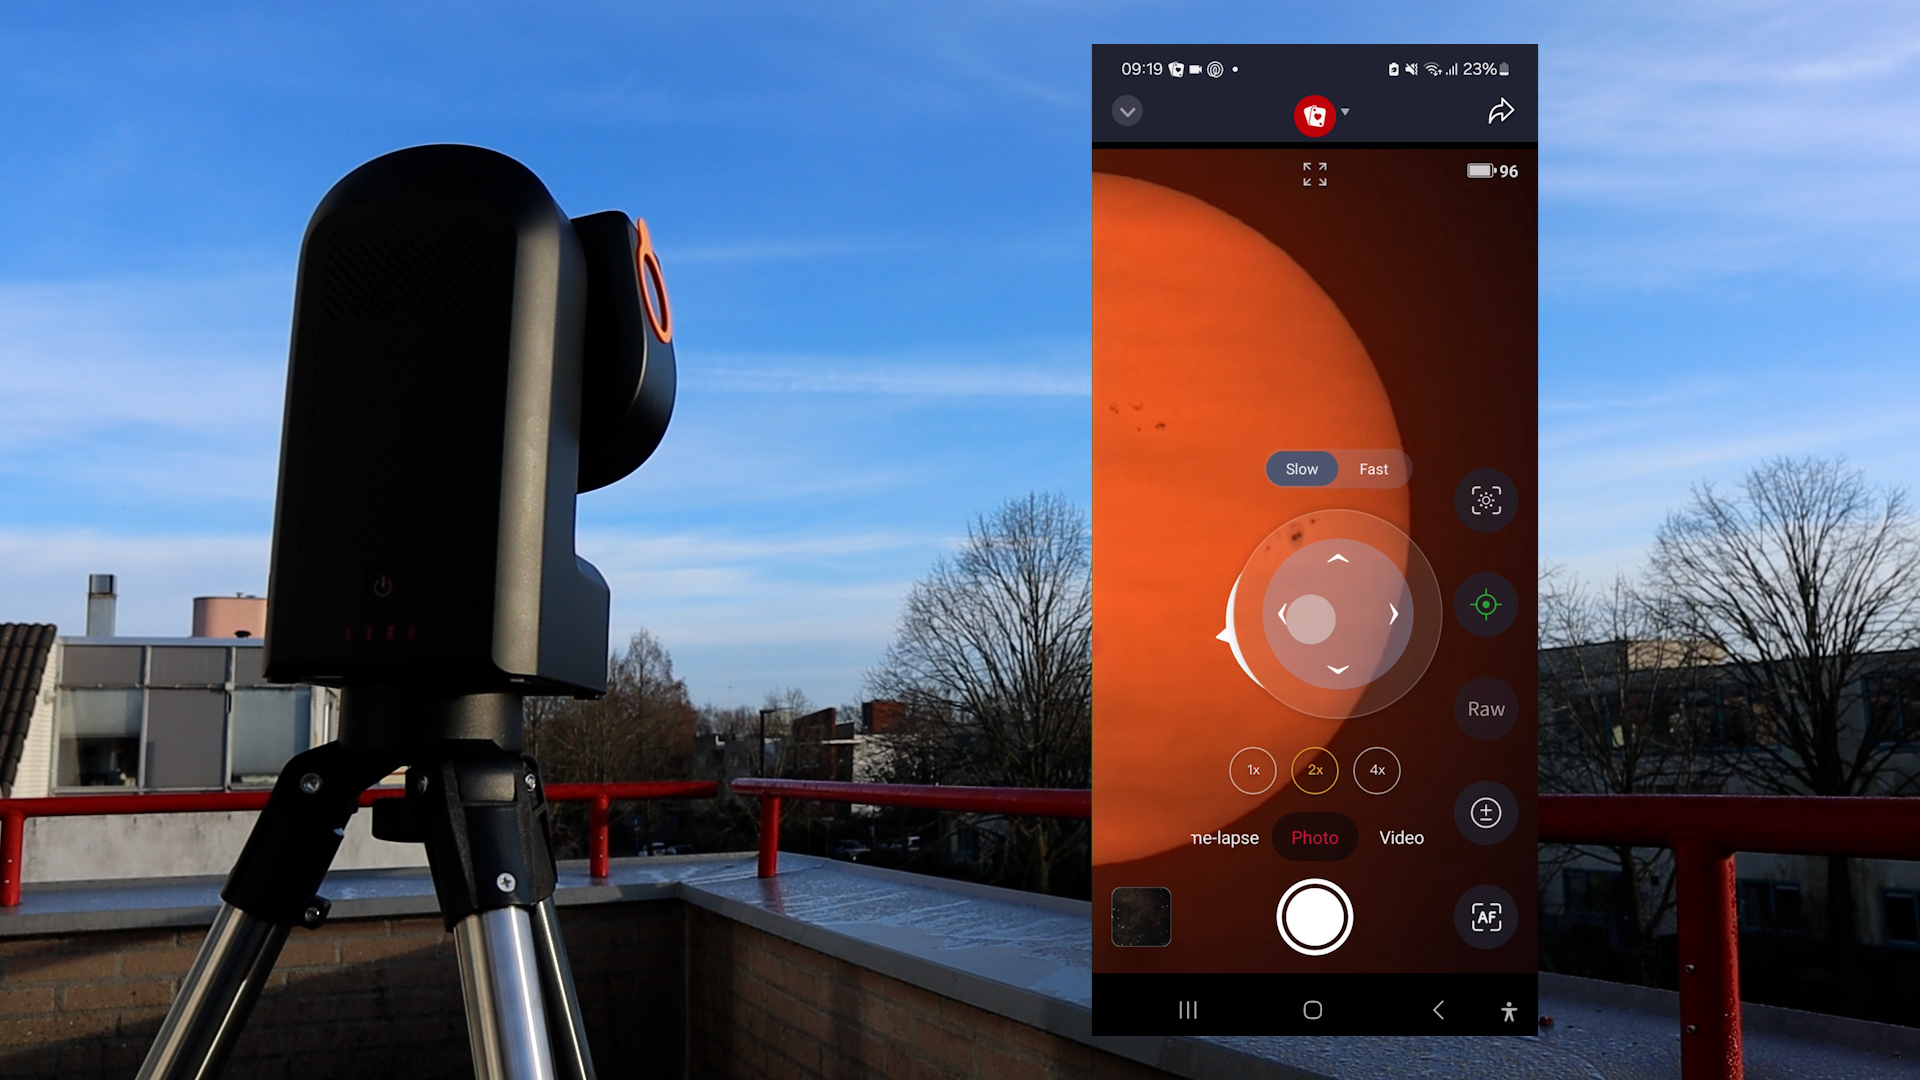
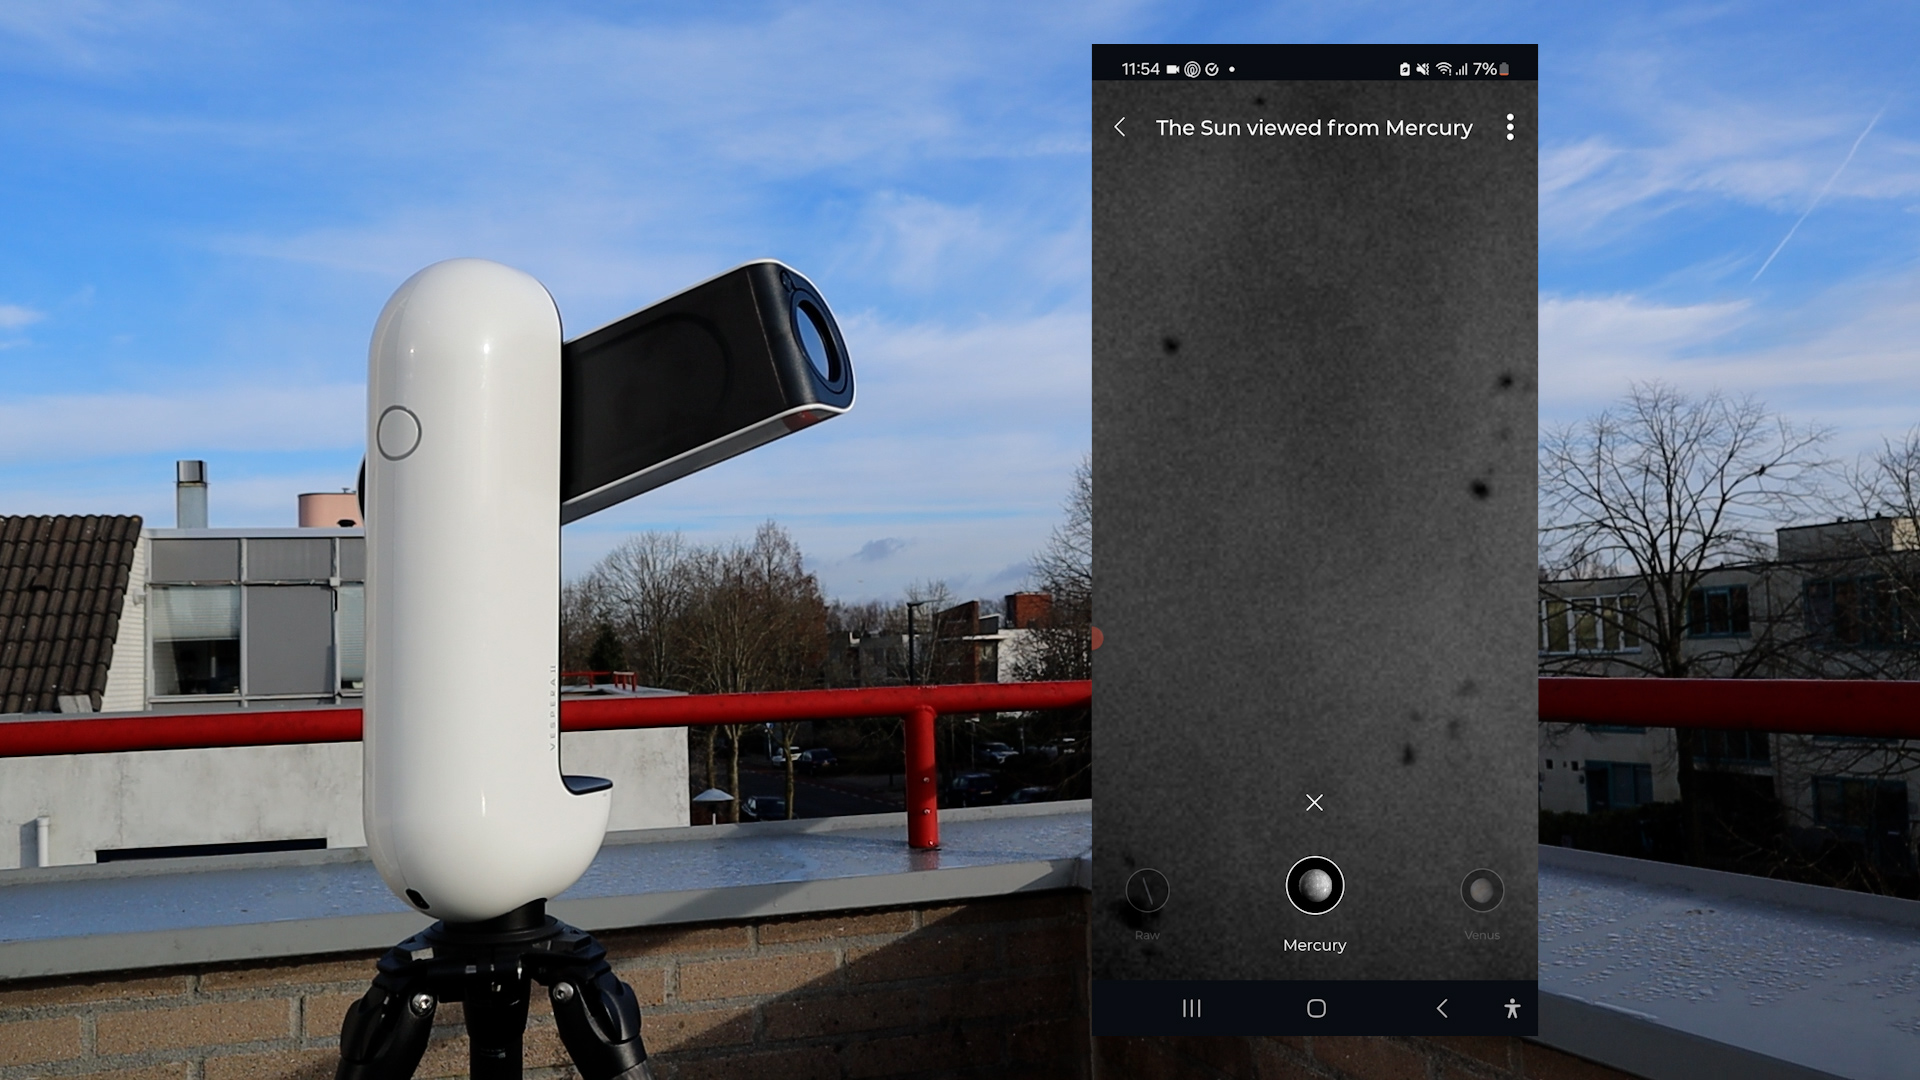
As the camera sensor on the Vespera is much bigger, the Sun appears a bit smaller on the screen of your smart device. However, you can easily pinch your screen to digitally zoom in on the Sun and watch the sunspots up close. Also, the APP has an interesting solar system feature to see how large the Sun would be when viewed from different planets in our solar system. You can snap a photo of the Sun by pressing on the photo icon. And in the Vespera APP under image formats, you can opt to switch on live images, which will download all photos in JPEG format that are taken during live observations of the Sun, the Moon, and the Planets.

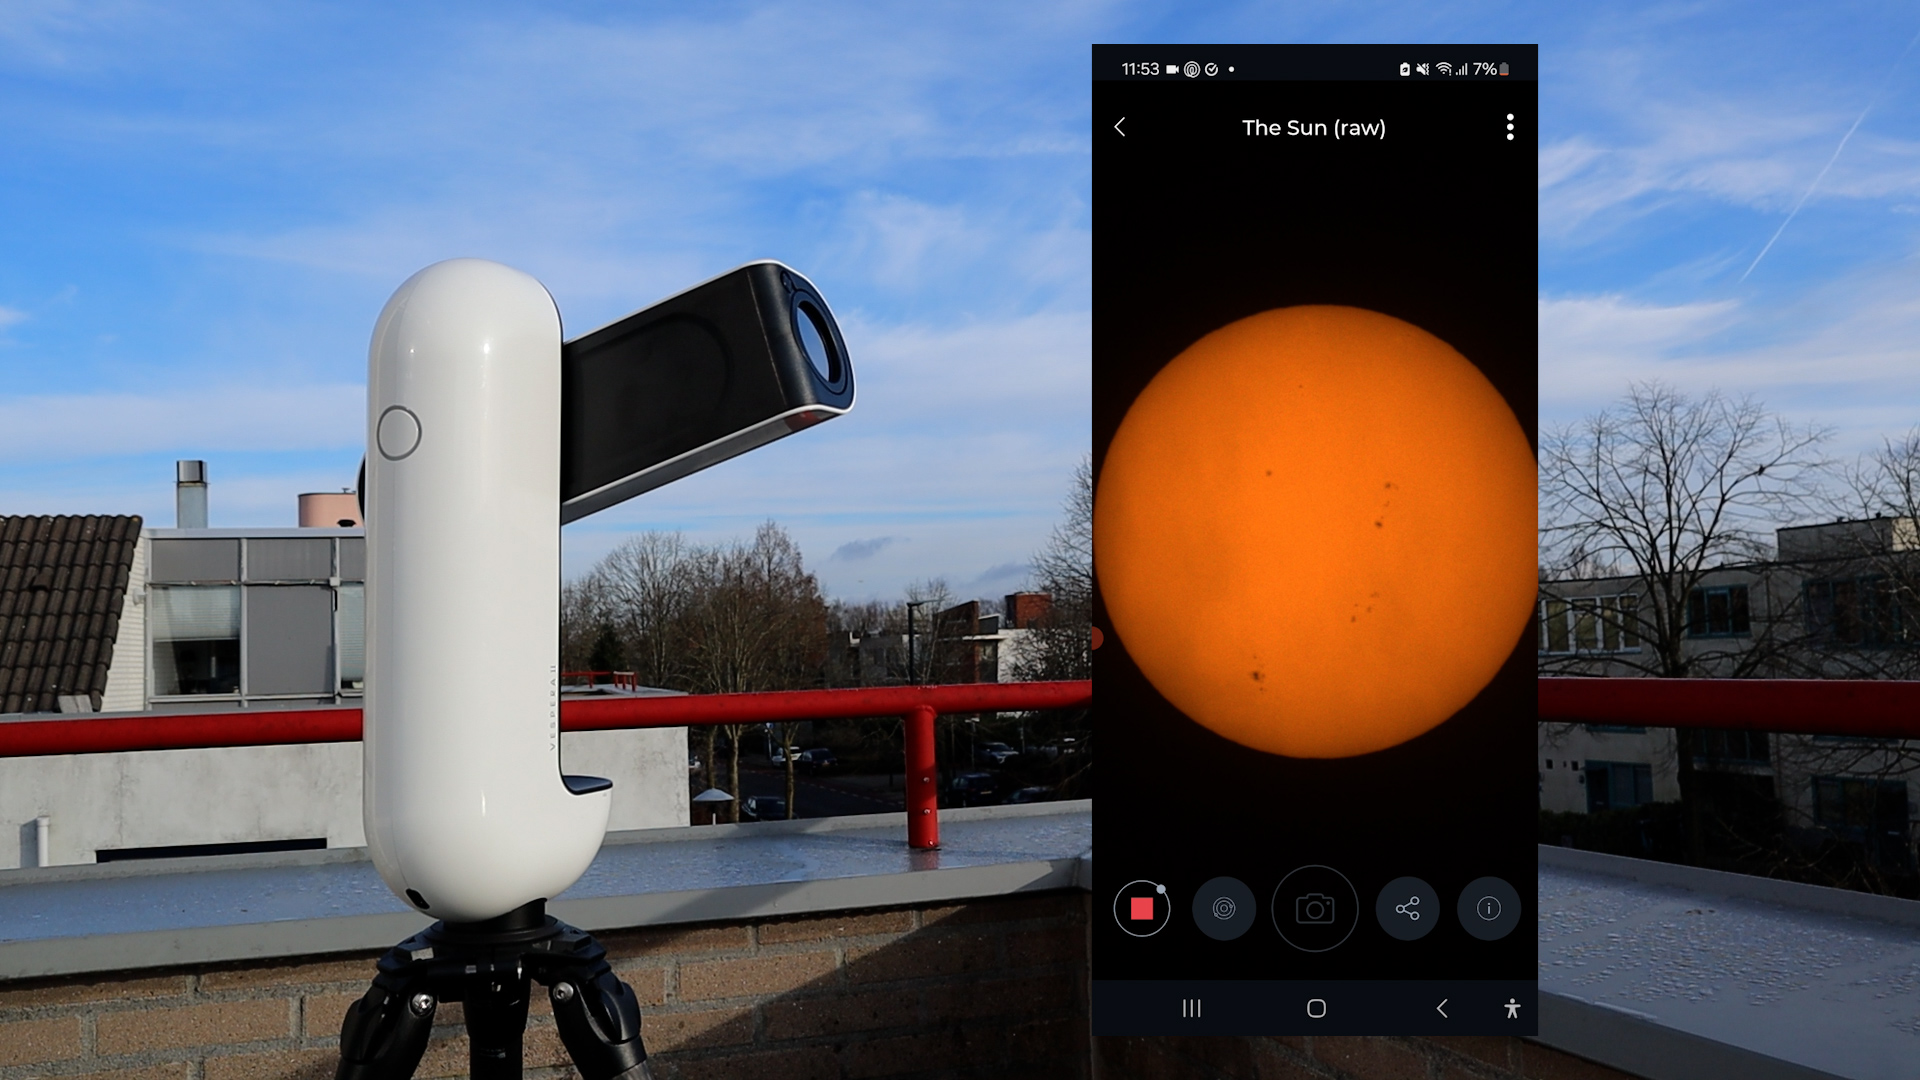
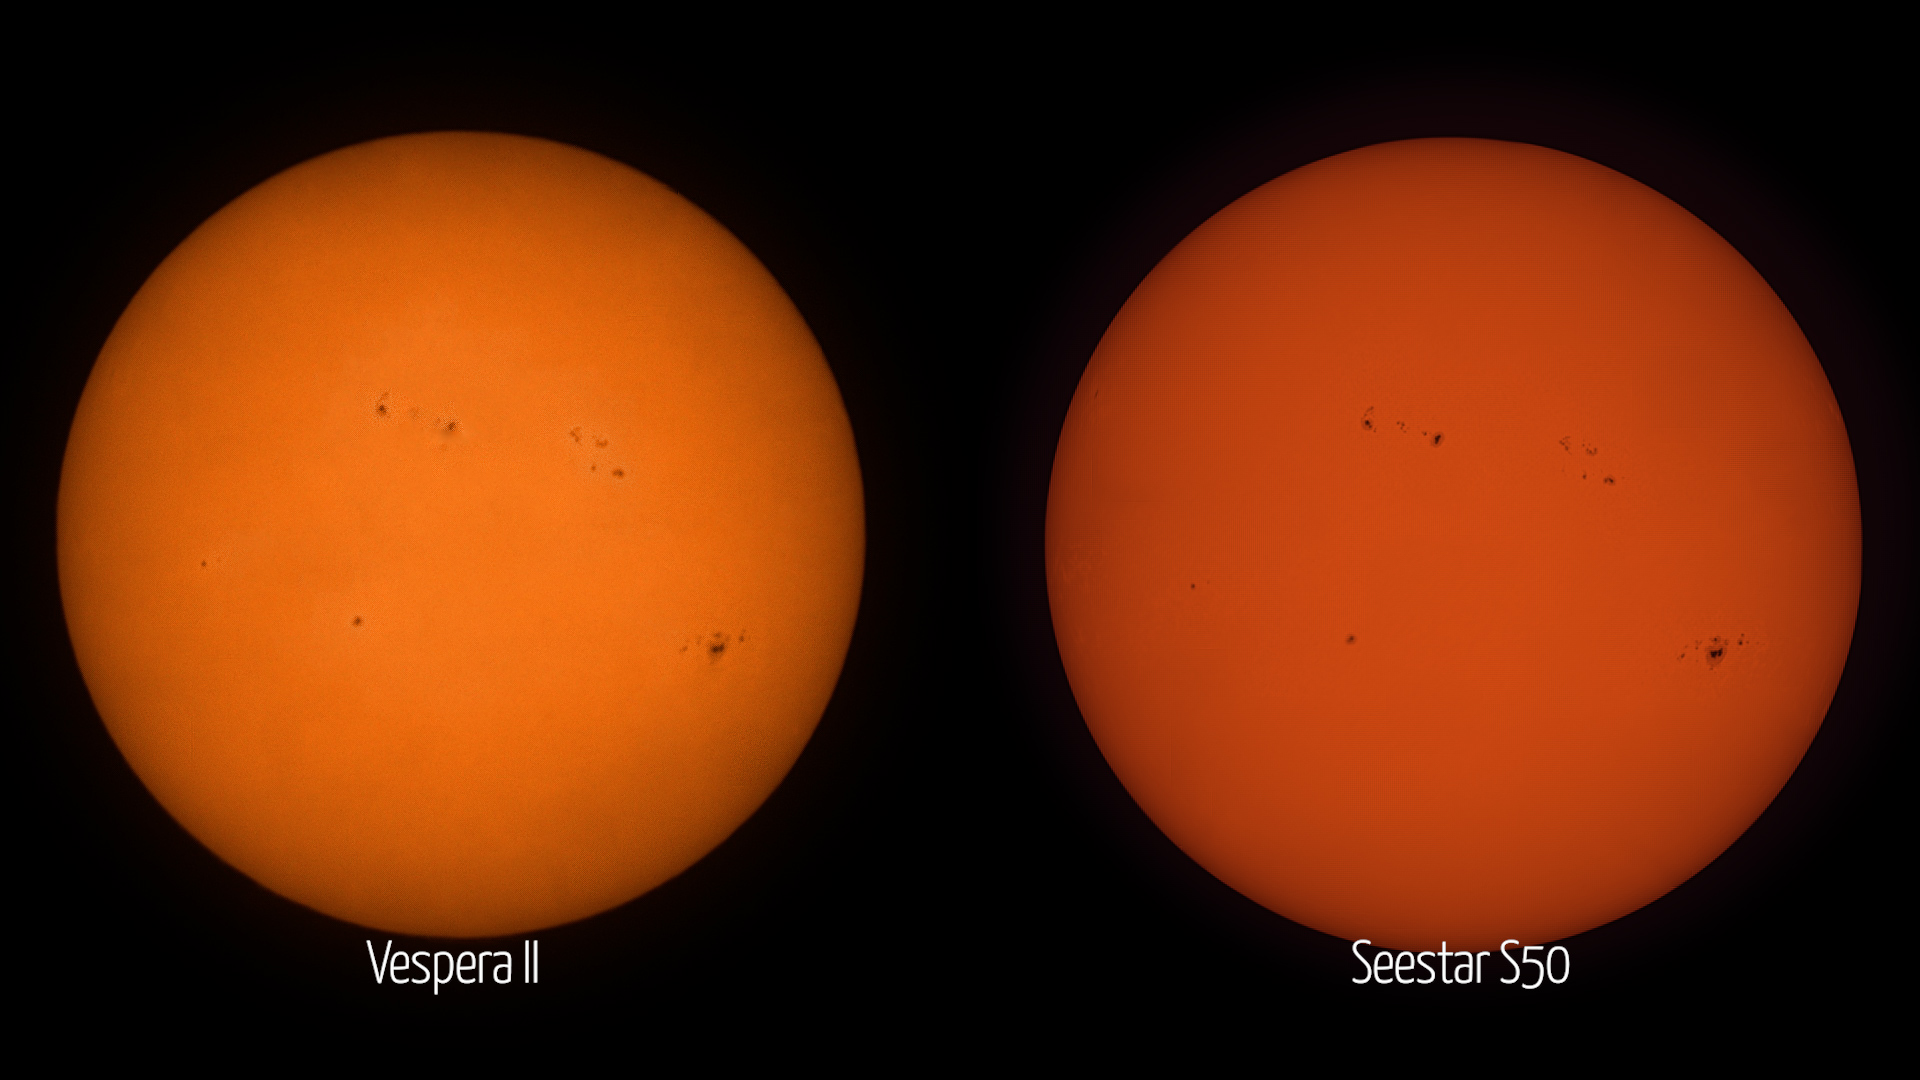
Comparing both solar modes, the Seestar S50 does offer extra features, like taking videos and time-lapses of the Sun compared to the Vaonis Vespera II. Also, the autofocus feature only takes a couple of seconds on the Seestar S50, whereas it takes about 2 minutes with the Vaonis Vespera II. Both telescopes produced nice live views of the Sun, with the Vespera providing a yellowish glow and the Seestar S50 an orange one. In terms of post-processing, the 16-bit AVI/RAW video files of the Seestar S50 offer great opportunities to produce a high-quality picture of the Sun whereas the Vaonis Vespera II downloads JPEG images. Here are two processed images of the Sun taken on a very hazy, cloudy day, so you probably do better when you try it on a clear day
The Moon: ZWO Seestar S50 vs Vaonis Vespera II
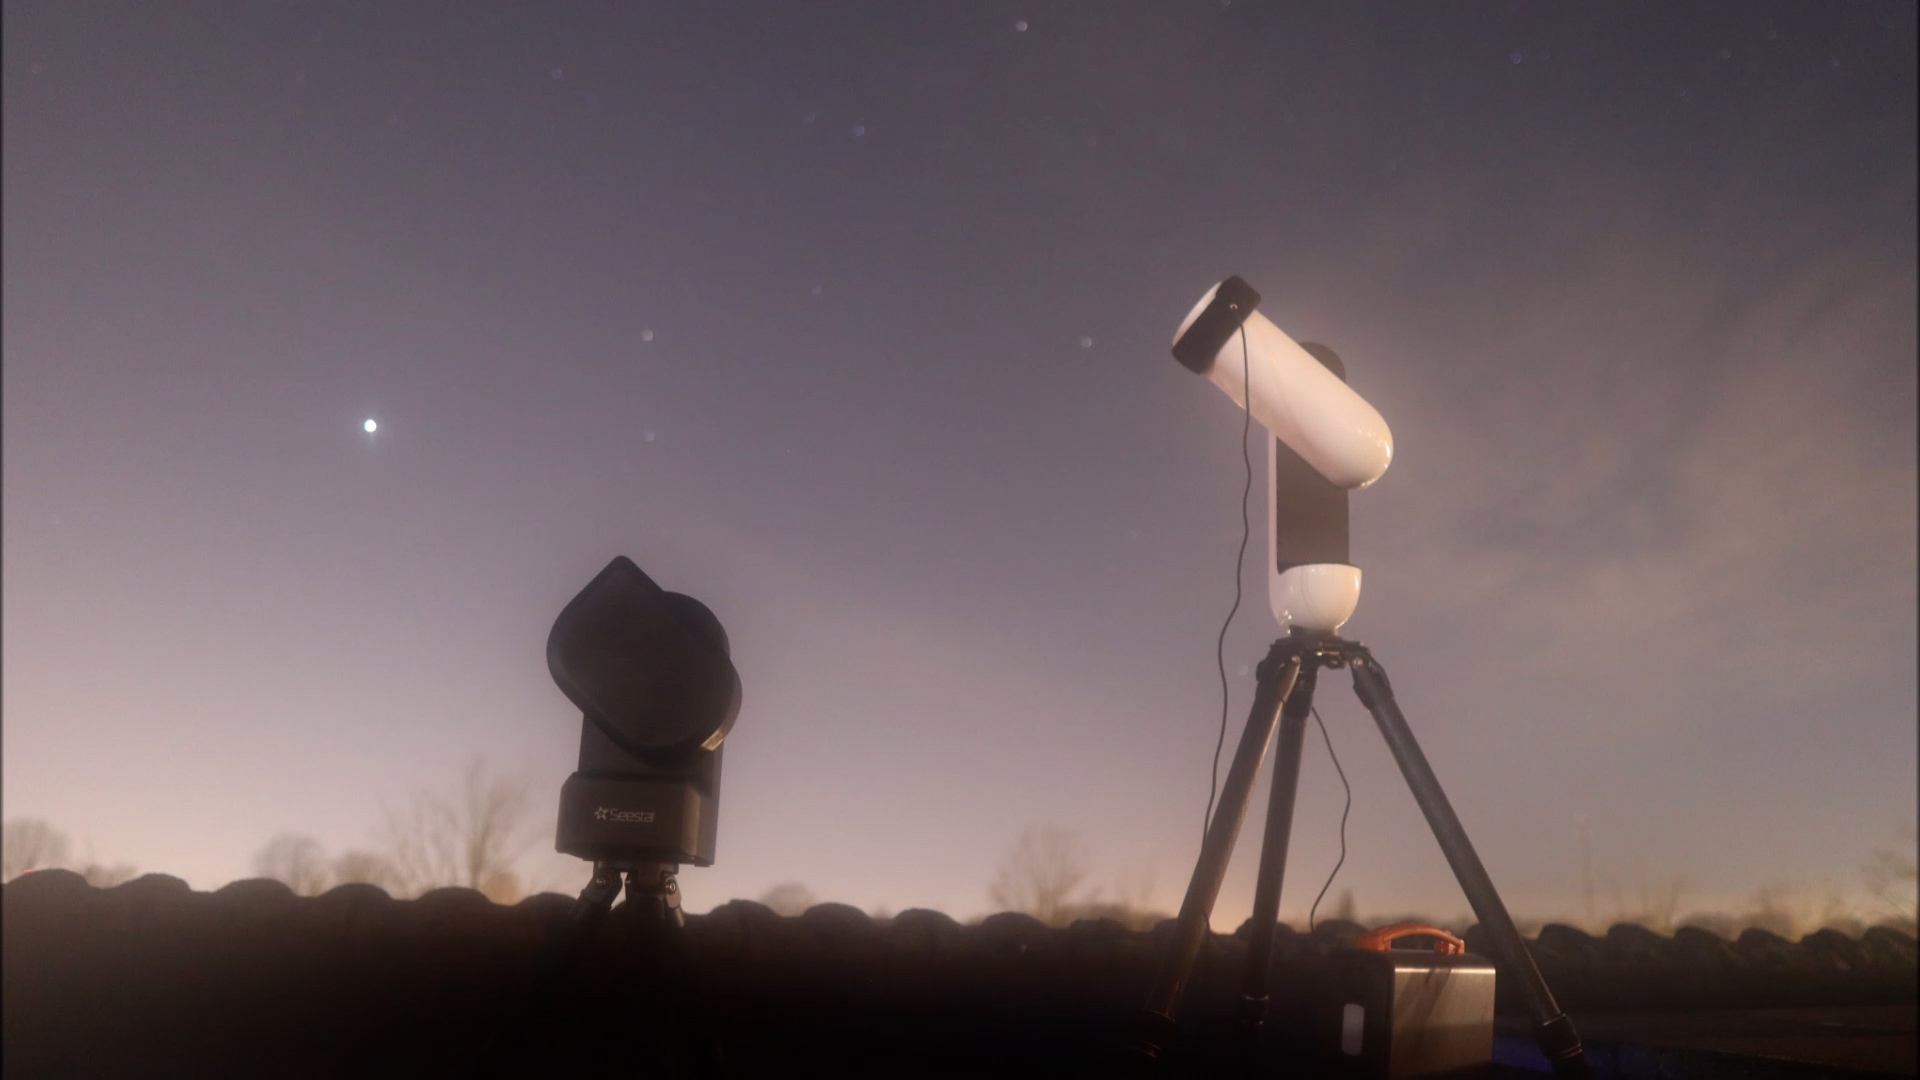
During my testing night, we were treated to a small but lovely crescent moon in the night sky. I positioned both telescopes on my rooftop and re-initiated both apps to observe the Moon. Let’s begin with the Vaonis Vespera II this time.
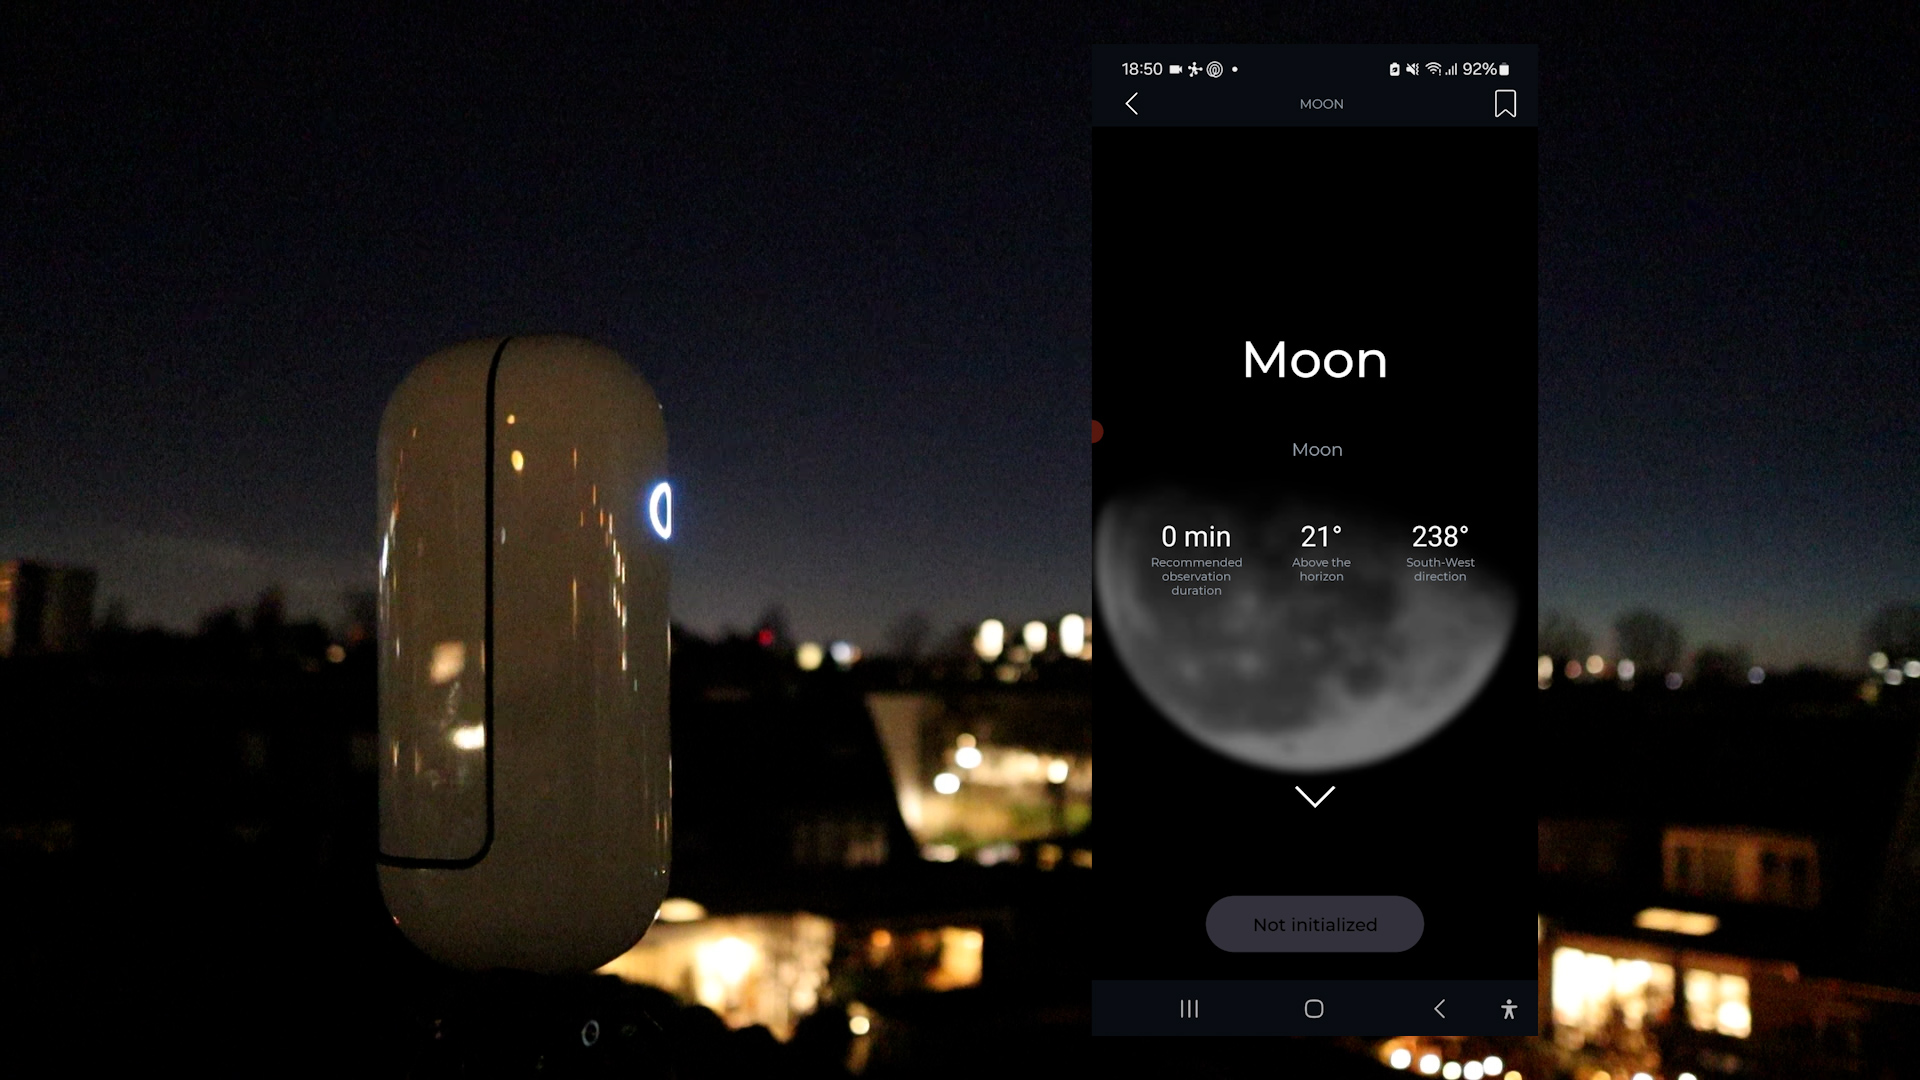
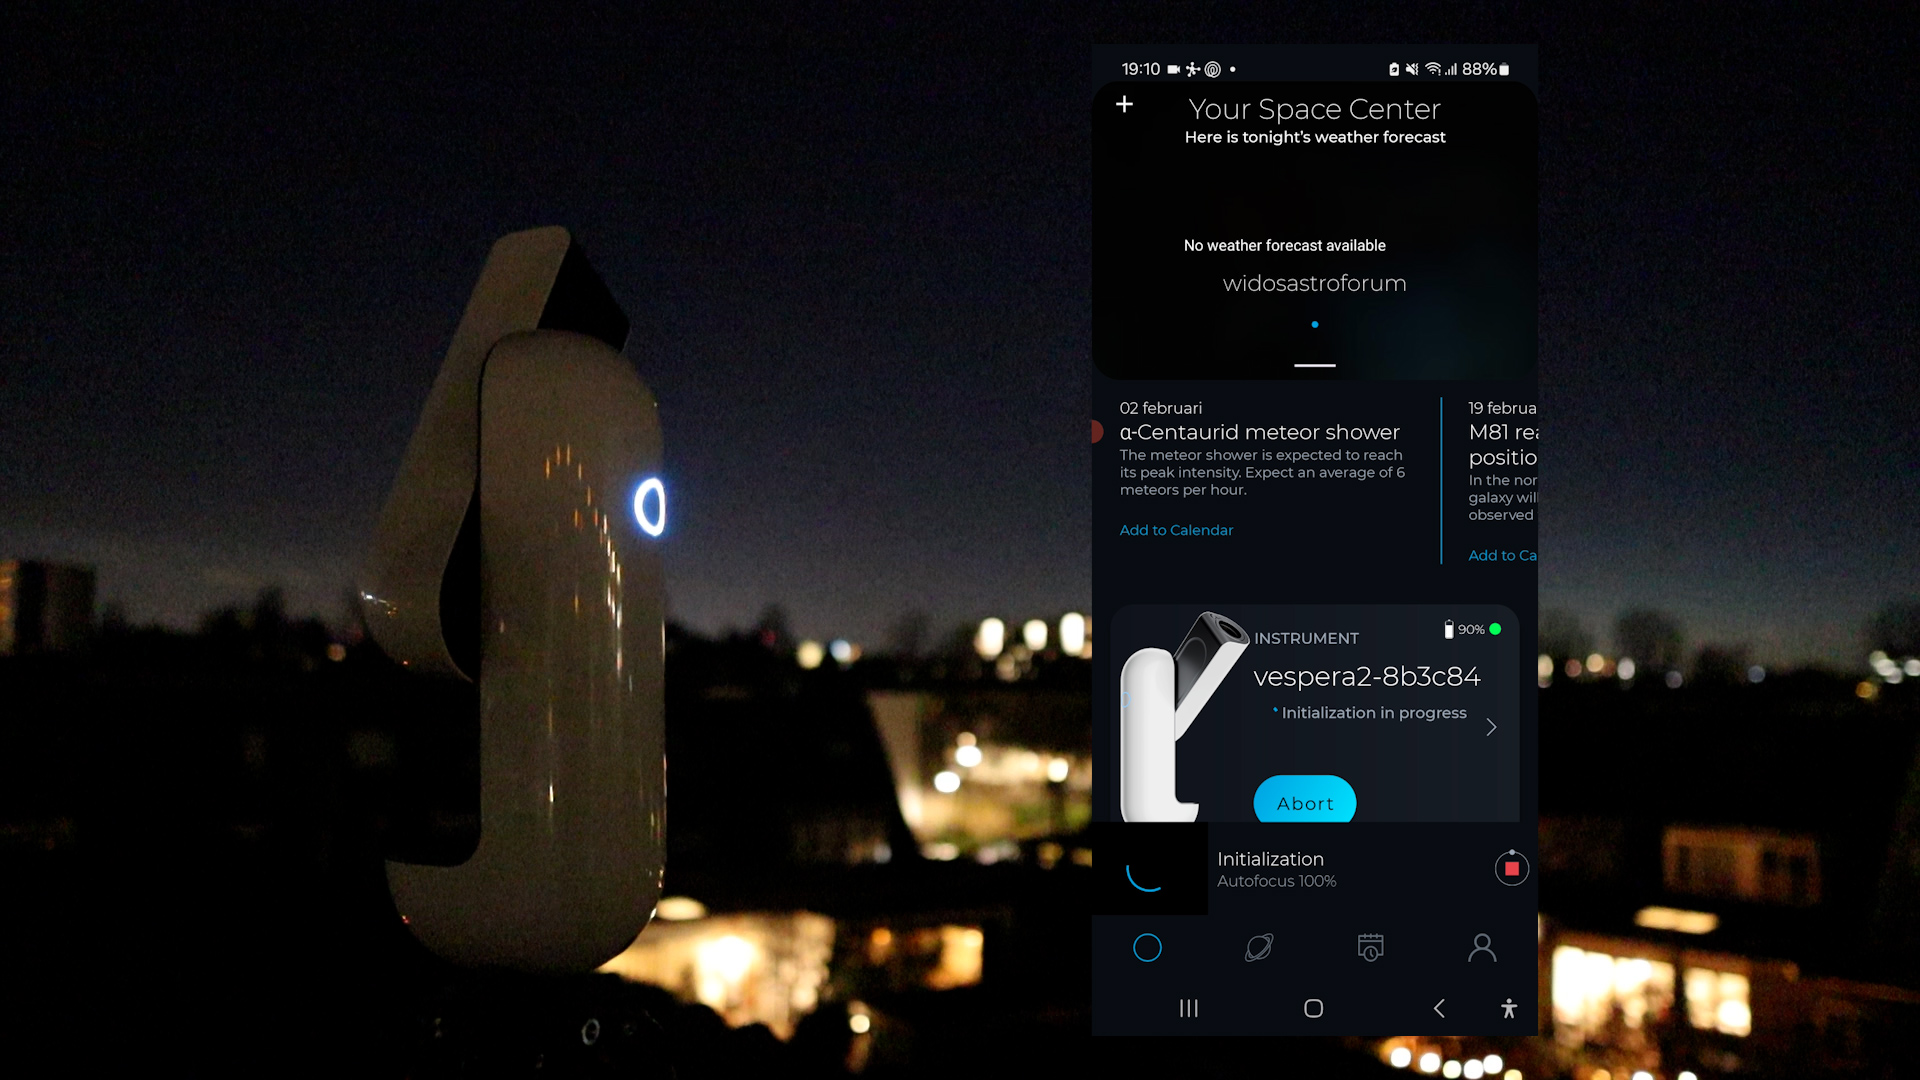
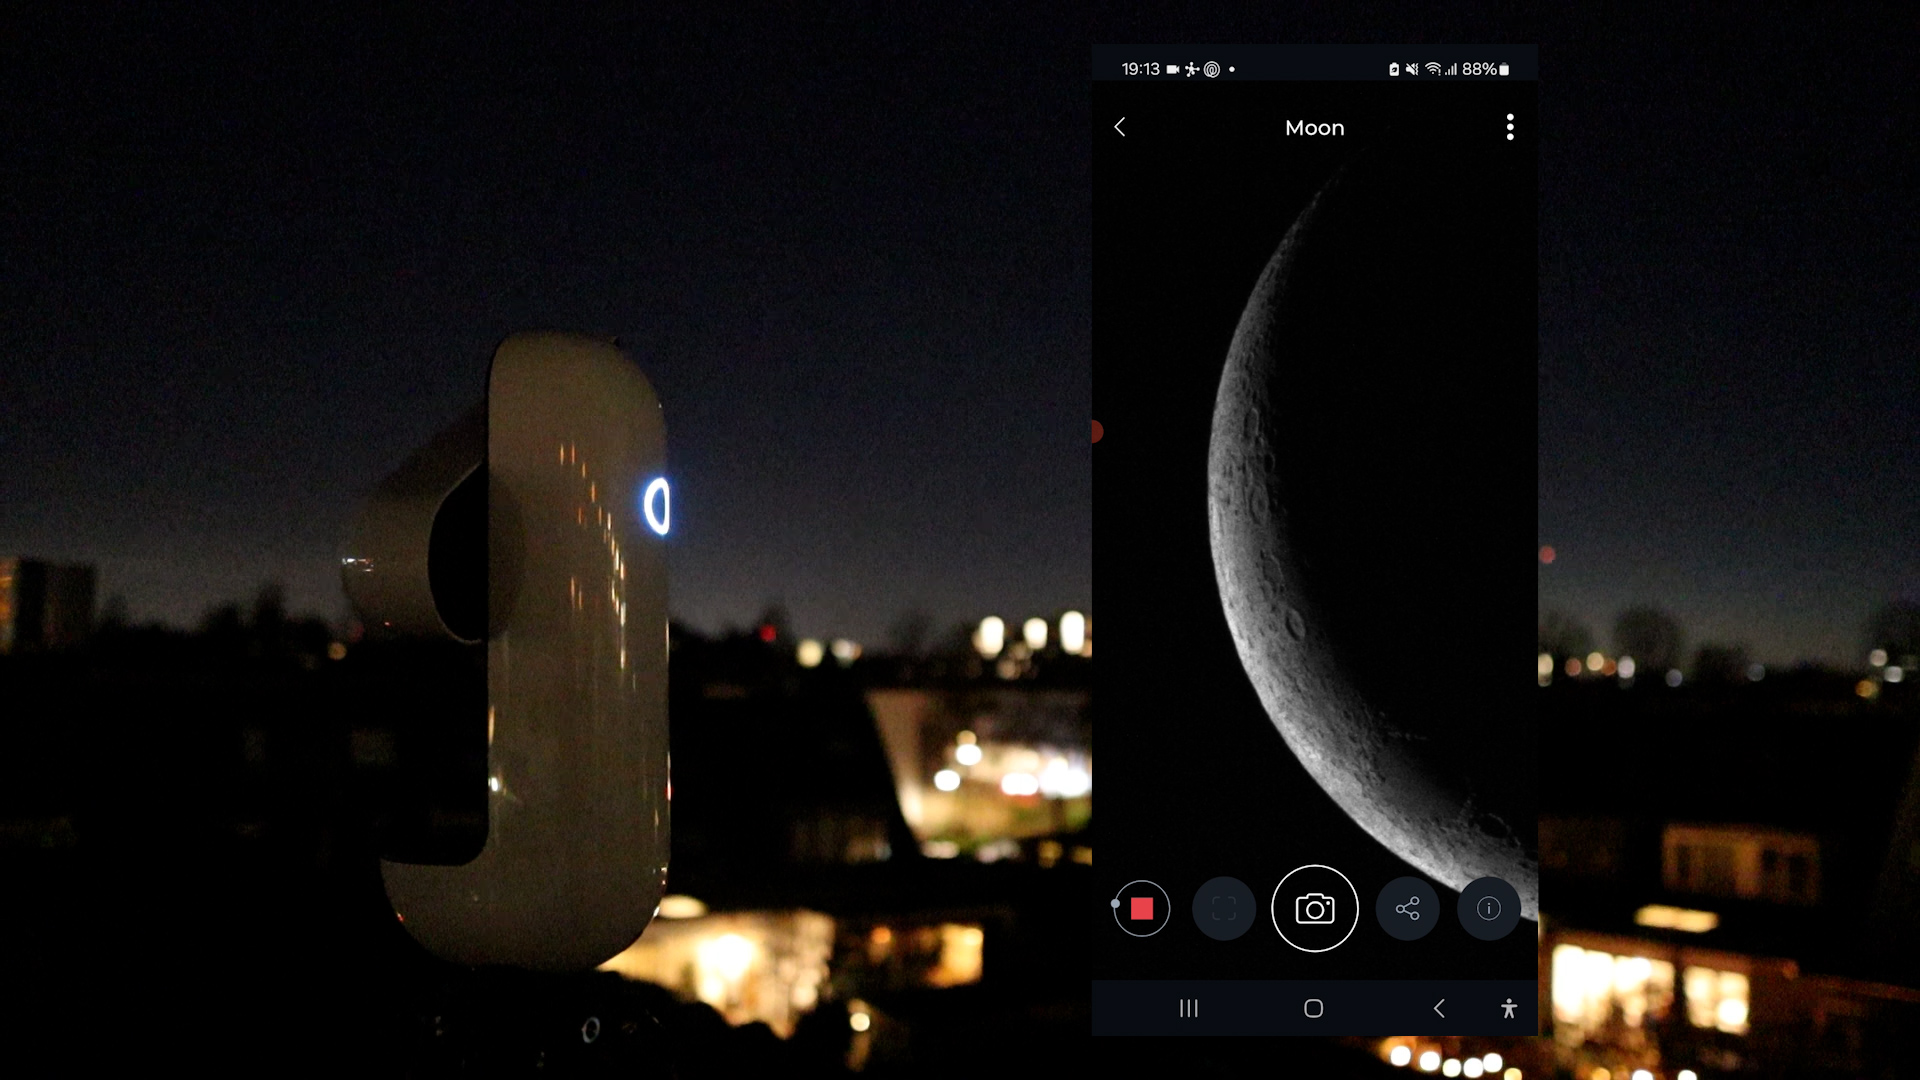
Although the Singularity APP lacks a specific lunar mode, selecting the moon is simple in the app. You can click on the planet icon at the bottom of the screen and search for the Moon in the search box, or choose solar system and click on the Moon. One drawback is that the Vaonis Vespera II requires initialization before you can observe the Moon, and this process only works at night. Consequently, I had to wait until twilight passed and the stars became sufficiently visible in the night sky. I initiated the telescope by clicking the initialize button on the main screen of the app. The initialization process took a couple of minutes, after which I selected the Moon and clicked “observe.” After about two minutes, the app provided a delightful live view of the Moon. Similar to the Solar mode, you can pinch the screen on your smart device to view the Moon up close and capture pictures using the photo icon, which can be saved on the internal storage card or shared by clicking the share button. It’s simple and effective.
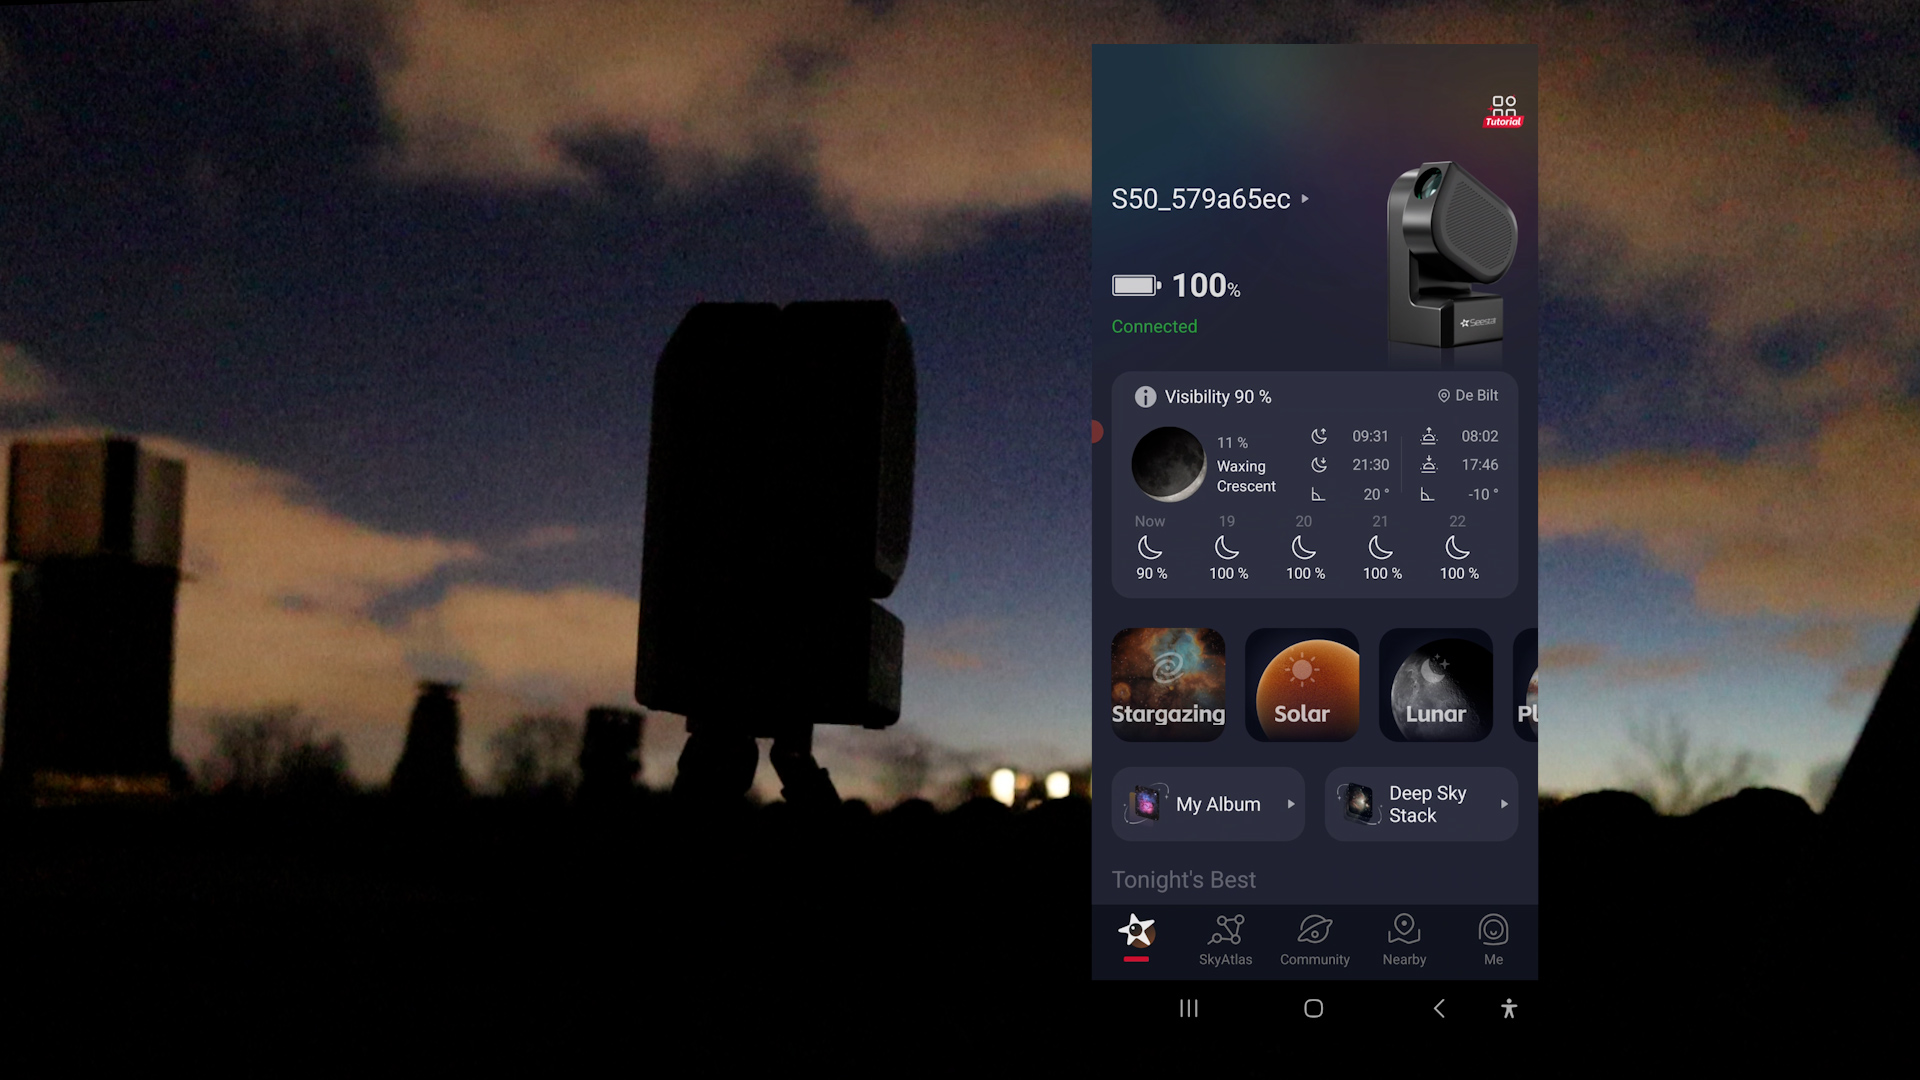
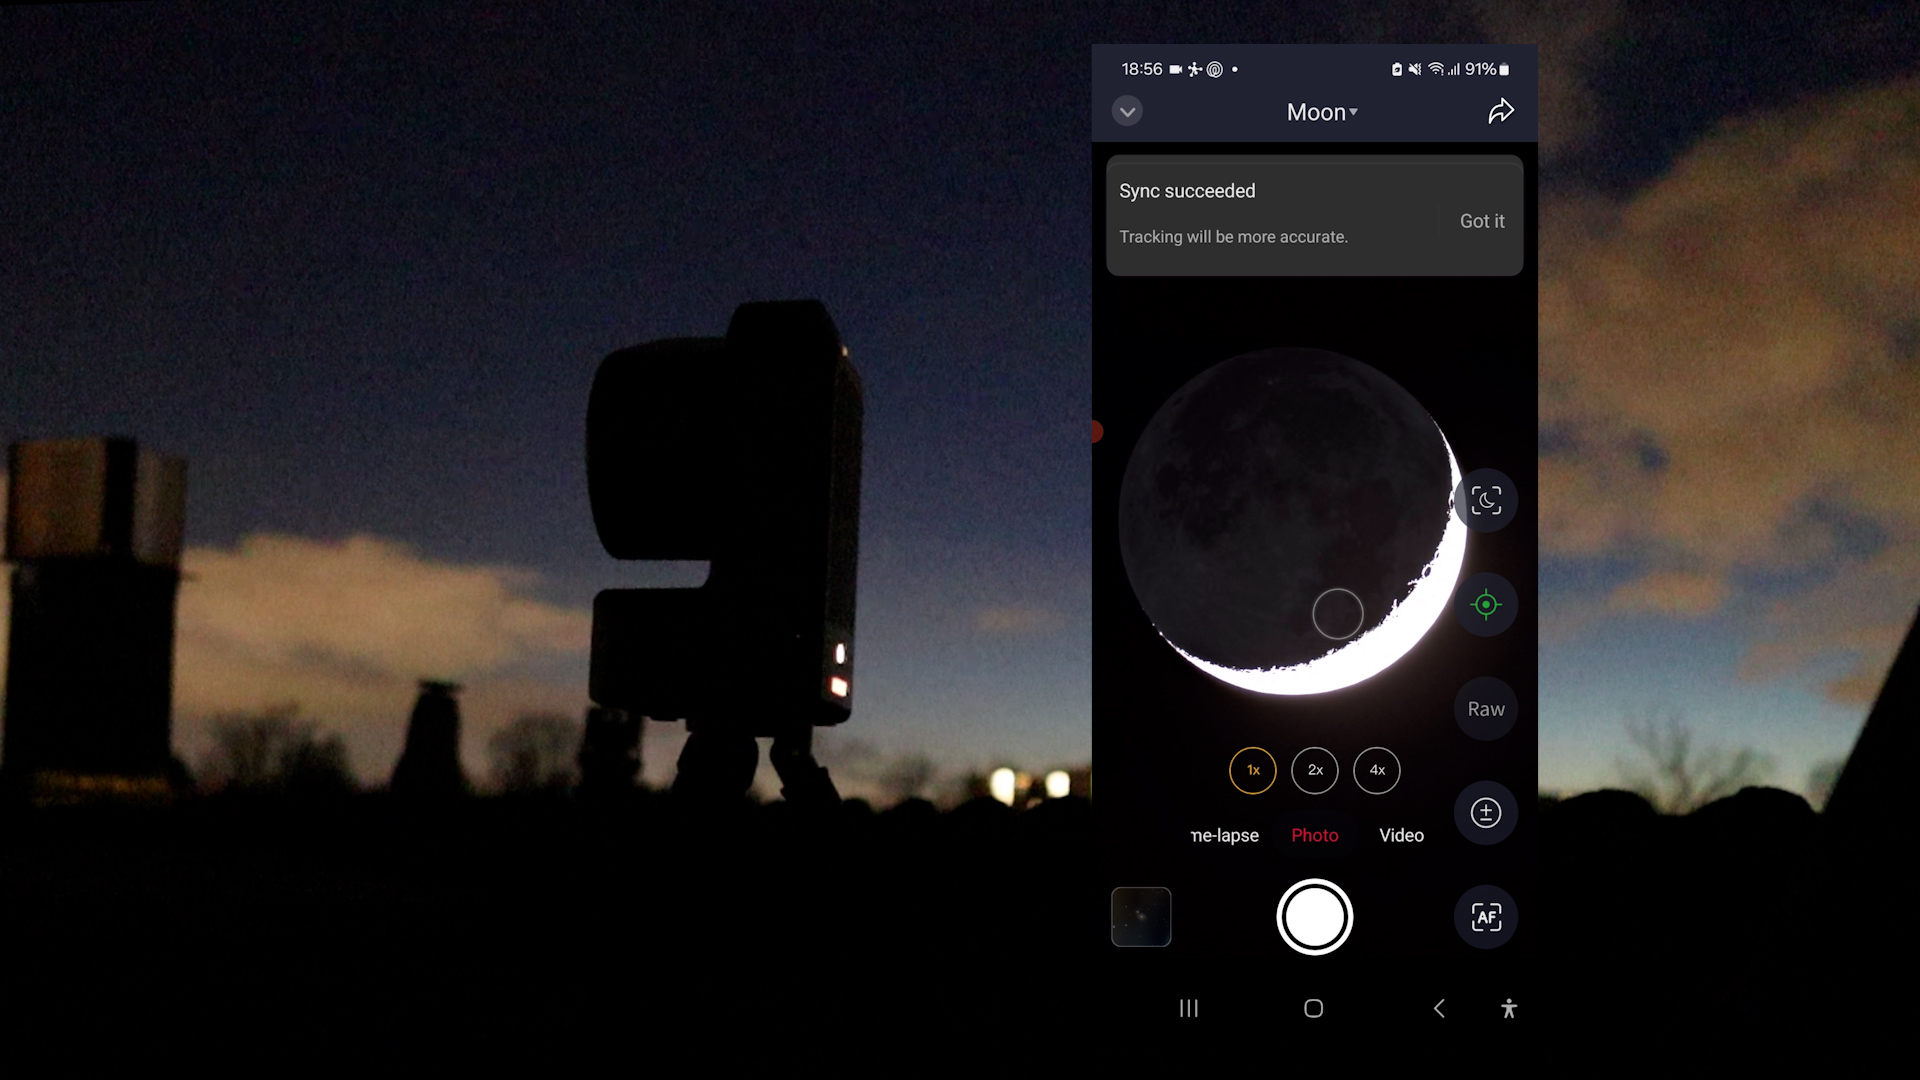
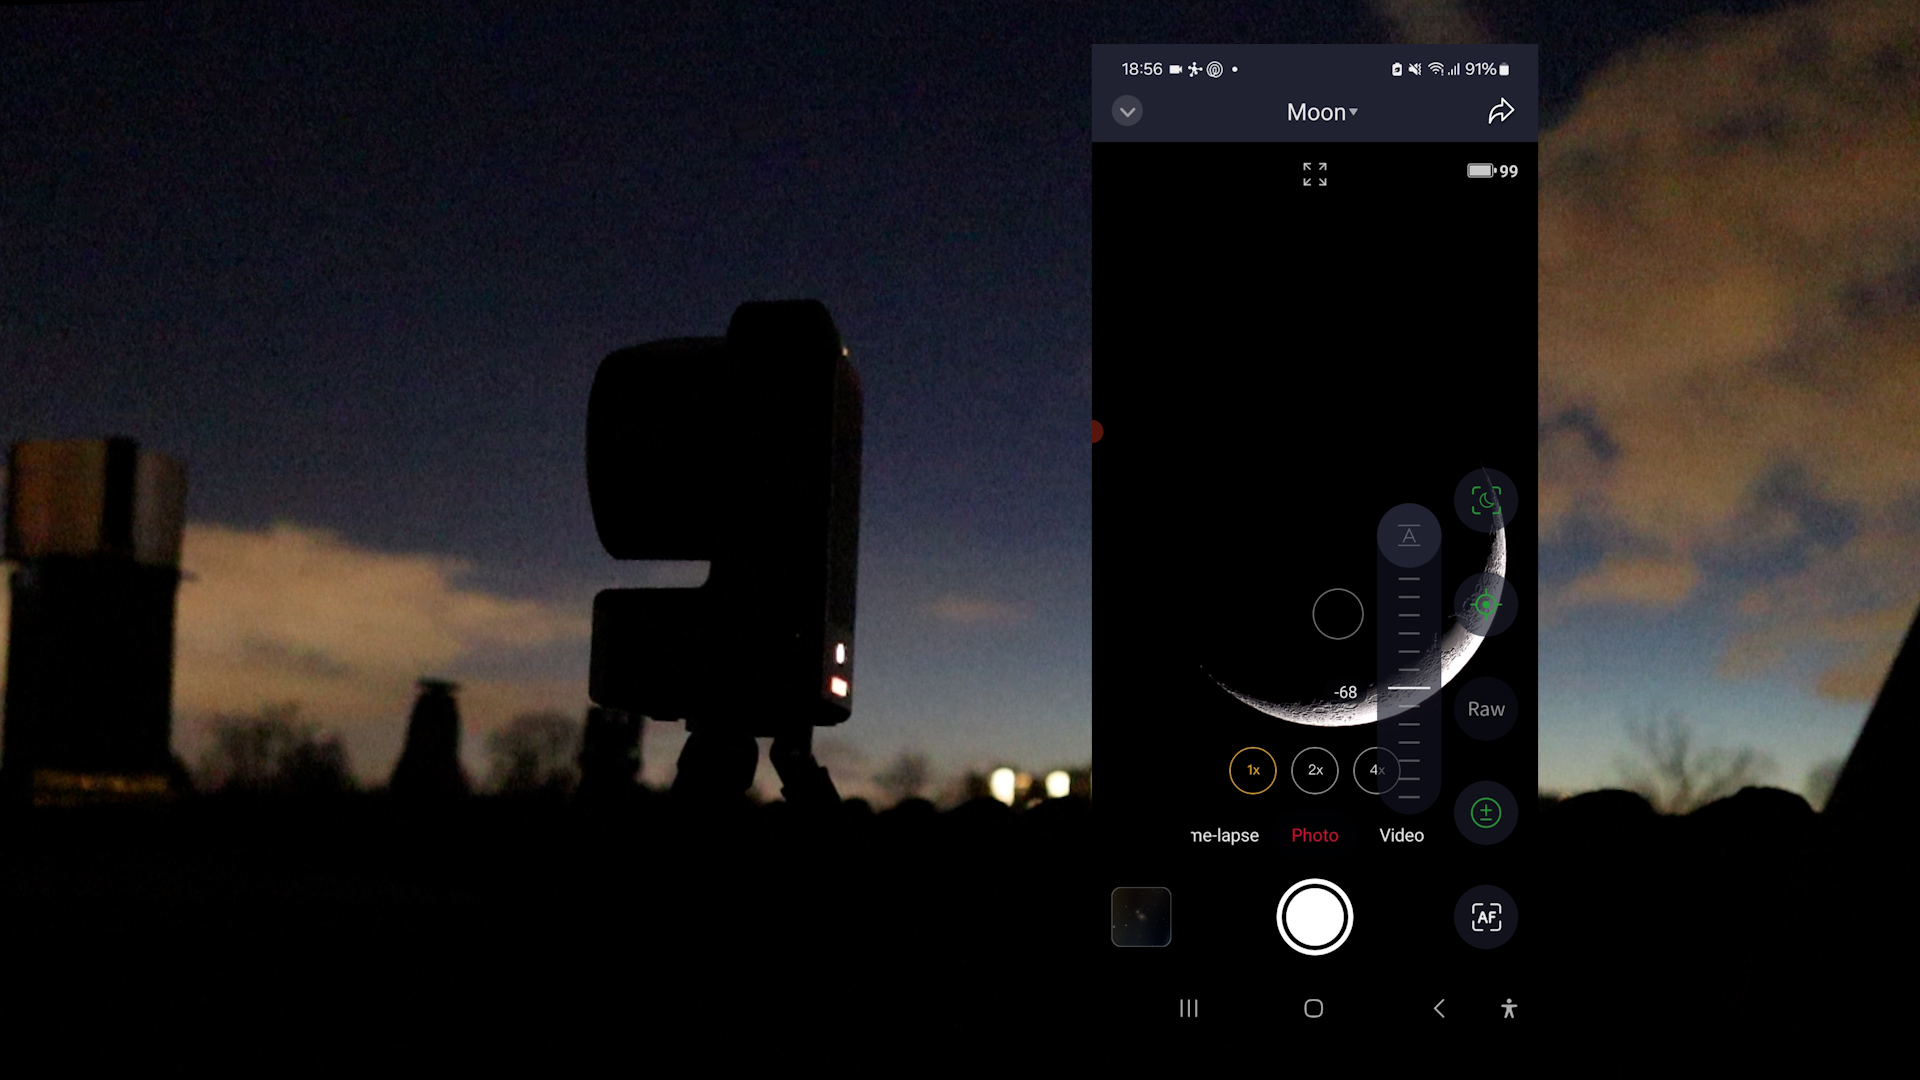
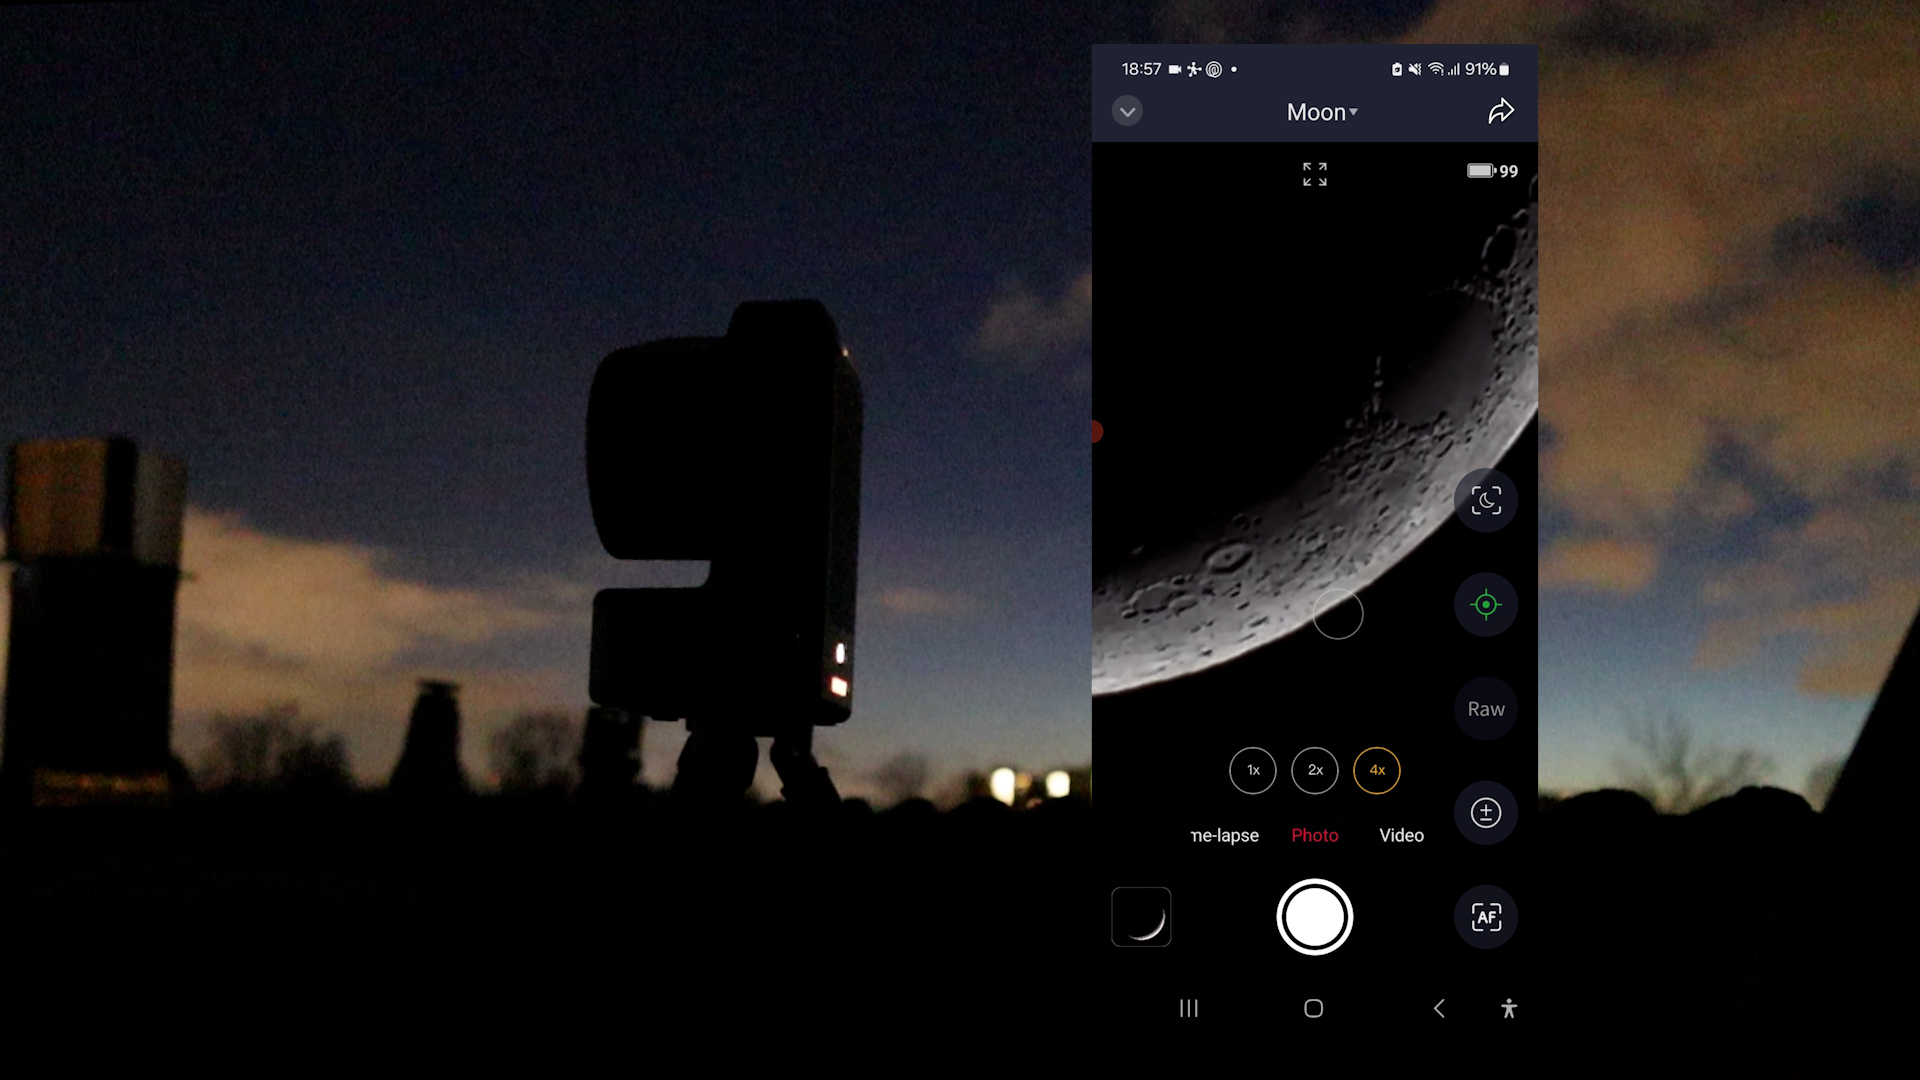
Turning to the Seestar S50, the app does include a specific lunar mode. A major advantage is that lunar mode can be used during twilight and even during the day to observe the Moon. Simply point the Seestar S50 at the Moon, level the mount, and the telescope will attempt to find and start tracking the Moon, like the solar mode. During this session, it took the Seestar S50 about one and a half minutes to locate the Moon in the evening sky. The auto settings produced an overexposed live view of the crescent moon, which was intriguing as it also displayed an underexposed view of the dark part of the Moon. You can easily adjust the exposure setting by clicking on the +/- icon to the lower right of the screen. Similar to the solar mode, you can activate auto-tracking to keep the Moon centered, zoom in to observe lunar craters up close, and capture photos, videos, and time-lapses of the Moon.

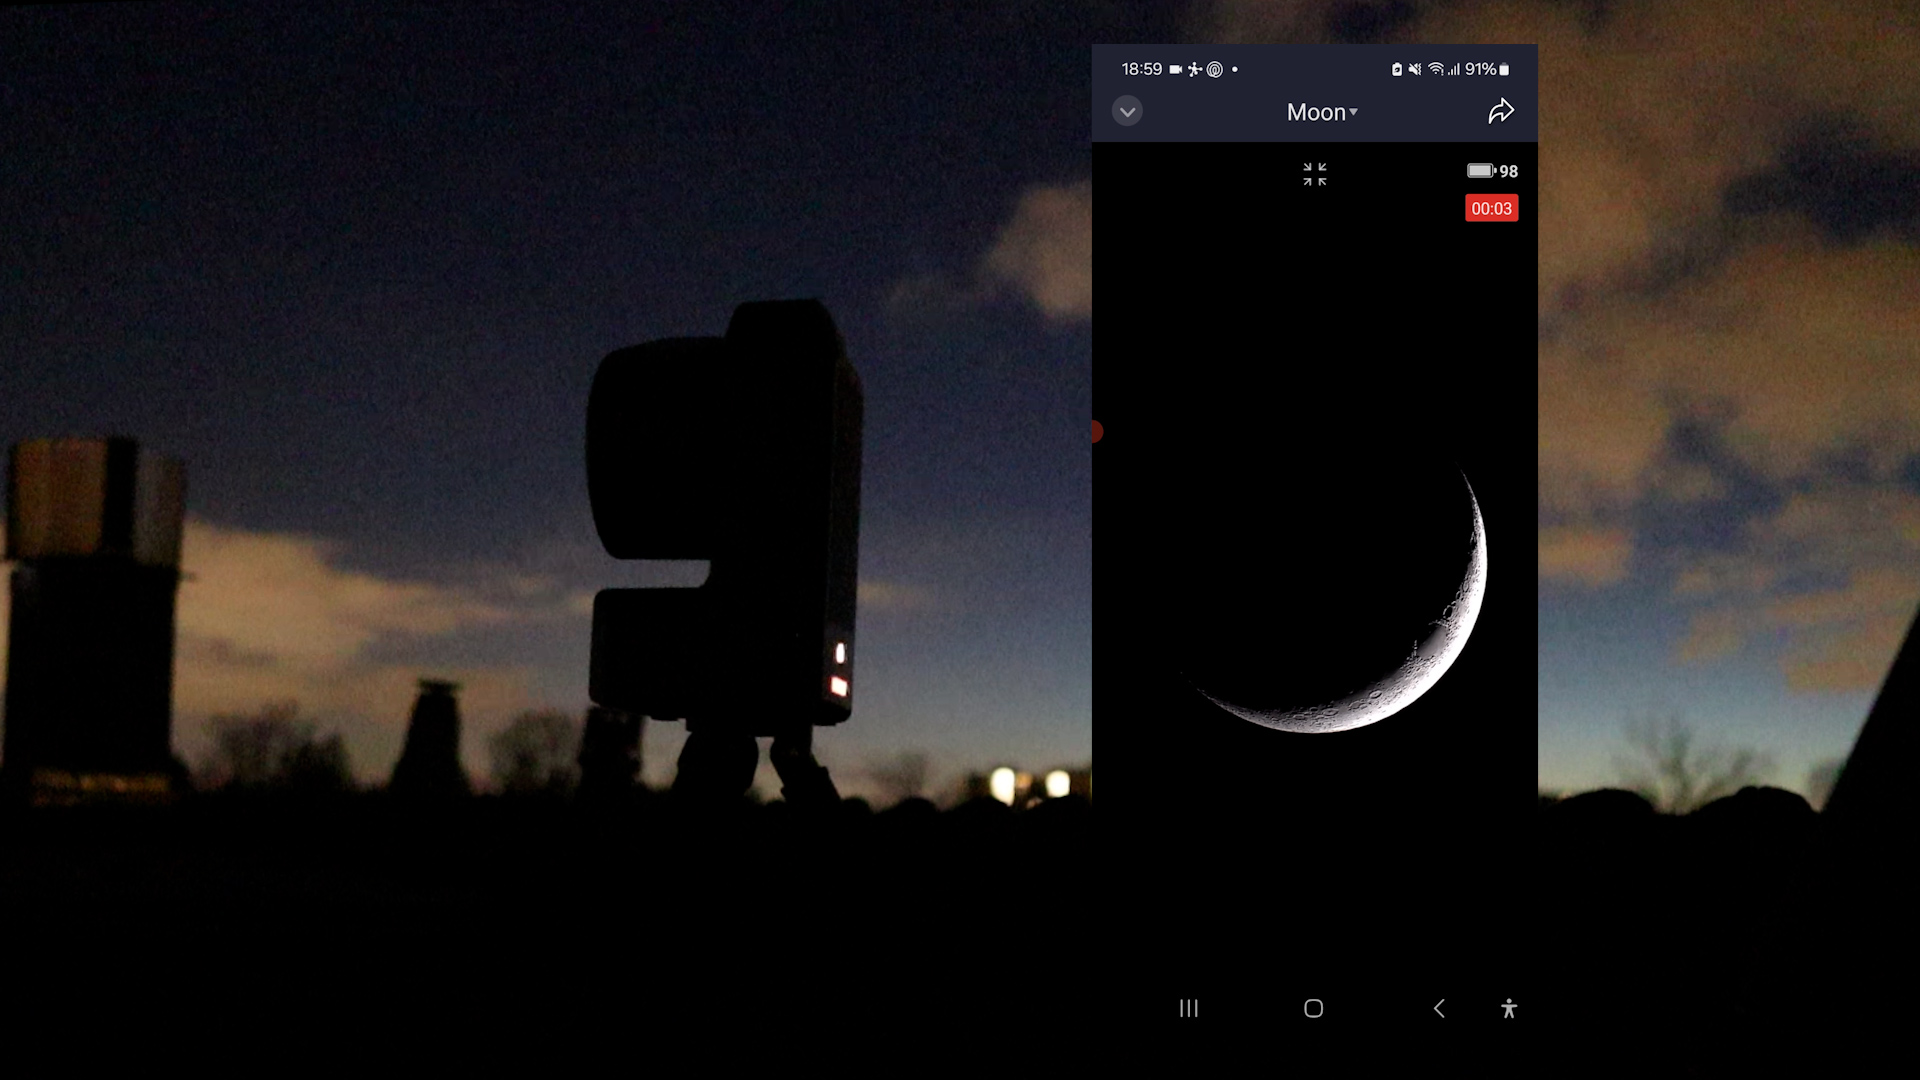
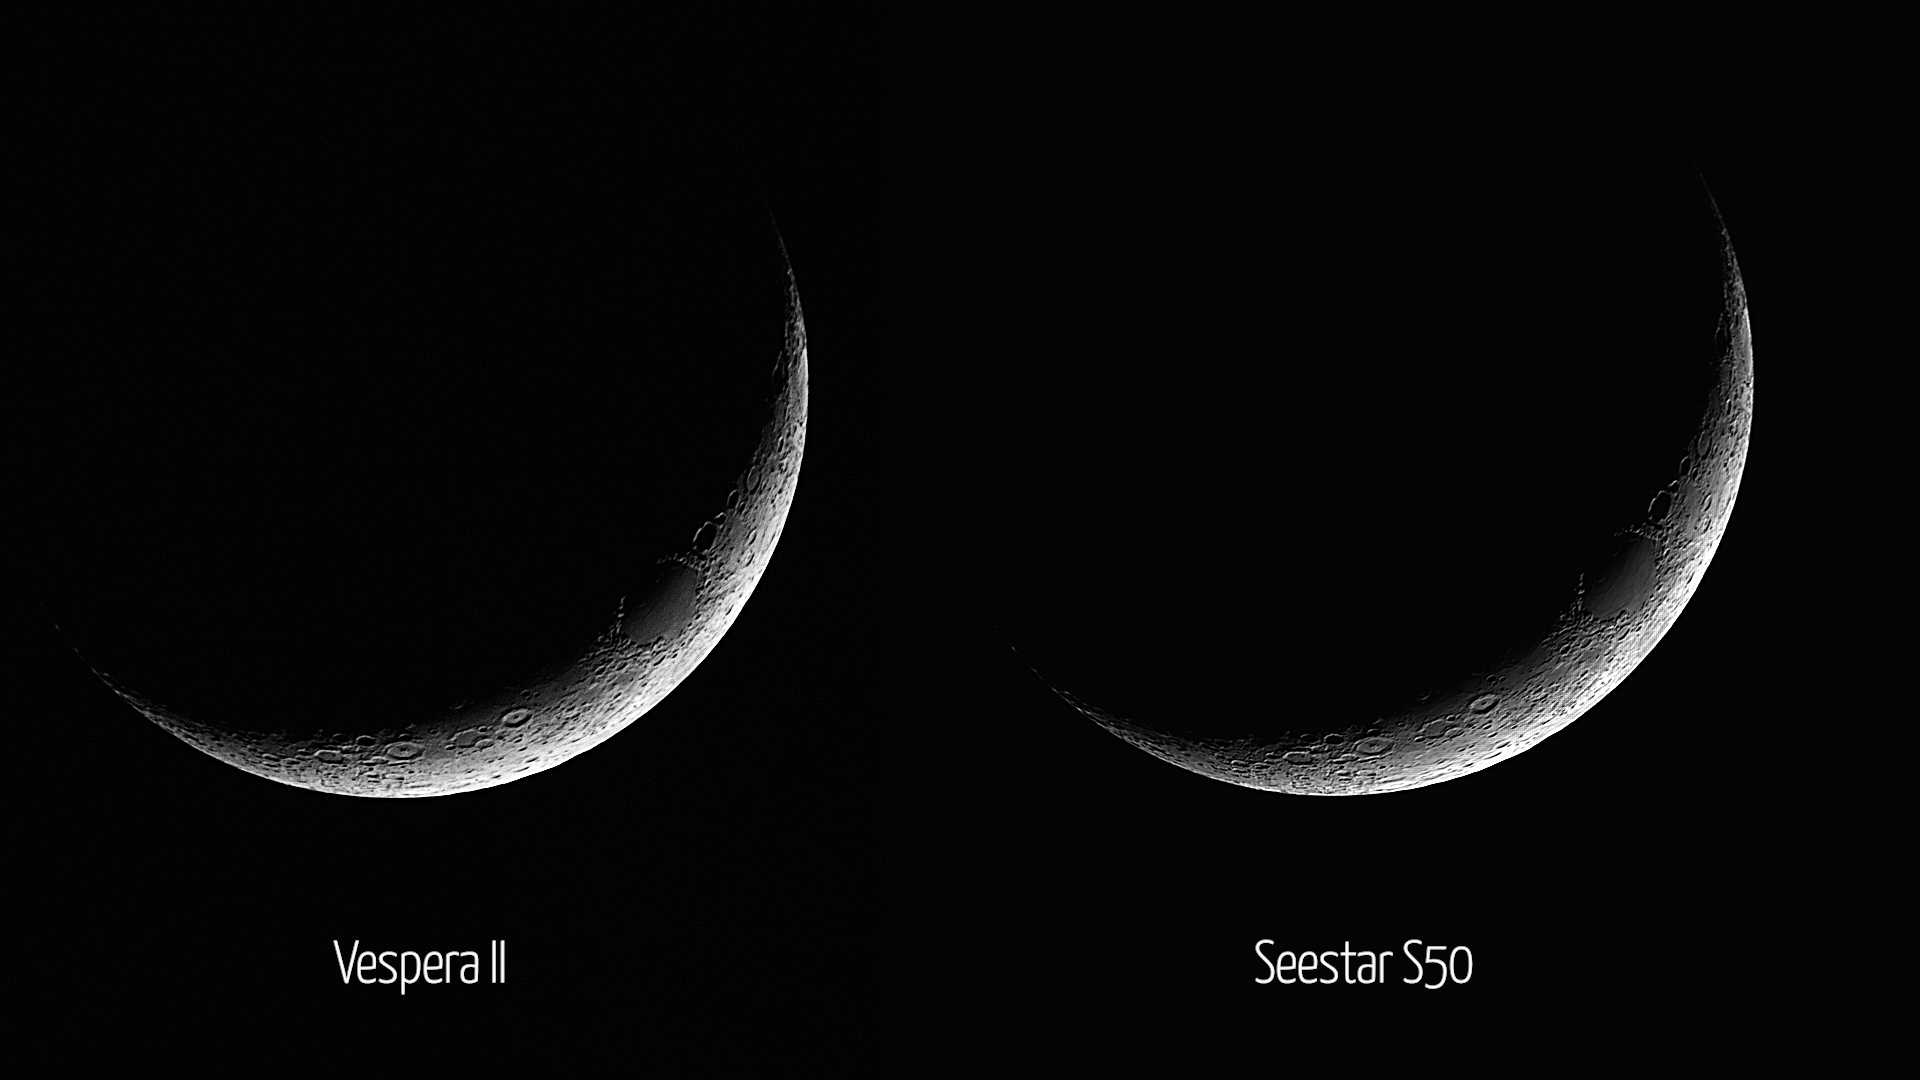
When comparing both apps for observing the Moon, the Seestar app offers a bit more by enabling lunar tracking during twilight and daytime. Additionally, it provides extra time-lapse and video options to capture the Moon, and users can play around with exposure settings. The Singularity app of the Vespera II requires telescope initialization, which is only possible at night when the stars are visible. While the app delivers a delightful live view of the Moon, everything is automated, from autofocus to exposure, and cannot be adjusted by the user. Here are my pictures of the crescent Moon from both telescopes.
Deep Sky Astrophotography: ZWO Seestar S50 vs. Vaonis Vespera II
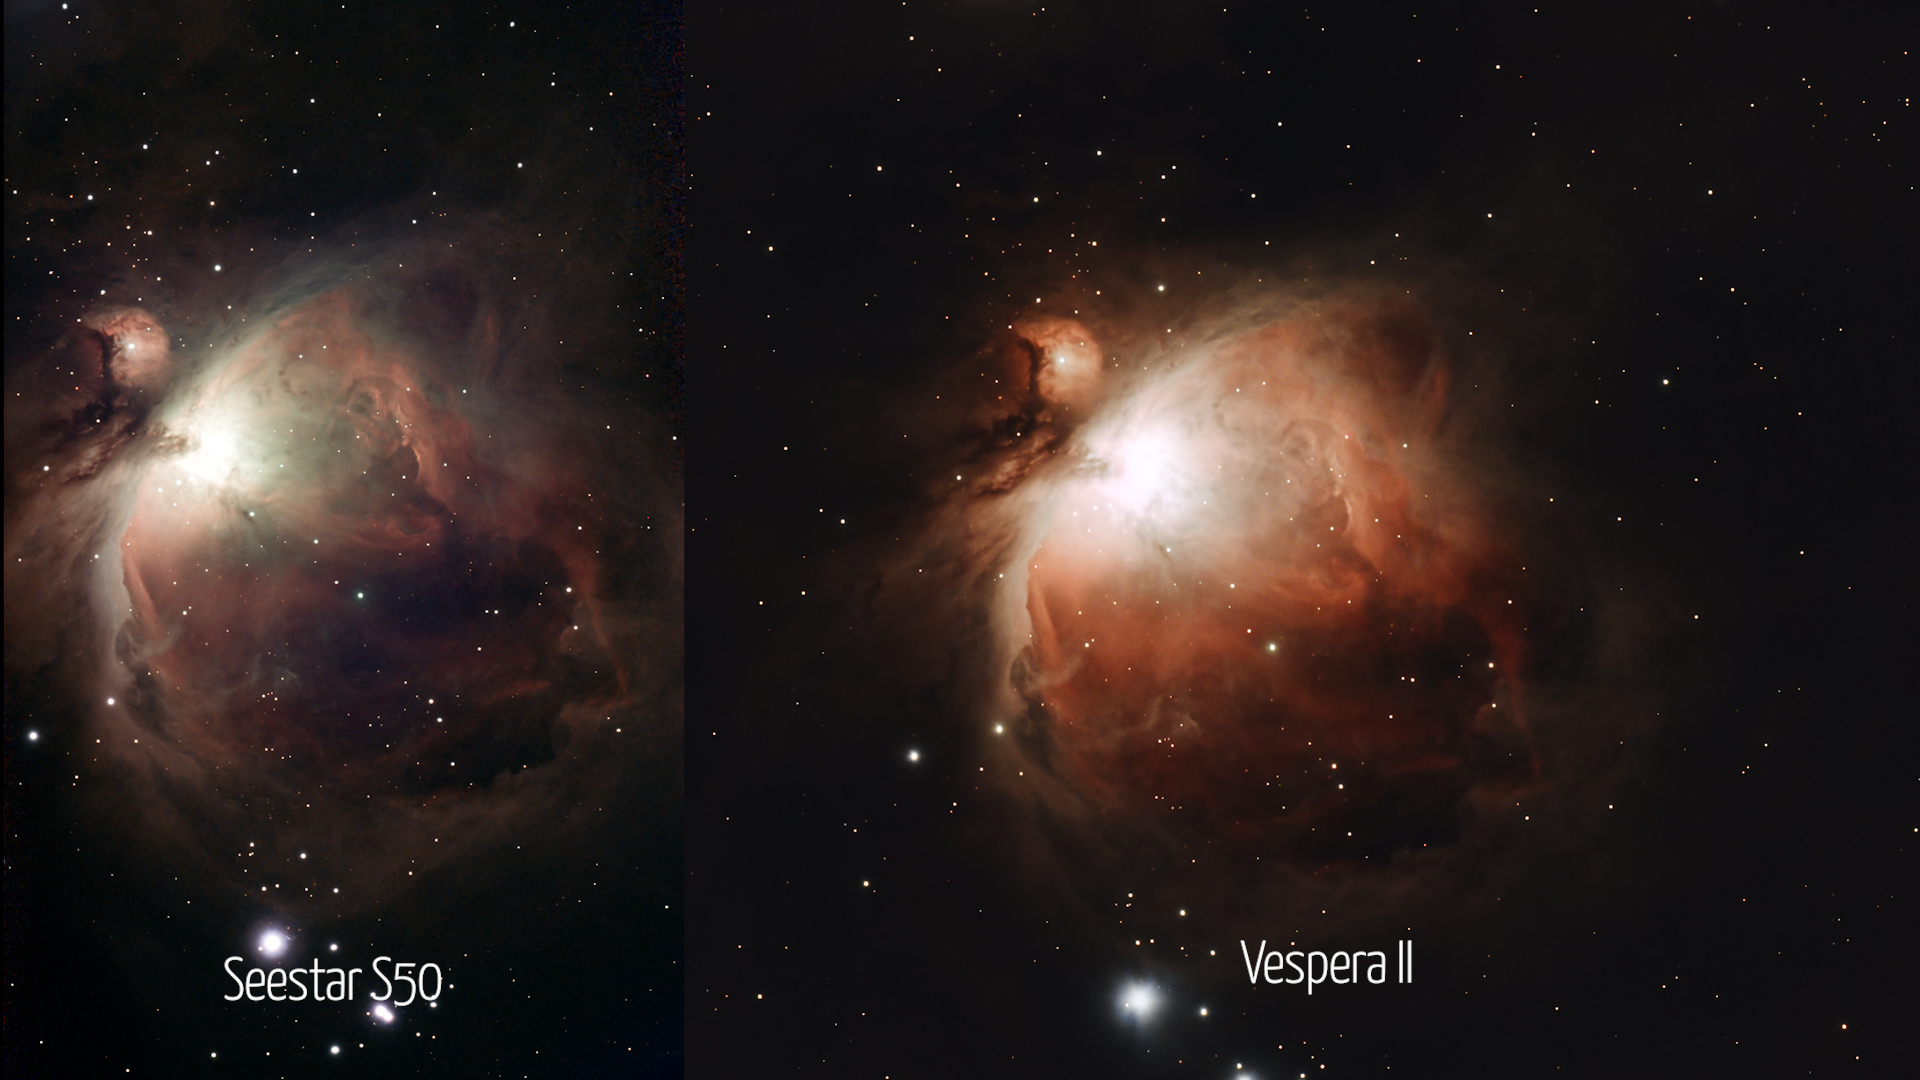
After gazing at the Moon, I decided to aim both telescopes at the fabulous Orion Nebula, also known as M42, one of the largest stellar nurseries in the winter sky. I used both telescopes simultaneously to image the same objects. Also, I used the default 10-second exposures for both scopes to make this comparison as equal as possible. I must mention that I’m imaging under Bortle class 7, Urban Skies. To combat light pollution, the Seestar S50 automatically uses its internal duo-band light pollution filter. To facilitate an equal comparison, I also used the dual-band light pollution filter with the Vaonis Vespera II.
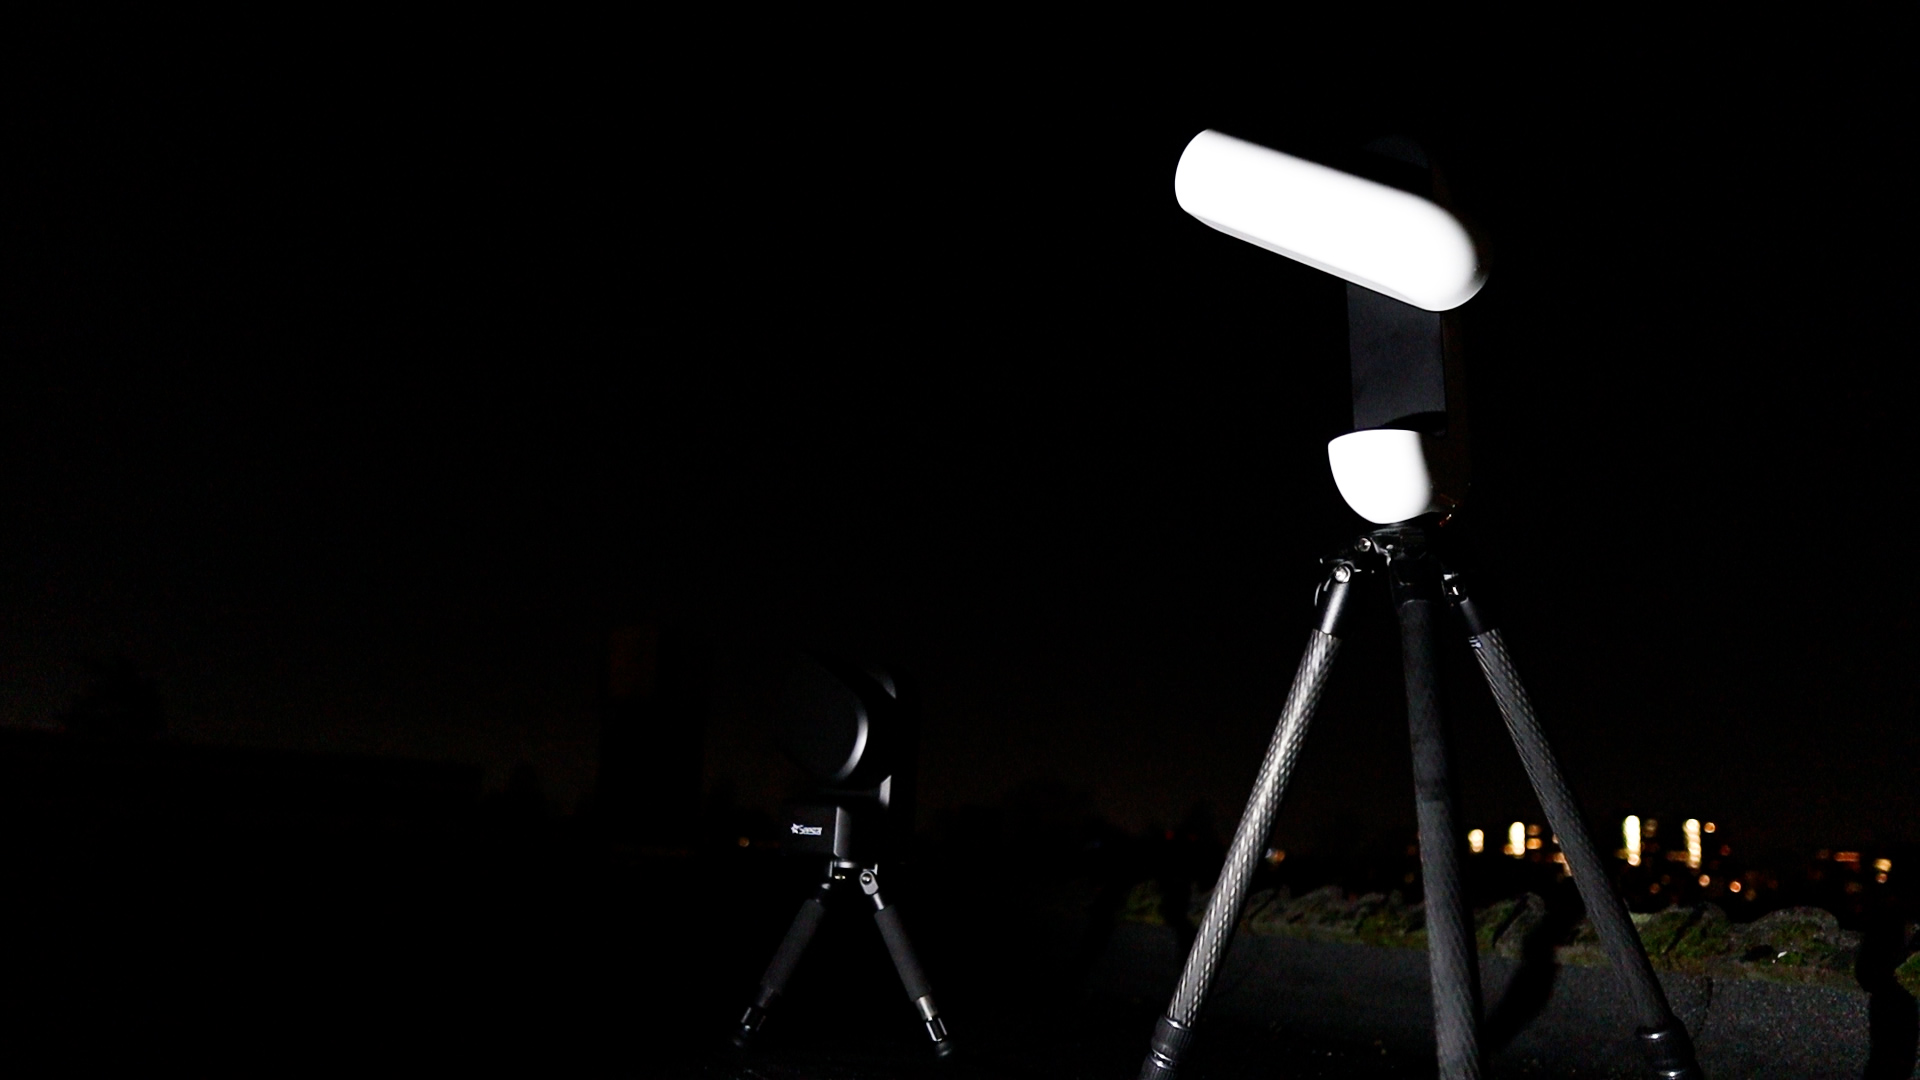
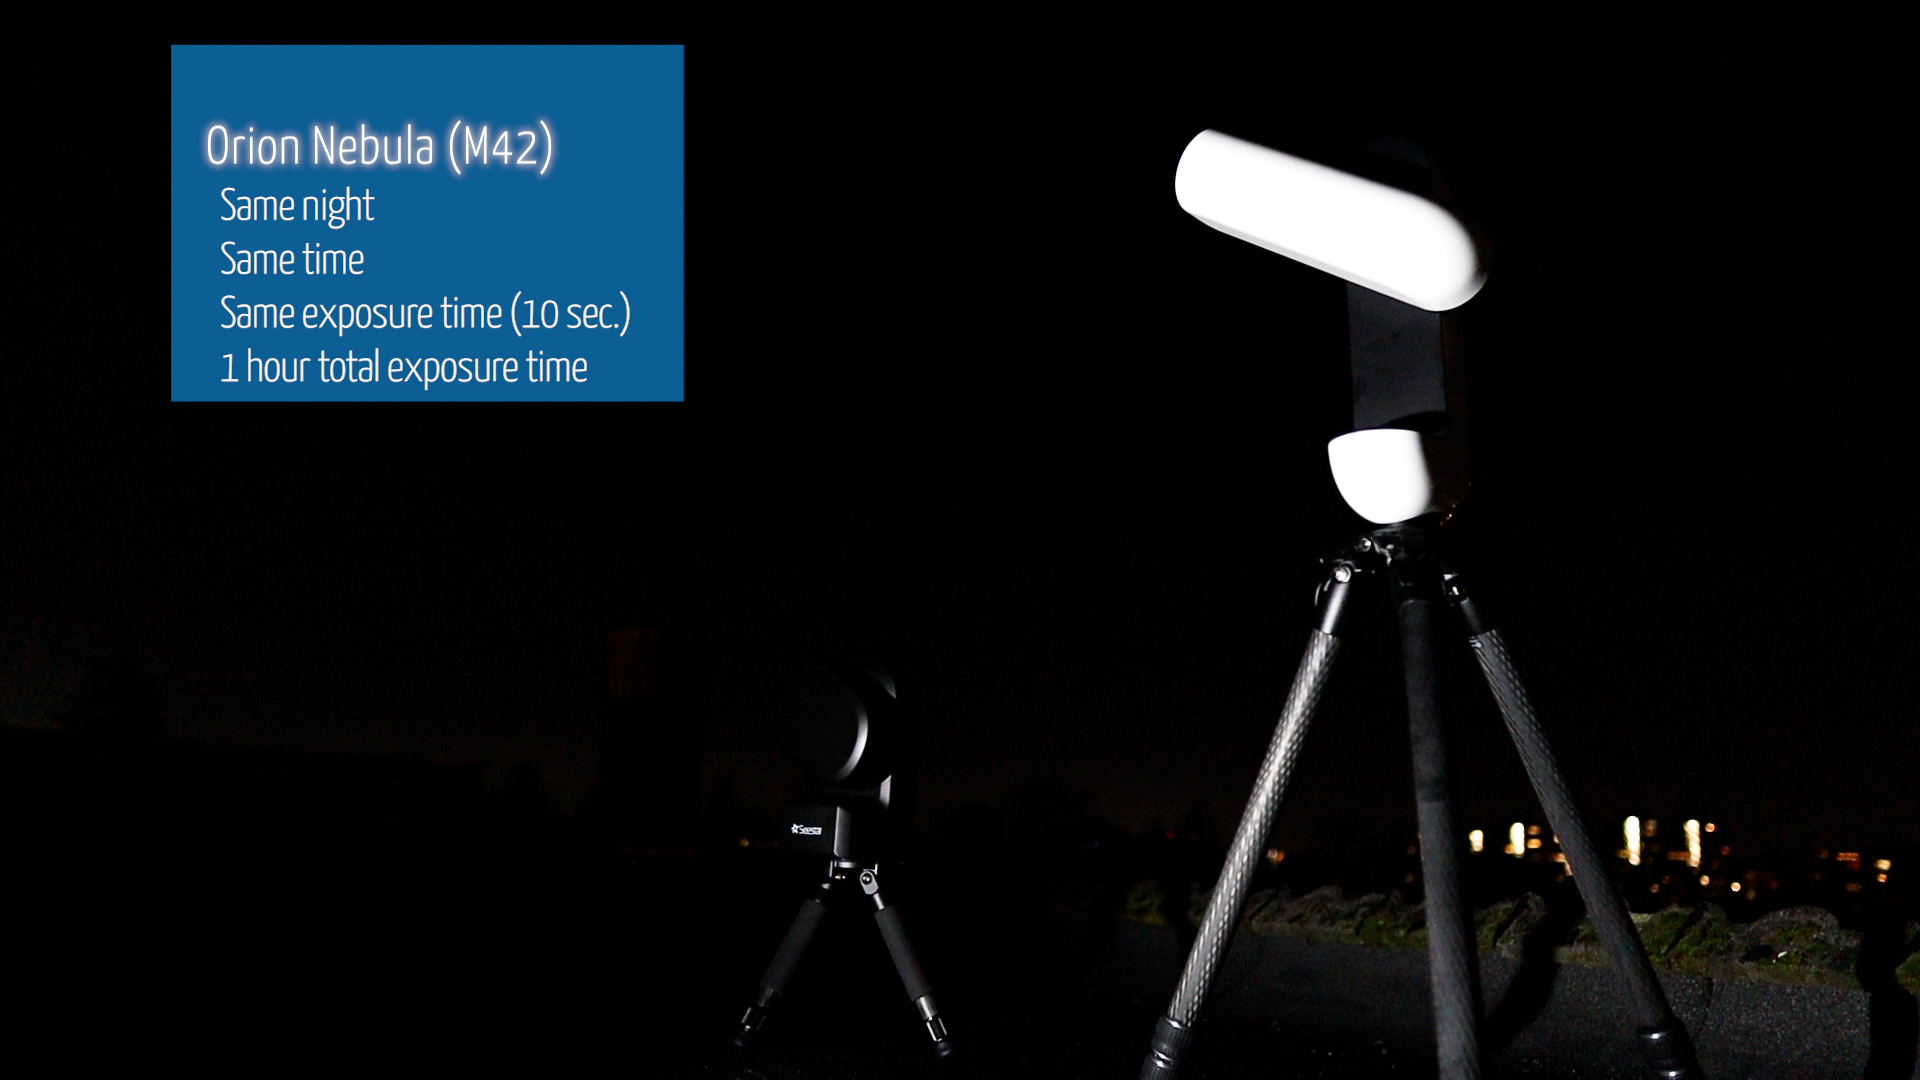
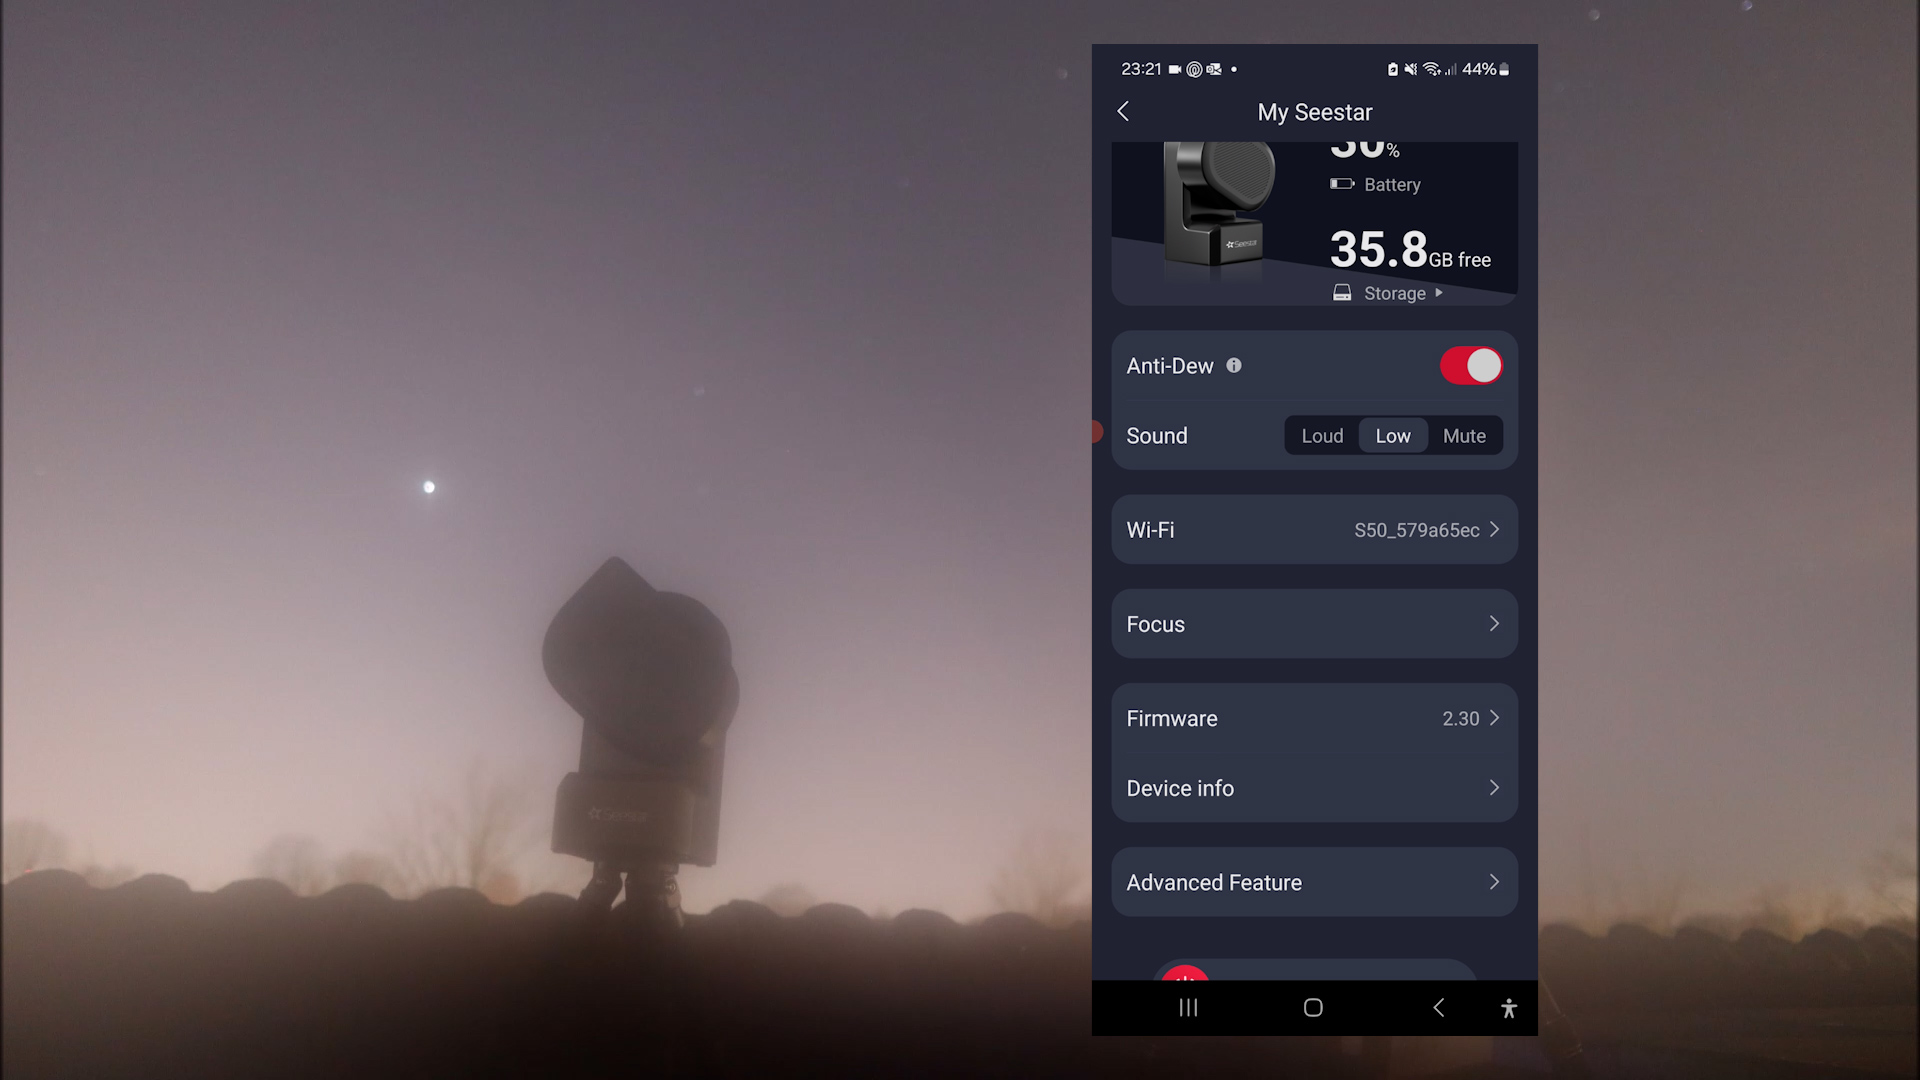
Although it was clear outside, it was also very moist, and most of my neighbors were using their wooden fireplaces to heat their homes to reduce their energy bills. This led to murkier skies than usual, as seen in this timelapse video. I switched on the internal Dew heater with the Seestar S50 and used an extra Dew heater band on the Vespera II to keep the views as crisp as possible. Note that the Vespera also has an optional, dedicated dew heater, but I couldn’t find it so I ended up using this external dew heater band which worked fine.
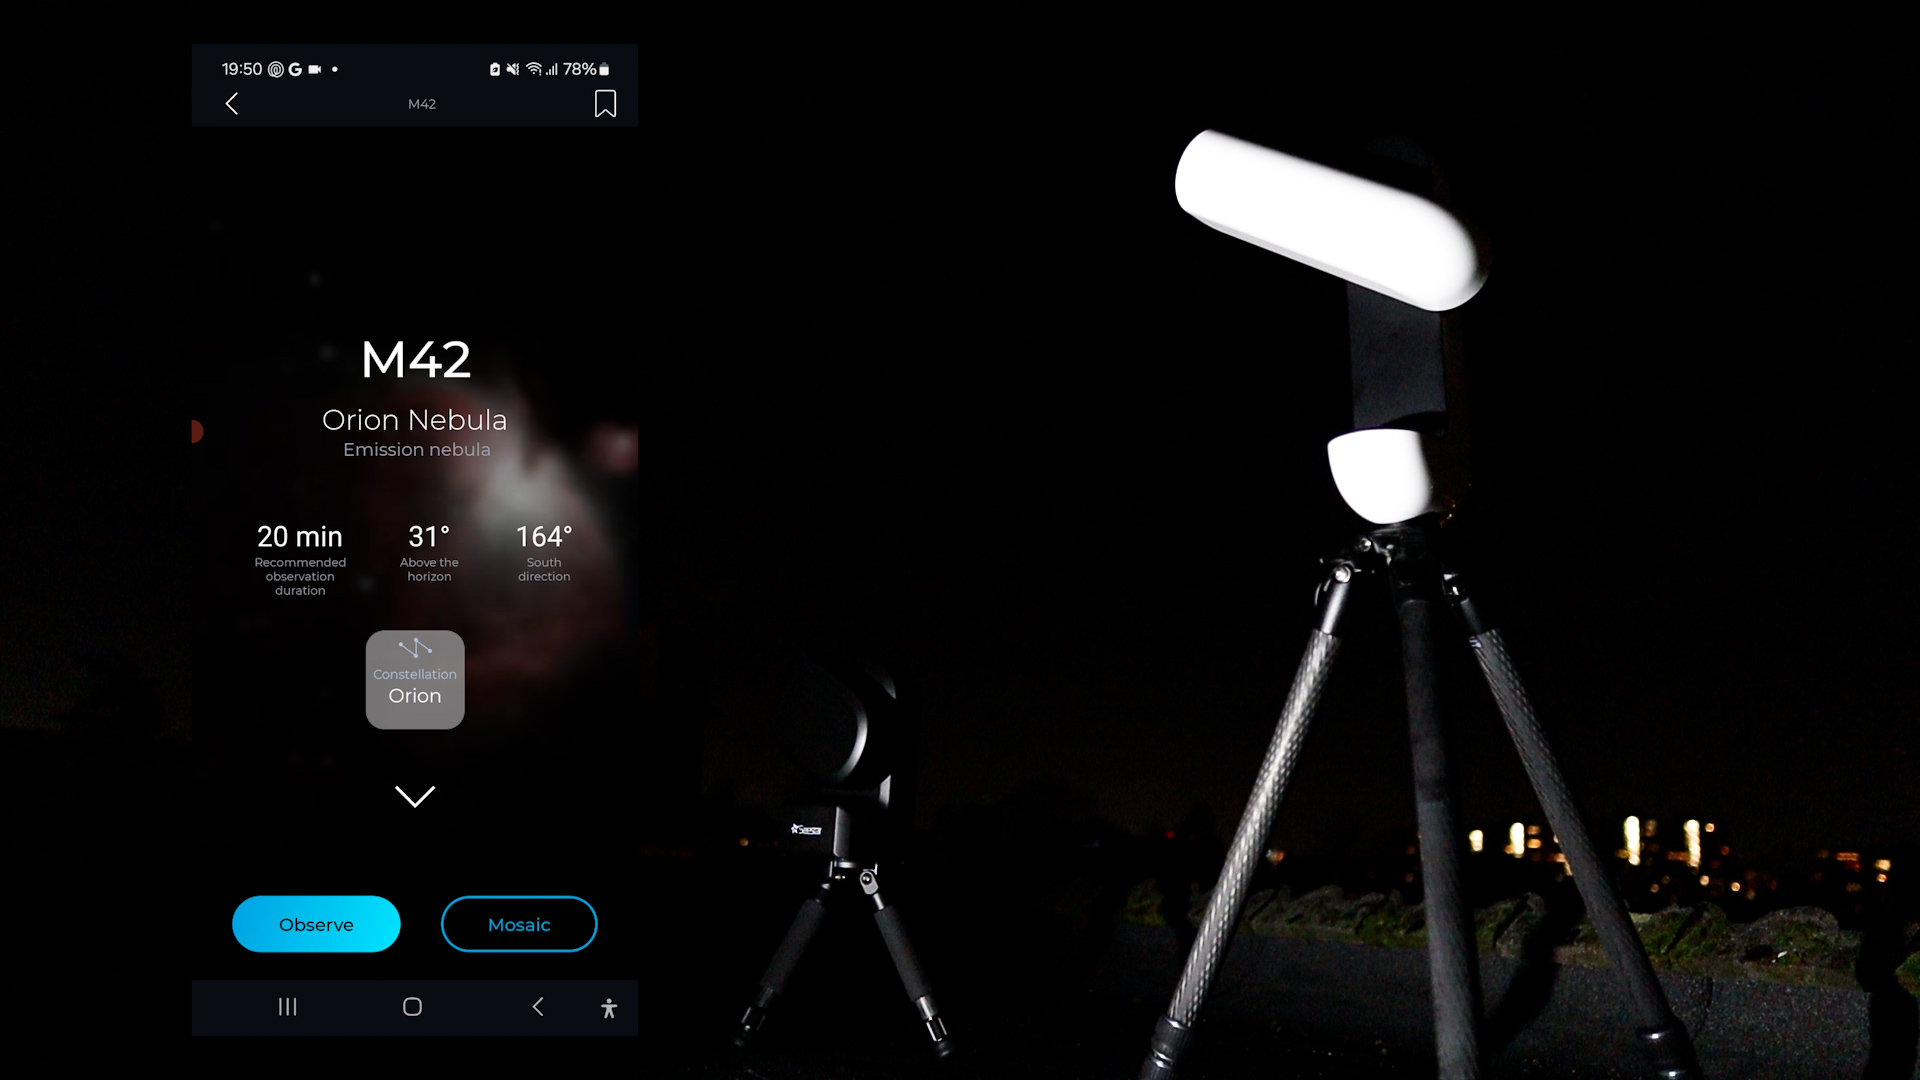
Let’s start with the Seestar S50 this time. The Seestar APP offers excellent features to find deep-sky objects, such as a virtual sky atlas with a compass mode that allows you to find objects in the night sky in real time. Also, you can press the magnifying glass in the virtual atlas to search for an object by entering its name or by searching the many solar system and deep-sky catalogs that are available. Selecting an object will provide you with all the necessary information, as well as the current position in the night sky at your particular location. Just press “go gazing,” and the Seestar S50 will automatically slew to the object of interest and enter a preview mode.
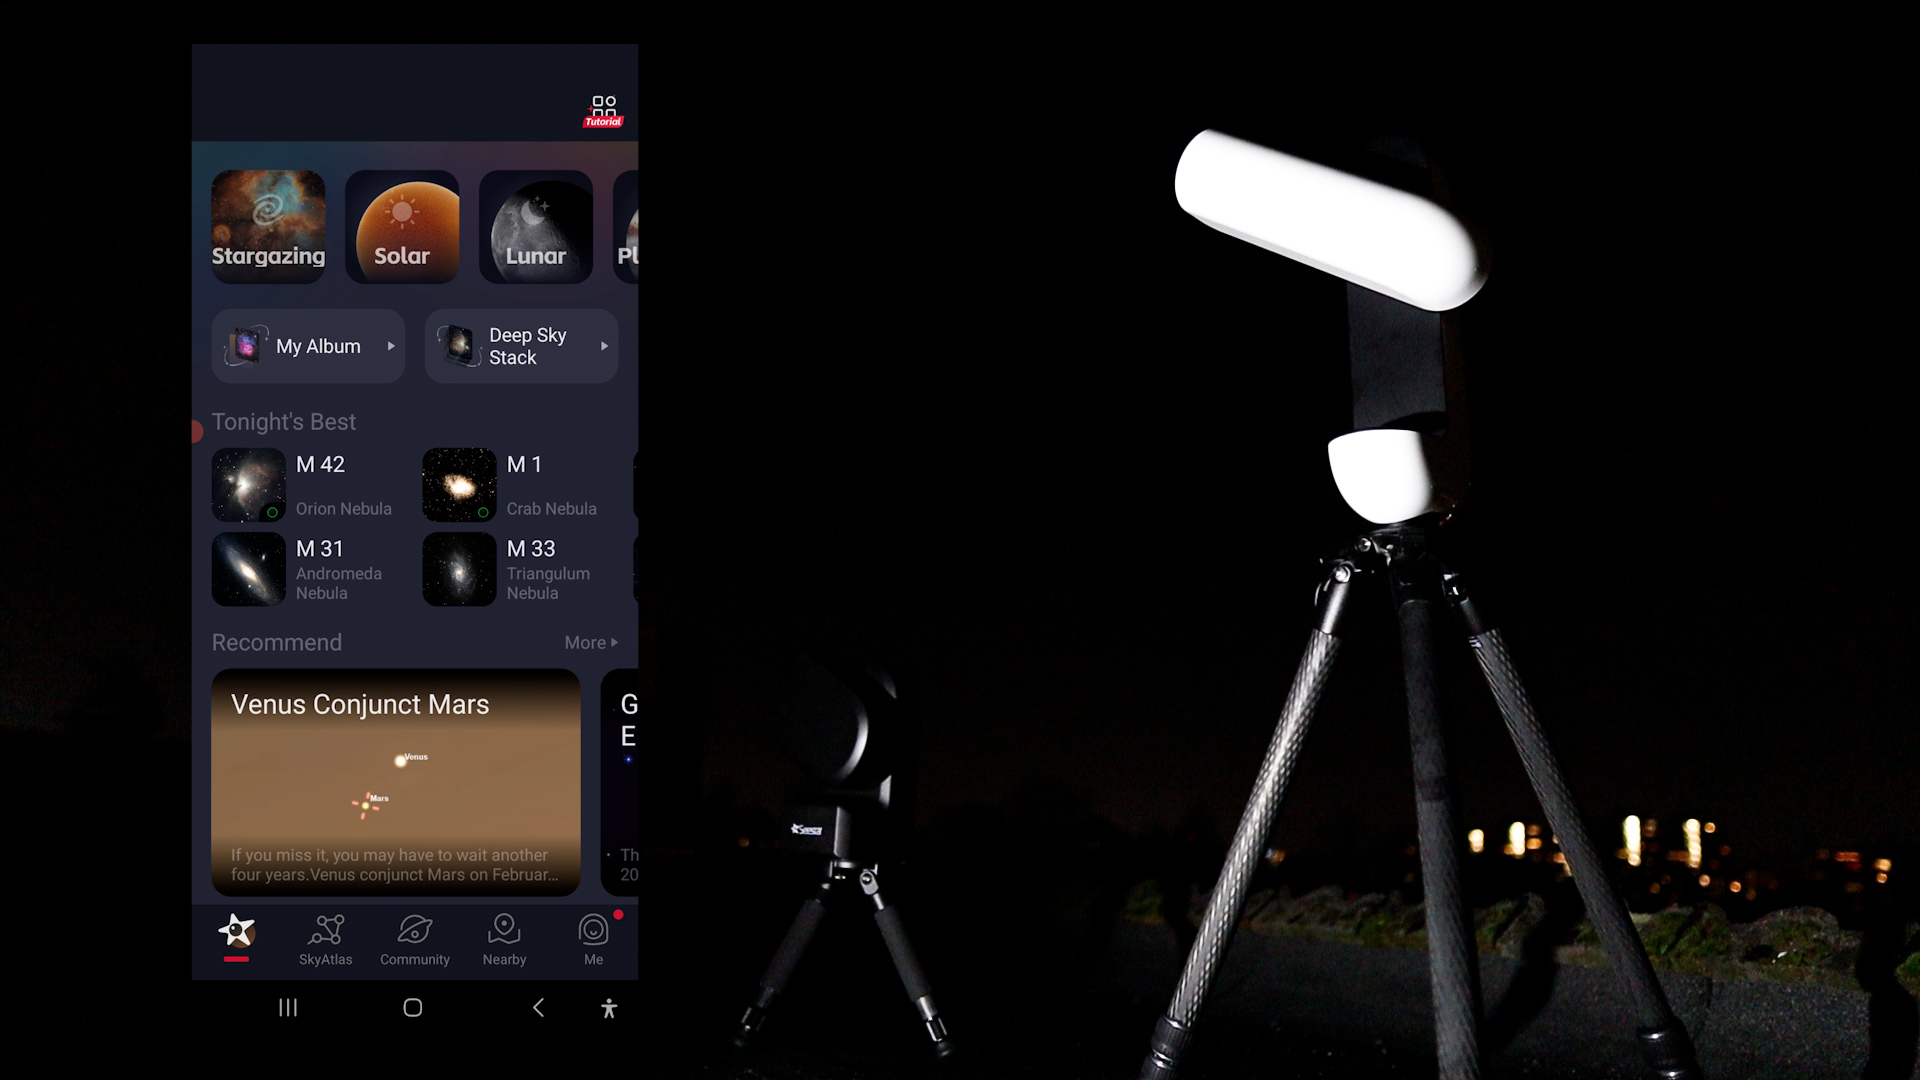

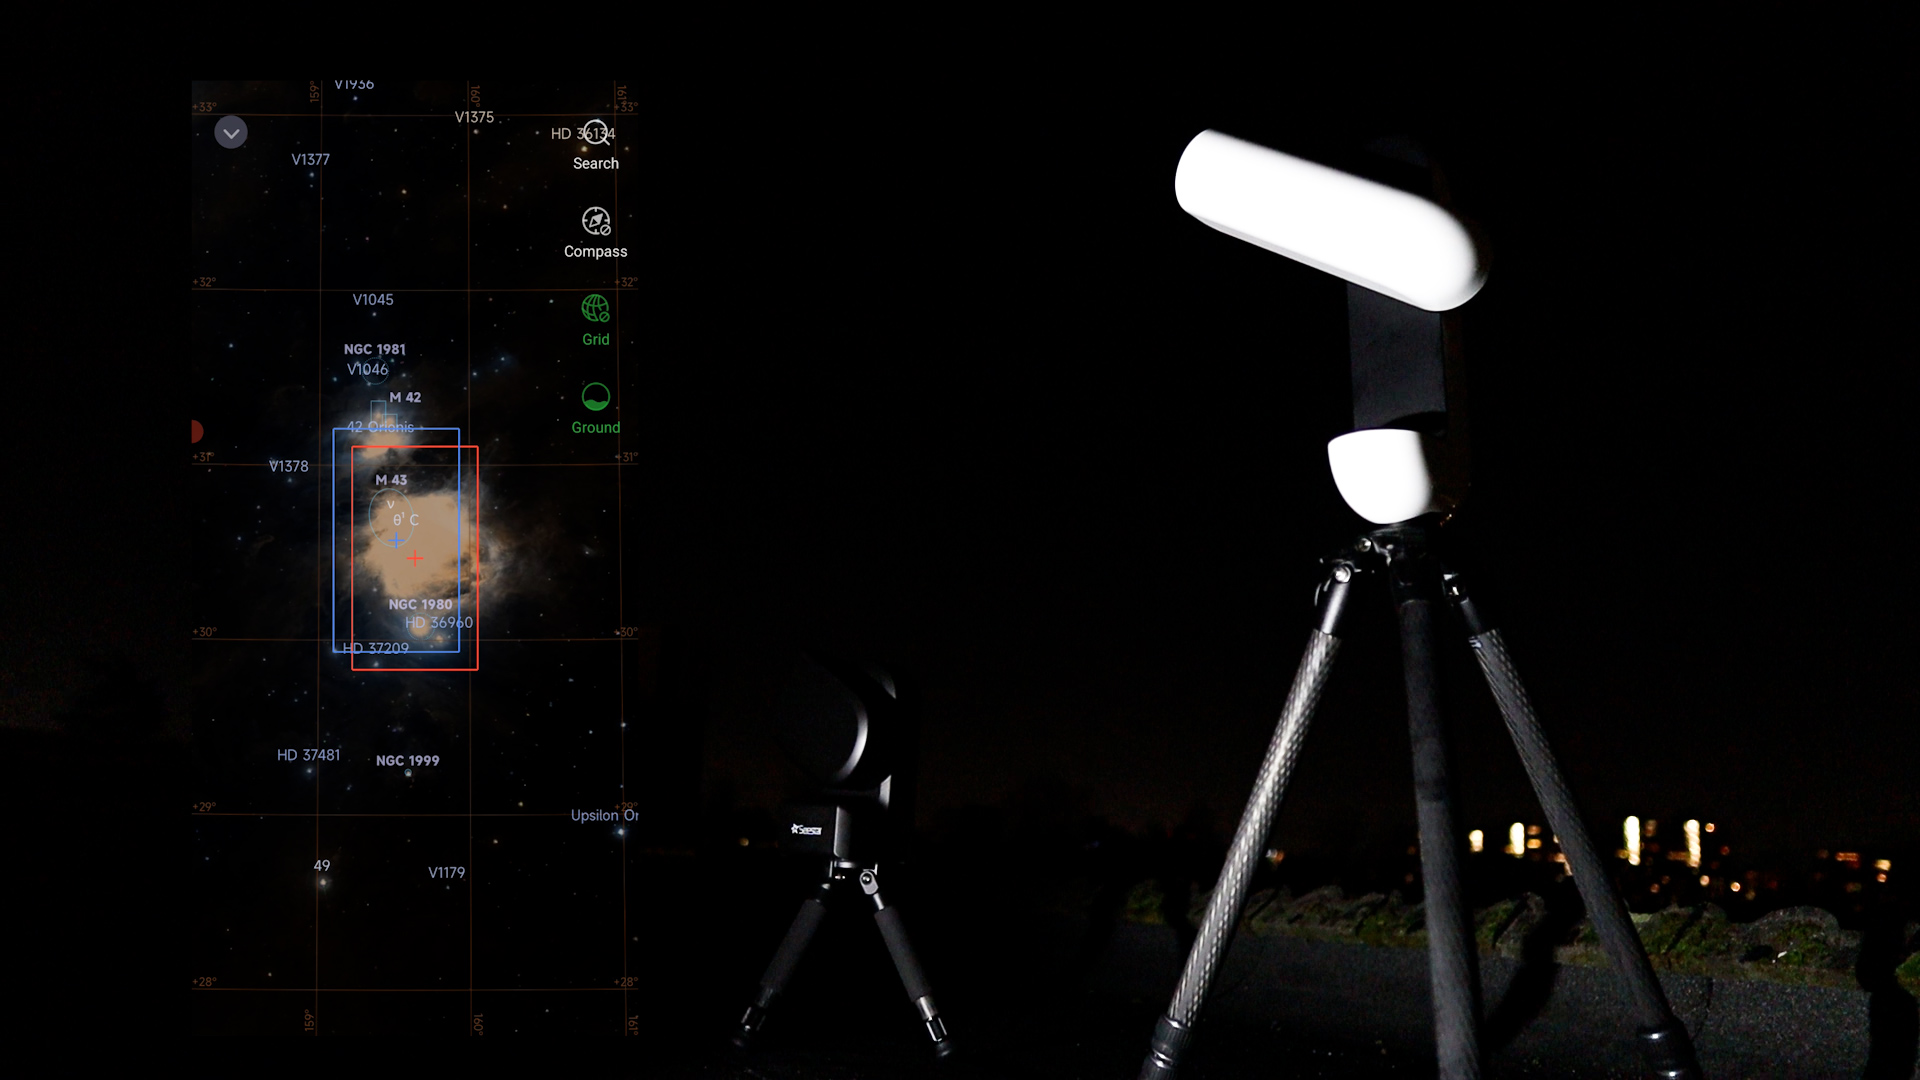
This time, I selected M42 from the main screen, featured as one of the best targets to observe that night. I pressed go gazing, and the Seestar APP automatically slewed to the nebula and produced a live view within one minute, which I found really impressive. I moved the nebula to the upper left by clicking on the Big Dipper icon at the bottom right and repositioning the blue square in the virtual sky atlas, which represents the live view you will be getting. After I was happy with the result, I pressed the red button to start capturing, and the Seestar entered a two-minute autofocus and enhancing mode, after which it began stacking its 10-second pictures.
Finding deep-sky objects in the Singularity app is easy. Selecting the planet icon at the bottom of the screen provides you with a wealth of targets to choose from, neatly organized in categories like nebulae, galaxies, solar system, star clusters, and more. The constellation category is quite interesting, as it shows the various deep-sky objects of interest within each of the constellations. For example, Orion features 11 deep sky objects.
Another great option is the Plan My Night mode, which can be found by clicking on the scheduling icon at the bottom of the screen. You can create a plan by clicking on the plus icon, selecting the location and date you will be imaging, naming your plan, and the Singularity app will show you various objects that will be visible during that night at that location to add to your schedule.
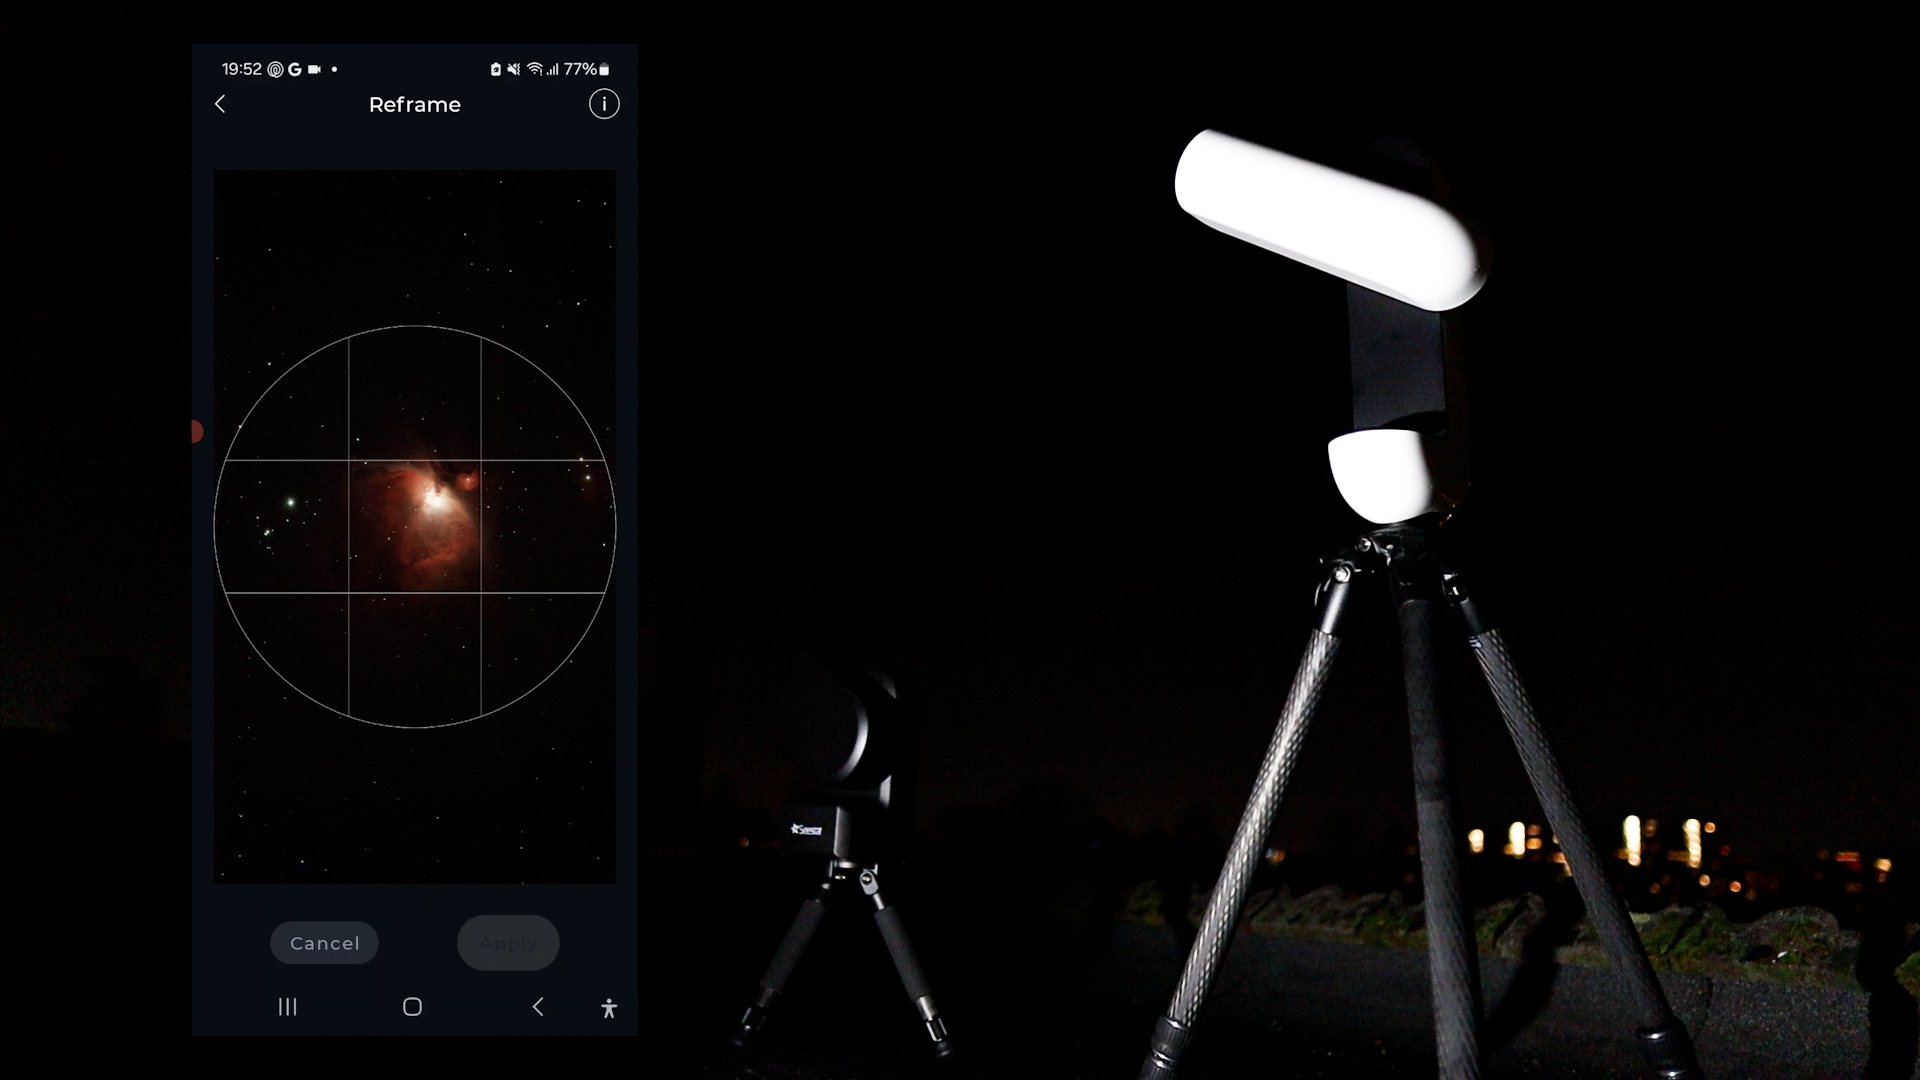
As the telescope was still initialized after observing the Moon, I simply selected the Orion Nebula and clicked on the observe button. The Vespera II automatically slewed to the target and started tracking and autofocusing. After two minutes, the Orion Nebula appeared on my screen, and the Vespera II automatically started stacking 10-second pictures. If you want to reframe the target, simply click on the reframe icon at the bottom of the screen and swipe the target to where you want. The Vespera II will automatically reposition itself to match your preferred view.

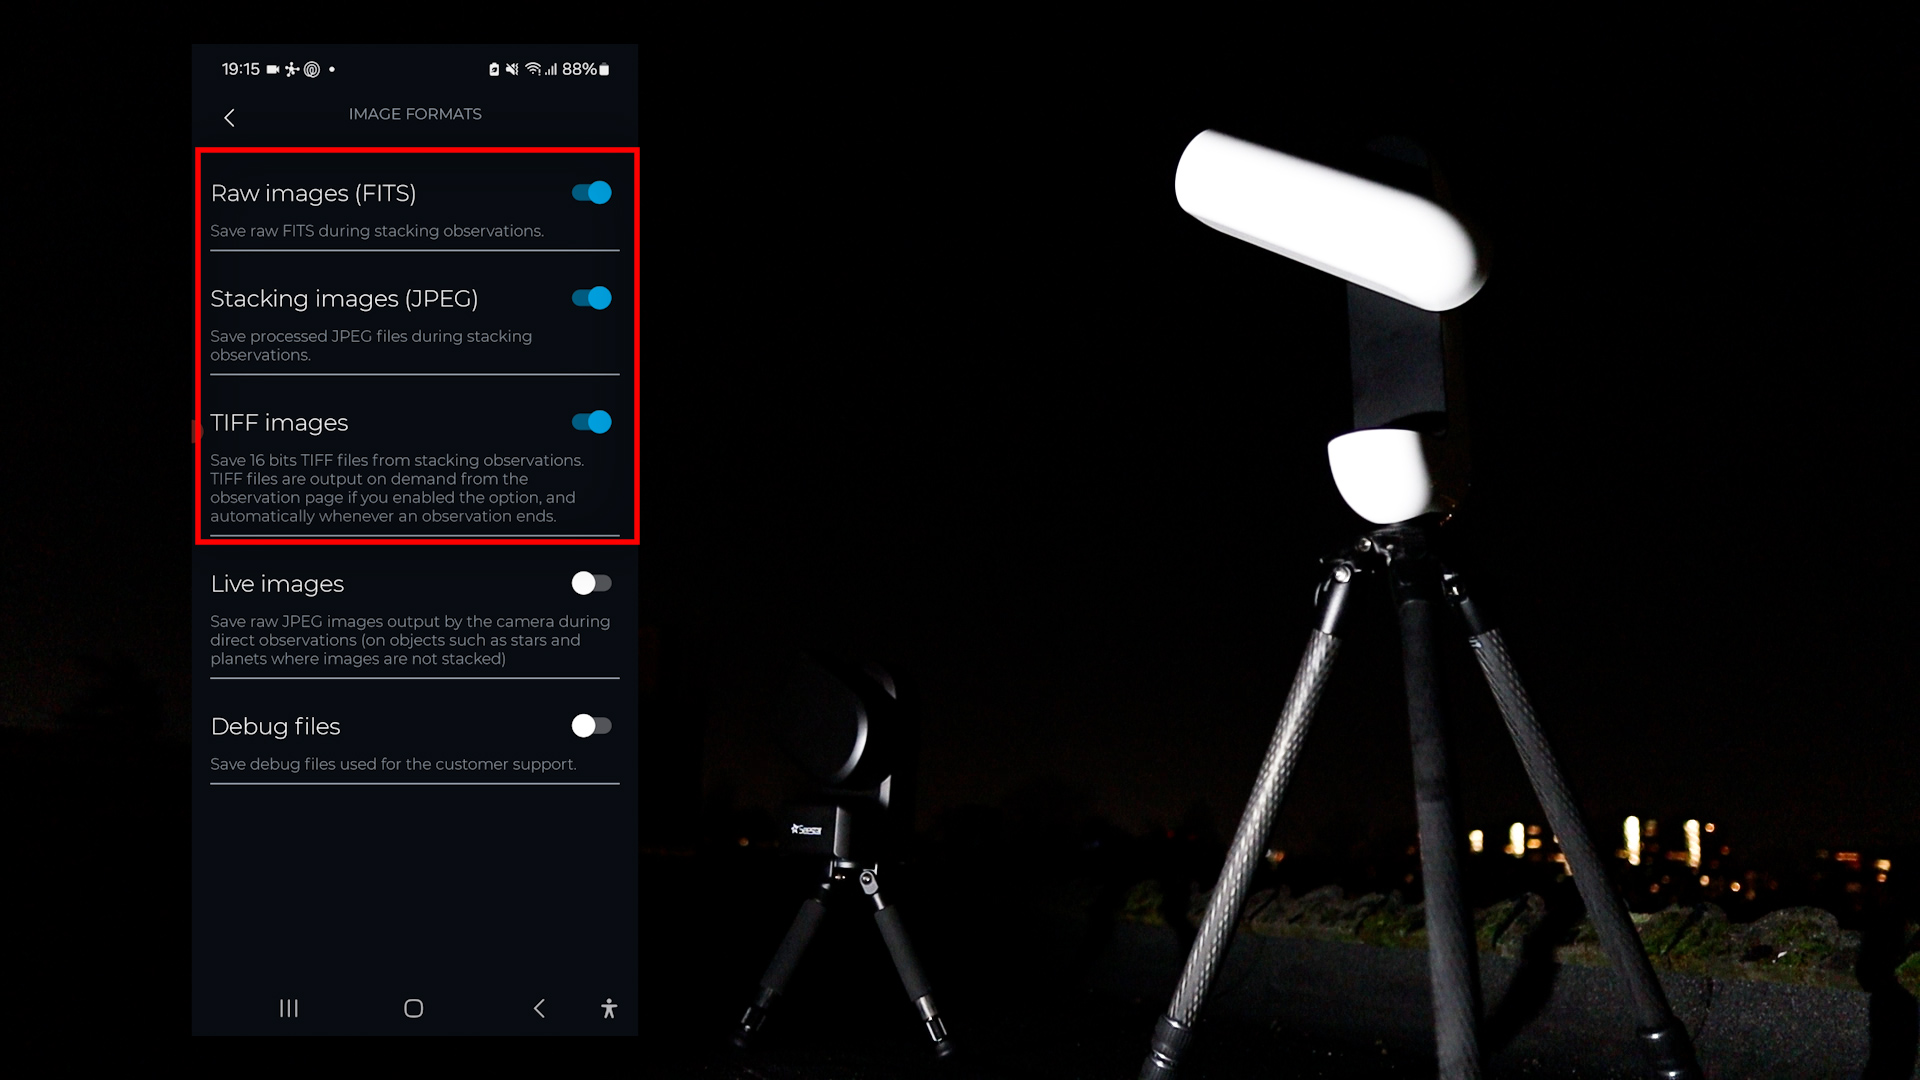
With both telescopes at the same time, I tracked the Orion Nebula for about 1 hour before stopping both observations. With the Vespera II, you have the option to save your individual images in FITS format, as well as the progressively stacked pictures in JPEG format. Enabling TIFF images will save a high-quality stacked TIFF file at the end of each observation session, which can be used for further processing. I especially like the stacked JPEG pictures, as it allows you to recreate a movie of the actual stacking process.
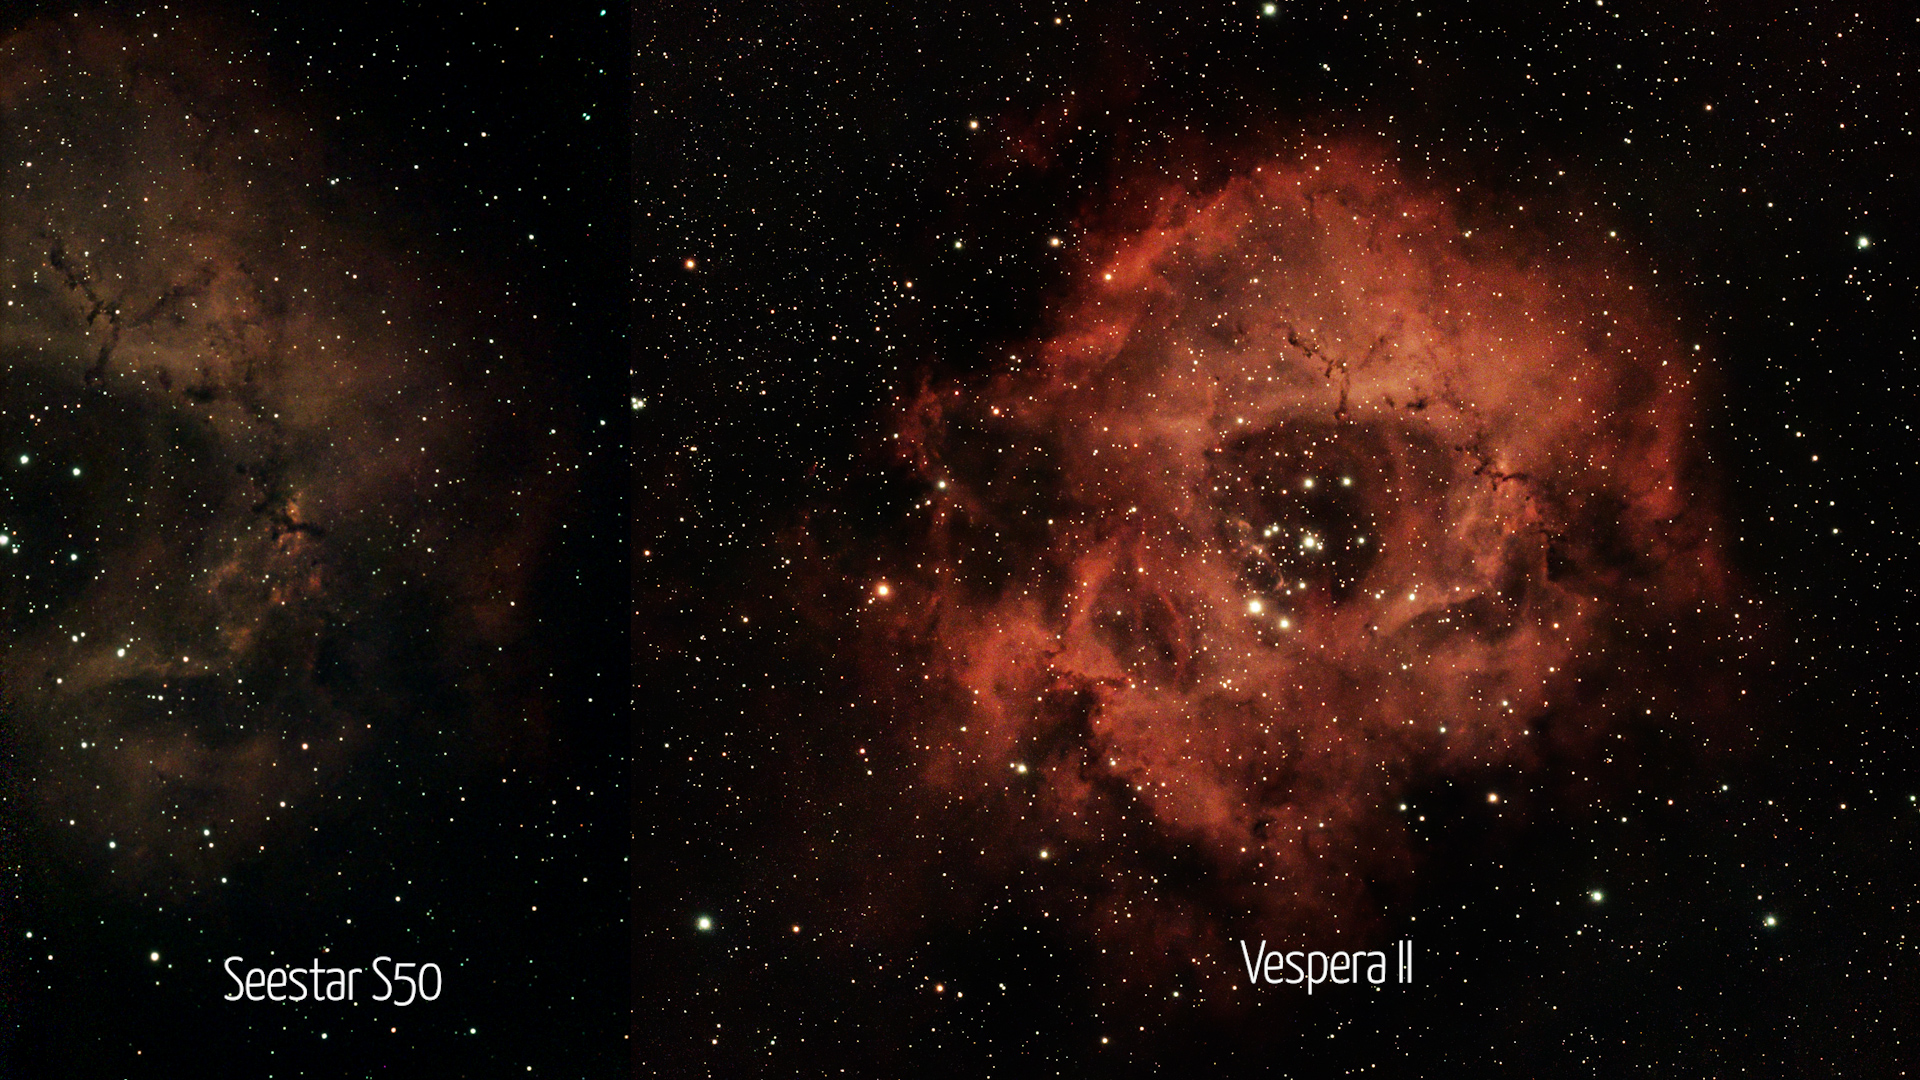
The Seestar also saves each picture in FITS and JPEG format and creates a TIFF file at the end of the stargazing session. Let me show you the processed photos of the Orion Nebula captured with both telescopes. The difference is quite obvious. The 8.3 MP camera sensor on the Vespera II has a much larger field of view while holding the same resolution and image scale as the Seestar S50. The Seestar does produce a nice picture of the Orion Nebula, but the nebula barely fits the field of view. The Vaonis Vespera II has a field of view that is more than 3 times bigger than the Seestar and doesn’t have any issue fitting the Orion Nebula in the picture.
Let’s move on to my second target attempt that night: the Rosette Nebula. The Rosette Nebula is a little over 1.3 degrees in size, and that doesn’t fit the field of view of the 2-megapixel camera sensor of the Seestar S50. So, I decided to aim at half the Nebula, which contains interesting dark structures.

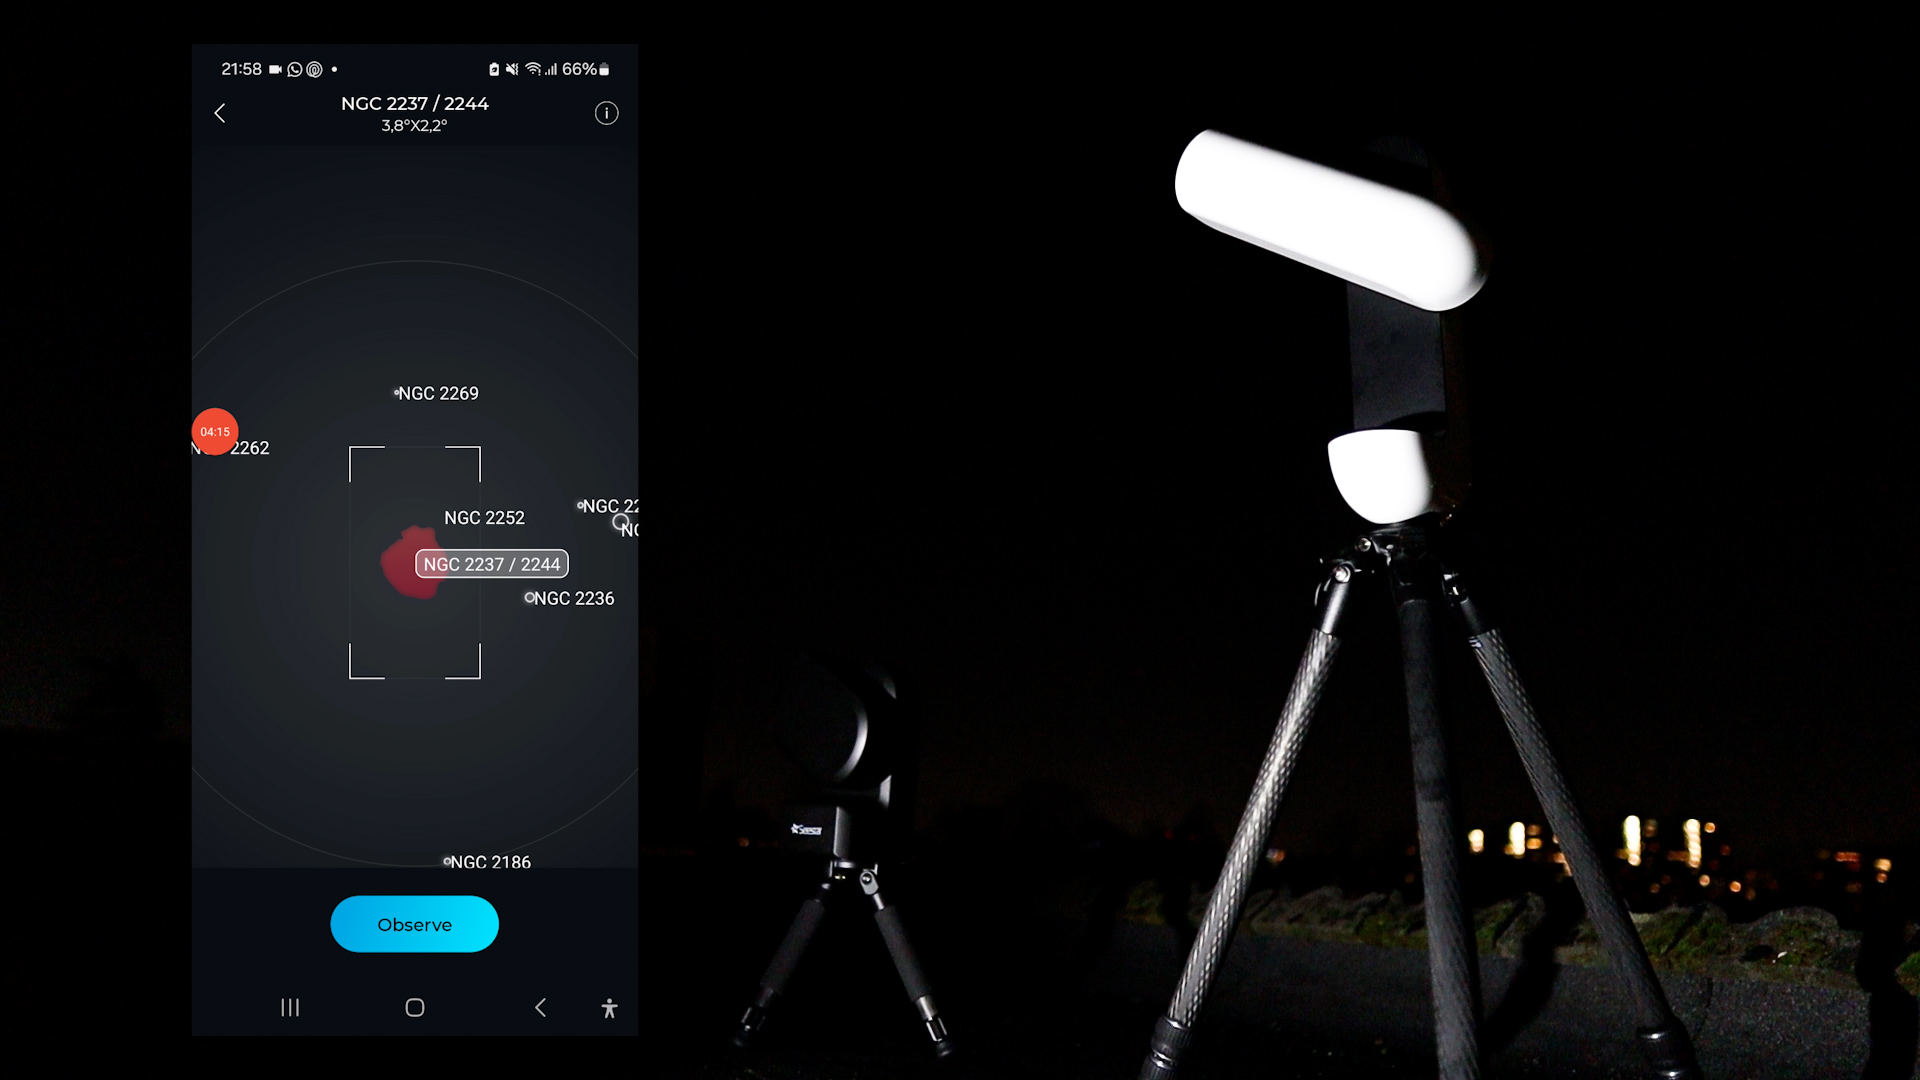
After setting up the Seestar S50, I was eager to set up the Vaonis Vespera II because I already knew from testing the classic version of the Vespera that Vaonis smart telescopes have a special trick – mosaic mode, also referred to as CovaLENS. This mode enables you to shoot a panorama picture of the night sky. When selecting a target and choosing mosaic mode, you will be presented with a picture of the target you want to image and a rectangle. You can rotate, enlarge, and reduce that rectangle by using two fingers to pinch and rotate, and use one finger to move the rectangle to the target you want to capture. The mosaic mode lets you create a mosaic up to four times the original camera sensor size. It does take over an hour or two to image the target as the Vaonis Vespera II will separately photograph different parts of the mosaic with its sensor and integrate it into a panorama picture. When in mosaic capturing mode, you can see a rectangle at the top of the capturing screen with a number, indicating the number of times it successfully photographed all parts of the picture.
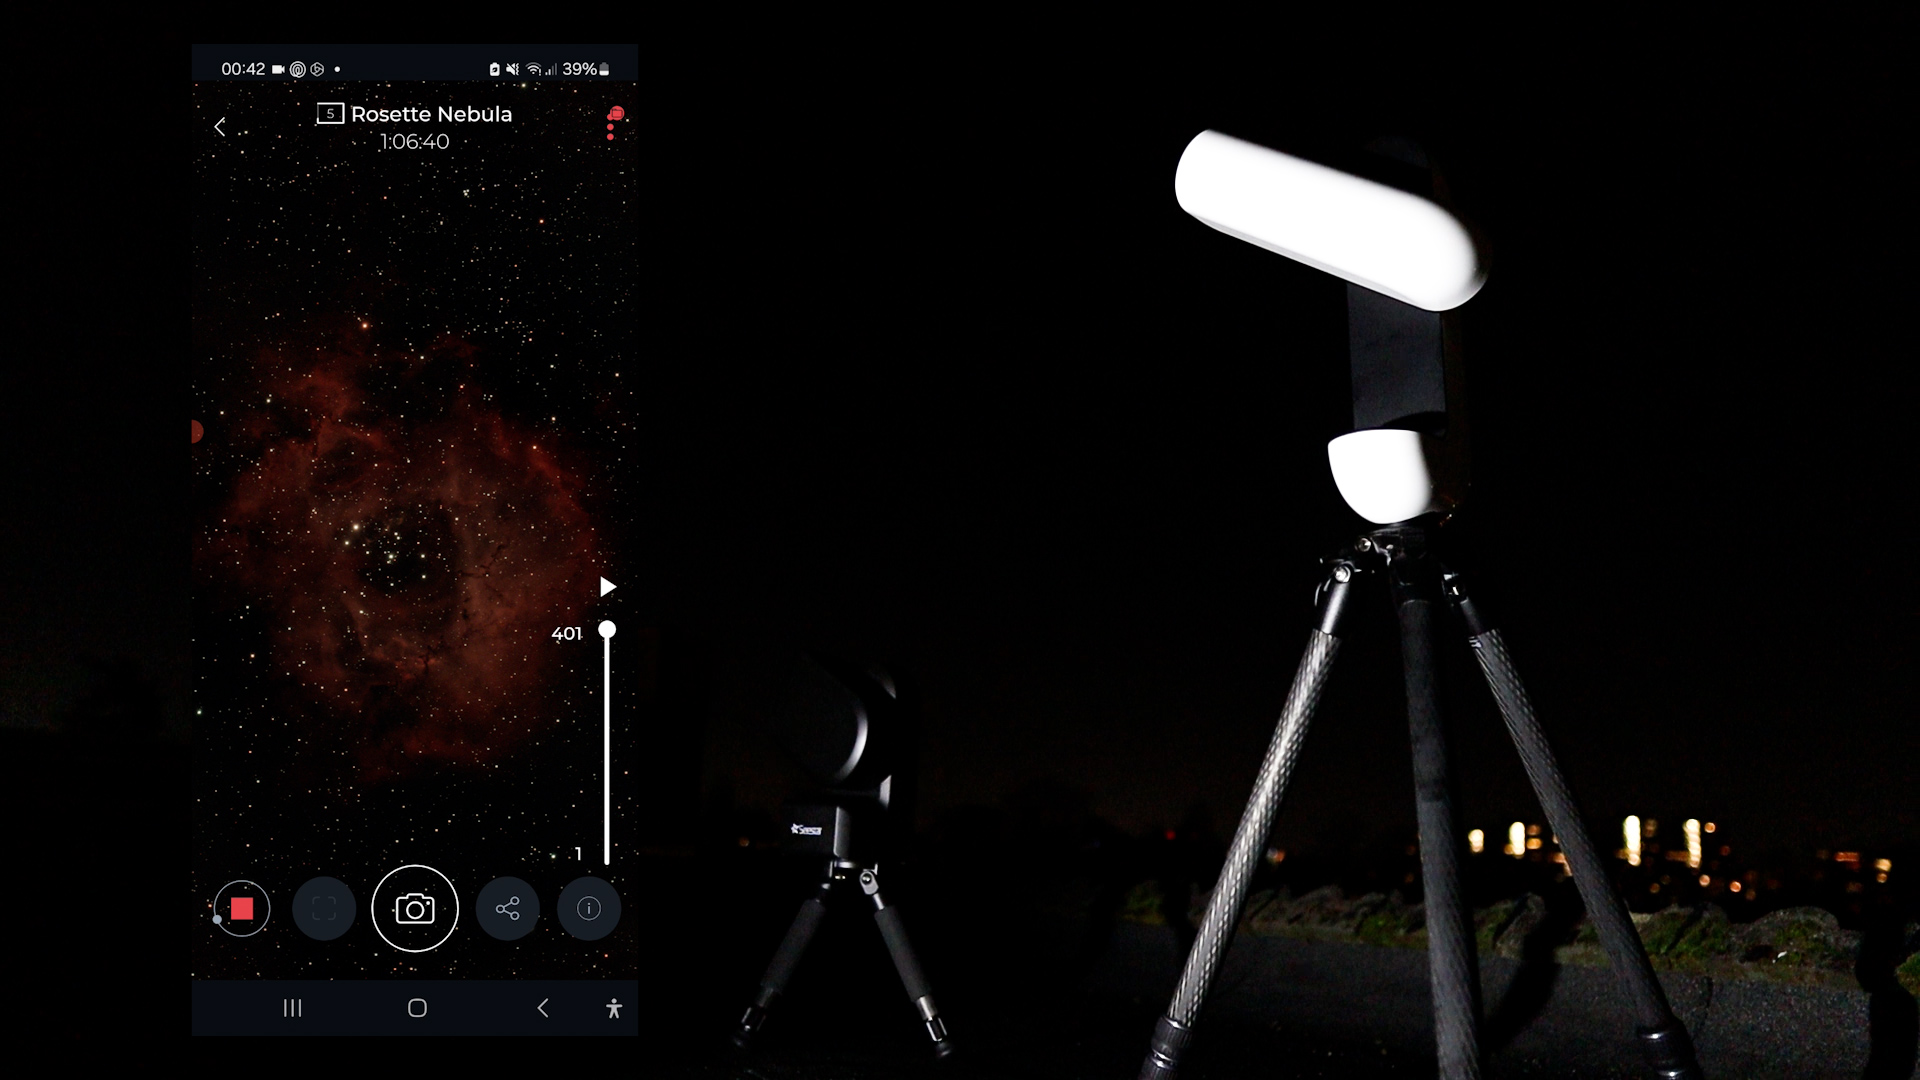
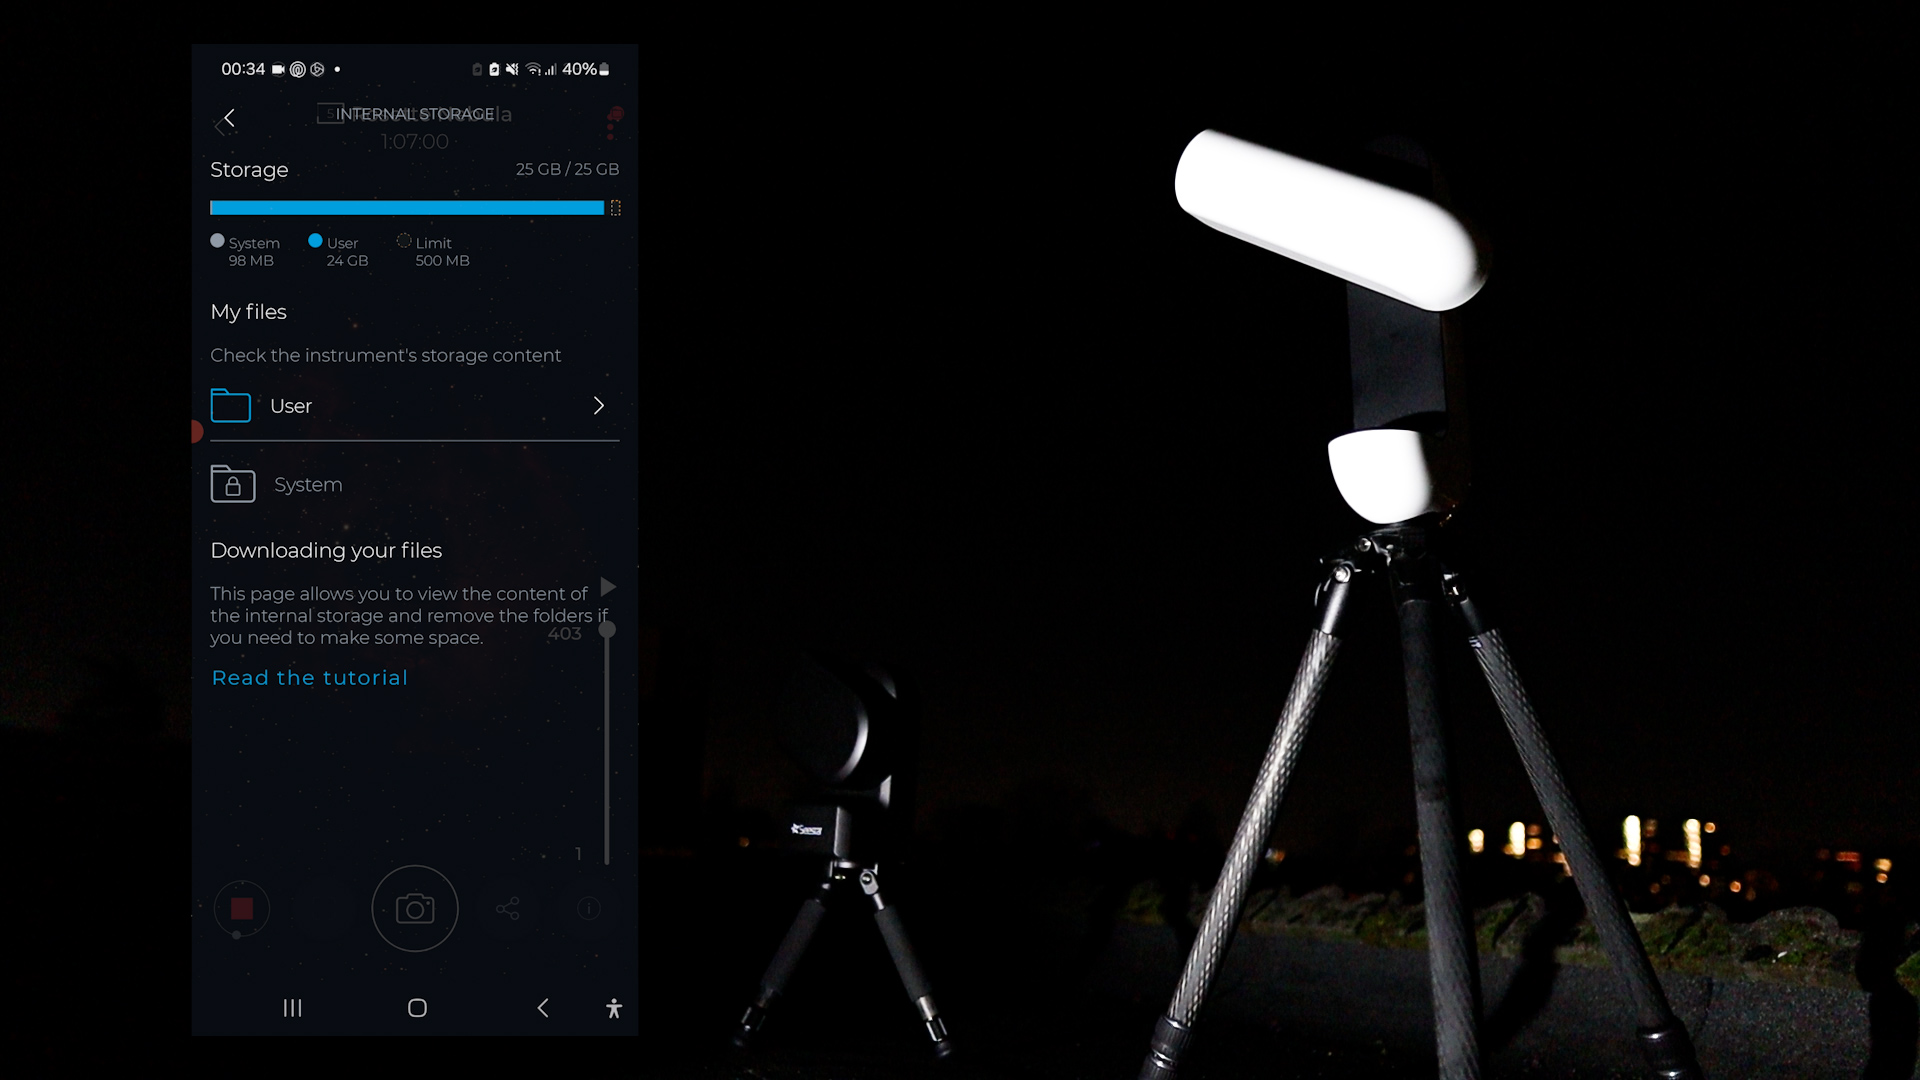
I had a couple of challenges when capturing the panorama picture of the Rosette Nebula with the Vaonis Vespera II. First, the Vespera II was running out of battery, as the Vespera II’s battery only lasted for about 4 hours. So I took my portable power station and a USB-C cable to recharge the Vespera II while imaging. This worked great. The second challenge was humidity. I know the Vaonis has an additional dew heater available that can be installed on the Vespera II, but I couldn’t find it. So, I ended up putting a dew heater band around the Vespera II, and that worked fine too. Just when I thought I’d solved all challenges, the Vespera II indicated that it was running out of storage space. The total storage space is 25 gigabytes on the Vespera II, and you quickly run out of space when using the mosaic mode. So after 1 hour and 20 minutes, I had to cancel the panorama capture on the Vespera II and I also decided to end the capturing session with the Seestar S50. Here are the two pictures of the Rosette Nebula, captured with the Seestar S50 and the Vaonis Vespera II.
The ZWO Seestar S50 can be purchased directly at ZWO, and at Agena Astro (USA/WW), High Point Scientific (USA/WW), and Astroshop (EU/WW).
The Vaonis Vespera II is available at Vaonis, Agena Astro (USA/WW), High Point Scientific (USA/WW), and Astroshop (EU/WW).
Jupiter: ZWO Seestar S50 vs. Vaonis Vespera II
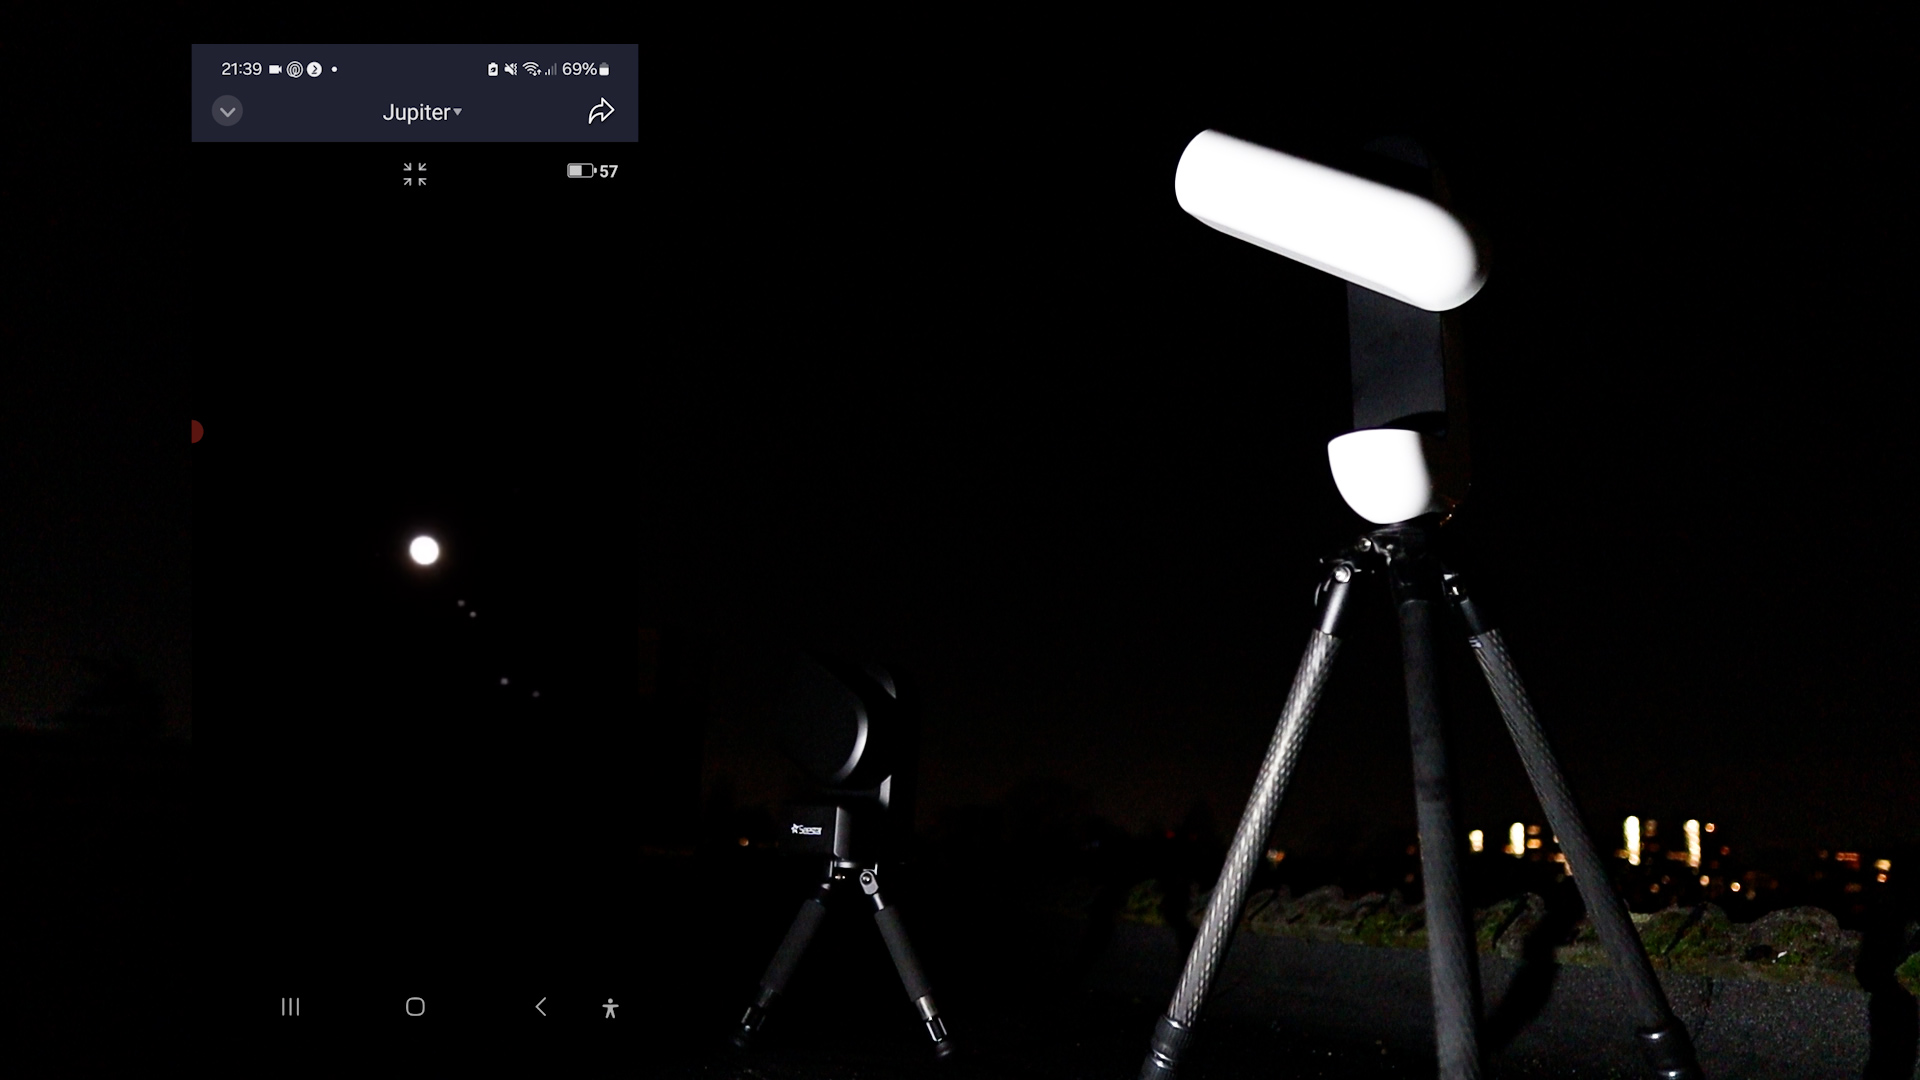
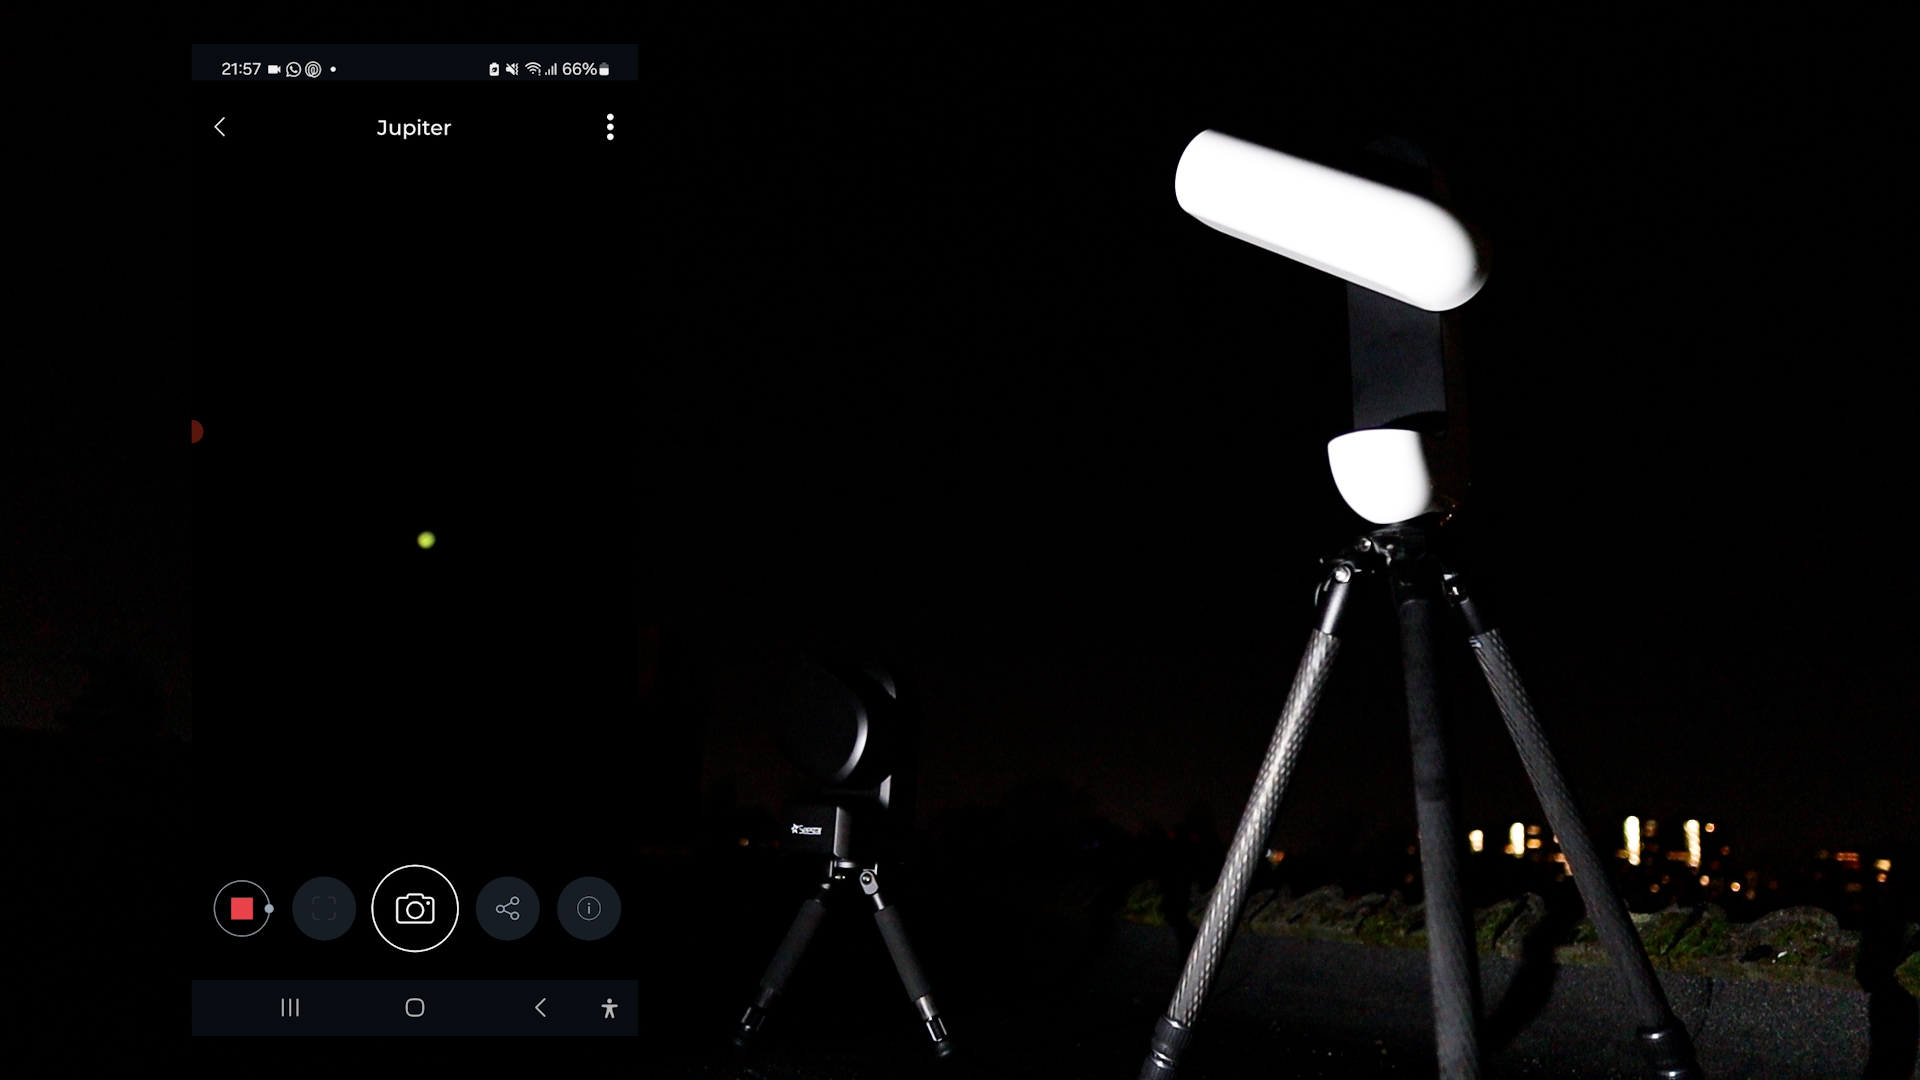
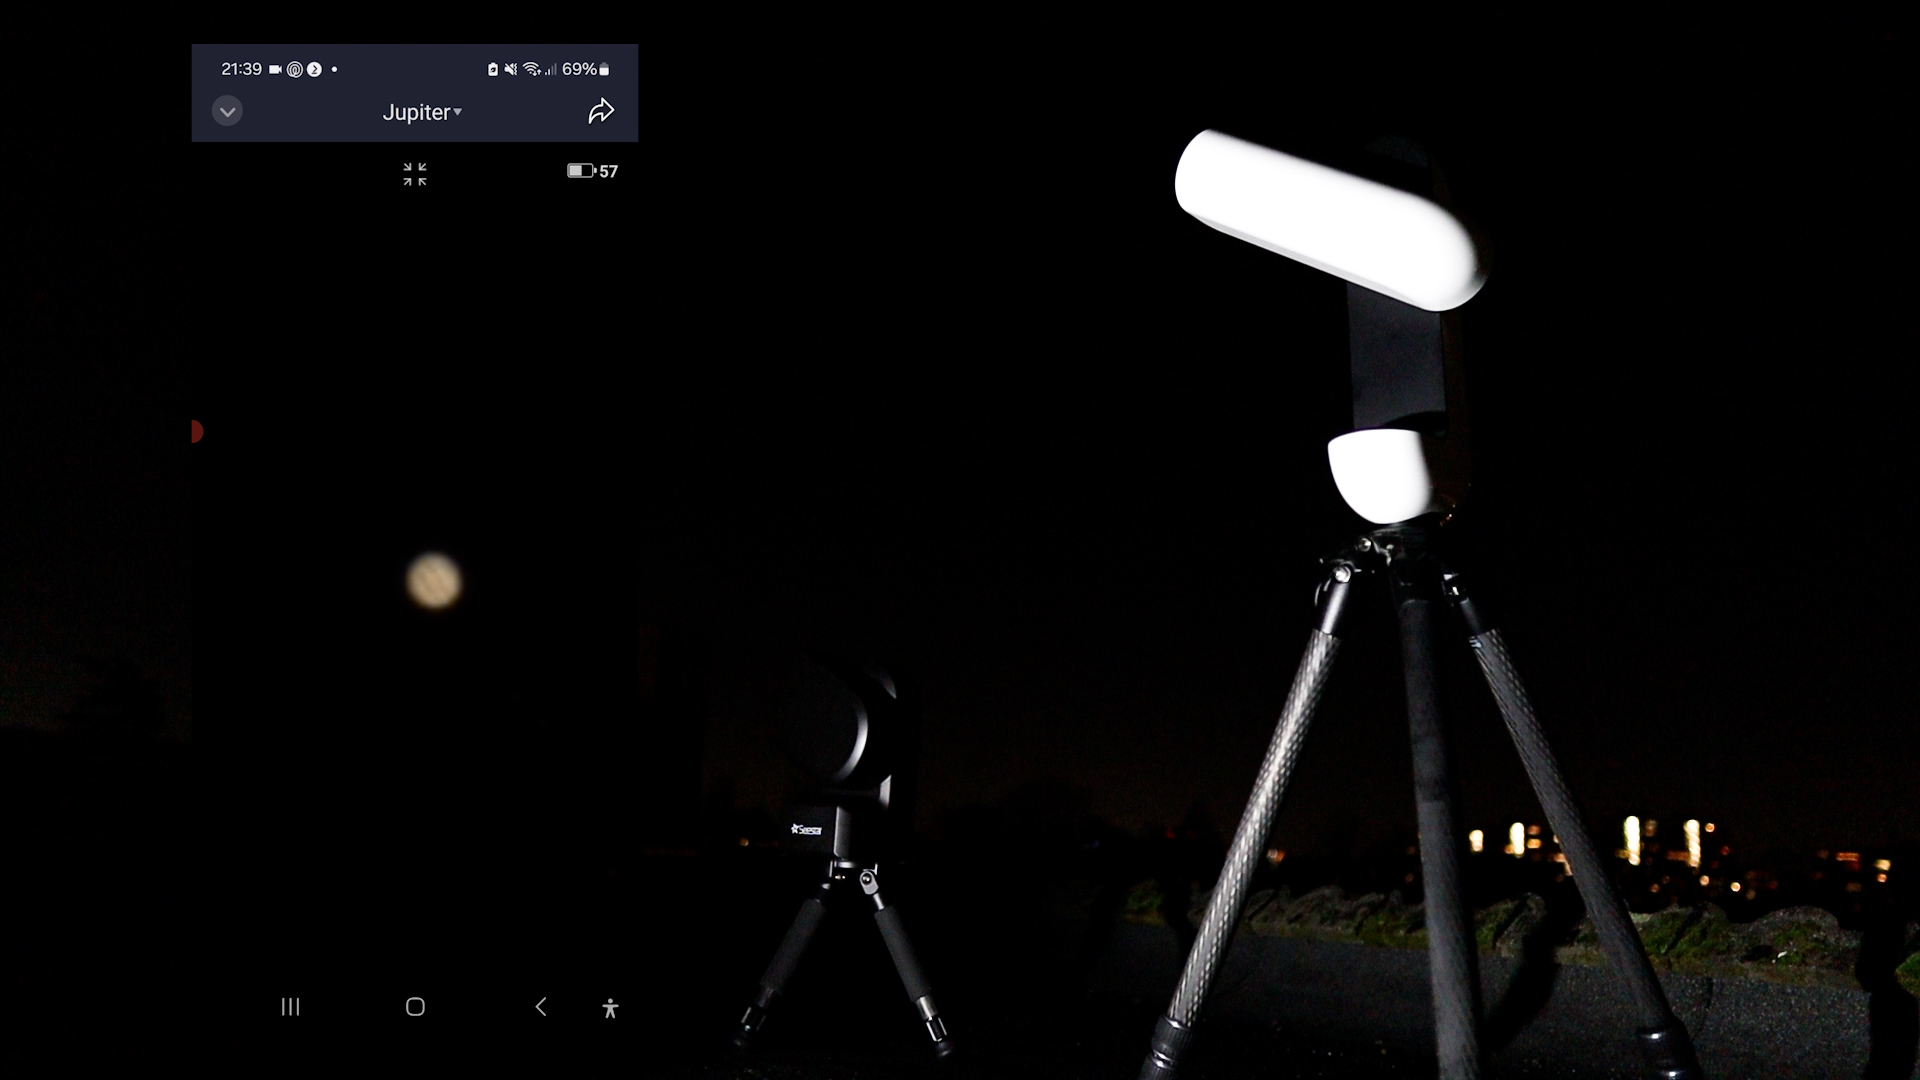
Finally, I do find it important to remind you that both these telescopes are not great for planetary imaging. Here’s my attempt to capture Jupiter with both telescopes. You can see Jupiter as a small dot in the night sky. The Planetary mode on the Seestar does enable you to play around with the exposure settings, so you can expose the four Galilean moons around Jupiter when increasing the exposure time, and you can zoom in and decrease the exposure time to see the two major cloud bands of Jupiter. However, the target remains very small on your screen. Don’t expect any Hubble or James Webb pictures. The same is true for the Vespera II. Jupiter appeared as a tiny dot in the field of view. You’ll need a bigger telescope with a longer focal length to capture the planets.
Conclusion
So here are my final thoughts. I love using both smart telescopes. They are up and running in just a couple of minutes, they are both lightweight and the apps make it easy to control both smart telescopes over WiFi. You can enjoy an enhanced view of the night sky within a couple of minutes without having to learn all the intricacies of astrophotography to capture the night sky like I had to learn in the past decade.

Both telescopes have their pros and cons when comparing them. I love using the solar and lunar modes in the Seestar app to capture the Sun and the Moon. The Seestar is very fast in finding both objects and you can capture the moon during the day and night. The Singularity app of the Vaonis Vespera ii has a specific solar mode but lacks a special lunar mode. This means, in practice, that you have to wait until the stars are visible and initialize the telescope before you’re able to watch the moon. Also, it takes the Vespera about two minutes to autofocus on the object whereas the Seestar S50 can refocus on the Moon and the Sun in a couple of seconds. The Seestar also features more options when gazing at the Sun and the Moon, such as the ability to adjust the exposure settings, and controls to reposition the telescope, and it can record in the video, which is great for capturing unexpected events such as a plane passing in front of the Sun. It also features a timelapse mode, which should be great for capturing upcoming lunar and solar eclipses.
Moving on to nighttime use, I favor the Vaonis Vespera II. Both apps work great with plenty of options to automatically find and capture deep-sky objects like nebulae, galaxies, and star clusters. The Vaonis Vespera II shines here, as it has a much bigger and newer camera sensor to capture these deep-sky objects. It also features a unique mosaic CovaLENS mode to take panorama pictures up to 4x the view of the camera. This makes the Vespera II great for large expansive nebulae in the night sky. It also reduces the issues related to field rotation, as the field of view is so big you can easily center and fit the object of interest. The Seestar S50 does do a good job of capturing parts of these nebulae, but after one and a half hours, you will notice the effects of field rotation at the edges of the stacked pictures that do not overlap and look noisy.
I did run into a couple of challenges with the Vespera II. As the internal storage capacity is 25 gigabytes, I ran out of storage space when capturing a mosaic, in combination with previous capturing sessions during that same night. The Seestar S50 has a 64 GB storage capacity and a smaller camera sensor, so I didn’t run into any issues here. It is straightforward to transfer files to your computer with both telescopes, and both apps allow you to share your pictures immediately online using your smartphone, iPad, or tablet. The Seestar app even features a whole community of users you can interact with.
Finally, the battery on the Seestar S50 has a 6-hour operating capacity, whereas I did need my portable power station to recharge the Vespera II during an imaging session after it almost ran out of battery after 4 hours of use. All in all, I think both telescopes are great. If you’re looking for an affordable telescope to gaze at sunspots and the moon and take some decent snapshots of deep-sky objects, the Seestar S50 is a solid choice. If you’re able and willing to spend a bit more, the Vespera II offers a more capable camera sensor with its unique mosaic mode to capture beautiful, expansive nebulae of the night sky. You can find more information about these and other smart telescopes on my website astroforumspace.com. Thanks for watching and see you in the next video.
The ZWO Seestar S50 can be purchased directly at ZWO, and at Agena Astro (USA/WW), High Point Scientific (USA/WW), and Astroshop (EU/WW).
The Vaonis Vespera II is available at Vaonis, Agena Astro (USA/WW), High Point Scientific (USA/WW), and Astroshop (EU/WW).
bonjour,
excellente comparaison, l’idéal serait un appareil reprenant le meilleur des deux, par exemple un capteur 4k ou 8k, une mémoire de masse de 1terra, une batterie plus costaude.
j’ai le seestar S50 et je débute avec.
bonne journée.
Vespera II 4x the sensor size + mosaic mode = better deal than Seestar!
4x price of seestar
seestar app has now the mosaic mode. So that will be not a problem. But Vespera has a bigger camera sensor. But for that, you have to pay almost 3 times, and for tripod and solar filter , you have to pay more. That is completely unjustifiable. In that price i will get a very good astrophotgraphy rig.