Vaonis recently sent me their brand-new Vespera II-X smart telescope, and over the past weeks I’ve been putting it through a series of real-world imaging sessions. I was curious how this new model performs on a wide range of astronomical objects, from high-contrast daytime imaging of the Sun, to detailed views of the Moon, all the way to popular deep-sky objects at night. In this review, I’ll share my first experiences, show the results I captured, and discuss how the Vespera II-X fits into the growing world of smart telescopes. Whether you’re considering this telescope for travel, backyard observing, or live stacking astrophotography, this hands-on test should give you a solid impression of what it can really do.
Vespera II-X unboxing and technical specs
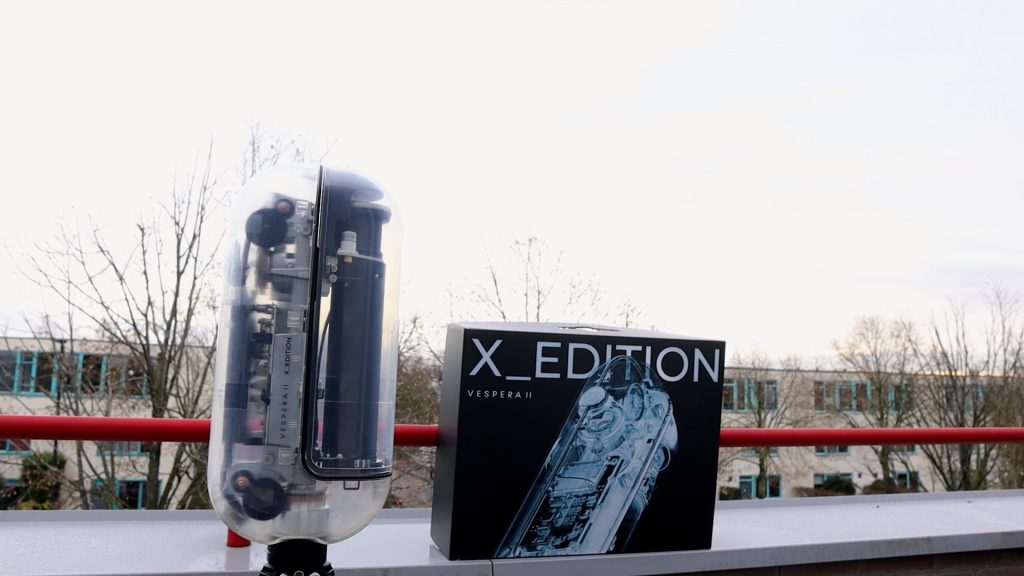
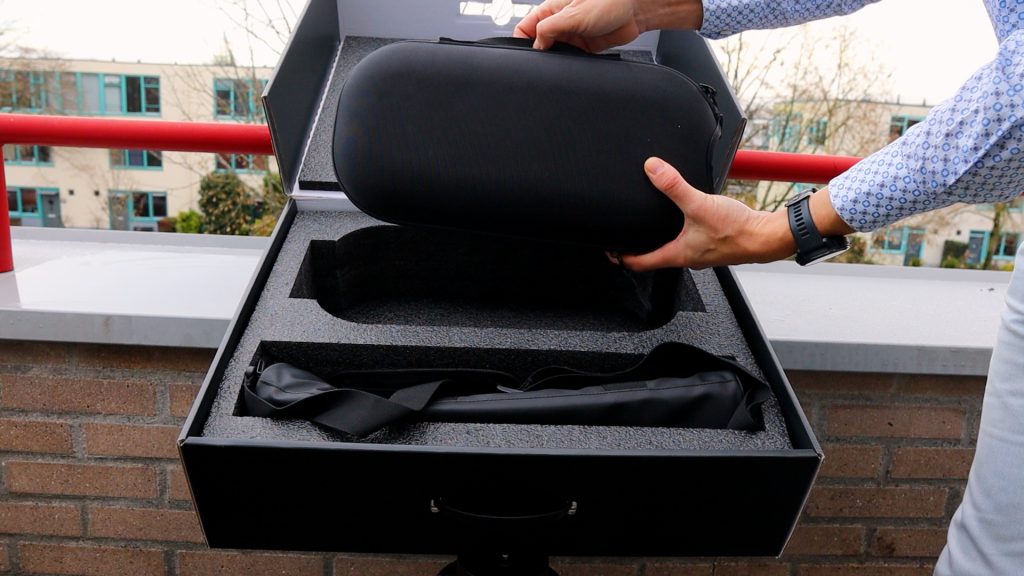
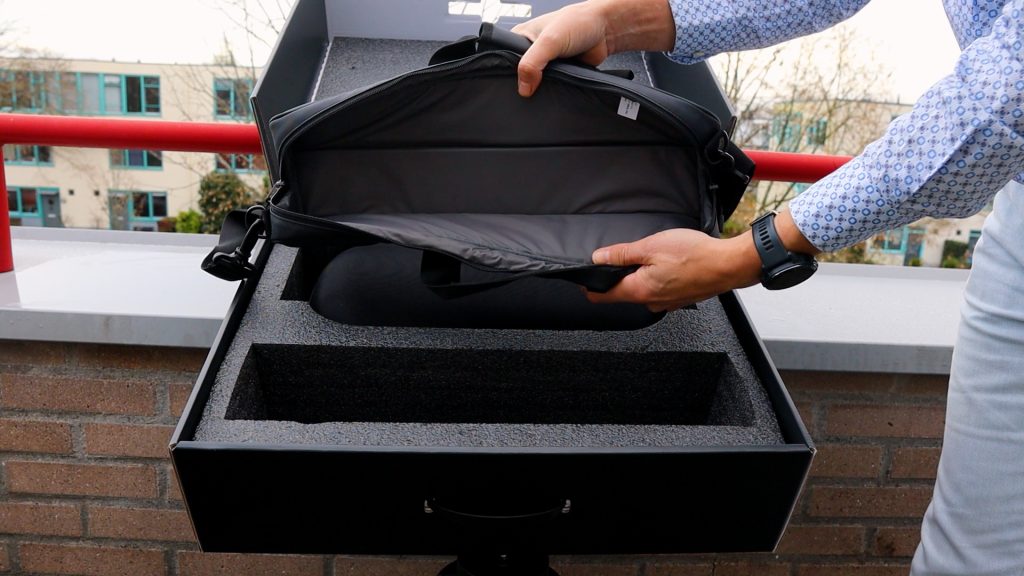
The Vespera II-X edition arrives in a well-designed package that includes a durable hard case for storing the smart telescope securely, along with a leather carry bag for the lightweight carbon tripod. It’s a compact setup that feels purpose-built for travel and quick deployment.
Optical Design and Camera Sensor
At the heart of every Vespera II model is the same quadruplet apochromatic refractor with a 50 mm aperture and a 250 mm focal length. This optical design delivers well-corrected, color-accurate views of the night sky—something Vaonis has become known for.
Instead of a traditional eyepiece, the Vespera II-X uses a Sony IMX585 8.3-megapixel sensor. This produces a 2.5 × 1.4-degree field of view, roughly five times wider than the apparent diameter of the Moon. Thanks to Vaonis’s Covalens mosaic technology—which I’ll explore later—you can create high-resolution images up to 24 megapixels at 2.39 arcseconds per pixel.
Storage, File Formats, and Battery Life
The Vespera II-X includes 25 GB of internal storage, capturing deep-sky objects as:
- single 16-bit FITS files
- stacked TIFF files
For Solar System imaging, such as the Sun and Moon, the telescope can also save individual 8-bit JPEGs. Power comes from a built-in battery rated for about 4 hours of use, and it can be recharged via USB-C—even while the telescope is actively imaging.
Optional Filters and Accessories
Vaonis offers several optional filters to expand the telescope’s capabilities:
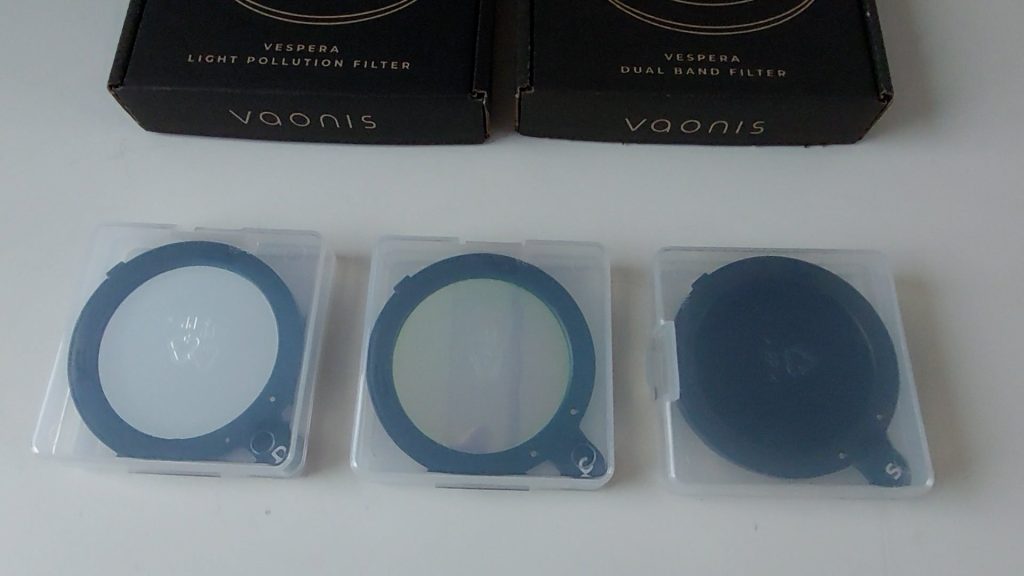
- Solar filter for safe solar imaging
- Light pollution filter for urban observing
- Duo-band filter for capturing emission nebulae in H-alpha and OIII
Dew Control and Pricing
The Vespera II-X also features an integrated hygrometer to help manage dew buildup—an essential feature for night-long sessions. Pricing currently sits at €2290, placing it as the premium option in the three-model Vespera II lineup, alongside the standard Vespera II and the Vespera II Pro.
The Vaonis Vespera II X-edition is available at: Vaonis (vendor, worldwide), Agena Astro (USA/WW), High Point Scientific (USA/WW), and Astroshop (EU/WW).
Vespera II-X setup and connecting to the Singularity app
Getting the Vespera II-X Edition ready for an observing session is pleasantly simple. You begin by extending the carbon tripod and leveling it using the built-in bubble indicator. Once the tripod is stable, attach the telescope, power it on, and the system is essentially ready.
To control the telescope, download the Singularity app on your smartphone or tablet. The installation process is quick and intuitive, and the app guides you through the initial steps. For readers who want a more detailed walkthrough, I’ve covered the full setup process in my original Vespera II review.
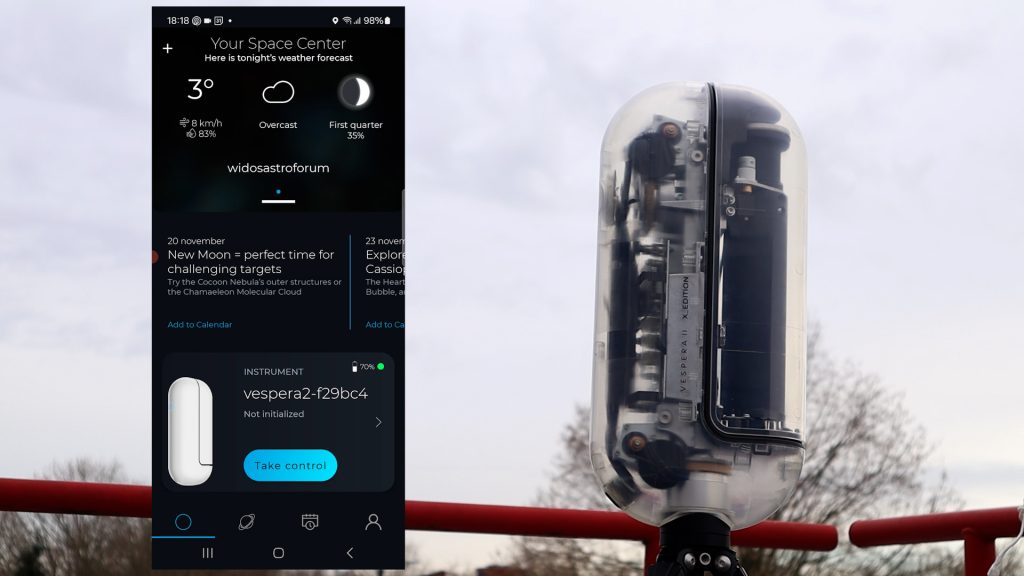
Connecting the Vespera II-X to your device is straightforward. Open your WiFi settings and select the telescope’s dedicated network—listed as “Vespera2” followed by a unique identifier. Once connected, the app can communicate directly with the telescope, allowing you to begin alignment and imaging.
Capturing the Sun with the Vespera II-X
Before starting the automated solar routine, I manually pointed the Vespera II-X roughly toward the Sun. From there, selecting Solar Mode in the app initiated the telescope’s setup sequence. The arm first moved to a 45-degree angle, and the software prompted me to confirm that the solar filter was attached. After a brief reminder about leveling the tripod and pointing the telescope toward the Sun—which I had already done—I tapped Confirm Arm Orientation.
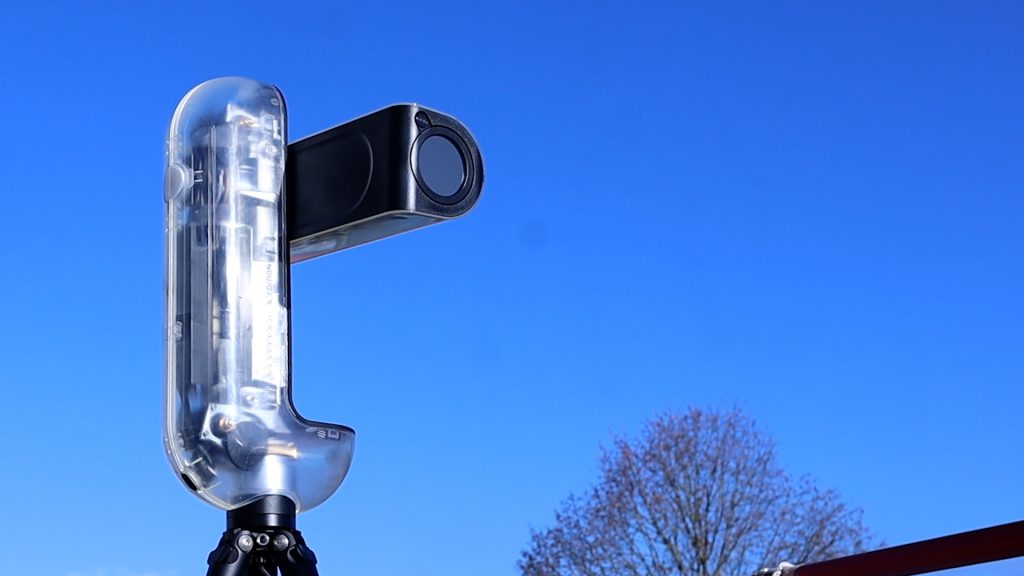
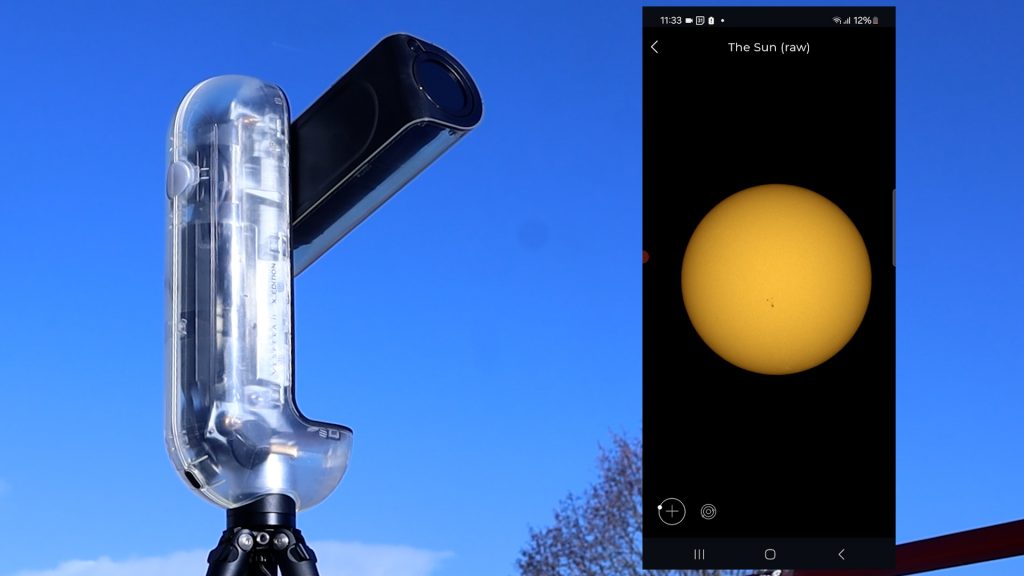
The telescope then retracted, raised again, and began its automatic pointing and focusing process. Within a couple of minutes, a live image of the Sun appeared on my screen. There weren’t many sunspots visible that day, but zooming in showed that the Vespera II-X had achieved solid focus.
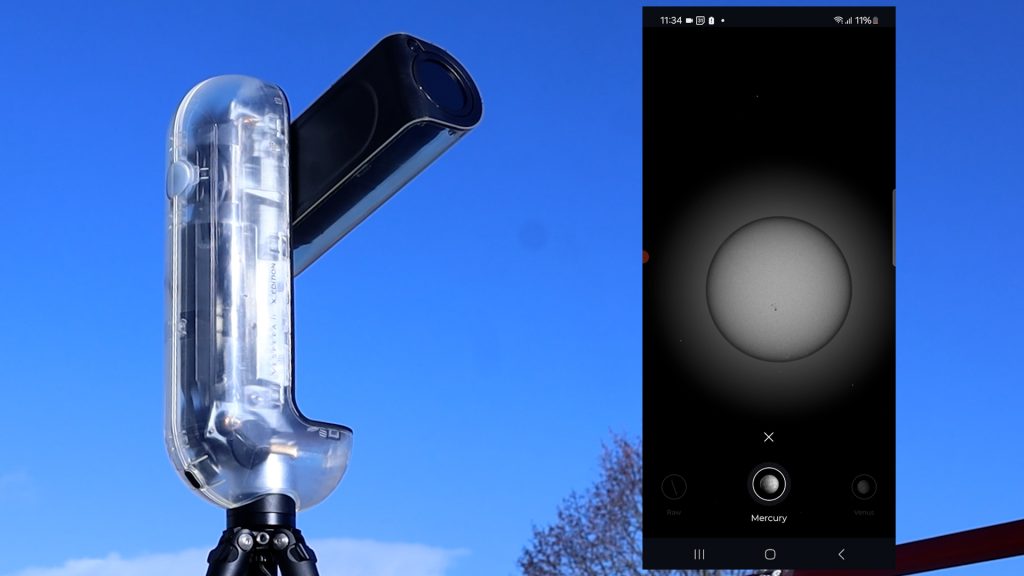
A Fun Solar System Feature
Tapping the Solar System icon in the Singularity app opened an interactive section where you can select other planets and see how large the Sun would appear from their perspective. As expected, Mercury and Venus displayed a significantly larger apparent solar disk, while the outer planets showed a smaller one. It’s a fun educational touch—even if not essential for imaging.
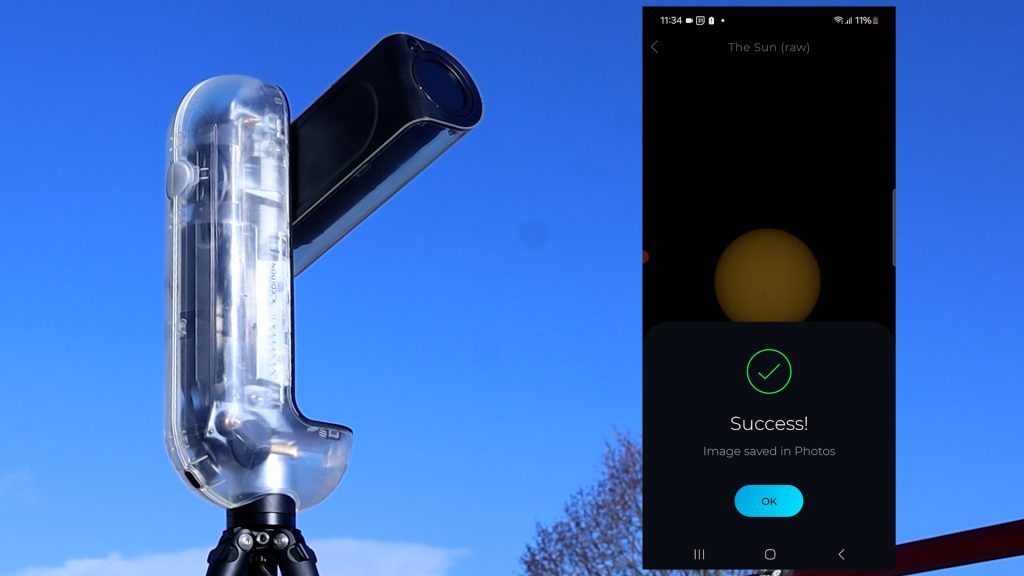
Saving Solar Photos
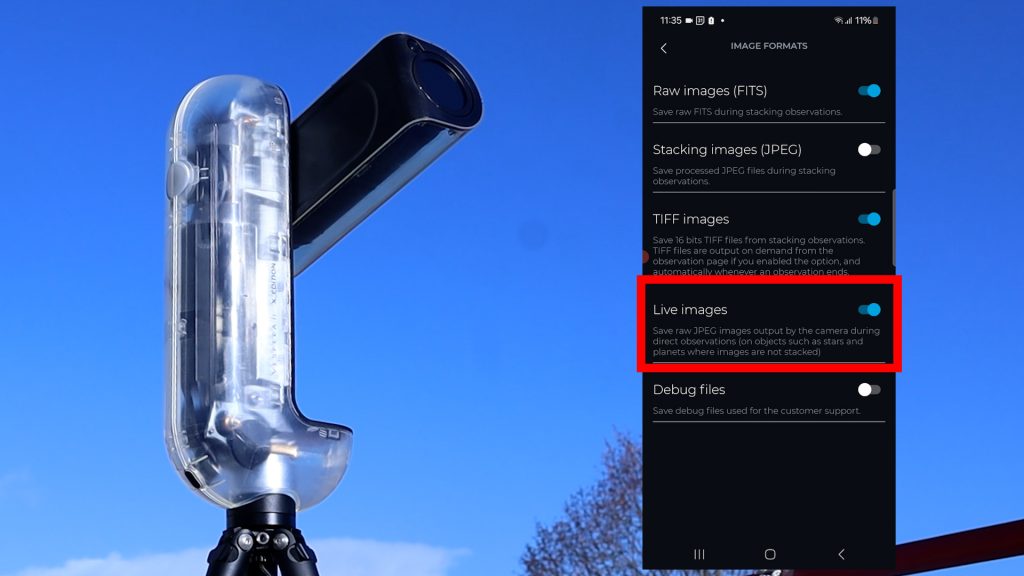
Back in the main view, the menu offered options to refocus and save images. I tapped Save Photo to capture a single solar snapshot. Then, under the “instrument” Vespera you’ll find “Image Format” where you can enable Live Images, which automatically saves all JPEGs during a live session. This allowed me to later stack the individual frames in Autostakkert and enhance the final result in Photoshop. After collecting a few minutes of data, I ended the session. The telescope returned its arm to the 45-degree position and prompted me to remove the solar filter.
Downloading Photos from the Vespera II-X
Transferring your photos from the Vespera II-X to a computer is not as straightforward as connecting a USB-C cable from the telescope to your computer. Start by powering on the telescope and connecting your computer or laptop to the Vespera’s dedicated WiFi network. Once connected, open your file explorer and enter:
ftp://10.0.0.1
This will give you access to the internal storage directory where all your captured images are saved. From here, you can simply copy the files to your computer and begin your usual editing workflow—whether that’s stacking, color correction, or full astrophotography post-processing.
Final Solar Results
Below is the single JPEG image captured through the app, followed by a processed version created by stacking about 100 JPEGs in Autostakkert and applying additional sharpening.

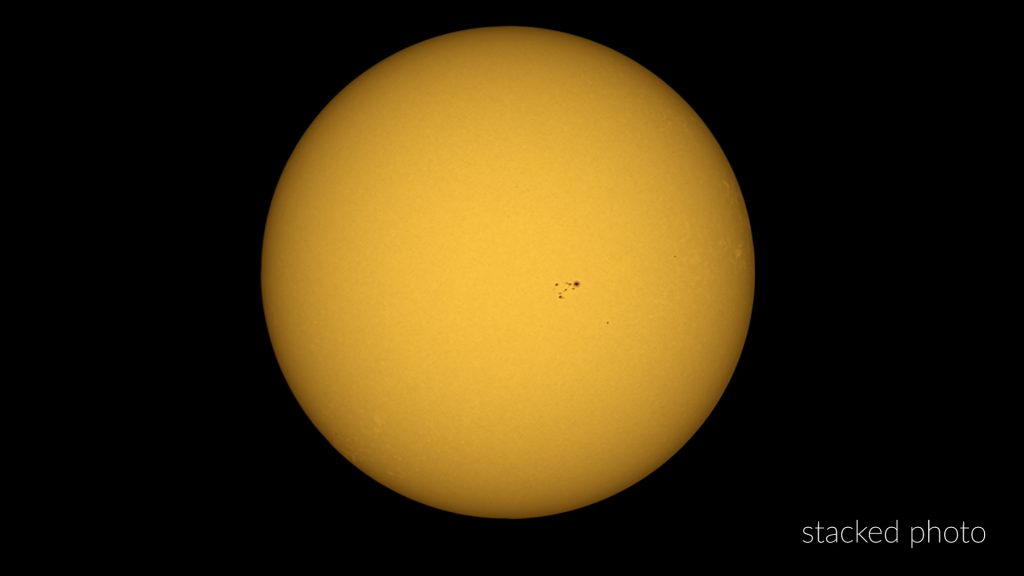
Overall, the Vespera II-X delivered a clean, well-focused view of the Sun. However, I did miss having an in-app auto-stacking feature, which some competing smart telescopes now include. Manually stacking the JPEGs on a computer certainly works and can produce excellent results, but the option to automate this inside the app would make solar imaging even more convenient.
Vespera II-X – Photographing the Moon
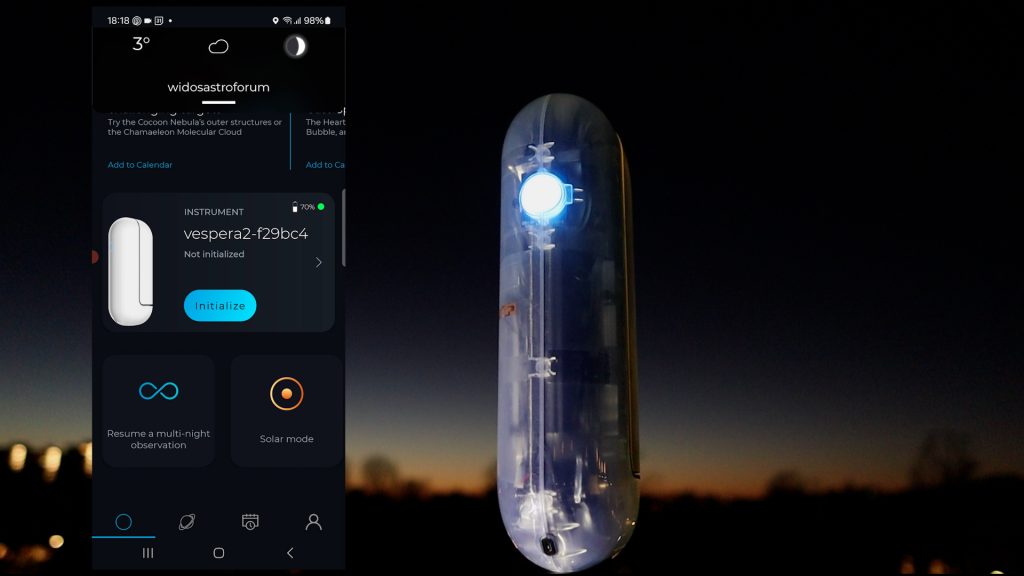
Once night fell, I set up the Vespera II-X on my rooftop, powered it on, and connected through the Singularity app. I began by tapping Initialize, which triggered the telescope’s automatic calibration and focusing routine. After a few minutes, the app reported a successful initialization, and I was ready to observe.
First Attempt: Crescent Moon Encounter
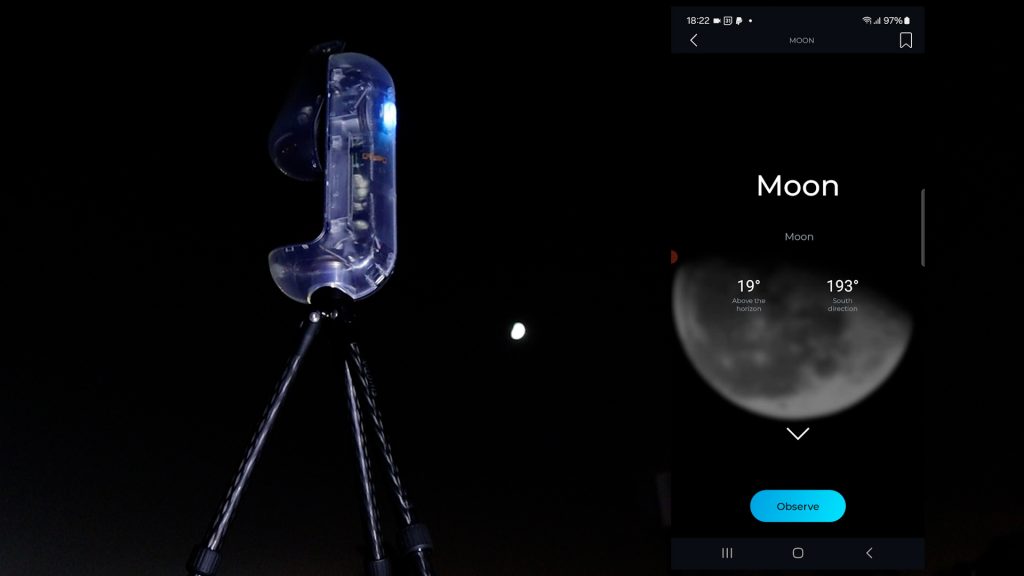
A beautiful crescent Moon was hanging low in the sky, so I tapped the small planet icon in the app, which opens the menu of Solar System and deep-sky objects. Selecting Solar System → Moon prompted the telescope to slew automatically to the lunar position. Within a minute or two, a live image of the Moon appeared on my smartphone.
However, the Moon was noticeably overexposed, likely due to thin haze that evening. I ran the autofocus routine again—and again—but each time the telescope returned an overexposed result. After several attempts, I ended the session.
This is one area where I’d love to see Vaonis add more manual controls, such as adjustable shutter speed or gain, which other smart telescope apps already include. Although the Singularity app offers an Expert Mode, it seems to be intended for deep-sky imaging rather than Solar System objects.
Second Attempt: Waxing Gibbous Moon
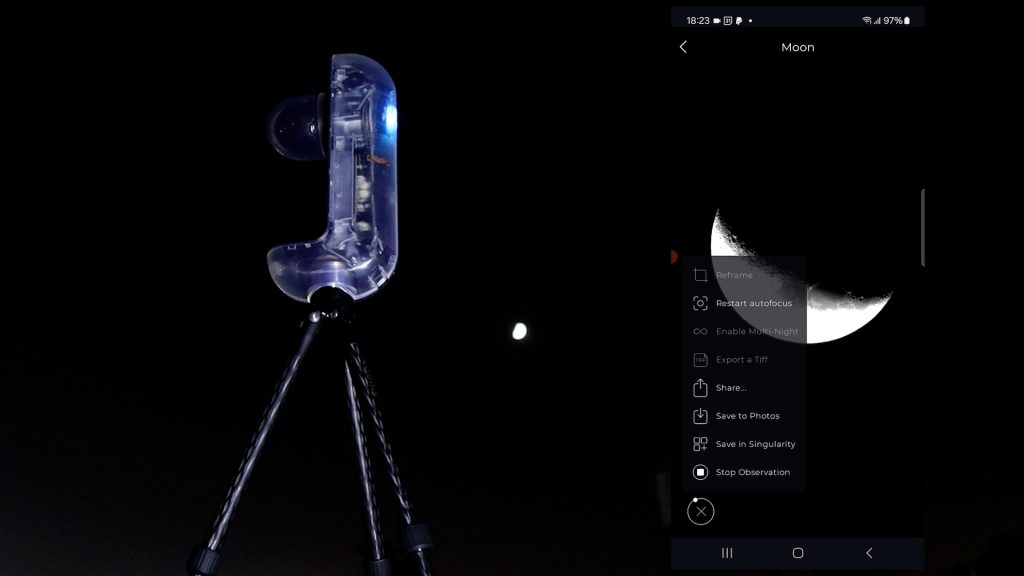
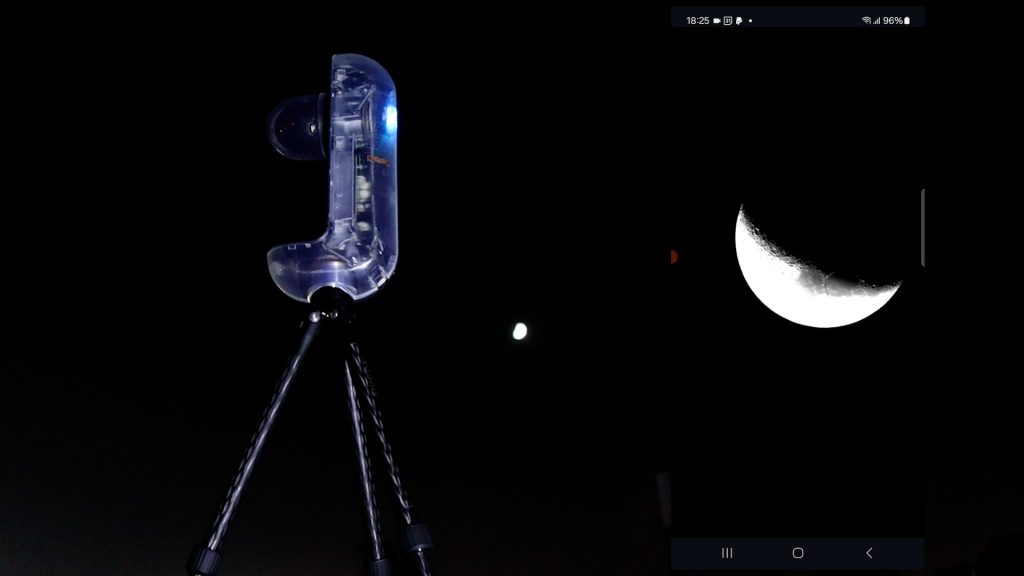
A couple of days later, under clearer conditions, I tried again—this time with a waxing gibbous Moon. After initializing the telescope, I selected the Moon and let the Vespera II-X handle the pointing. The exposure looked much better, but the image appeared upside-down—or more accurately, in a southern hemisphere orientation.
Assuming this might be a focusing issue, I ran autofocus again. A few minutes later, the Moon reappeared… still upside-down. It was clearly a real-time view, with thin clouds drifting across, but the orientation remained unusual for a northern hemisphere user.
Despite this, I continued observing for a few minutes with Live Images enabled in the Image Format menu. I also captured a single JPEG snapshot.

Final Lunar Results
Below are the results from that session:
- A single unprocessed image captured directly through the Singularity app
- A stacked and sharpened version created using ~100 JPEG frames processed in AutoStakkert and Photoshop
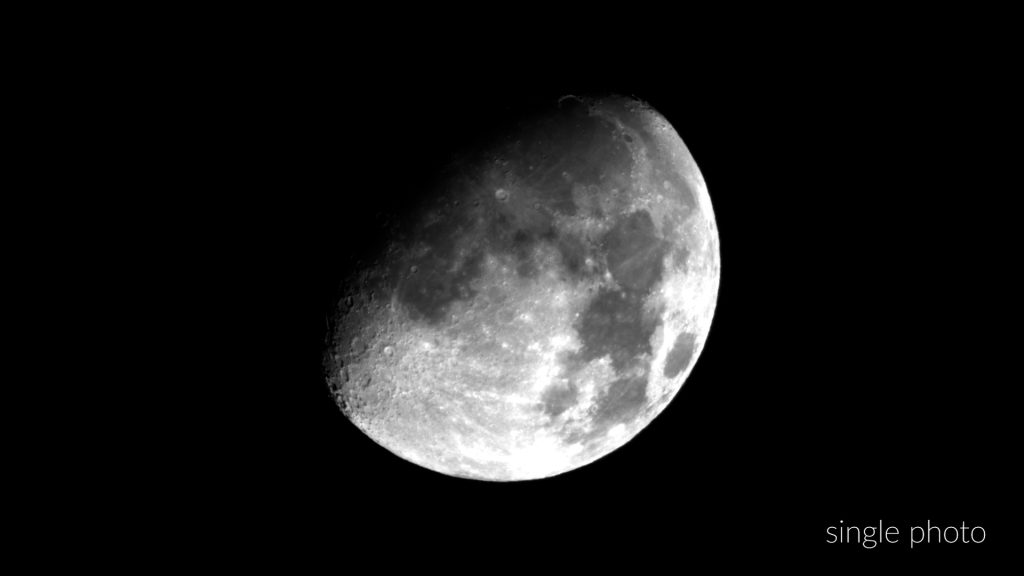
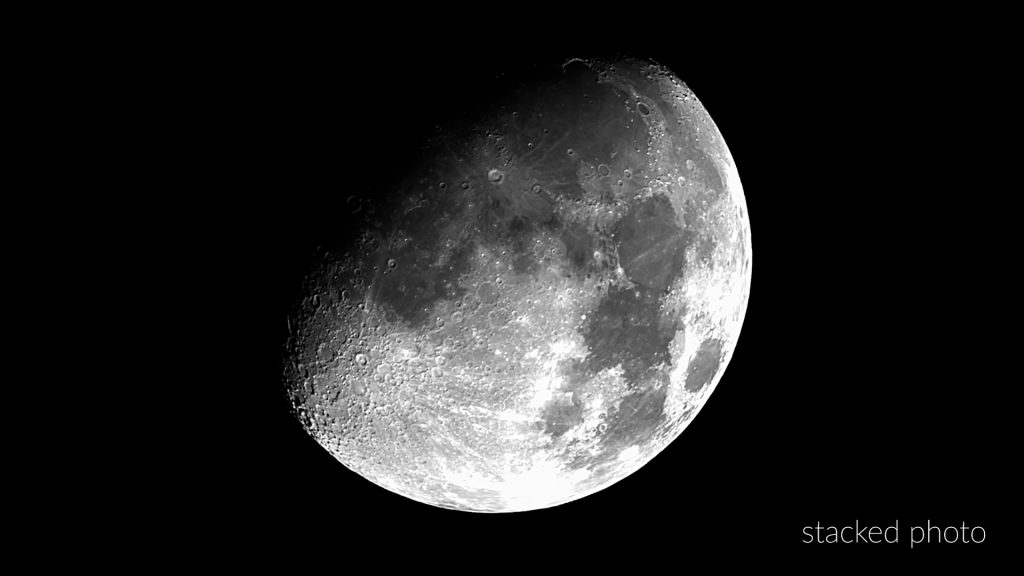
While the Vespera II-X is capable of delivering nice lunar imagery, it would greatly benefit from an in-app stacking feature, especially for beginners who may not yet be comfortable with advanced tools like AutoStakkert, Registax, WaveSharp, or Astrosurface. Having this capability built directly into the Singularity app would make the experience more seamless and more in line with what modern smart telescope users expect.
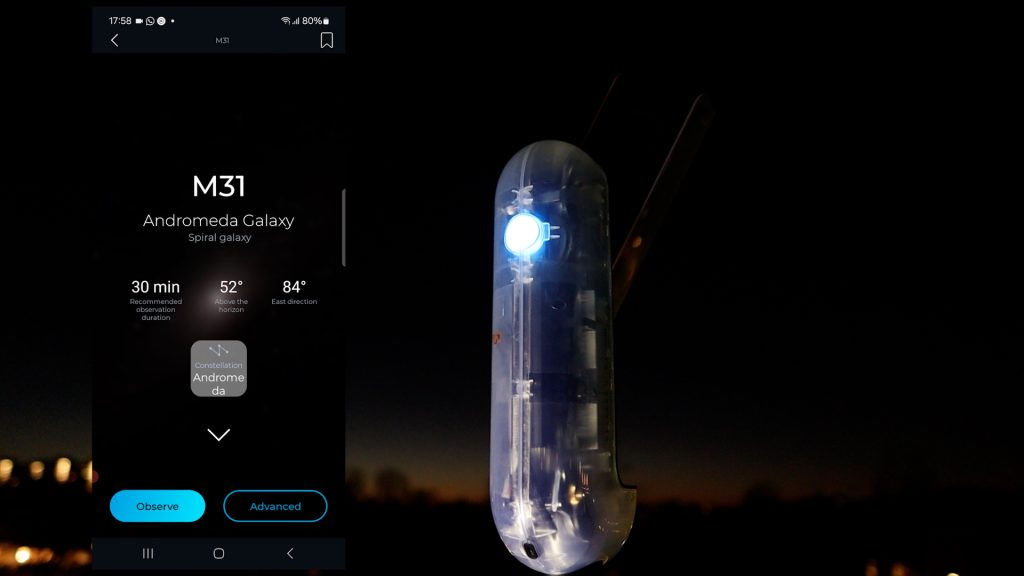
Deep Sky Imaging: Capturing the Andromeda Galaxy (M31)
Deep-sky imaging is where the Vespera II-X truly excels, so after finishing my tests on the Sun and Moon, I turned my attention to galaxies. I began with Andromeda, our nearest major galactic neighbor at 2.5 million light-years away. Andromeda is an excellent autumn object for mid-northern observers, rising close to the zenith and minimizing the effects of light pollution and atmospheric distortion. That’s important for me, since I’m imaging from a Bortle 7 city sky.
To keep this test realistic, I chose not to use a light-pollution filter so you can see exactly what the telescope produces straight out of the box in an urban environment.
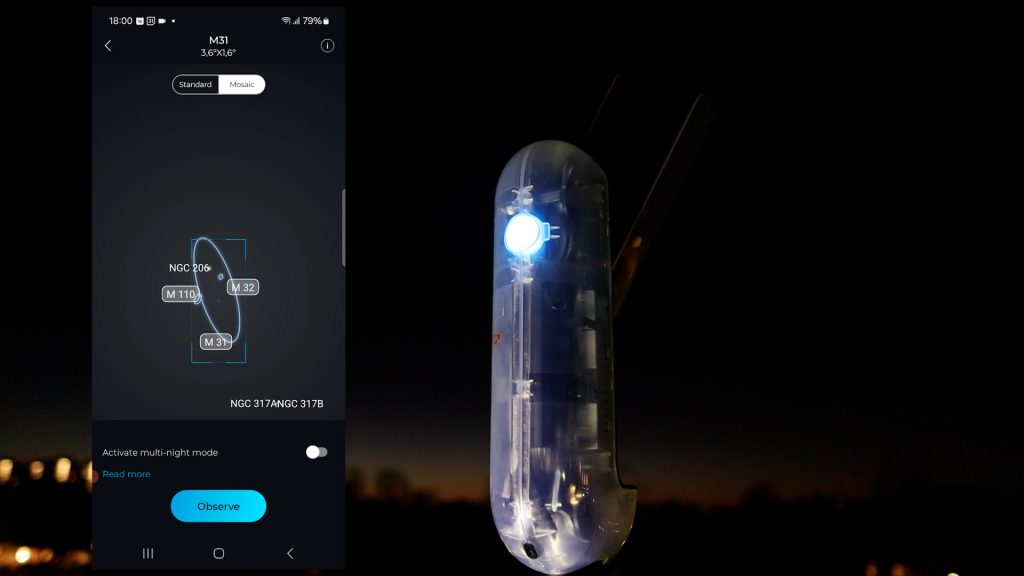
Creating a Mosaic with Covalens
After selecting Andromeda in the Singularity app, I tapped Advanced, which allowed me to rotate and resize the frame to build a mosaic. The Vespera II-X uses the Sony IMX585 sensor to capture 8-megapixel images with a 2.5 × 1.4-degree field of view. But with Vaonis’s Covalens technology, you can expand the frame dramatically—up to 24 megapixels—creating fields of view as wide as 4.3 × 2.4 degrees or 3.2 × 3.2 degrees. That’s extremely useful for Andromeda, which spans nearly 3 degrees from end to end. I also enabled Multi-Night Mode, which lets you continue photographing the same object across multiple sessions—a great feature for building deeper images over time.
Automatic Imaging Workflow
Once I finalized the mosaic, I tapped Observe. The Vespera II-X slewed to Andromeda and began capturing 10-second exposures automatically. In the Image Format settings, I enabled both RAW FITS and stacked TIFF output, ensuring the telescope saved each individual exposure plus the final stacked result.
All Vespera models are limited to roughly 10-second exposures because they are alt-azimuth mounted and not polar-aligned. Longer exposures would require an equatorial alignment or a built-in field derotator, which some other smart telescopes provide. I reached out to Vaonis about the possibility of adding an equatorial mode in the future, but they currently have no plans to implement this.
That said, the simplicity of alt-az tracking is one of the strengths of the Vespera line—just level the tripod, power on the telescope, and it handles everything else automatically.
Capturing Andromeda
Over the course of about 90 minutes, I collected roughly 550 exposures, each 10 seconds long. In mosaic mode, the Singularity app displays a small square indicator for each panel; once the first panel was sufficiently exposed, the indicator on the top switched from 1 to 2, showing that the next mosaic capture had begun.
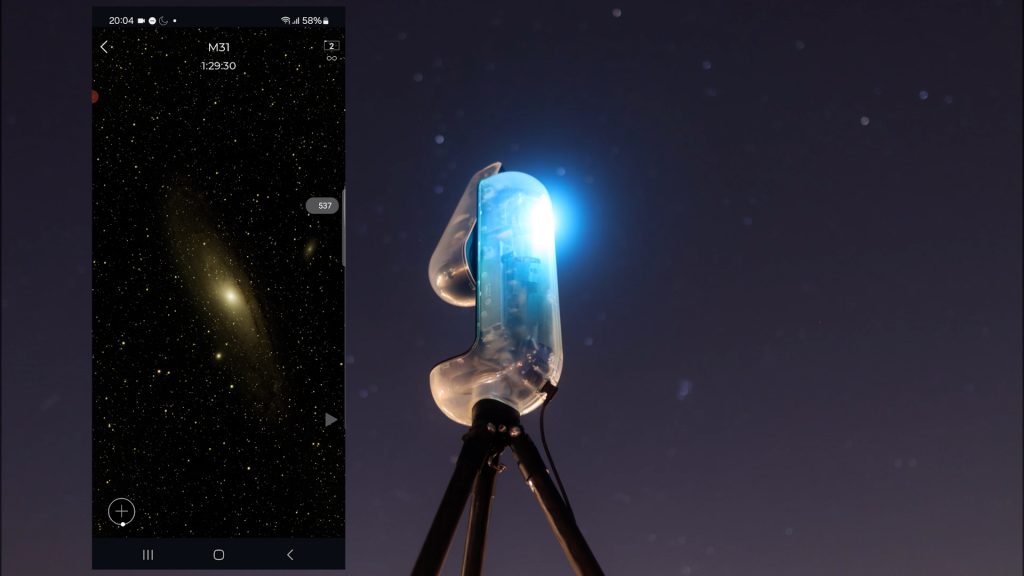
When I stopped the session, the built-in stacked preview appeared in the app, but it looked quite dark. After downloading the stacked file and stretching it myself, far more structure appeared, including the glow of city light pollution.
I then processed the image in PixInsight to reduce gradients and bring out the galaxy’s dust lanes and star-forming regions.
Final Result
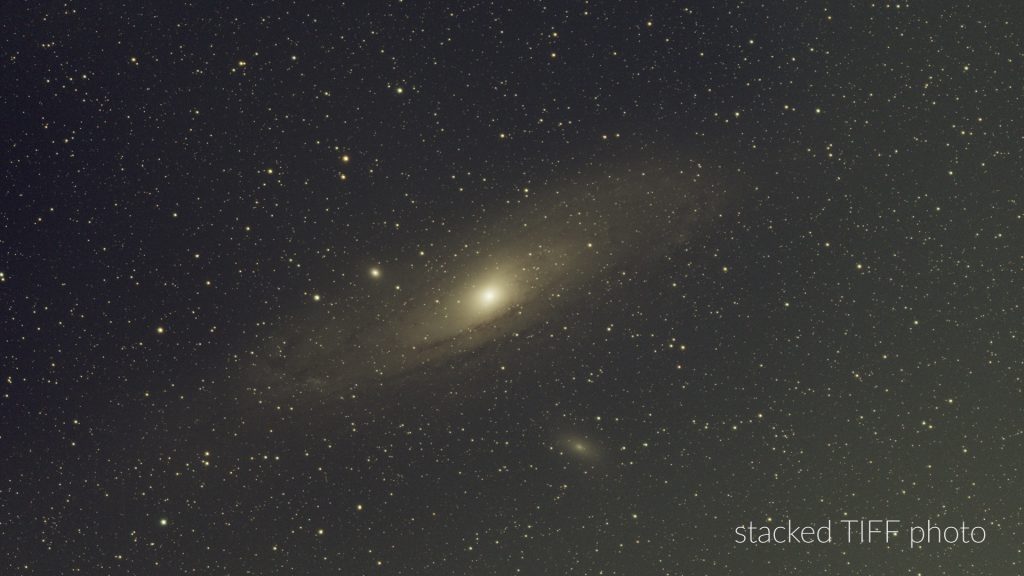

Considering this image represents only 1.5 hours of integration time under a Bortle 7 sky, I’m genuinely impressed with what the Vespera II-X delivered.
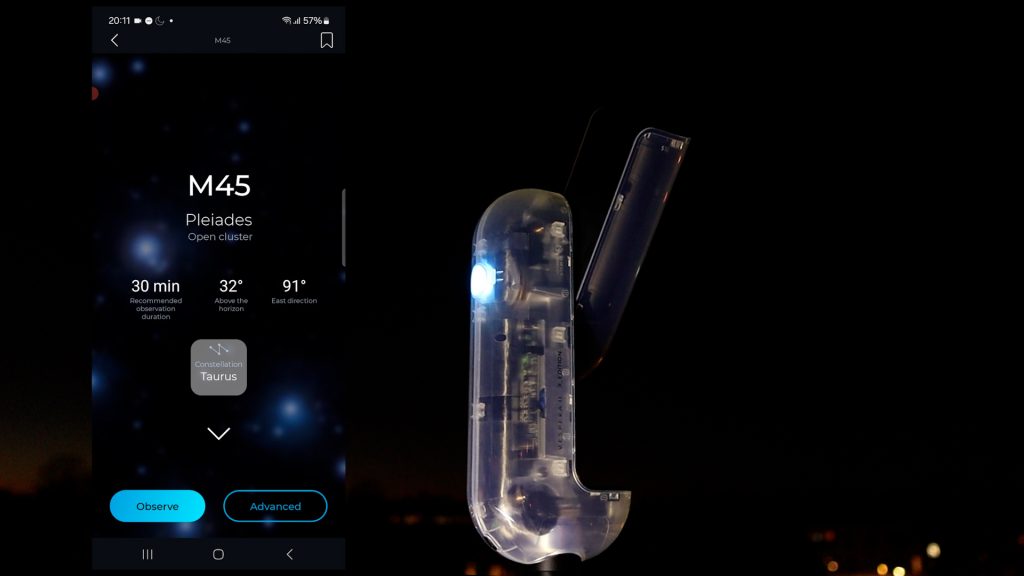
Capturing the Pleiades (M45)
After finishing Andromeda, I turned to another autumn favorite: the Pleiades, also known as the Seven Sisters. This bright open star cluster lies about 445 light-years away and is famous for its reflection nebulae. I couldn’t immediately find it under the Clusters category in the Singularity app, so I simply typed “Pleiades” into the search bar and selected it from there.
As with every object, the app displayed helpful observing data such as altitude, direction, and even a recommended imaging time. I rotated the framing slightly, tapped Observe, and the Vespera II-X automatically slewed to M45 and began capturing.
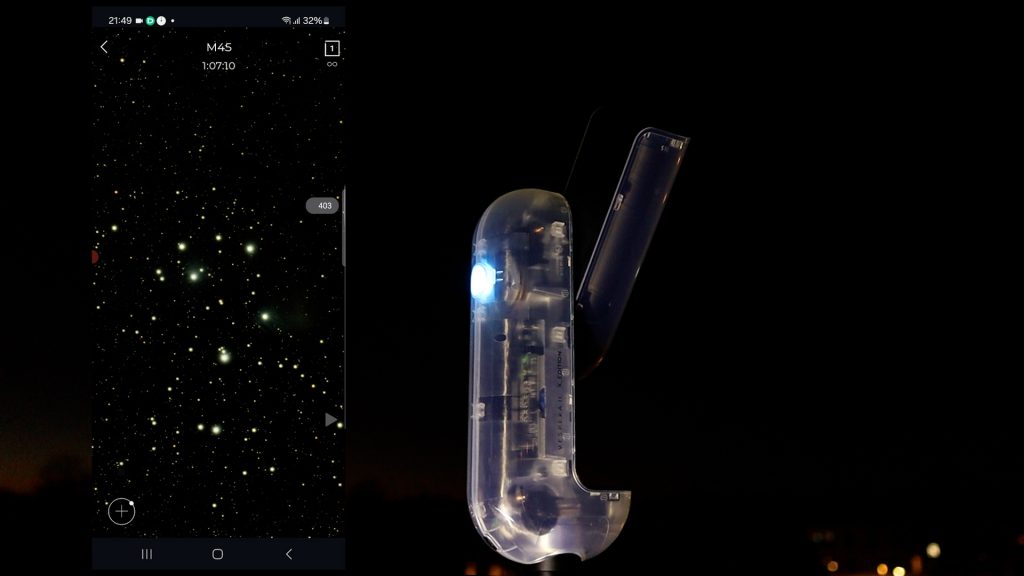
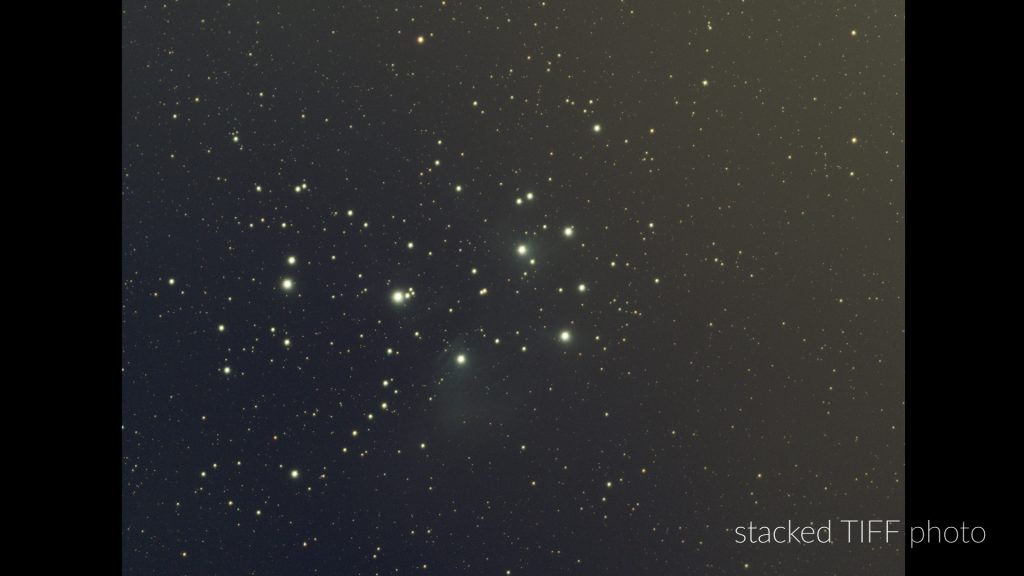
For this session, I gathered a little over 400 ten-second exposures, totaling roughly one hour of integration time. As expected, the preview inside the app appeared quite dark, but once I downloaded and stretched the stacked TIFF, the Pleiades emerged clearly—even under my Bortle 7 urban sky.
After processing the stacked image in PixInsight to reduce gradients and enhance the faint reflection nebulae, the final result turned out very nicely. Not bad at all for a 50 mm smart telescope imaging in a light-polluted city.

Capturing the Orion Nebula (M42)
To finish my deep-sky testing, I turned to one of the most iconic objects in the night sky: the Orion Nebula. Located about 1,344 light-years away, it’s the closest large star-forming region to Earth and one of the brightest nebulae visible from mid-latitudes.
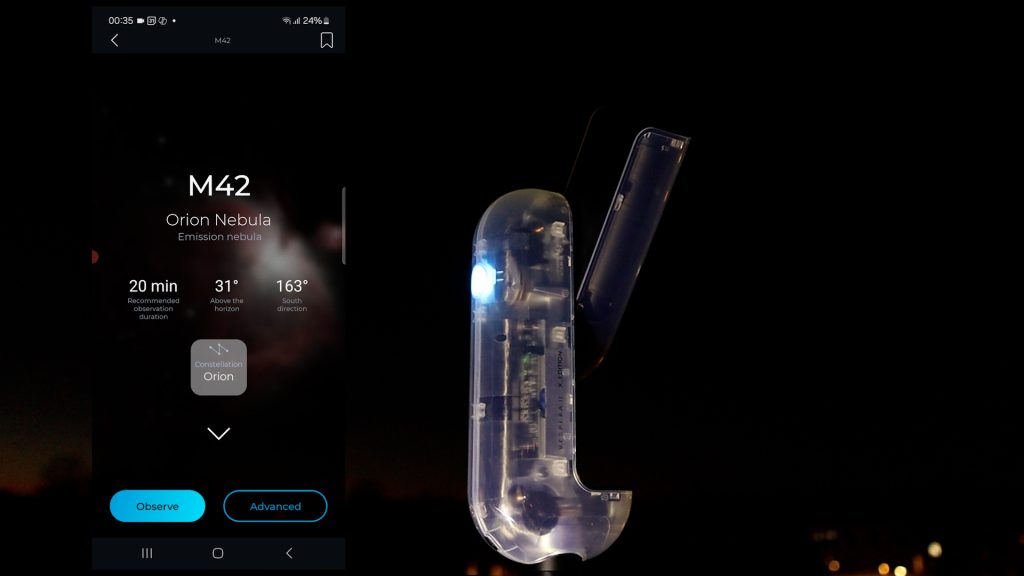
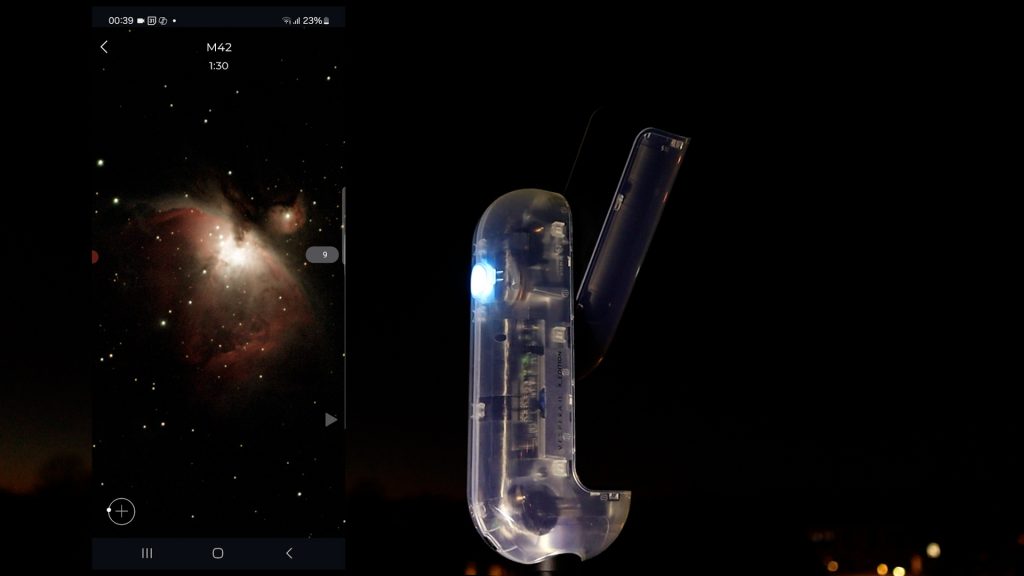
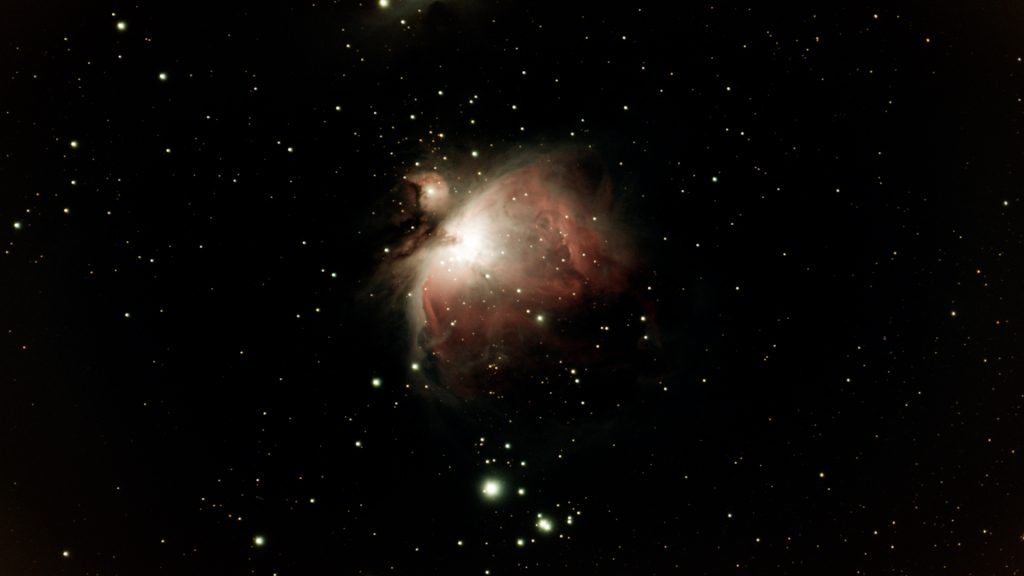
I selected M42 in the Singularity app and tapped Observe. The Vespera II-X automatically slewed to the nebula and began capturing 10-second exposures. I tracked the object for roughly an hour without using any filters, and this time I allowed the telescope to save the automatically stacked JPEGs.
The stacked auto-generated jpeg illustrates how the nebula gradually takes shape during live stacking.
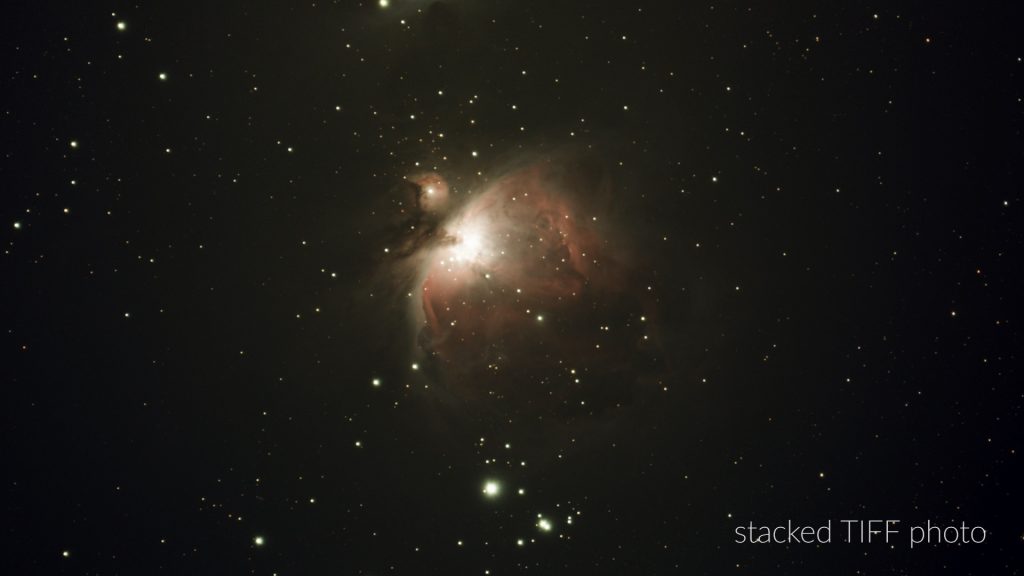
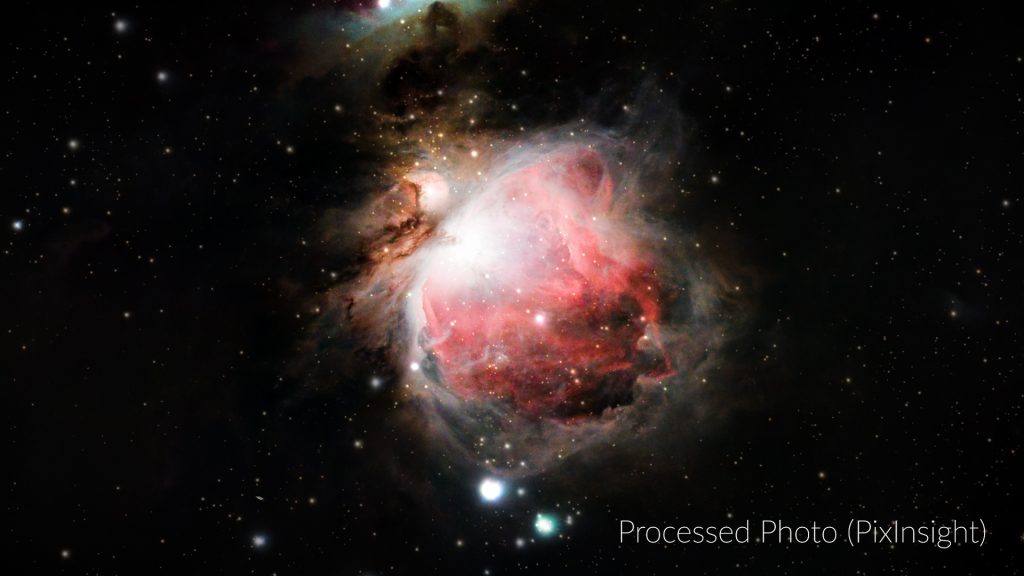
The app’s built-in stacking preview looked quite dark—as with Andromeda and the Pleiades—but once I downloaded the stacked TIFF and applied a stretch, the nebula revealed far more detail. After additional processing in PixInsight, the final result showed nicely defined structure, especially considering the 50 mm aperture and the bright, light-polluted city sky.
Performance Under City Skies
It’s worth emphasizing that the total exposure time was just over one hour, captured from my rooftop in a Bortle 7 city, and taken without any filters. Under darker skies—or by using Multi-Night mode to extend exposure time—the results would be even better. Considering these factors, the Vespera II-X delivered an admirable performance.
Planetary photography
With all that said, it’s important to emphasize that the Vespera II-X is not intended for planetary imaging. The field of view is very wide, and objects like Jupiter appear extremely small on the sensor—far too small to capture meaningful detail.
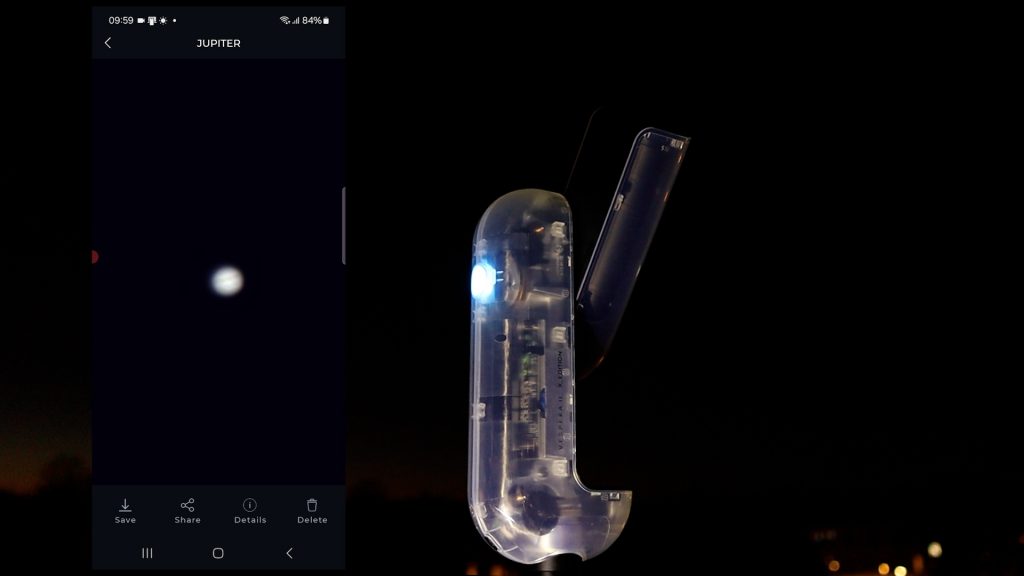
For proper planetary work, you need a completely different setup: a telescope with much larger aperture and significantly longer focal length, paired with a high-speed planetary camera. The Vespera II-X simply isn’t built for that task, and that’s perfectly fine—it excels in other areas.
Additional features and options
Before sharing my final verdict, there are a couple of additional features worth mentioning—ones that genuinely enhance the overall experience of using the Vespera II-X.
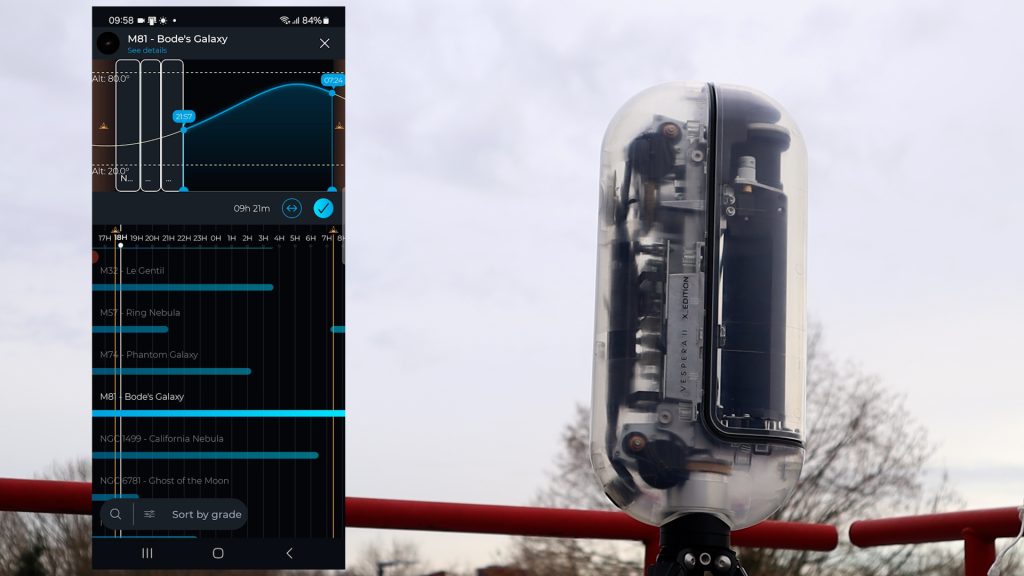
Automated Scheduling Mode
The Singularity app includes an excellent scheduling mode that allows you to fully automate a future imaging session. Simply choose your date, location, and the objects you want to capture, and the Vespera II-X will handle the rest automatically. This is especially useful if you want to make the most of a clear night while you sleep, or if you prefer to plan out longer imaging sequences in advance.
The app also includes a built-in gallery where all your captured images are neatly organized, making it easy to revisit or download previous sessions.
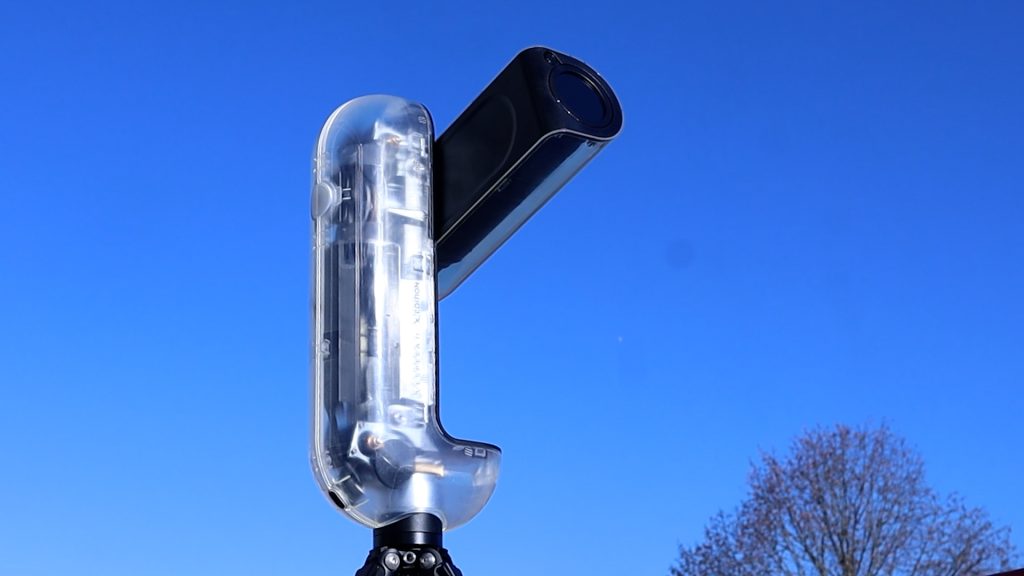
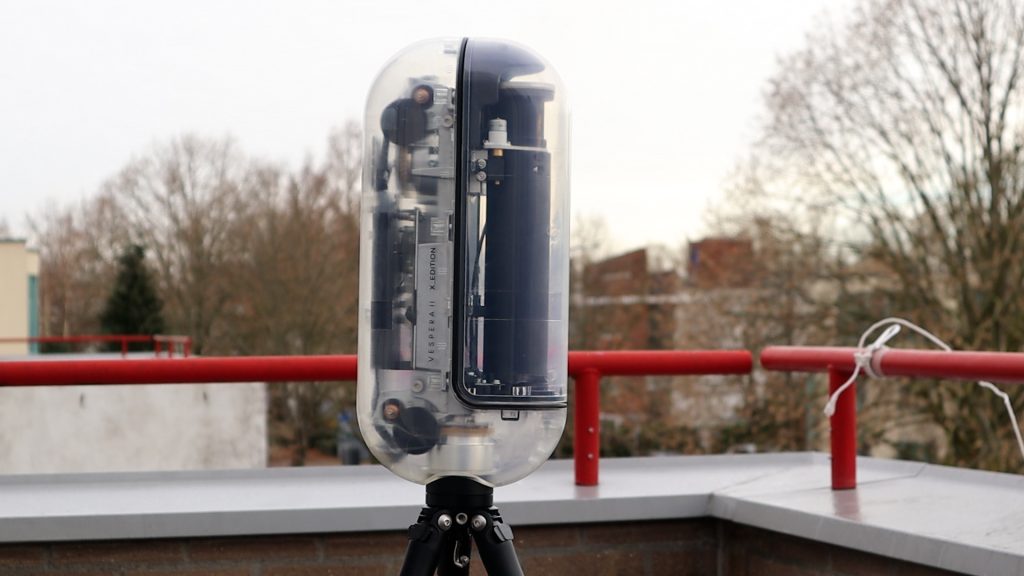
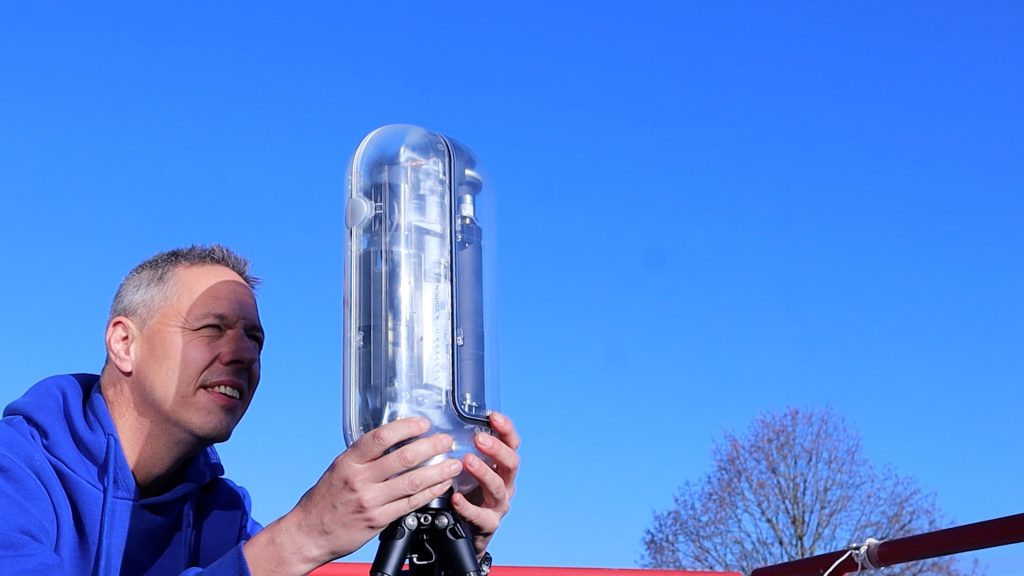
A Beautiful, Transparent Design
Another unique aspect of the Vespera II-X edition is its design. This model features a transparent housing that allows you to see the internal mechanics of the telescope as it operates. Watching the optical assembly and tracking arm move in real time is not only visually appealing but also fascinating for anyone curious about how smart telescopes actually work.
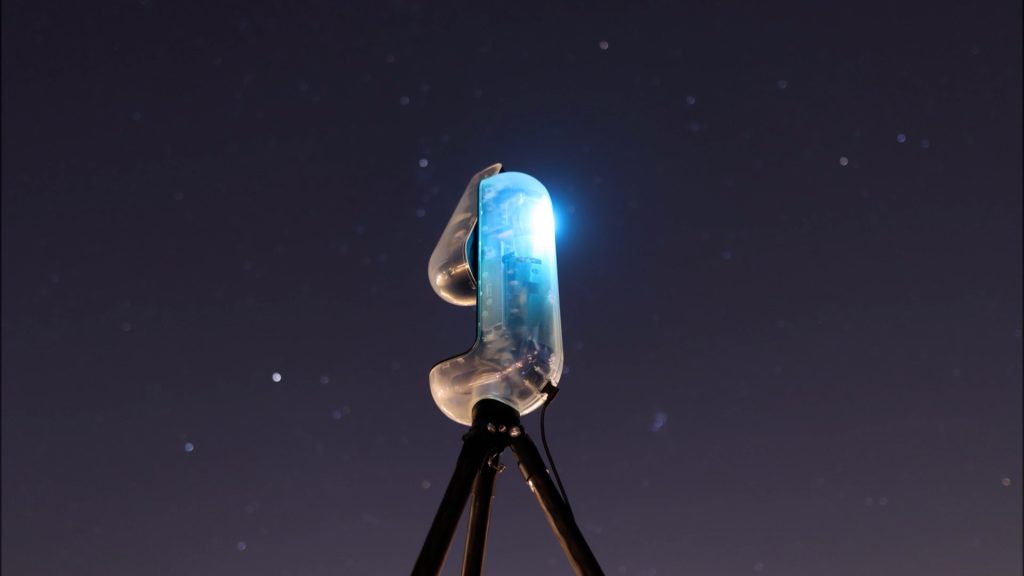
It’s a thoughtful touch—especially for tech-savvy users who love seeing the engineering behind the device they’re using to image the night sky.
Final verdict
Let me wrap up with my overall thoughts—starting with what I genuinely like about the Vespera II-X. This smart telescope sits comfortably in the mid-range category, offering a noticeable step up from budget models that are often limited by smaller apertures, shorter focal lengths, or smaller camera sensors. The design is excellent, the included hard case and carbon tripod feel premium, and the Singularity app provides a very approachable entry point into both astronomy and astrophotography.
For newcomers and seasoned observers, the Vespera II-X shines when capturing the Moon, galaxies, star clusters, and bright nebulae. With its mosaic feature, intuitive automation, and well-corrected optics, it consistently delivers strong results—especially considering its compact 50 mm APO refractor design.
What Could Be Improved
There are, however, a few areas where I’d love to see Vaonis push things further:
- More manual control in the app for Solar System imaging
Options to adjust focus, gain, exposure time, and image rotation directly within the Solar System menu would make lunar and solar imaging much more flexible. - In-app automated stacking for planets, the Moon, and the Sun
This would be tremendously helpful for beginners who aren’t yet familiar with software like AutoStakkert or Registax. - A future equatorial mode
The ability to use the Vespera II-X in equatorial mode would allow for longer exposures and deeper images of faint nebulae and galaxies.
Final Thoughts
If you’re looking for a beautifully engineered, user-friendly smart telescope that excels at deep-sky imaging and makes the hobby incredibly accessible, the Vespera II-X is a strong choice. Despite a few limitations, it delivers impressive results. And while the Vespera II-X isn’t inexpensive, you do get a beautifully designed, well-built smart telescope with excellent optics and an ecosystem that is continuing to evolve.
Clear skies!
— Wido Oerlemans
One Reply to “Vespera II-X Smart Telescope Review + Tutorial”