It’s early March, and a brilliant Full Moon is lighting up the night sky. For many astrophotographers, that much moonlight makes capturing faint deep-sky objects feel like a lost cause. But with a monochrome narrowband setup, you can block out most of that unwanted glare by isolating specific wavelengths of light—making a full moon the perfect excuse to test out some new gear.
🔭 In This Post / Quick Summary:
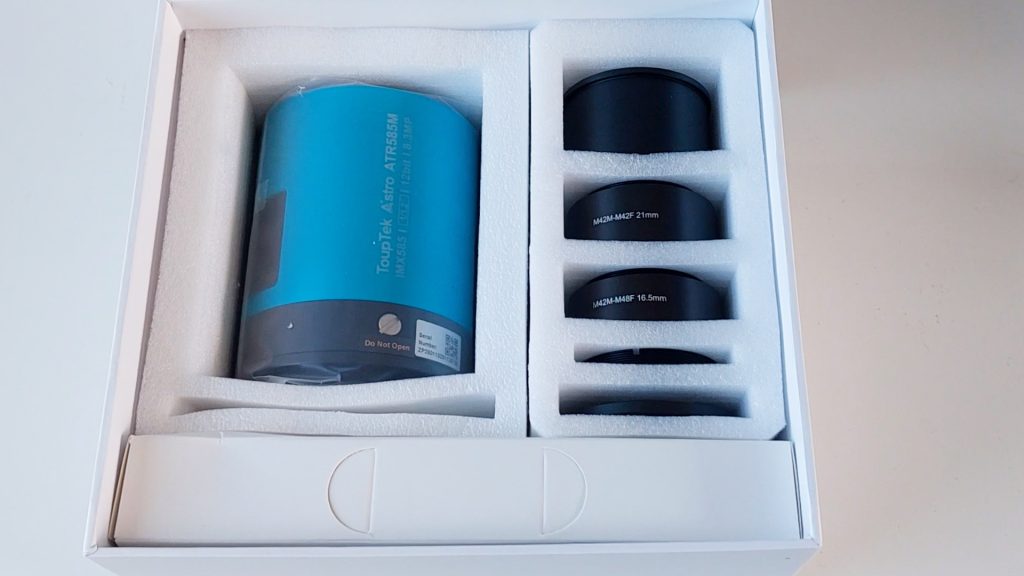
- The Gear: Putting the affordable ToupTek ATR585M monochrome camera, the AFW-M electronic filter wheel, and 1.25″ SHO/LRGB filters to the test.
- The Target: The expansive Tadpoles Nebula (IC 410) in the constellation Auriga.
- The Challenge: Attempting deep-sky narrowband imaging (Ha and OIII) straight through the intense light pollution of a blazing Full Moon.
- The Big Question: Can the IMX585 pull vibrant nebula details and natural star colors out of a completely washed-out sky? Let’s find out.
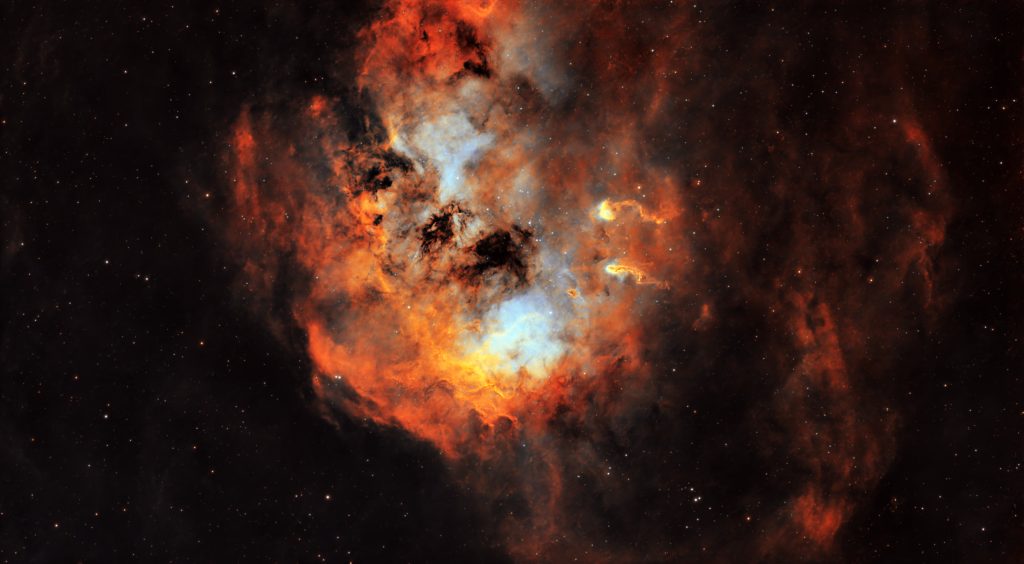
Instead of defaulting to the famous (and tempting) Orion Nebula, I decided to go for something a little less common. Located about 12,000 light-years from Earth, IC 410 is a beautiful emission nebula where powerful radiation from young stars sculpts long streams of glowing hydrogen gas that look surprisingly like giant cosmic tadpoles drifting through space.
With clear skies and a setting sun, it was time to get this show on the road.
The Gear: ToupTek’s Monochrome Powerhouse
Before we dive into the imaging session, let’s take a look at the gear ToupTek sent over. Together, these pieces create a complete, affordable monochrome imaging system for both broadband and narrowband astrophotography.
ToupTek ATR585M Camera
Built around the popular Sony IMX585 back-illuminated CMOS sensor (the same sensor found in smart telescopes like the Seestar S30 Pro and Vespera II), this camera is highly versatile. It’s well-suited for high-resolution lunar and planetary imaging, as well as detailed deep-sky captures.
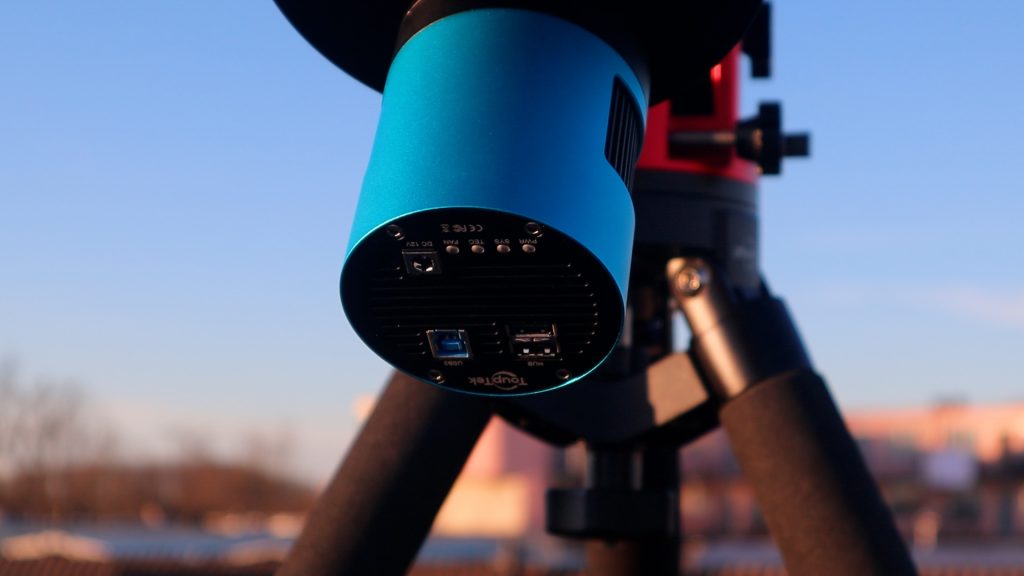
- Resolution: 8.3 megapixels at 4K (3840 x 2160) with 2.9-micron pixels.
- Sensor Tech: Native 12-bit ADC (expandable to 16-bit HDR), a full well capacity of ~39,000 electrons, and a peak quantum efficiency of over 90%.
- Cooling: A dual-stage TEC cooling system brings the sensor down to roughly 45°C below ambient, dramatically reducing thermal noise.
- Performance: Zero amp-glow, a 512MB DDR3 buffer for stable data transfer, and frame rates up to ~24 fps at full resolution over USB 3.0.
- Bonus: Two extra USB ports on the back of the camera, which were perfect for plugging in my filter wheel and guide camera to reduce cable clutter!
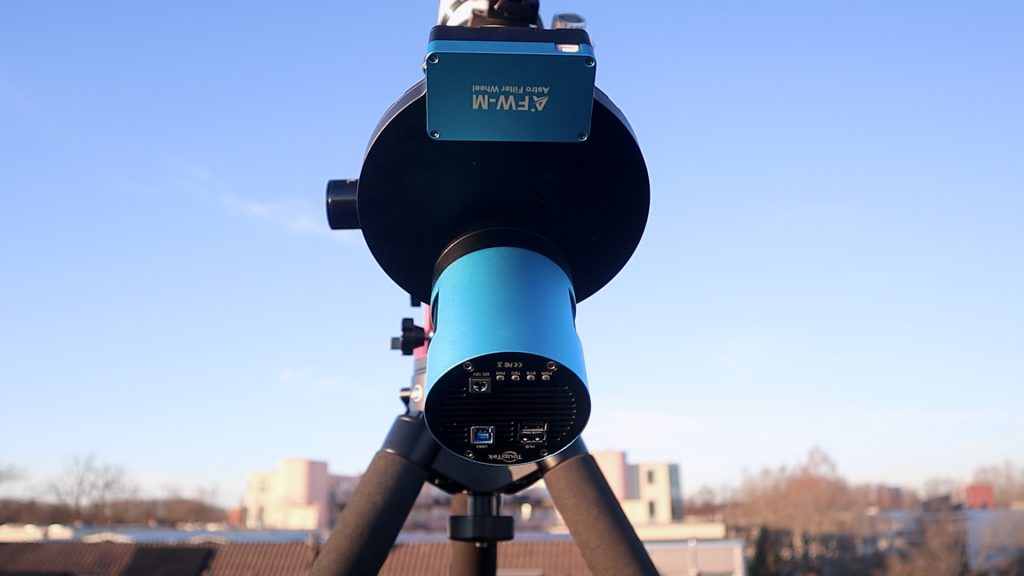
ToupTek AFW-M Electronic Filter Wheel
This motorized wheel is designed to automate filter changes seamlessly without you having to touch the imaging train.
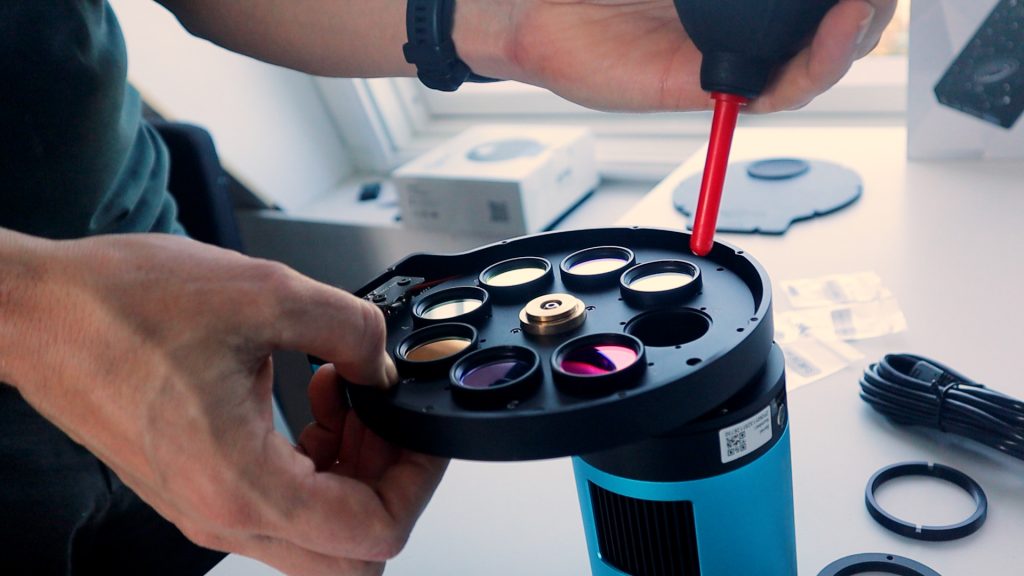
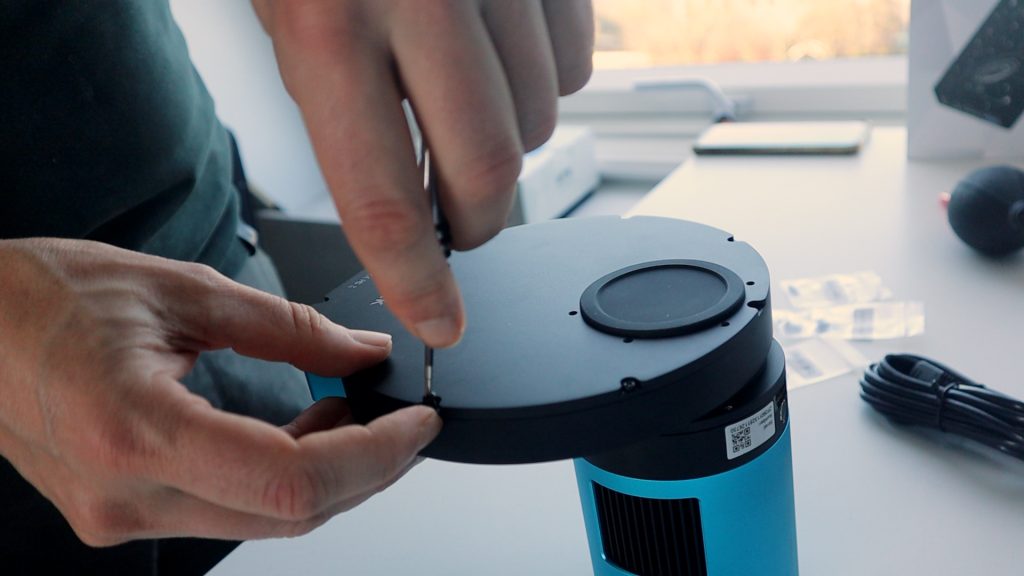
- Capacity: Holds up to eight 1.25-inch filters.
- Design: Ultra-thin profile at only 20mm thick.
- Connectivity: USB-powered and easily controlled remotely via common astrophotography software.
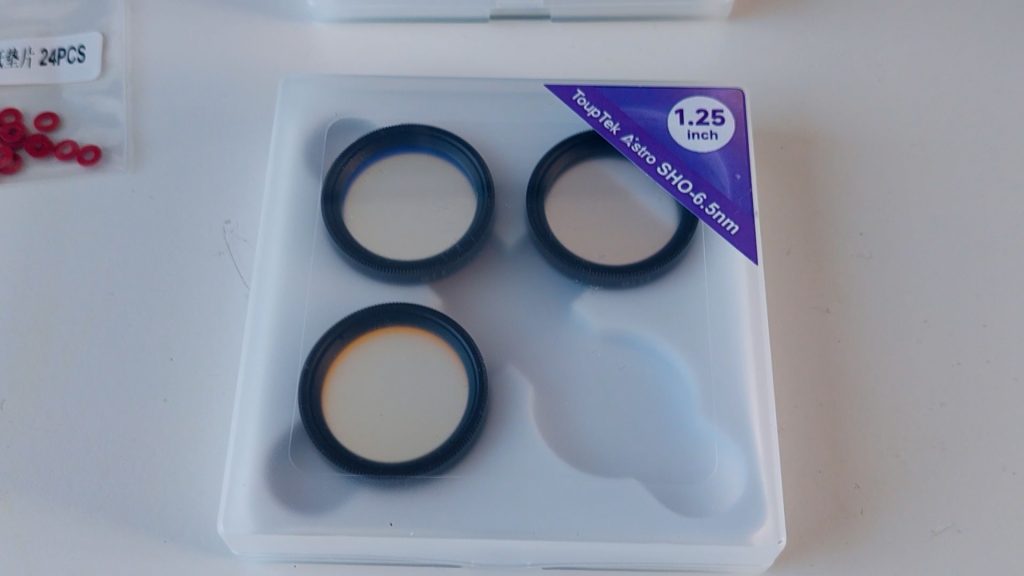
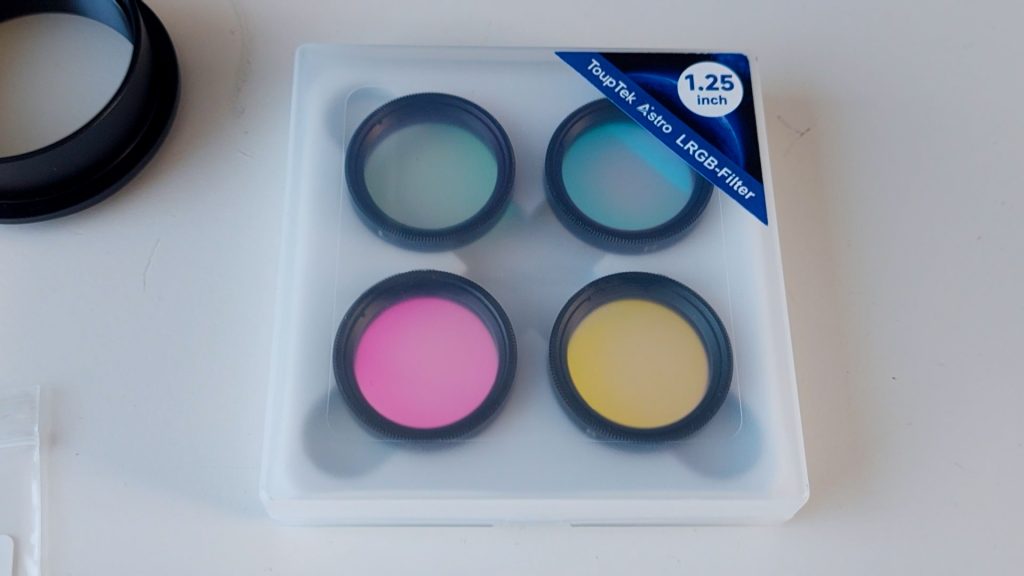
ToupTek 1.25″ SHO & LRGB Filters
- SHO Narrowband Filters: These isolate Hydrogen-alpha, Oxygen-III, and Sulfur-II emission lines. With a tight 6.5nm bandwidth, they are incredibly effective at cutting through light pollution—even my Full Moon tonight.
- LRGB Filter Set: Designed for full-color deep-sky images, offering over 95% transmission and carefully balanced spectral bands for natural astronomical colors.
📸 Links to ToupTek Astro Gear
- ToupTek 585M Camera: Link to ToupTek Website
- AFW-M Filterwheel: Link to ToupTek Website
- LRGB Filters: Link to ToupTek Website
- SHO Filters: Link to ToupTek Website
(Disclaimer: The links above are affiliate links. If you purchase through them, I may earn a small commission at no extra cost to you. This helps support the site!)
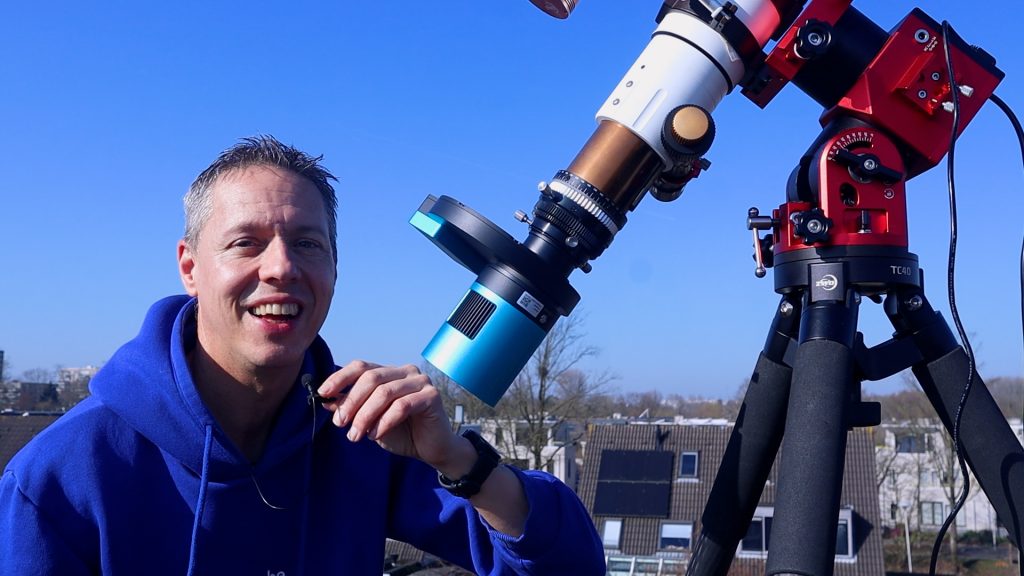
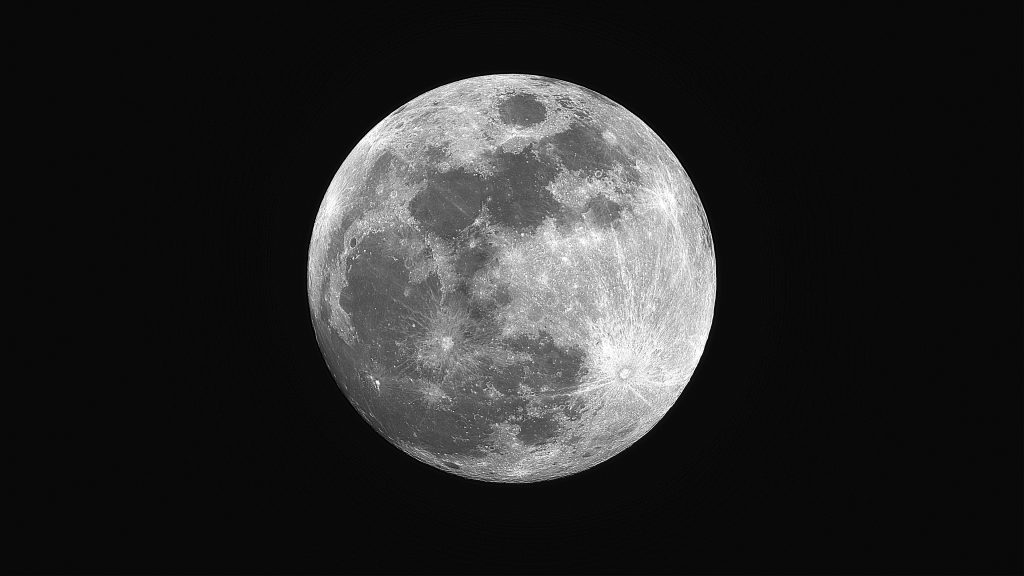
First Light: High-Speed Lunar Imaging
First things first: since the Full Moon was out, I had to capture it.
I hooked the camera up to my trusty 10-year-old TS 80/480mm APO refractor. Its focal length is a perfect match to capture the entire Moon in a single frame, giving me an image scale of about 1.25 arcseconds per pixel.
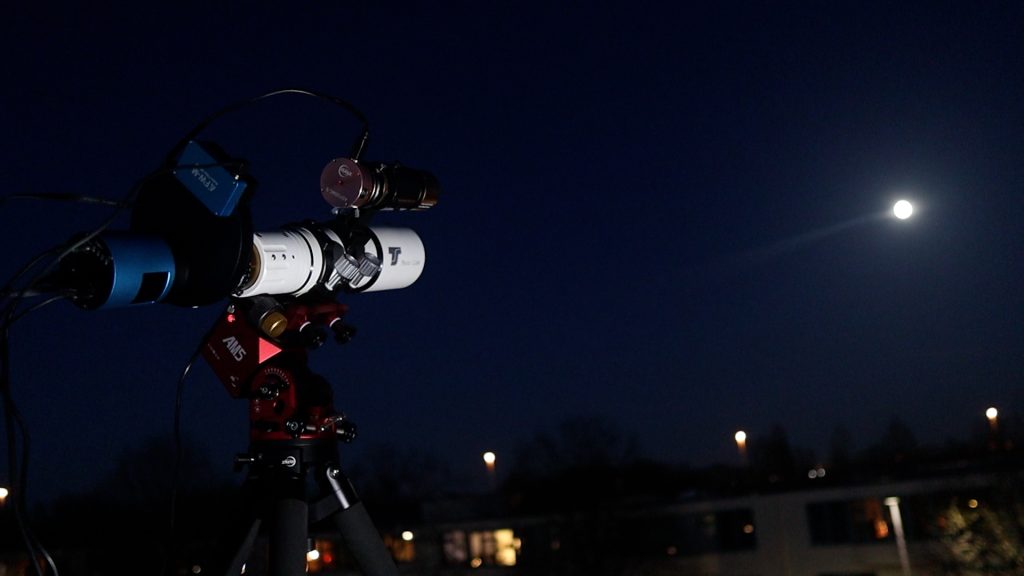
I was genuinely surprised by the ATR585M’s fast frame rate. Even running at its maximum 4K resolution, the camera easily stacked 500 images of the Moon in less than a minute. I used the live stacking feature in SharpCap, and the result was so good right out of the gate that it required very little post-processing. It’s absolutely a capable camera for fast lunar and planetary work with longer focal length telescopes.
Deep-Sky Capture: The Tadpoles Nebula
Next, I switched to my main deep-sky target. I cooled the camera down to –15°C, and it ran flawlessly all night. Even battling the bright moonlight, the narrowband filters allowed me to pull rich data using 5-minute exposures.
My total integration time:
- Hydrogen-alpha (Ha): ~4.5 hours
- Oxygen-III (OIII): ~3.5 hours
- RGB (for star color): ~30 minutes (60-second exposures, 10 minutes per filter)
A Quick Note on Field of View
While I am thrilled with the camera’s performance, I do want to point out a practical limitation I ran into with my specific telescope setup. The ATR585M features a relatively compact sensor. When combined with my telescope’s 480mm focal length, the resulting field of view simply wasn’t wide enough to capture the entire Tadpoles Nebula in a single frame. The framing is a bit tight for such a sprawling target.
If you are looking to use the ATR585M specifically for wide-field nebula captures, you will want to consider one of two options:
Shoot mosaics: Keep your current focal length, but plan to capture multiple overlapping panels and stitch them together in post-processing to create a massive, high-resolution wide-field image.
Use a shorter focal length: Pair the camera with a much smaller, wider-field refractor or even a standard camera lens to widen your framing.
Calibration and Post-Processing
When I loaded the stacked data onto my computer, the results were impressive. To be precise with my integration times under that bright moonlight, here is exactly what I captured:
- Hydrogen-alpha (Ha): 55 x 300-second exposures
- Oxygen-III (OIII): 42 x 300-second exposures
- RGB Stars: 10 x 60-second exposures for each of the Red, Green, and Blue filters
For calibration, I used flats and dark flats. Interestingly, I skipped dark frames entirely! The STARVIS 2 sensor technology in the ATR585M does such a fantastic job at keeping noise levels down that I found I simply didn’t need them. I did have to apply a bit of star correction in post, as my TSFlat1 field flattener was sitting slightly off-axis that night.
As expected, those 5-minute Ha exposures yielded an incredibly strong signal. The OIII data was a bit more challenging and noisy due to the Full Moon being so high in the sky, but it held up very well. I combined the Ha and OIII data to create an HOO color image, carefully processing it to mimic a bit of that classic, dynamic SHO (Hubble Palette) look.
Since shooting broadband RGB under a Full Moon means your background will inevitably be washed out, I used that data purely for the stars. I extracted the natural-colored RGB stars, created a star mask in linear mode, and gently stretched them using a Histogram Transformation. This allowed me to control the stars independently so they wouldn’t dominate the glowing gas of the nebula. Finally, I reintegrated those natural RGB stars back into the narrowband HOO picture to give the final combined photo a beautiful, realistic star field.
The Final Result
After combining the rich Ha and OIII narrowband data with the natural RGB stars, the cosmic tadpoles finally came to life. Considering the sky conditions, I am thrilled with how this imaging session turned out, and the ToupTek gear performed beautifully.
Final Thoughts: A Capable and Affordable Monochrome Setup
Battling a blazing Full Moon is never an astrophotographer’s first choice, but this imaging session proved that with the right gear, you don’t have to pack up your telescope. The ToupTek ATR585M, paired with the AFW-M electronic filter wheel and narrowband filters, proved to be a highly capable and affordable system for monochrome astrophotography.
I was thoroughly impressed by the versatility of the IMX585 sensor. It effortlessly handled high-speed 4K lunar imaging and then seamlessly transitioned into long-exposure deep-sky work. The dual-stage cooling and the STARVIS 2 technology kept noise so impressively low that skipping dark frames entirely wasn’t an issue.
While you do need to keep the smaller sensor size in mind when framing expansive targets like the Tadpoles—either by dropping your focal length or planning a mosaic—the resulting image quality speaks for itself. The ability to cut through intense moonlight with the Ha and OIII filters, process an HOO image, and reintegrate natural RGB stars made this a highly rewarding night under the stars.
If you’re looking to make the jump to a dedicated monochrome setup without breaking the bank, this ToupTek combination is absolutely worth considering.
Clear skies!
Links to all gear used:
📸 Camera & ToupTek Astro Gear
- ToupTek 585M Camera: View on ToupTek
- AFW-M Filterwheel: View on ToupTek
- LRGB Filters: View on ToupTek
- SHO Filters: View on ToupTek
🔭 Telescopes & Mounts
- TS-Optics 80/480mm APO Telescope: View on Astroshop
- ZWO AM5N Mount:
(Disclaimer: Some of the links above are affiliate links. If you purchase through them, I may earn a small commission at no extra cost to you. This helps support the site!)