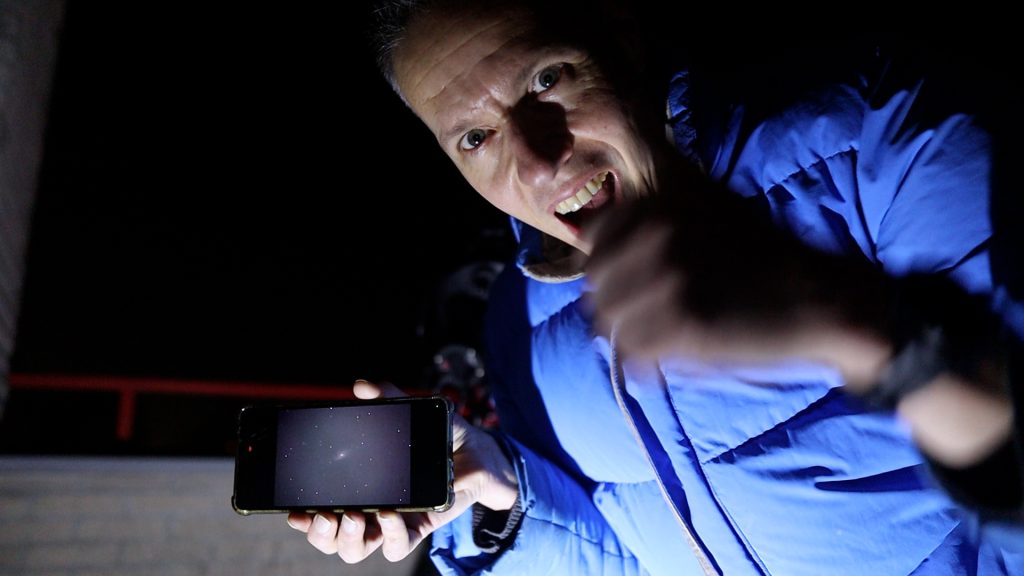
In this blog, I’m sharing my first full night with the Stella Vita Smart Astrophotography Controller (formerly the AstroStation). Huge thanks to ToupTek for sending this unit over for an independent and unpaid review. My goal: see if this device can truly act as a “universal brain” for an eclectic mix of hardware.
The Setup: The Multi-Brand Challenge
The Stella Vita’s draw is wireless freedom without the “brand-lock” common in other ecosystems. I pushed its compatibility to the limit by connecting a diverse rig:
- Mount: ZWO AM5
- Guide Cam: ZWO ASI 120mc
- Imaging Cam: SVBony SC571CC
Controlling this via a smartphone or tablet (iOS/Android) is a potential game-changer for anyone looking to ditch the windows based PC/laptop while keeping their gear choices flexible.
You can find the equipment featured in this video via the affiliate links below, where using my codes often provides a discount and helps support my content at no extra cost to you:
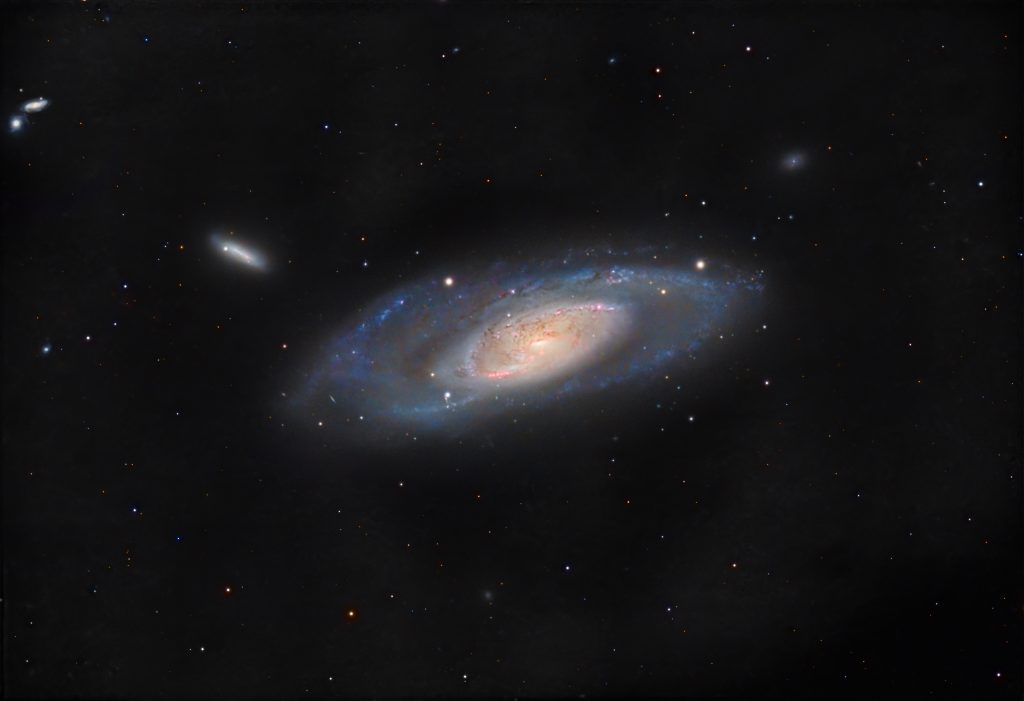
Tonight’s Object: Messier 106
To put the controller to the test, I aimed for Messier 106 in Canes Venatici, just below the Big Dipper’s handle. At 23 million light-years away, this spiral galaxy hides a violent secret: a Seyfert II nucleus. Its active supermassive black hole blasts out jets of superheated gas, creating a “second pair” of arms. Capturing this majestic galaxy at 2030mm focal length requires precision—the perfect stress test for a new controller.
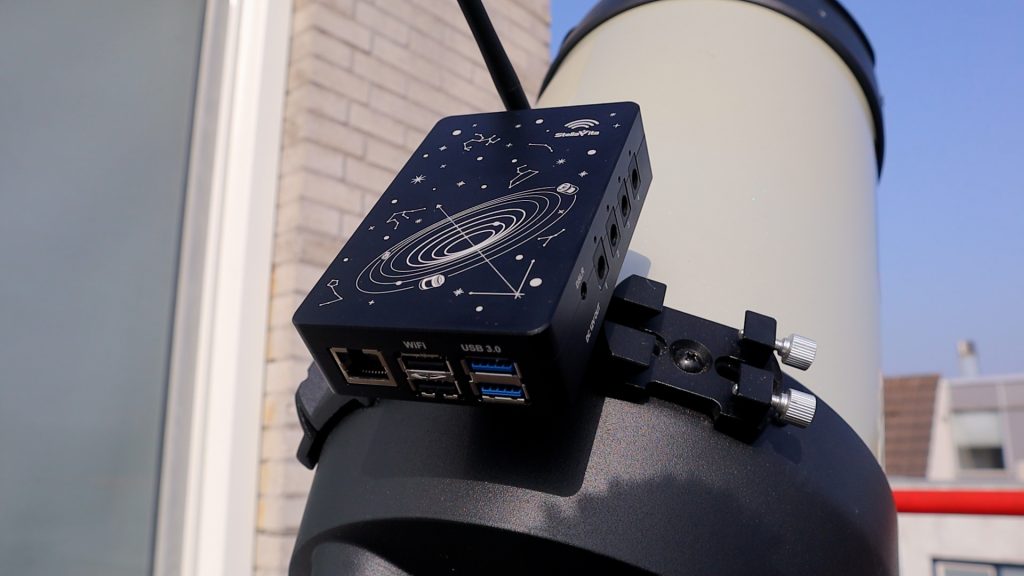
The Stella Vita: A Universal Nervous System
The ToupTek Stella Vita is a smart, all-in-one controller designed to be the central hub of your imaging rig. If you’ve used an ASIAIR, the concept will feel familiar, but with one major advantage: freedom.
While the ASIAIR locks you into a single-brand ecosystem, especially for cameras and other accessories (rotators, focusers), the Stella Vita is built on an open ecosystem. It natively supports a diverse range of hardware—such as ToupTek and ZWO to QHY and Player One—meaning you aren’t forced to choose between your favorite gear.
Mobile Workflow
The experience is entirely wireless, managed via the Stella Vita App (v2.05 at the night of testing) on iOS or Android. Right from your phone or tablet, you can handle the heavy lifting of a session, such as:
- Precision: Polar alignment, plate solving, and auto-guiding.
- Control: Automated focusing, filter wheel rotation, and sequence planning.
The Hardware at a Glance
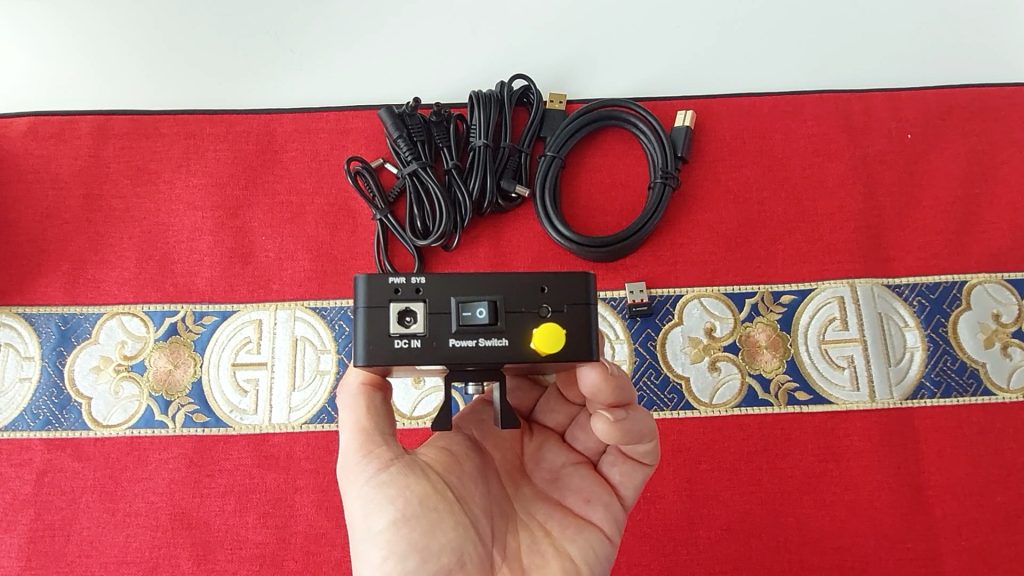
The Stella Vita itself is housed in a rugged aluminum body and serves as a power and data powerhouse:
- Power: 4x 12V DC outputs (to keep your mount and cameras running).
- Data: 2x high-speed USB 3.0 and 2x USB 2.0 ports.
- Storage: 32GB internal memory, plus an SD card slot for easy file expansion.
It promises the “smart” experience of a dedicated wireless controller with the hardware flexibility of a mini-PC. But does it actually deliver under the stars?
Let’s look at how the software performed and whether it managed to keep my multi-brand rig in sync.
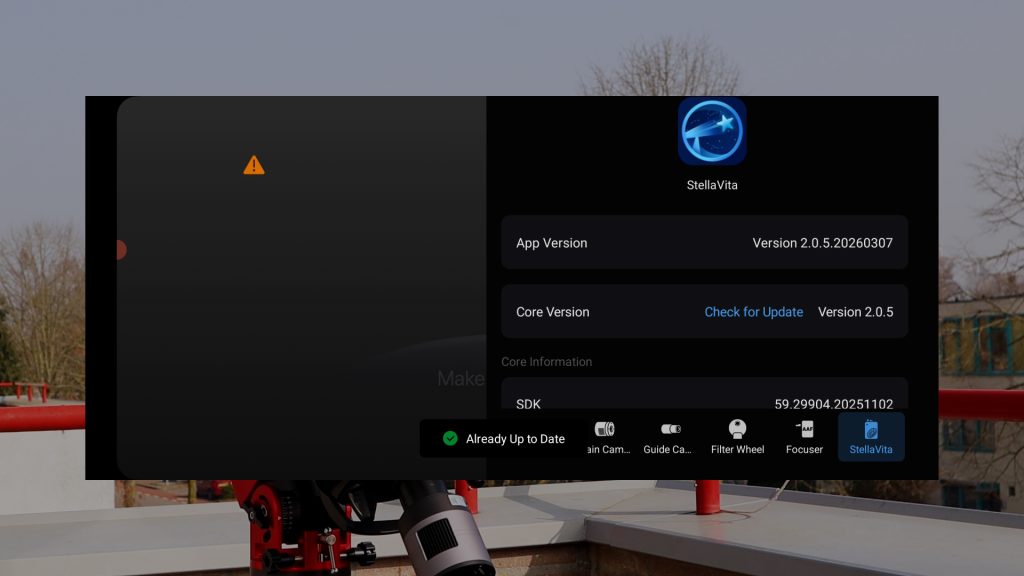
Initial Configuration: App Integration and Firmware Calibration
The first step in the workflow is to download the Stella Vita App (available on the iOS App Store or the Google Play Store). This mobile interface serves as the primary control center for the hardware.
It is critical to note that before attempting to interface your equipment, the Stella Vita must be updated to the latest firmware. In my case, this was version 2.05. During my initial bench test, I attempted to link my gear prior to this update, which resulted in immediate communication failures; most notably, my ZWO AM5 mount became unresponsive and remained locked in “park” mode.
Once the firmware was successfully updated to v2.05 via the app, the integration was seamless. By selecting the equipment icon in the upper-right corner of the interface, I was able to initialize and synchronize my multi-brand configuration.
My first night under the stars with Stella Vita
I. Hooking Everything Up
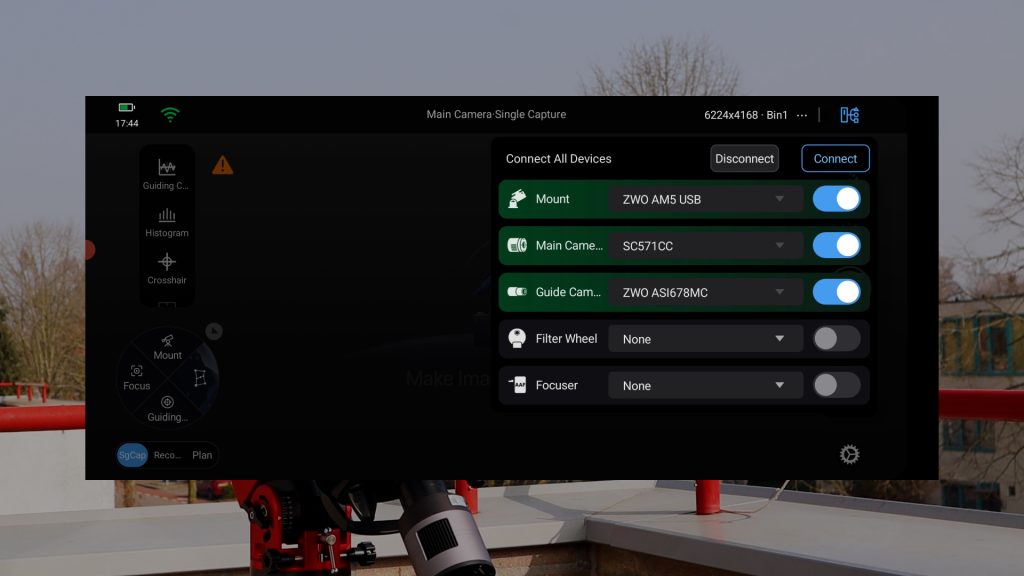
I started my first-light session by connecting to StellaVita’s native Wi-Fi with its default password being 12345678. Once I was connected, I went to the power management section of the stella vita on the bottom right of the main menu. I toggled on the 12V DC outputs to power my mount, the dew heater, and my cooled camera. After that, I hit the equipment icon at the top right to sync the mount and both cameras. Everything connected on the first try.
II. The Settings and the “Focus Hack”
Next, I went into the main camera settings at the bottom right and set my imaging camera to -15°C, I selected High Gain Conversion, and a default 100 gain. I also decided to use 2×2 binning with my EdgeHD 8″ running at its native 2030mm focal length, which shifted my resolution to 0.76″ per pixel with this setup. This gave me a nice signal-to-noise boost and if if you’re interested in a binning debate – put your comments into the comment section!
Next, I wanted to check my focus and I noticed the capture menu had SGcap, Rec, and Plan on the bottom left. SGcap lets you take single images by clicking the shutter button, which is good, but I couldn’t find an “auto-loop” button for real-time focusing. So my workaround was using the Record mode. I cranked the gain to max, and took 1-second shots. This forced the screen to update automatically while I adjusted the focussing knob. It wasn’t the most high-tech way to do it without HFR numbers, but it worked.
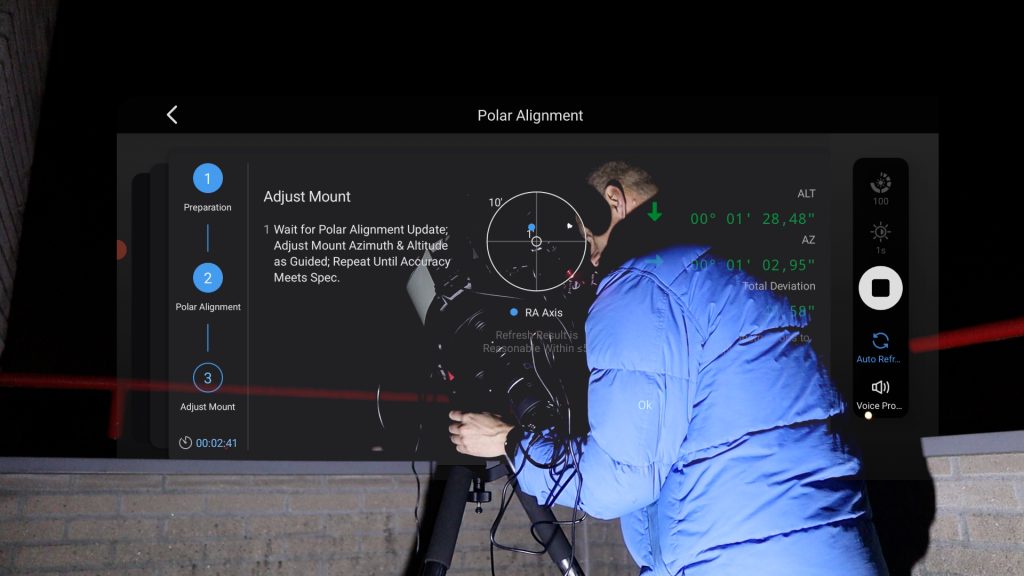
III. Polar Alignment
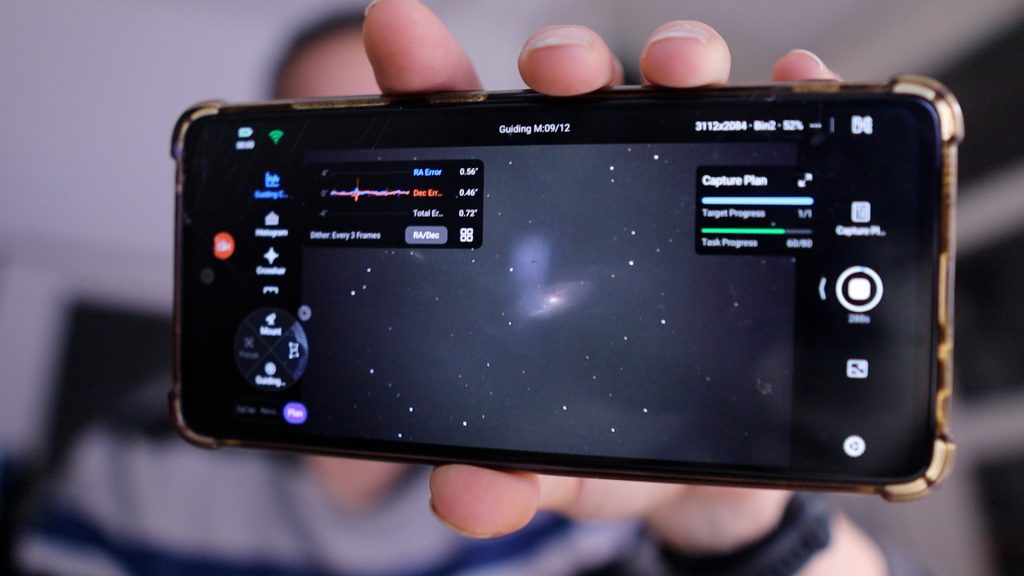
Next, I moved to the Polar Alignment menu which i found after clicking the Mount icon at the bottom left. This routine was actually really smooth. I hit play, and the mount automatically took three pictures, slewing in RA between each one. After the platesolve, it gave me a super easy-to-read overlay showing me how to move the physical knobs on the mount. I used the auto-refresh button to get 1-second updates and tweaked the mount RA and DEC knobs until the alignment was within 2 arcseconds.
IV. Finding M106
Next, I slewed the mount back to its home position by using the mount menu, and I tapped the virtual Sky Atlas icon at the bottom left of the main screen which opened the atlas, and I searched for M106. The app showed its virtual position in the atlas, and I hit “Slew To.” The mount moved to its position, but it hit a snag: during the platesolve, I suddenly lost the connection to the mount. I had to power the StellaVita off and on again to reset. After reconnecting everything, I tried it again and this time the stella vita nailed the platesolve procedure. My guess is that I had an intermitted WiFi signal issue as I was not using the USB 2.0 WiFi Antenna yet, that came with the mount, which I get to in a minute.

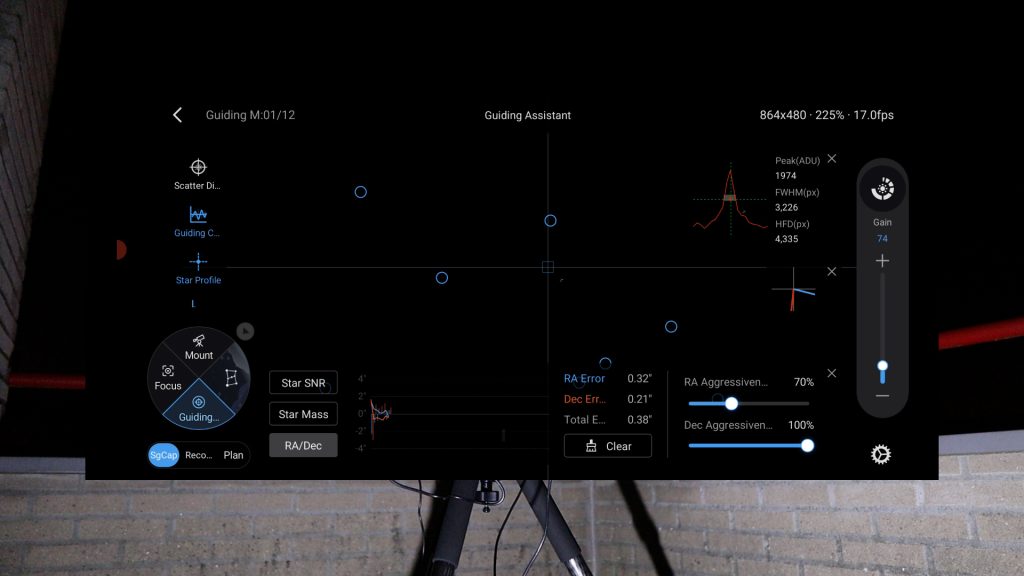
V. Guiding and the First Shot
After that, I opened the guide menu on the bottom left, and the StellaVita started by calibrating the exposure time, moving from 5 seconds down to 1. Once that was set, it began its internal calibration for multi-star guiding. The stars looked a little blocky but the guiding module calibrated on the stars moving the mount slightly, and then and started guiding once it was done. I took a 15-second test photo and, to my delight, M106 appeared perfectly centered and sharp. I was officially in business.
VI. The Wi-Fi Fix and Sequence Planning
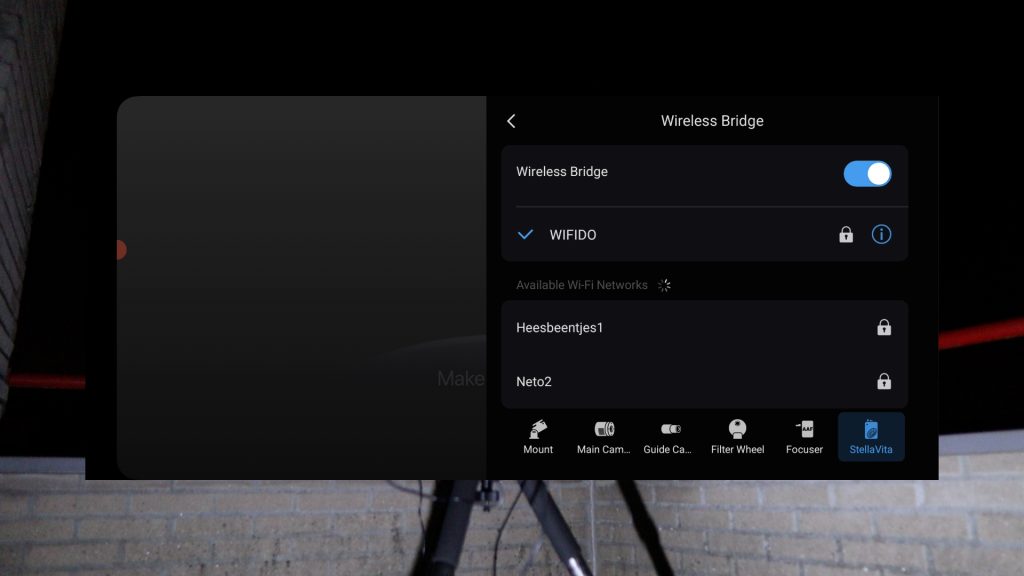
Before starting the full plan, I decided to first plug in the USB Wi-Fi antenna that came with the stella vita as I suspected that my issue with the disconnect might be due to a WiFi issue. I plugged in the antenna to one of the USB 2.0 slots and the signal got a lot stronger immediately. Using the antenna also allowed me to use the Wireless Bridge option, to connect the StellaVita to my home network. After selecting my home WiFi, I could monitor the stella vita using my home WiFi signal from inside the house, which was great. With the system stable, I decided to setup my imaging plan for the rest of the night.
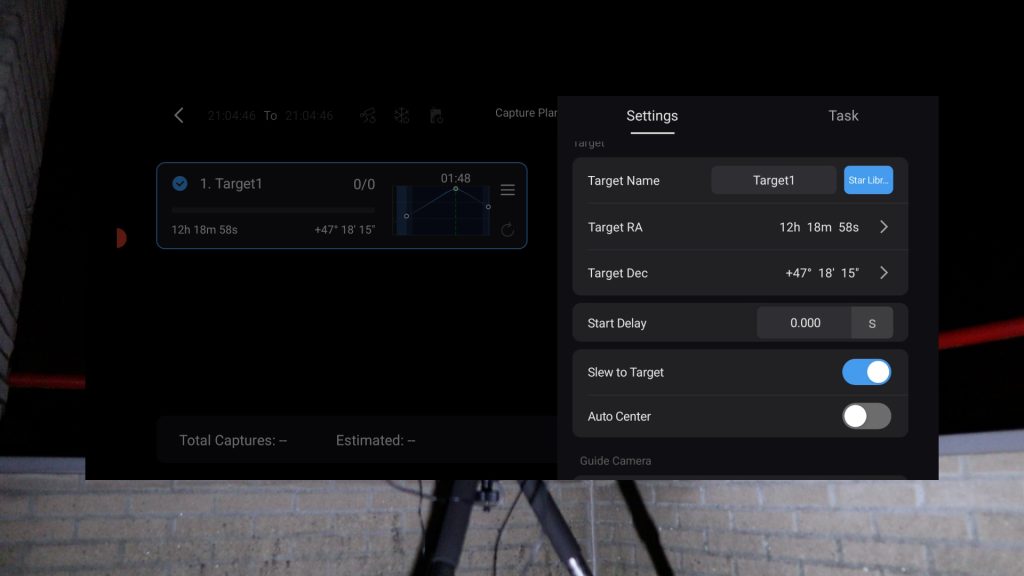
I switched to Plan View on the bottom left and tapped the Capture Plan icon on the top right. By hitting the plus icon on the bottom right, you can create a new capture plan. You get a Settings tab where you can manage things like naming your imaging session, selecting auto-slew and centering on your target, and starting your auto-guiding—along with auto-focusing options if you have an electronic auto focusser, which I did not have on this setup.
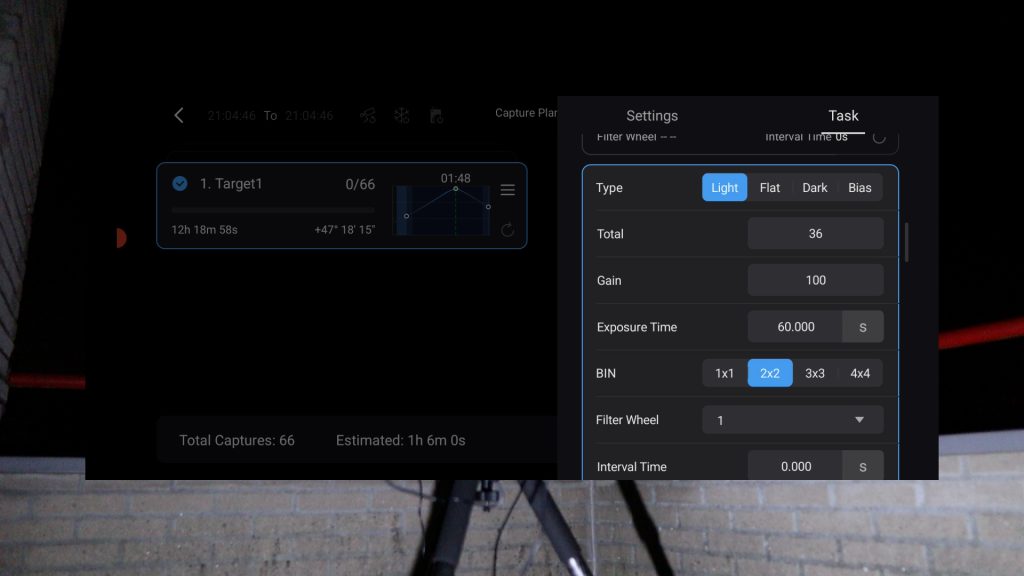
In the Task tab next to the Settings tab, you can manage your sequence of images by setting the number of photos, the exposure time, gain setting, binning, and your filter if you have a filter wheel. For this sequence, I set thirty-six images at gain one hundred and sixty-second exposures, and i added a second sequence hitting the plus icon and setup thirty-six images at gain one hundred and three-hundred-second exposures, using no filters and just the color camera. I named the sequence m-106-test and started the session.
I got a warning when starting the capture plan that I did not select ‘Slew to Target,’ which was fine because I was already tracking the object I wanted to capture. So, I pressed Cancel, and the sequence automatically started taking sixty-second exposures. I went inside and monitored most of the session that night, and the Stella Vita successfully captured all the images
VII. Taking Flats and Dark Flats the next morning
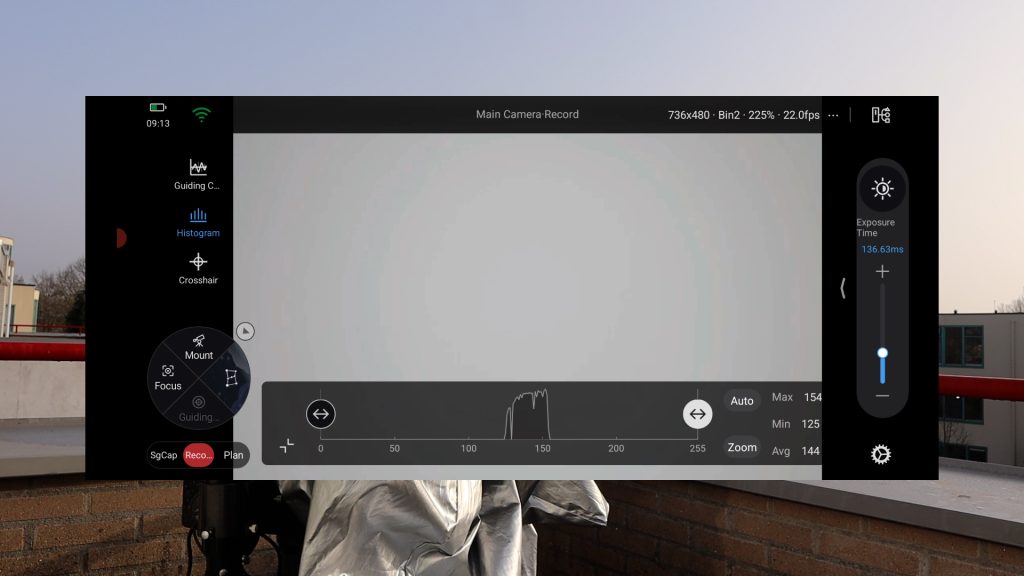
The next morning, I decided to take my flats and dark flats with the Stella Vita using the good old T-shirt method. Perhaps I missed it, but I couldn’t find an auto-flat exposure calculator on the Stella Vita, so instead, I used Record Mode with a gain at one hundred. I then played around with the exposure time to see at what point the histogram would show a peak in the middle.
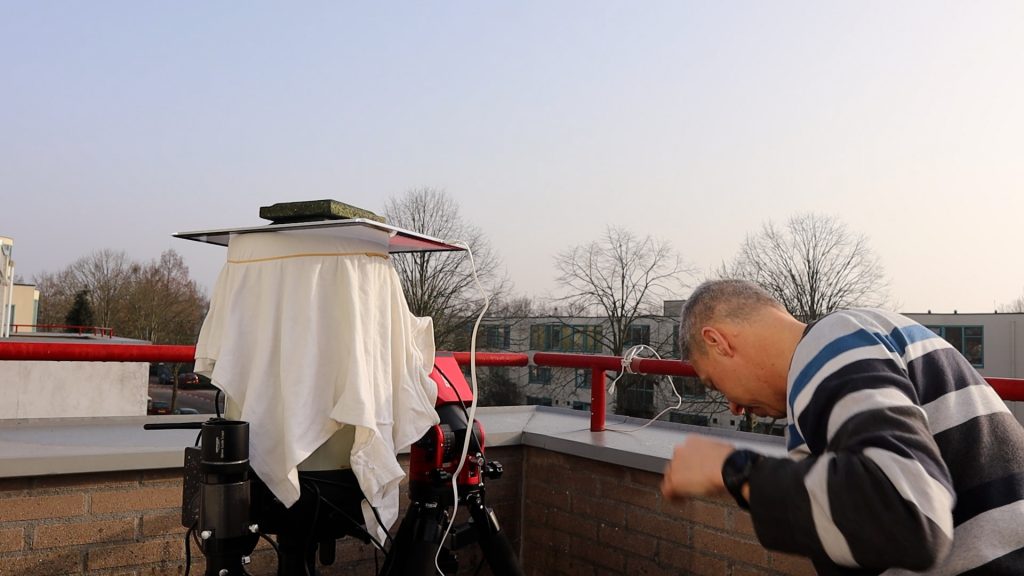
After determining the correct exposure, I set that time in a Capture Plan and took twenty flat frames at gain one hundred. This worked perfectly fine. After that, I removed my light panel and put the lens cap on to take another twenty flat-darks with the same exposure time.
VIII. Transfering images from the Stella Vita
After taking these calibration frames, it was time to transfer all the images to my desktop computer. Unfortunately, the Stella Vita didn’t recognize my external USB drive, and the USB-C port on the device doesn’t appear to support file transfer viaa usb cable, which was a bit of a bummer.
So, I powered up the Stella Vita near my desktop and tried the Wi-Fi transfer option. I selected the Stella Vita Wi-Fi signal on my computer, used the default password one-two-three-four-five-six-seven-eight, and opened a file explorer window. I entered the address backslash-backslash-ten-dot-zero-dot-ten-dot-one, as explained in the guide.
A login screen appeared, and I entered ‘as’—which is short for Astrostation—as the username, and ‘astrostation’ as the password. With that, I was able to log into the internal storage of the Stella Vita and select the images I wanted to transfer. Although this method worked, it took quite some time—about fifteen minutes—to transfer all my images to my computer.
The Verdict: First Light with the Stella Vita
I really appreciate that the ToupTek team is developing a wireless astrostation that supports gear from various brands, rather than locking you into one ecosystem. The app is straightforward and clearly designed for touchscreens; I found the polar alignment, autoguiding, and capture plan menus very intuitive. I also loved the wireless bridge, which let me monitor everything from inside my home via my local Wi-Fi.
That said, I did notice a few missing features during this ‘first light’ impression. An auto-refresh option for manual focusing would be a great addition. Also, the external USB antenna feels mandatory—without it, the signal was intermittent, and using it does take up a valuable USB slot. Finally, the lack of data transfer via the native USB-C port was a bit surprising.
Overall, the Stella Vita has massive potential. It’s a compelling alternative for those who want to avoid the brand-specific limitations of the ASIAIR, or the complexity of a Windows-based ASCOM system. It might not have every feature yet, but with ToupTek’s regular updates, it’s definitely a device to consider—especially if you want to support the development of a wireless platform that isn’t locked to one brand. Now, here’s that final image I took of M-106, after spending an additional evening under the stars to capture with my 7nm Ha filter.