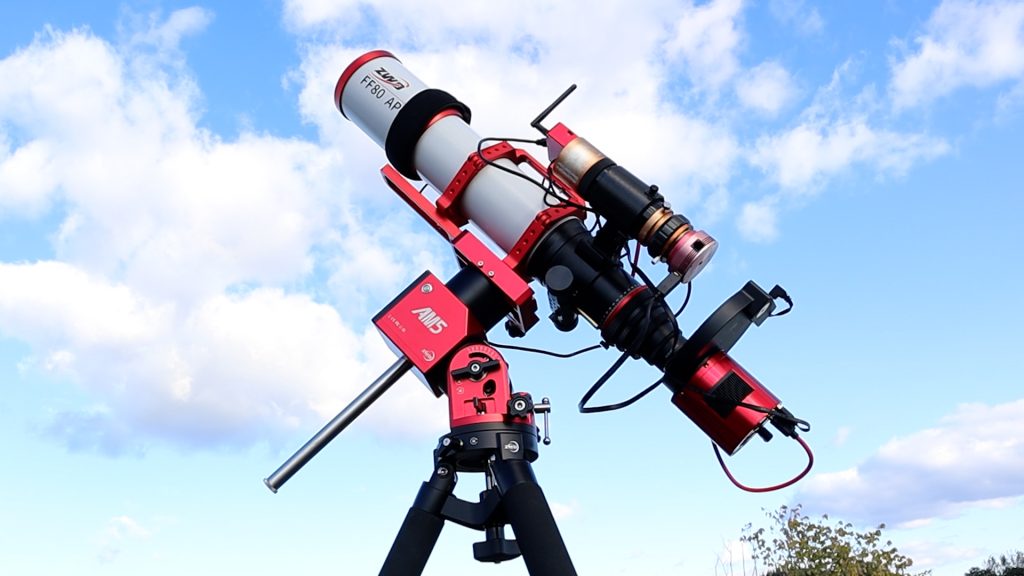
After six months of using the ZWO FF80 refractor telescope, I’m excited to share my experience and show you how this telescope performs in combination with my astrophotography gear. In this post, I’ll walk you through how I use the ZWO FF80 with my ZWO AM5 mount, ASI2600MC Pro camera, and ASIAIR Plus to capture stunning deep-sky images. I take you step-by-step through my astrophotography setup, from assembly to capturing breathtaking shots of the night sky. II’ll share my insights and conclusions on the ZWO FF80 telescope after six months of use, along with the rest of my astrophotography gear—the ZWO AM5 mount, ASI2600MC Pro, and ASIAIR Plus—highlighting how capable this setup is for deep-sky imaging.
Technical specifications
ZWO AM5 Mount
Let’s start with the mount. I’ve been using the ZWO AM5 mount for over a year now—it’s a super portable, lightweight harmonic drive mount. The mount head weighs just 5.5 kilograms, and with the optional TC40 carbon tripod at only 2.3 kilograms, it’s about three times lighter than classic german equatorial mounts like my SkyWatcher EQ6-R Pro. I have used this mount to setup my telescope on my rooftop without breaking a sweat. The AM5 is capable of supporting up to 13 kilograms without a counterweight and up to 18 kilograms with one, which comfortably accommodates my telescope, camera, and guidescope. One major advantage of this mount is that I no longer need to deal with counterweights for balancing, unlike with traditional German equatorial mounts—making the setup process much quicker and more efficient. ZWO released a new version of this mount, the AM5N, with upgrades like a power outlet and USB port on the saddle for easier cable management, the removal of azimuth locks, replaced by springs that simplify polar alignment. The new AM5N also adds Bluetooth connectivity, increases the payload capacity to 15 kg without a counterweight and the tracking accuracy has improved with a periodic error of only ±10″.
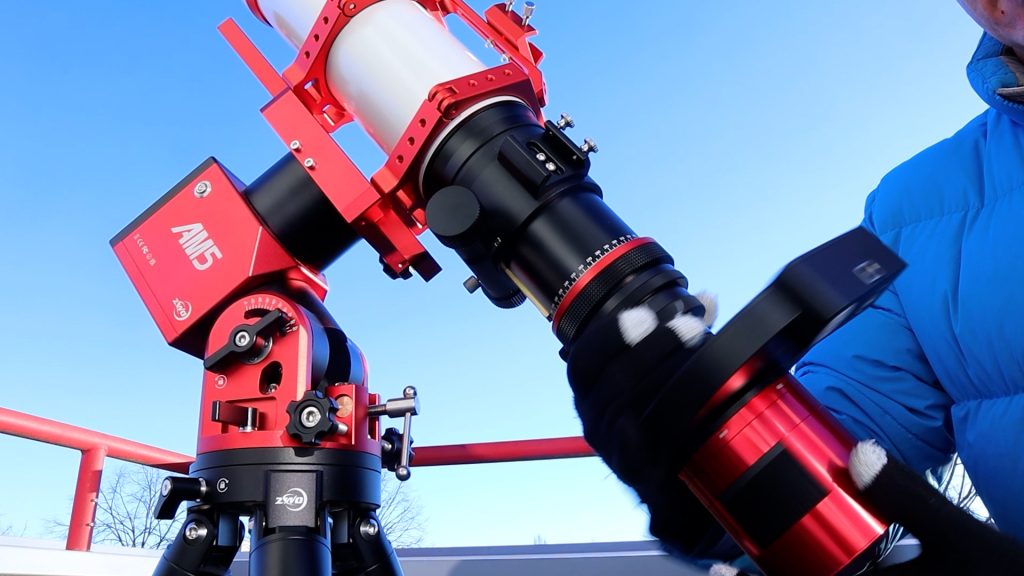
The ZWO AM5N Telescope Mount is available at ZWO (WW), Agena Astro (USA/WW), High Point Scientific (USA/WW) and Astroshop (EU/WW).
ZWO FF80 Telescope
With its 80mm aperture and 600mm focal length, the native f/ratio is 7.5. The “FF” in its name stands for flat field, indicating that the FF80 is a quadruplet telescope capable of producing well-corrected, round stars across the entire field of view without the need for an extra field flattener. The dual-speed RAP focuser allows for accurate manual focusing, and precise framing is facilitated by the manual rotator. The telescope weights only 3.9 kg without and 4.7 kg including the tube rings. While the f/7.5 ratio is somewhat slower for light collection, it actually ensures excellent color balance and round stars across the field of view, making it ideal for APS-C and full-frame camera sensors.You can also get an optional 0.76 reducer, which brings the focal length down to 456mm at f/5.7. Attaching astrocameras and/or a filter wheel to the FF80 telescope is straightforward, thanks to the included adapters.

The ZWO 80FF quadruplet telescope is available at ZWO (WW), Agena Astro (USA/WW), High Point Scientific (USA/WW), and Astroshop (EU/WW).
ZWO ASI2600MC Pro Camera
This color camera features a large 26 MP APS-C sensor that pairs beautifully with the FF80’s optics, providing a 2.24° x 1.5° view of the night sky at a resolution of 1.29 arc seconds per pixel. This resolution falls perfectly within the recommended range of one to two arc seconds per pixel for deep-sky imaging from your backyard or balcony. The Sony IMX571 sensor offers high sensitivity, low noise, and excellent dynamic range with its 16-bit analog-to-digital converter, surpassing the dynamic range of more affordable 12-bit and 14-bit models. The ASI2600MC Pro features cooling a Peltier cooler, allowing it to reach temperatures as low as -35°C below ambient, and it offers a total of two extra USB outputs for seamless connectivity with various astrophotography devices.
By the way, ZWO has made this camera sensor their primary workhorse, incorporating mono versions, guide sensors, and even ASIAIR functionality in their newer models. But we’ll dive into that in another blog. I’m using this 7×2 inch filter wheel in front of the camera, which has Ha, Sii, and Oiii narrowband filters for capturing narrowband images. These filters allow me to detect light at specific wavelengths emitted by ionized hydrogen, sulfur, and doubly ionized oxygen. This technique is especially useful for imaging emission nebulae while significantly reducing the impact of light pollution in my city.
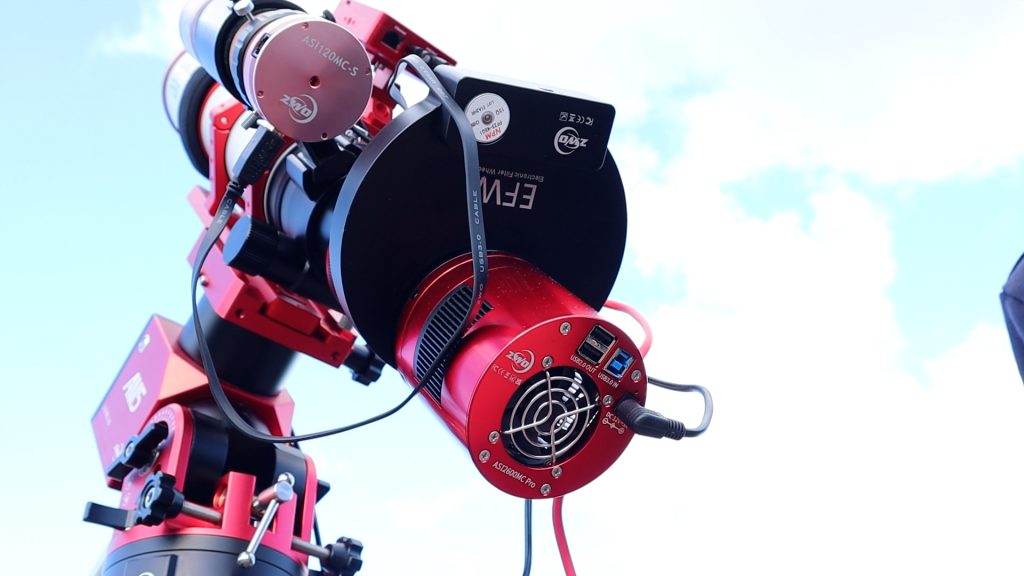
The ASI2600MC Pro Camera is available at: ZWO (WW), Agena Astro (USA/WW) High Point Scientific (USA/WW), and Astroshop (EU/WW)
ASIAIR Plus 256GB
The ASIAIR Plus 256 GB is a compact, all-in-one astrophotography control device with 256 GB of internal storage, perfect for managing large imaging sessions. It comes with 4 USB outputs and 4 12V power outputs, allowing it to power and control multiple astrophotography devices simultaneously, effectively functioning as both a controller and a powerbox. The ASIAIR Plus integrates seamlessly with ZWO cameras, mounts, and other accessories, making tasks like polar alignment, focus, and imaging easy to manage. Its wireless control via mobile devices simplifies cable management and allows remote operation from indoors. This combination of power distribution, storage, and wireless control makes it a great tool for astrophotographers seeking to streamline their setup and capture high-quality images. I’m using an six-year old old 50mm aperture guidescope with a 165mm focal length on my telescope, paired with my ASI120MC camera, which still works remarkably well for guiding. For more info about guiding, read this blog.

The ASIAIR Plus 256GB is available at ZWO (WW), Agena Astro (USA) High Point Scientific (USA), and Astroshop (EU)
How I Set Up My Astrophotography Gear During the Day
Setting up my astrophotography gear ahead of time during the day is key to a smooth imaging session. First, I make sure that my AM5 mount is facing north, is level, and set it to roughtly 52 degrees which is my latitude in the Netherlands. Then, I place my telescope—with the camera, guidescope, and ASIAIR Plus—onto the AM5 mount. Next, I connect two cables to the AM5: a USB cable on the left to link it to the ASIAIR Plus, and a power cable on the right to power the AM5. I know there’s a Bluetooth option to connect ZWO mounts to the ASIAIR Plus, but I haven’t tested that yet. After that, I run a power cable from the 12V output on the AM5 to the ASIAIR Plus to power it. I also connect the USB cables from my guidescope and camera to the ASIAIR. For the ASI2600MC Pro camera, I plug in an extra power cable to power the Peltier cooler, which cools the camera down to as low as -35°C below ambient temperature. I also attach the USB cable from the filter wheel to one of the USB ports on my main camera. To summarize, my ASIAIR Plus has one power cable connected to the main camera and four USB cables: one for the main camera, one for the guidescope, one for the AM5, and one for the dew heater wrapped around my telescope—since it’s quite humid here in the Netherlands.
Recently, I’ve been using the Apertura All Night Power Supply to run my entire setup. With this battery, I can get about 8 to 9 hours of use. I use a USA-to-EU adapter for one of the AC outputs, which powers an extension cord. I also place a Wi-Fi repeater next to the telescope to connect the ASIAIR to my home Wi-Fi using Station mode. Once all the USB and power cables are connected, I power up both the AM5 and the ASIAIR Plus. I try to do this during the day if possible, and I always make sure that all the equipment is recognized by the ASIAIR Plus. To check this, I open the ASIAIR app, which you can download on a smartphone or tablet, and verify that everything shows up on the main screen. I also make sure my AM5 mount is in the home position by going to the mount menu and pressing “Go to Home Position.” After all that is done, I wait until nightfall to start my imaging session.
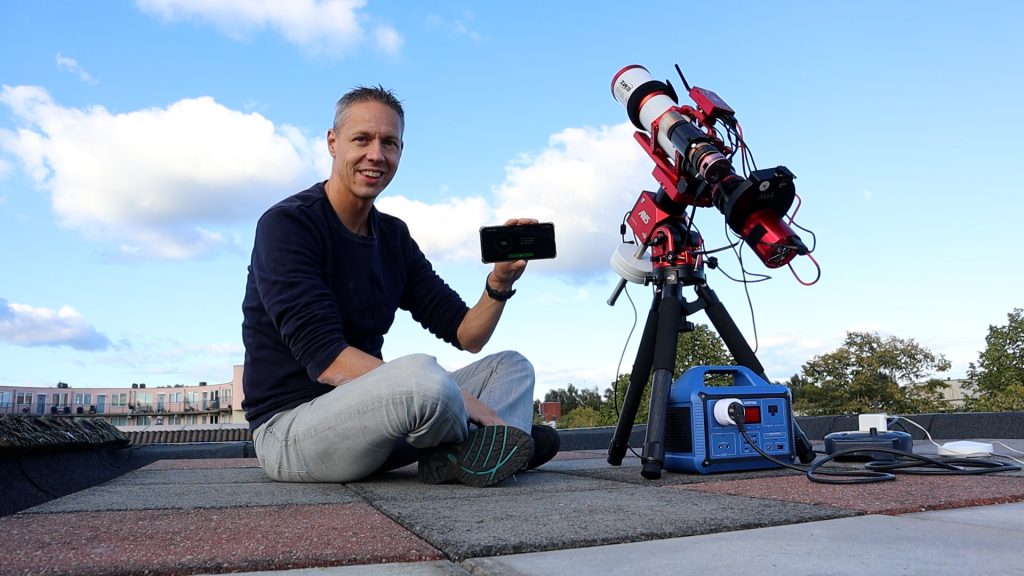
The Apertura All Night Power Supply is available at High Point Scientific (USA/WW)
How I Use the ASIAIR Plus to Start My Night Imaging Session: A Step-by-Step Guide
After setting up my gear during the day, I wait for nightfall to begin capturing deep-sky images. First, I open the ASIAIR app, connect to my setup, and ensure all my devices—mount, camera, and guidescope—are recognized on the main screen. Once confirmed, I press “Enter” to start.
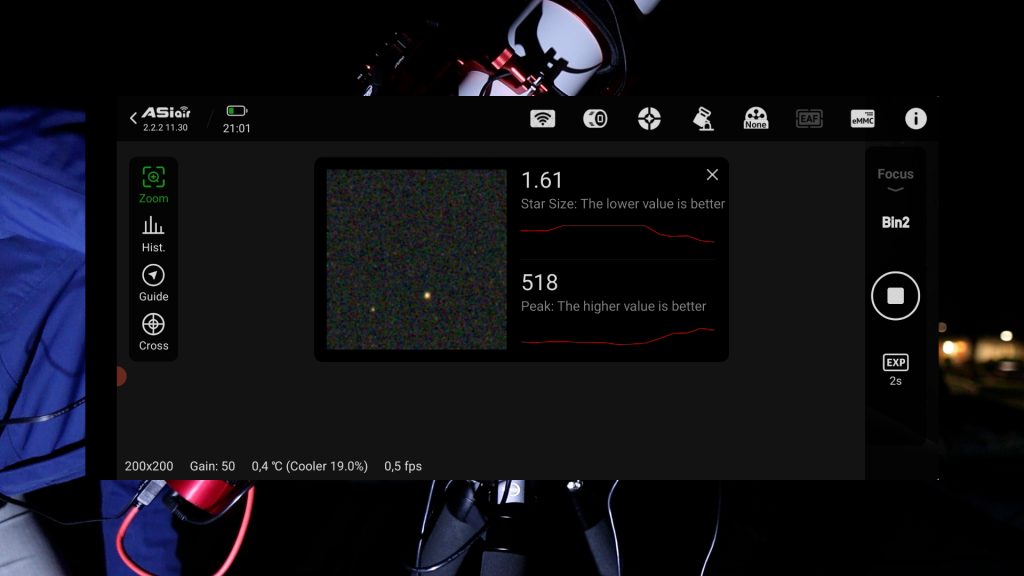
Next, I check the focus by taking a 1-second test shot in preview mode. If the telescope is out of focus, I switch to focus mode, adjust the bin and exposure settings (I typically use bin 1 or 2 with a 2-second exposure), and zoom in on a star to fine-tune the focus. I continue adjusting the focuser until the star size is minimized and the peak value is maximized, then lock the focuser in place.
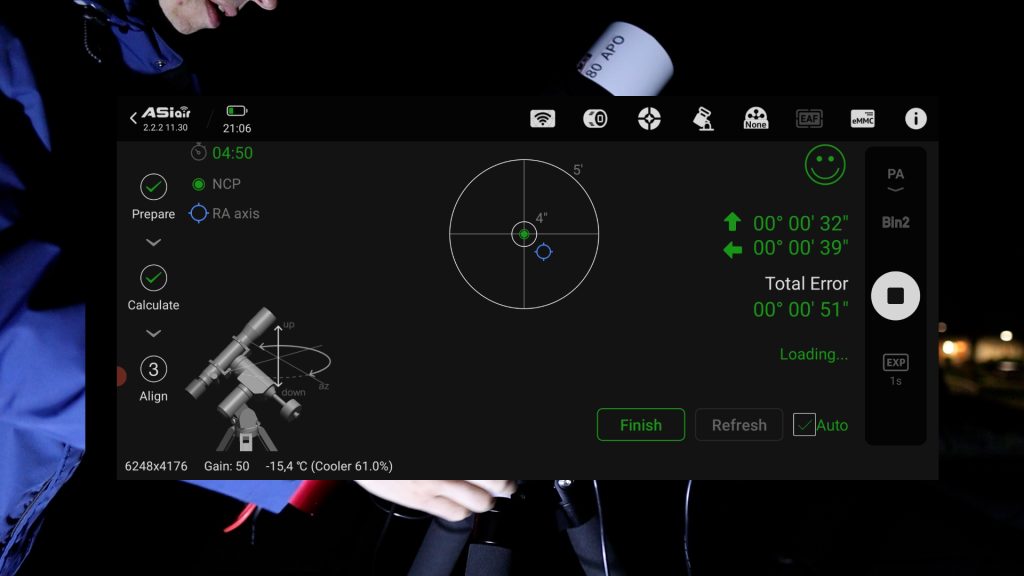
With the focus sharp, I move on to polar alignment, a crucial step for tracking deep-sky objects. I use the ASIAIR’s plate solving feature, which takes images and calculates the telescope’s position. After rotating the mount by 60 degrees and taking a second image, the app shows me how close I am to aligning with the North Celestial Pole. If adjustments are needed, I fine-tune the mount’s position using the alt-az screws until the alignment is within one degree.
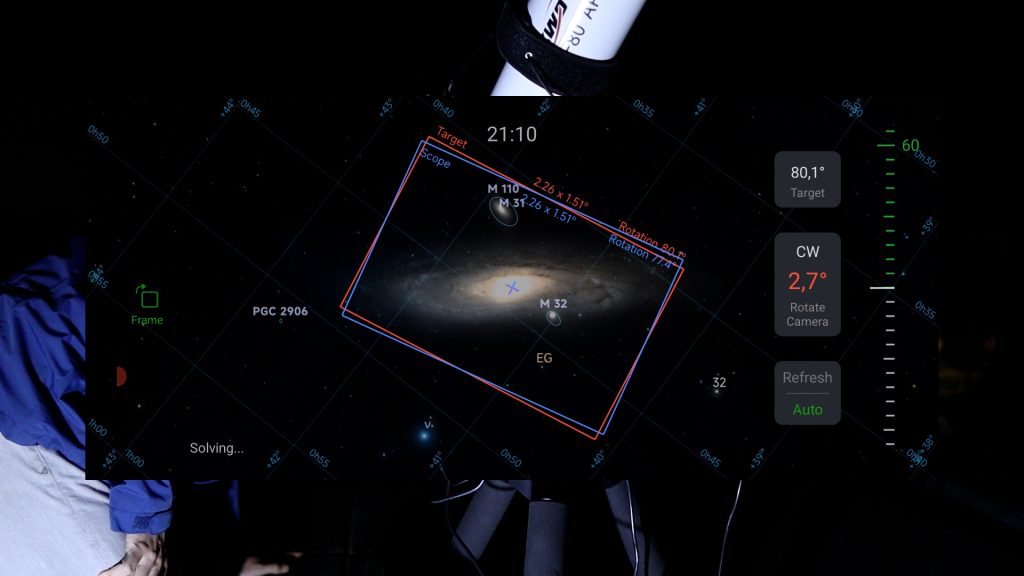
Once aligned, I select my target—M31, the Andromeda Galaxy—from the Virtual Sky Atlas, and the AM5 slews the telescope to it. I take a quick preview shot to confirm M31 is centered, then adjust the framing using the virtual wheel in the app, and start rotating the camera to align my actual view displayed in a blue rectangle to get the perfect composition. After that, I double-check the focus one more time.
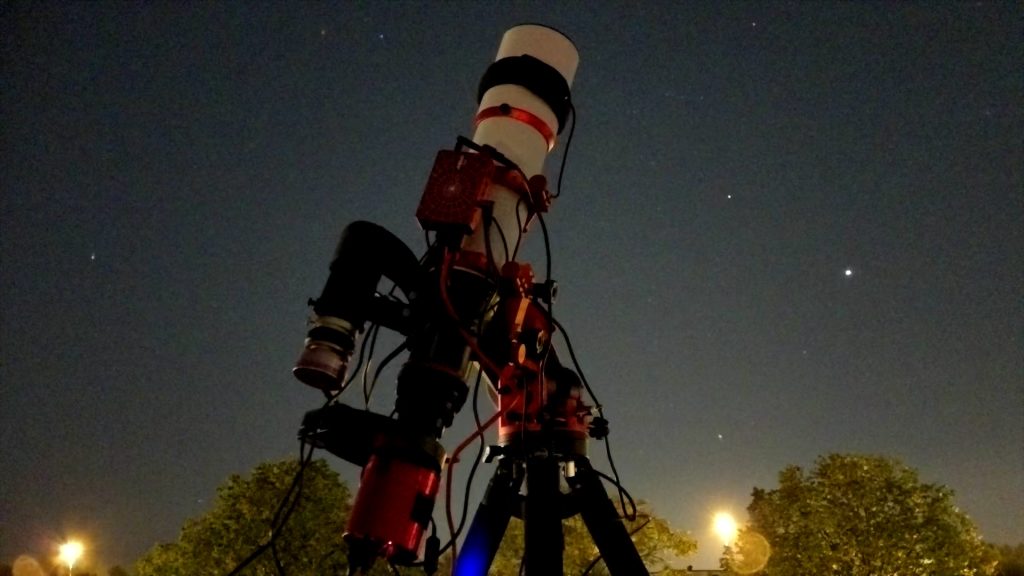
Next, I initiate autoguiding to ensure precise tracking during long exposures. I start by clicking the guide button, loop the guiding camera, and tap on the tracking button to start tracking – typically with a 1-second interval. With guiding set, I switch to autorun mode to plan my imaging session. In this case, I initially set autorun to capture 120 three-minute photos of Andromeda without using any filters, as it’s a broadband target. I typically cool the camera to about -15°C and ensure dithering is enabled to reduce noise; both can be adjusted by tapping on the camera and guiding icons and going through the menu options. Once the first image comes through, I check if the stars are sharp using the “detect” feature that displays the star sizes. Once everything is set, the ASIAIR takes control and manages the rest of the imaging session automatically. While deep-sky astrophotography involves a series of steps that require practice and precision, the ASIAIR Plus simplifies the process significantly. As an all-in-one device, it streamlines the entire workflow, making it much easier to manage your astrophotography setup from start to finish.
During the first week of October, under a new moon, we had three exceptionally clear nights here in the Netherlands. Despite the heavy light pollution in my city, I managed to capture 153 three-minute exposures of the Andromeda Galaxy without using any filters, plus an additional 35 five-minute exposures using the Hydrogen alpha filter to capture the emission nebulae within Andromeda. I also took 87 three-minute exposures of M45, the Pleiades cluster, again, without using any filter. Let me show you the resulting images after stacking and processing the single images in PixInsight.
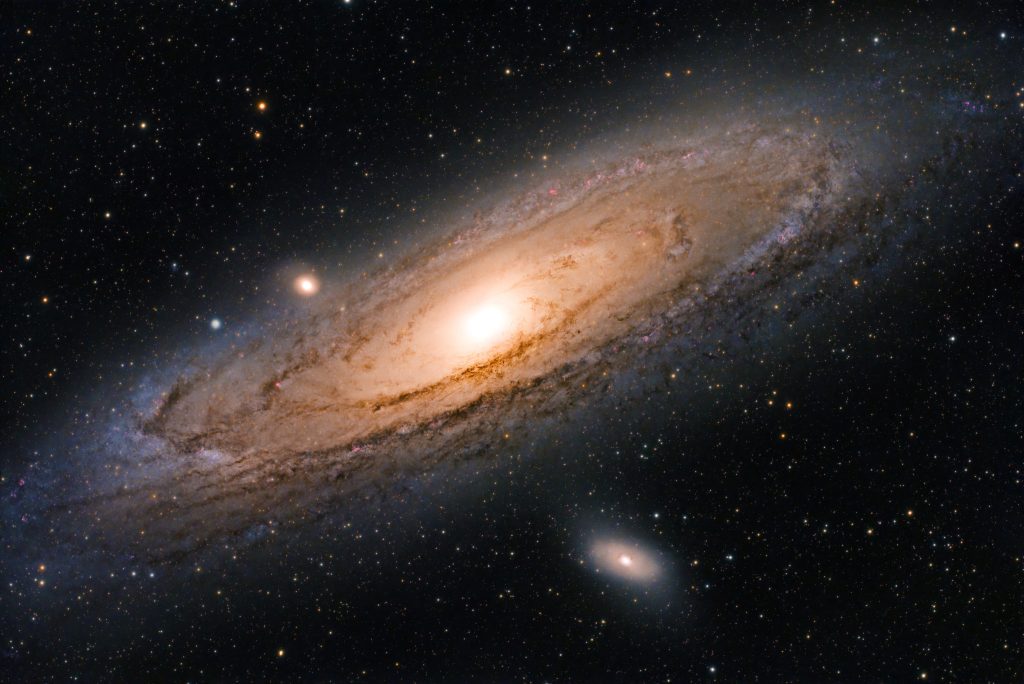
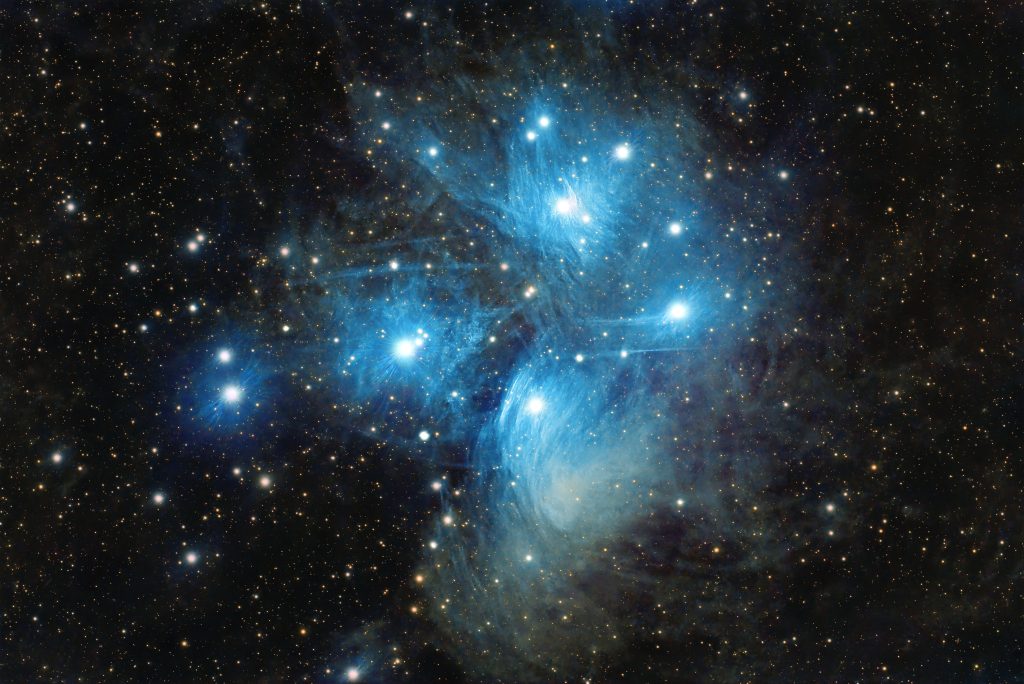
Does the FF80 Telescope produce sharp and round stars across its field of view?
I’m very pleased with the final images I captured of two popular deep-sky objects this autumn using the FF80 telescope and my astrophotography rig. Before I share my final thoughts, I want to clarify that I’m not sponsored by ZWO; I purchased the entire setup myself. Now, let’s address the key question: does the FF80 produce sharp and round stars?
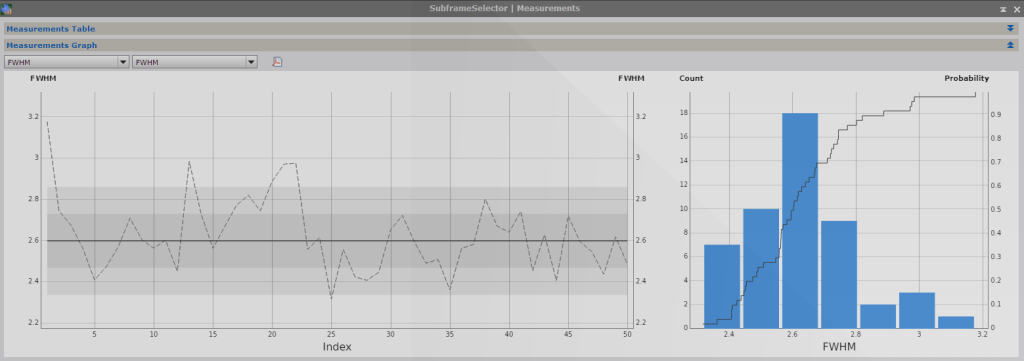
To evaluate this, I looked at the Full Width at Half Maximum (FWHM), which indicates how sharp a star appears in a photograph across 50 images taken during my first night while capturing the andromeda galaxy. For a 600mm focal length telescope like the FF80, a good FWHM ranges from 2 to 3.5 arcseconds, with lower values signifying sharper stars. In my analysis of the Andromeda Galaxy images, I found the average FWHM to be 2.6, with 95% of the stars measuring under 3 arcseconds, confirming that the stars are indeed sharp!
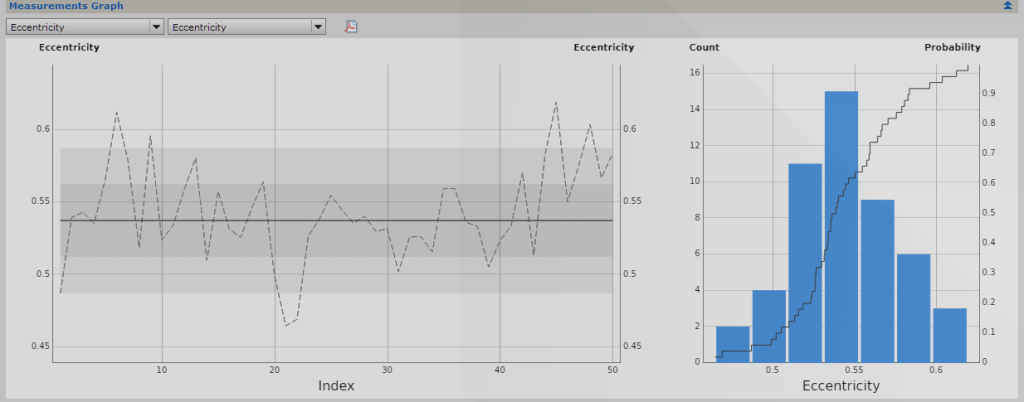
Now, let’s discuss star roundness, measured using eccentricity, which ranges from 0 (perfectly round) to 1 (highly elongated). For a 600mm telescope, an eccentricity below 0.4 is considered excellent, 0.4 to 0.6 is good, and above 0.6 indicates noticeable elongation. In my Andromeda images, the average eccentricity was 0.54, with 90% below 0.6, which is quite acceptable, although not perfect. You may notice some elongated stars when zooming in on the corners, but the eccentricity is minimal and can be easily corrected in post-processing with tools like Blur Exterminator. In conclusion, the FF80 telescope does indeed produce nice, round stars!
Final Verdict: Is the ZWO FF80 Telescope and Entire Astrophotography Rig Worth the Investment?
In my evaluation of the ZWO FF80 Telescope, AM5 Mount, ASI2600MC Pro Camera, and ASIAIR Plus, I am sincerely impressed by ZWO’s innovations. The ASIAIR Plus allows for seamless wireless control of my equipment, and the portable ZWO AM5 mount makes it easy to transport the entire setup to my rooftop, providing a stunning 360-degree view of the night sky. The AM5 accurately tracks celestial objects while autoguiding, achieving an impressive average of 0.4 to 0.6 arcseconds. However, it’s important to note that this lightweight mount can be sensitive to wind, so I always attach an extra counterweight on breezy nights. Is this the perfect rig? I wouldn’t go that far. The complete setup costs around $5,000, which isn’t the most budget-friendly option for entering astrophotography. However, if you’re in the market for a relatively affordable flat-field telescope and a portable astrophotography rig that produces high-quality images suitable for printing and displaying at home, this setup is definitely worth considering. Clear skies!
How do you attach the ASIair to the top rail, please?