Smart telescopes like the Dwarf 3 are designed to make observing and photographing the Sun, the Moon, wildlife, and deep-sky objects like distant nebulae and galaxies enjoyable, straightforward, and hassle-free. Simply set it up, connect wirelessly to the app on your smartphone or tablet, choose your target, and the Dwarf 3 handles the rest while you enjoy the images on your device. The best part? It’s priced at $499 (before tax). But is it really that easy? Let’s explore this review to find out!
About a year ago, I reviewed the Dwarf 2 smart telescope from Dwarflab, its predecessor. I really wanted to love it—the design was impressive—but I faced some challenges. The astrophotography images were noisy, I had issues with the app’s connectivity and control, and the WiFi range was limited. Fast forward to today and Dwarflab has just released their Dwarf 3 Smart Telescope, the latest model in the series. It comes with improved optics, a better camera sensor, an updated app, and more. I reached out to Dwarflab, and they kindly sent me an early production unit of the Dwarf 3—big thanks to Jimmy! I want to clarify that I wasn’t paid to write this review, and all opinions and thoughts expressed here are entirely my own. For this review, I tested the Dwarf 3 on solar, lunar, and deep-sky astrophotography, as well as using it for daytime bird photography to see if it truly excels as an affordable multi-purpose device for nature, wildlife and astrophotography.
The Dwarf 3 Smart Telescope is available at Dwarflab (WW), High Point Scientific (USA/WW), and Astroshop (EU/WW).
Dwarf 3: Design, Features and Specifications
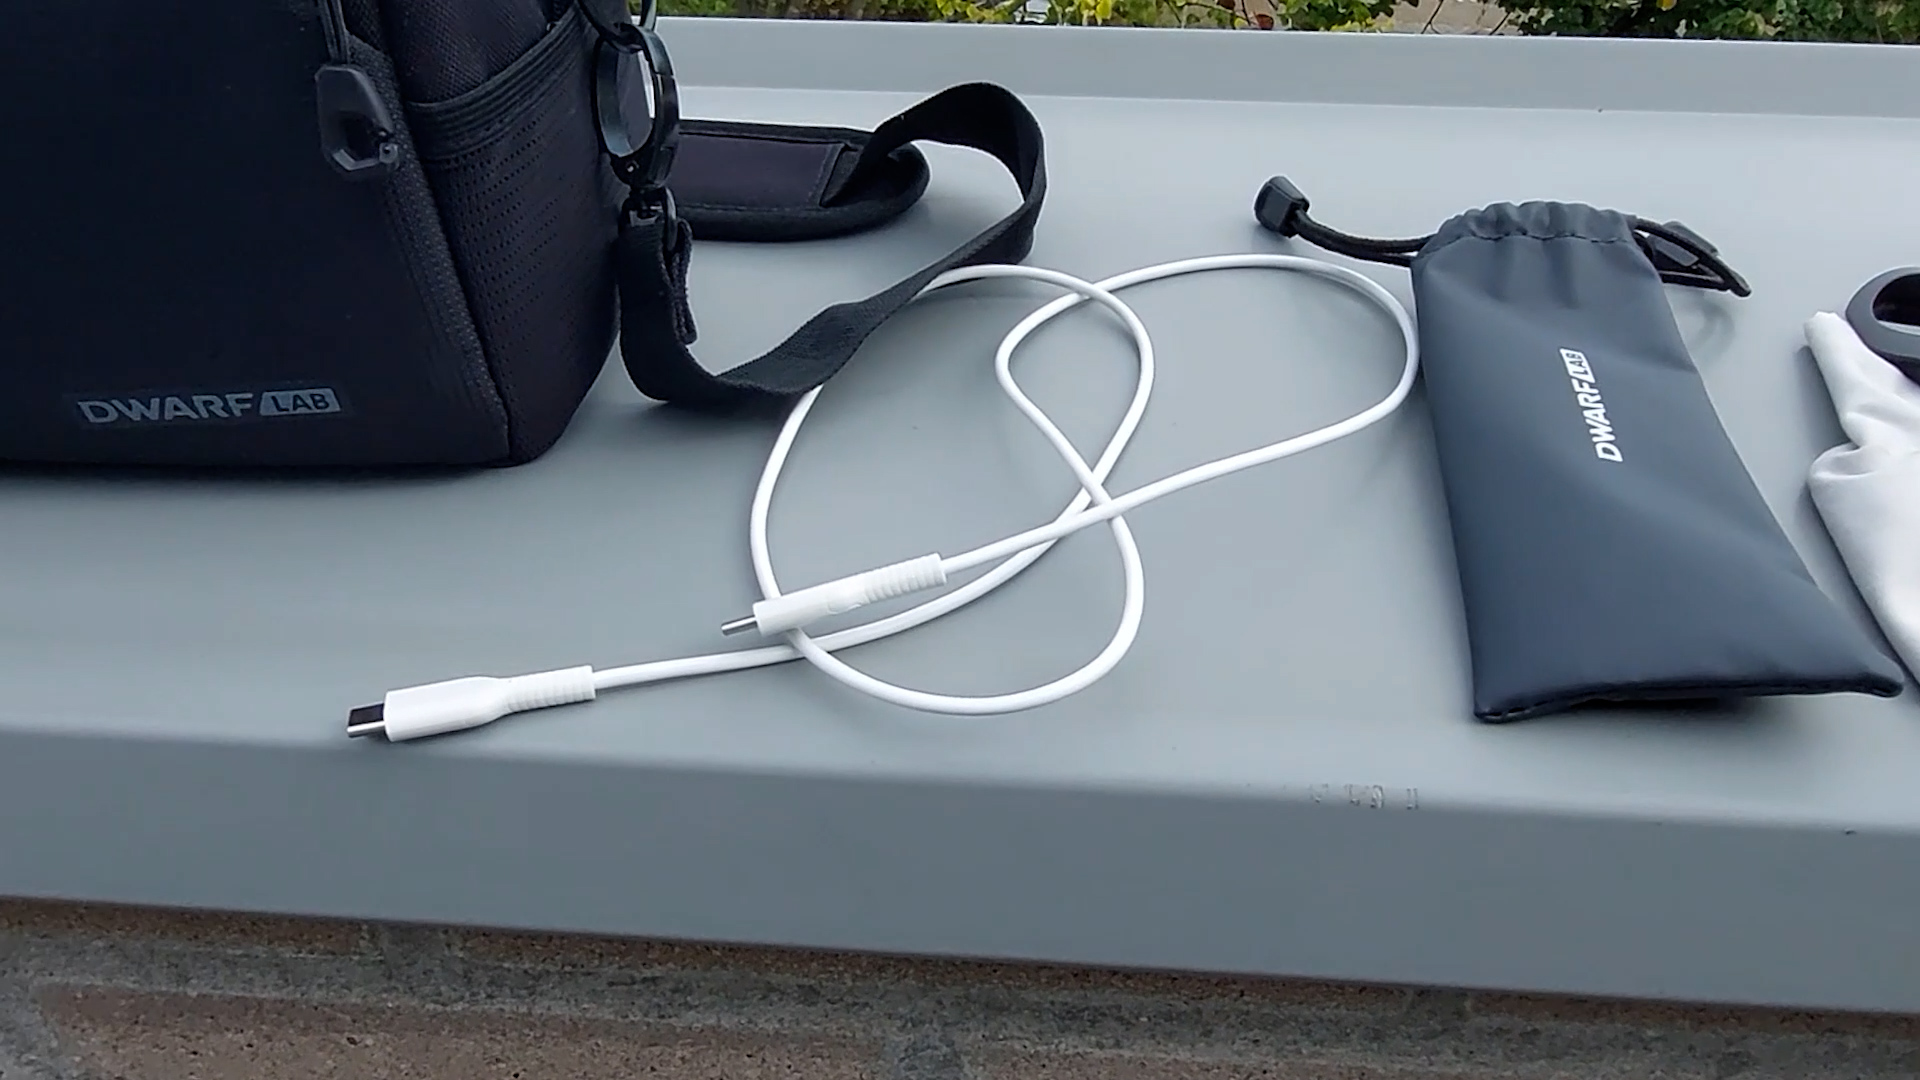
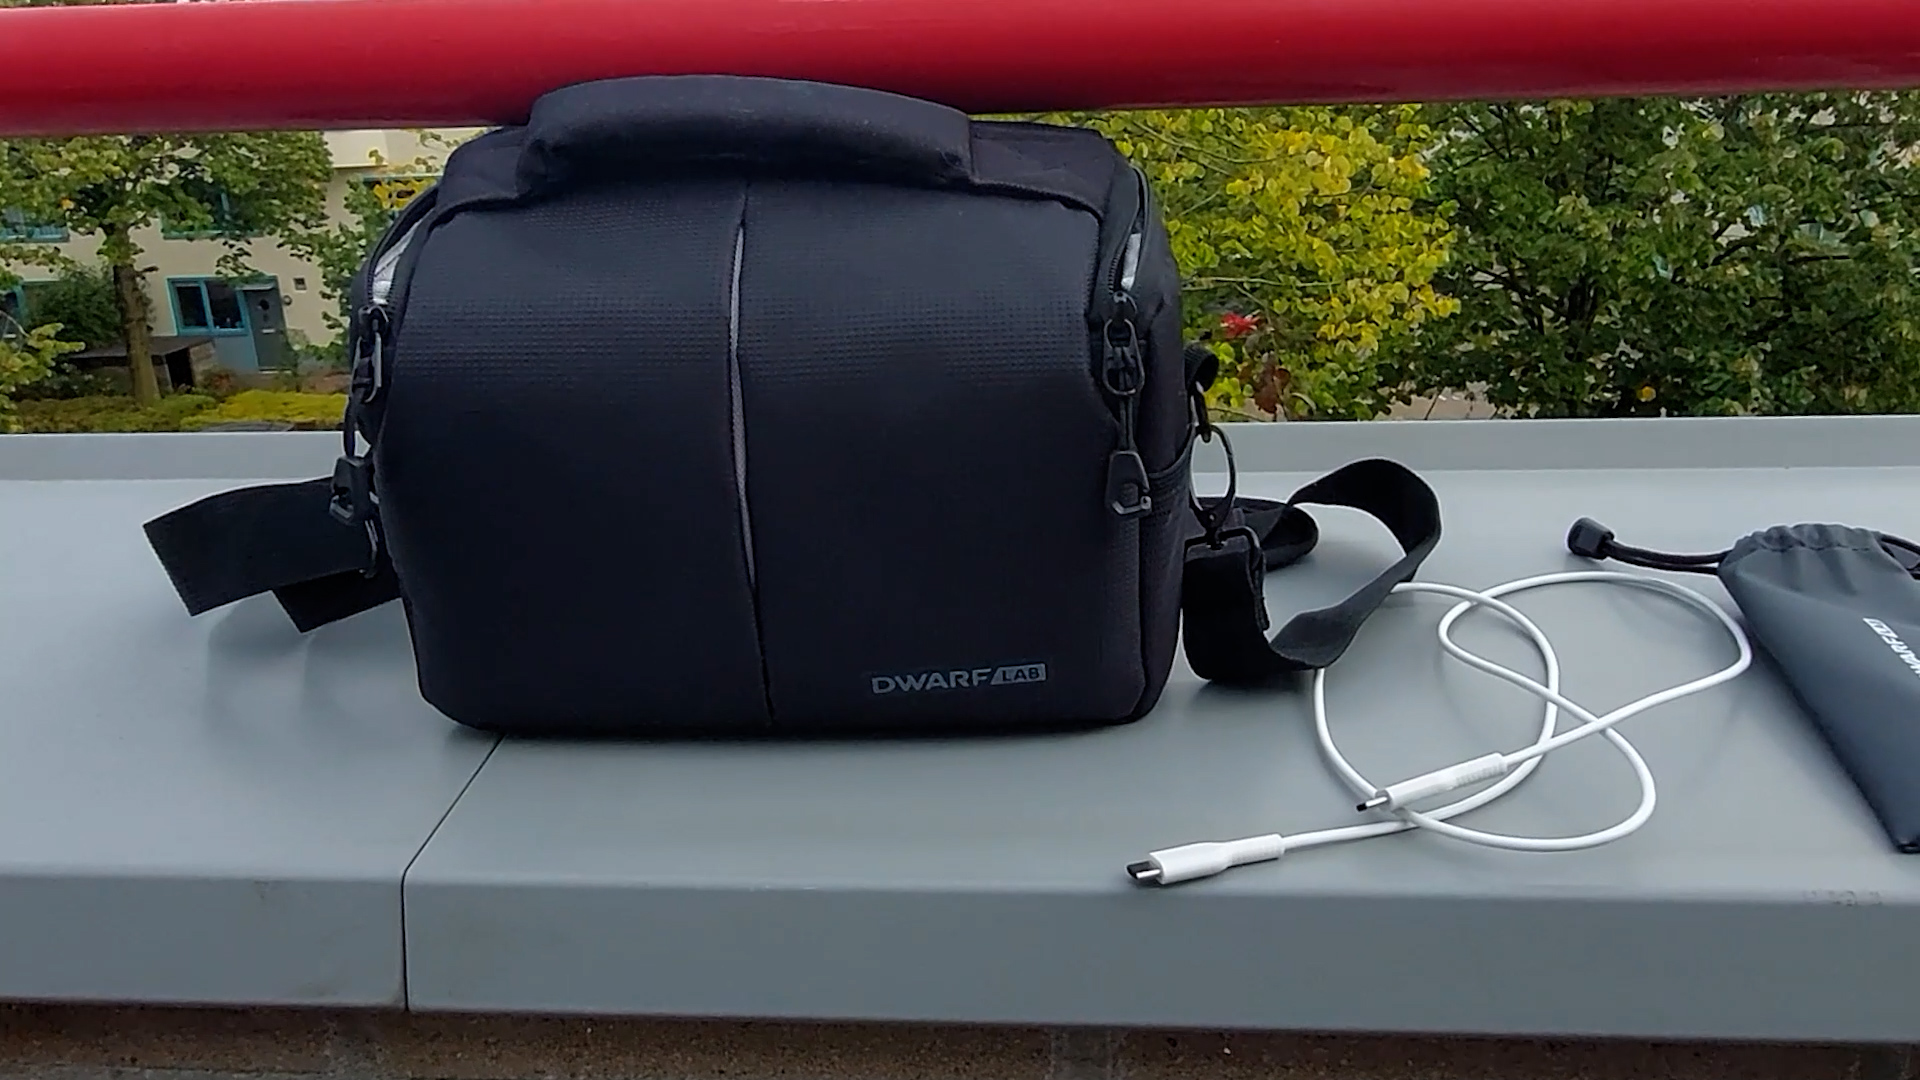
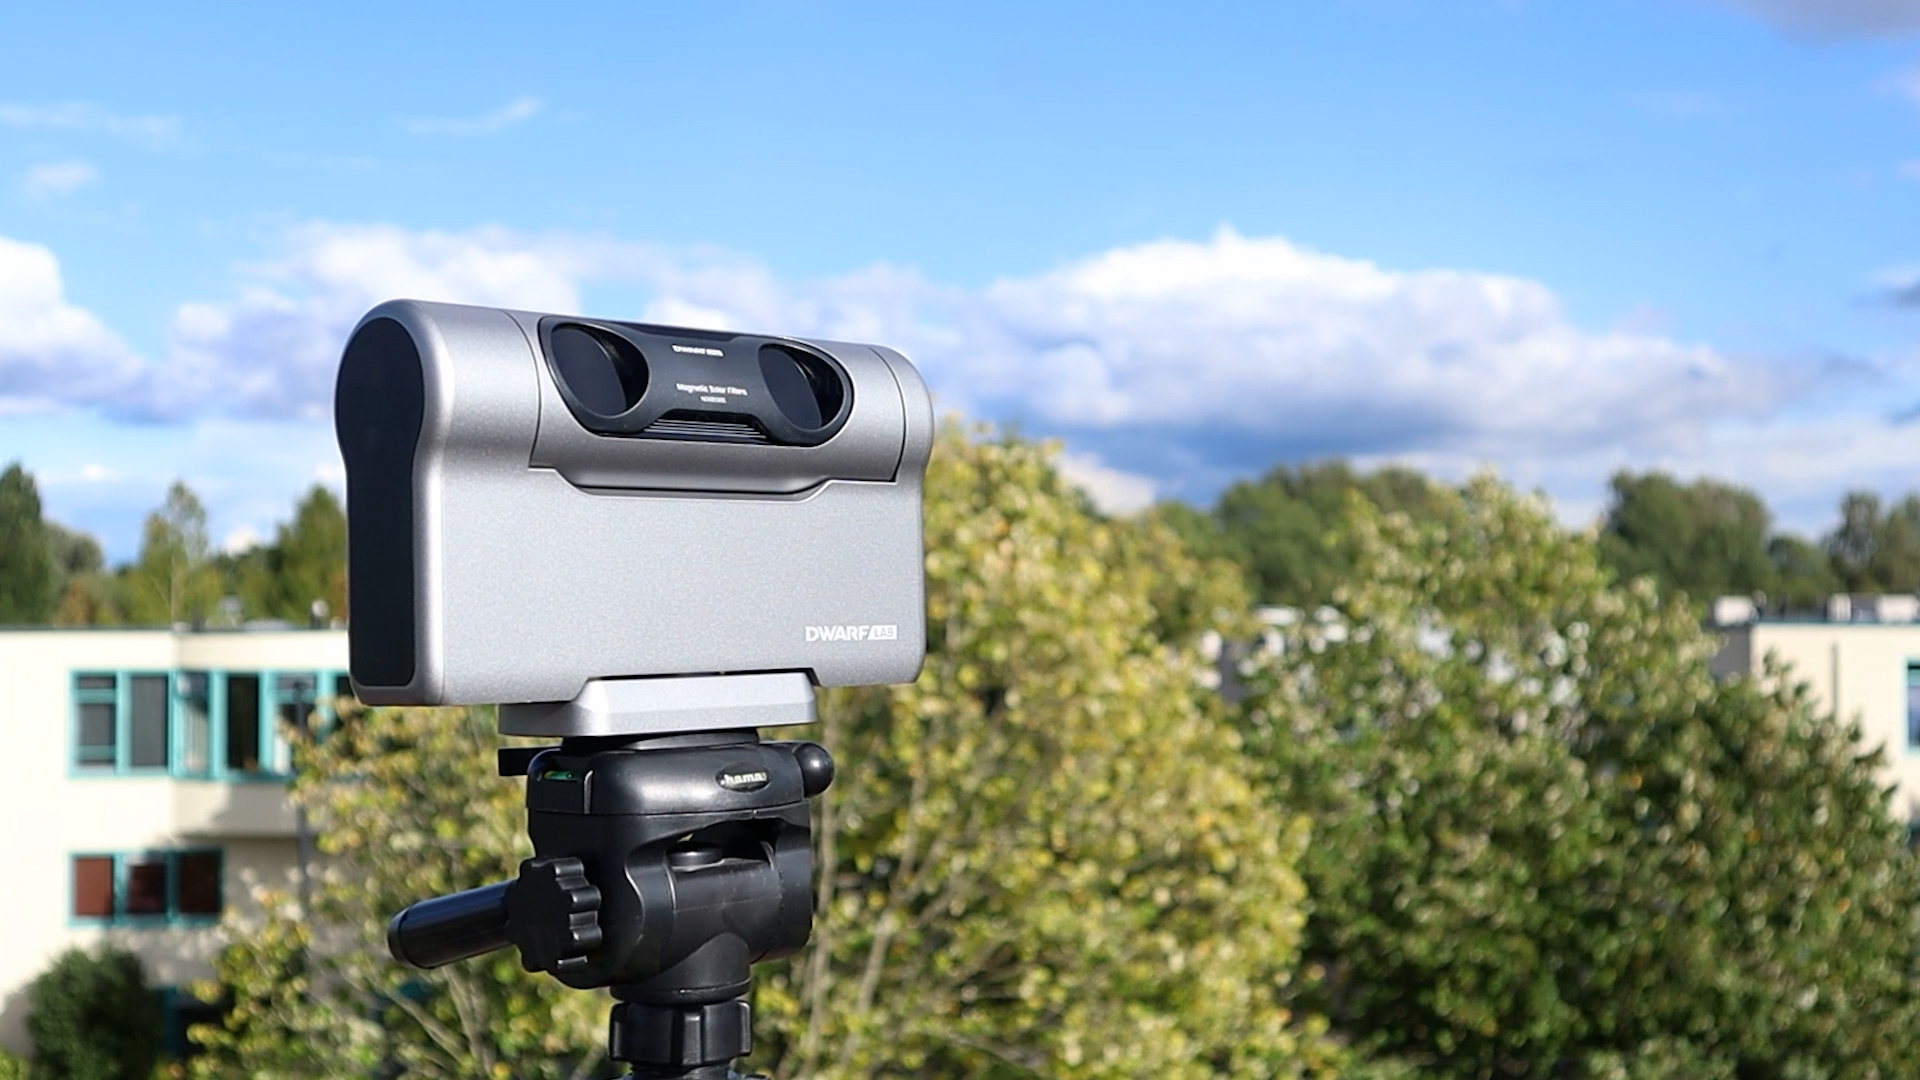
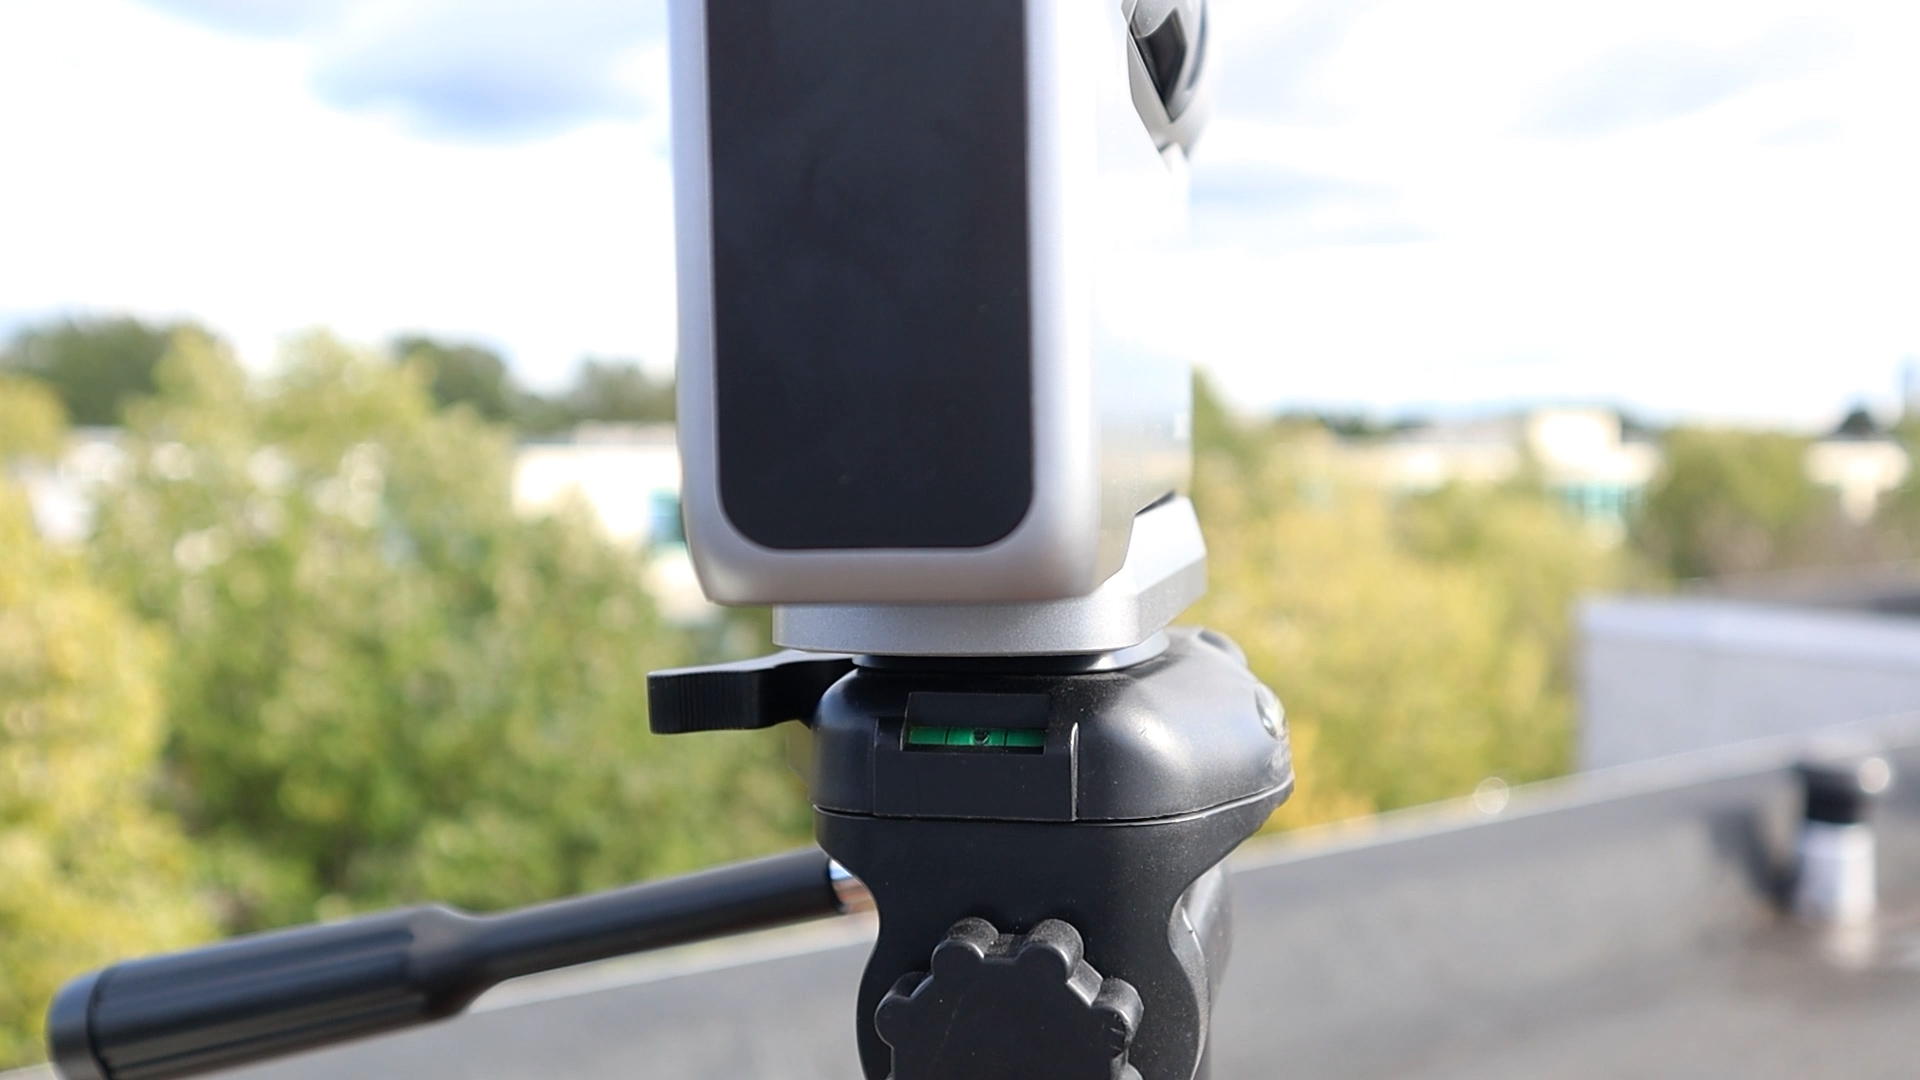
As of now, the Dwarf 3 smart telescope is priced at $499 (before tax). This package includes the Dwarf 3 telescope, magnetic solar glasses for solar imaging, a USB 3.0 charging cable, a cleaning cloth, and a travel bag for easy portability. However, it does not come with a tripod. Fortunately, the Dwarf 3 is compatible with any camera tripod using a standard 1/4 inch 20 screw size.
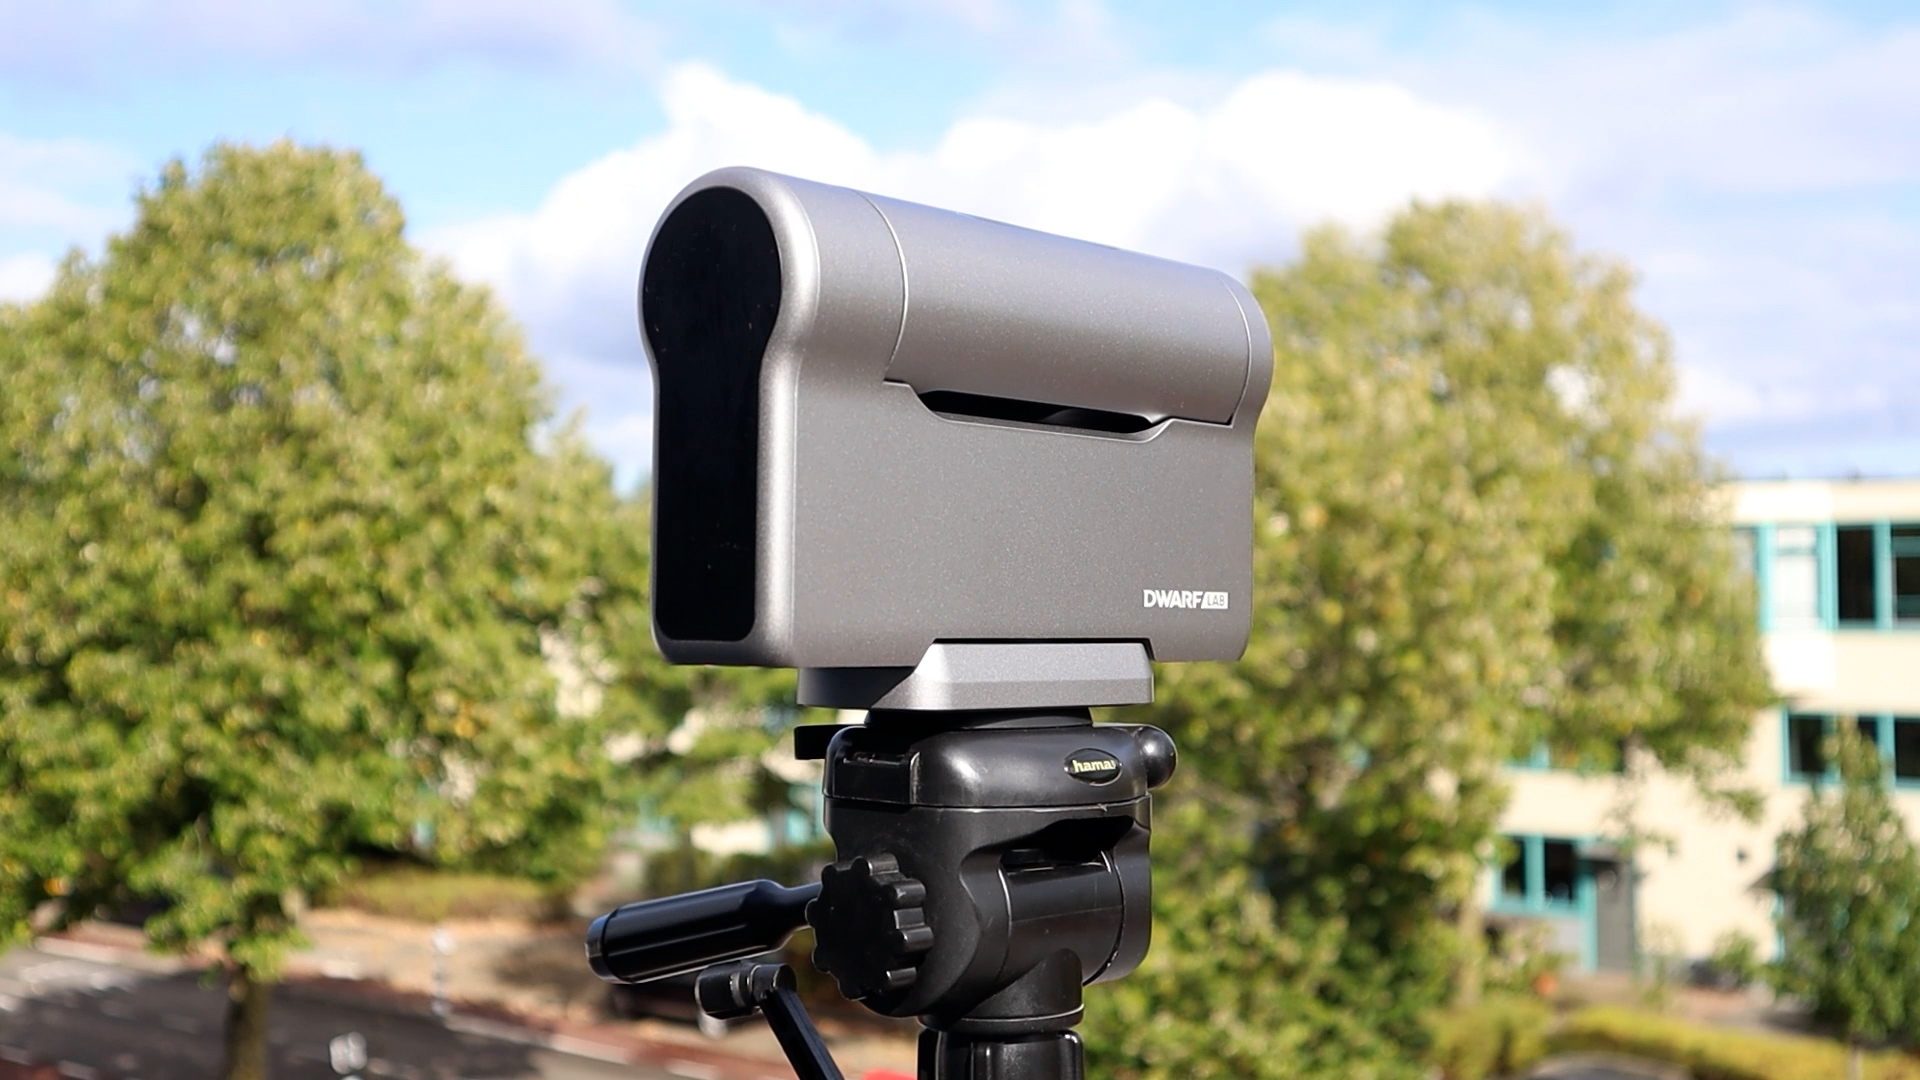


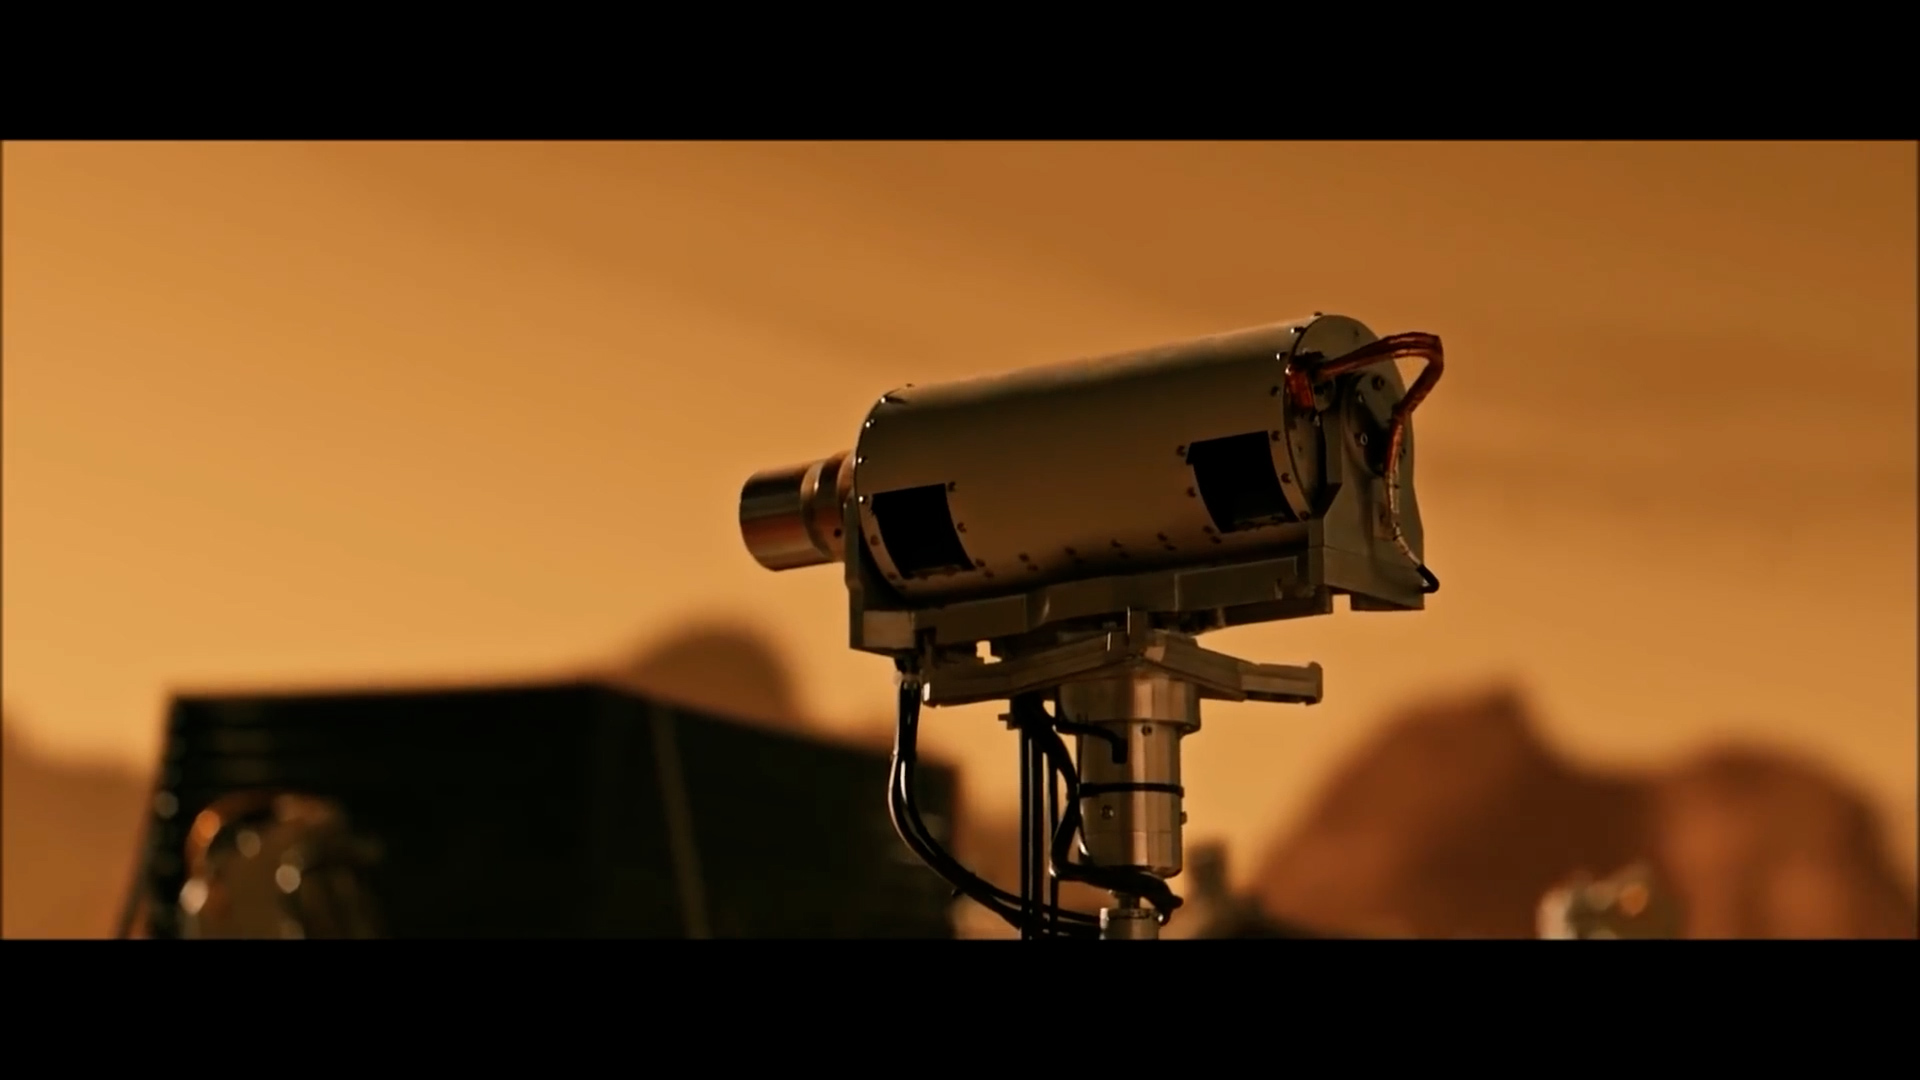
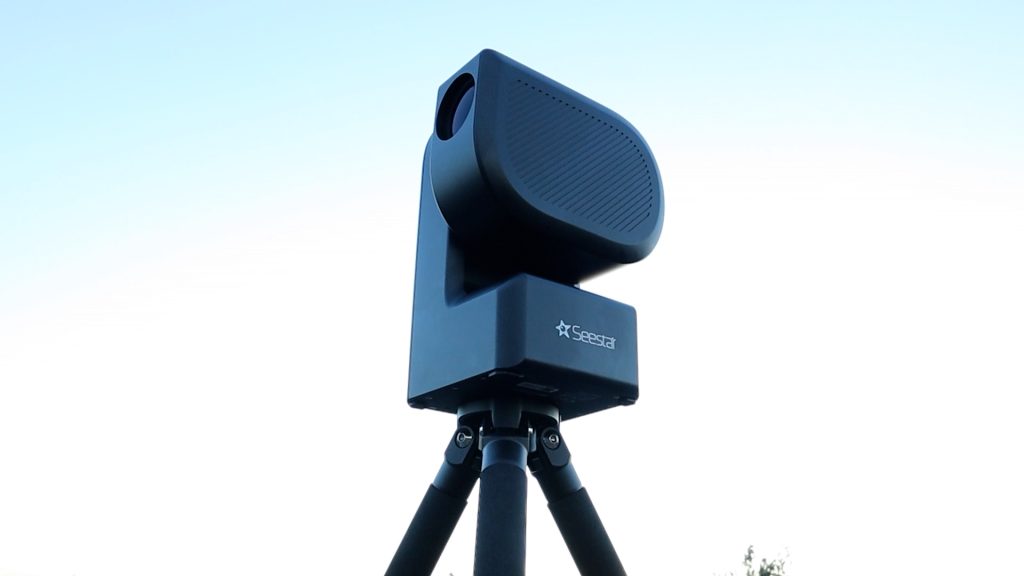
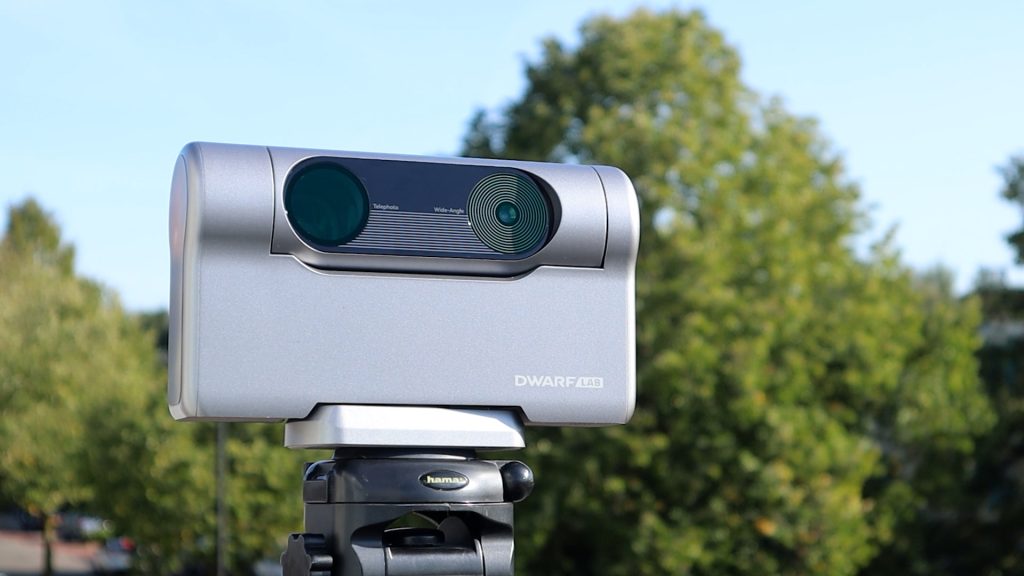
I’m impressed with the design of the Dwarf 3, which evokes memories of NASA’s old Pathfinder rover on Mars. Specifically, it reminds me of the scene in The Martian where Pathfinder is controlled remotely from Earth and responds “yes” to Mark Watney’s question, “Are you receiving me?”. I prefer the silver-grey color of the Dwarf 3 over the white of its predecessor, the Dwarf 2. Additionally, its compact size (22 x 14 x 6.5 cm) and light weight (1.3 kg) make it an ideal travel companion for late-night stargazing, weekend getaways, and holiday trips.
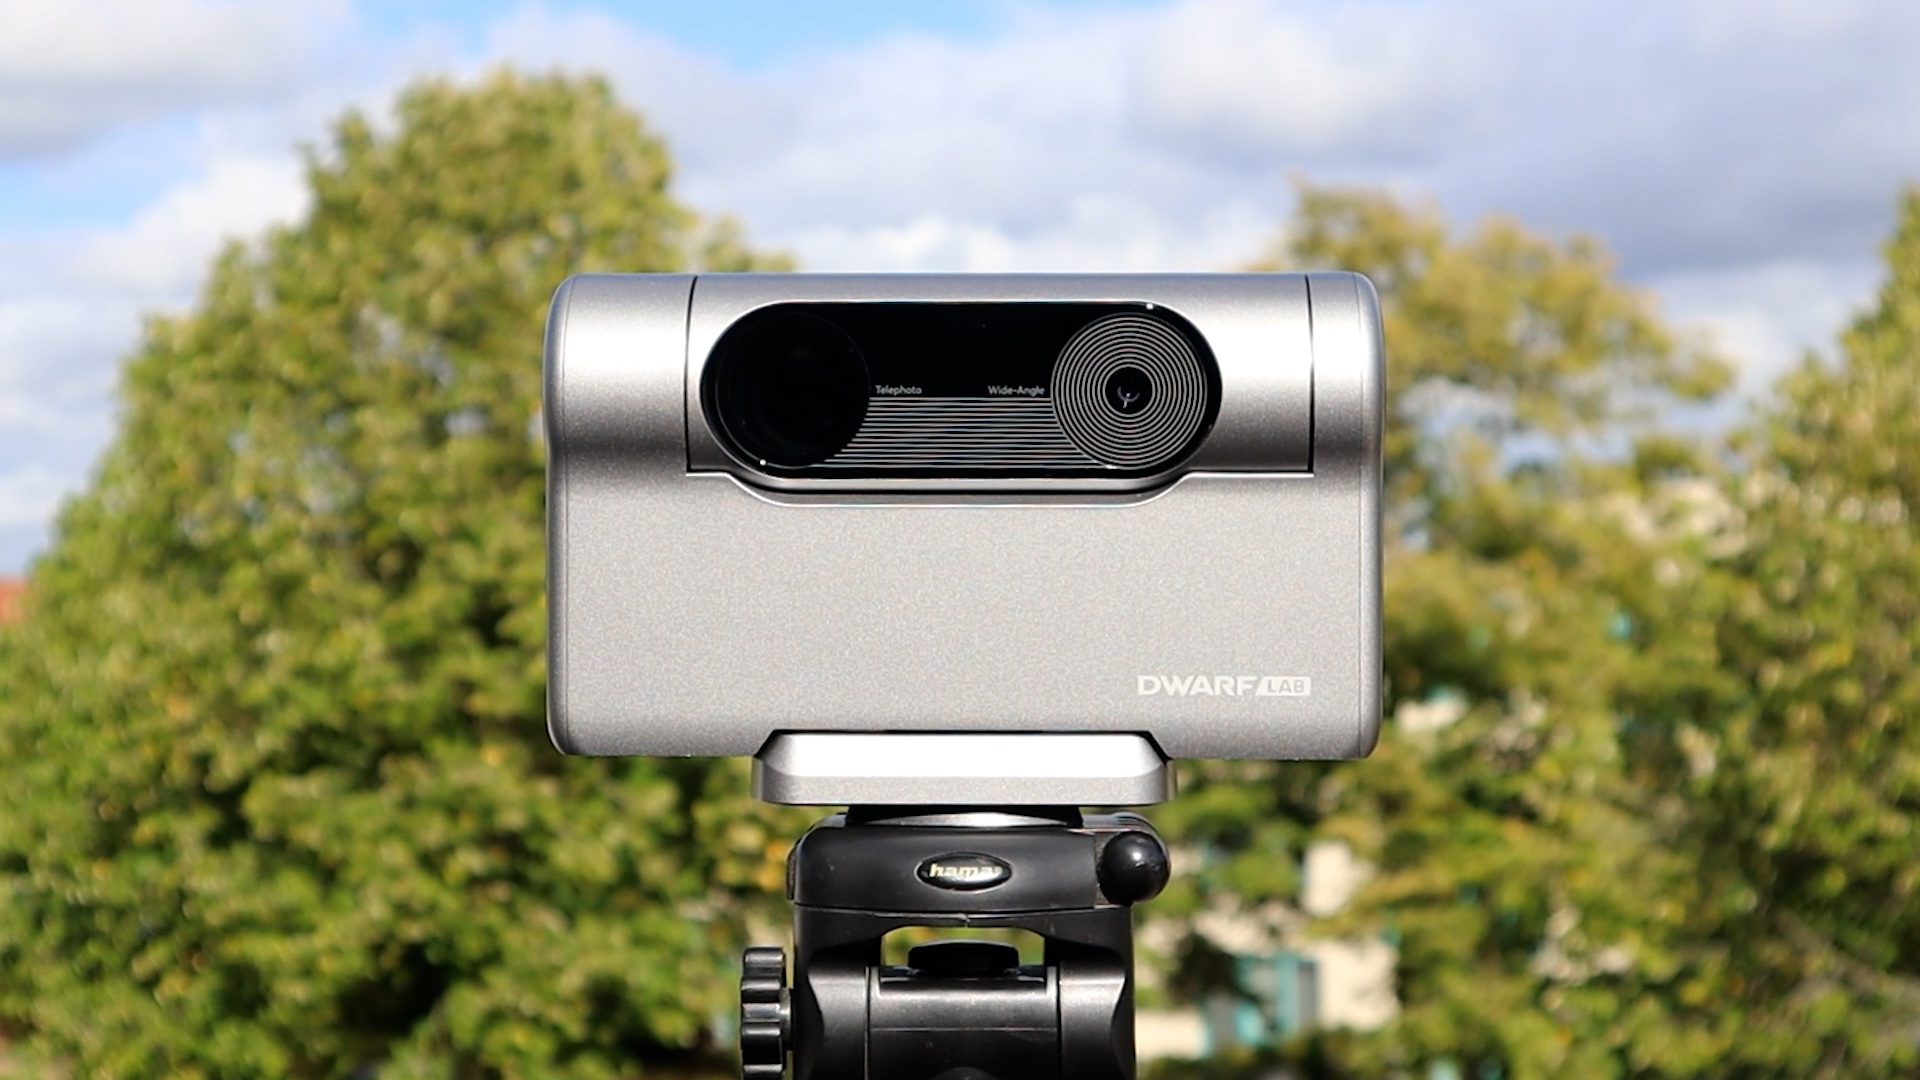
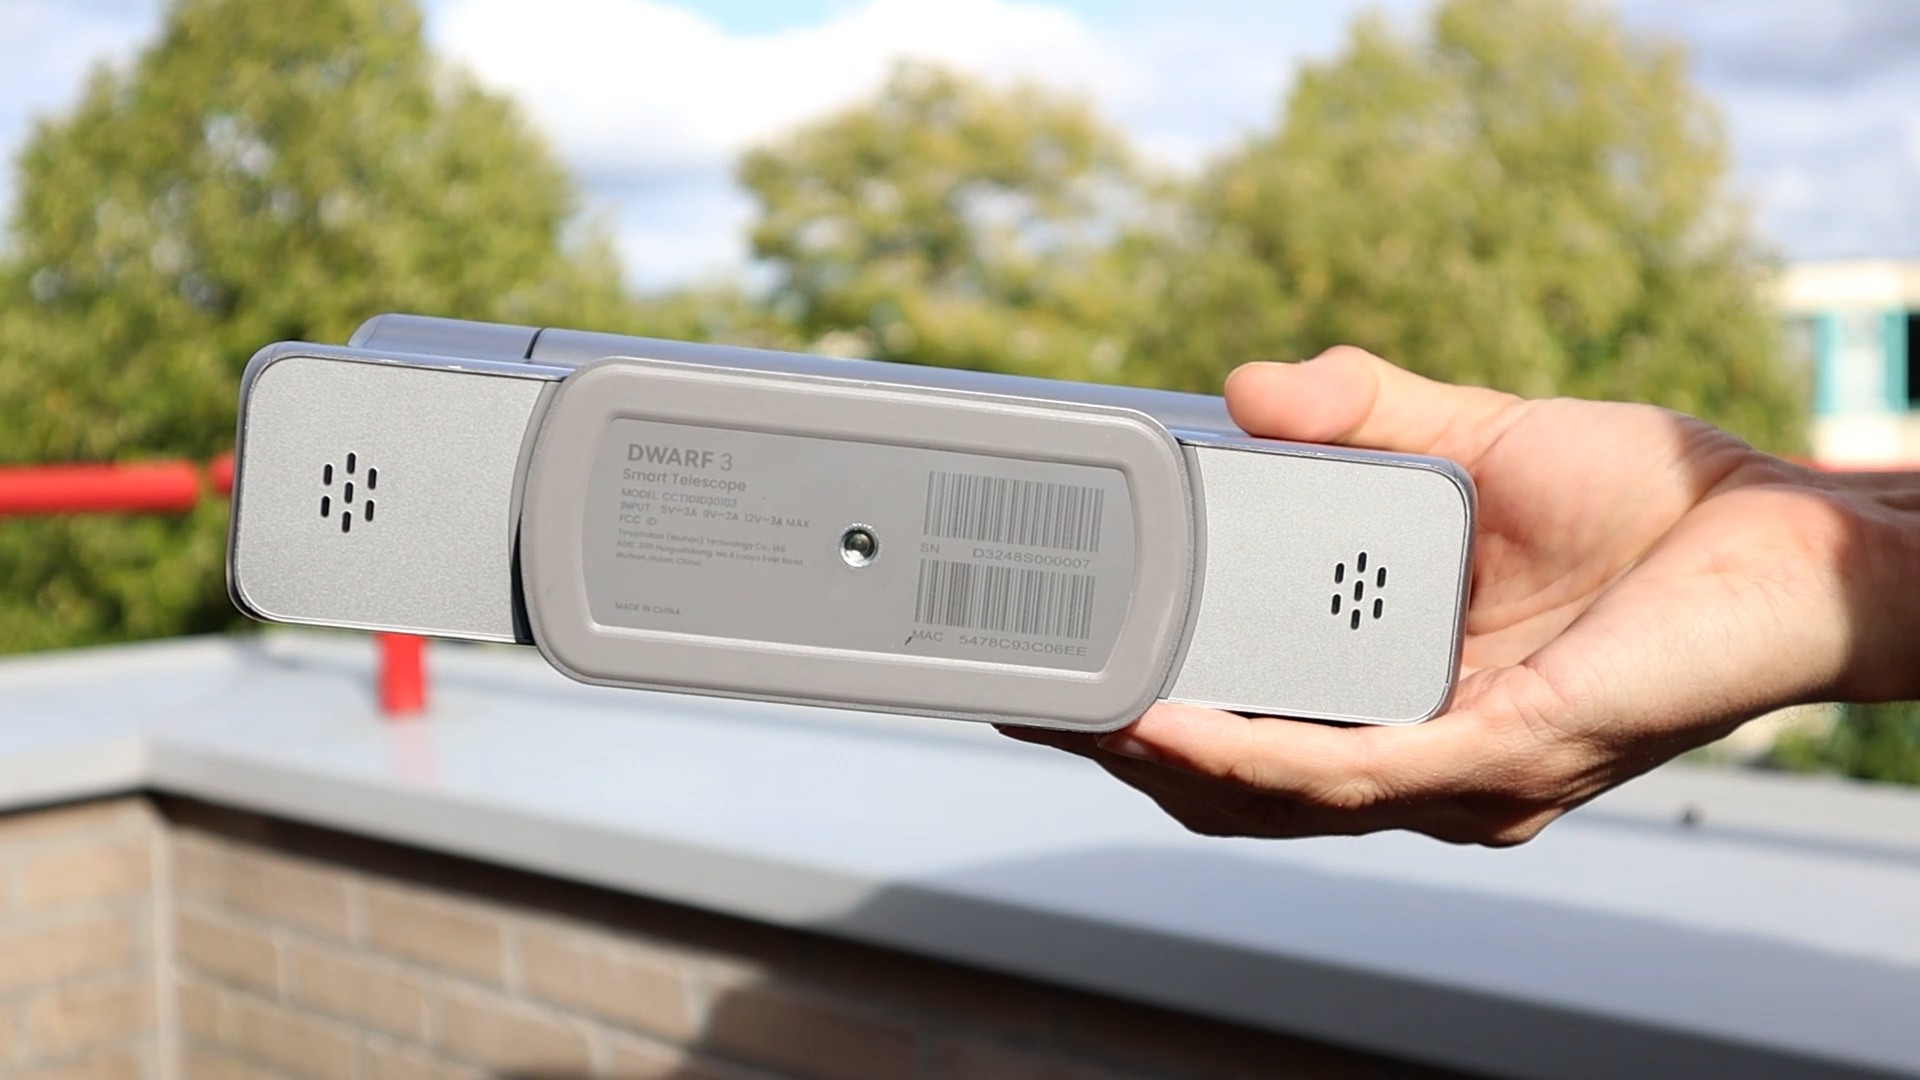
The Dwarf 3 features a 3.4mm aperture widefield lens and a 35mm aperture telephoto lens. The telephoto lens is constructed with extra-low dispersion glass to reduce diffraction spikes and chromatic aberration, which should result in clear, sharp images of celestial objects. With a focal length of 150mm, the telephoto lens provides an equivalent focal length of 737mm for digital camera users, thanks to the embedded Sony IMX678 camera sensor. This compact yet powerful sensor boasts a resolution of 8.3 megapixels (3840×2160) and a pixel size of just 2 microns. Additionally, it utilizes Sony’s STARVIS 2 technology, an advanced design that excels in low-light and night-vision conditions.
For astrophotographers, the field of view provided by the Dwarf 3 is 2.93 x 1.65°, which is approximately six times the width of the Moon, making it large enough to capture expansive objects like the Andromeda Galaxy in a single shot. The telescope offers an image scale of 2.75 arcseconds per pixel, which is slightly above the optimal range of 1 to 2 arcseconds per pixel for astrophotography but is still quite good for its price point.
The Dwarf 3 features a larger, built-in 10,000mAh battery, which charges via USB-C—an upgrade from the replaceable battery system of the Dwarf 2. Another enhancement is the wide-angle lens, which can now capture both photos and videos—features that were not available in the previous model. Additionally, the telescope includes Astro and Duo Filters, designed to enhance the signal-to-noise ratio and capture faint light from deep space objects. The Duo Filter is especially effective for photographing emission nebulae, targeting specific wavelengths such as ionized hydrogen and doubly ionized oxygen. Finally, the Dwarf 3 offers a generous 128GB of built-in eMMC storage, providing ample space for photos and videos. You can easily download these files to your smartphone or tablet by selecting “download” in the app’s album, or transfer them to your computer via USB-C.
Nature and Wildlife Photography with the Dwarf 3
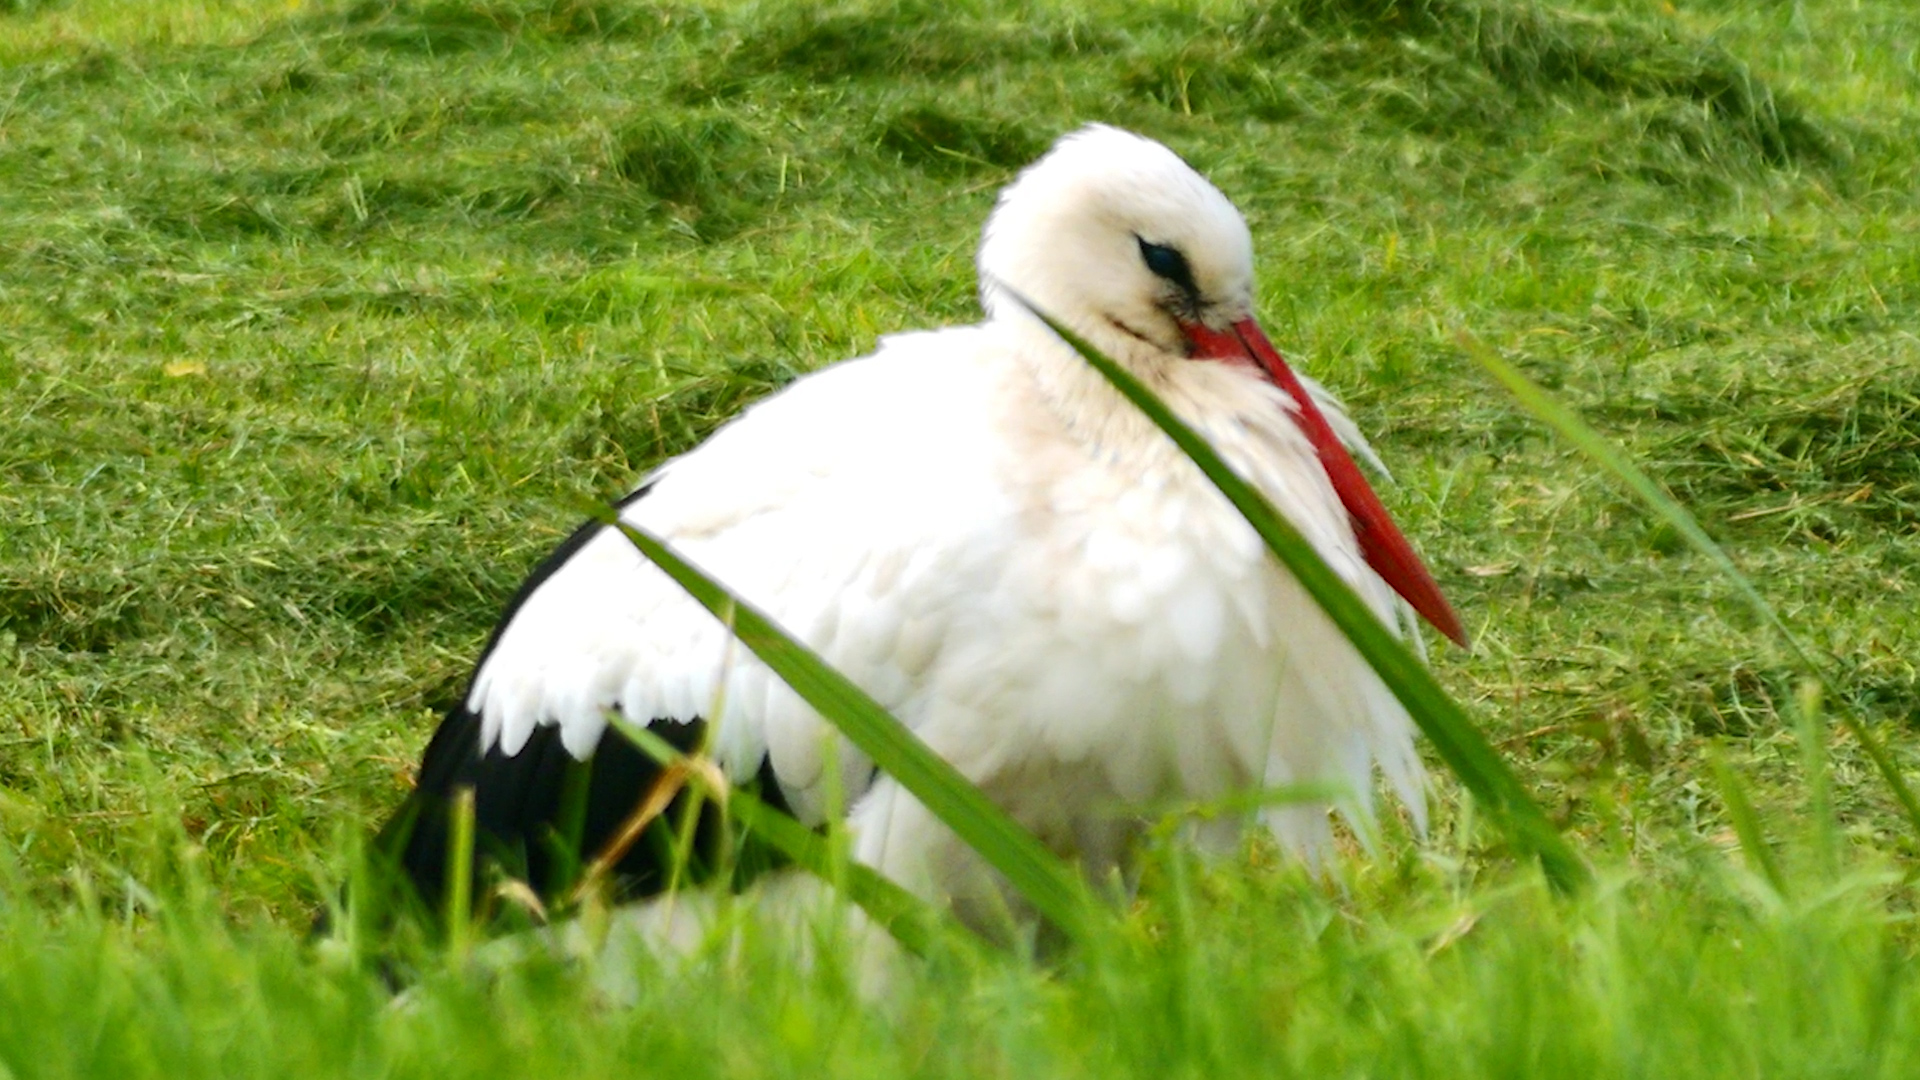
On a windy day, I came across some swans, a stork, and a heron enjoying the ryegrass in a farmer’s field—something quite common here in the Netherlands. I quickly set up my Dwarf 3 Smart Telescope and connected it to my smartphone.
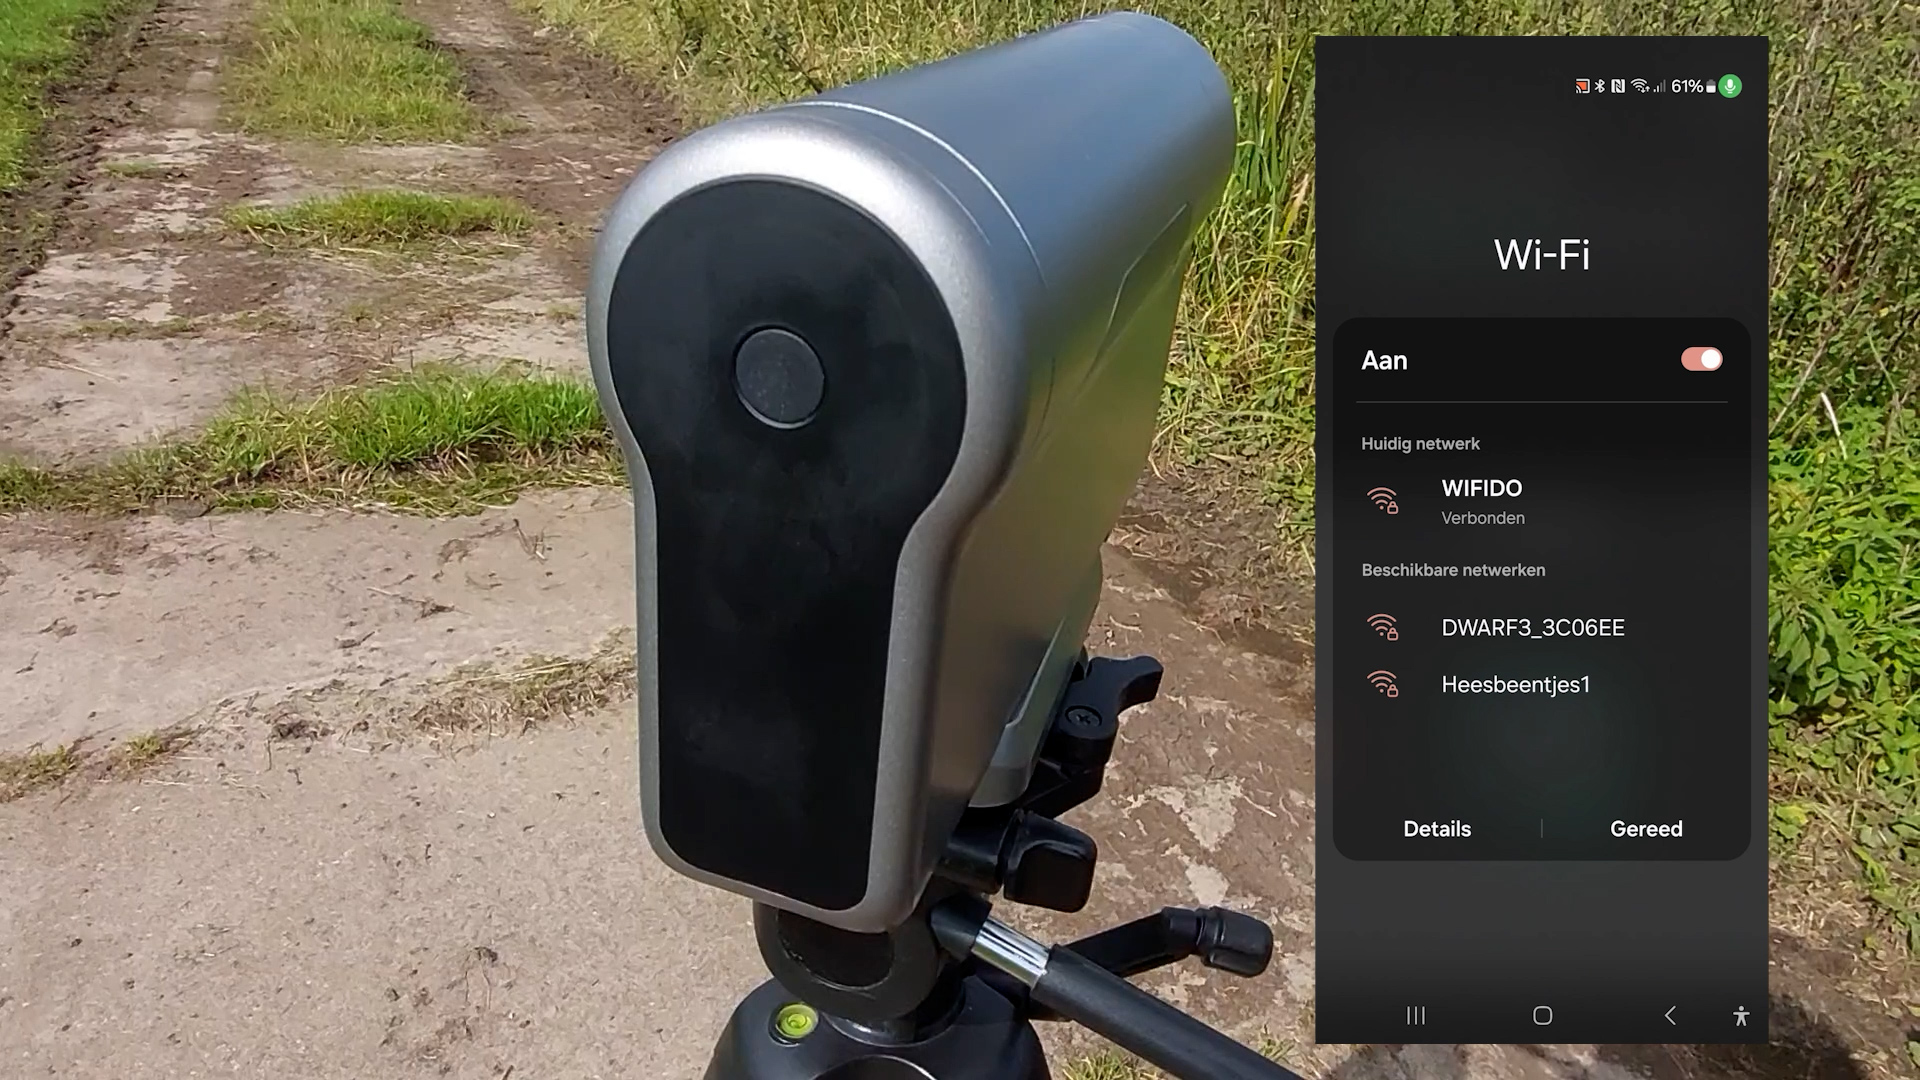

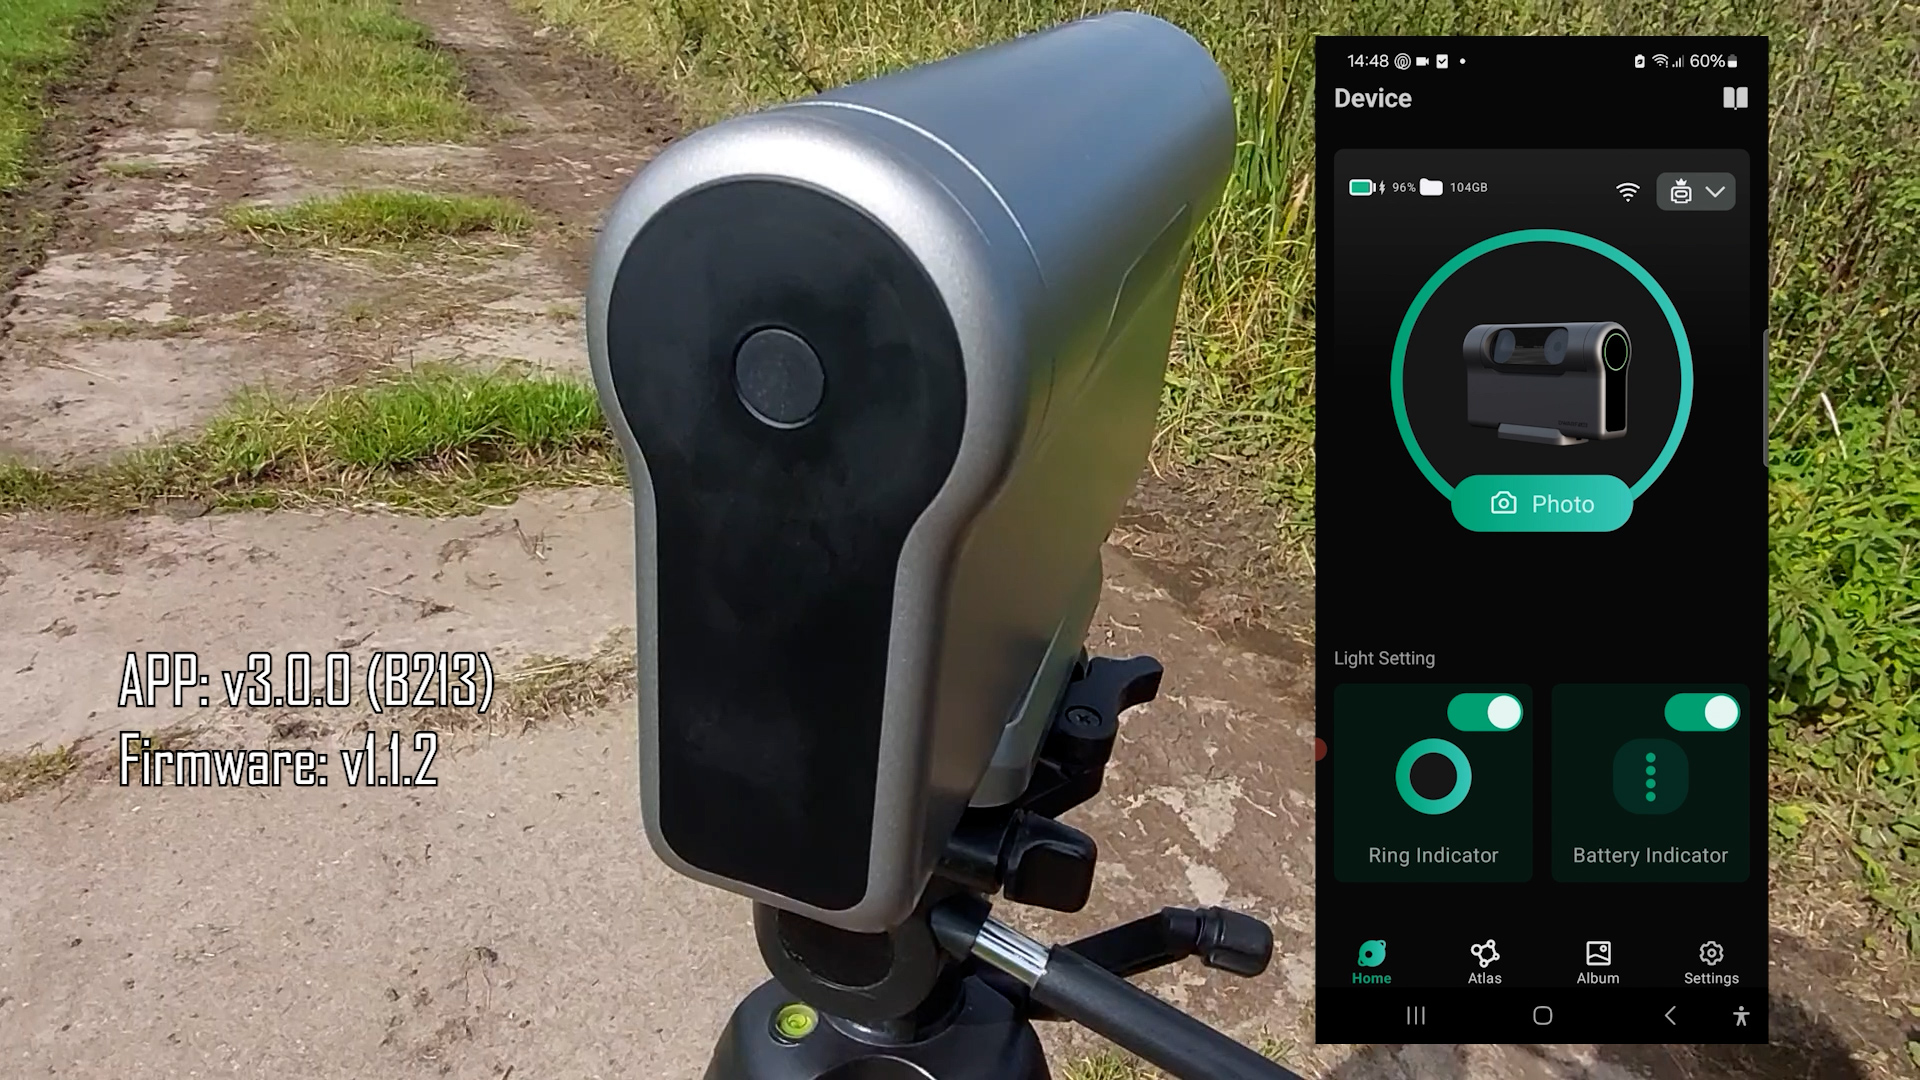
To get started, you first need to download the DWARFLAB app onto your smartphone or tablet and connect to the telescope’s WiFi signal after turning it on. The default WiFi password was “Dwarf_12345678”. I was using app version 3.0.0 (B213), while the Dwarf 3 itself was running firmware V1.1.2. It’s worth mentioning that both the app and the firmware get updated regularly, as Dwarflab pointed out.
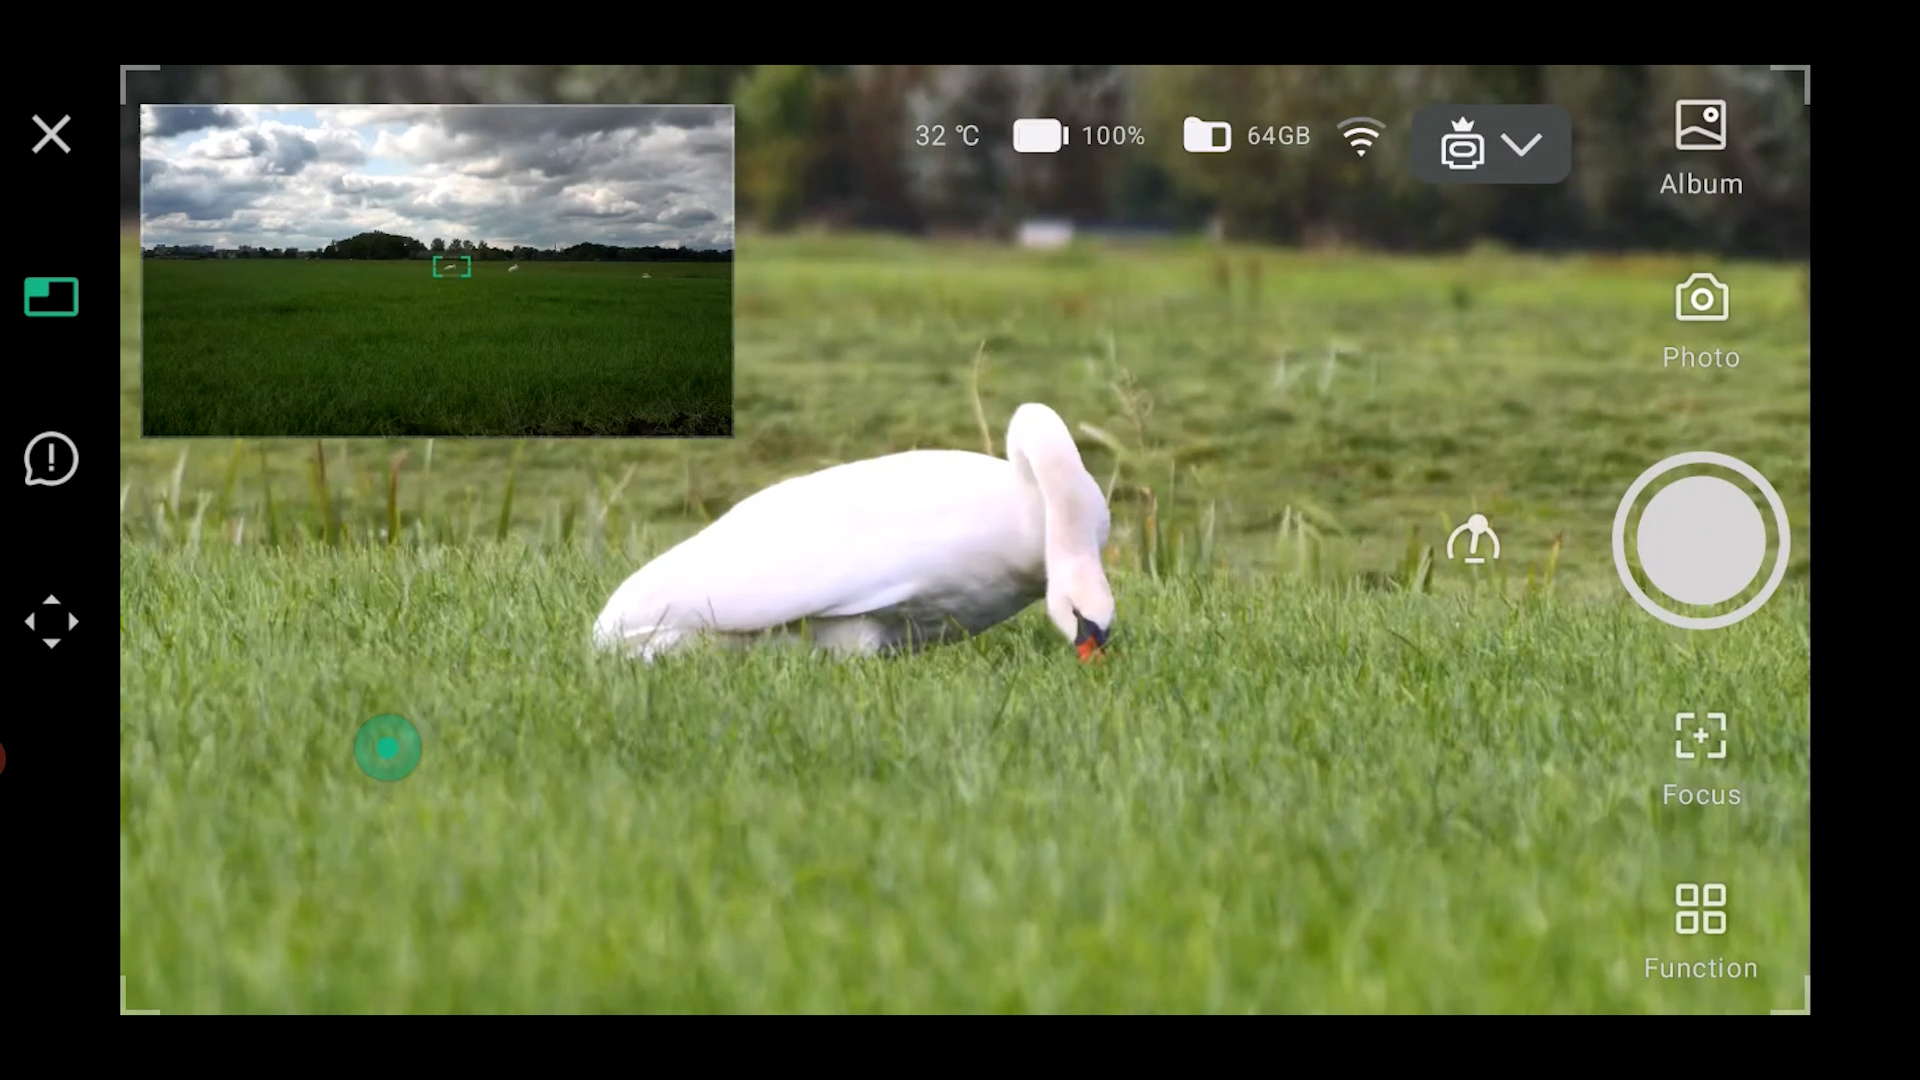
Once connected via WiFi, I opened the app and clicked on the photo option, which brought up a control panel. The interface features a virtual joystick on the bottom left for maneuvering the telescope and a speed dial on the right to adjust the movement speed. I used the widefield lens to frame one of the swans within the view of the telephoto lens. With a simple tap in the top left corner, I switched to the telephoto view. This seamless switching between views and lenses is one of my favorite features of the Dwarf 3.


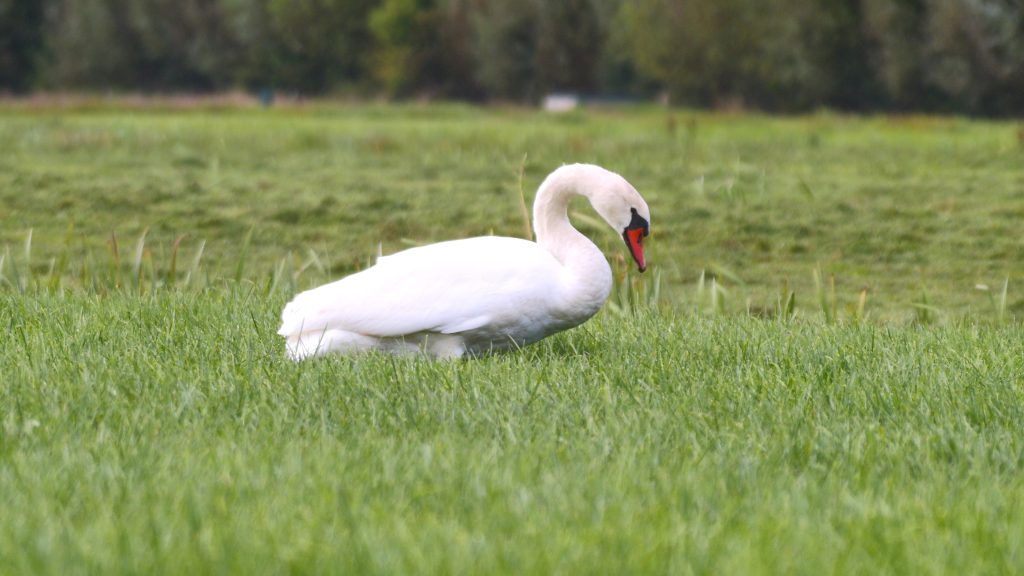
I then used the autofocus feature to focus on the swan and snapped a photo using the large photo button. Here’s the resulting image, saved as a JPEG. I also tested the burst mode, selecting five shots with no interval between them. While the burst feature isn’t as fast as some traditional cameras, it still captured all five images.
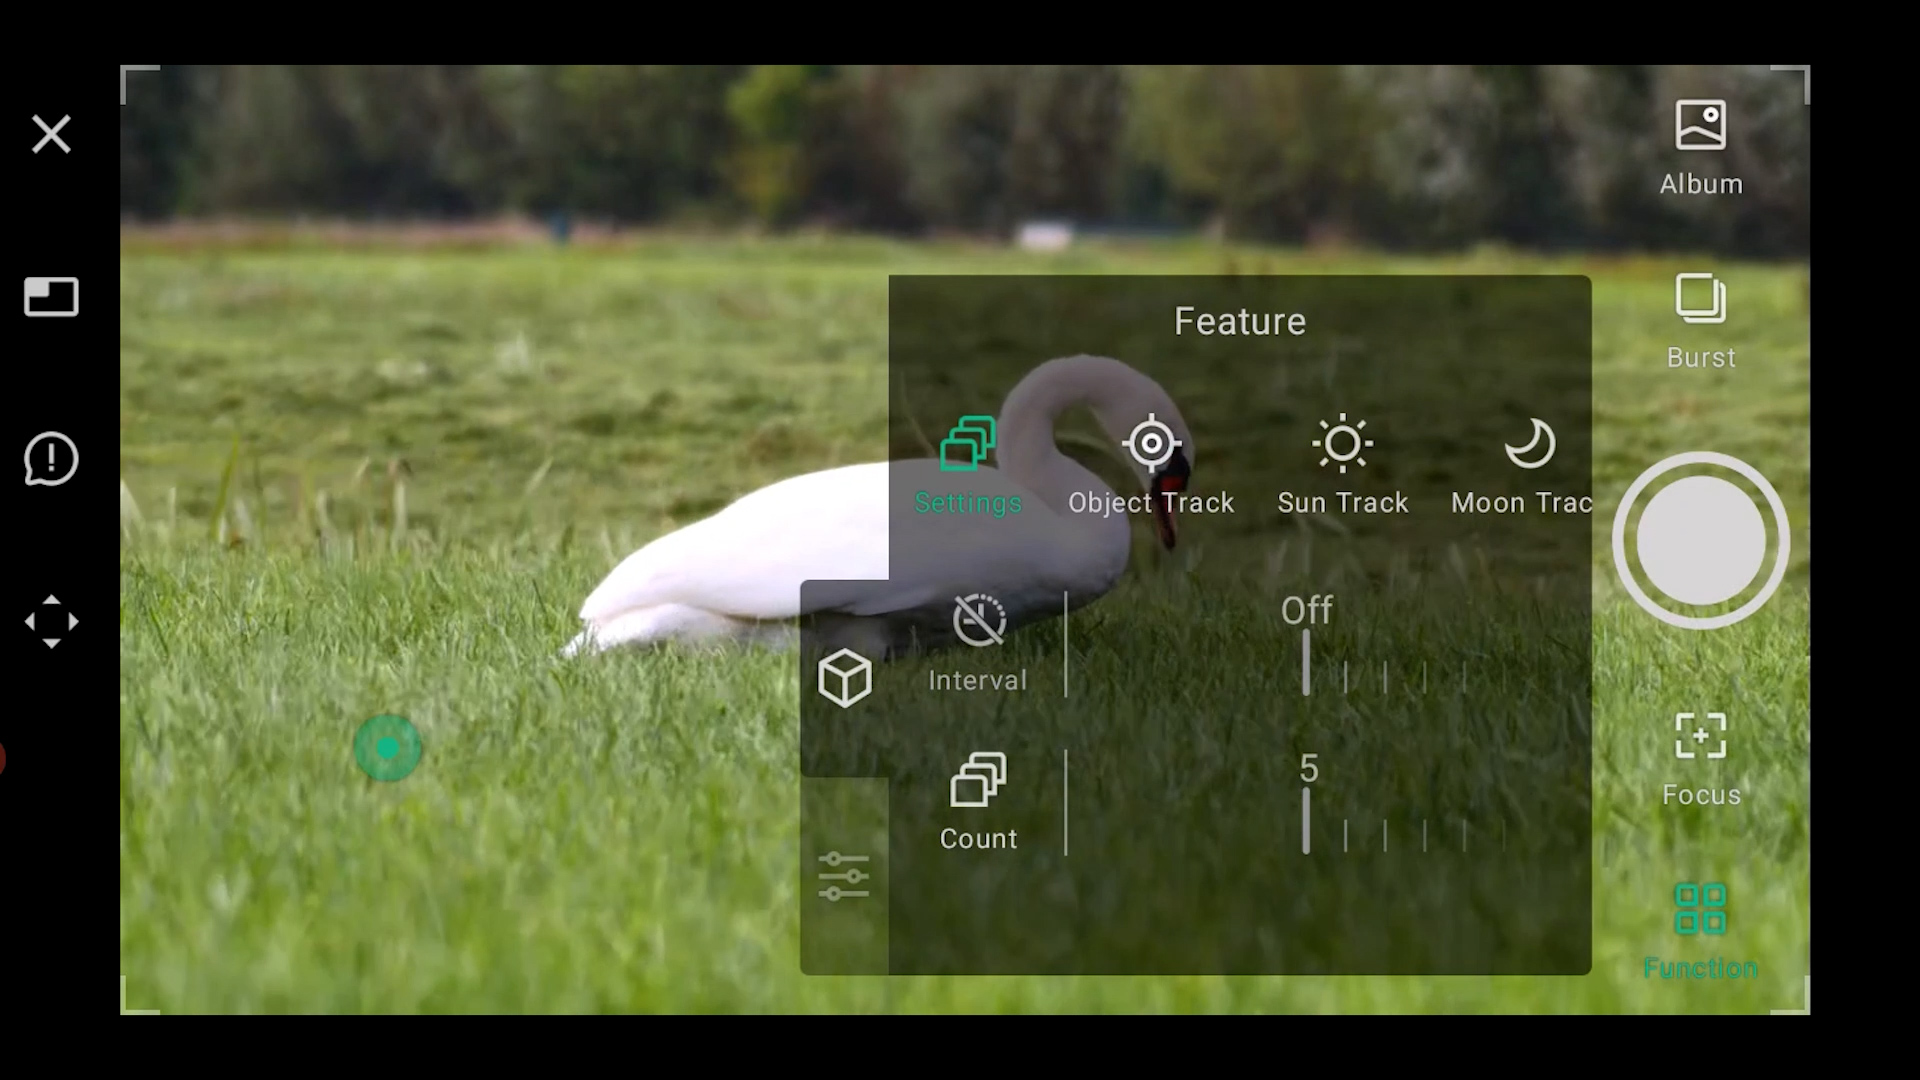
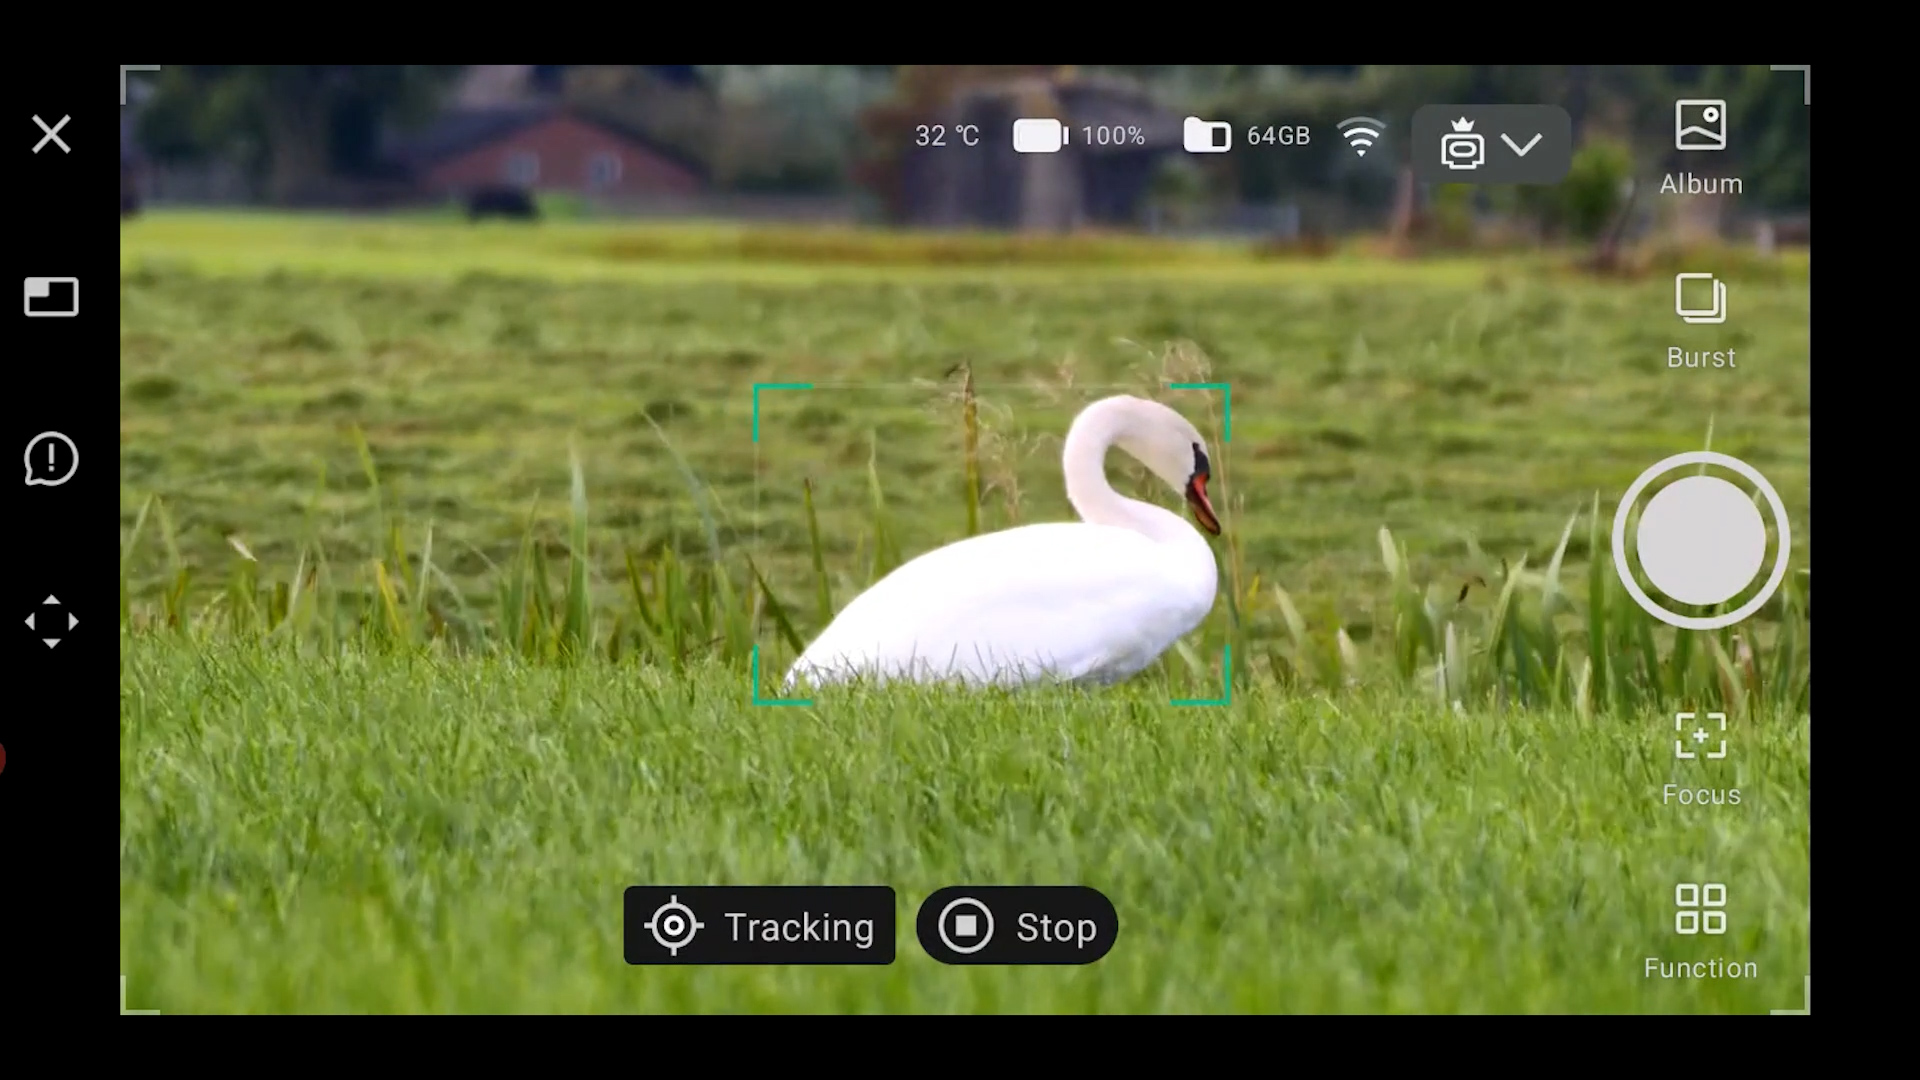
As the swan began to move, I initiated the object track feature of the Dwarf 3. By drawing a rectangle around the swan, the Dwarf 3 automatically tracked the Swan until it moved out of view. I switched back to the widefield lens and focused on a heron. I activated burst mode again and captured five more images. I also photographed a stork lying in the field. The app provides options to adjust settings like shutter speed, gain (similar to ISO), white balance, brightness, contrast, hue and saturation—similar to functions found on a digital camera. While these settings are set to auto by default, they can easily be adjusted manually as needed.

I concluded the session by capturing 4K videos of two swans, a heron, a stork, along with some ducks and geese I spotted in the farmfields just outside my hometown of Utrecht, Netherlands. Videos taken with the telephoto lens were saved with a 4k resolution (3840×2160) in MP4 format. Although I experienced occasional WiFi lag, staying within 5 meters of the device ensured stable control. On windy days, I recommend using a sturdy tripod to reduce vibrations, especially when using the telephoto lens. It’s important to note that the Dwarf 3 records video and photos, but no sound. Overall, using the Dwarf 3 during the day was a highly enjoyable experience!
Capturing the Sun with the Dwarf 3
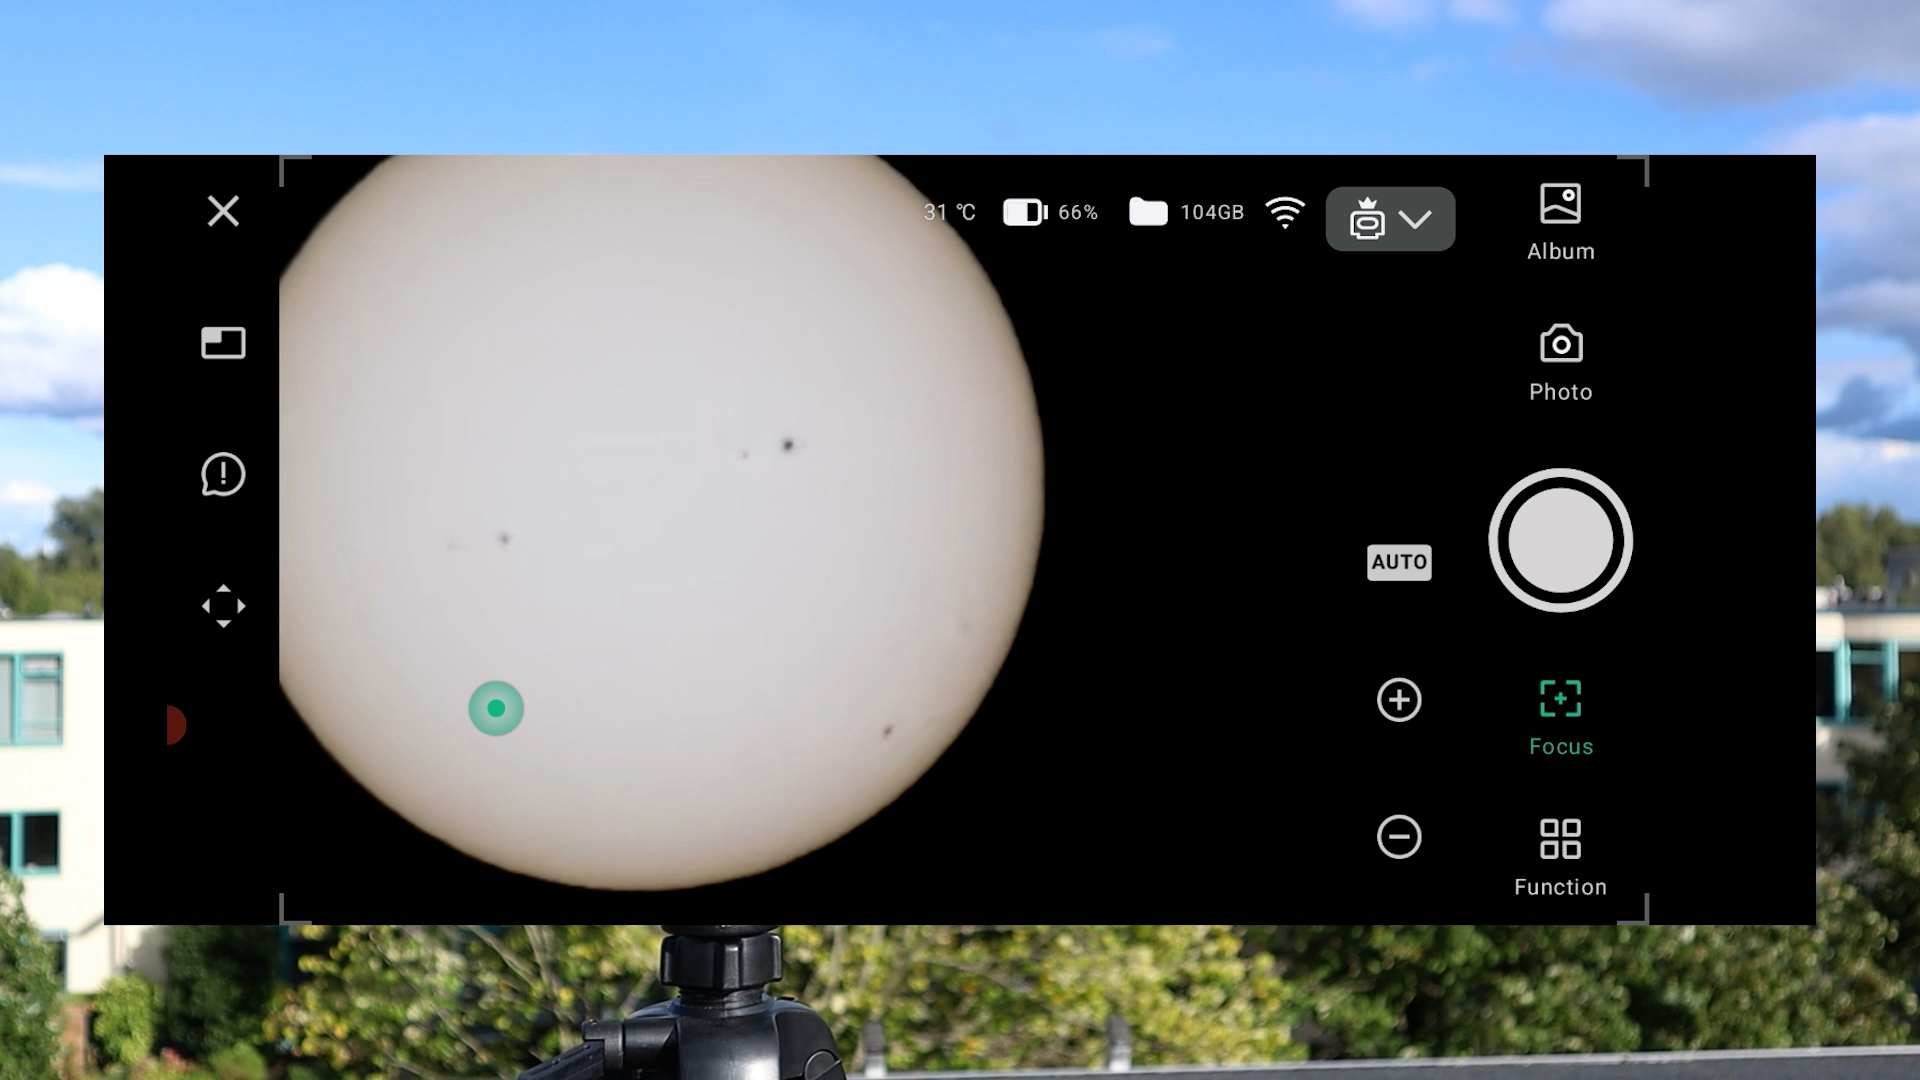
I captured the sun from my rooftop. After setting the Dwarf 3 on my tripod and leveling it, I had to deal with the strong wind, but using the app’s joystick controls, I managed to center the sun in the telephoto lens view. Autofocus worked seamlessly and quickly revealed some sunspots, which was an exciting sight!
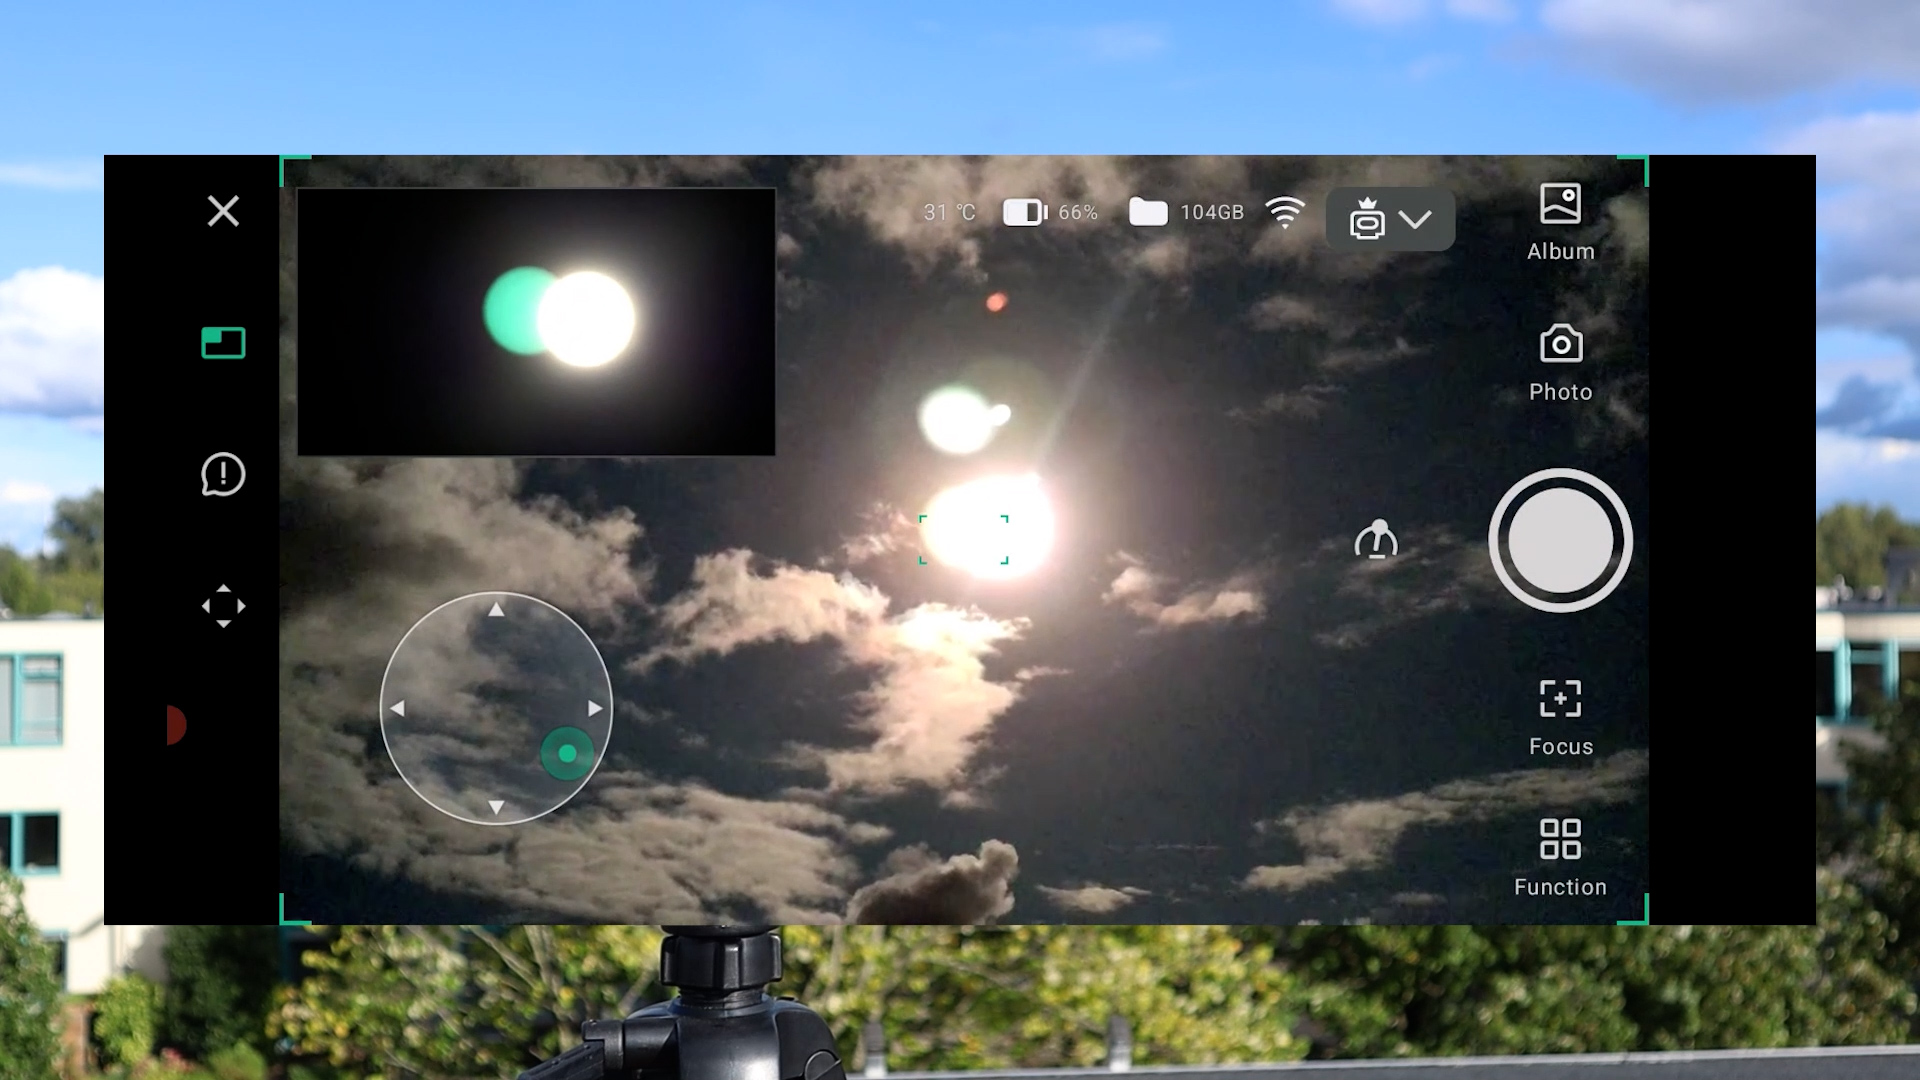
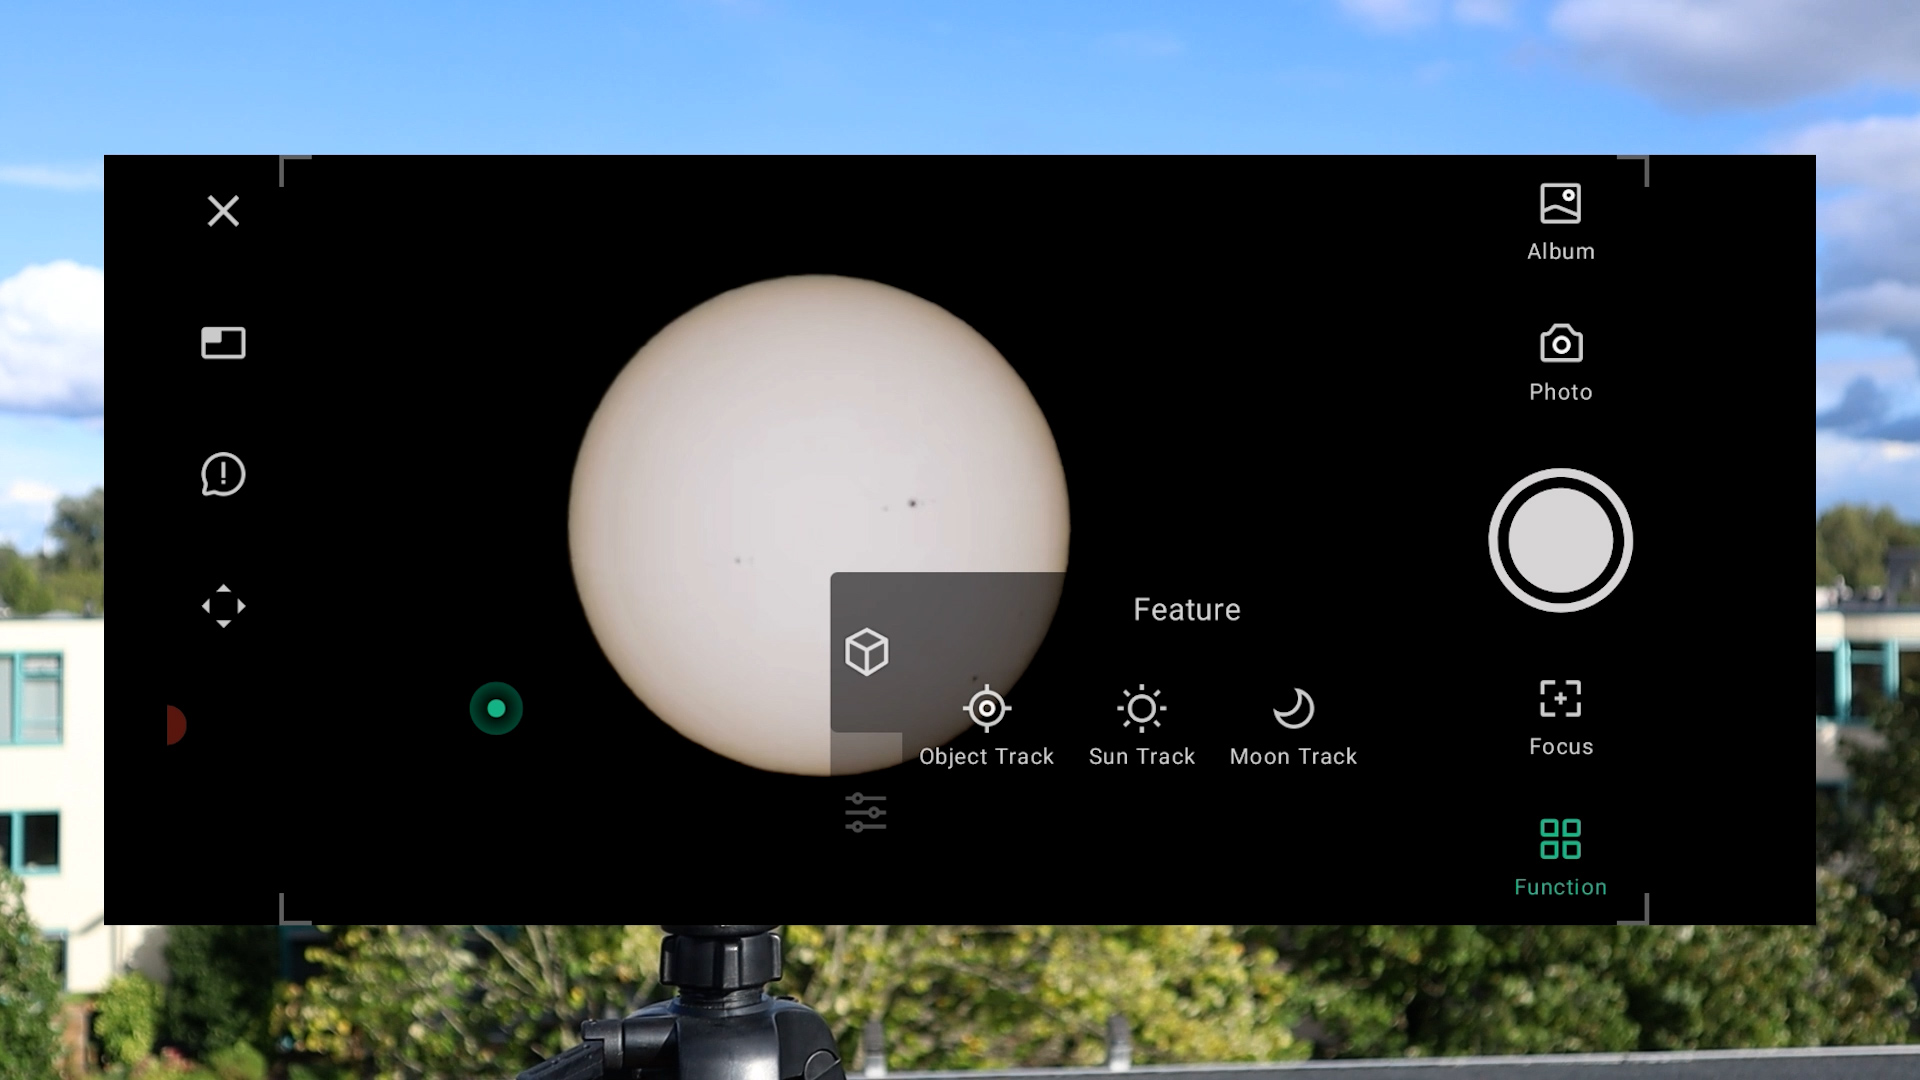
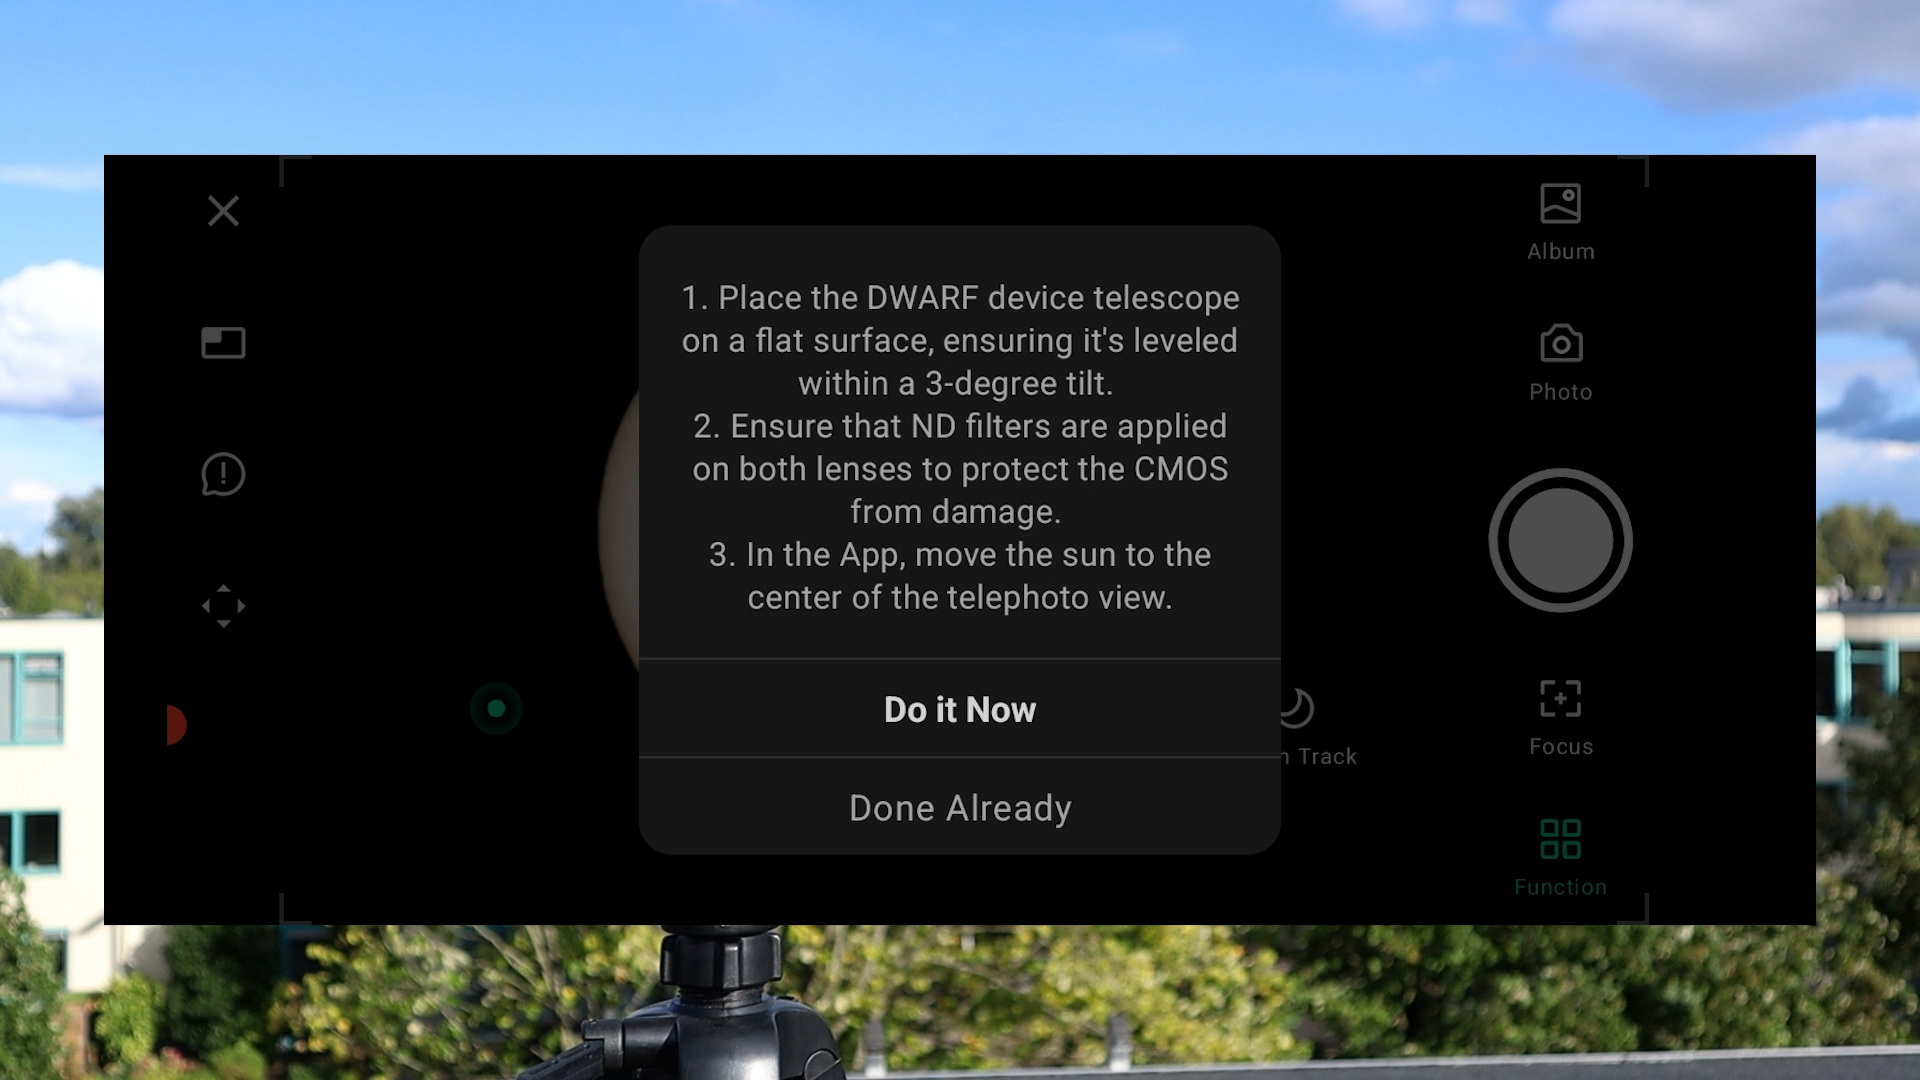
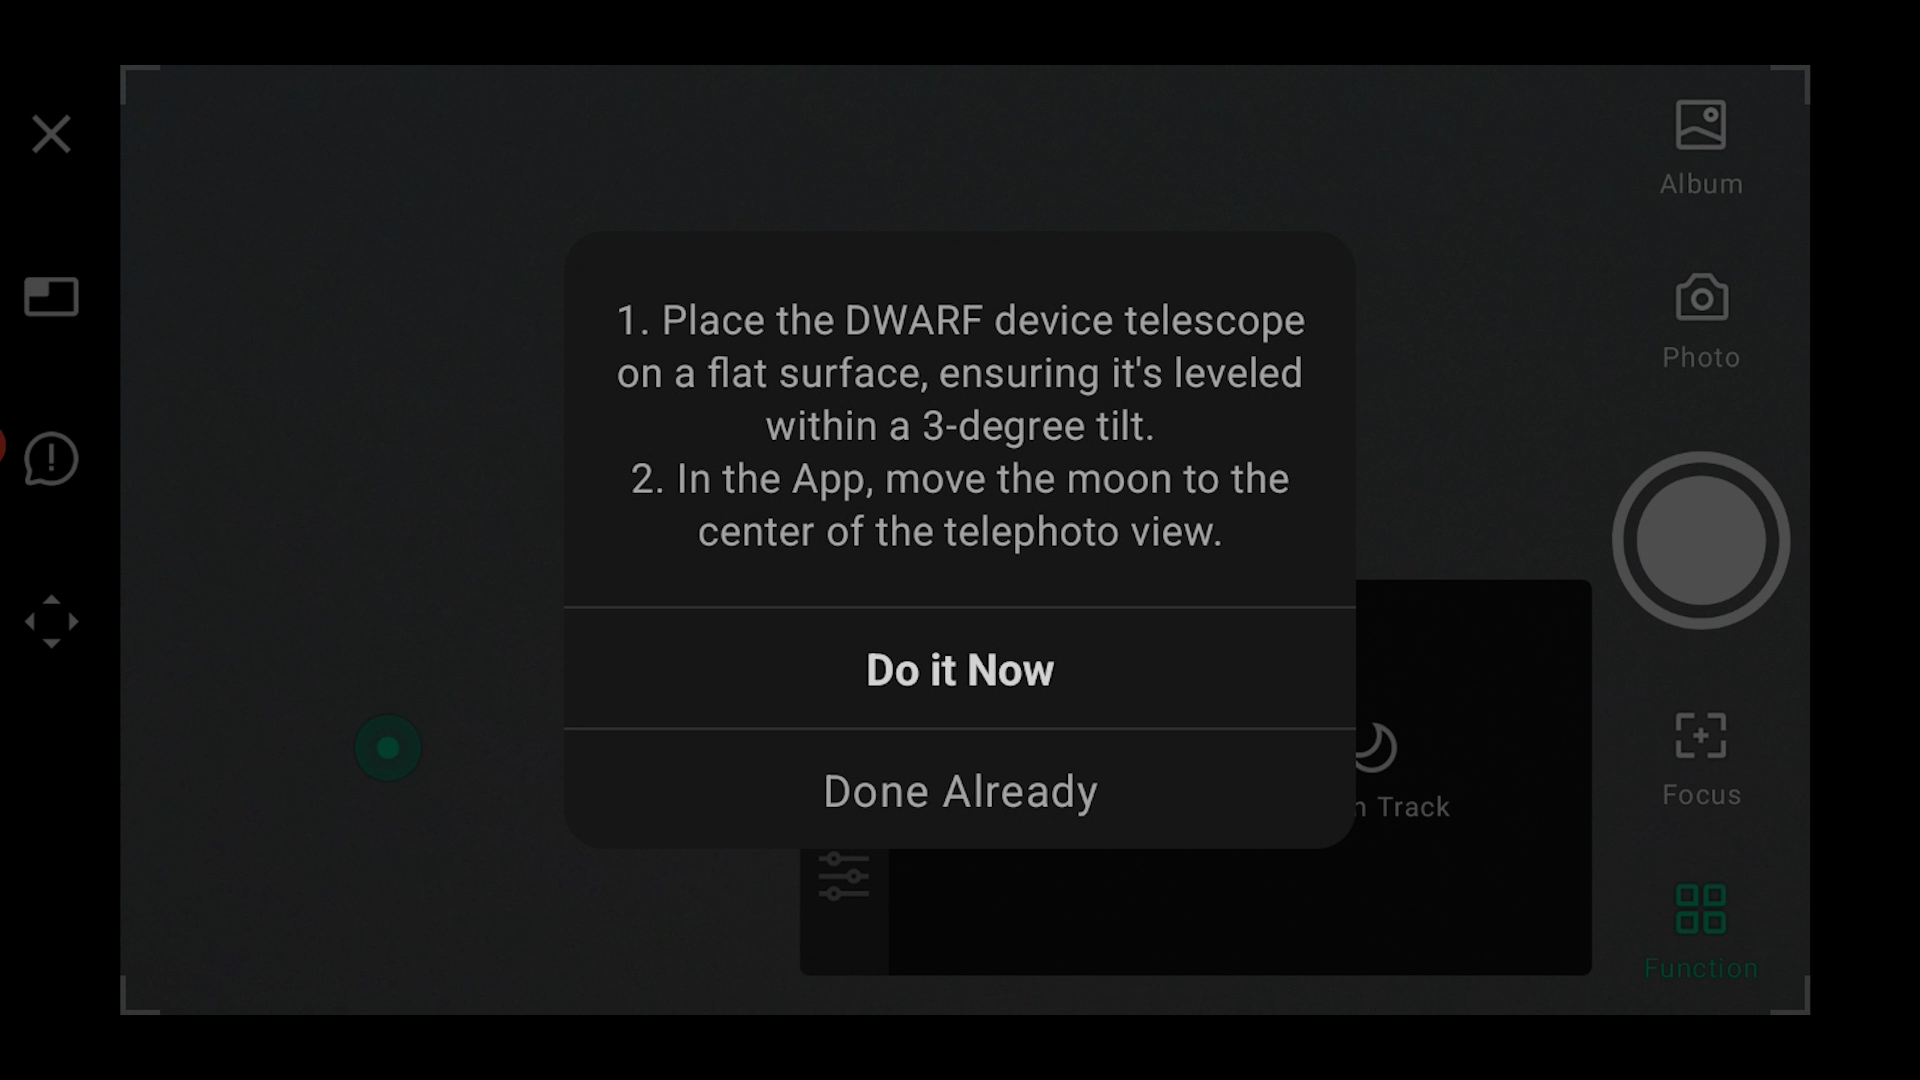
I selected Sun Track under the app’s functions (bottom right), which reminded me to ensure the tripod was level, attach the magnetic solar filters, and center the sun in the telephoto view. Since I had already done that, I clicked ‘done,’ and the Dwarf 3 began tracking the sun automatically. Here’s a quick snapshot I captured in photo mode to check the focus.
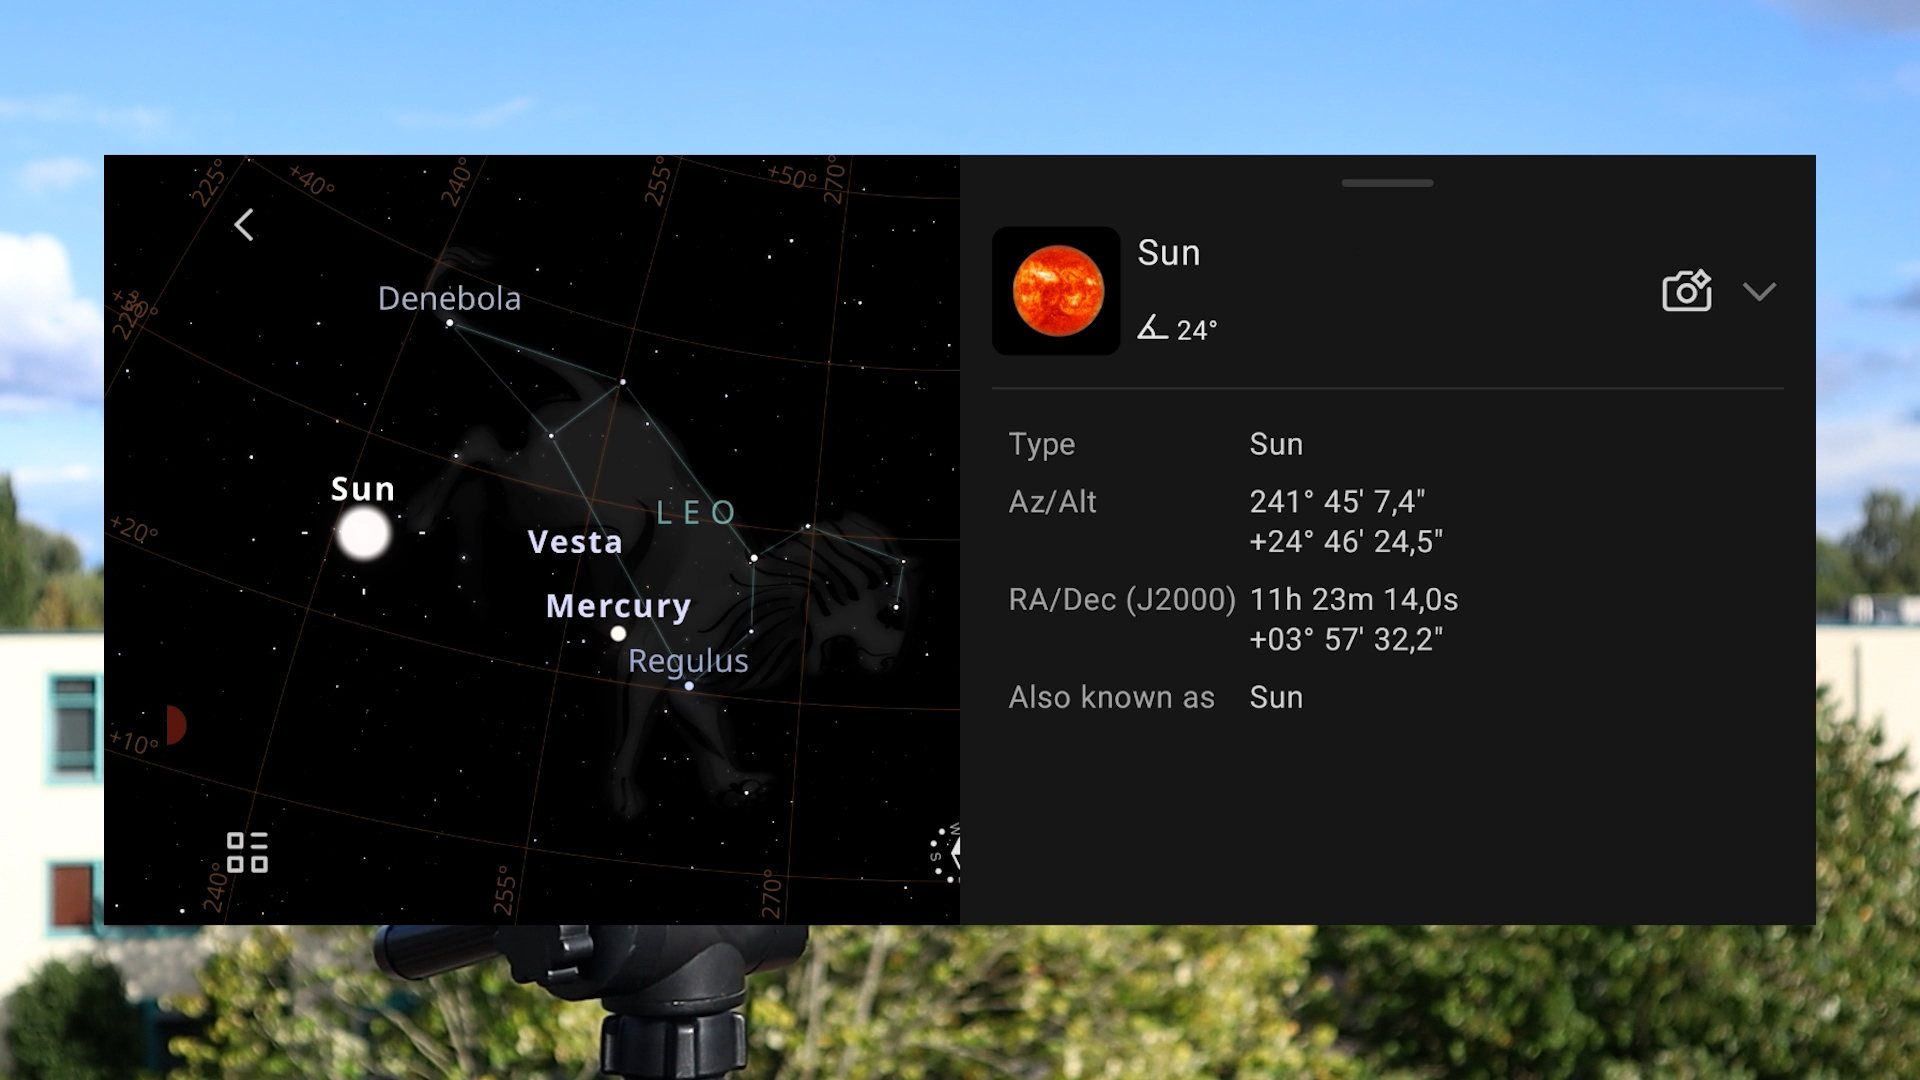
Next, I selected ‘Astro mode’ for a more in-depth approach to solar imaging. I explored the new virtual sky atlas, which provided a real-time view of the sky based on my location. I selected the sun and clicked the photo icon. At that point, the app asked me to stop tracking the sun, which caused some initial confusion, but once I clicked OK, the tracking resumed automatically in astro mode, and I continued the process.
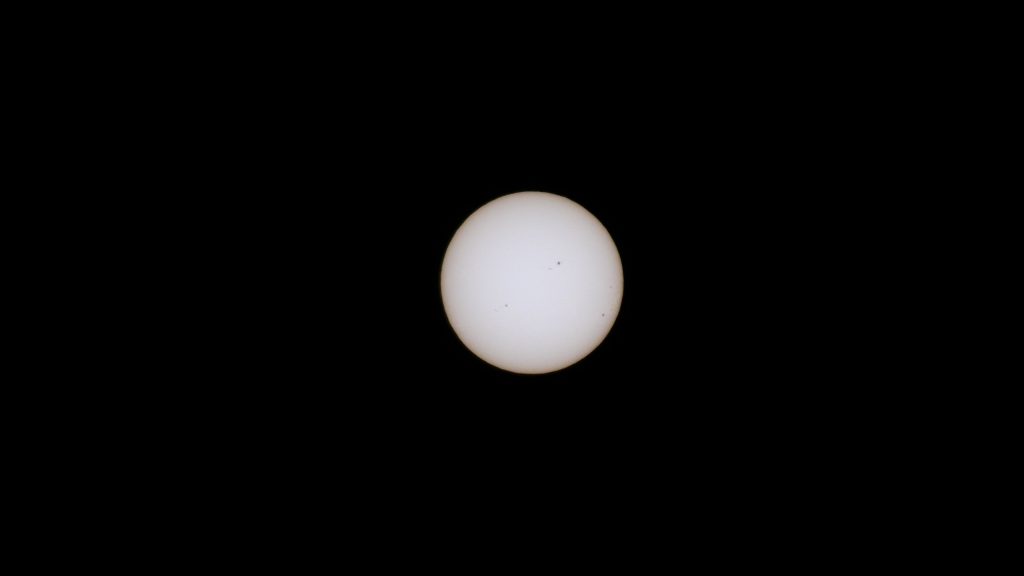
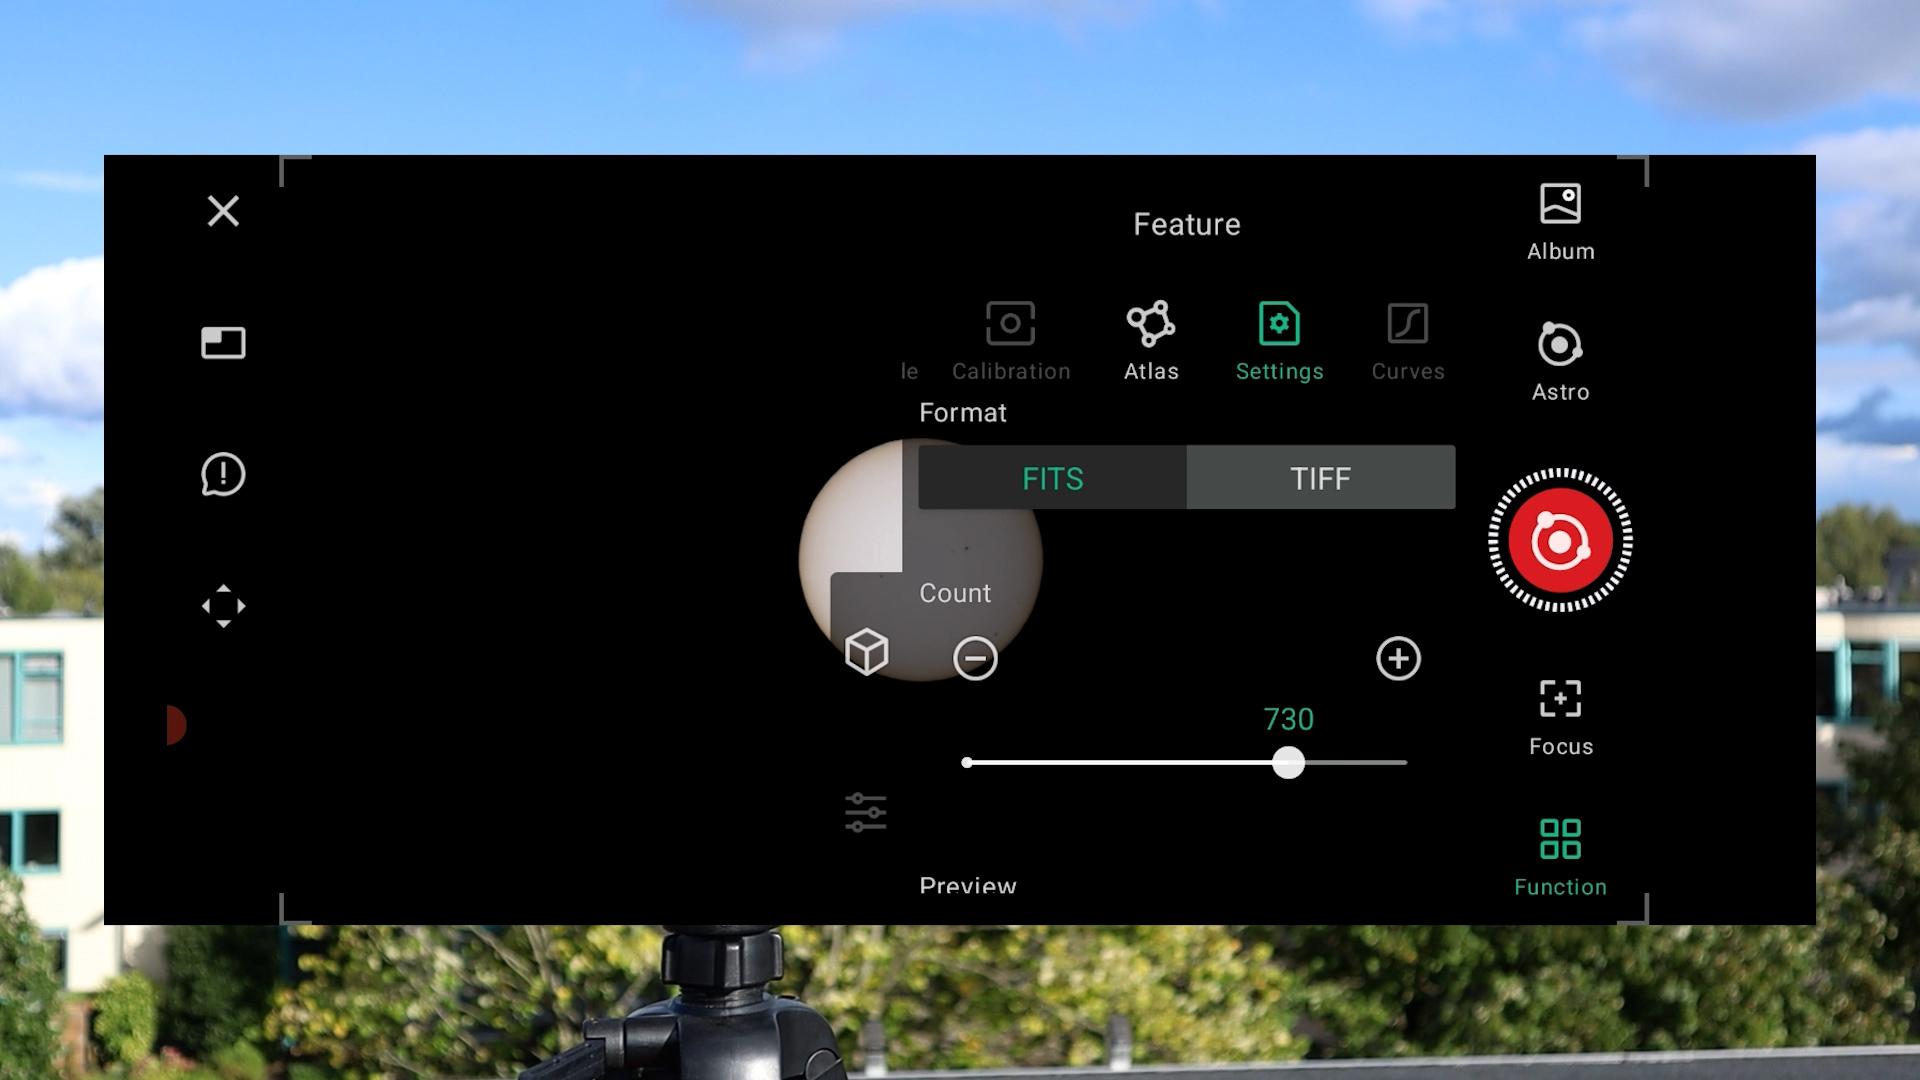
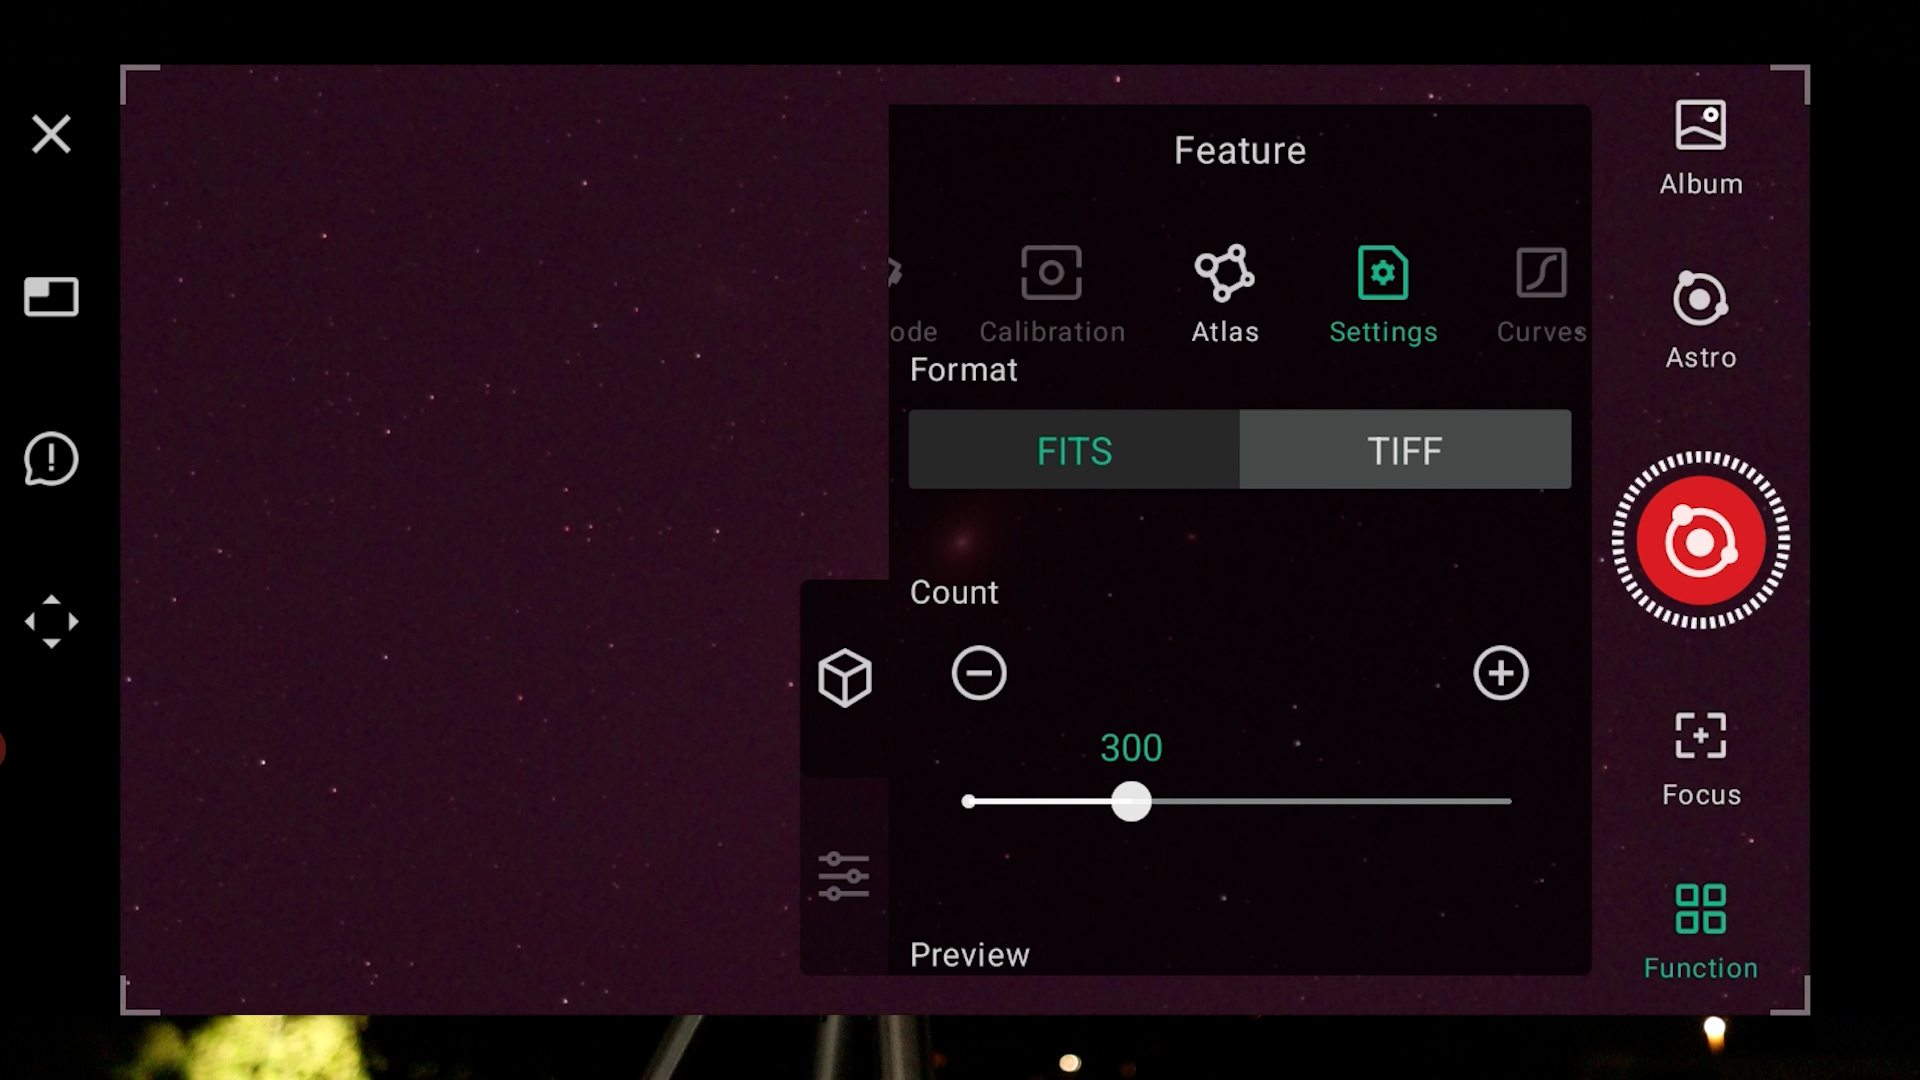
In the settings, I could adjust the number of photos I wanted to take in either FITS or TIFF format, choose to live stack the images or show single photos, enable or disable binning, and enable or disable an AI tool to improve the image quality. I left everything to default (FITS images, stacked view, no binning, AI tool enabled) and hit record. The Dwarf 3 began capturing images of the sun, with a live stack appearing in the app—quite fascinating to watch! I noticed that the default shutter speed to capture the sun was automatically set at 1/800 and the gain at 0. Unfortunately, after around 80 images, clouds rolled in, forcing me to end the session early. The individual images were stored in FITS format, and the stacked image was stored in both TIFF and PNG format on the Dwarf 3’s memory (eMMC) card.

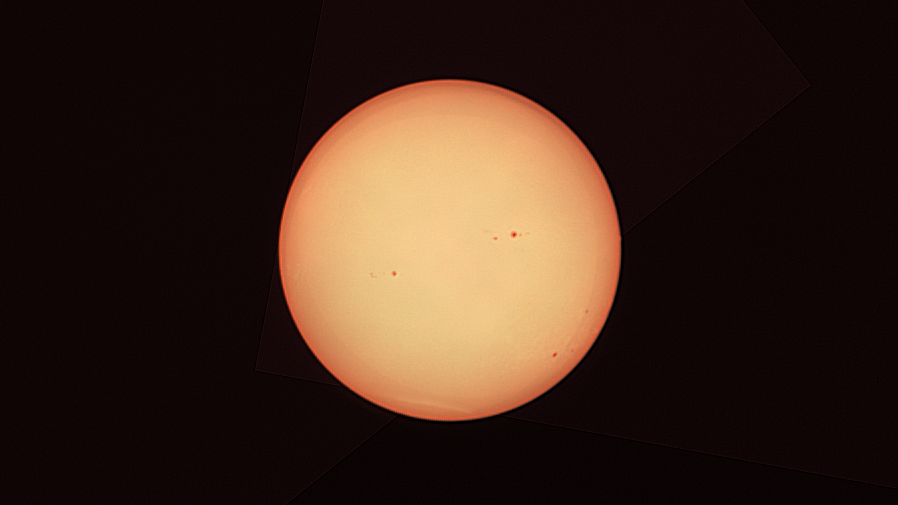
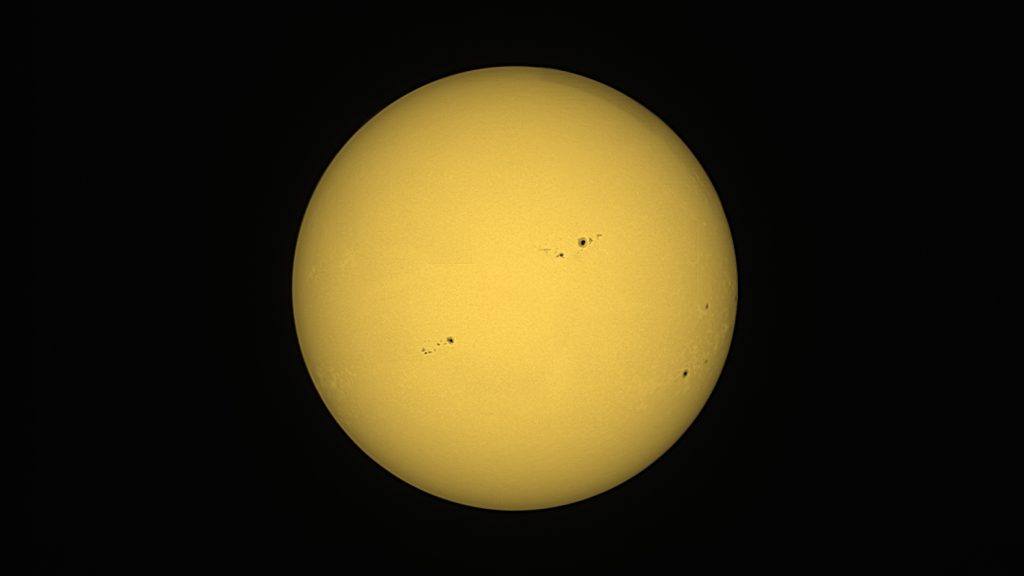
Below is the automatically stacked image generated by the Dwarf 3, untouched by me, I only cropped the image. Next, I downloaded the individual FITS images on my PC using the USB-C cable to transfer the files, and processed them using free software tools—Autostakkert and Registax—for stacking and extra sharpening. The final result impressed me. The Dwarf 3’s larger aperture provided significantly better detail of sunspots compared to its predecessor, the Dwarf 2. Despite the windy and partly cloudy conditions, I managed to capture a nice solar image with the Dwarf 3.
Time-lapse & tracking a helicopter with the Dwarf 3
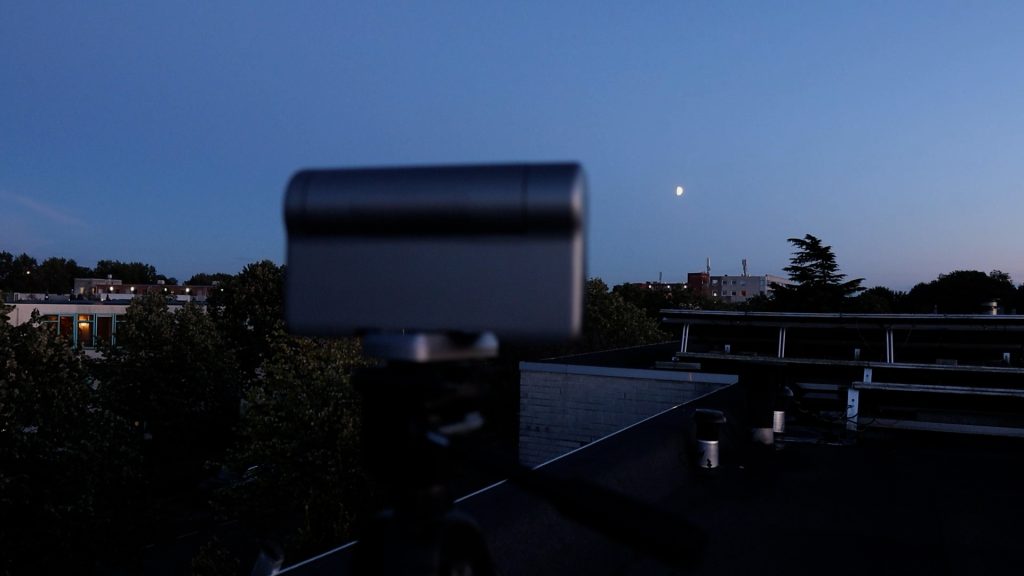
In the evening, I headed out to capture the Moon. As I made my way to the roof, I was greeted by a stunning sunset, prompting me to power up the Dwarf 3 to test its time-lapse feature with the widefield lens. I was quite pleased with the results! Living near Schiphol, the largest international airport in the Netherlands and one of the biggest airports in Europe, I noticed numerous planes in the evening sky. The wide lens records videos in HD (1920×1080) resolution and in MP4 format.

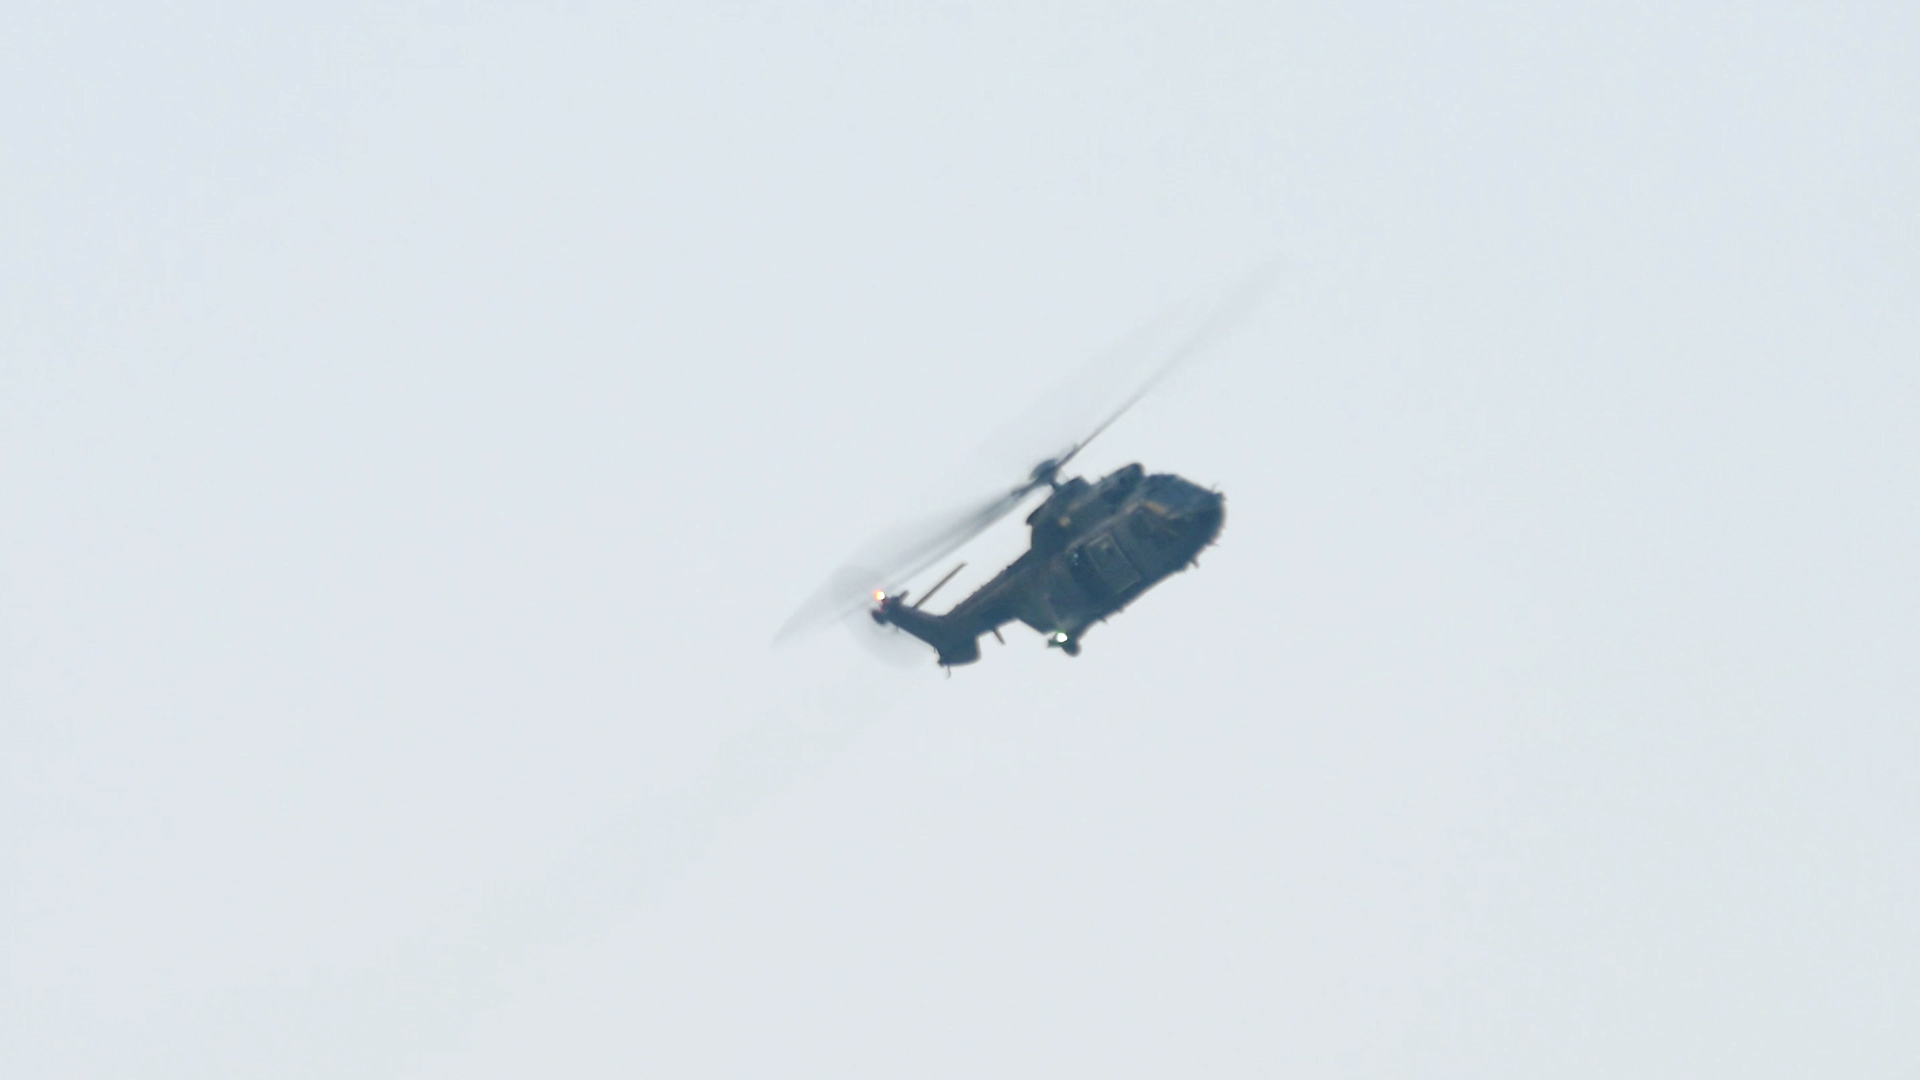
To my surprise, I soon heard a helicopter flying much closer to my rooftop. The military was conducting VFR flight drills for Operation Falcon Leap, preparing for the annual Market Garden celebration, which honors the liberation of southern Netherlands from German occupation in 1944. Excited to capture the action, I switched the Dwarf 3 to object tracking mode to follow the combat helicopter. Amazingly, the Dwarf 3 tracked the helicopter flawlessly, even during its sharp turns right above my rooftop.

Once the excitement of tracking the helicopter had subsided, I turned the Dwarf 3 towards the moon. During my initial attempt to center it in the telephoto view, I noticed that the green rectangle in the widefield view—designed to align with the telephoto view—was slightly misaligned. However, after finding and autofocusing on the moon in the telephoto view, the Dwarf 3 automatically adjusted the alignment of the green rectangle to match.
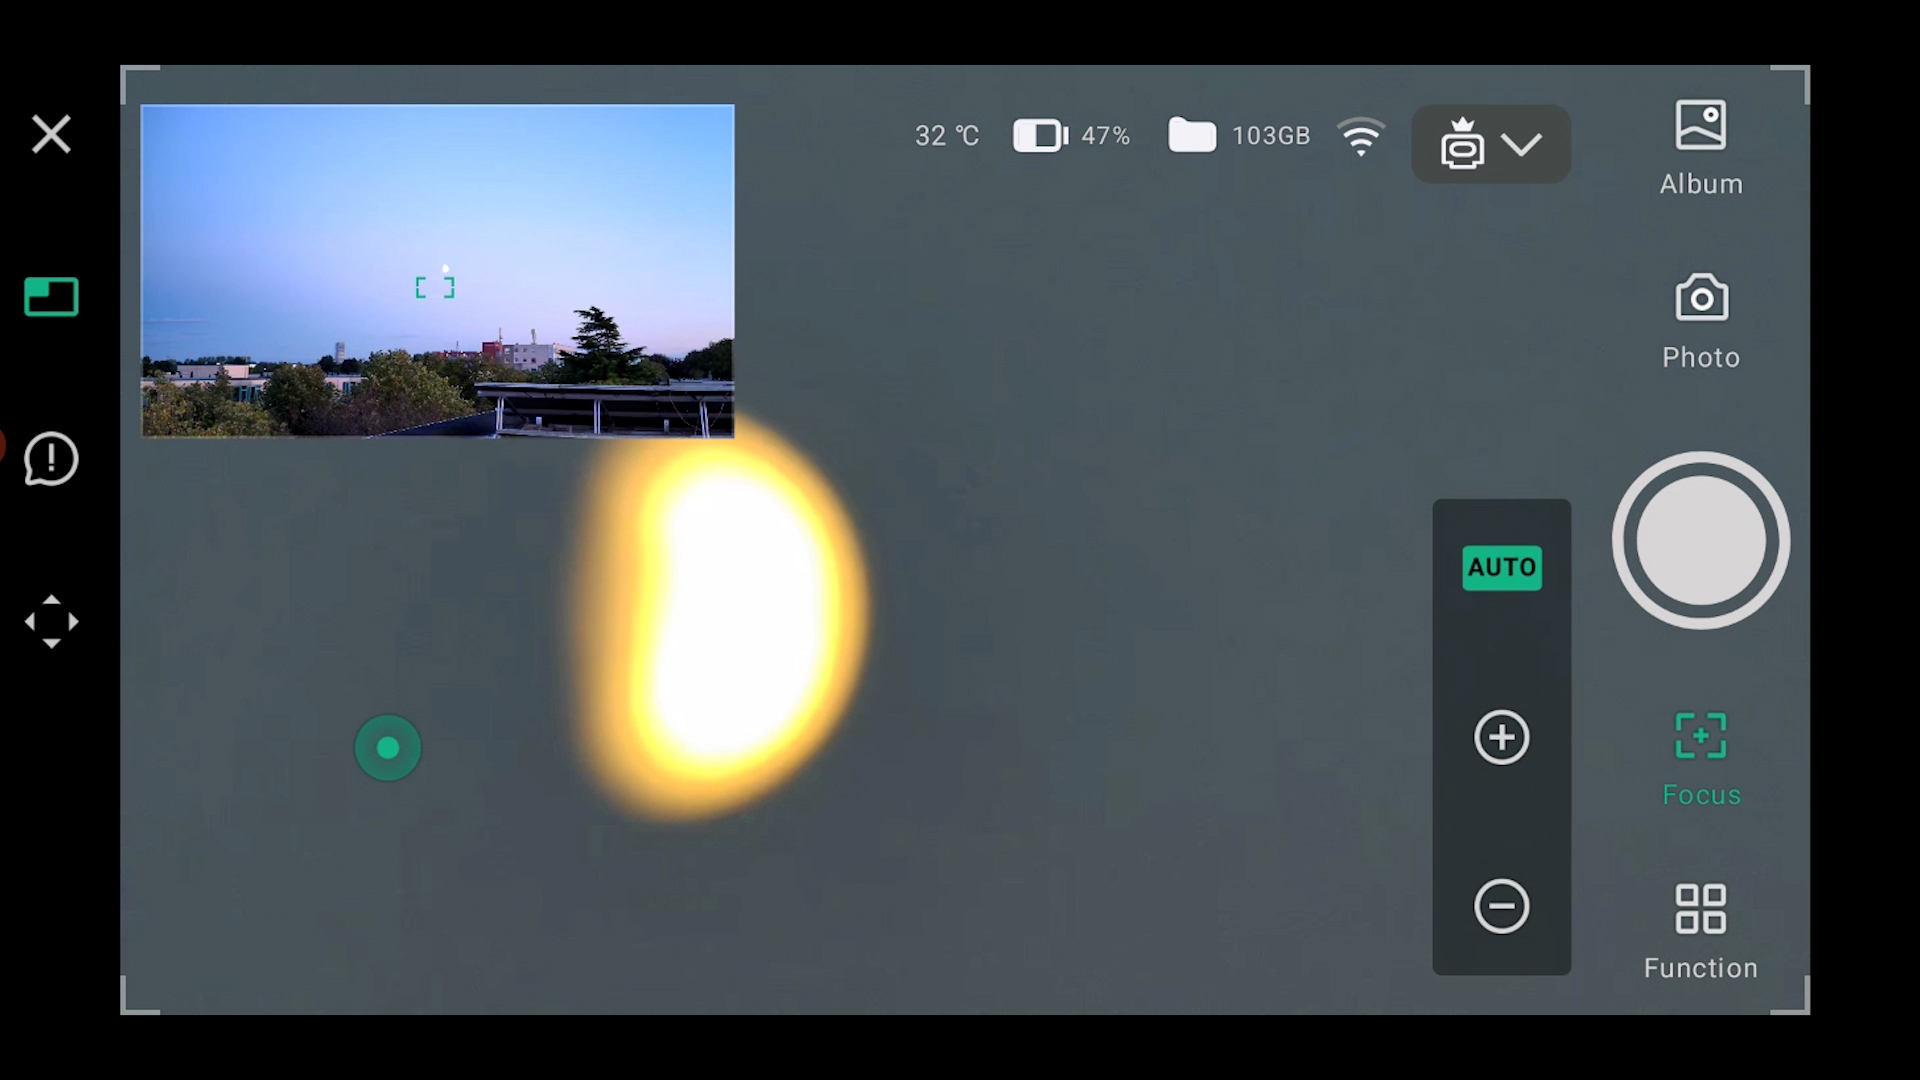

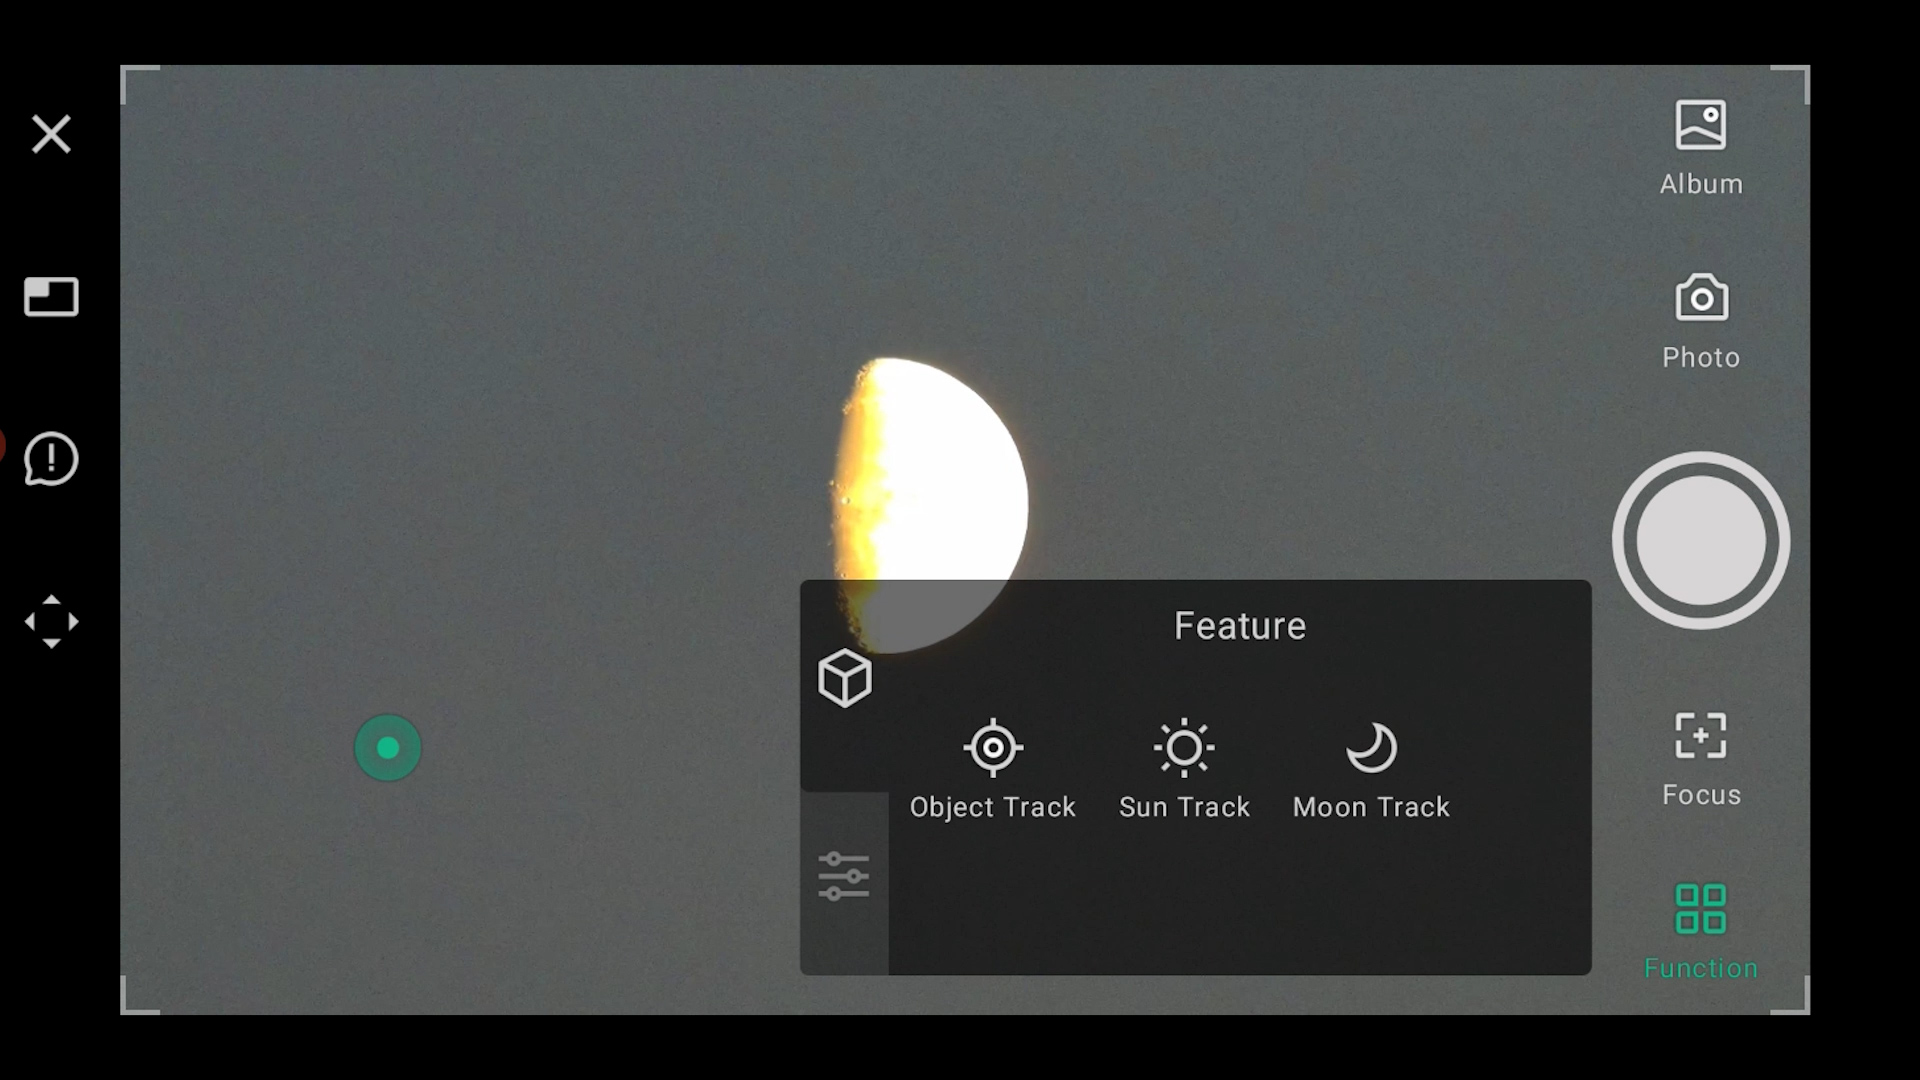
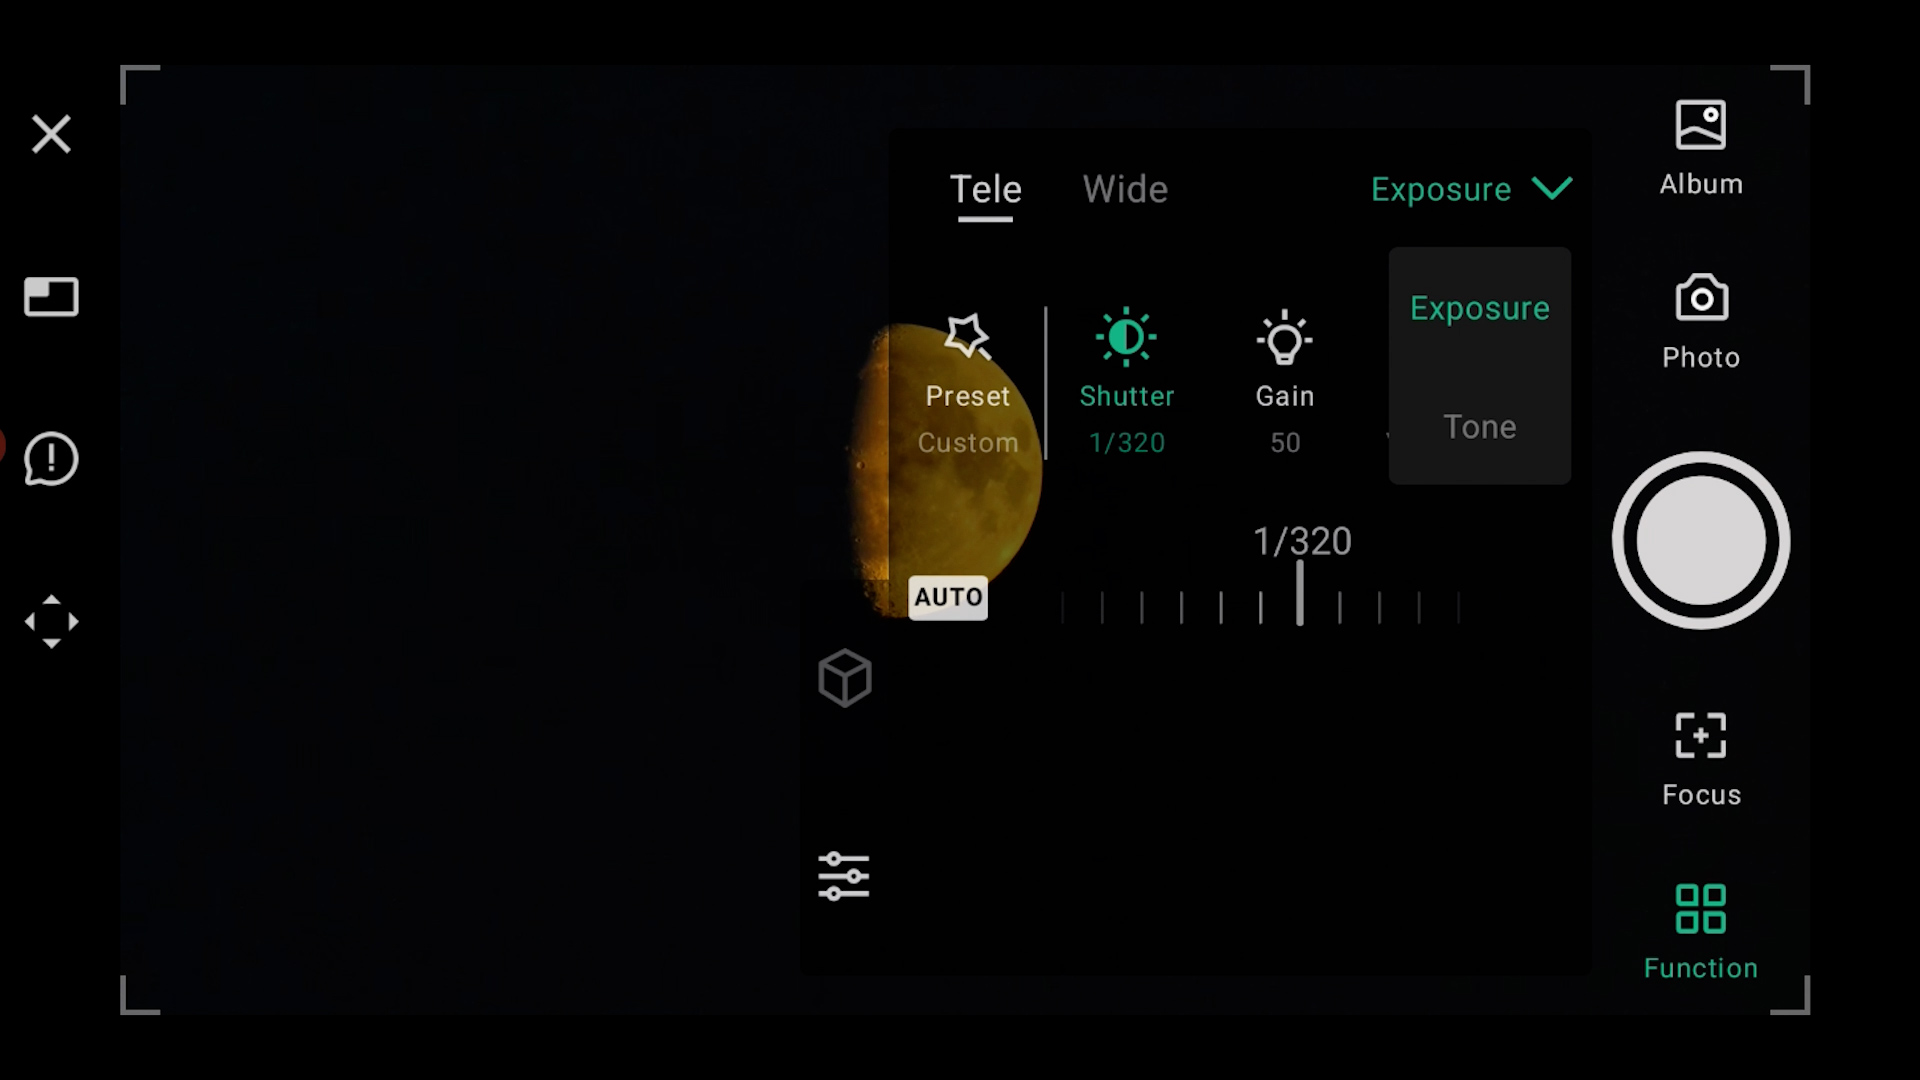
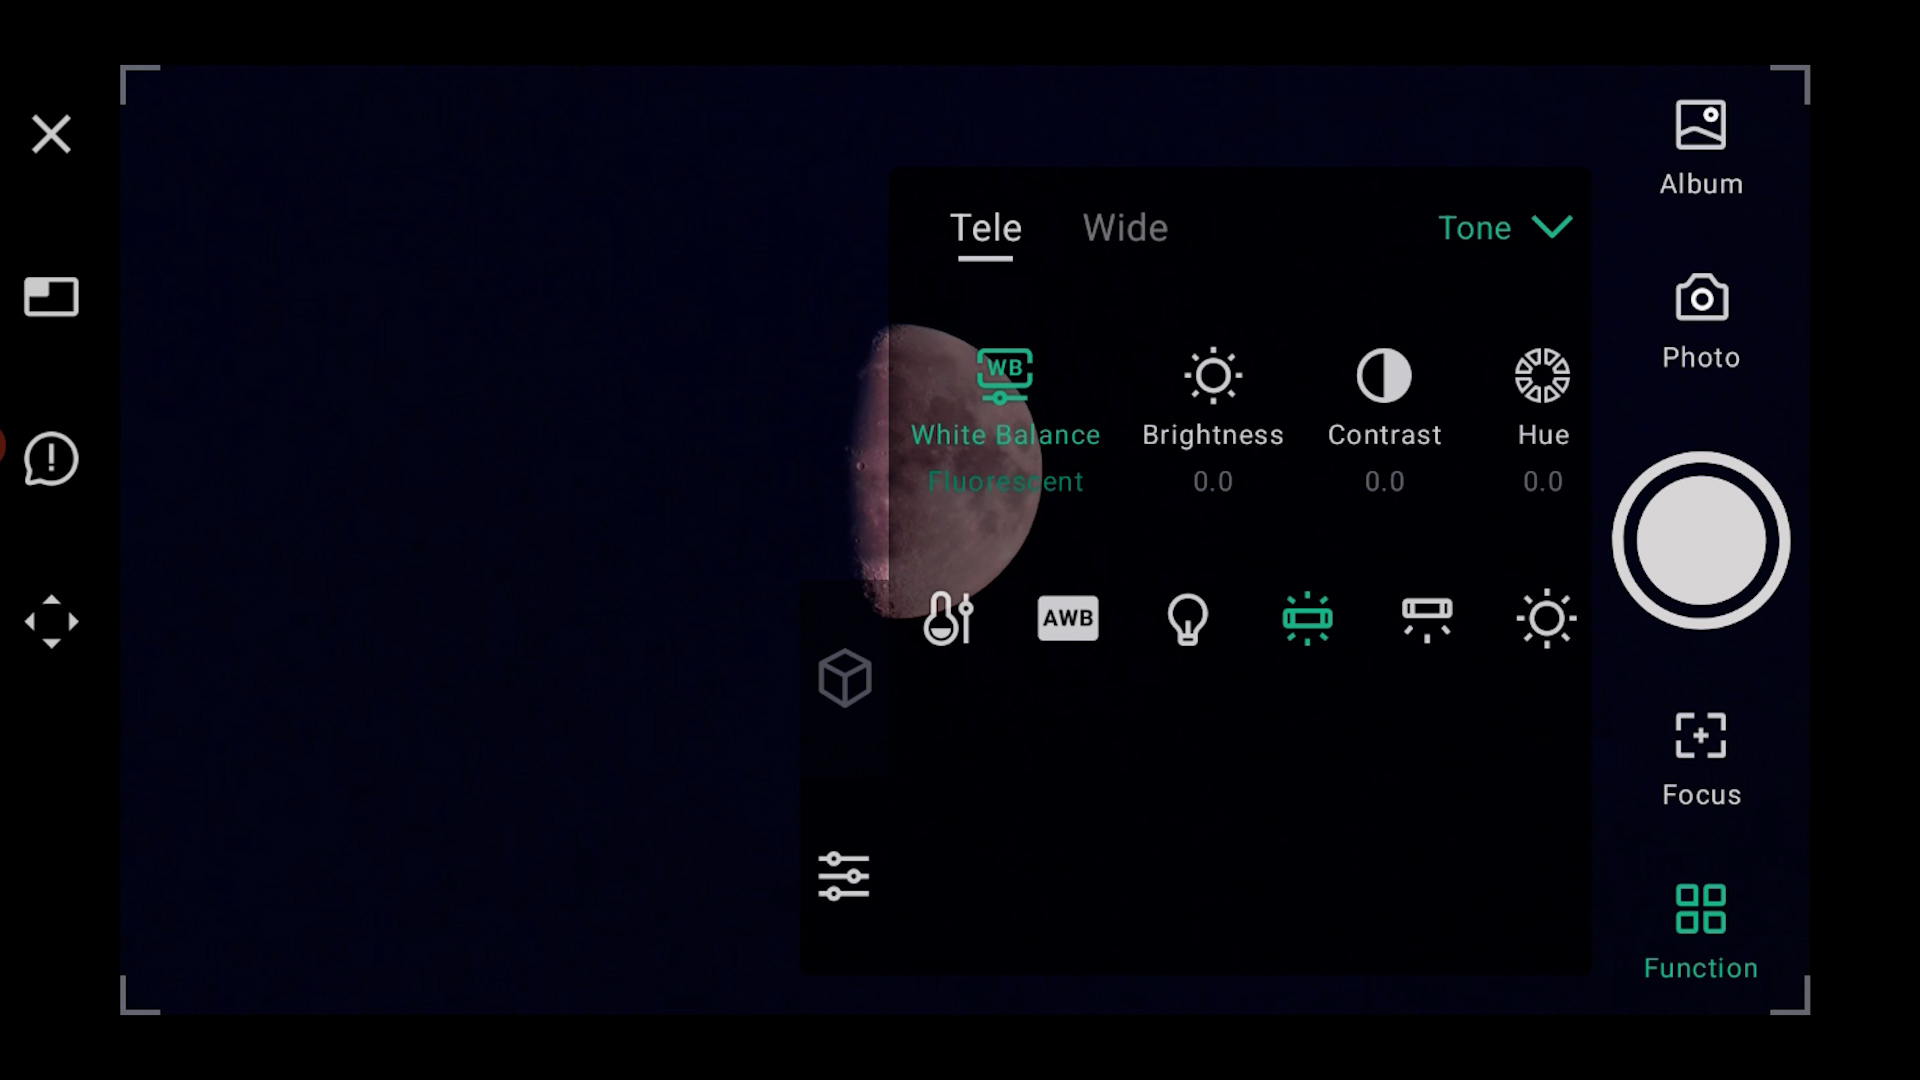
As it was twilight, the Dwarf 3’s autofocus left the moon somewhat overexposed. To get a better view of the moon’s surface, I manually adjusted the shutter speed to 1/320, lowered the gain to 50, and tweaked the white balance. This adjustment gave me a stunning silver-grey moon set against a beautiful blue twilight background. I then enabled the ‘Moon track’ mode, found under ‘Function’ at the bottom right, and the Dwarf 3 effortlessly began tracking the moon, making it simple to photograph or record.
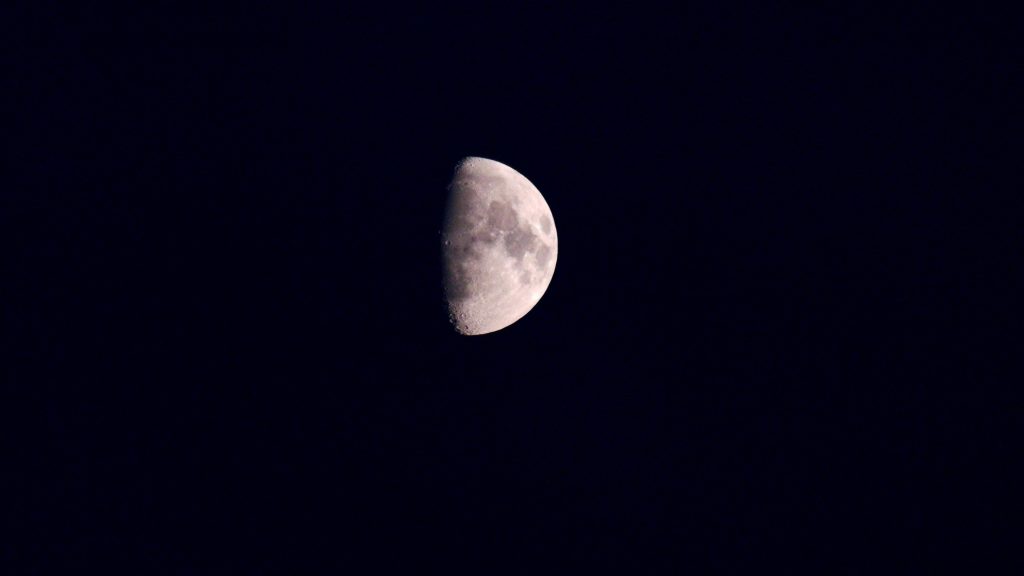
I opted to take some JPEG photos using burst mode to verify the focus. Here’s a sample of one of the images I captured.
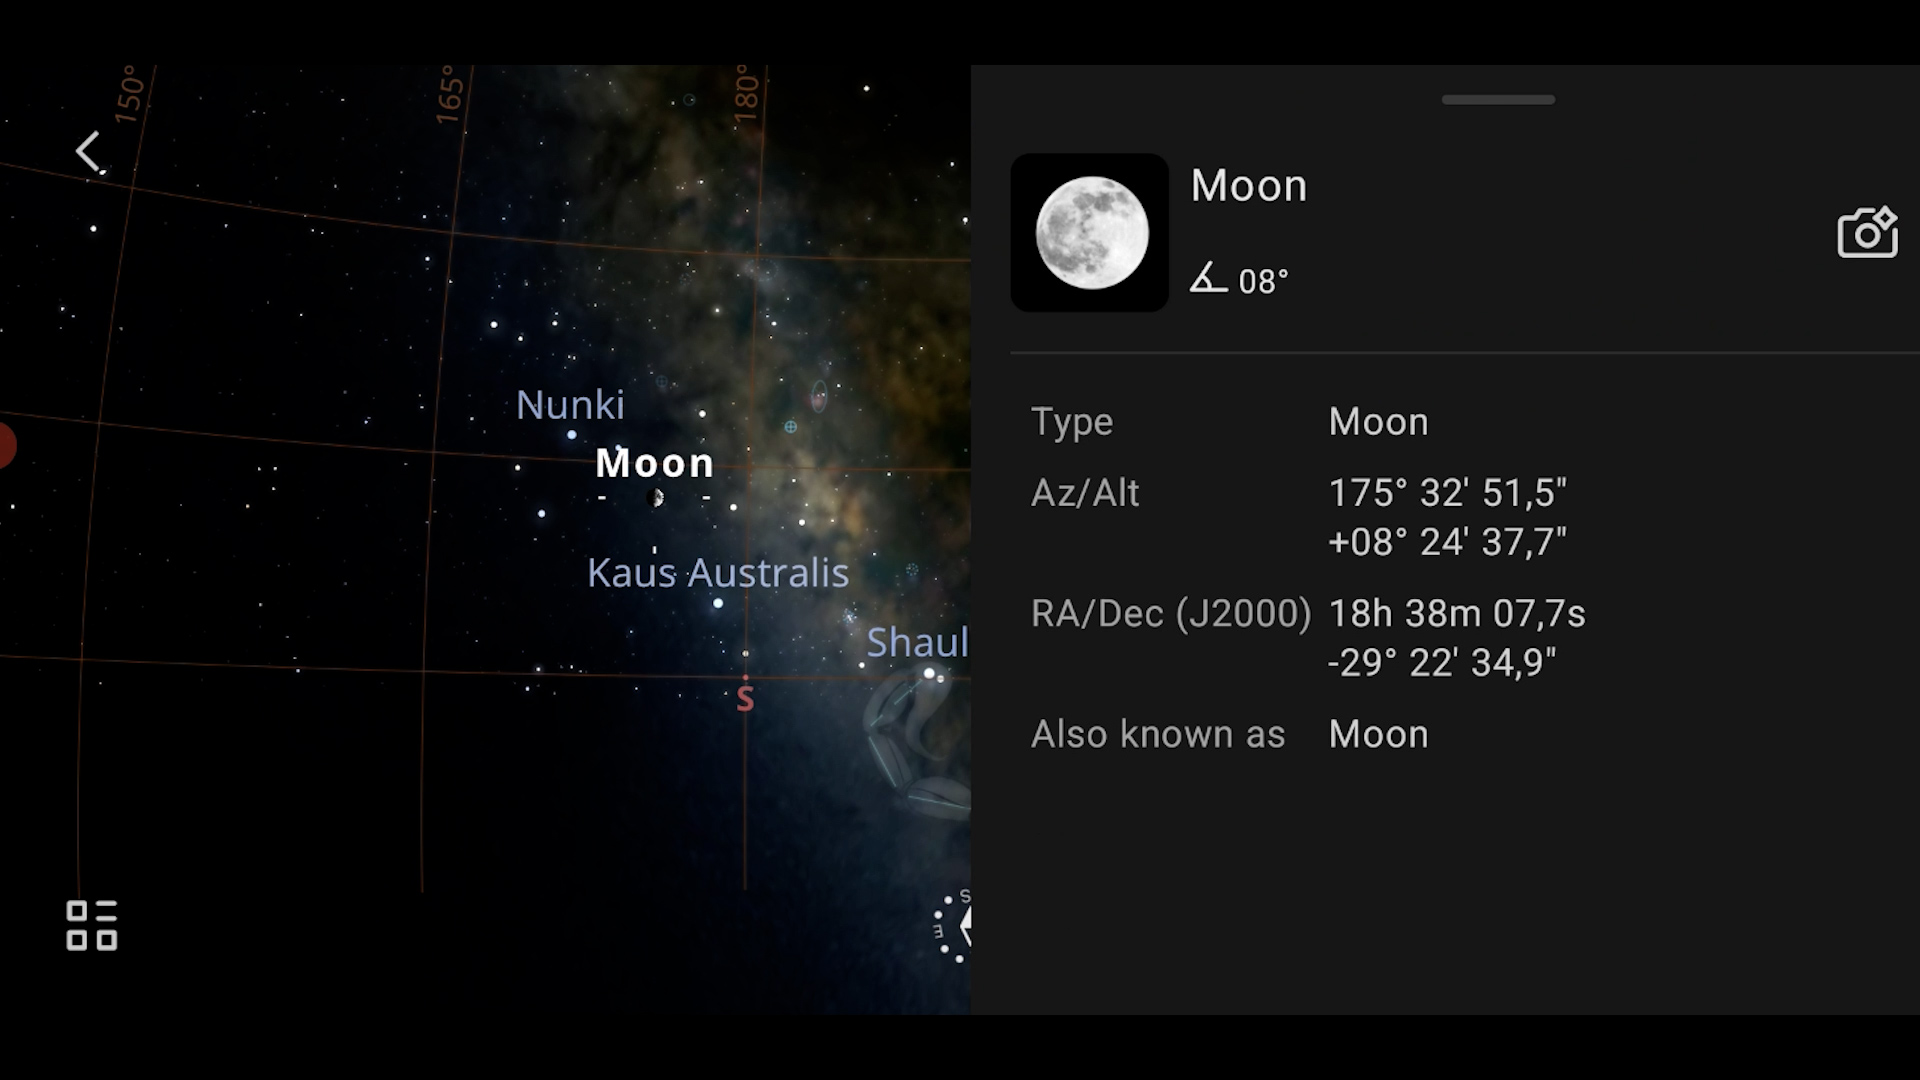
Following that, I switched to Astro Mode for a more advanced lunar photography experience. In Astro Mode, I utilized the virtual sky atlas, also located under ‘Function,’ which showed me an accurate virtual view of the night sky at my location. After selecting the moon and clicking on the photo icon in the virtual sky atlas, the app prompted me to stop tracking the moon to re-initiate tracking, which was a bit confusing, so I’ll be reporting this minor issue to DwarfLab. Once I clicked ‘OK,’ tracking resumed.
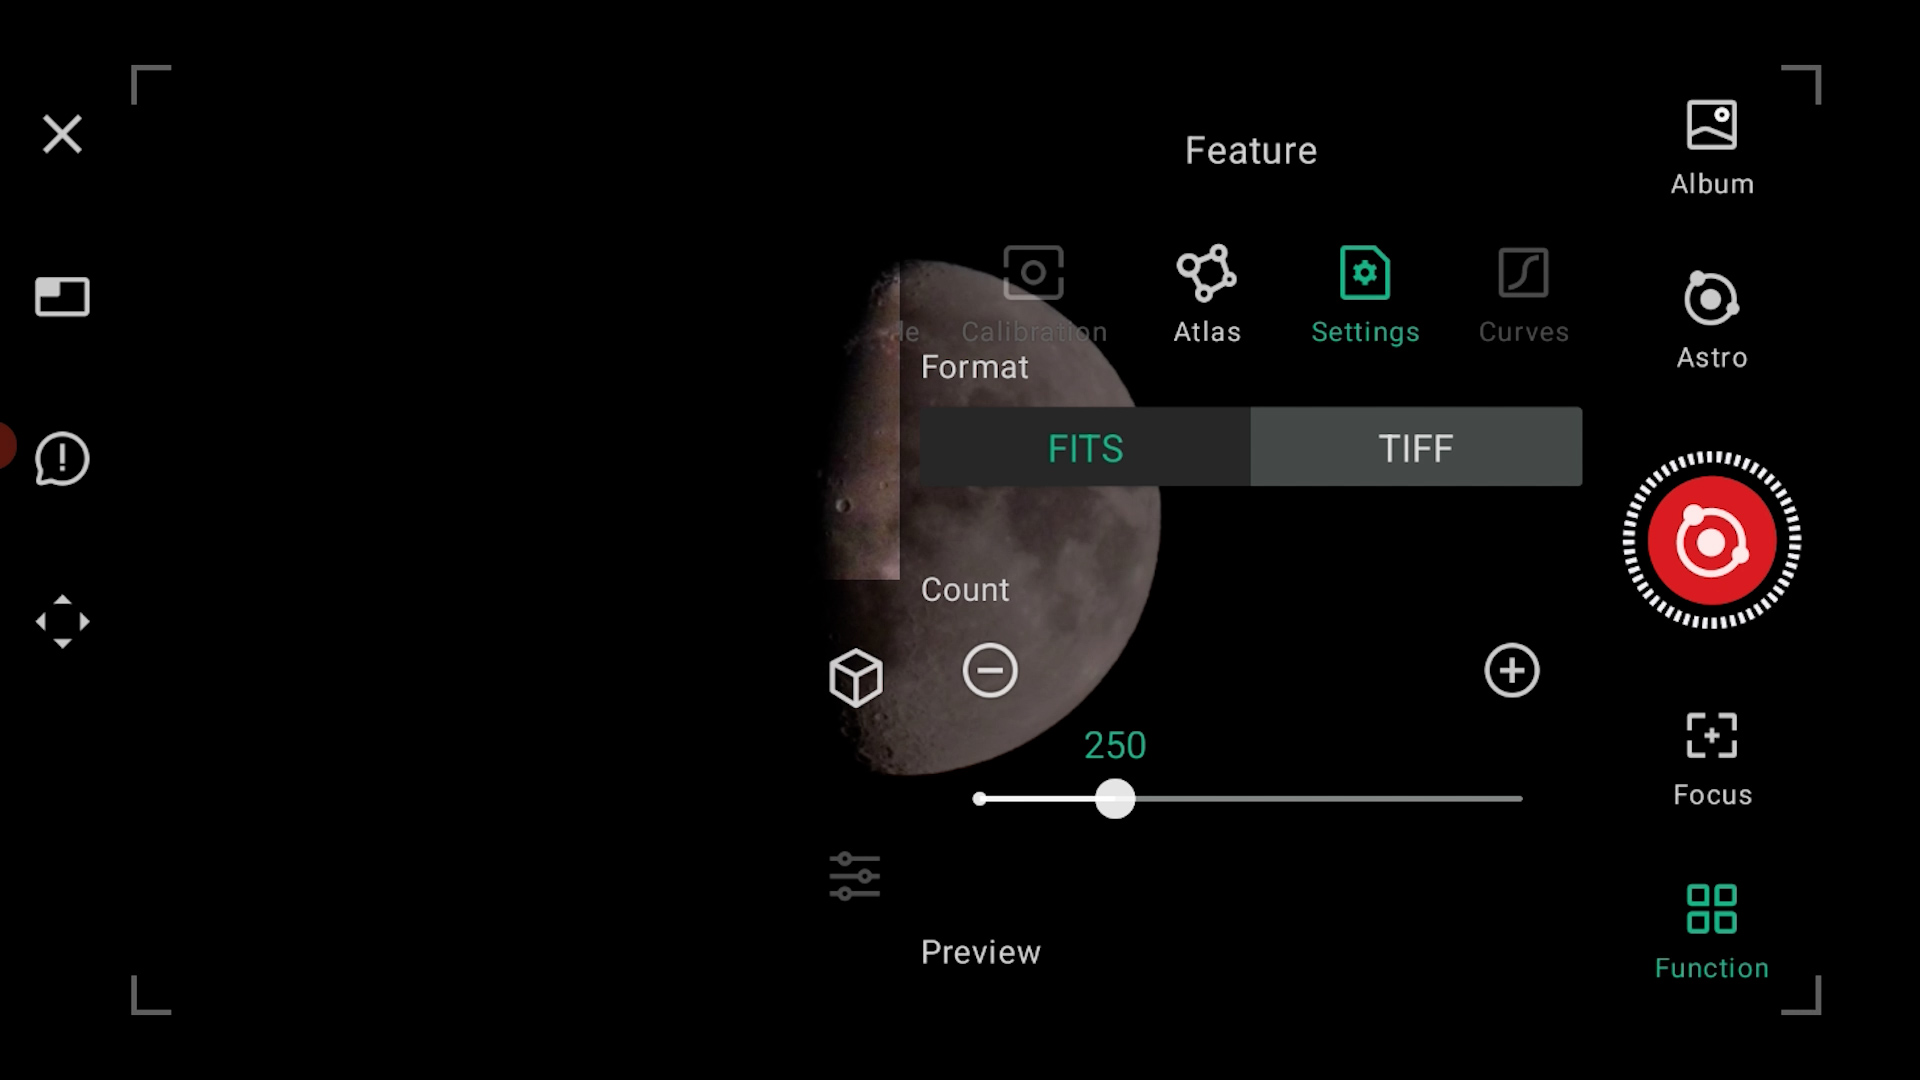
In Astro Mode, I fine-tuned the focus using both autofocus and manual adjustments with the plus and minus buttons to achieve the sharpest possible image of the moon. Once satisfied with the focus, I selected 250 photos in FITS format with stacking, 4K, and AI Tool enabled, and hit the record button.
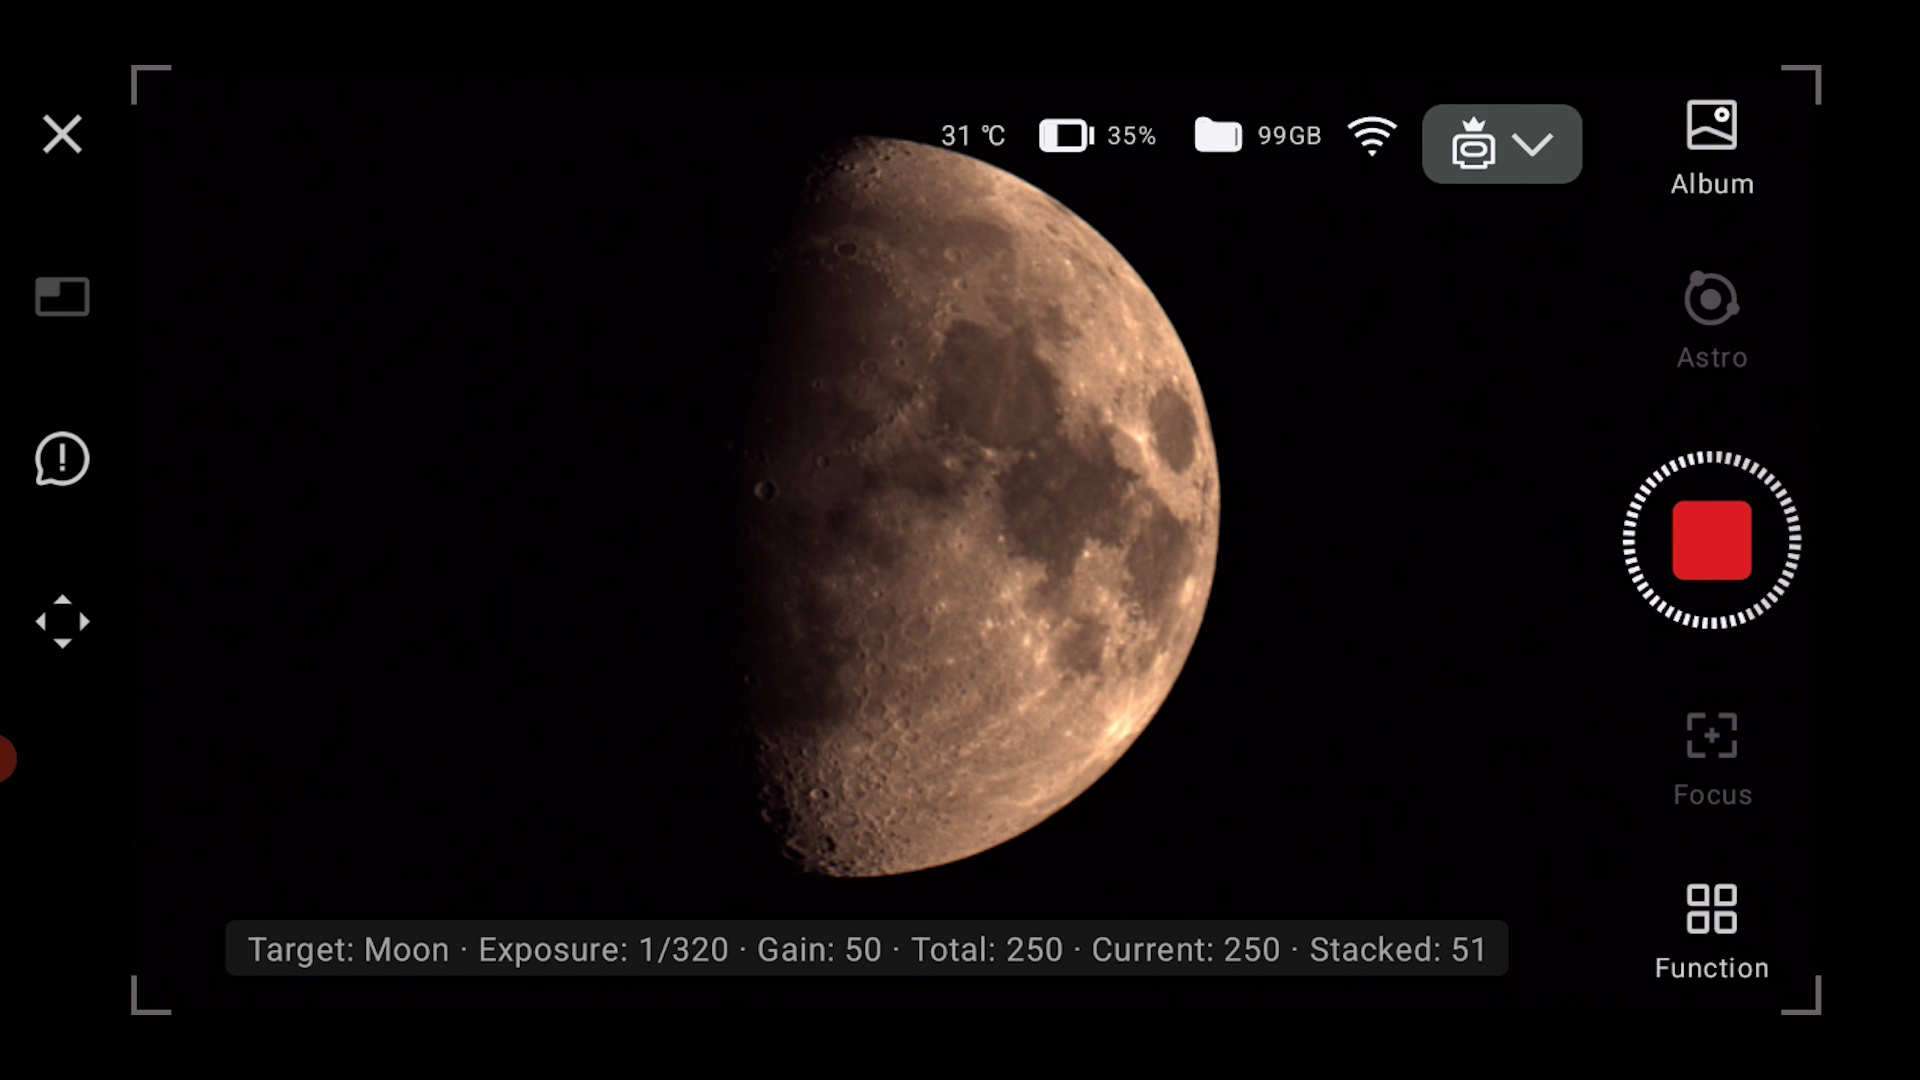
Similar to Solar Mode, the Dwarf 3 began capturing and live stacking the images. Within just a few stacks, I could already see how much smoother the stacked view was compared to the individual photos. However, I did notice that live stacking was slower than the actual image capture when using my smartphone. After capturing 250 photos, I ended the session, and the telescope switched back to live view.
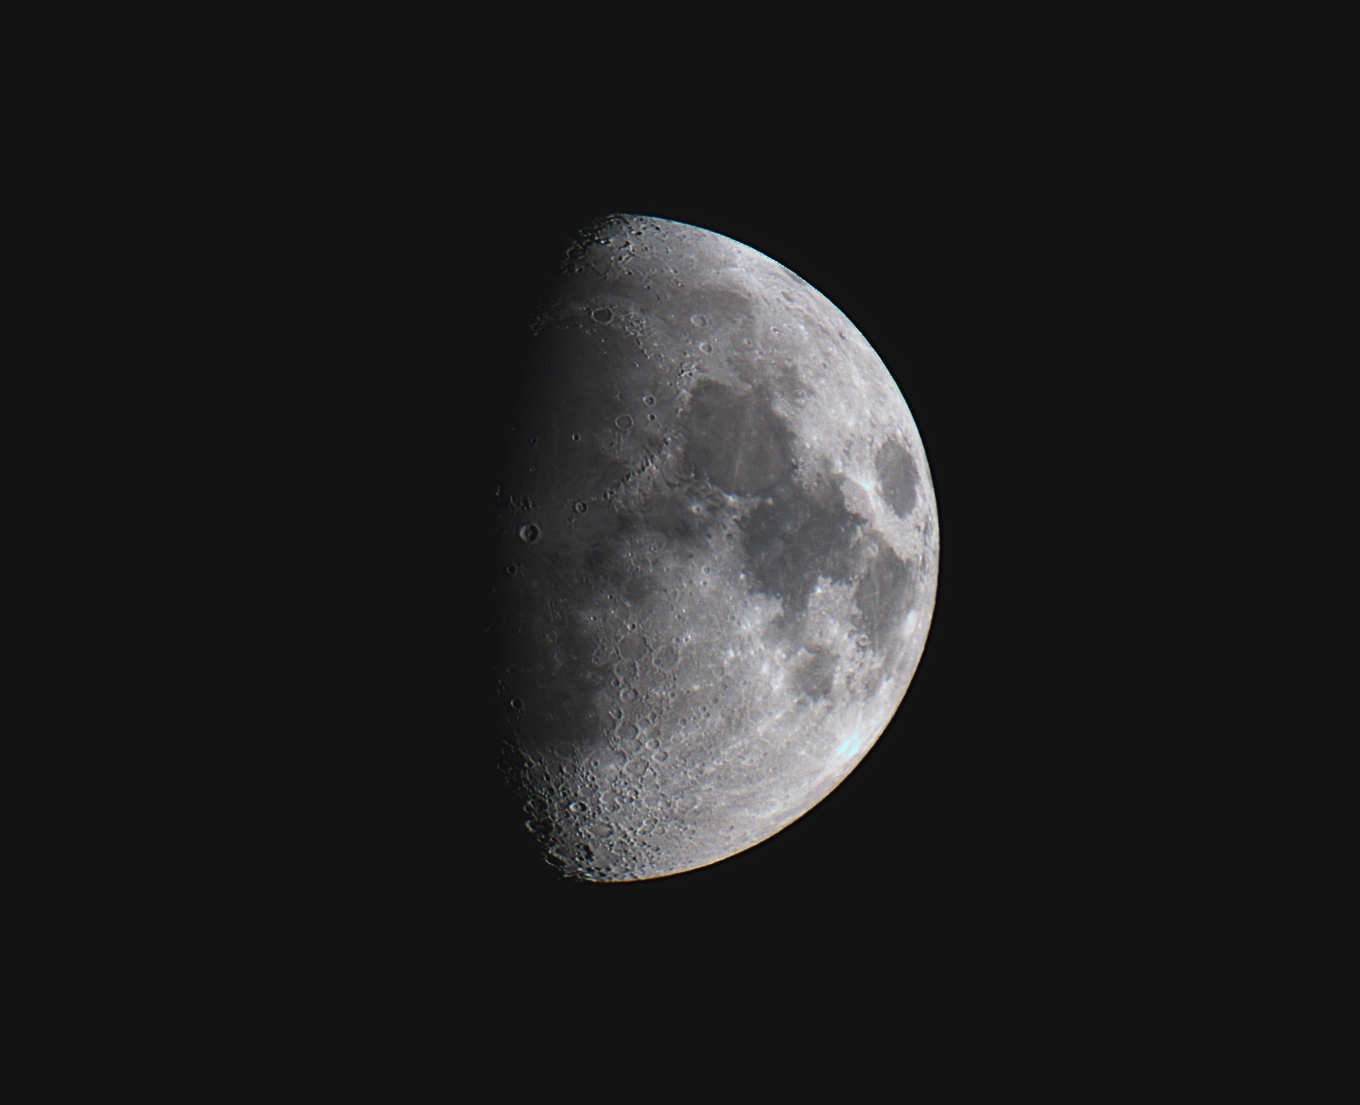
Here is the final automatically stacked image of the Moon, untouched by me, and it looks impressive. I also processed the 250 FITS files in Autostakkert and Registax to stack, sharpen, and desaturate the Moon, as shown in the second picture below. Like with the Sun, the Dwarf 3 delivered a sharp image of the Moon, clearly showing its craters and maria. This is a significant improvement over what I could accomplish with its predecessor, the Dwarf 2, and is quite comparable to the telephoto lenses I’ve used with standard digital cameras at a similar price point.

Deep-Sky Astrophotography with the Dwarf 3

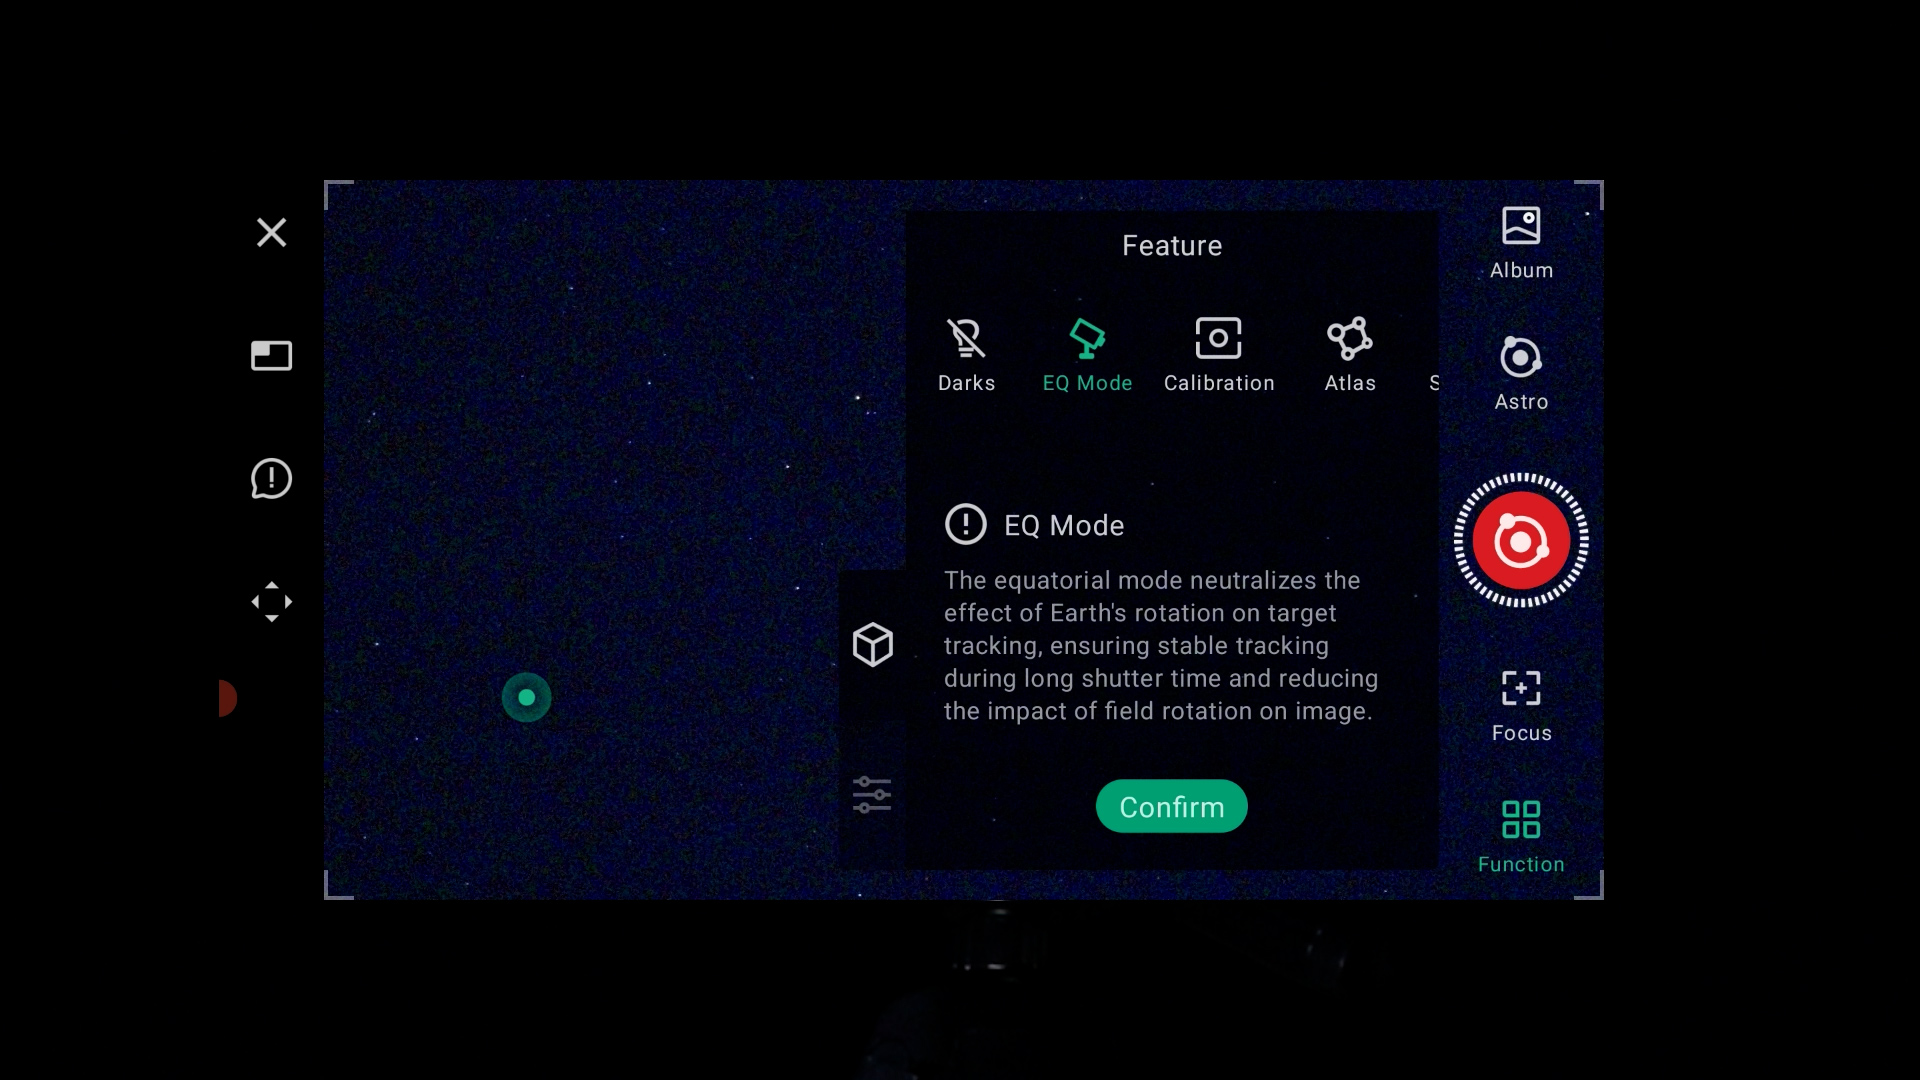
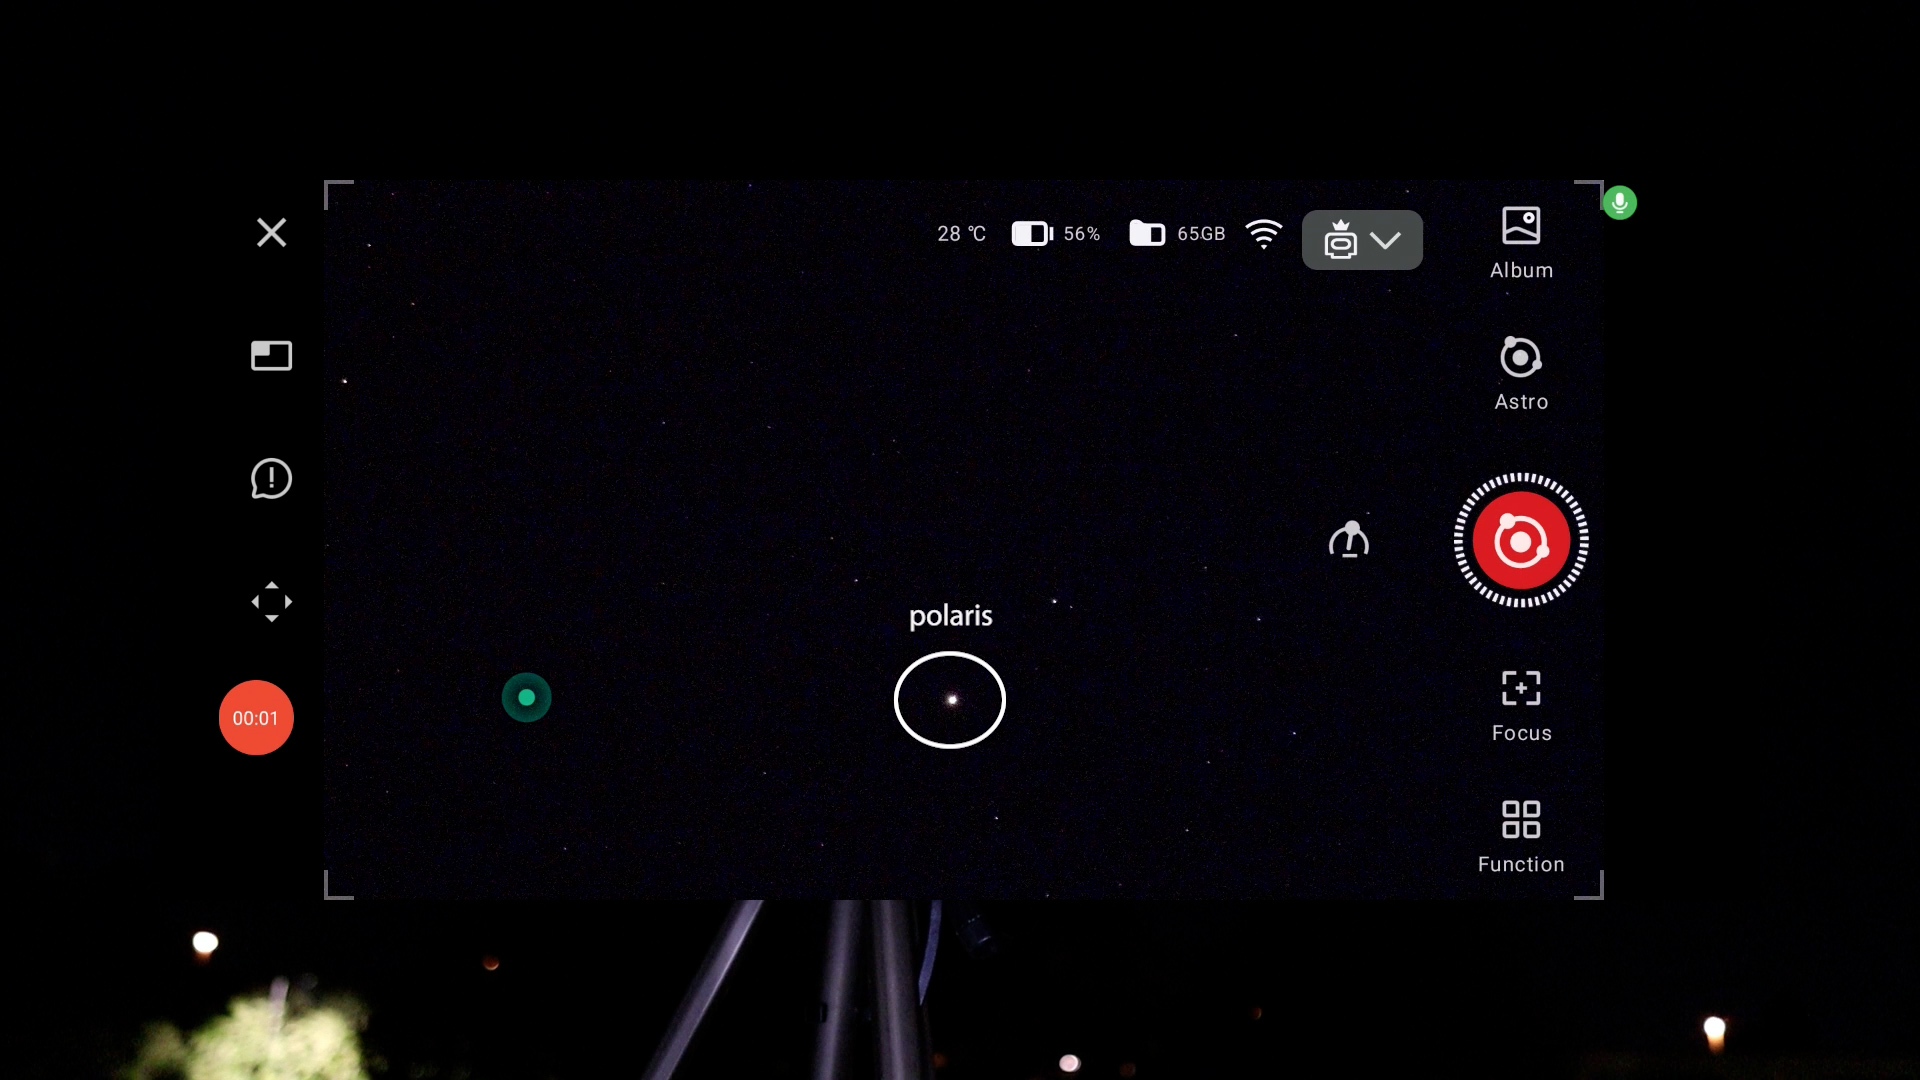
As night descended, I geared up for some deep-sky astrophotography and was excited to try out the new EQ mode on the Dwarf 3. This feature allows for precise polar alignment with either the North or South Celestial Pole. Polar alignment is the process of aligning a telescope’s mount with the Earth’s rotational axis, specifically pointing it toward the Celestial Pole. This alignment reduces star trailing and enhances long exposure photos of space by allowing the telescope to track celestial objects accurately as they move across the sky, resulting in clearer, sharper images. I pointed the Dwarf 3 towards the star Polaris in the north, which is close to the north celestial pole, and used a 2-second shutter speed in the app to check if the stars were in focus.

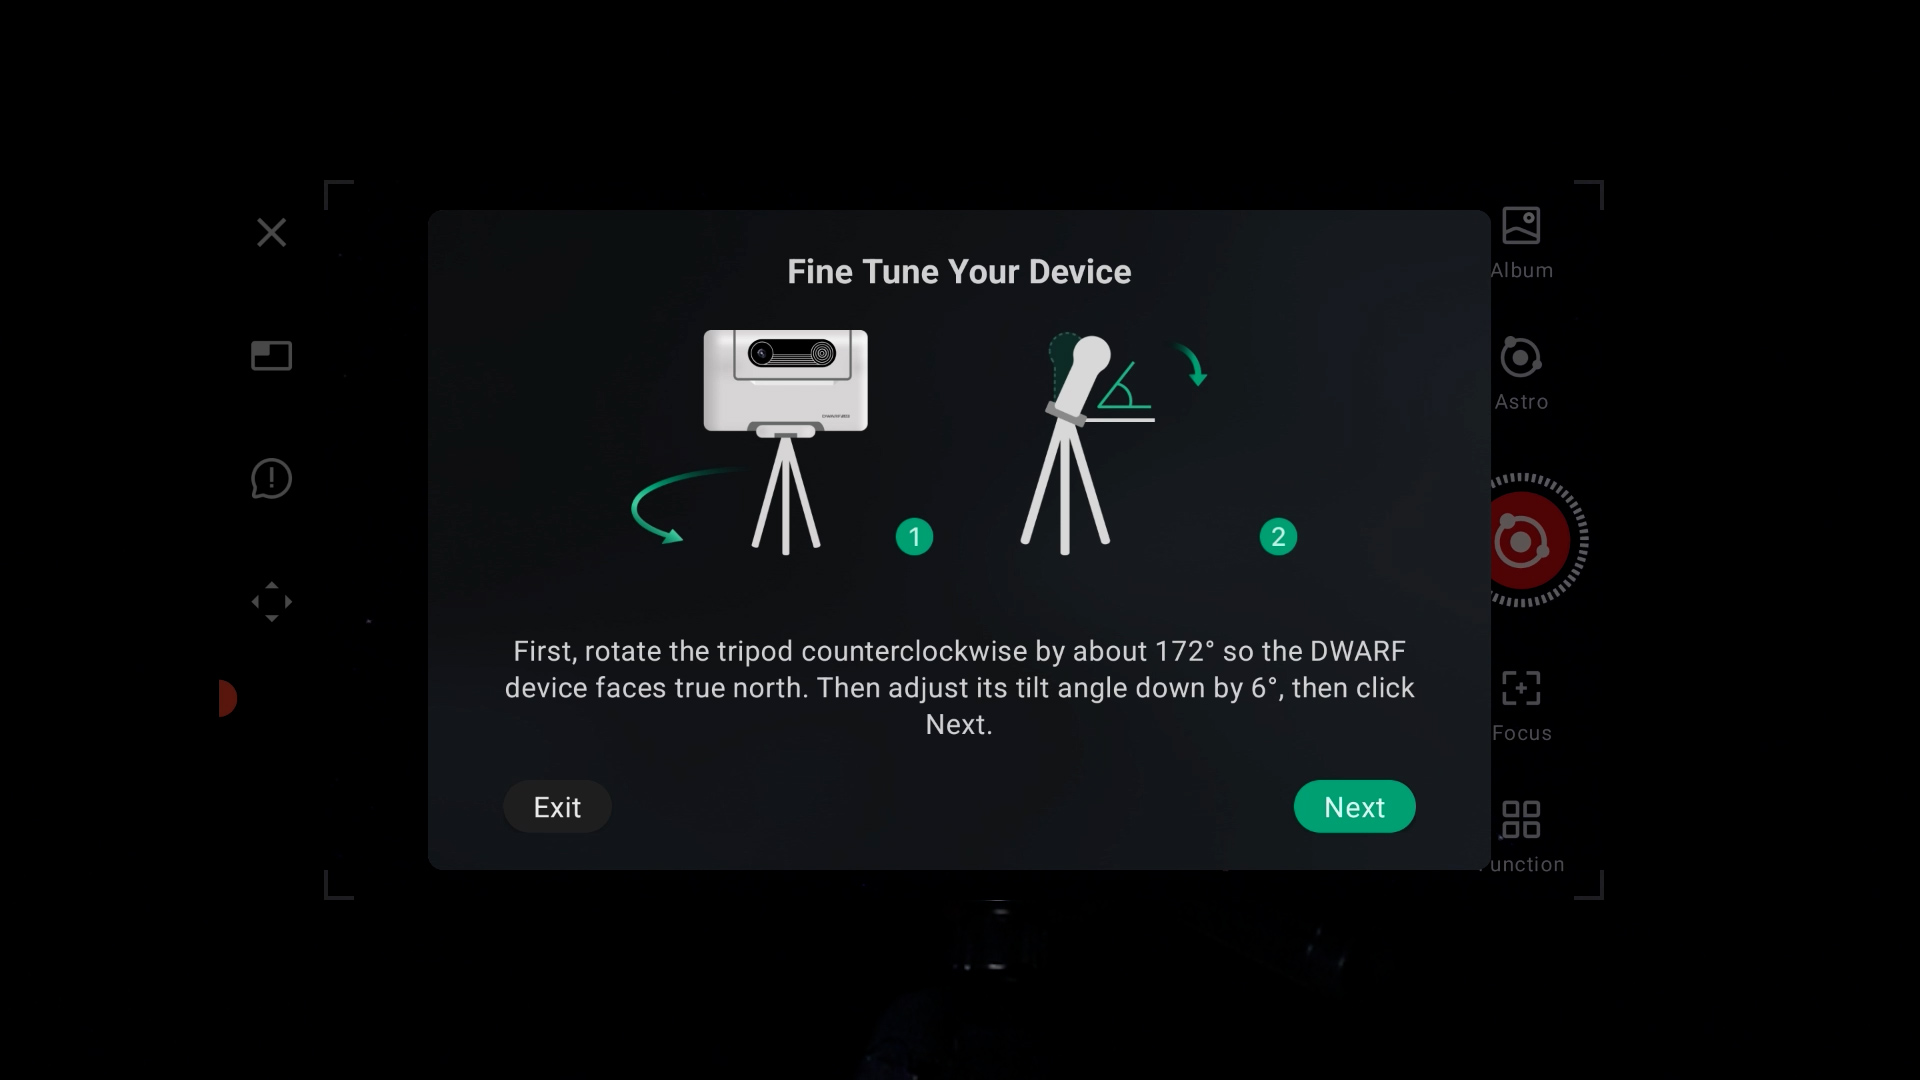
Once focused, I activated the EQ mode, but things didn’t go as planned. After starting the procedure, the Dwarf 3 instructed me to rotate the telescope 172 degrees toward the south —I never encountered this behavior during other polar alignment processes. After some unsuccessful troubleshooting, I decided to set EQ mode aside for the moment. Instead, I tilted the telescope toward Polaris and used the telephoto lens to confirm its visibility, achieving a rough polar alignment. It’s worth noting that I’m testing an early production version, and Dwarflab is keen to enhance the overall experience.
The Andromeda Galaxy
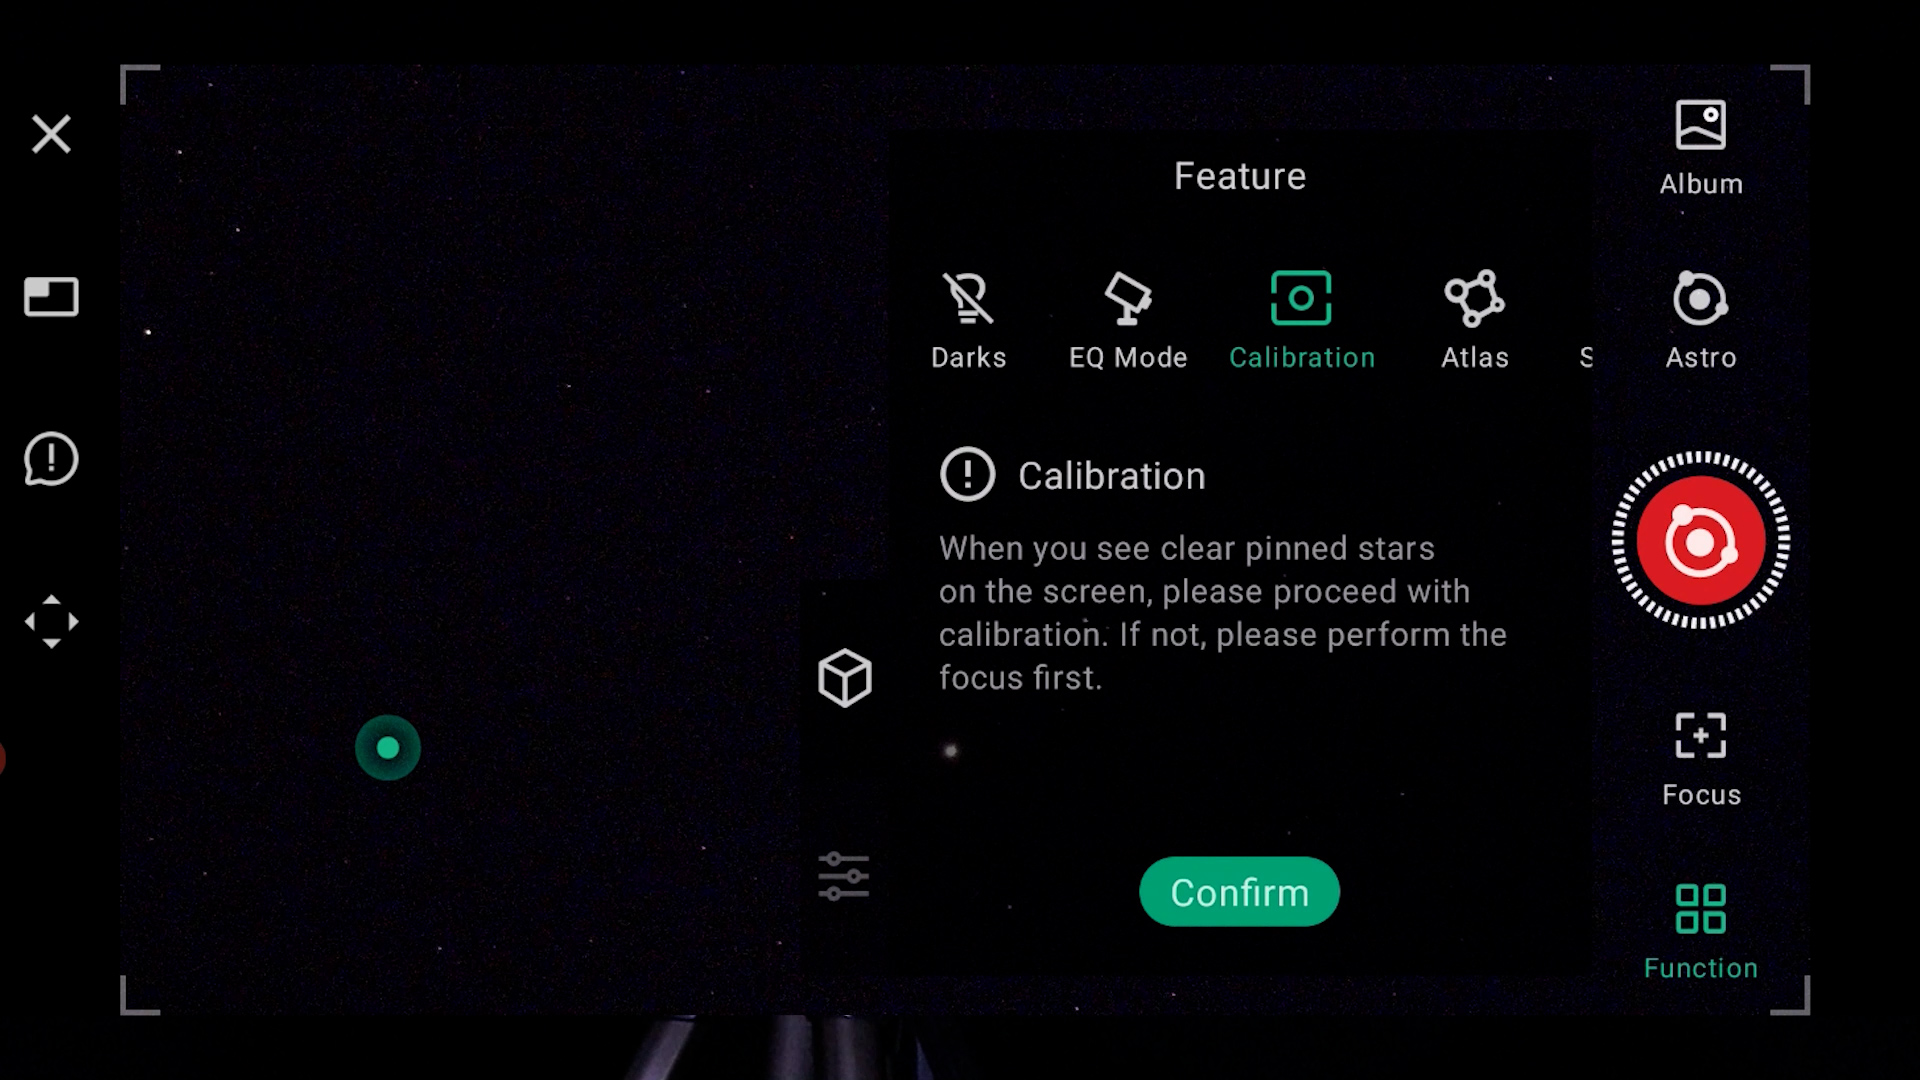
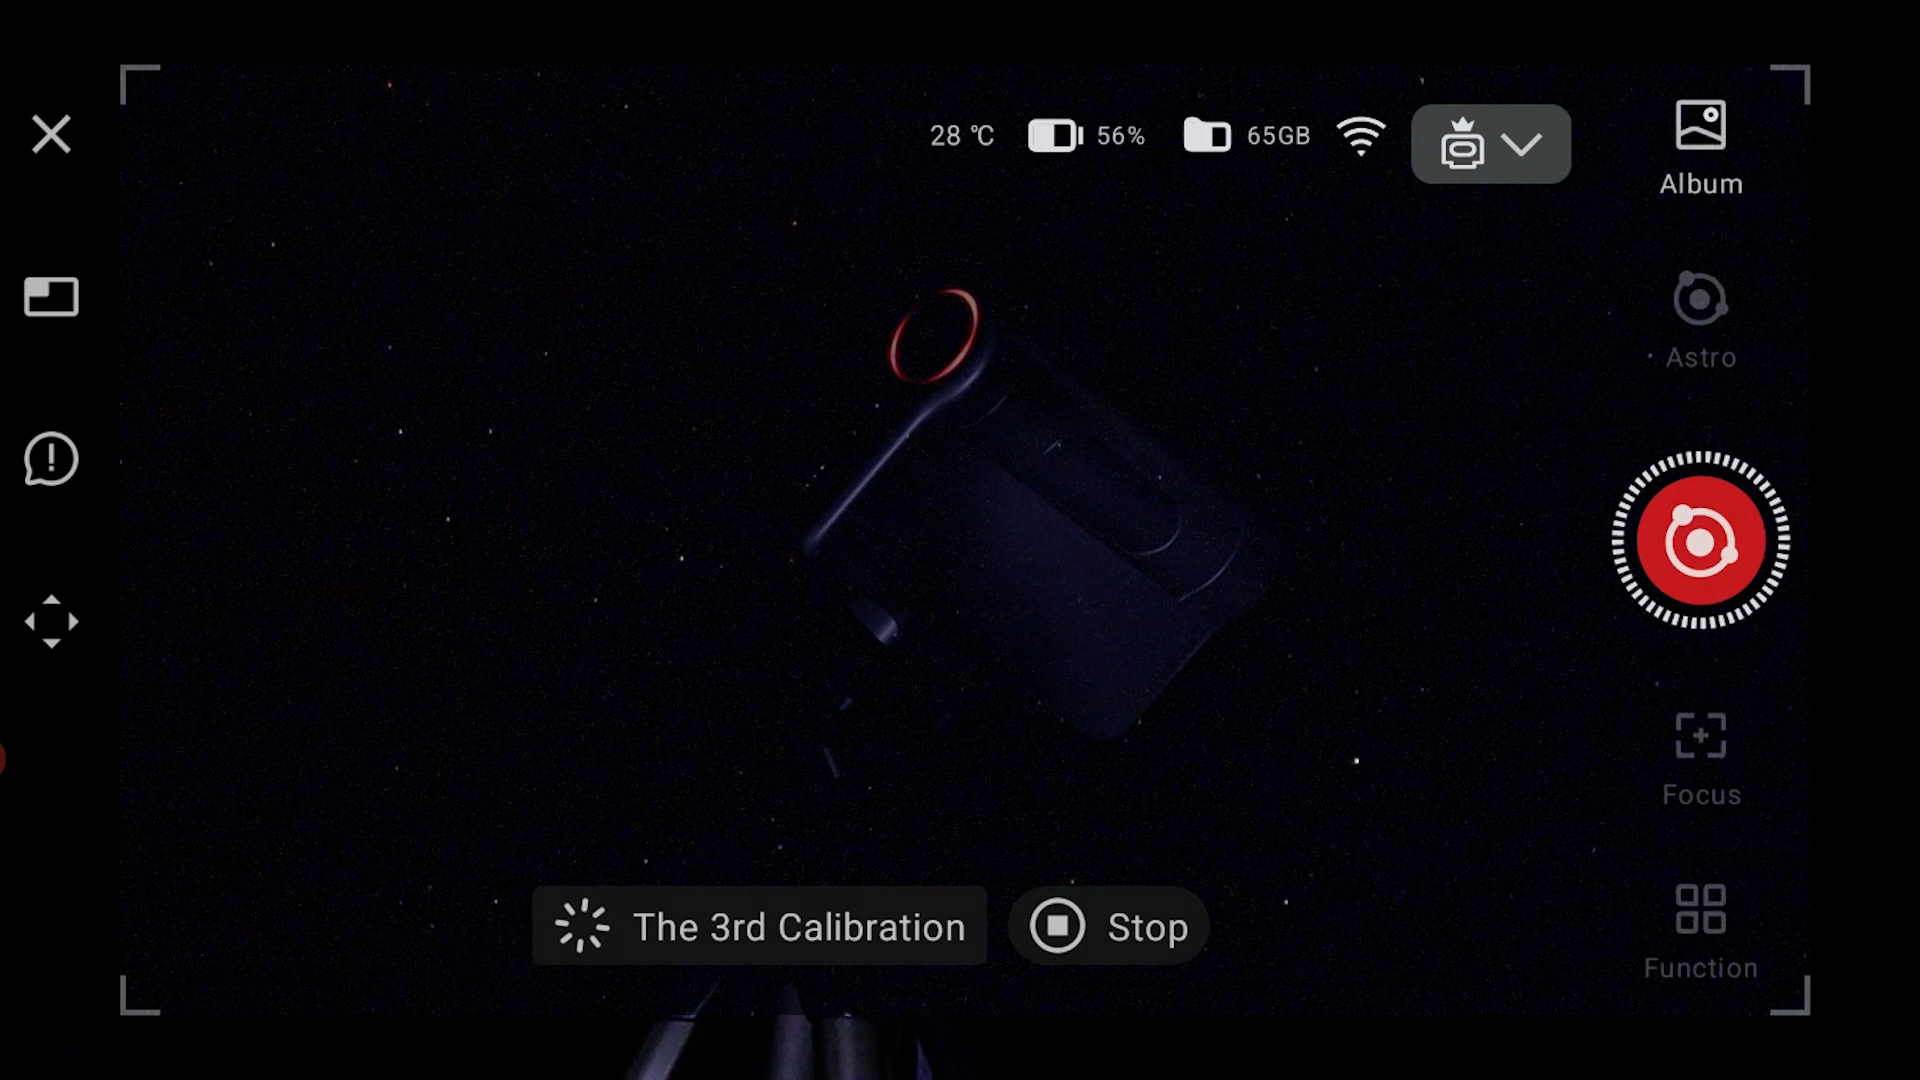
With Polaris in view, I pressed the calibration button, allowing the Dwarf 3 to pinpoint its exact location in the sky.
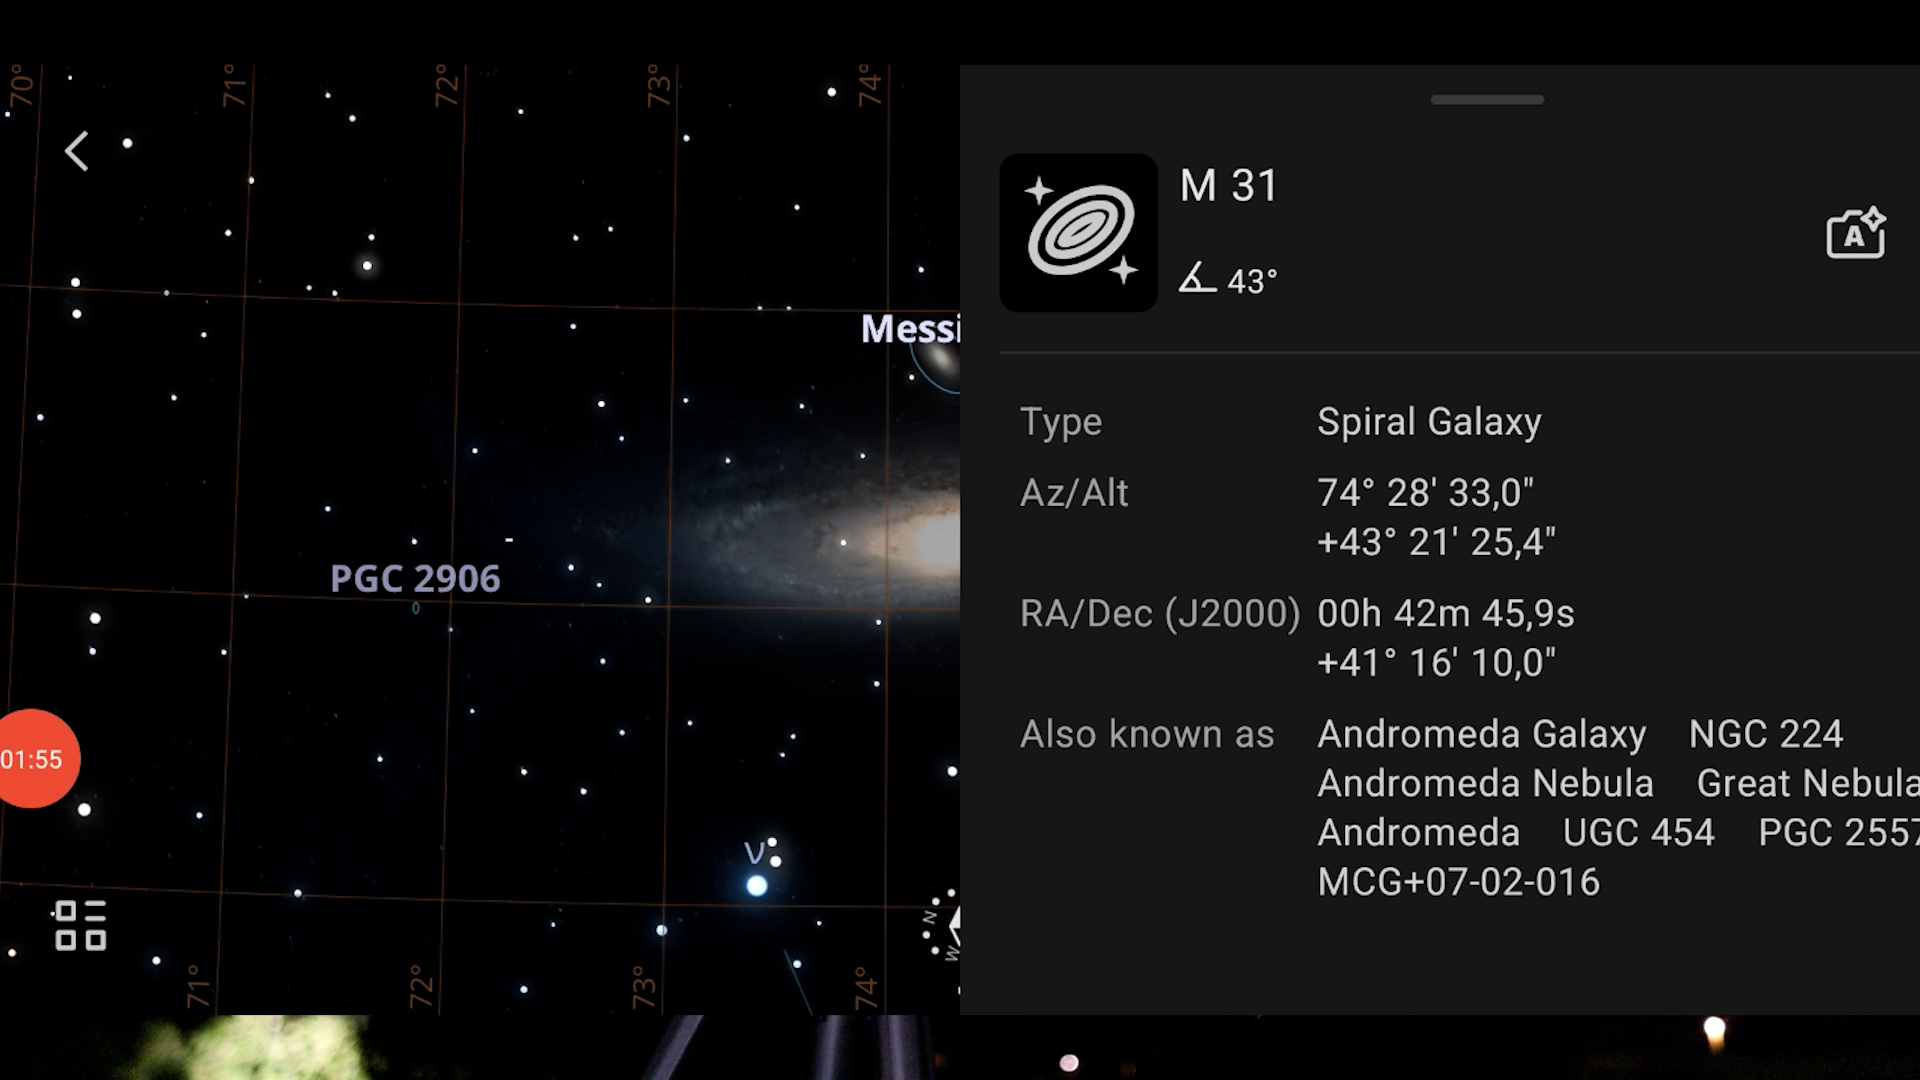
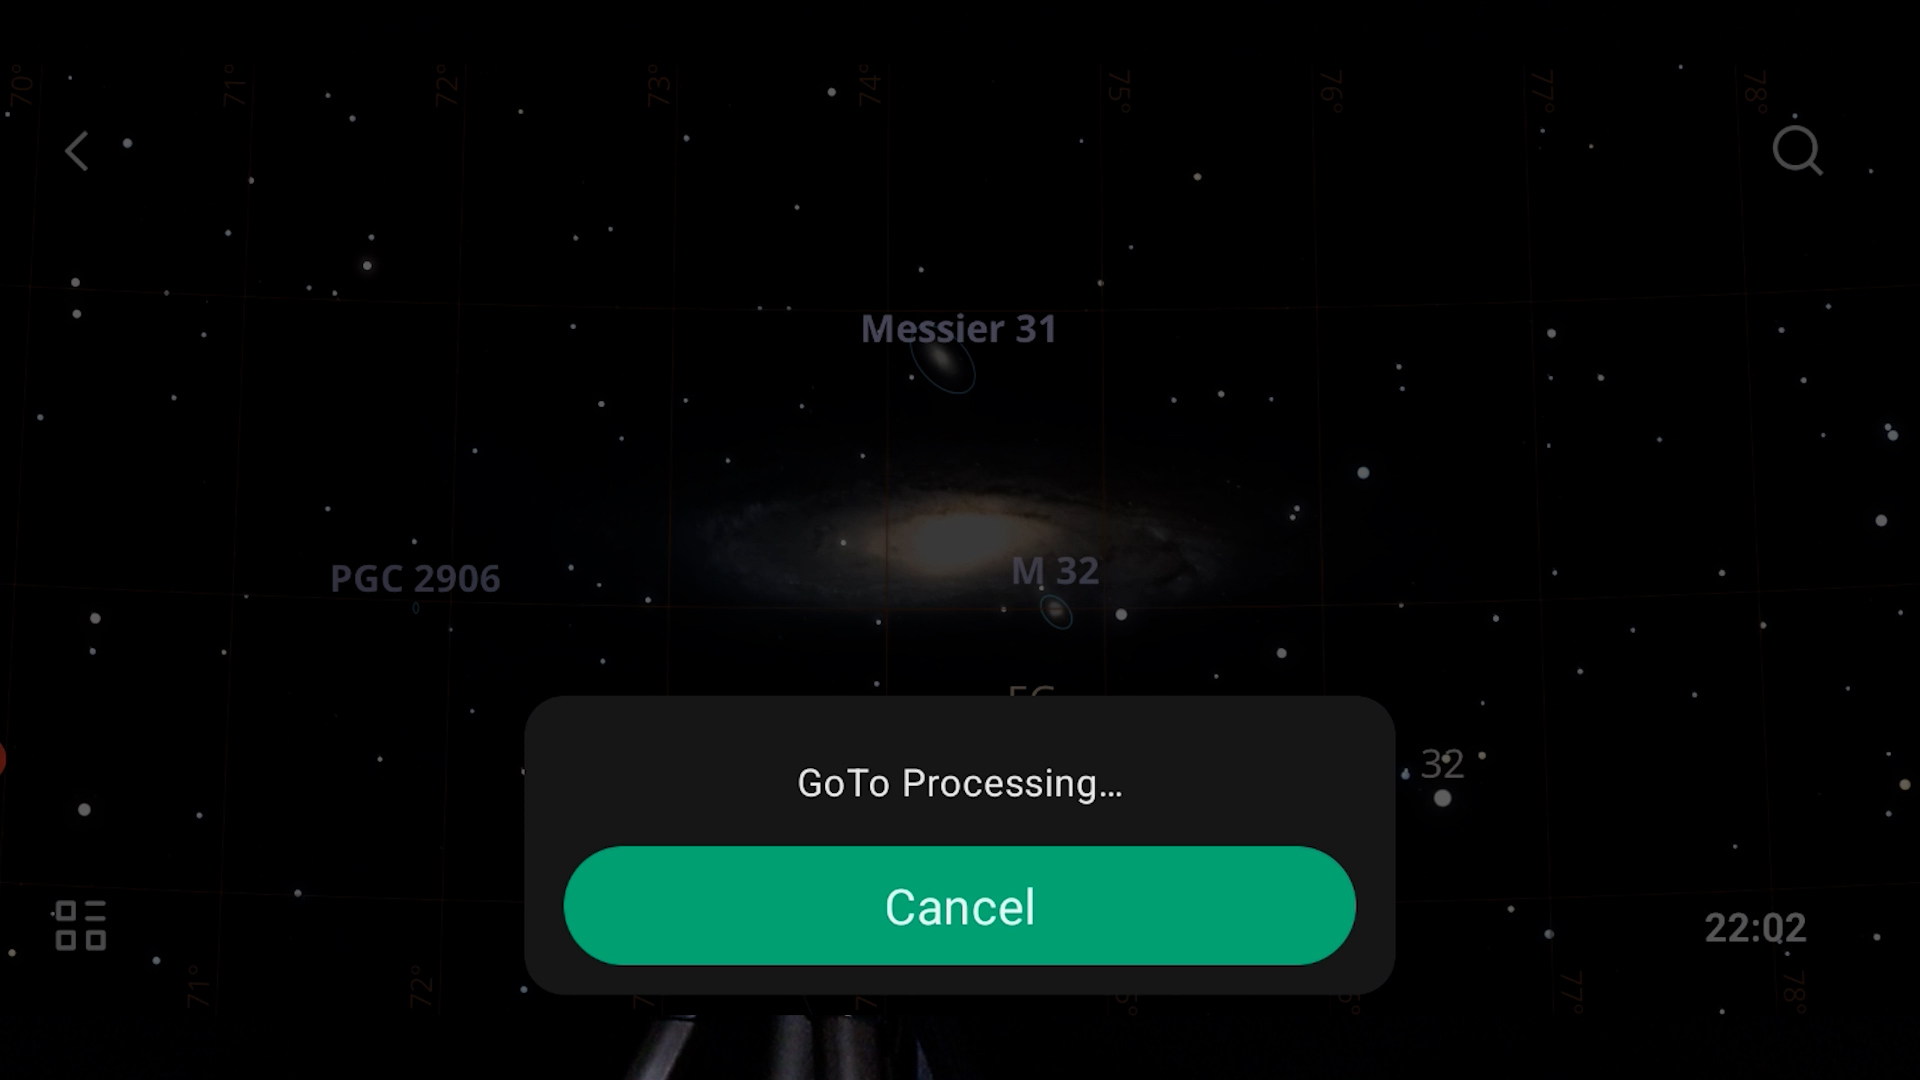
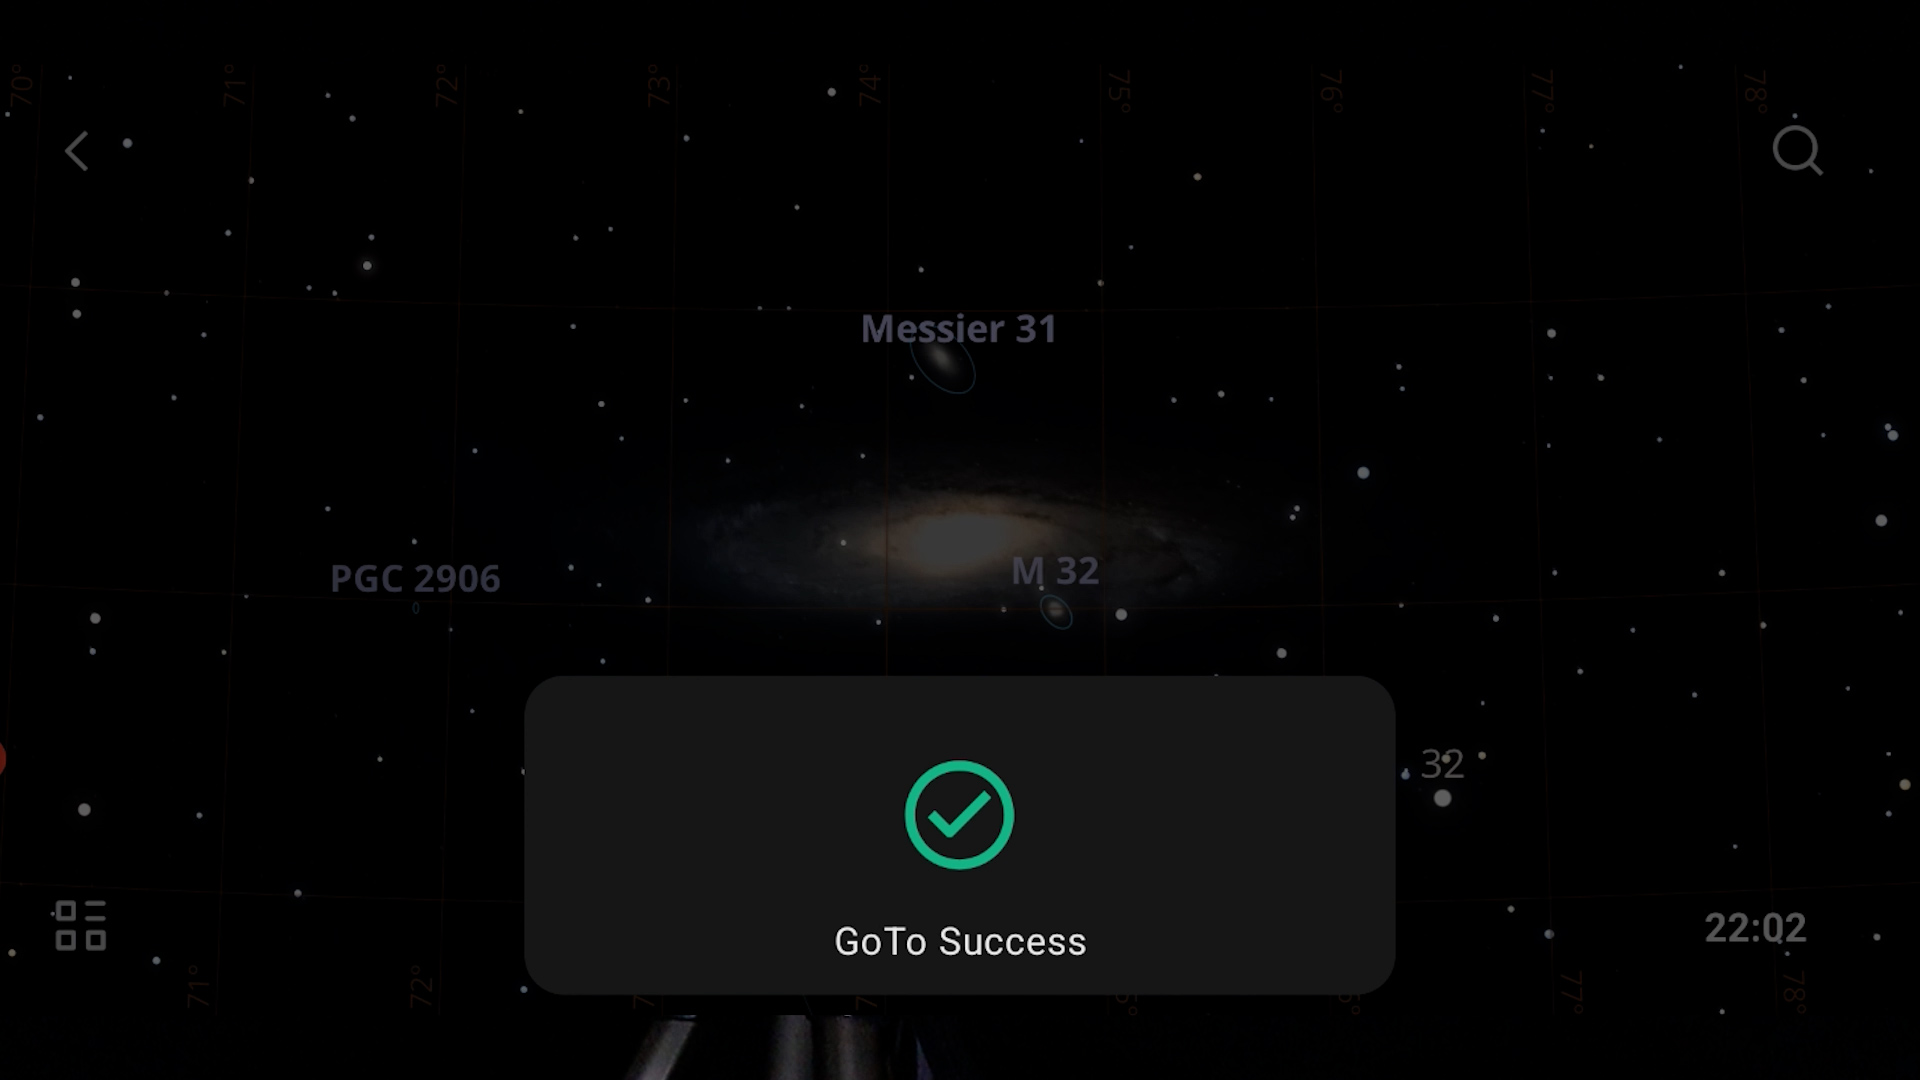
After the automatic calibration was complete, I returned to the virtual sky atlas in Astro mode, located under the functions menu. I selected the Andromeda Galaxy, the furthest object for this imaging session at around 2.5 million light-years away. A simple tap directed the telescope smoothly toward Andromeda, centering it perfectly in the field of view.
I set the shutter speed to 30 seconds, given my rough alignment with the North Celestial Pole. To capture the light of the galaxy, I used the internal ‘Astro’ filter, which extends into the near-infrared range. I adjusted the gain to 50 and configured the telescope to take 300 FITS images of Andromeda in the settings menu.
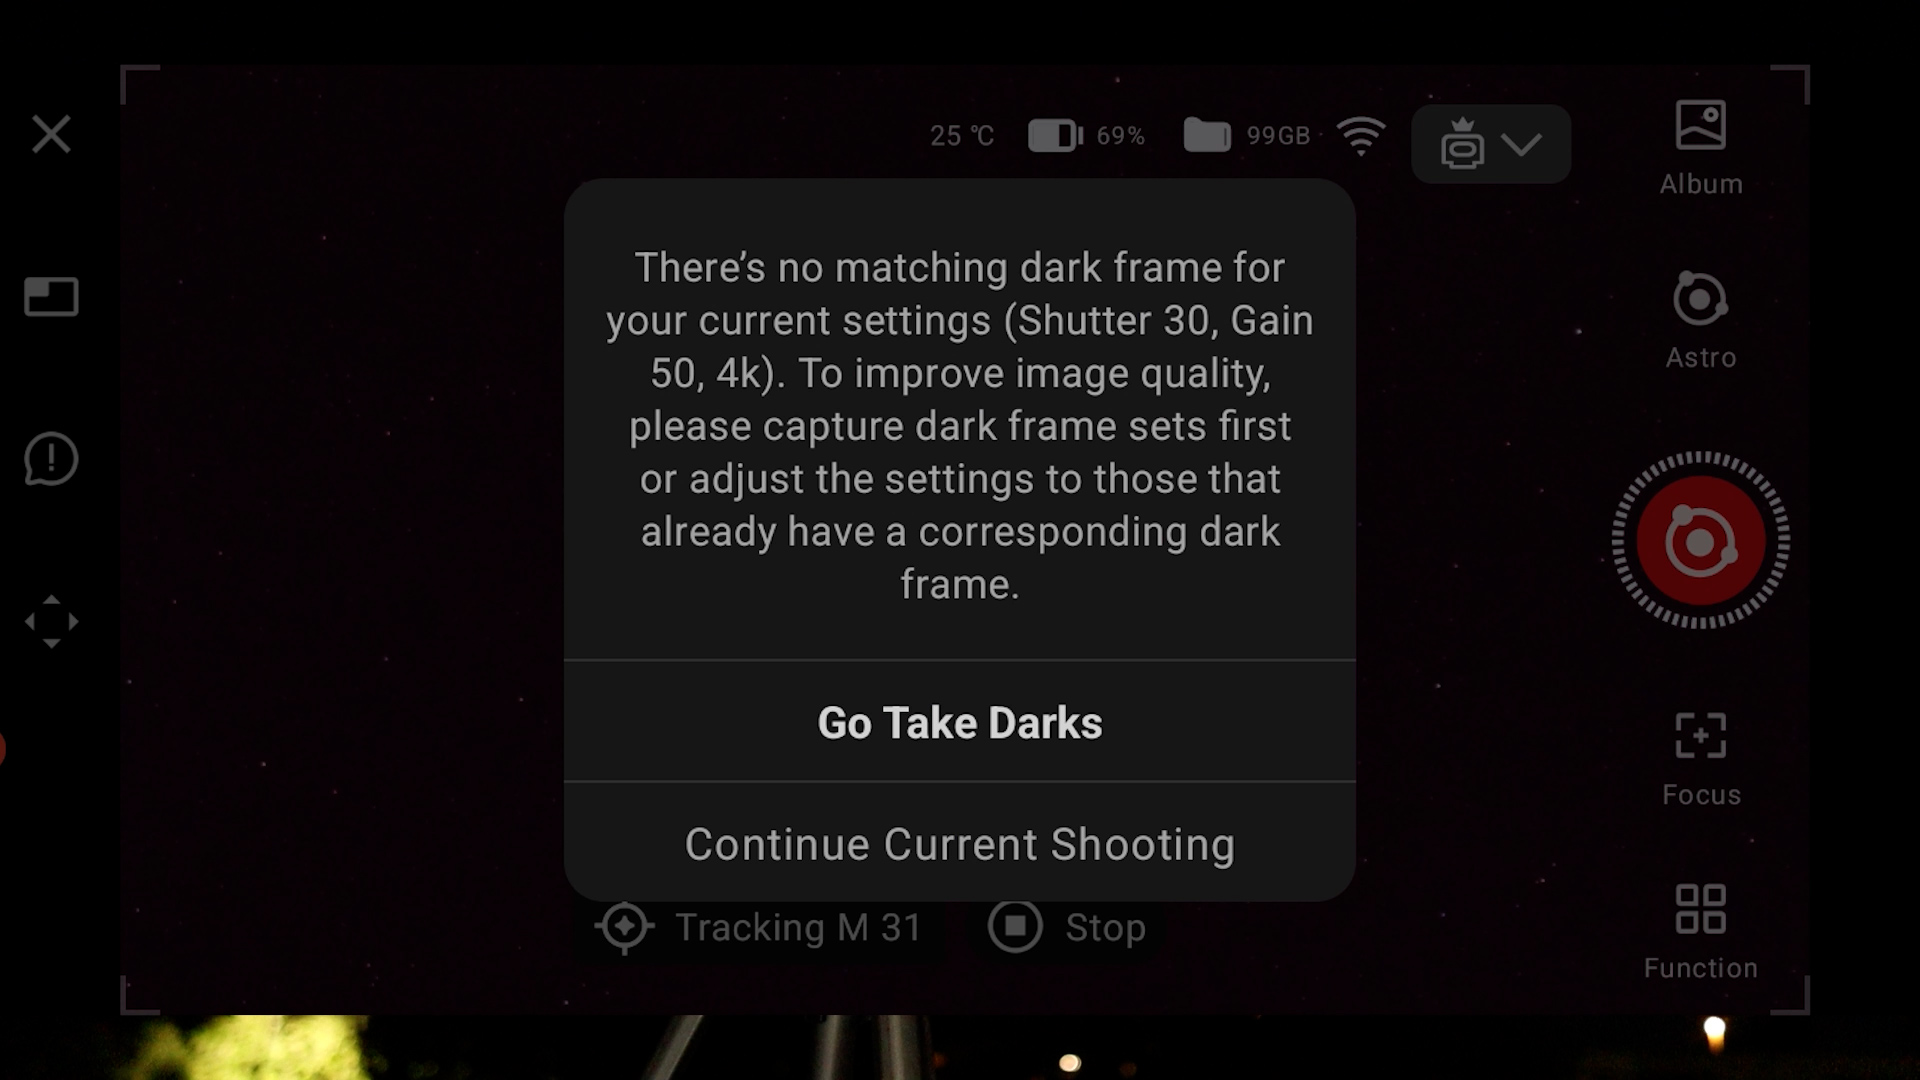
As soon as I hit record, the app reminded me that I hadn’t captured any dark frames. These frames are essential for reducing noise in your photos and should ideally be taken with the lens cap on, matching the shutter speed and temperature of your exposures. In hindsight, I should have used the magnetic solar glasses to capture about 20 dark frames with a 30-second shutter speed, but in my eagerness to photograph the galaxy, I skipped that step. Luckily, the Dwarf 3’s new Sony IMX678 sensor with Starvis 2 technology generates significantly less noise than older CMOS sensors, so I decided to take my chances.
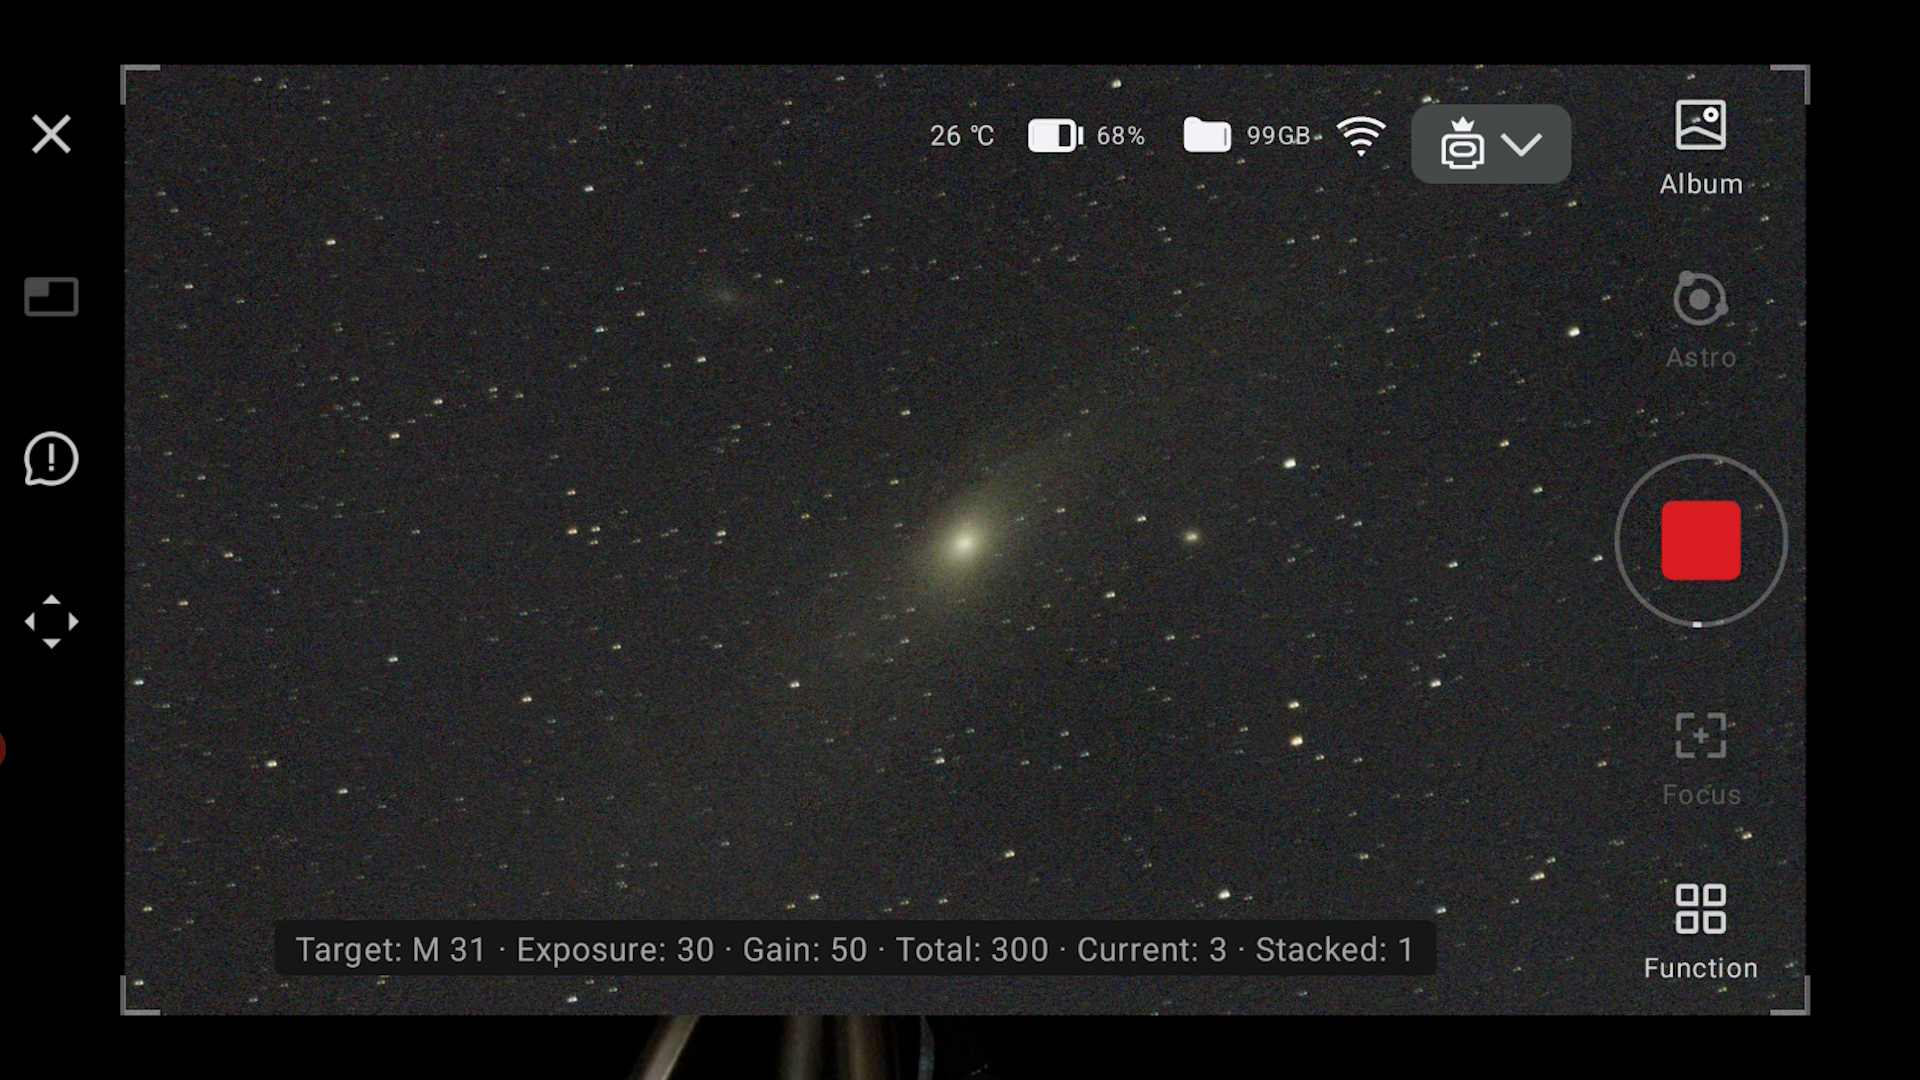
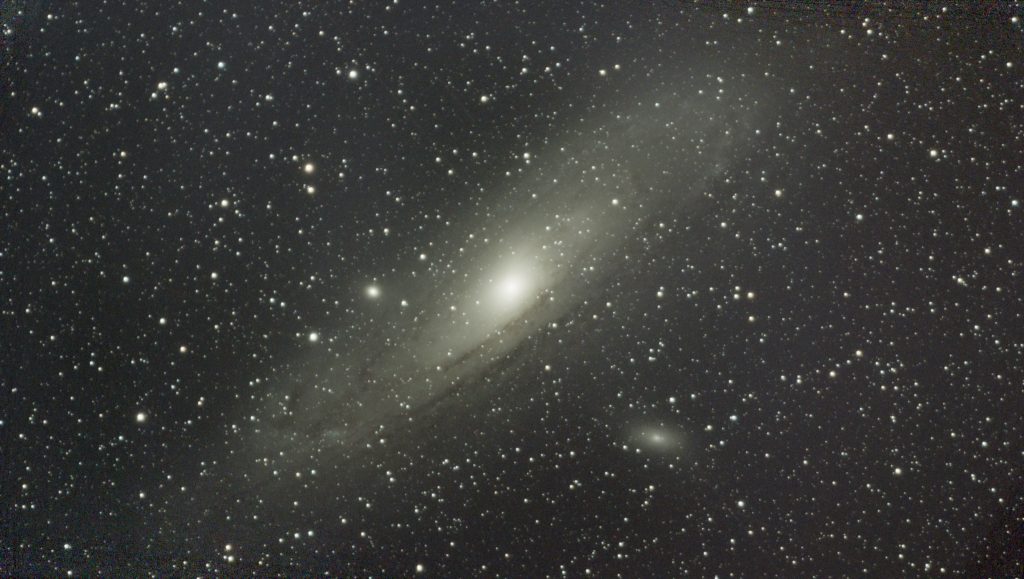
The Dwarf 3 began capturing 30-second images and live stacking them in real-time. While some stars appeared slightly elongated in the initial frames, I continued with the 30-second exposures. Longer exposures are crucial for revealing the faint details of the galaxy. I want to highlight that I used my Dwarf 3 in an urban area with light pollution and a half moon in the sky—definitely not ideal conditions for capturing a broadband object like the Andromeda Galaxy. After approximately 2.5 hours, I managed to capture 300 frames.
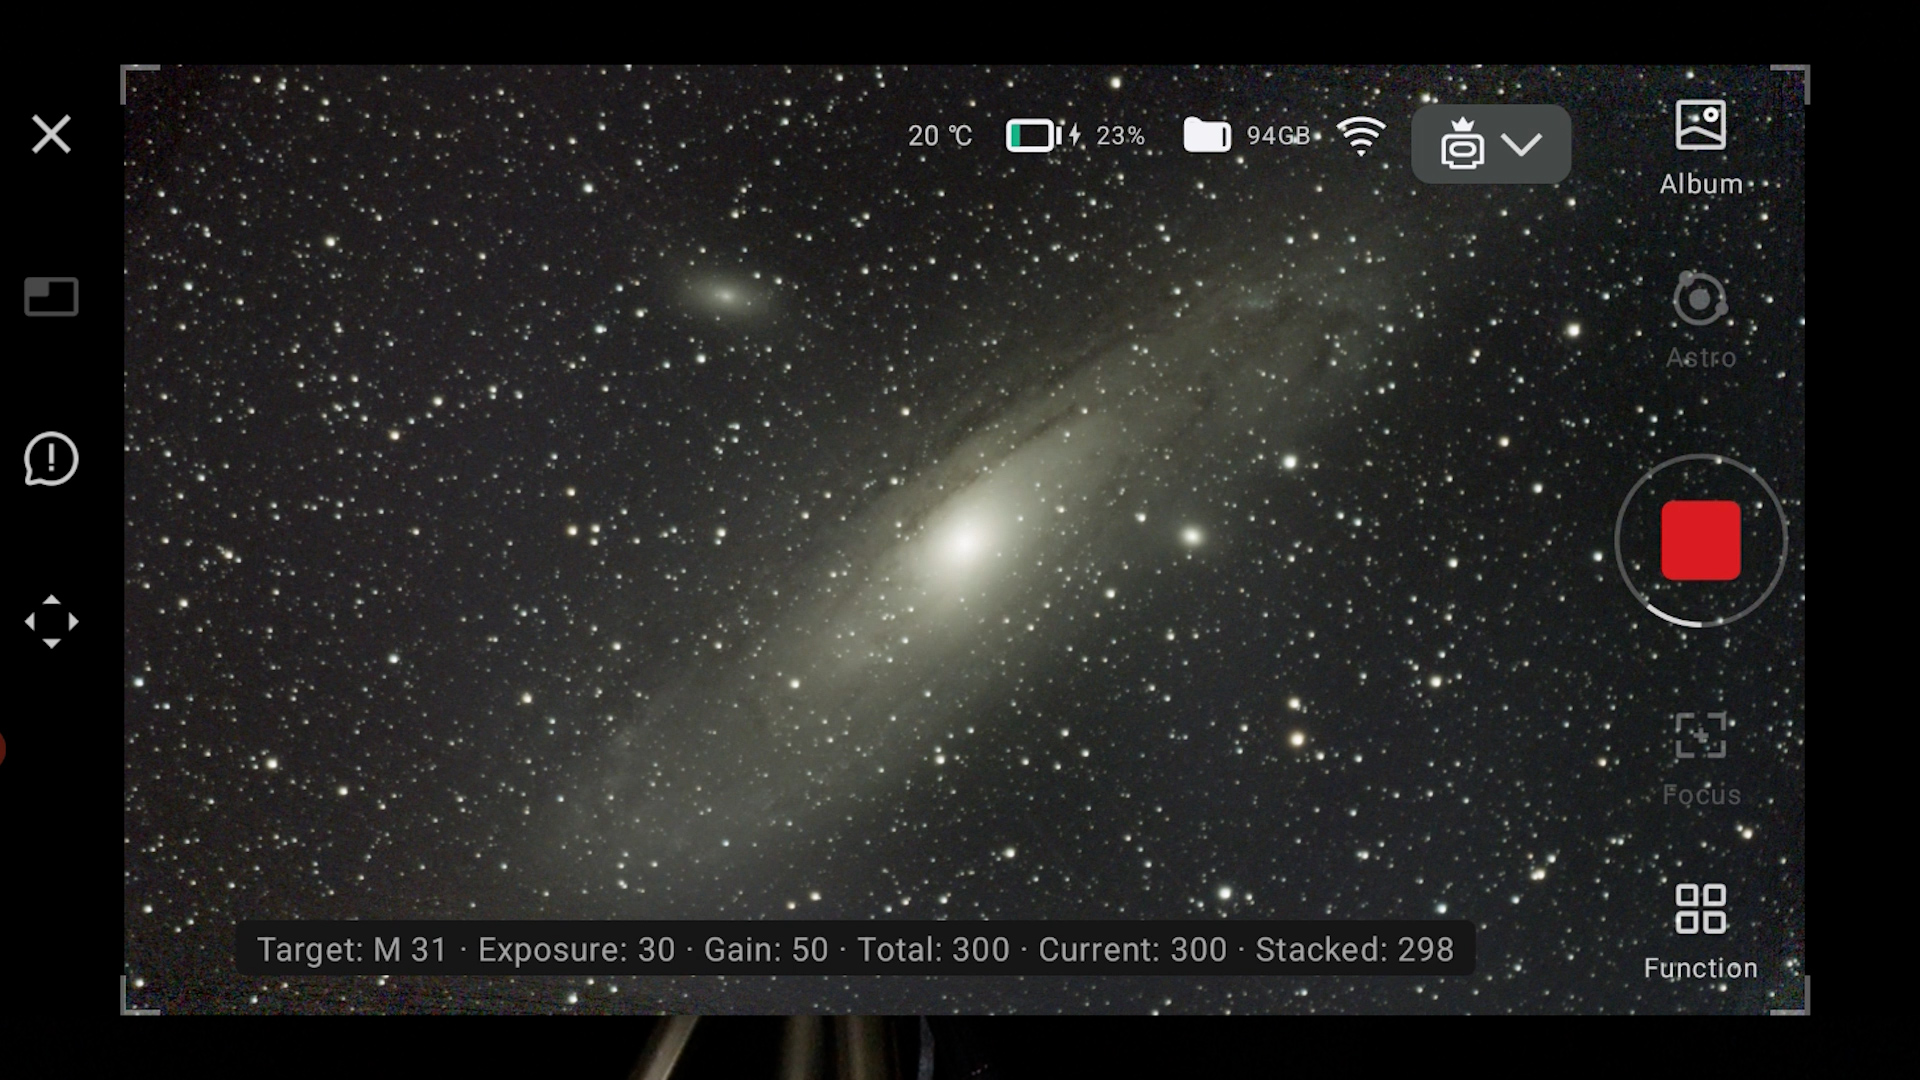
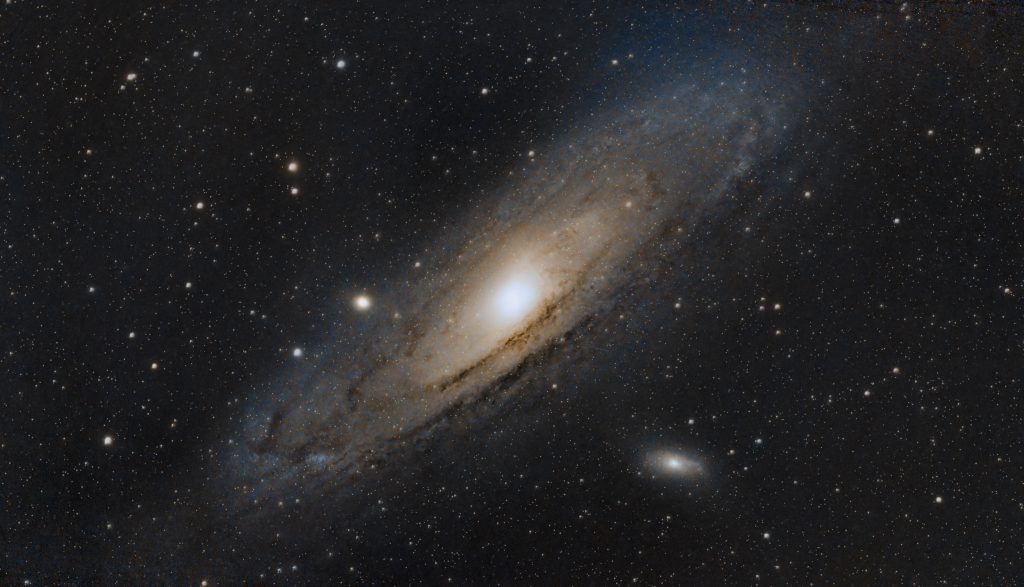
Below you’ll find the live stacked image generated by the Dwarf 3 which was automatically saved in the app’s photo album—it looked quite impressive! I also took the time to stack and edit the FITS files myself, using PixInsight, resulting in the final image shown below. While I have taken better pictures of the Andromeda Galaxy over my eight years of astrophotography using much more expensive setups, these images are quite satisfactory given the price range. They’re quite impressive for a smart telescope priced at around $500!
North America Nebula and Pleiades with the Dwarf 3
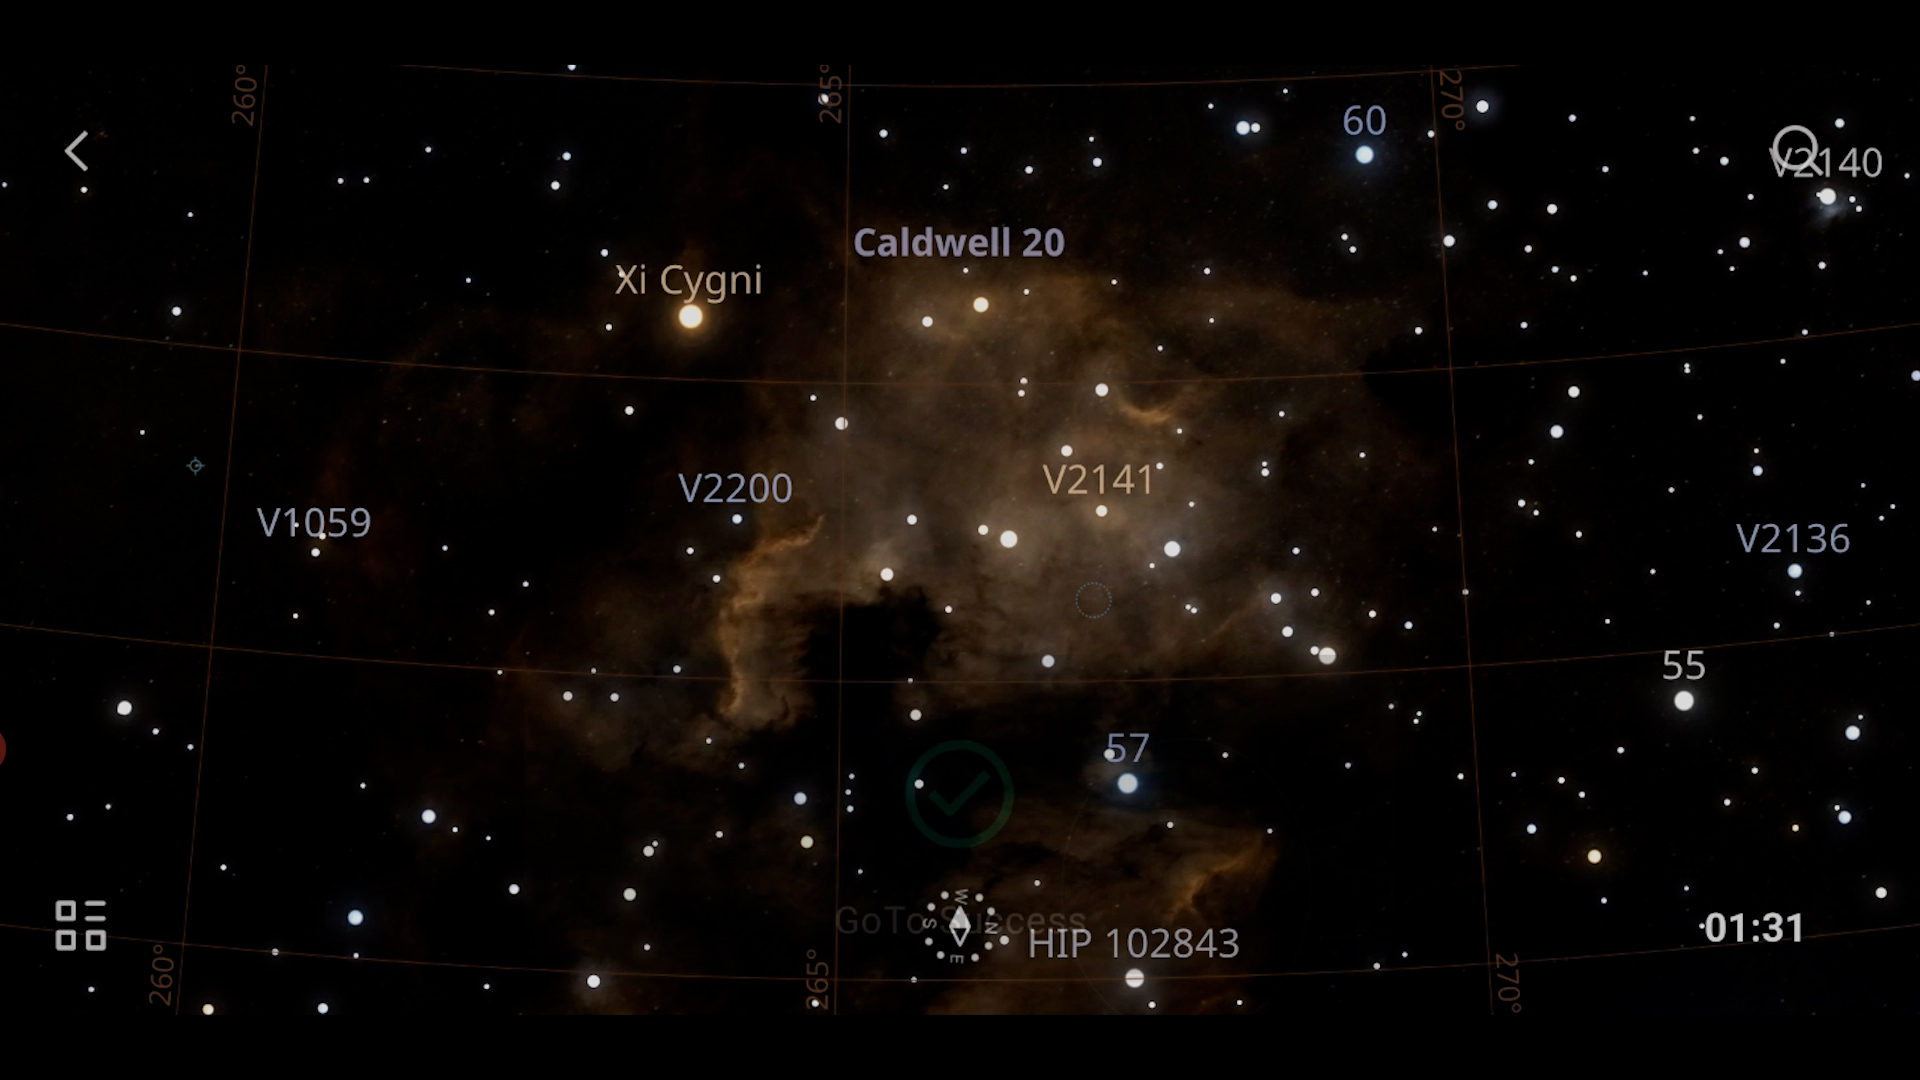
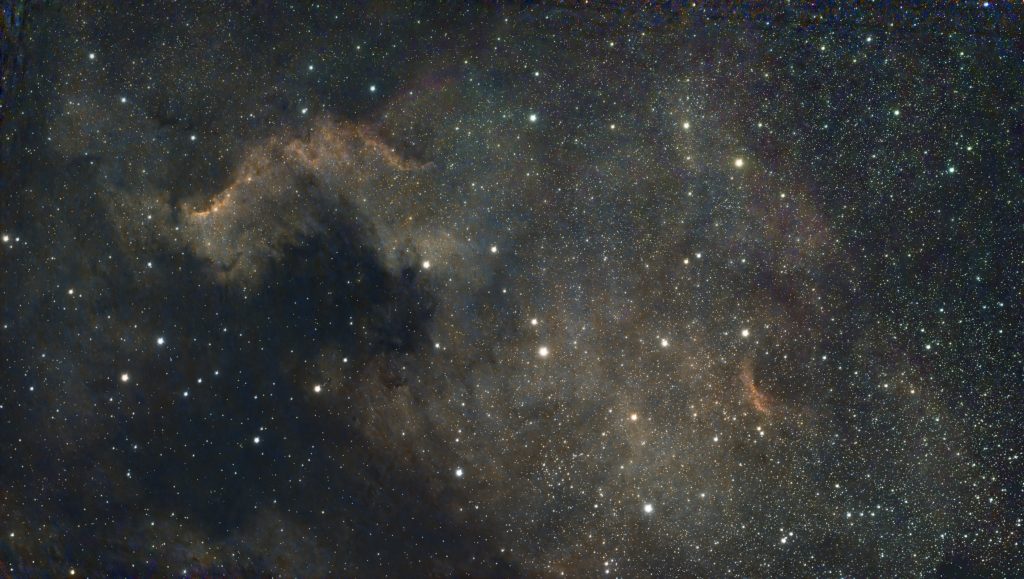
I shifted my focus to photographing the North America Nebula, a breathtaking emission nebula located in the constellation Cygnus. Once again, the virtual sky atlas worked flawlessly—just a quick selection of the nebula, a tap on the photo icon, and the Dwarf 3 smoothly slewed to the target, centering it perfectly in the telephoto lens.
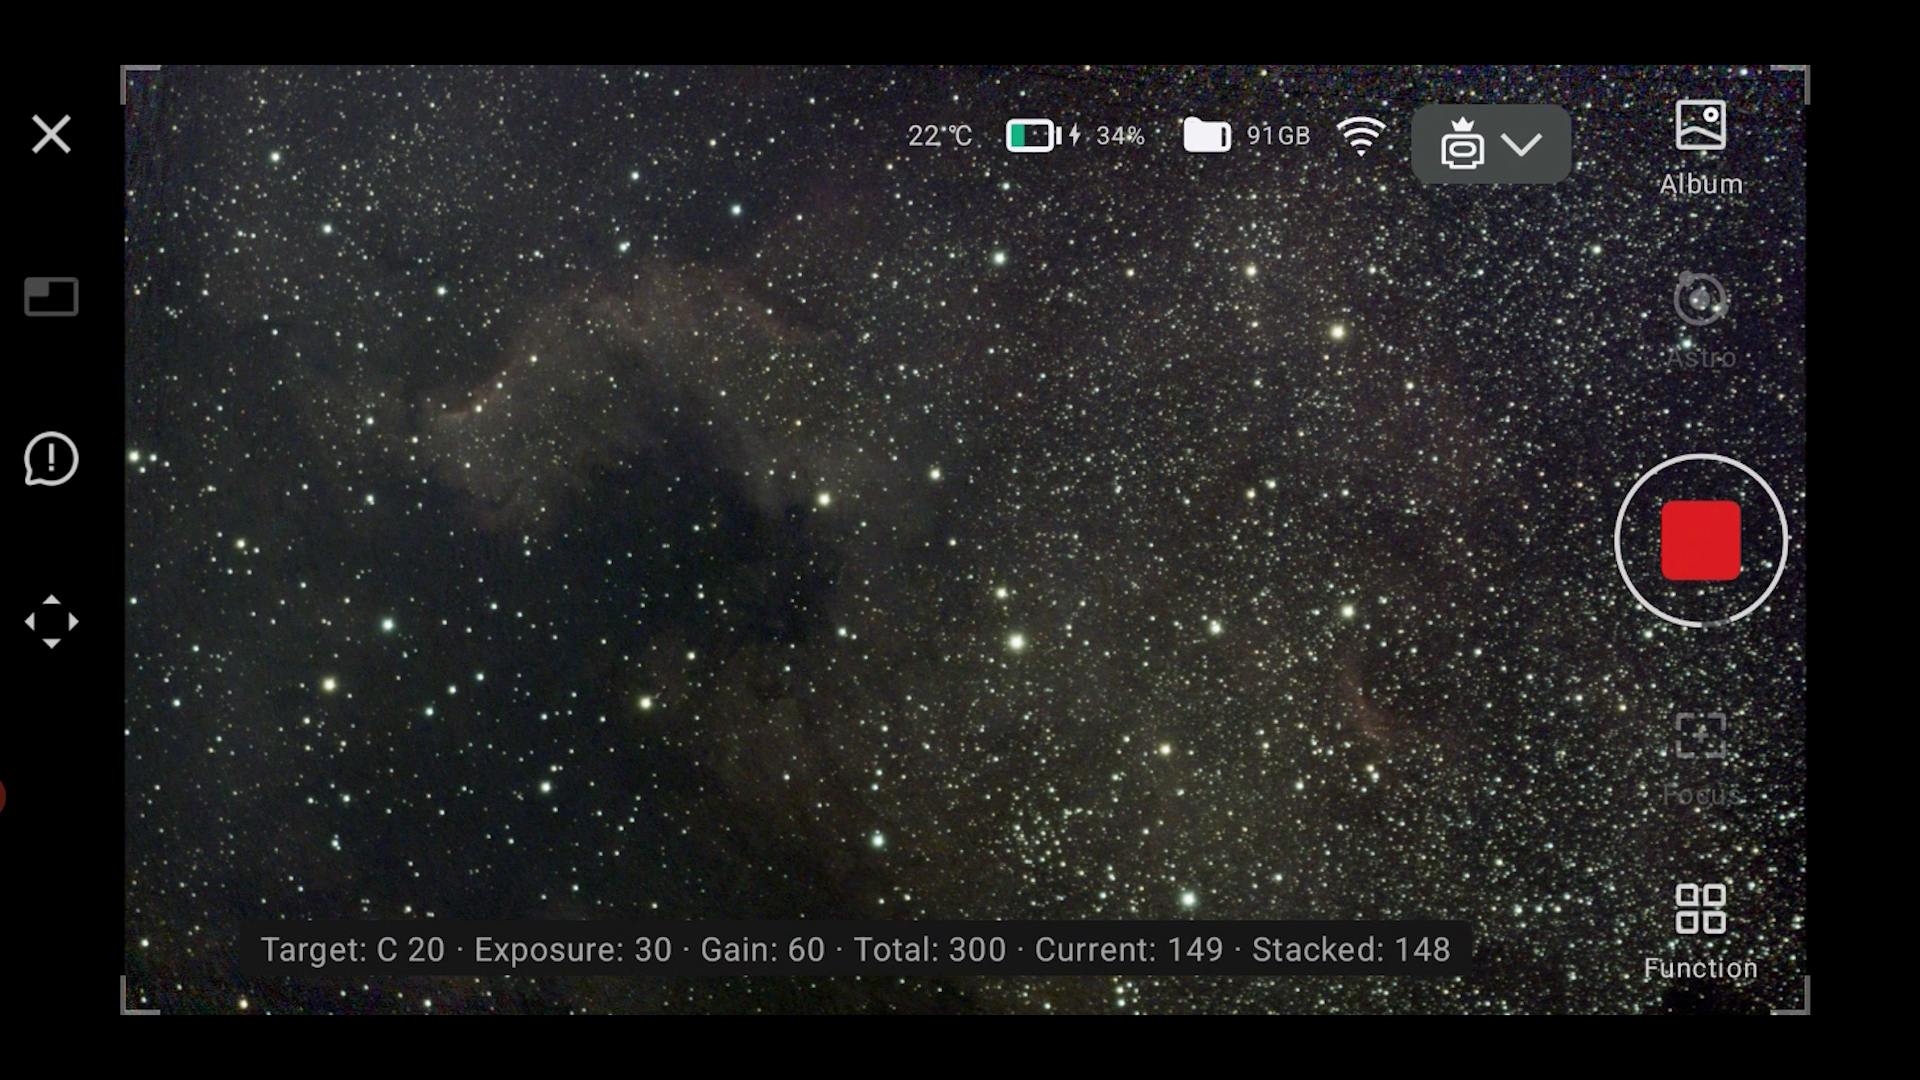
I kept the shutter speed at 30 seconds and began capturing images. After taking 160 frames over a total exposure time of 1 hour and 20 minutes, I wrapped up the session. Here’s the automatically generated stacked image from the Dwarf 3, along with my processed version using PixInsight. I was genuinely impressed with how well the North America Nebula and the Cygnus Wall came through after just an hour and a half of exposure.

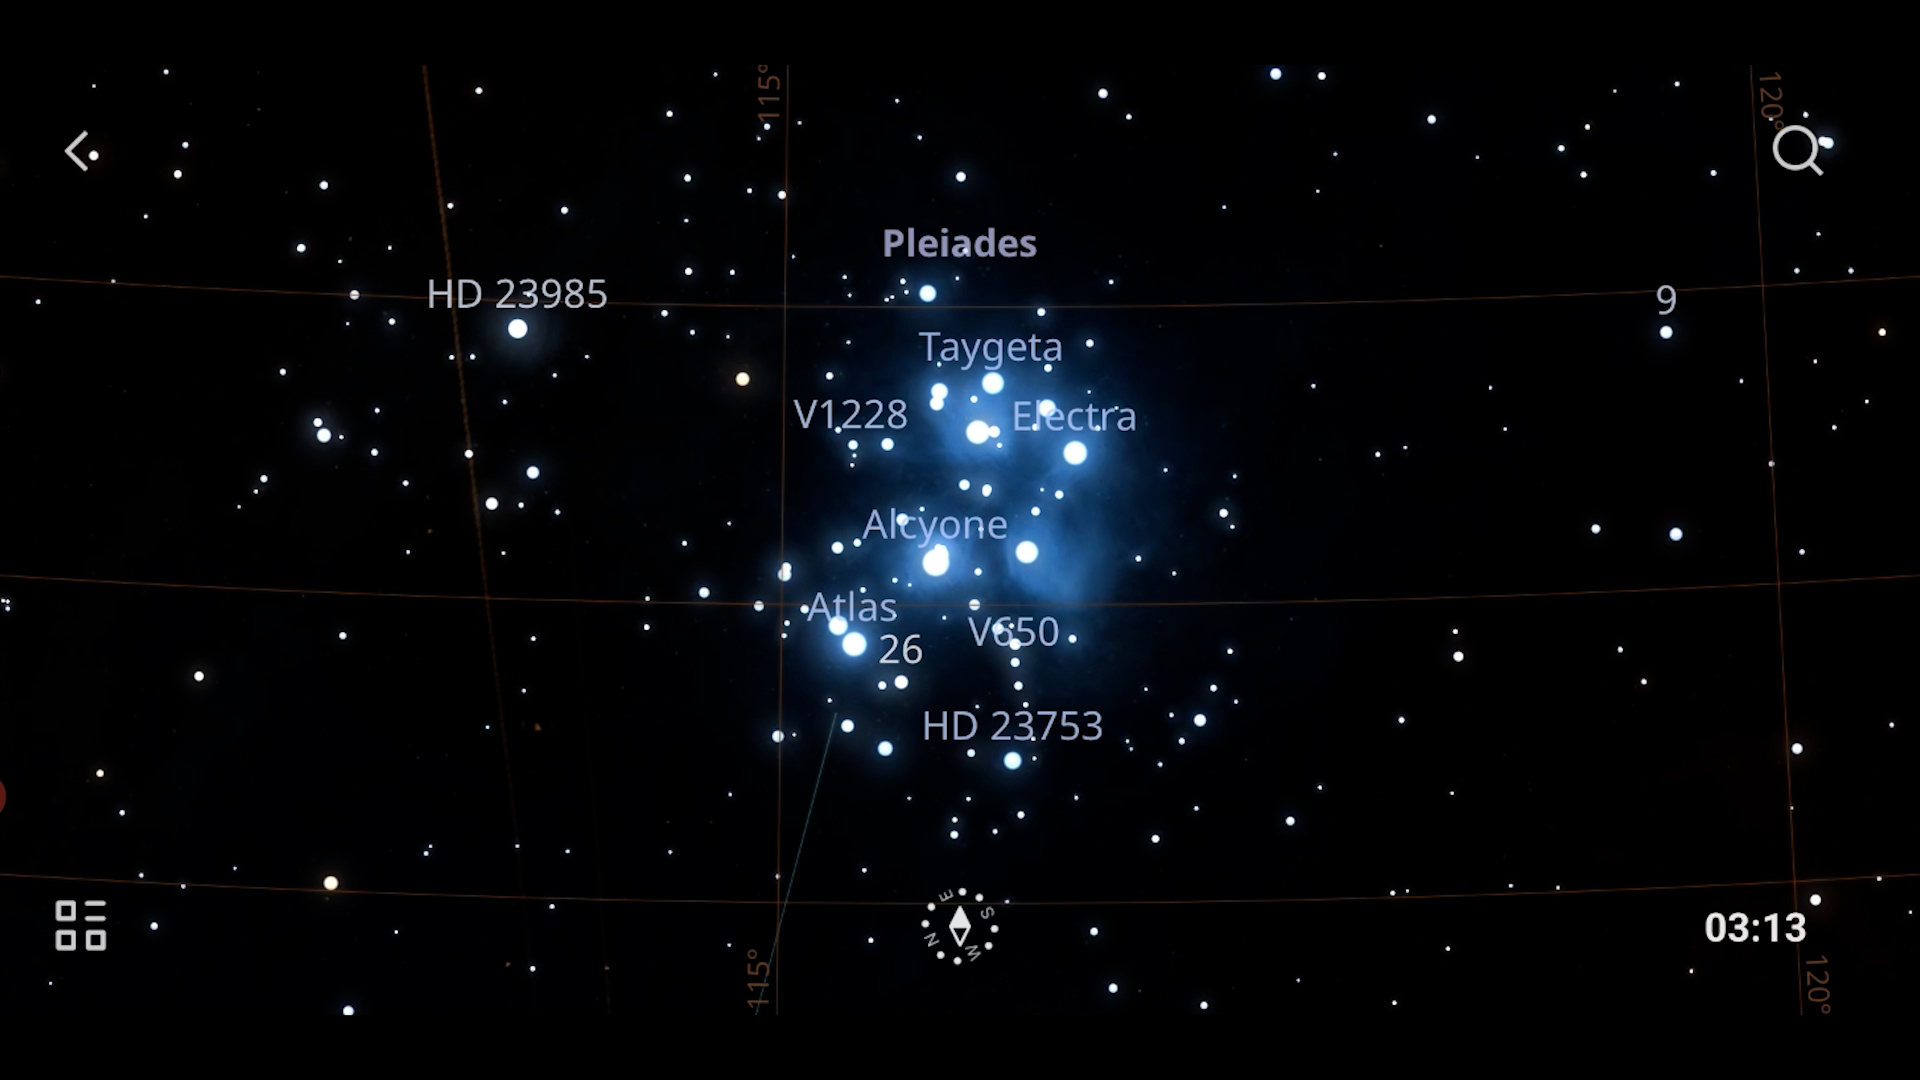
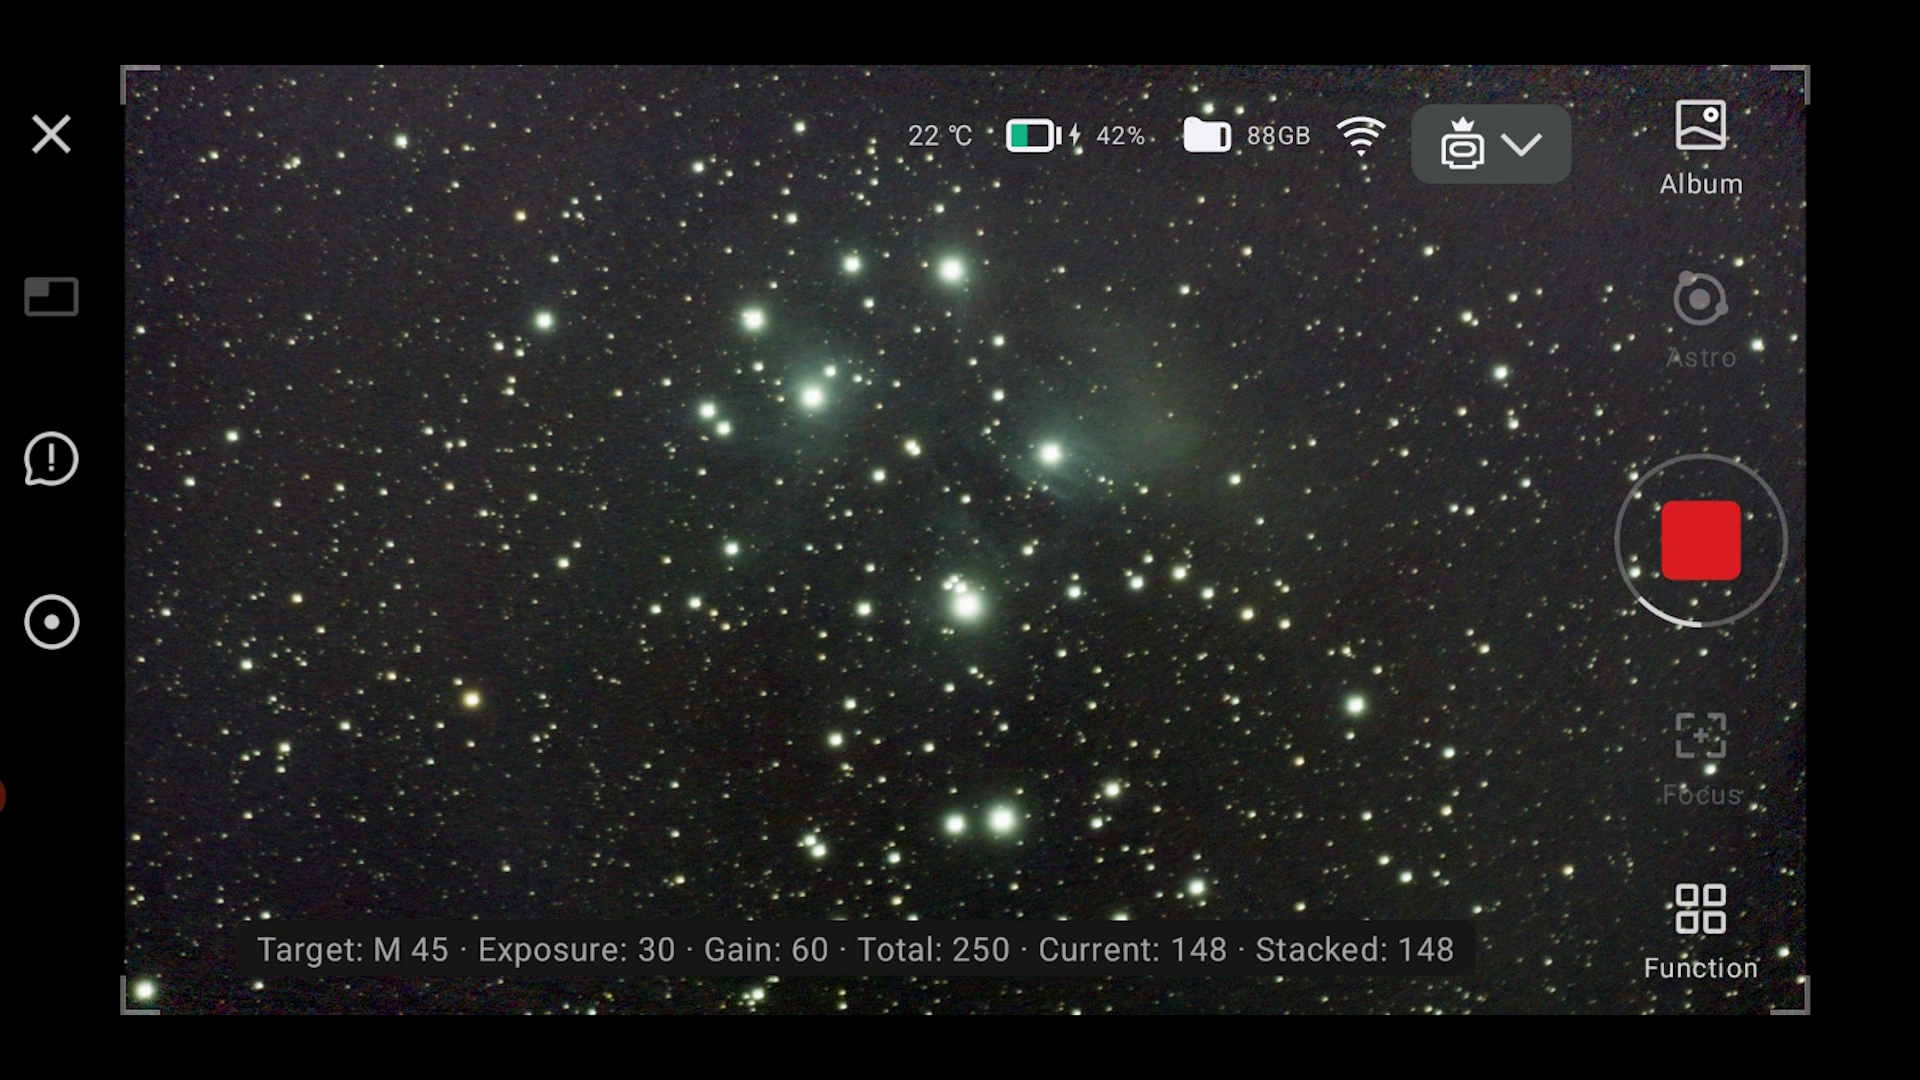
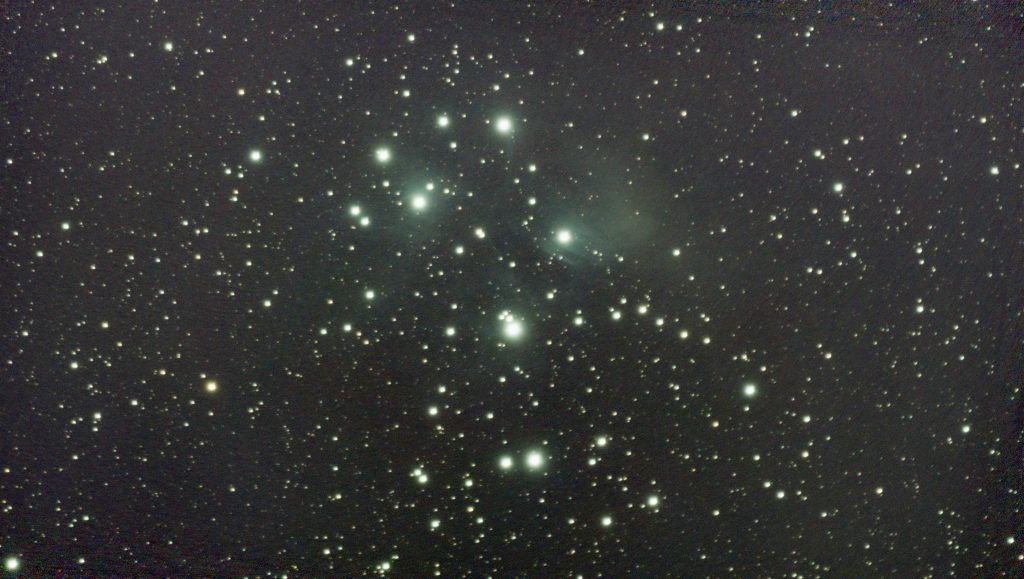
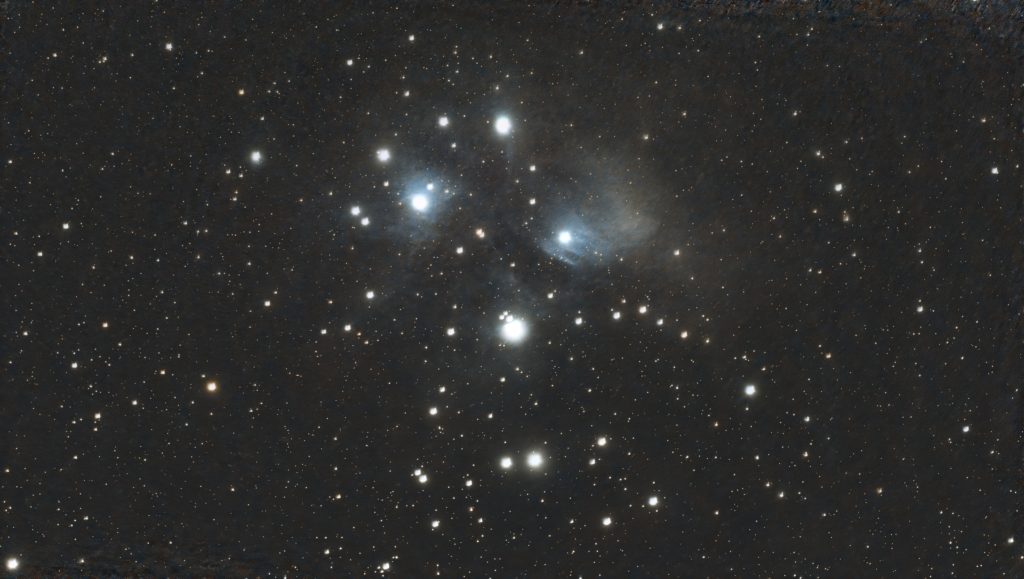
Next, I focused on M45—the Pleiades, a bright cluster of blue gas giant stars visible to the naked eye. I captured 150 frames, each lasting 30 seconds, using the Astro filter. Here’s the stacked version produced by the Dwarf 3, along with my processed image, which highlights the dusty nebulae surrounding the stars. While I might have been a bit enthusiastic in my editing, it was impressive to uncover such detail with only 1 hour and 20 minutes of data.
Jupiter and Orion Nebula with the Dwarf 3
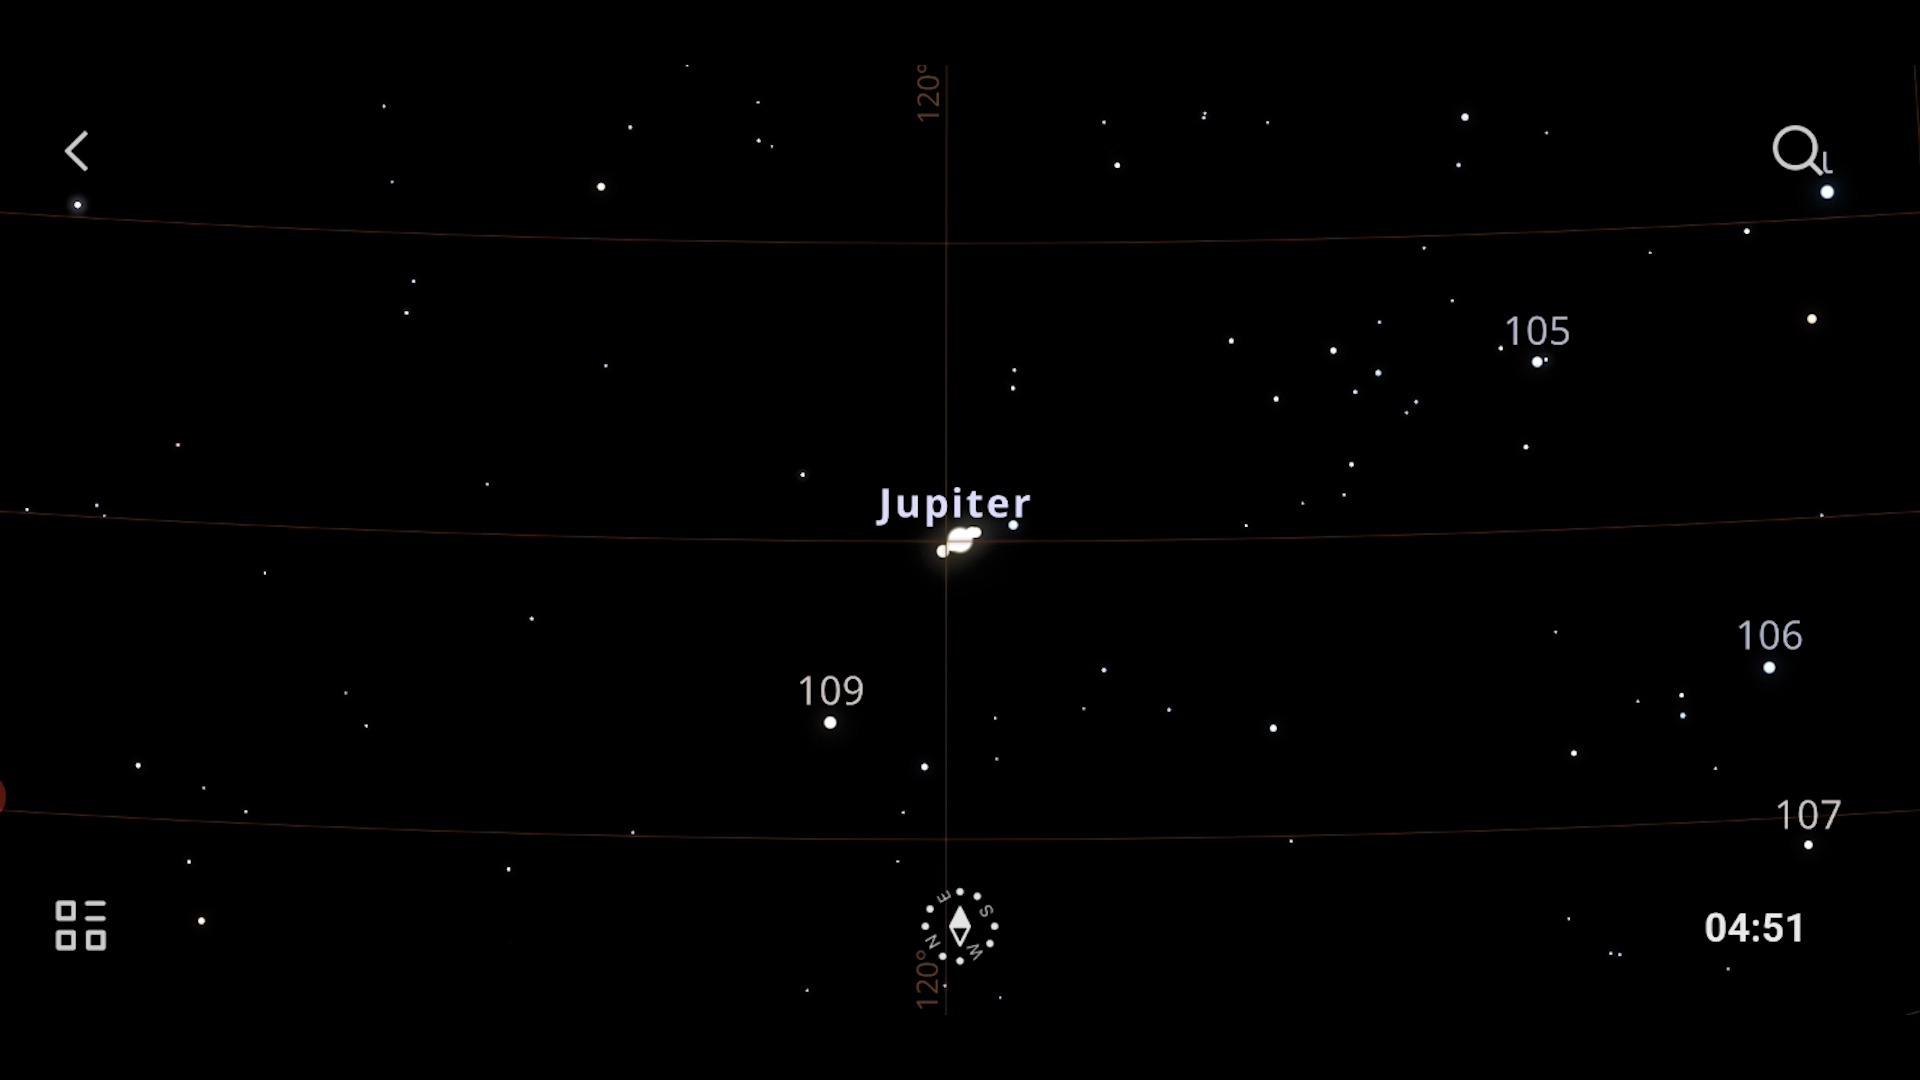
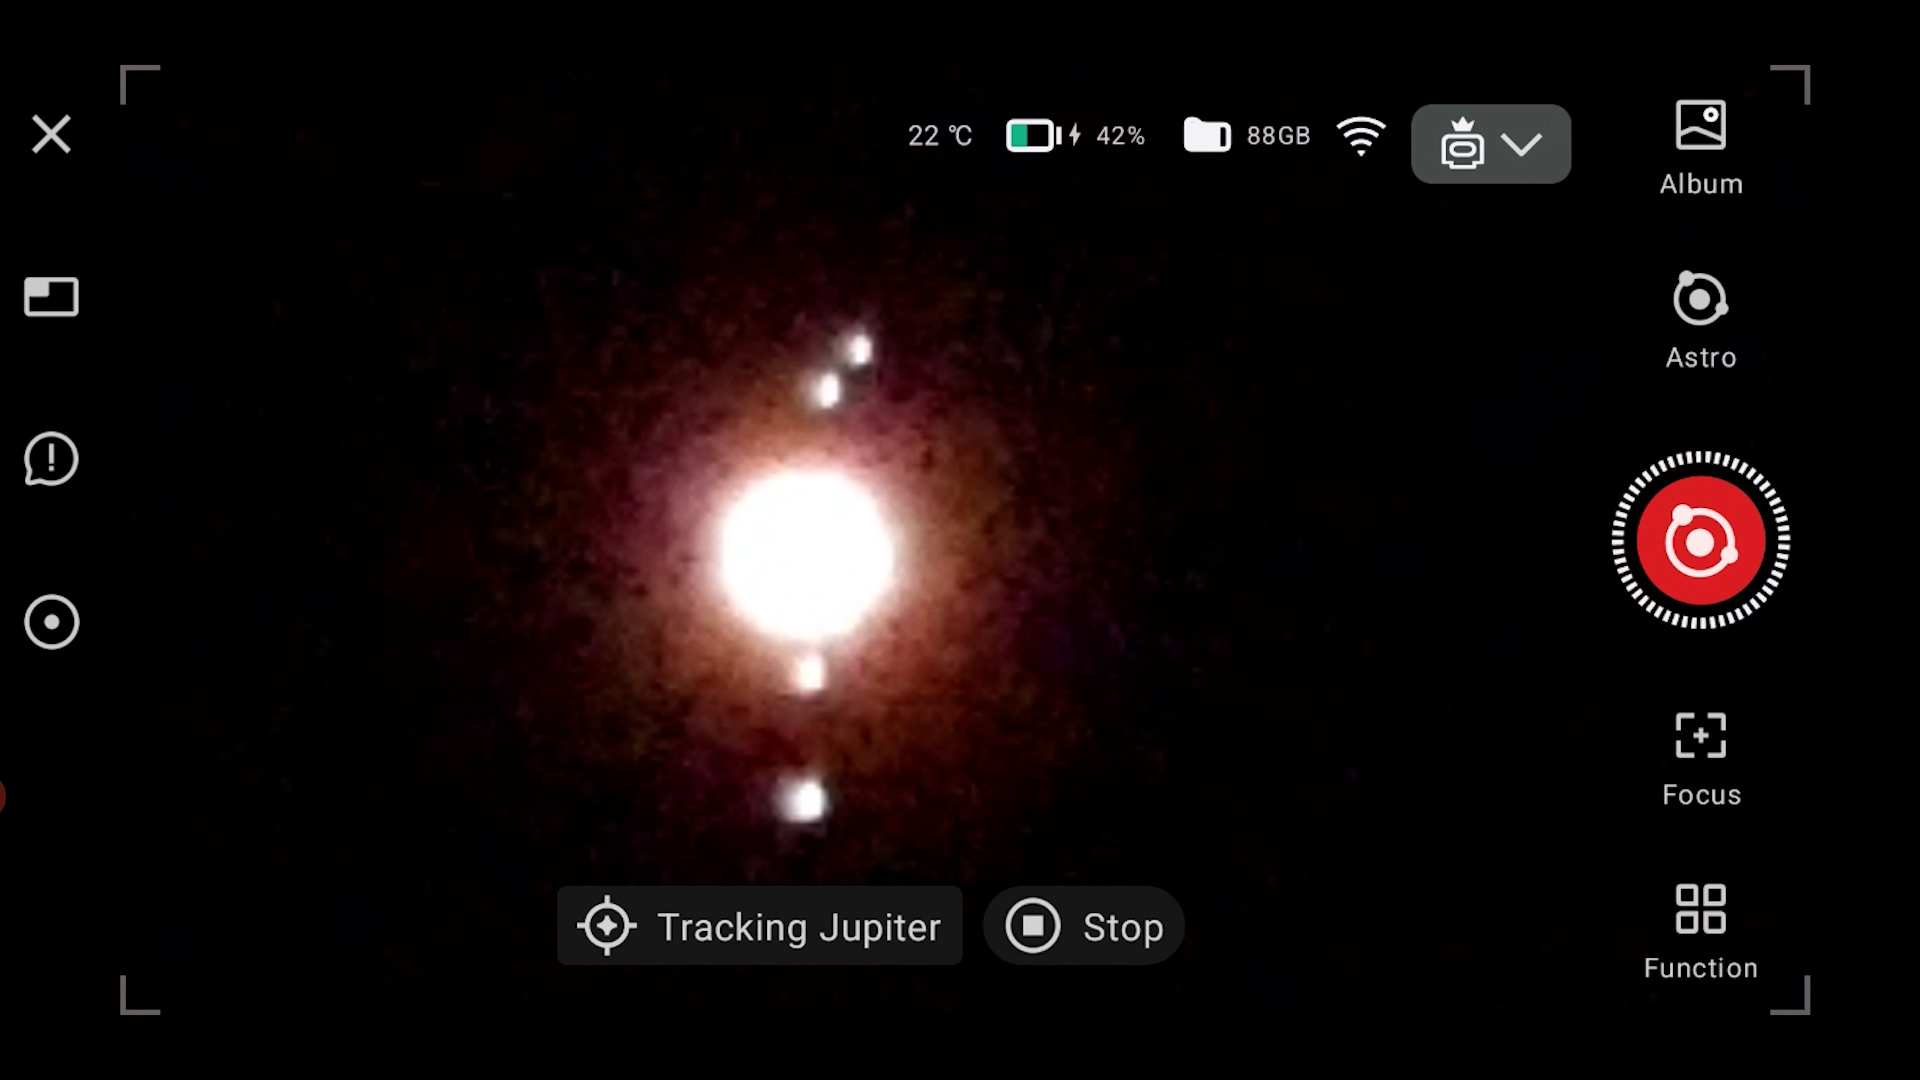
As the night progressed, I noticed the humidity increasing. Interestingly, the Dwarf 3’s lenses remained fog-free, which was a pleasant surprise. While scanning the sky, I spotted Jupiter rising. When I aimed the telescope at the planet, it appeared as a bright dot, accompanied by four smaller points—Jupiter’s Galilean moons. Observing these moons shift positions over consecutive nights could create an intriguing time-lapse. However, capturing details of Jupiter’s surface, such as the Great Red Spot and its cloud bands, would require a telescope with a much larger aperture and longer focal length. For recommendations on good telescopes for planetary imaging, check my blog here.

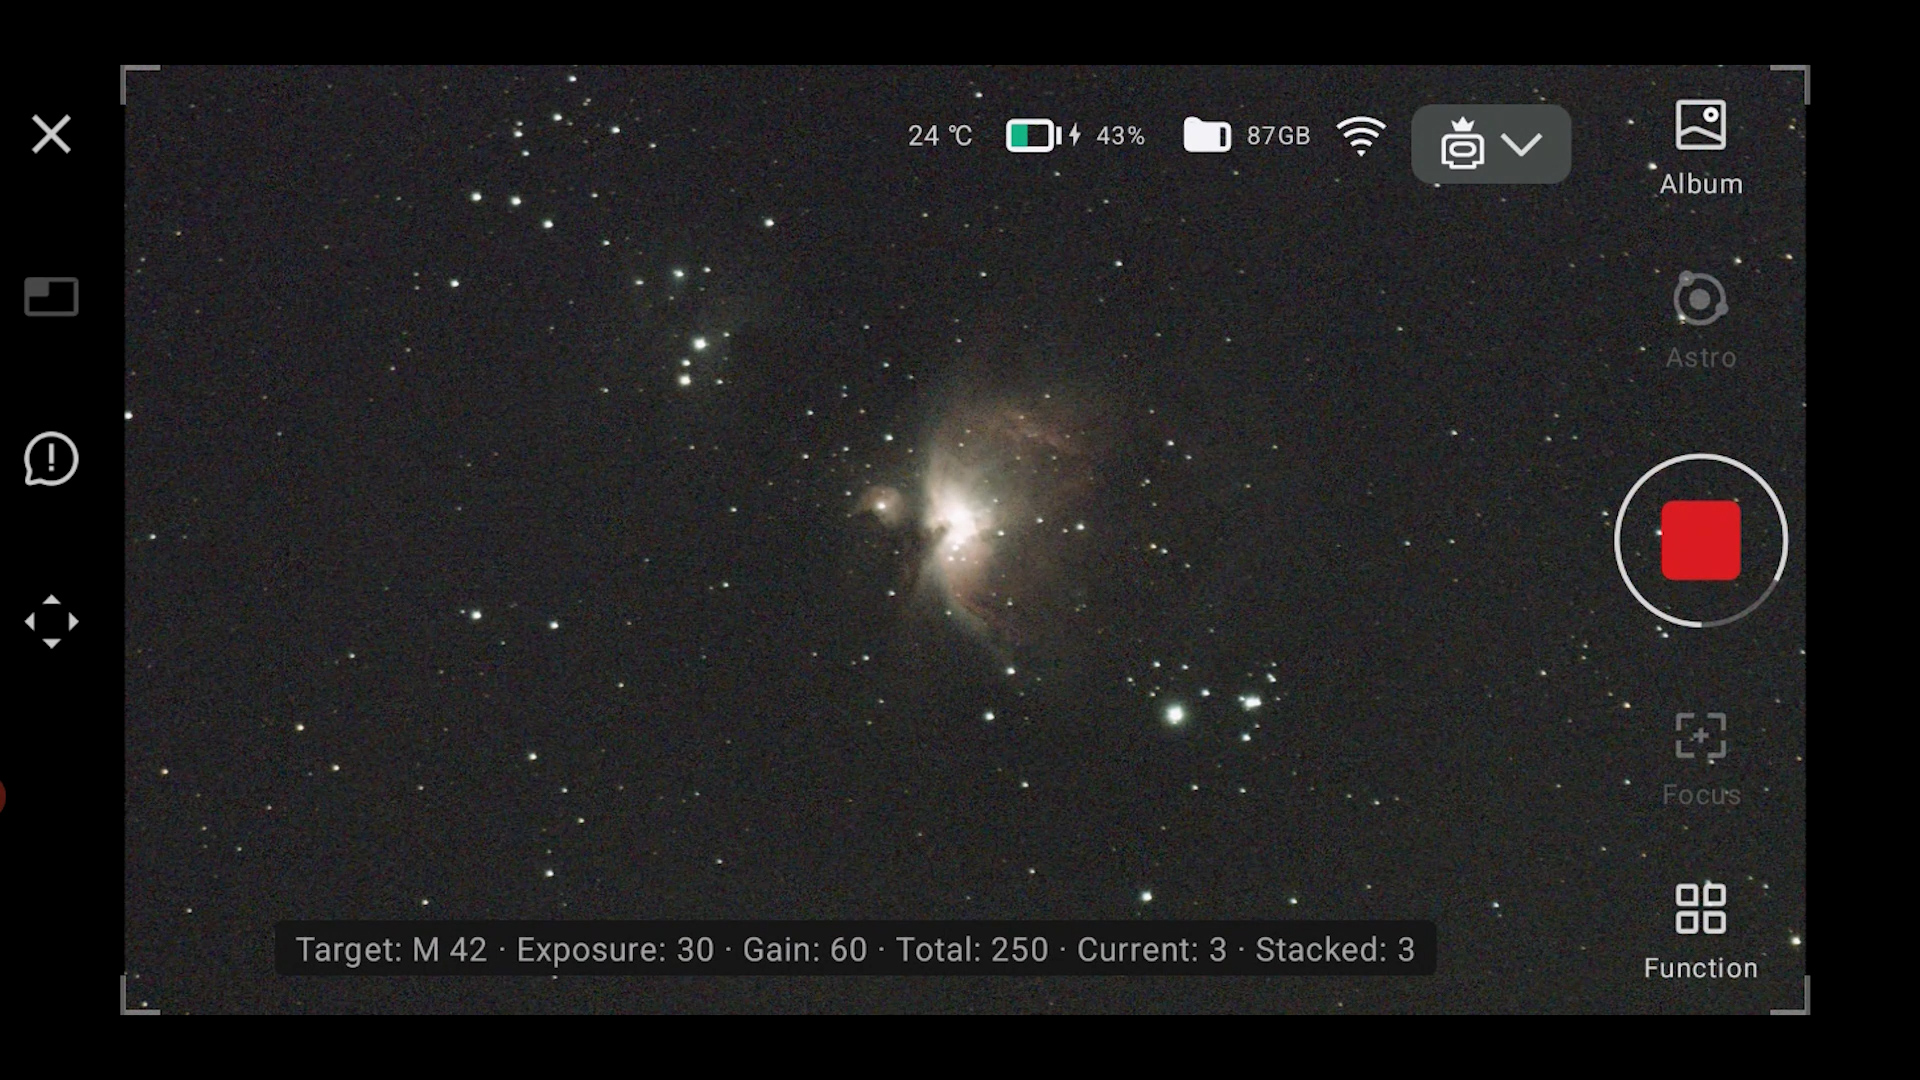
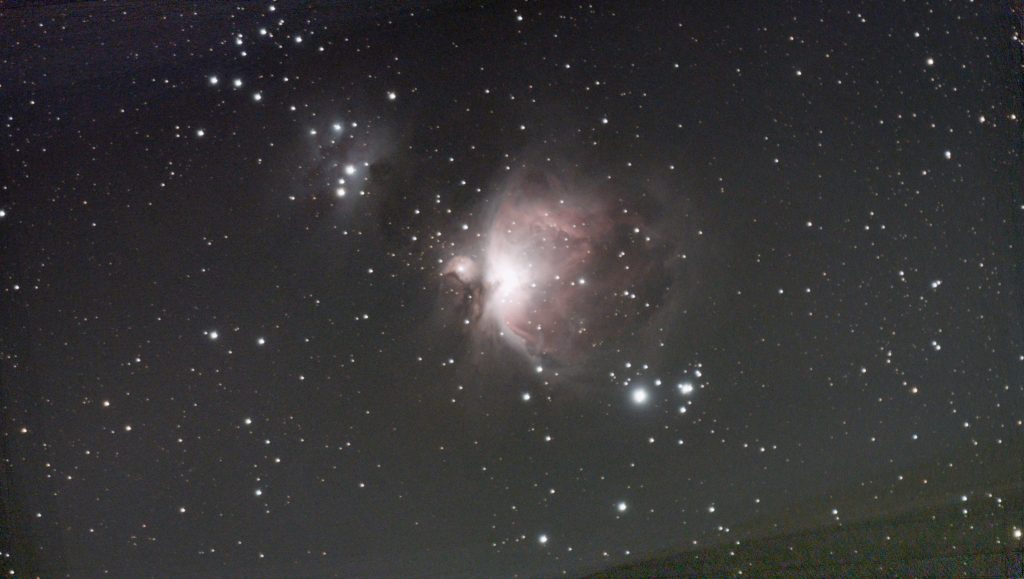
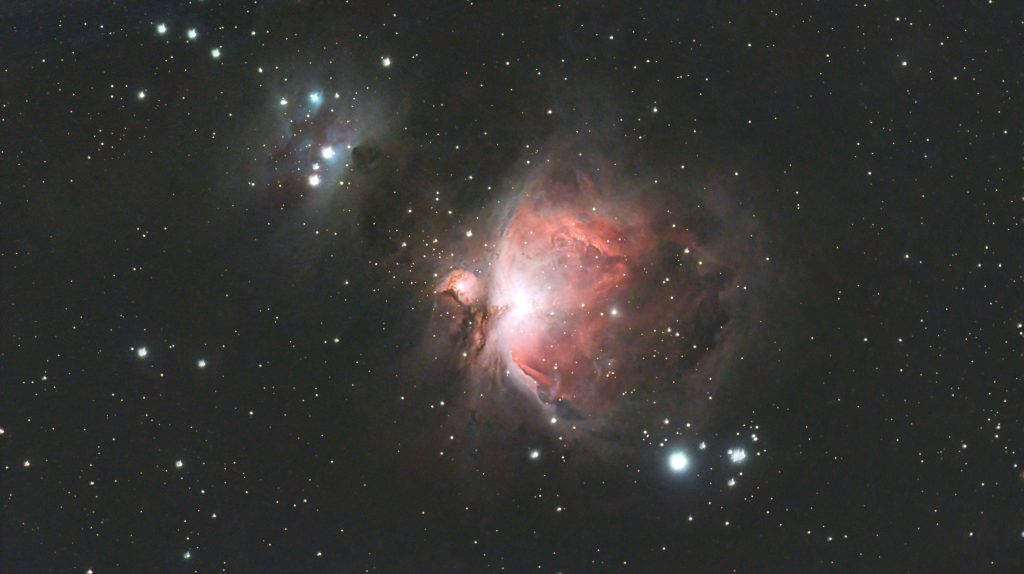
Just as I was about to call it a night, Orion began to rise in the early morning sky, and I couldn’t resist. Using the same settings and the Astro filter, I captured 120 frames before dawn forced me to stop. This gave me only one hour of exposure time. Below you can see the unedited stack from the Dwarf 3, along with my version after manually stacking and processing the Orion Nebula in PixInsight.

Overall, it was a fantastic night. I managed to capture images of four deep-sky objects and caught a glimpse of Jupiter. The Dwarf 3 flawlessly located and centered each target, impressively performing despite a minor hiccup with EQ mode. The 10,000 milliampere-hour battery lasted throughout the night and, if needed, can be recharged while the telescope is powered on and in use. In terms of storage, the 128GB internal memory card provided ample space for all the photos and videos I mentioned in this review.
Additional Features of the Dwarf 3
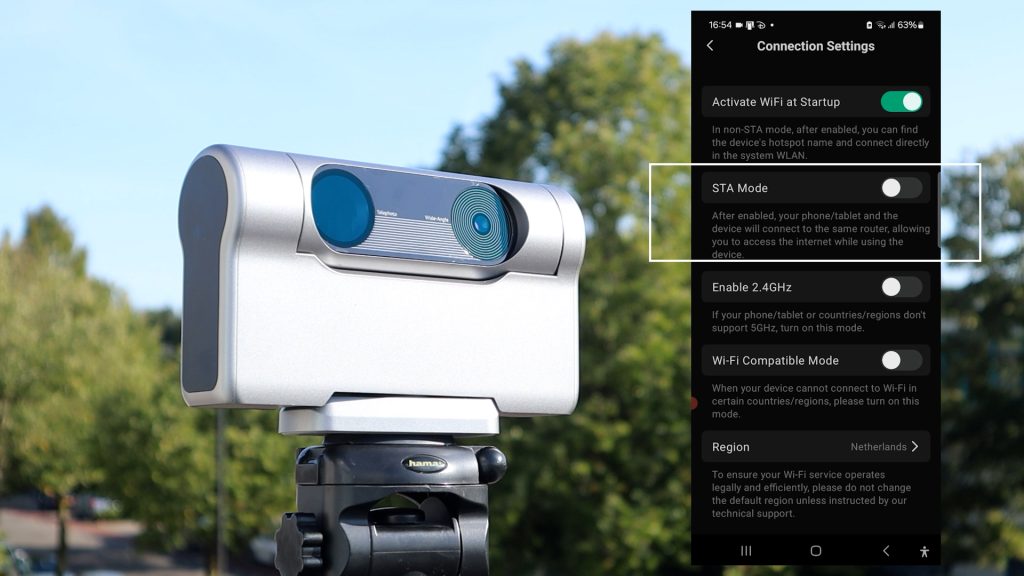
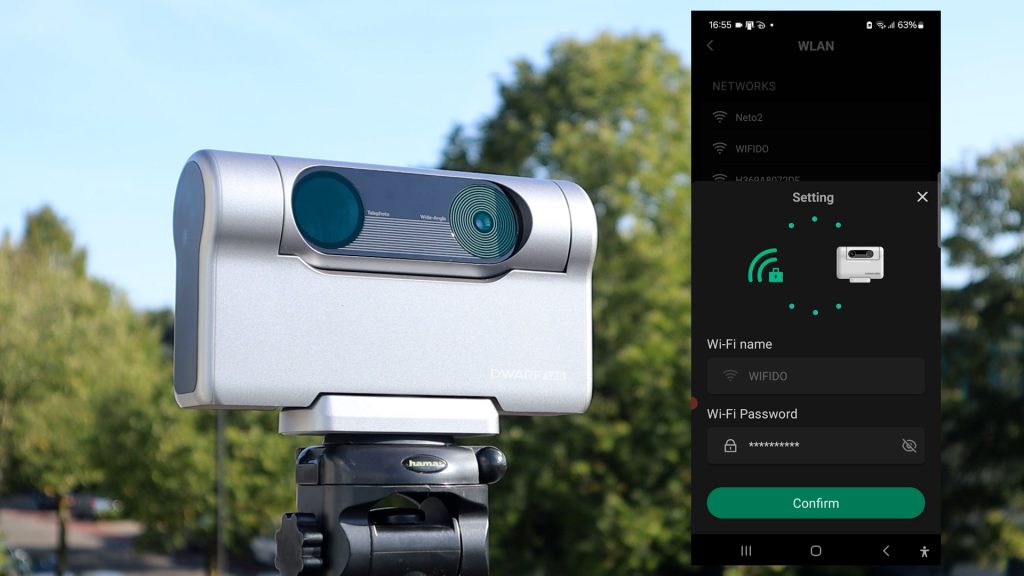
One incredibly convenient feature I didn’t mention is that you can link the Dwarf 3’s WiFi to your home network, allowing you to control the telescope from the comfort of your home. This is especially handy for monitoring your Dwarf 3 during colder nights. Setting it up is very easy—just go to the settings on the main screen, navigate to connection settings, and enable STA mode. This will initiate a WiFi search where you can select your home network and enter the password. Once connected, you can control the telescope via your home WiFi, significantly extending the range of the Dwarf 3.
Other notable features include the ability to exit the Dwarflab app once the Dwarf 3 starts capturing an object, allowing the telescope to continue photographing independently. When you reopen the app, simply tap ‘Photo’ to return to the live view. I also noticed a small TV button labeled ‘Set current device as host,’ suggesting you can connect multiple smart devices to the Dwarf 3, with one device controlling the telescope. This is a fantastic feature for outreach events, allowing others to use their devices to view live or stacked images from the Dwarf 3.
Alternatives for the Dwarf 3
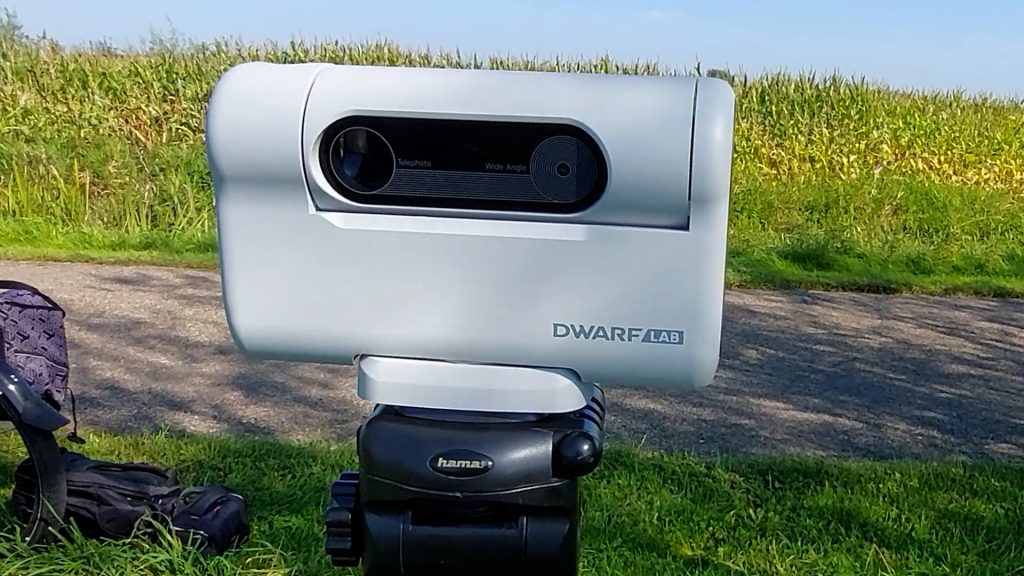
Regarding potential alternatives, the only smart telescope that matches the DWARF 3’s price range is the Seestar S50 from ZWO. I plan to hold off on detailed comparisons for a month or two, as Dwarflab is set to introduce some app updates for the full production version of the DWARF 3. So, stay tuned for more updates!
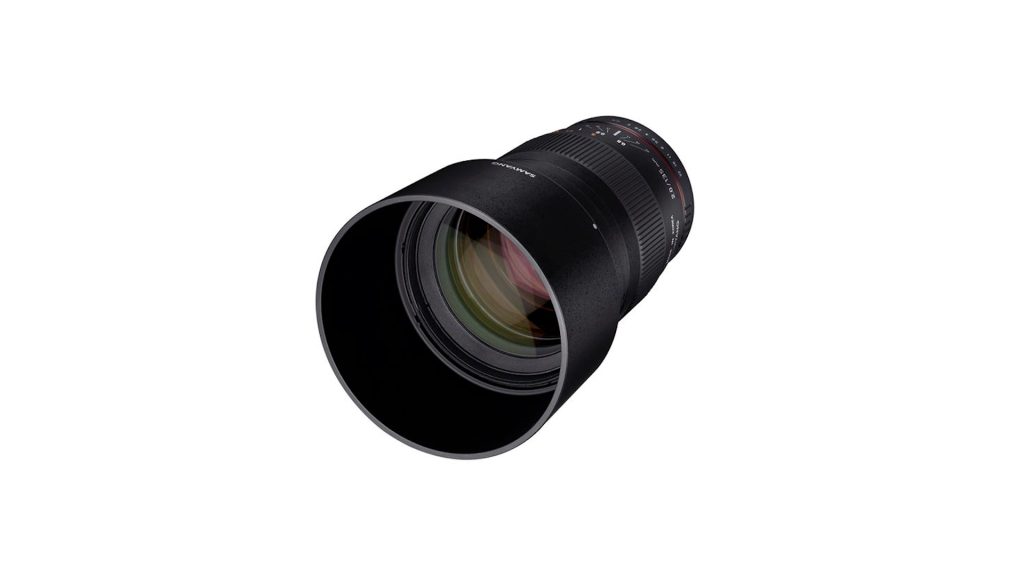
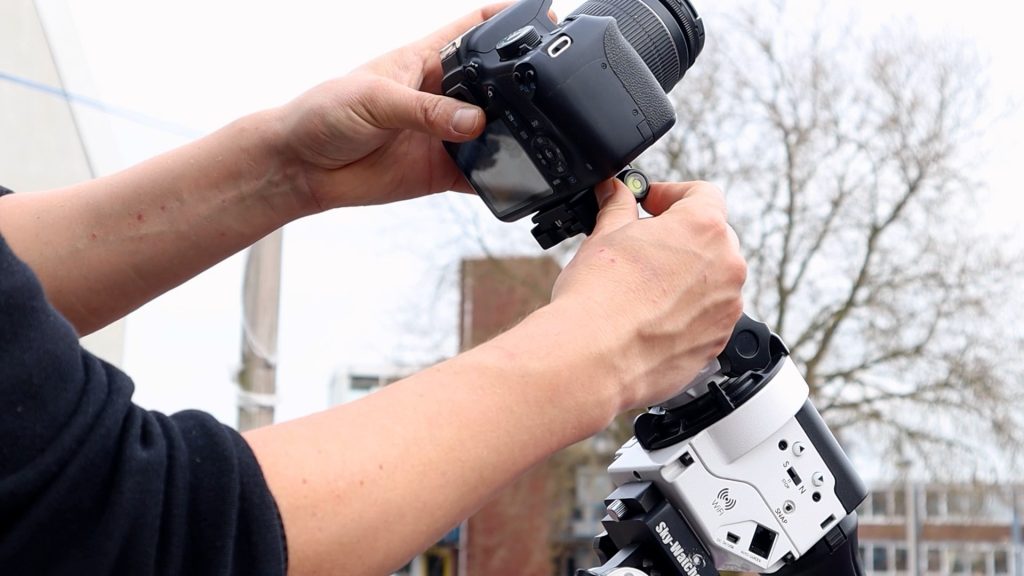
Alternatively, if you already own a digital camera, you might consider investing in a quality astrophotography lens like the Samyang 135mm F/2. However, keep in mind that you would also need a star tracker, such as the Skywatcher 2i Pro, to effectively track stars, which can significantly increase costs—definitely more than the $40 tripod I used for this review.
In comparison to its predecessor, the DWARF 2 that I tested last year, the DWARF 3 offers superior optics and an improved camera sensor. The app experience has also seen substantial enhancements; it’s user-friendly with its virtual sky atlas and automatic settings, making it perfect for beginners, while still being enjoyable for someone like me with over eight years of experience. I can easily see myself taking the lightweight DWARF 3 along on holiday or weekend trips. It’s worth noting that the updated app is also compatible with the DWARF 2.
Concluding Verdict on the Dwarf 3 Smart Telescope
I want to clarify that DWARFLAB did not pay me for this review. Thanks to Jimmy from DWARFLAB for providing this early unit for testing; however, all opinions expressed here are entirely my own. Would I recommend the DWARF 3? Definitely! For $500, it offers excellent value, especially for those wanting to capture impressive night sky photos without spending a fortune. While there are a few minor downsides—like limited WiFi range when not connected to a home network and a slower burst mode—the positives far outweigh the negatives. The telescope is beginner-friendly with its updated app, and the ED optics combined with the low-noise camera sensor deliver solid images of the Sun, Moon, and deep-sky objects. Though it might take a day or two to get used to the app, the learning curve is minimal, and the virtual sky atlas makes locating distant celestial objects easy.
But, what do you think of the DWARF 3 smart telescope? I’d love to hear your thoughts! Feel free to drop any questions in the comments section. Thank you for reading! If you enjoyed this review, please consider liking, subscribing, or joining my YouTube channel to support future free and unbiased content on astrophotography. Wishing you clear skies!
thank you for this thorough review! the fact that you captured all these images with one piece of equipment has me thinking about selling my current thousands of dollars set up! I has been so over my head that I rarely see anything and most of the nights here in northeastern US are covered in clouds in the summer so lugging out my heavy equipment and setting it up not only takes an hour, once the connectivity stops working to the mount it is three hours of troubleshooting and there goes the night. This seems like I could get up and going faster and with less stress and enjoy this hobby again! As a Movie Industry Gal the tie in to the Martian makes me really want to get this one and feel like I am staring at the planets and they are possibly staring right back at me 🙂 Excellent all around and I really appreciate the thorough reporting of all your settings and tools. I hope soon to be able to support your page again when I get working! Thank You Wido!!
I’m awaiting delivery , thank you for your indepth review.
Starting out first time on this astro adventure and this dwarf 3 is what I’ve been waiting for,
Hello,
which tripods are compatible with dwarf3 ?
Thanks
The Dwarf has a similar screw size as a regular DSLR cameras (1/4-20), so all photo camera tripods are compatible.
Quick question – great review by the way…!
Do you get a ‘live’ view of the image as it renders on your iphone and/or tablet? I’m thinking of casting to my TV so the kids can watch as the images materialise and reach definition. Feedback appreciated.
Yes, this is called stacking in astrophotography. Smart telescopes like the dwarf stack each photo onto the previous one to increase the signal of the object, so with each additional photo, you’ll see the “resolution” of the photo increase.You’l get a live view of that stacking process with a countdown timer for each additional photo.
Can anyone tell me exactly what mount is required to get a correct polar alignment?
With the Dwarf 3, you can use nearly any standard photo tripod that allows vertical and horizontal adjustments.
Nice review and mini tutorial – thanks!!!
I have a DWARF 3 (newly arrived last week). I have a question / concern around framing – particularly galaxy targets.
My concern stems from the limited focal length that DWARF can offer in such a small package. 150mm (~730mm effective) often creates a situation where the galaxy (I took M101 and M51 last night) is only around 5-10% (at best) of the overall frame. The concern I have is that no matter how much data is captured and how much post processing is performed when cropped down that small (maybe less than HD – 1024×768) there is little detail left to extract?
Your Andromeda image is excellent – but then again Andromeda is the larget galactic target – meaning you’ll have “more of it” filling the frame anyway!
Have you tried some of the smaller / further away galactic targets?
If this is a “feature” of the DWARF are there any recommendations to help / improve those types of targets?
I’d love to see a step-by-step guide from yourself around targeting those sort of objects!!
Many thanks
Hi Simon, Yes, you’re correct. The 150mm focal length of the Dwarf is a bit short and the 3 arcseconds per pixel will not bring out much detail during Galaxy season in spring. However, there are a couple of objects like Markarian’s chain, Bode’s Galaxies (M81 and M82), and the Leo triplet that are all nice. You can also wait until early morning when in april/may, you should be able to photograph the nebulae in cygnus again, like the veil, north america, pelican nebulae. During summer / autumn, you’ll have plenty of nebulae within our milkyway that are much larger than the distant galaxies during spring, and in winter we also have orion with plenty of objects like the orion, horsehead and flame, rosette, california, and many others.
Hello, is there any way to remotely controll the Dwarf 3, like remote hosting far away with dark skies? Thank you for excellent review and your help. B.
You need a create remote access to the tablet/phone that controls the Dwarf 3, and the remote place needs to have a connection to the internet.
I’m awaiting delivery , thank you for your indepth review.
Starting out first time on this astro adventure and this dwarf 3 is what I’ve been waiting for,
Can images taken on a DLSR be imported to the Dwarf3 for stacking?
I would recommend downloading your DSLR images and use a free tool like deep-sky stacker or sequator to stack your images. You don’t need hardware for that, you need software.
Is there a specific setting for planetary image that I should be using? Every time I try to image Saturn or Jupiter the images come out with a green tint to them and ultra bright, leaving no details of the object being imaged, like the rings or lines on the planet.
Smart telescopes like the Dwarf 3 don’t have enough aperture and are not designed to take great images of the planets. To get a good view, you’d need to go into video mode and then lower the gain and exposure settings until you see the planetary details (e.g. the cloud bands on jupiter). Unfortunately, the Dwarf 3 has only 35mm of aperture – my advise would be to look for what I call “planetary telescopes” with an aperture of at least 200mm or 8″. Here’s my blog about that: https://astroforumspace.com/best-telescopes-to-photograph-the-planets/
Thanks for sharing, now I’m pretty sure of getting one, and returning to deep sky observation. I had to quit because of moving out of suburbs, and with light pollution my current telescope is to heavy to take the fuss of going outside the city. This bad boy though, can go anywhere I want:))
Cheers from Gdańsk