Do you have trouble deciding which budget smart telescope fits your needs? Then you’ve come to the right blog! In this overview, I’ll compare the most affordable smart telescopes in the $400 to $600 price range. These include ZWO’s Seestar S30, S30 Pro, and S50, as well as Dwarflab’s DWARF Mini and DWARF 3. I’ll break down pricing, technical specifications, and ease of use, and I’ll show you real-world photos and videos I captured during my hands-on reviews. Finally, I’ll reveal which smart telescope I would choose in 2026. Let’s get started.
Smart Telescopes
So why would you go for a smart telescope in the first place? Smart telescopes are designed to capture real-time photos and videos of objects in the night sky. They combine a telescope, a camera, and a motorized mount into one compact system that you control wirelessly using an app on any iOS or Android device.
They have three big advantages. First, they’re small and portable, which makes them great for traveling to darker skies. Second, they’re incredibly quick to set up. You just put the telescope down, turn it on, pick an object in the app, and it automatically finds it, tracks it, and shows it live on your screen. And third, there’s no eyepiece involved. Instead, the built-in camera shows a live view and starts stacking long-exposure images, revealing far more detail than you’d ever see by just looking through a traditional telescope.
Now, to be clear, these budget smart telescopes don’t yet match the image quality of a full, dedicated astrophotography setup that can cost thousands of dollars or euros. But stay tuned, because you might be surprised by just how good the results are. With that in mind, let’s start by looking at the pricing.
Pricing and what’s in the box
The most affordable options here are the DWARF Mini and the Seestar S30. At the time of writing, the S30 costs about $349, while the DWARF Mini comes in at $399. Moving up, the Seestar S50 is priced at $499, and the most expensive models in this comparison are the Seestar S30 Pro and the DWARF 3, both priced at $549 at the time of this video. Keep in mind that these prices are vendor-based and don’t include possible tariffs or VAT. So for the most accurate pricing in your region, check the links below.
Where to buy:
Seestar S30: ZWO (WW), Agena Astro (USA/WW), High Point Scientific (USA/WW), Astroshop (EU/WW)
Seestar S30 Pro: ZWO (WW), Agena Astro (USA/WW), High Point Scientific (USA/WW), Astroshop (EU/WW)
Seestar S50: ZWO (WW), Agena Astro (USA/WW), High Point Scientific (USA/WW), Astroshop (EU/WW)
DWARF Mini: Dwarflab (WW), Agena Astro (USA/WW), High Point Scientific (USA/WW), Astroshop (EU/WW)
DWARF 3: Dwarflab (WW), Agena Astro (USA/WW), High Point Scientific (USA/WW), Astroshop (EU/WW)
All Seestar smart telescopes come with a carrying bag or case, a small tripod, a solar filter, and a USB-C cable. Dwarflab’s DWARF Mini and DWARF 3 also include a solar filter, a USB-C cable, and a cleaning cloth. The DWARF 3 comes with a carrying bag, while the DWARF Mini does not — mainly because it is small enough to fit in a pocket. Neither the DWARF Mini nor the DWARF 3 includes a tripod. However, both use a standard photo tripod connection, allowing you to mount them on any regular camera tripod. The Seestar telescopes, on the other hand, use a thicker 3/8″-16 astronomy-style connection, which is standard in the astronomy world.
The Seestar tripods included with each of their smart telescopes are certainly decent—especially for travel—but they are small. As you can see in the videos, I often use my larger telescope tripod instead with the Seestar telescopes.
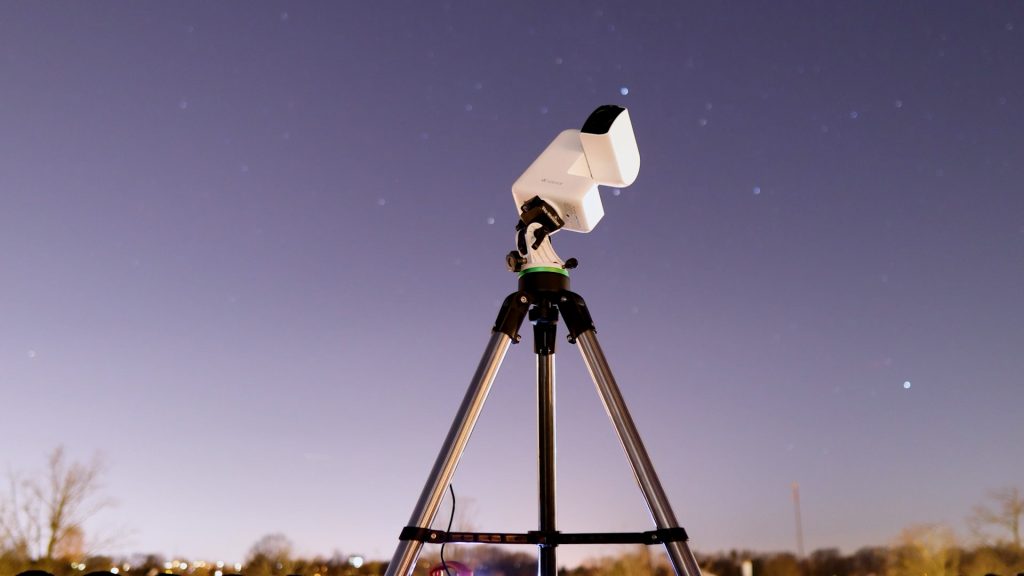
My iOptron Tripod is available at: Agena Astro (USA/WW): High Point (USA/WW), and Astroshop (EU/WW).
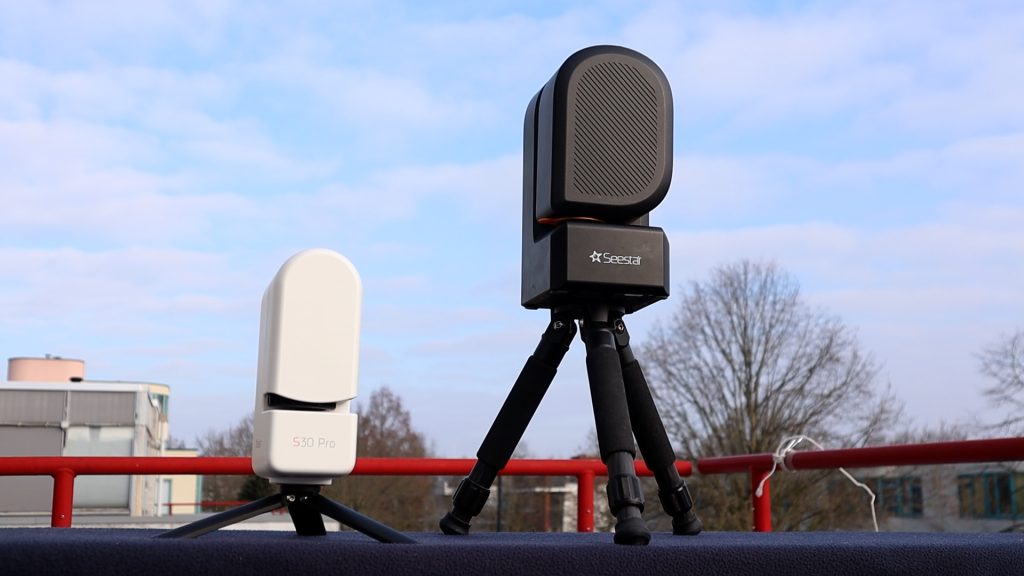
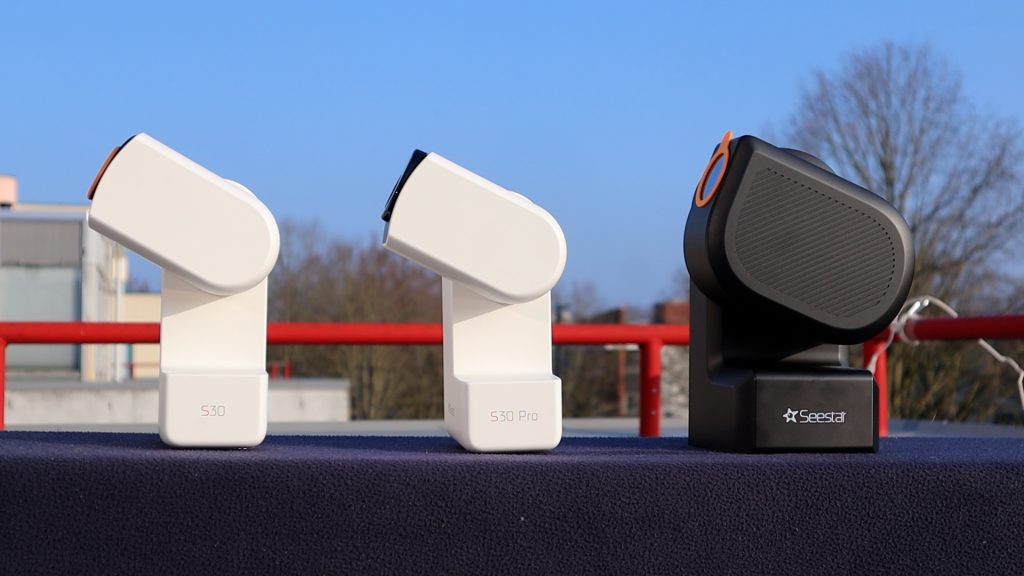
Design-wise, ZWO goes for consistency. The S30 Pro looks identical to the S30, while the S50 follows the same overall design but is slightly larger and finished in black instead of white.
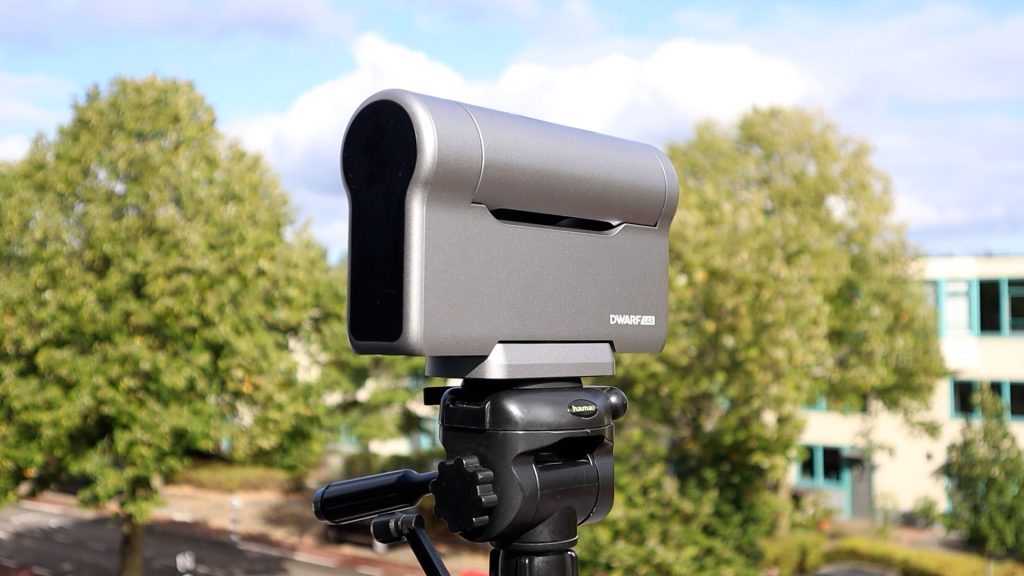
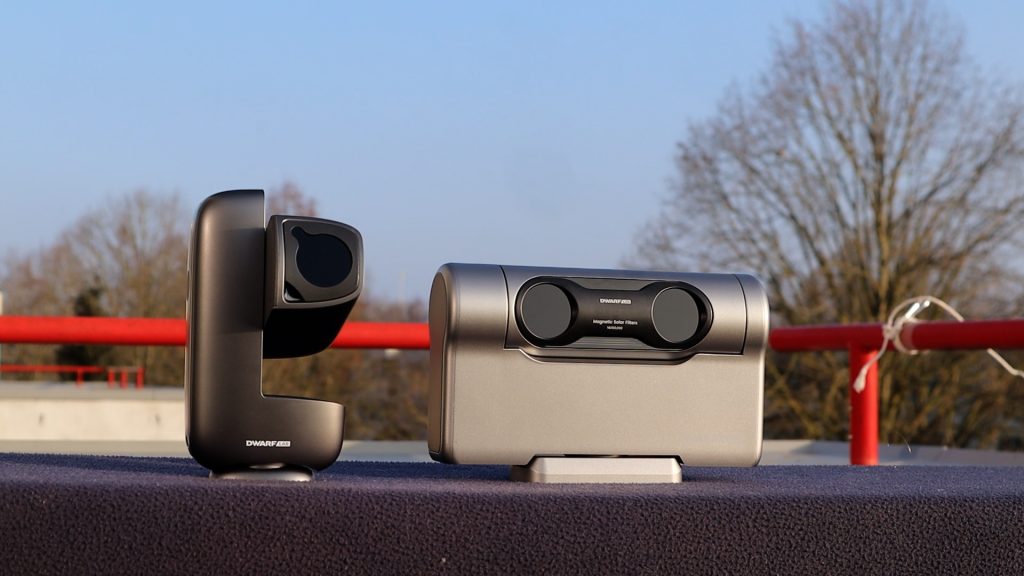
Dwarflab takes a completely different approach, using a more versatile silver design. The DWARF Mini is smaller than the S30, and the DWARF 3 has a very distinctive look that honestly reminds me a bit of the Pathfinder rover that landed on Mars back in the nineties.
Personally, I really like the experimentation Dwarflab brings to its designs. But when it comes to mass production, ZWO has probably made the smarter choice — especially if they’re quietly working on a new S70, as the latest rumors suggest.
Technical specifications
Telescope type
Dwarflab’s DWARF Mini and DWARF 3 are, in essence, telephoto lenses. Both use extra-low dispersion glass to achieve well color-corrected views of the night sky. In contrast, all Seestar models are APO refractor telescopes. The Seestar S30 and S50 use a triplet APO design, while the S30 Pro features a quadruplet APO design to deliver high-quality images with excellent color correction. What does that mean in terms of photo quality? I’ll get to that.
Field of View & Resolution
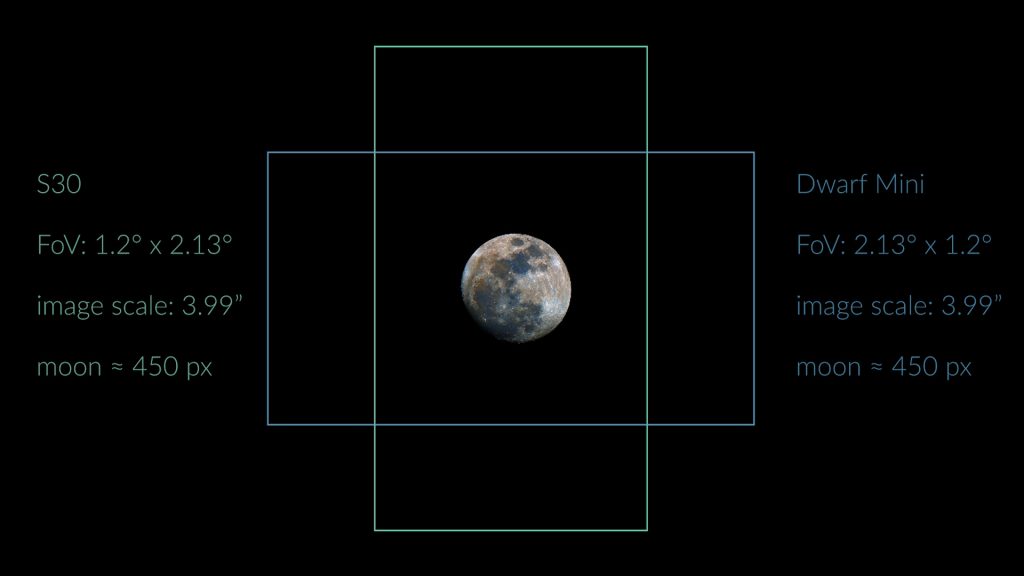
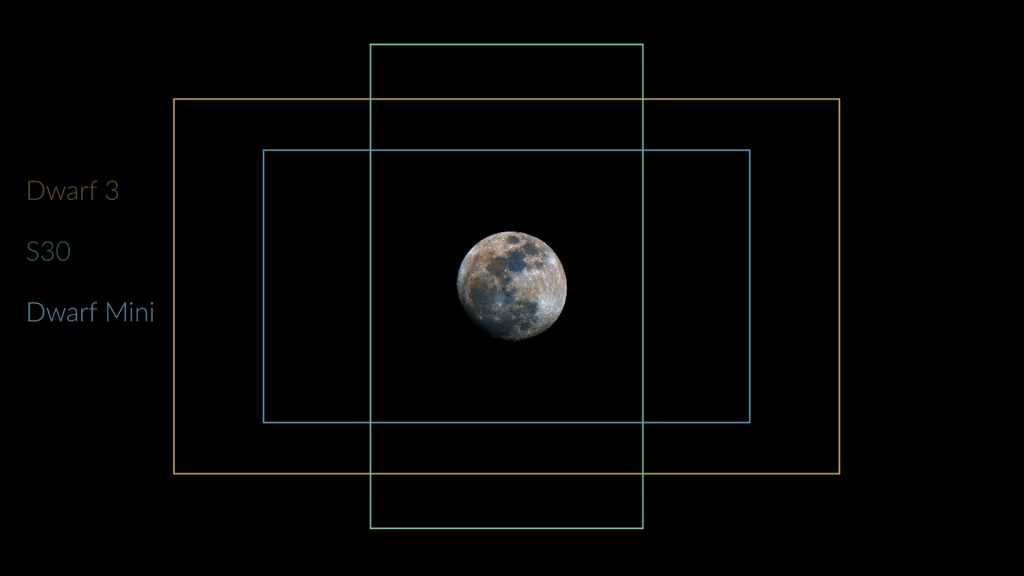
Both the Seestar S30 and the Dwarf Mini feature a 30 mm aperture and a 150 mm focal length, and they use the same 2-megapixel IMX662 sensor. This combination delivers an HD field of view of 2.13° × 1.2° (1080 × 1920), which is roughly four times the apparent size of the Moon. With an image scale of 3.99 arcseconds per pixel, the full Moon ends up spanning about 451 pixels across the sensor.
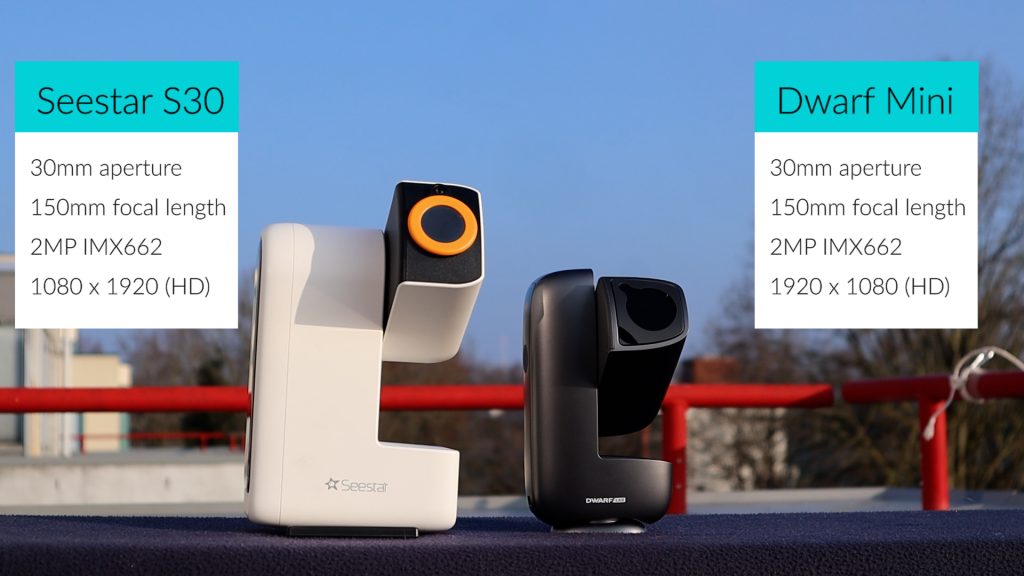
The Dwarf Mini outputs a landscape view, while the S30 uses a portrait orientation. Now of course there is no up and down in space but some objects like the andromeda galaxy better fit a landscape view, whereas others like the orion and running man nebula better fit the portrait mode.
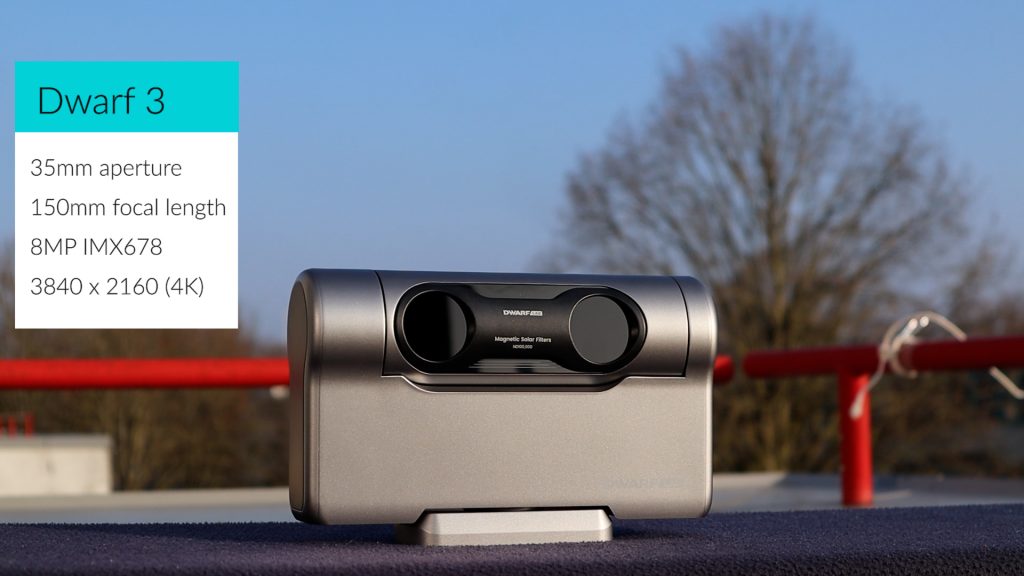
Next up, the Dwarf 3 features a slightly larger 35 mm aperture while maintaining a similar 150 mm focal length. The big upgrade, however, is its much larger 8-megapixel IMX678 sensor. This combination delivers a wide 2.9° × 1.7° landscape field of view in 4K resolution (3840 × 2160), covering roughly six times the apparent size of the full Moon. Thanks to the smaller pixel size of the IMX678, the sampling is finer at 2.75 arcseconds per pixel, meaning the Dwarf 3 captures the Moon across about 654 pixels.
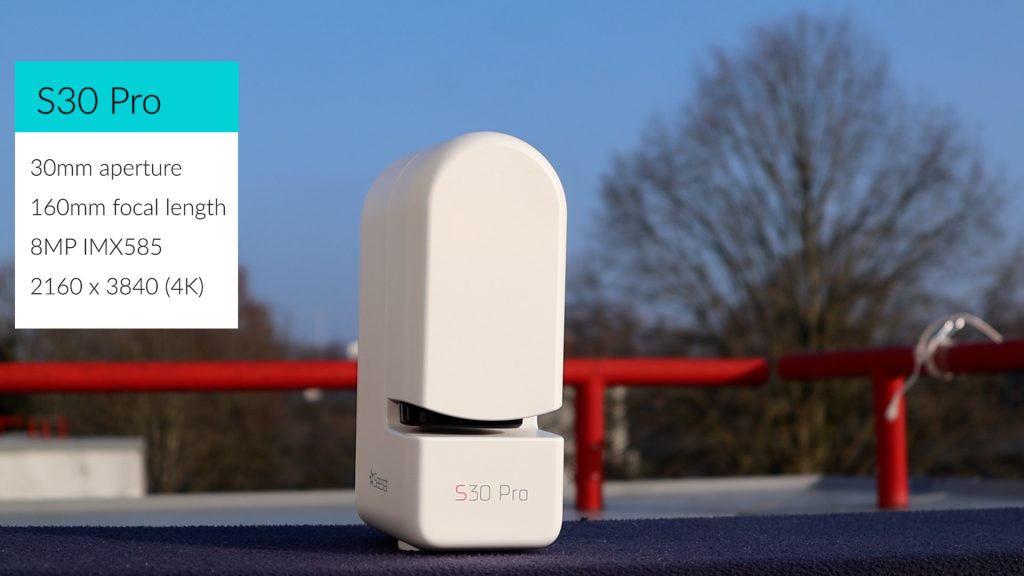
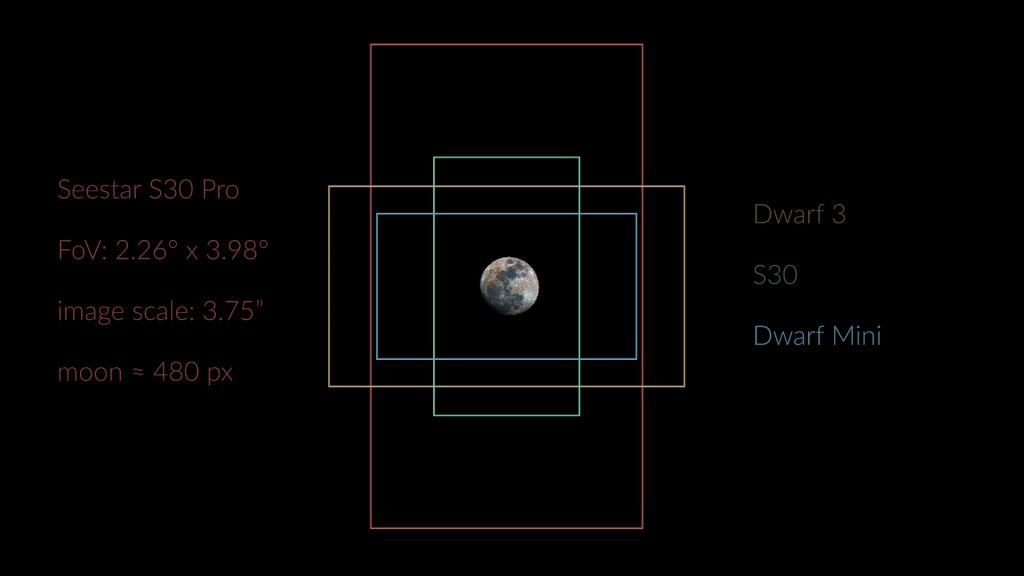
The Seestar S30 Pro pairs a 30 mm aperture with a slightly longer 160 mm focal length and an 8-megapixel IMX585 sensor, resulting in the largest field of view of the lineup at 2.26° × 3.98° in 4K resolution in portrait orientation. Along its long axis, that’s roughly eight times the apparent size of the full Moon. However, the sampling at 3.75 arcseconds per pixel is only marginally better than that of the more affordable S30 and Dwarf Mini, as the full Moon is recorded at about 480 pixels across.
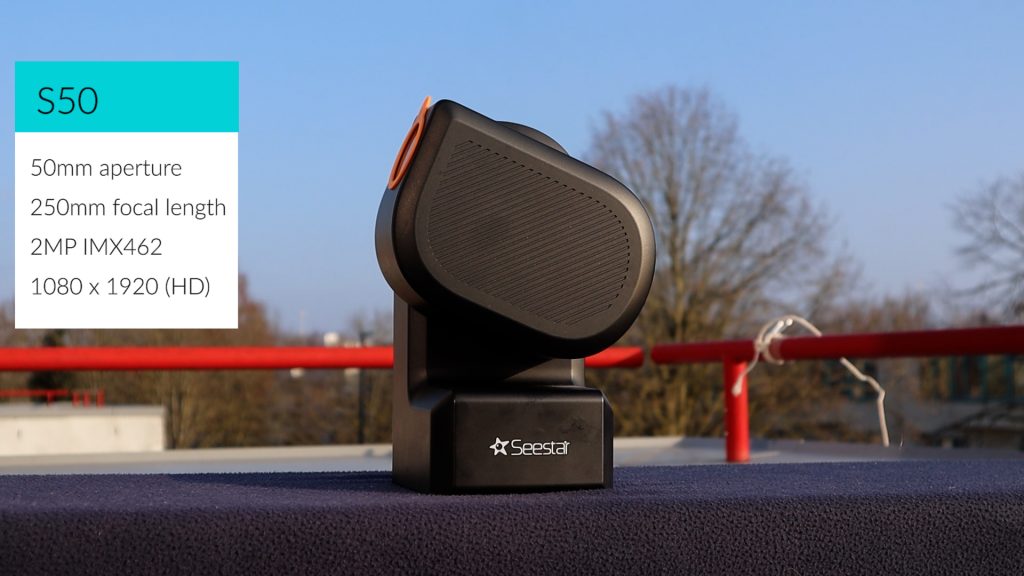
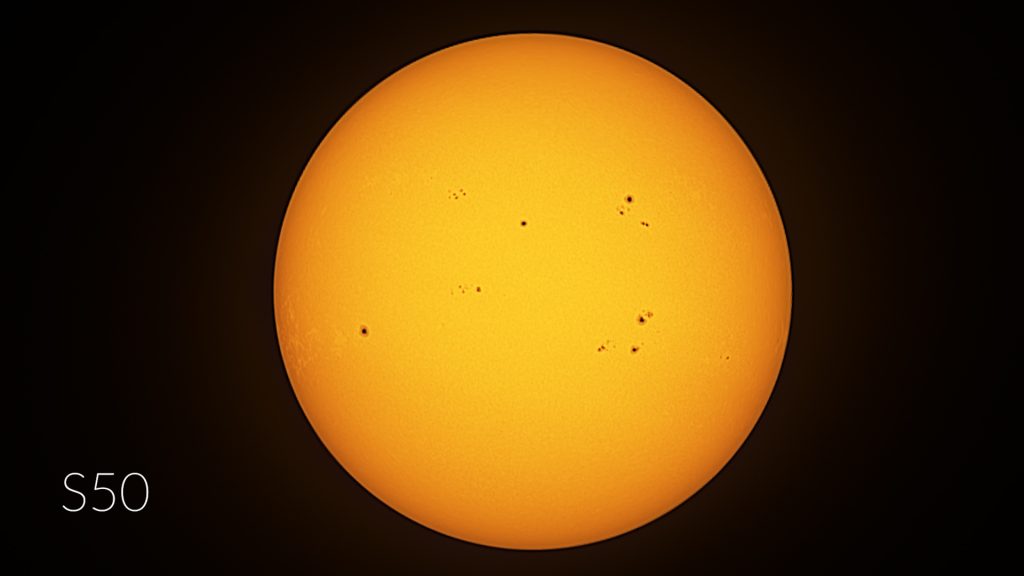
The Seestar S50 stands out with the largest aperture at 50 mm and the longest focal length at 250 mm, paired with an older 2-megapixel IMX462 sensor. This setup produces the narrowest 0.7° × 1.3° HD (1080 × 1920) field of view of all smart telescopes in this overview in portrait orientation. It is just wide enough to fit the full Moon. However, thanks to the image scale of 2.39 arcseconds per pixel, it records the full moon with the highest resolution of all smart telescopes in this overview, spanning about 753 pixels across.

So in conclusion, the S50 delivers the narrowest, but highest resolution field of view which is great for capturing smaller objects like the moon or smaller, like globular clusters or distant galaxies, whereas theS30 Pro delivers the widest field of view of the night sky which is excellent for capturing larger objects like large galaxies and nebulae. I’ll get back to some more technical details later, but let’s talk about the APPs used to wirelessly control these smart telesopes first.
Explore my experimental Field of View App and compare every smart telescope’s viewing size!
Dwarflab APP vs Seestar APP
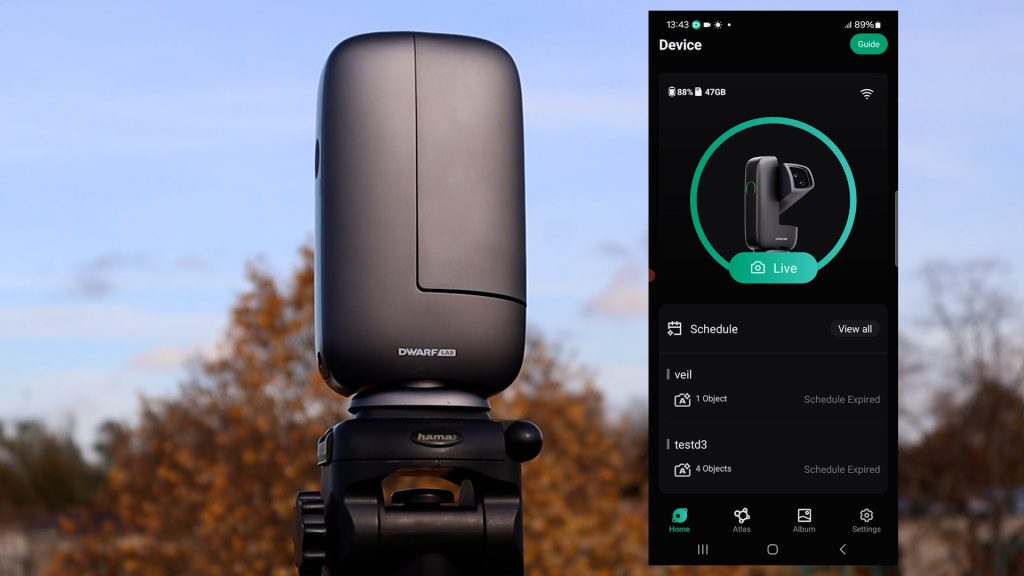
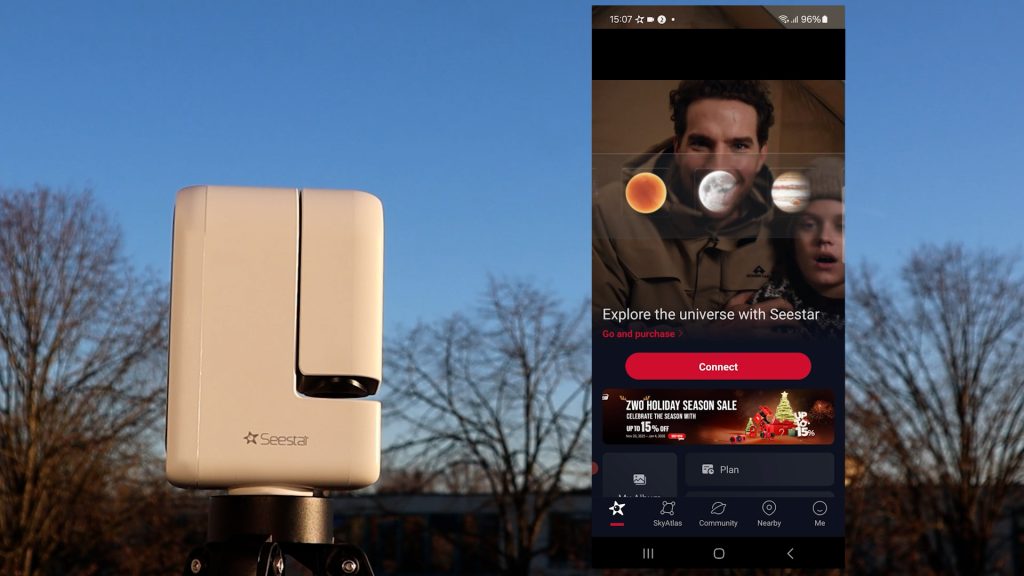
Both the DwarfLab app and the Seestar app can be downloaded on any iOS or Android device, allowing you to wirelessly control your smart telescope over Wi-Fi. When you connect for the first time in either app, you’ll likely be prompted to install a firmware update for the telescope—just follow the on-screen instructions and you’ll be good to go. Keep in mind that both the app and the telescope firmware are updated regularly to introduce new features and improvements. For a detailed walkthrough of each app, I’ve added links to my in-depth review videos for each of the smart telescopes in the video description below.
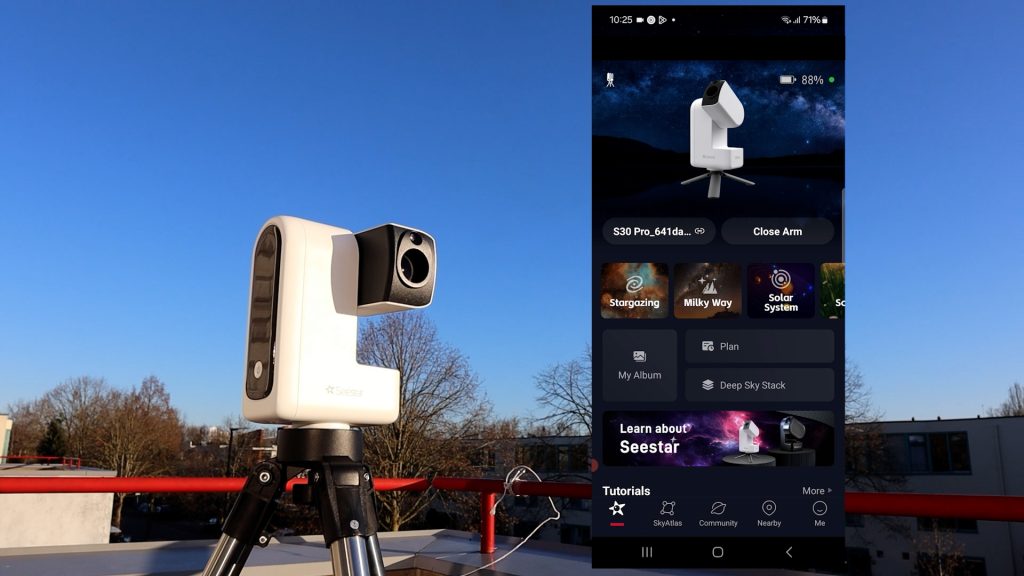
Both apps are very user-friendly and offer similar functionality. When you open the Seestar app, you’re greeted by a clear home screen with several dedicated modes: Stargazing for deep-sky imaging, Solar System for capturing the Sun, Moon, and planets, and Scenery for daytime photos, videos, and timelapses. On the S30 Pro, there’s also a Milky Way mode designed for wide-field Milky Way shots and star trails. In addition, the Seestar app includes an interactive sky atlas, making it easy to find virtually any object in the night sky.
By comparison, the DwarfLab app is a bit more hands-on. When tapping live it immediately displays the live view from the Dwarf 3 on your smart device. However, the latest version of the app also adds dedicated modes for general daytime use, which includes taking photos, videos, and timelapses, solar system mode to capture the sun, moon and the planets, and a deep-sky mode for astrophotography, along with an interactive sky atlas to help you find objects of interest in space. You can simply select an object, tap the photo button, and the telescope will automatically locate and track it in the night sky.
Both apps offer a solid range of extra features, including built-in photo editing, the ability to connect the telescope to your home Wi-Fi network for indoor control, a planning mode to automate your imaging session, and a mosaic mode to capture larger portions of the night sky.
Overall, both apps are user-friendly and provide plenty of options for capturing and editing photos and videos. I wouldn’t say there’s a clear winner when it comes to the app experience.
Solar and Lunar Imaging
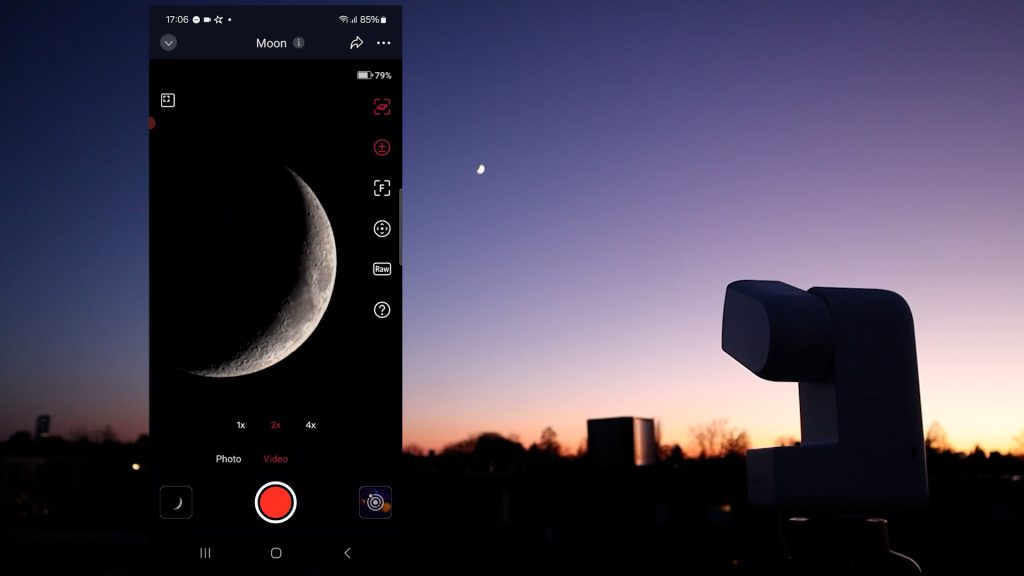
Alright, let me show you some real life images, starting with the Sun and the Moon. First, never look directly at the Sun and always use a proper solar filter. The Dwarf 3, Dwarf Mini, and Seestar S30 and S30 Pro all have magnetic solar filters, making them quick and easy to attach. The Seestar S50’s filter is not magnetized, so it takes a bit more care to position it in front of the lens.
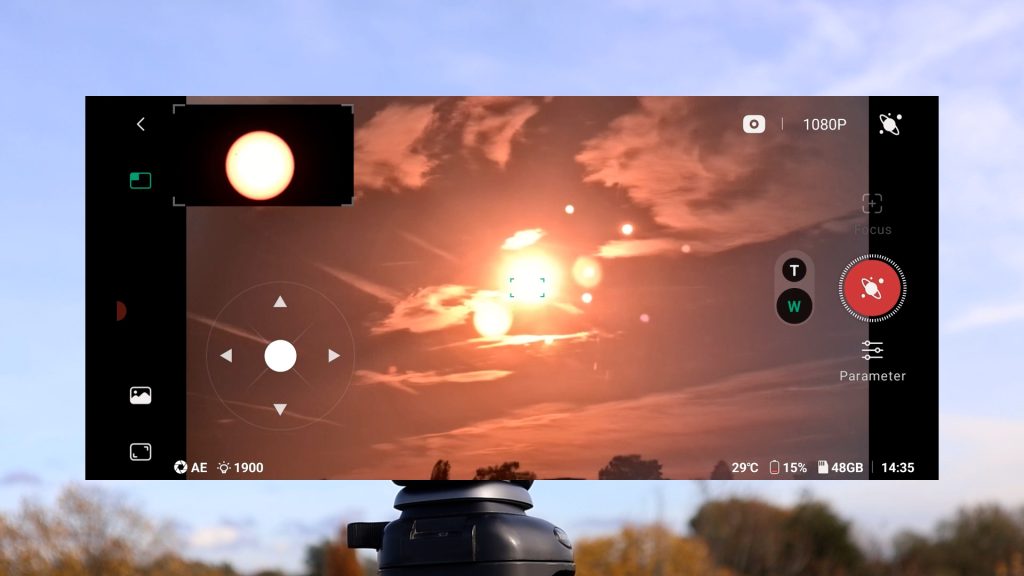
All smart telescopes except the Seestar S50 include a wide-field lens to help locate objects like the Sun or the moon. In the Dwarflab app, tapping the live button opens a live view from both the wide-field and telephoto lenses, allowing you to center the Sun using on-screen slew controls. In the Seestar app, you can select the Sun from the solar system menu and initiate a GoTo command after which the telescope automatically slews to the sun. In addition, the Seestar app also supports manual slewing where the S30 and S30 pro have a wide-field and telescope view. The Seestar S50, however, only shows the narrow telescope view, which makes finding objects like the Sun or Moon manually much less convenient.
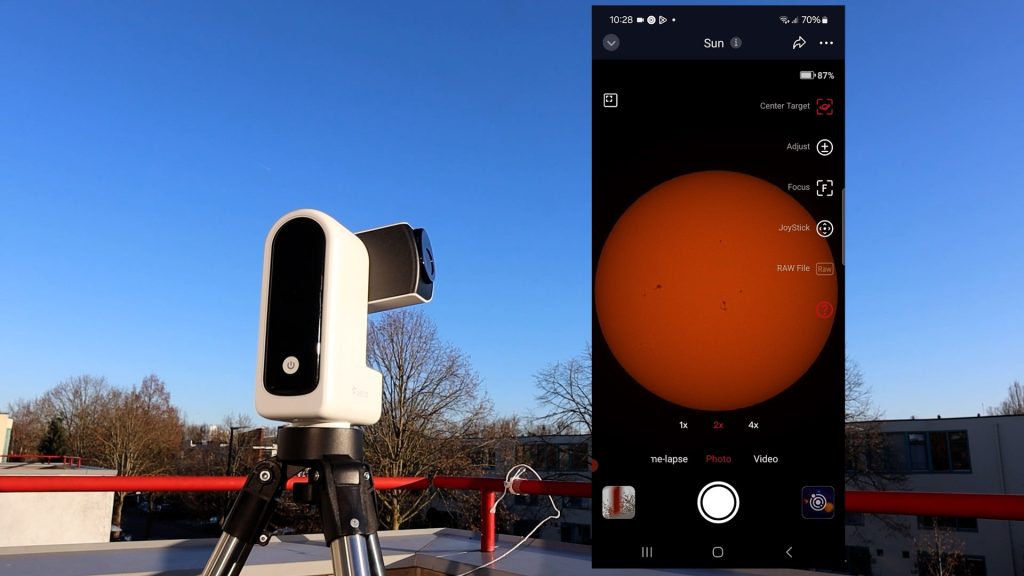
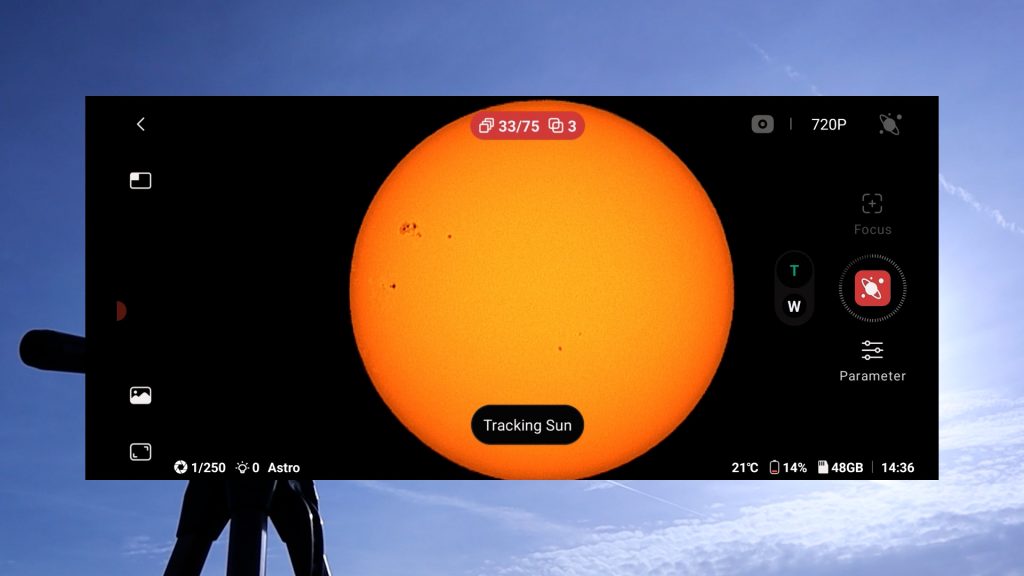
Once centered, both APPS offer automatic solar tracking, autofocus, and you can adjust your exposure and gain. You can capture photos, record videos, or create timelapses to capture longer events like solar and lunar eclipses, making both apps very beginner-friendly.
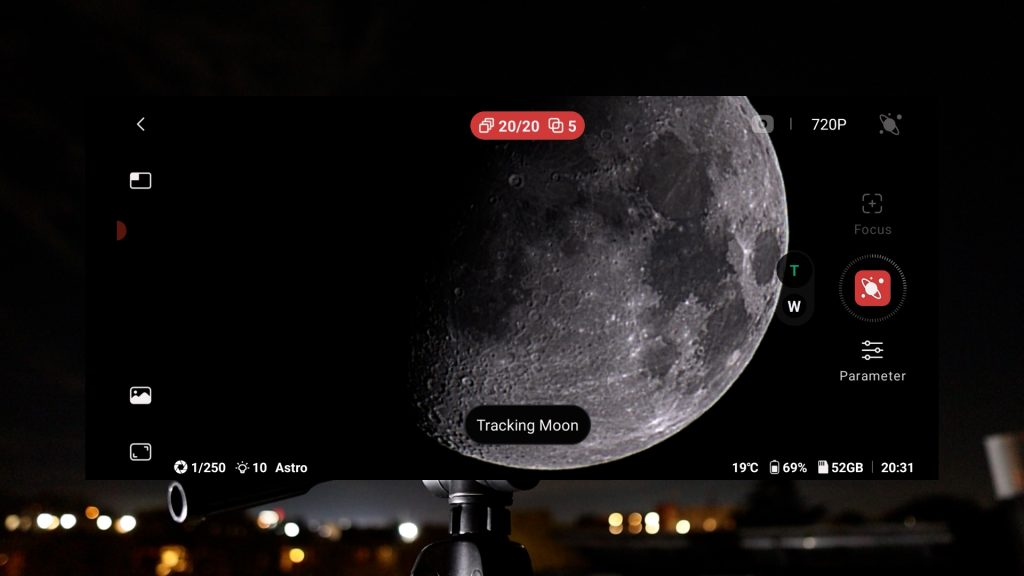
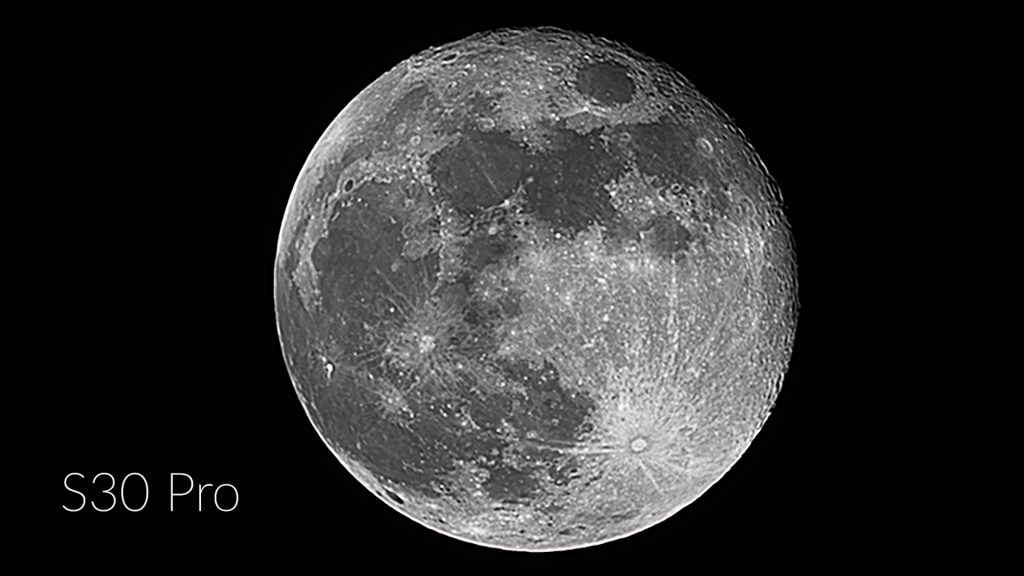
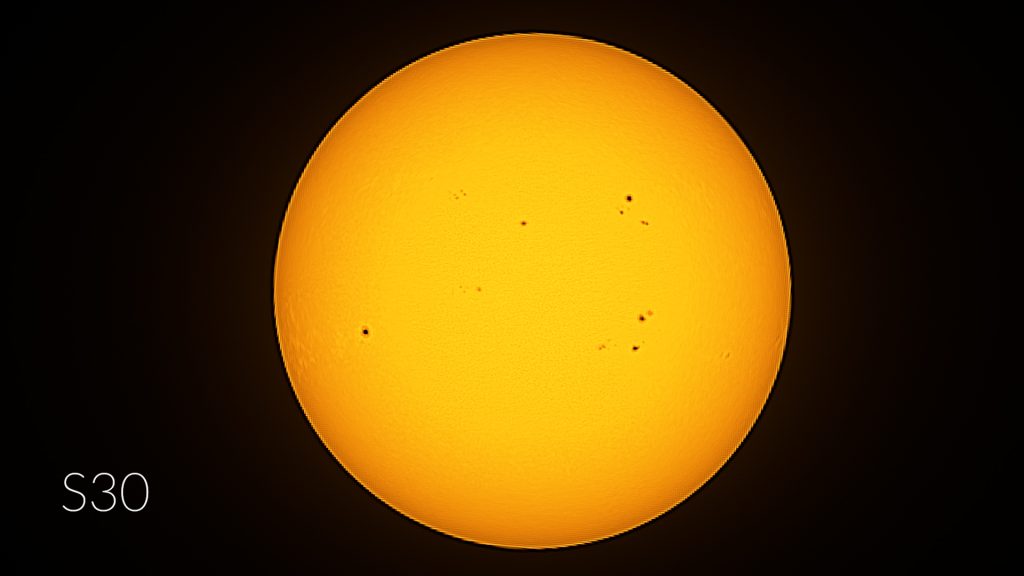
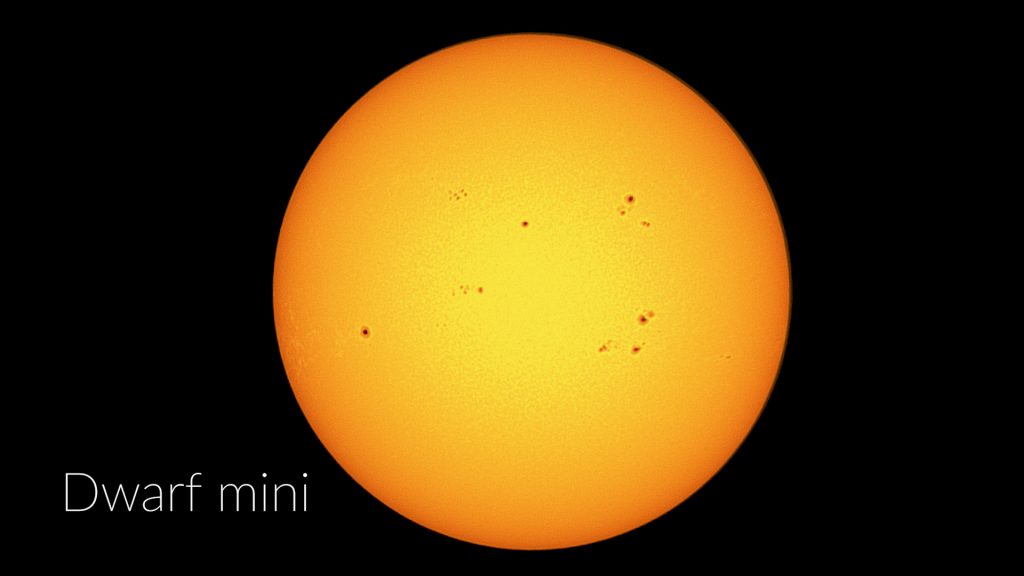
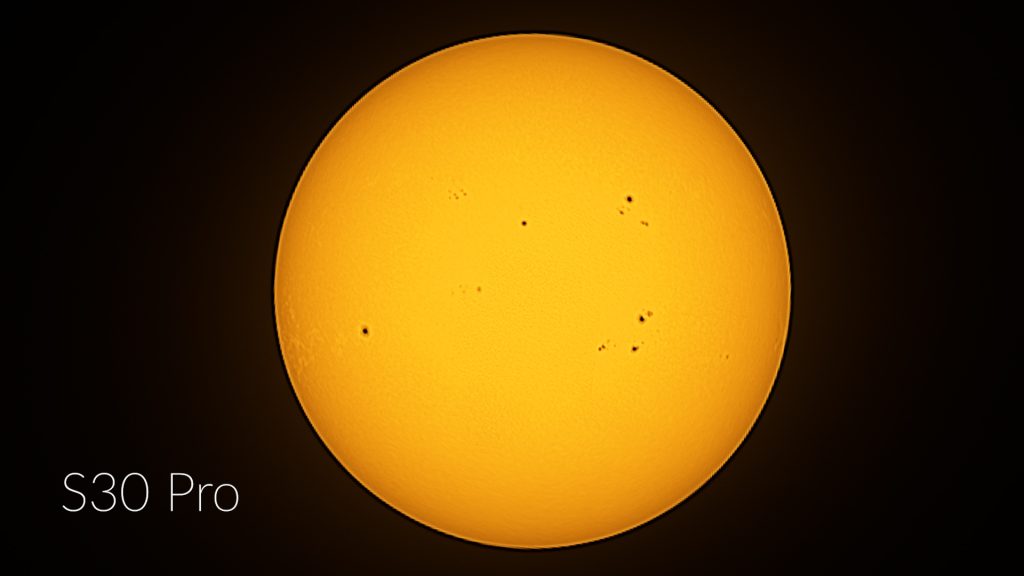
One feature I really like in the Dwarflab app is its automatic in-app stacking for solar system objects. It helps reduce atmospheric turbulence and brings out finer details, like sunspots on the Sun or craters on the Moon. The Seestar app relies on recording solar system objects like the sun and moon in high-quality RAW AVI videos, and there are in-app stacking and editing option available in the “my album” section of the app. However, in-app stacking is relatively slow. Stacking a one and a half minute video lasted about 10 minutes. So I do prefer to download the RAW videos and use free software like like AutoStakkert and wavesharp to get similar results.
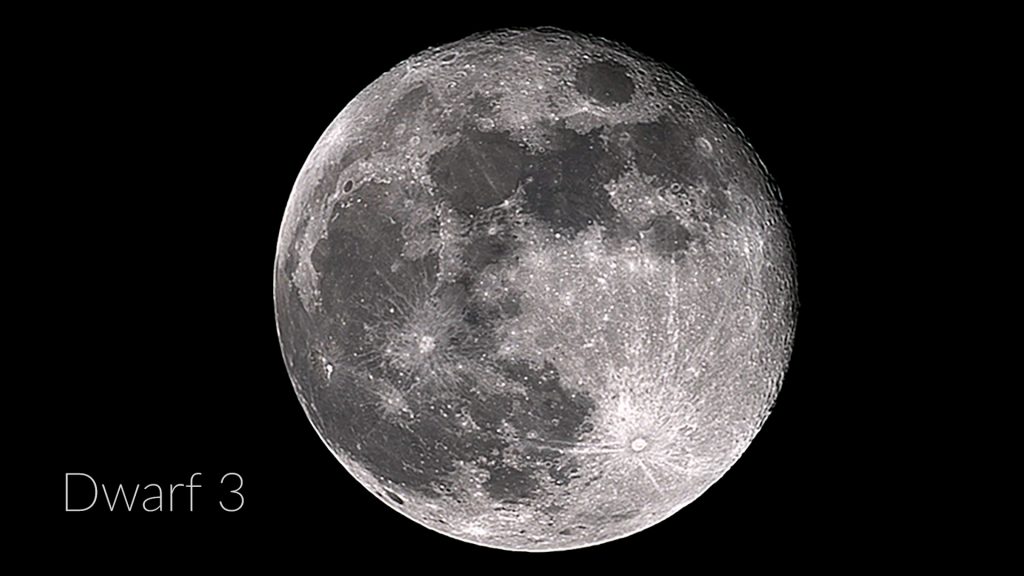
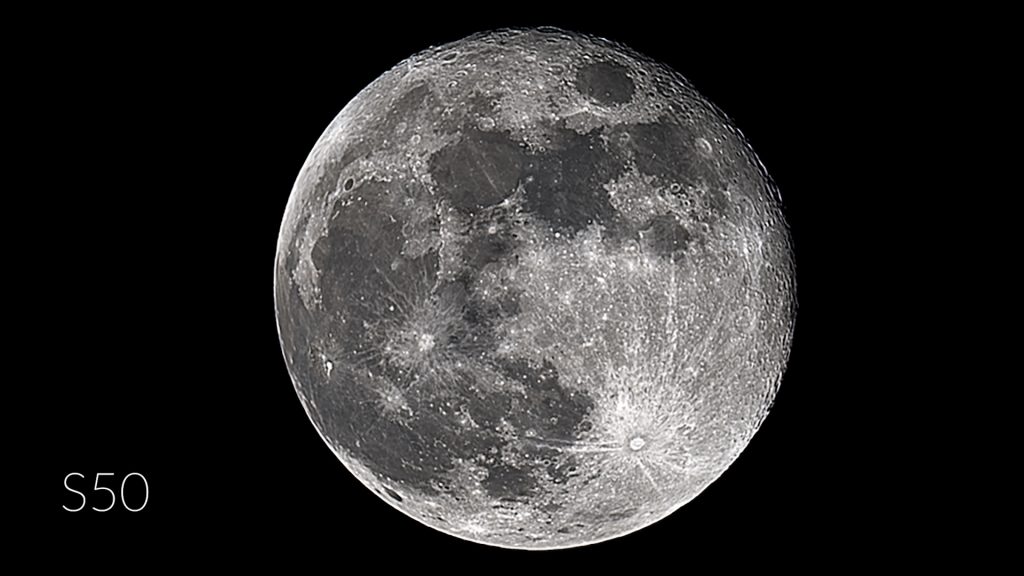
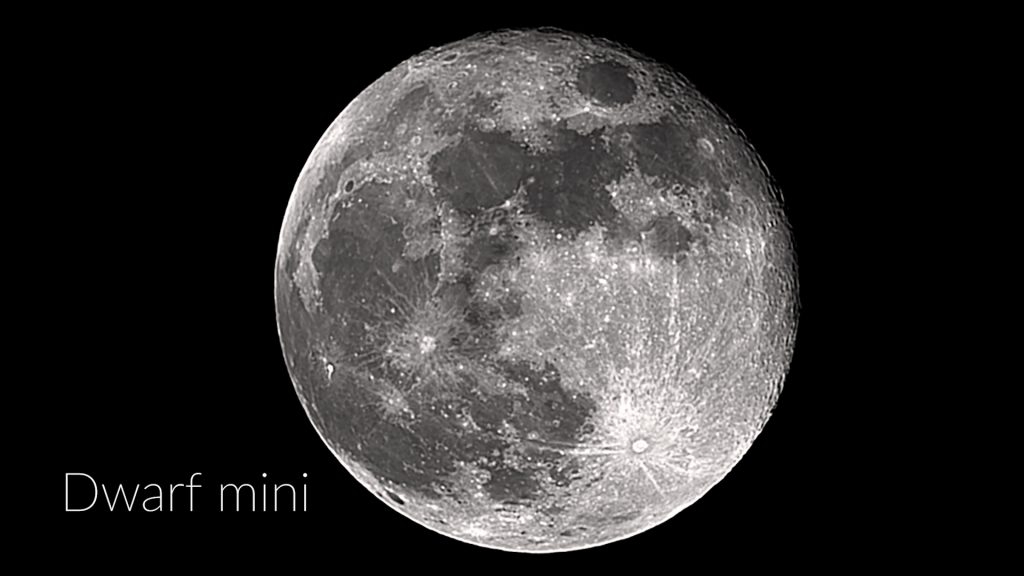
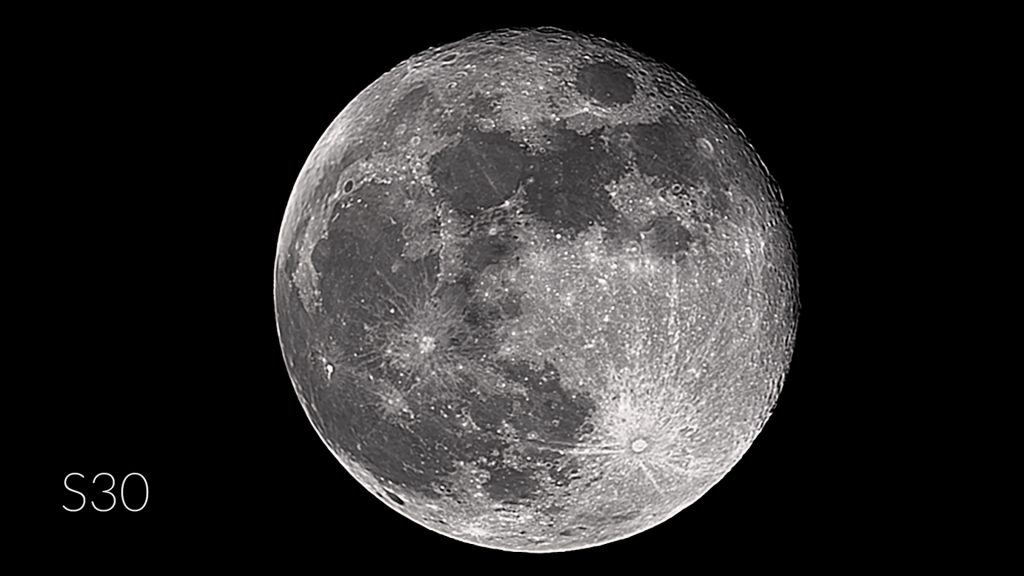
Here are some stacked images of the full moon and the sun taken on the same day from all telescopes. Obviously, the results are pretty close but because of it’s higher aperture, focal length and detailed image scale, the S50 slightly outperfroms the rest of the smart telescopes, and I’d say the Dwarf 3 takes second place.

Deep Sky Astrophotography
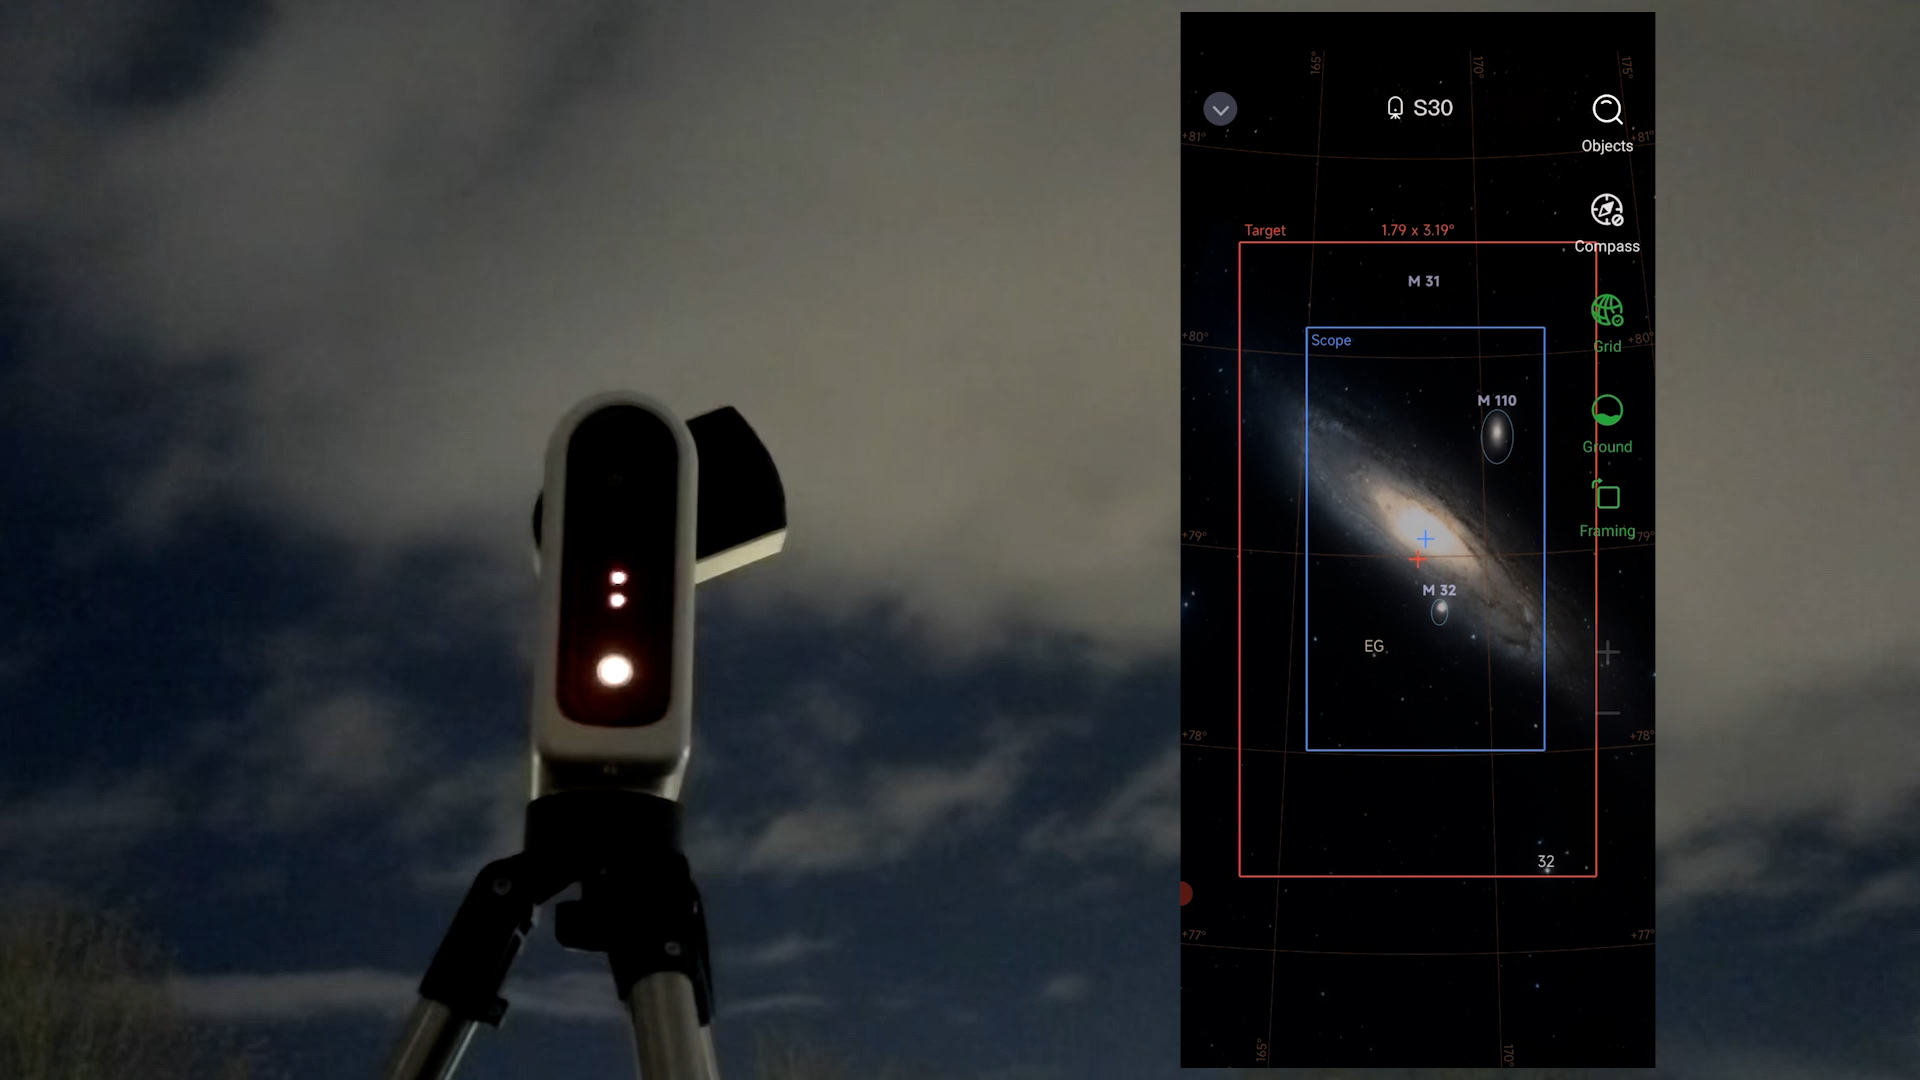
Both apps offer multiple ways to engage in deep-sky astrophotography. The Dwarflab app includes a virtual sky atlas and a deep-sky menu where users can explore and select objects such as nebulae, galaxies, and star clusters. In deep-sky mode, a simple tap on the photo icon slews the telescope to the selected target. The app also features a scheduling tool that allows you to plan and automate your imaging session by selecting specific objects at set times.
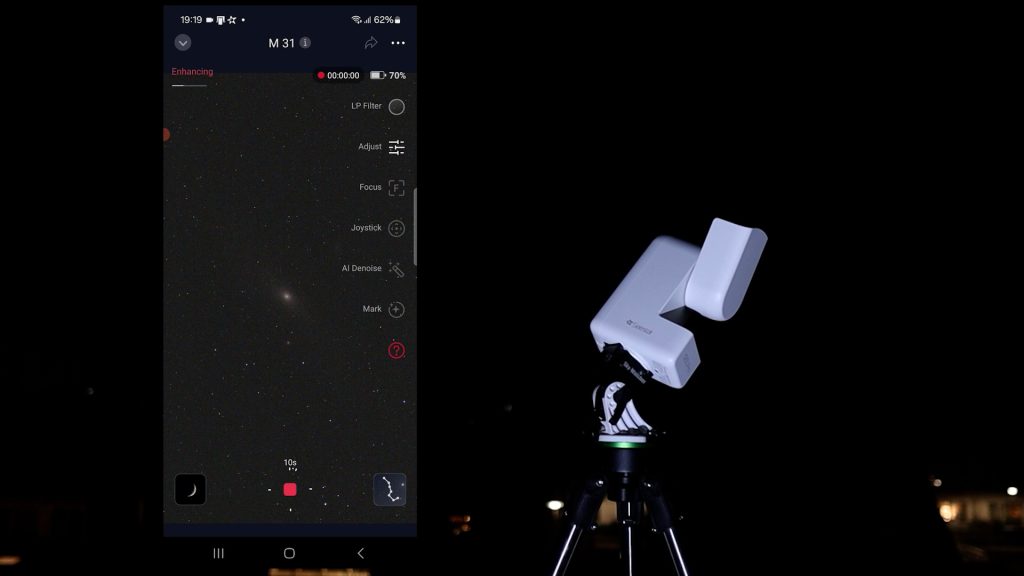
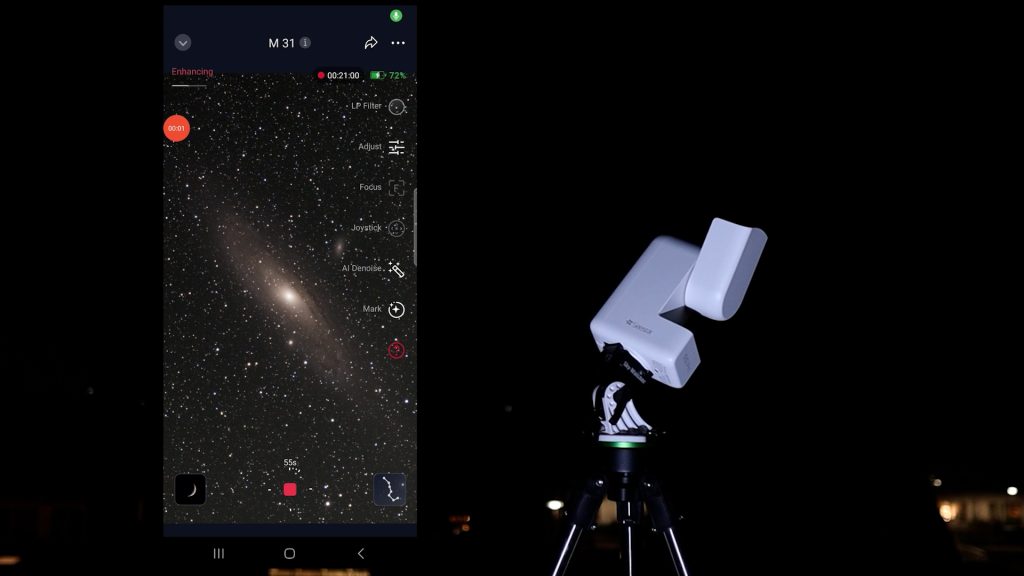
Similarly, the Seestar app organizes objects into categories such as “Tonight’s Best,” galaxies, nebulae, and star clusters. Like the Dwarflab app, it includes a virtual sky atlas and a planning feature to automate imaging throughout the night. Select your objects, tap GoTo, and the telescope begins capturing and stacking images.
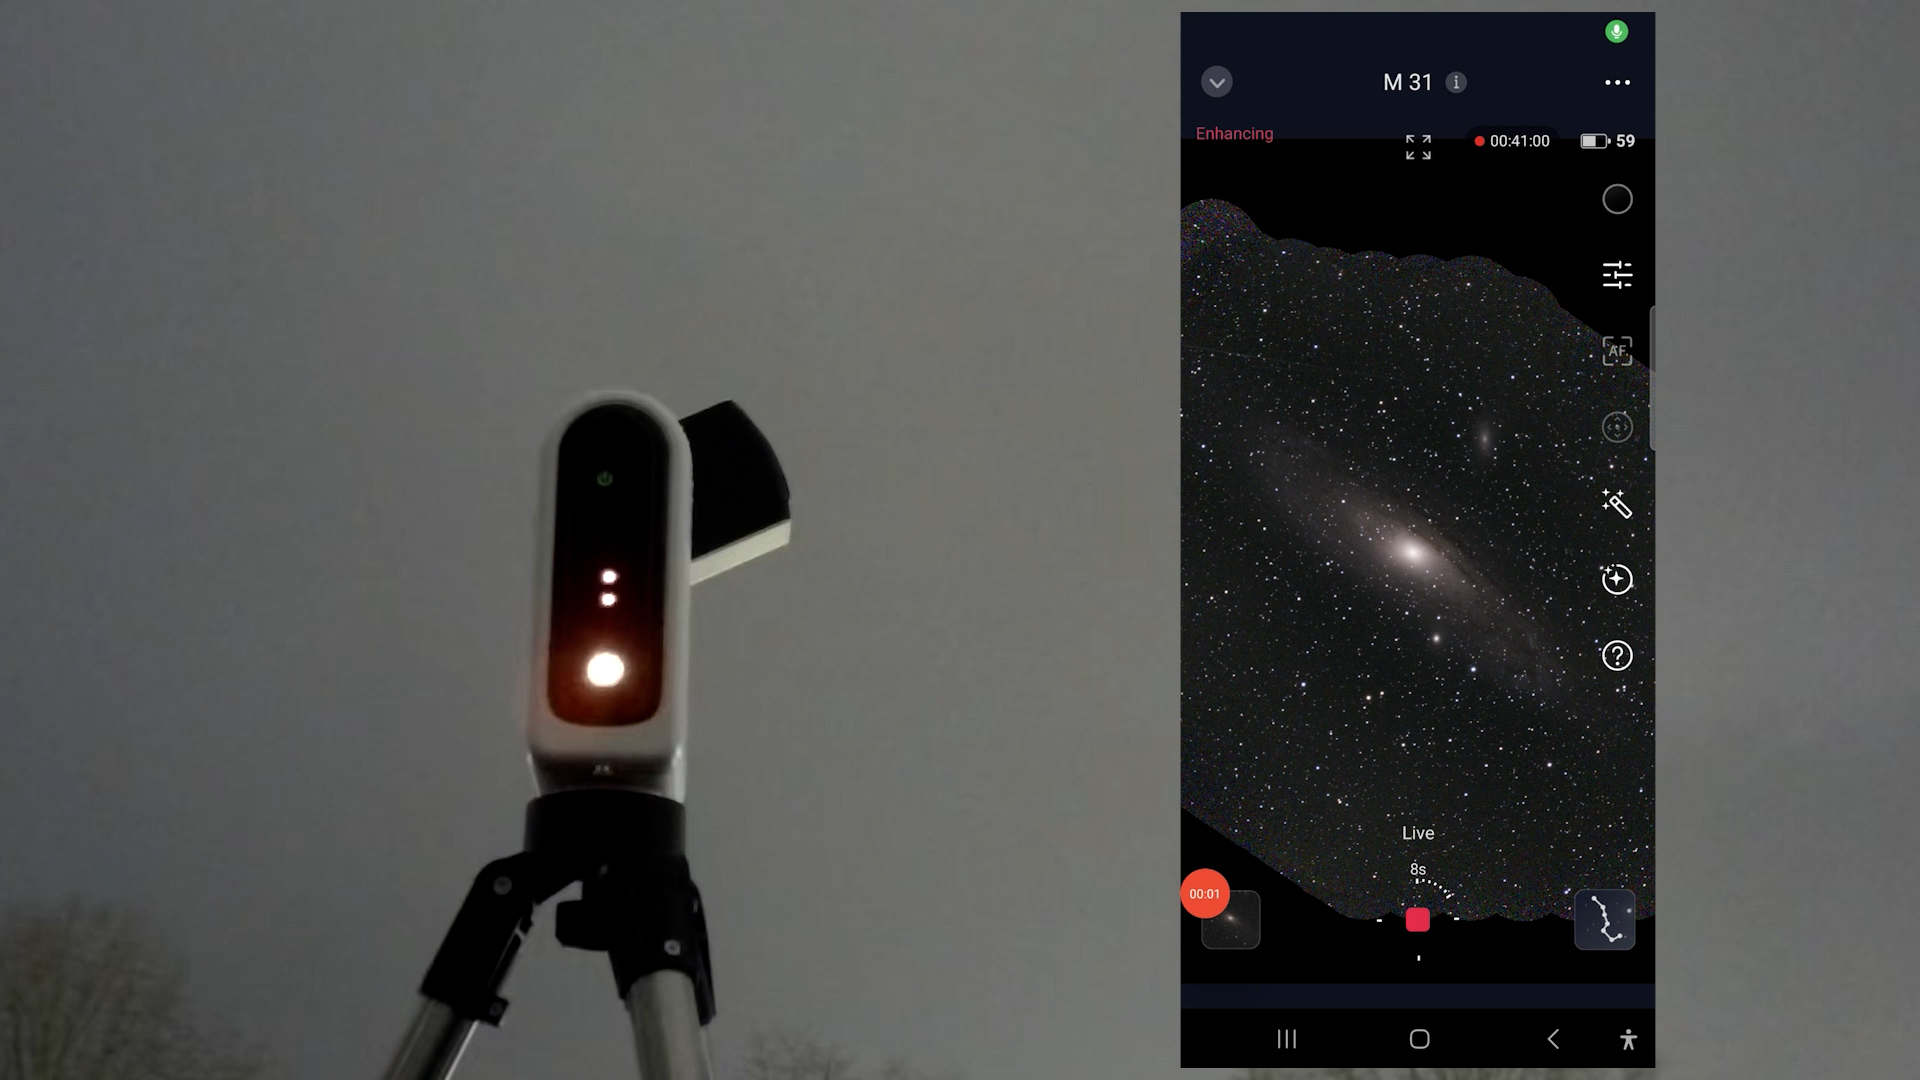
The capture process is very similar on both APPs. After selecting an object, the telescope slews to it, calibrates, and starts stacking images to improve detail. As each frame is added, the signal-to-noise ratio increases, making faint details more visible. Just sit back and watch the image gradually improve as more frames are stacked.

I usually spend about one to one and a half hours imaging a single object with a smart telescope before moving on. This already delivers solid results, although spending more time would further improve image quality. Part of the appeal of smart telescopes, at least for me, is using them more like visual telescopes where you’d move between different objects during one observation session. Also, I image from a light-polluted urban environment, around Bortle class 7, so for the best results you want to move to darker skies.
EQ mode Test
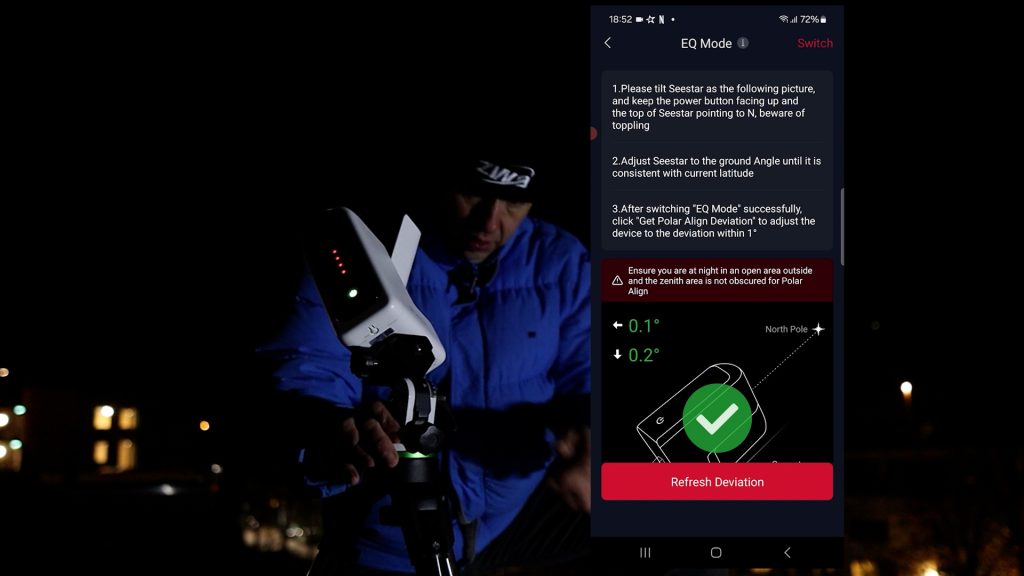
One excellent feature shared by both Dwarflab and Seestar smart telescopes is EQ mode, which allows you to align the telescope with the celestial pole. Polar alignment does require some extra effort: Seestar users may need an optional wedge, while Dwarflab telescopes require a tripod that can be tilted toward the celestial pole.
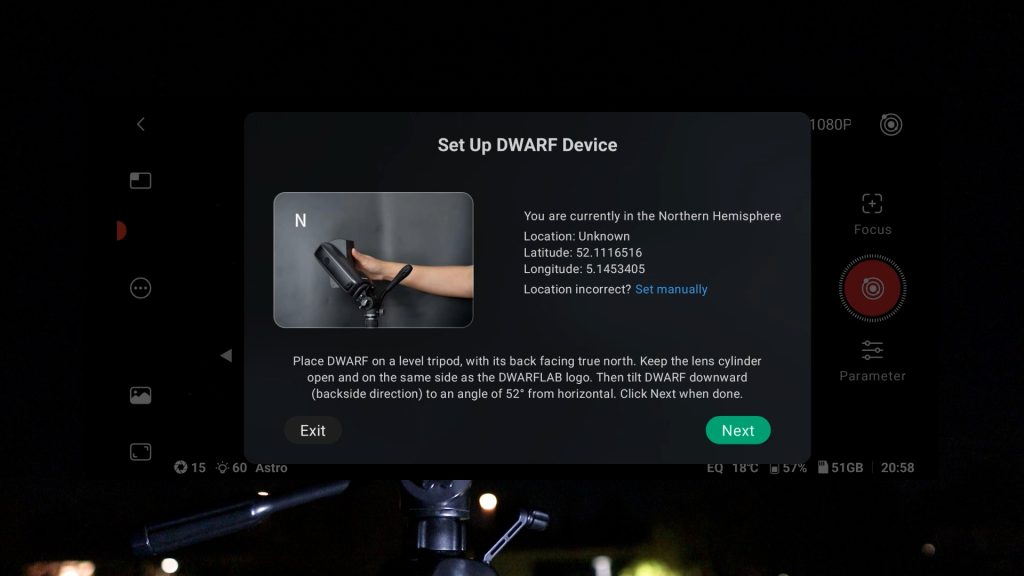
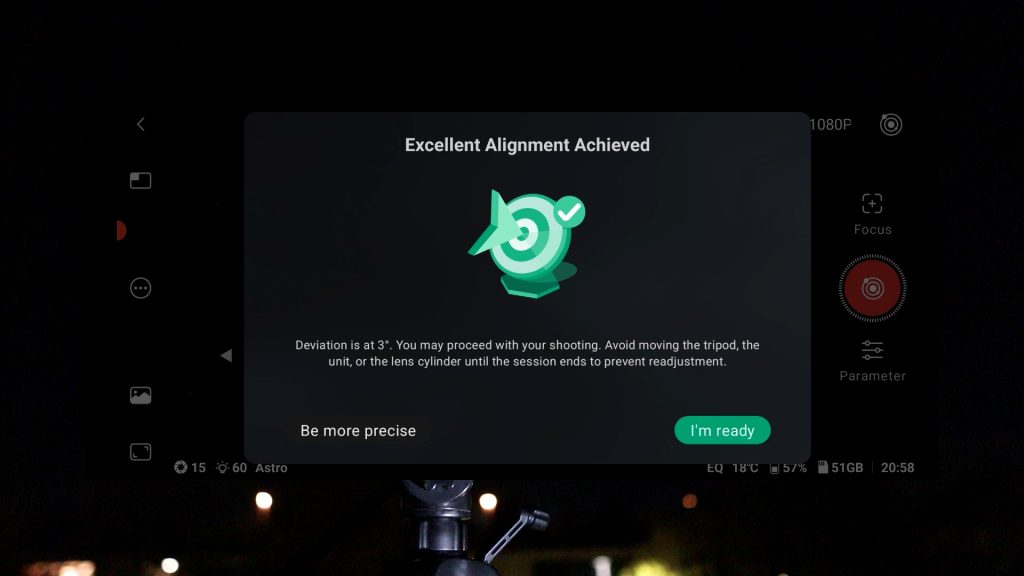
EQ mode significantly improves tracking accuracy by compensating for Earth’s rotation. Instead of being limited to 10-second exposures in the normal alt-az mode, you can take much longer exposures, allowing you to collect much more light from faint deep-sky objects in each stacked photo.
I tested EQ mode on all the smart telescopes. With the Seestar S50 in EQ mode, I had to limit exposures to about 30 seconds, anything beyond that resulted in a lot of rejected frames. With the Seestar S30, and S30 Pro, I could reliably reach 60 seconds and with dwarf mini and dwarf 3 smart telescopes sometimes even 90 seconds, depending on weather conditions. Keep in mind that these telescopes all use a shorter focal-length, which makes accurate tracking less demanding as compared to the Seestar S50, which delivers the most highly magnified view. . I also noticed that the Dwarflab app is slightly more forgiving when stacking frames, typically keeping about 90%, compared to roughly 80% with Seestar. This also depends on weather conditions such as sky clarity and wind.
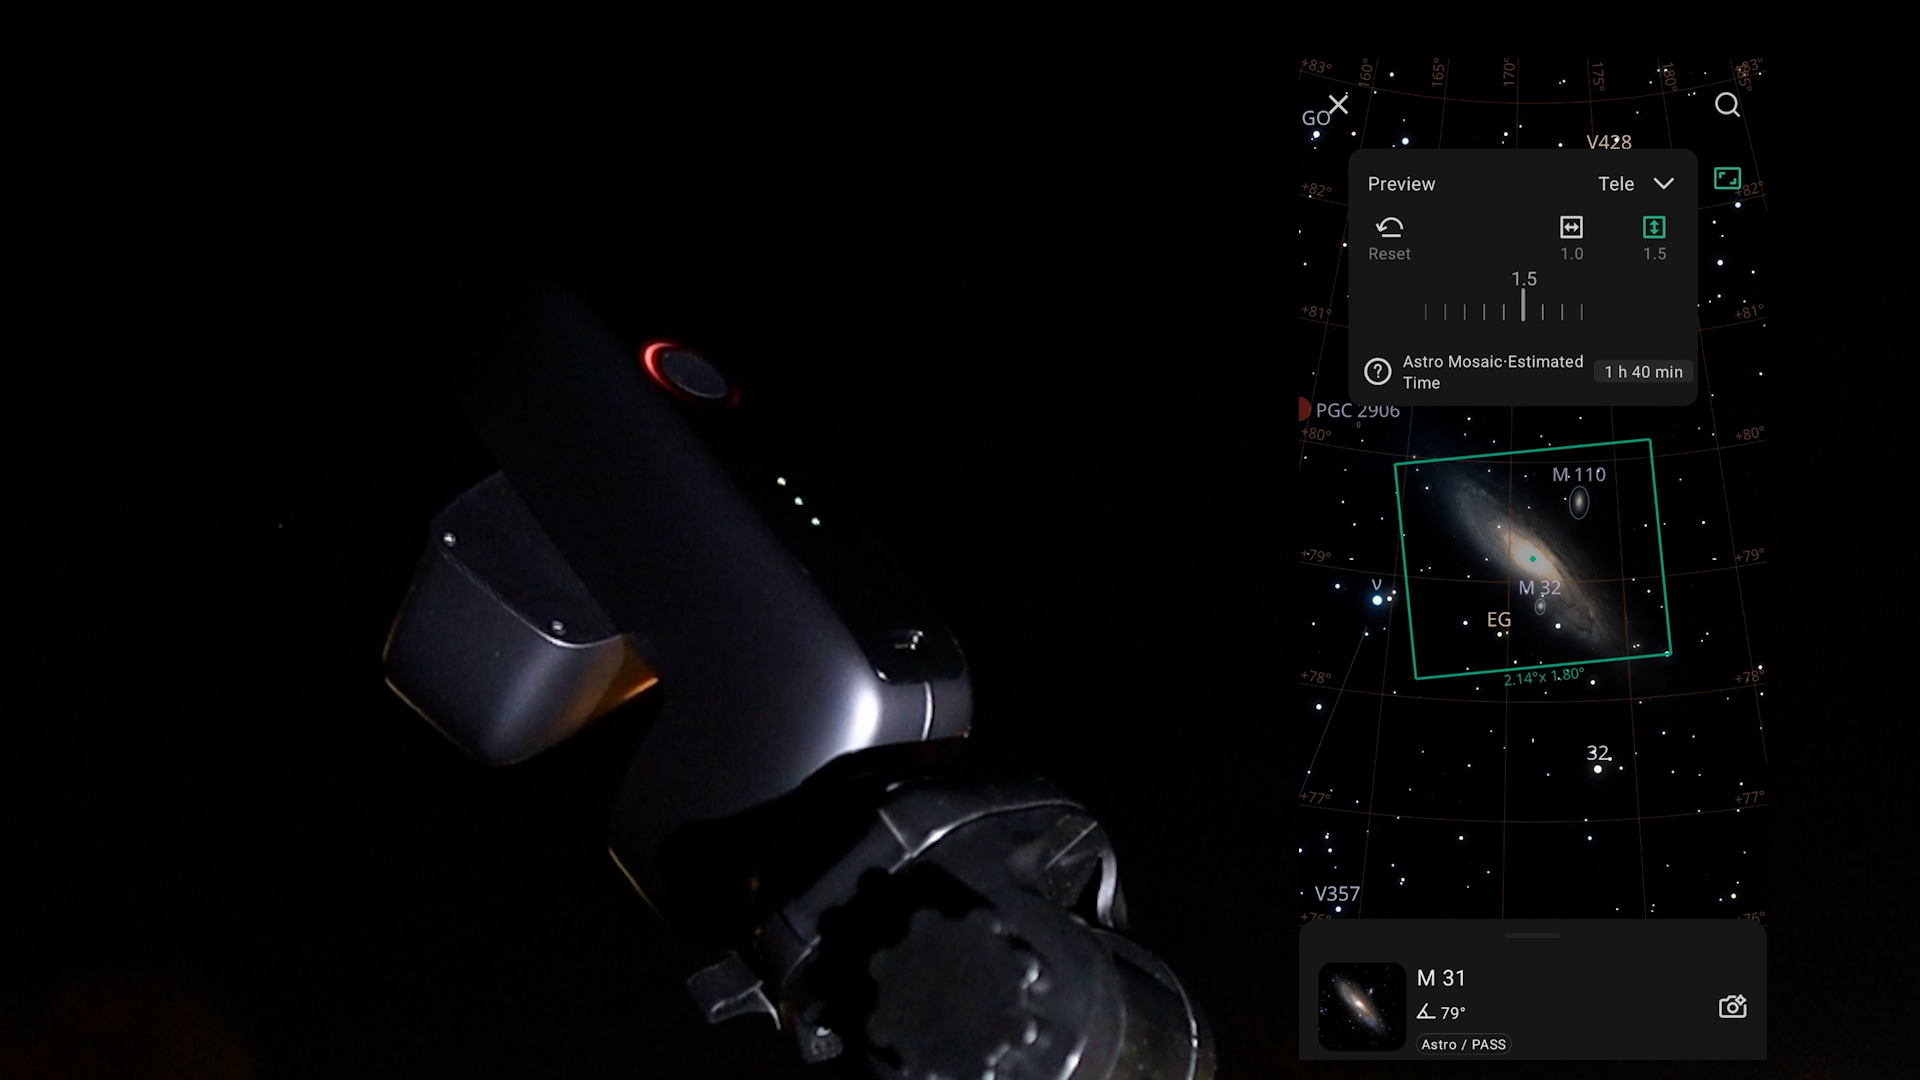
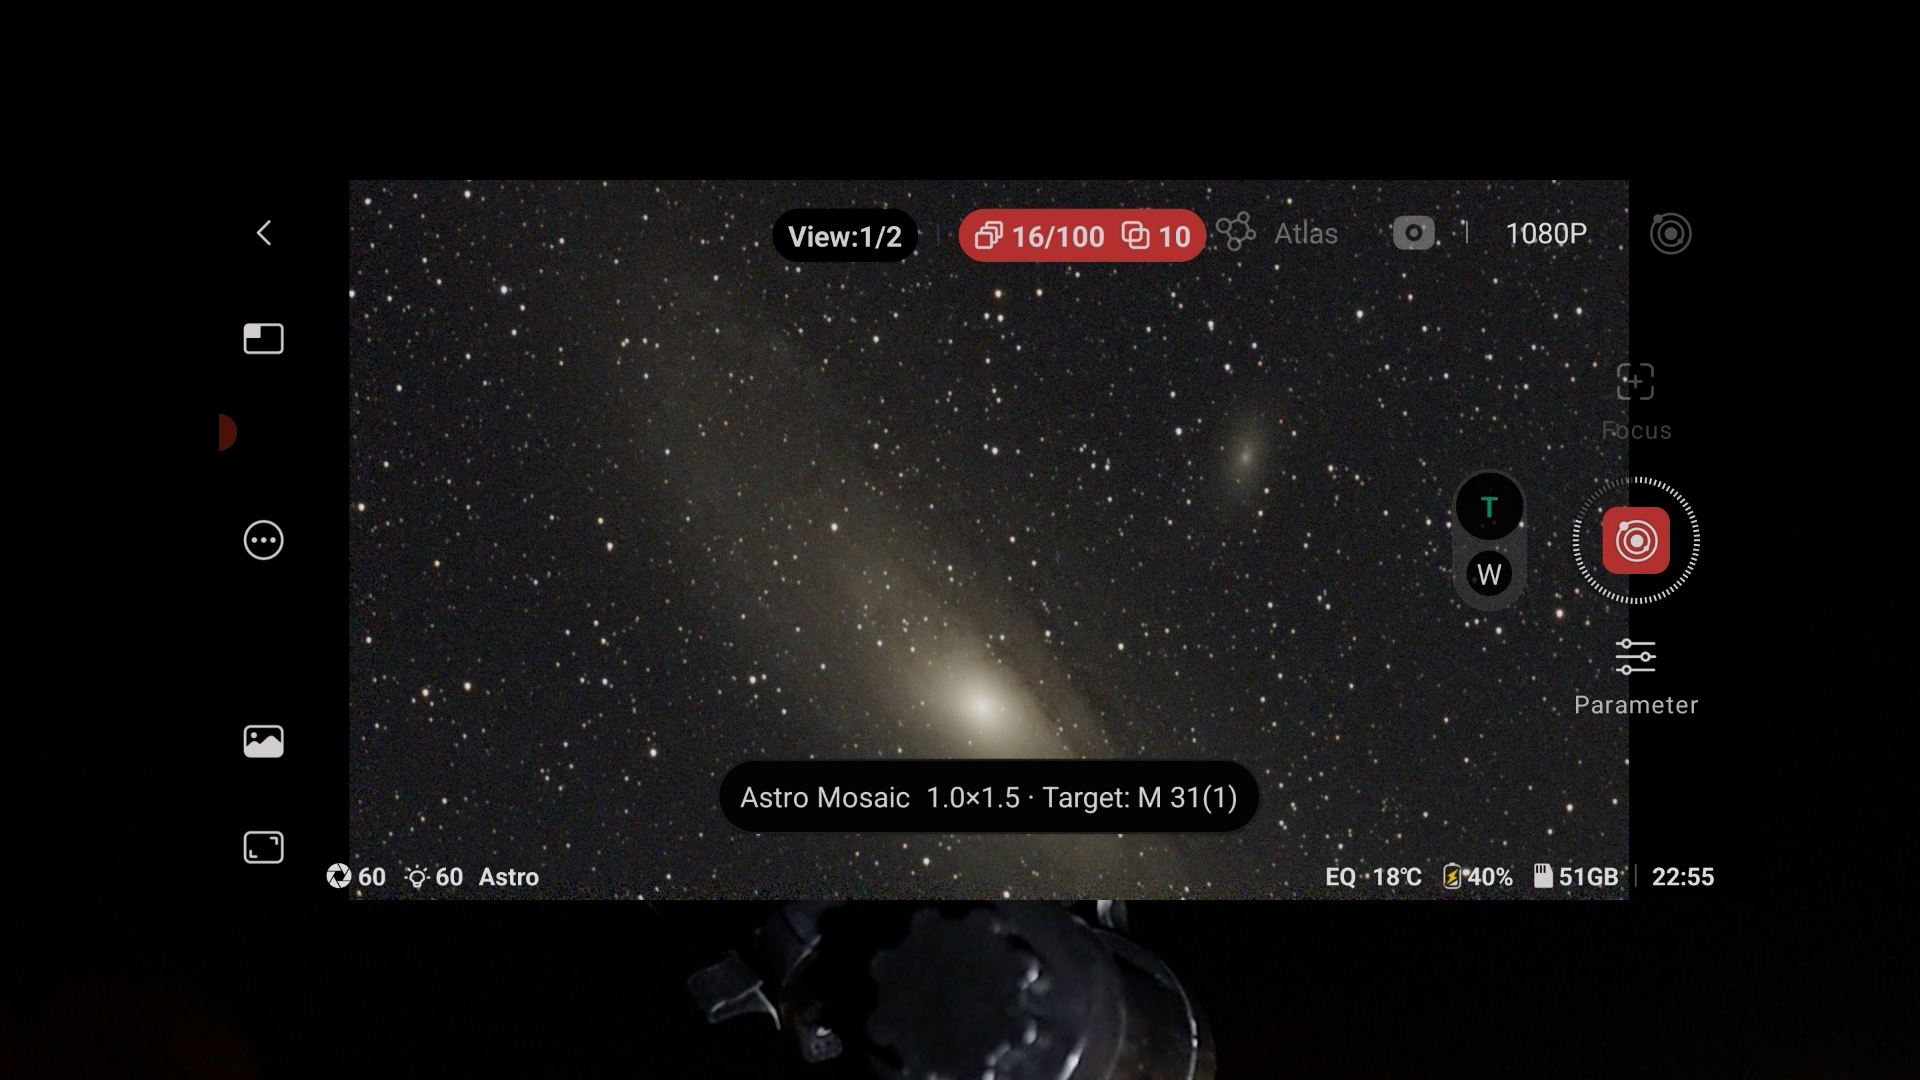
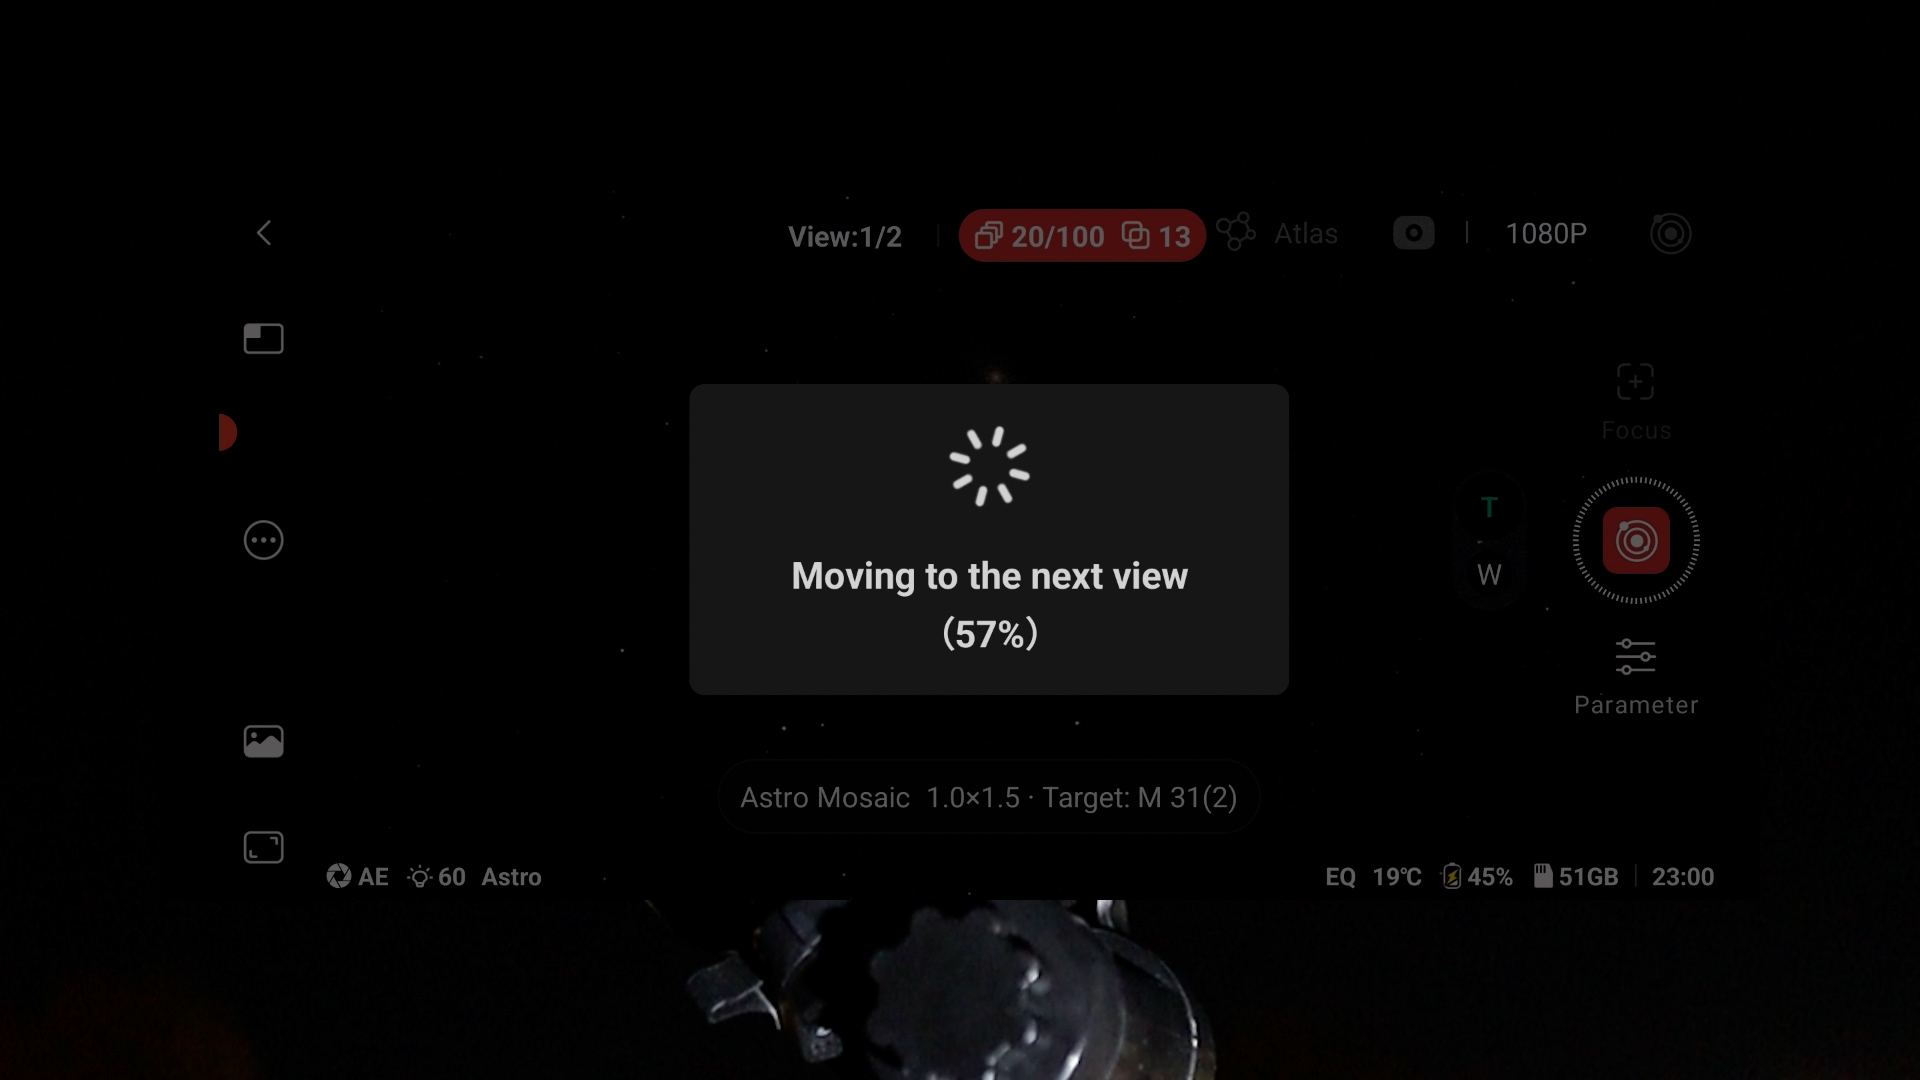
Mosaic feature
Both apps also include a framing or mosaic feature, enabling you to expand your field of view by up to 2x its original size. This is particularly beneficial for the Seestar S50, S30 and Dwarf mini who have the narrowest field of view. However, enlarging the field of view also requires additional capturing time since the camera must photograph different sections of the night sky and stitch them together into one mosaic photo. In contrast, the Dwarf 3 and the S30 Pro, with their wider field of view, can capture larger objects more quickly without needing to create a mosaic.
in-APP editing tools
In addition, aboth apps include in-app editing tools to enhance your stacked deep sky images. Although they’re not as good as dedicated tools like pixinsight and photoshop, you can definitely use them to enhance your images. It’s also important to point out that they capture real-time photos of the sky, including planes, clouds, and satellite trails. There are no downloaded or AI-generated images here—which is worth mentioning, especially with how flooded the internet is with AI images these days.
DSO images compared
Now, let’s take a look at some stacked images and my processed versions, captured with these smart telescopes. Each photo is a stack of about 1 hour of exposure time.
Dwarf mini
The Dwarf Mini has the smallest field of view in this overview, so I often needed to use the mosaic feature to capture larger objects. That said, I was positively surprised, as the Dwarf Mini actually performed quite well. The built-in astro filter produces nicely balanced and natural colors on broadband objects, and the dual-band filter works very well on emission nebulae like the Heart Nebula, giving them solid contrast and structure.
I took 60-second exposures using EQ mode on a cheap photo tripod, and I did notice a small amount of star trailing in the automatically stacked images. My total exposure time for all photos was around one to one and a half hours, so the results are generally a bit noisy and affected by urban light pollution.
I did some post-processing to correct the stars, reduce noise, and remove background light pollution, resulting in some pleasing final images. I used PixInsight, but Stellar Studio in the Dwarflab app offers similar tools if you prefer processing inside the app.
All in all, I was really surprised by what this small and affordable smart telescope can accomplish.
The Dwarf Mini is available at Dwarflab (WW), Agena Astro (USA/WW), High Point Scientific (USA/WW), and Astroshop (EU/WW).
Seestar S30
Like the Dwarf Mini, the Seestar S30 has a small field of view, so larger objects require the mosaic mode. With similar total integration times of one to one and a half hours, the automatically stacked images appeared slightly darker than those from the Dwarf Mini.
The dual-band filter works well for capturing emission nebulae and blocking light pollution, but I was somewhat disappointed by the lower resolution — even compared to the Dwarf Mini. This may be because the Dwarf uses its astro filter, which captures light in the near infrared, something the S30 does not.
The Seestar S30 is available at ZWO (WW), Agena Astro (USA/WW), High Point Scientific (USA/WW), and Astroshop (EU/WW).
Dwarf 3
The more expensive Dwarf 3 offers a much larger field of view, which makes it easier to frame and photograph objects without needing mosaics. This significantly reduces capture time compared to the Dwarf Mini and the S30, where multiple panels often need to be stitched together.
The Dwarf 3 also has the most complete filter set of all the smart telescopes: a VIS filter for daytime use, an astro filter for near-infrared imaging, and a dual-band filter to capture specific H-alpha and OIII emission lines from emission nebulae. Tracking at 30 to 60 seconds on a cheap photo tripod did result in some star trailing on certain nights, but the built-in star correction tools in the Dwarflab app make it easy to fix.
While I don’t see a dramatic increase in resolution in my images, I’m happy with the test results, and I do think the larger field of view justifies the extra cost compared to the S30 and the Dwarf Mini.
The Dwarf 3 is available at Dwarflab (WW), Agena Astro (USA/WW), High Point Scientific (USA/WW), and Astroshop (EU/WW).
Seestar S30 Pro
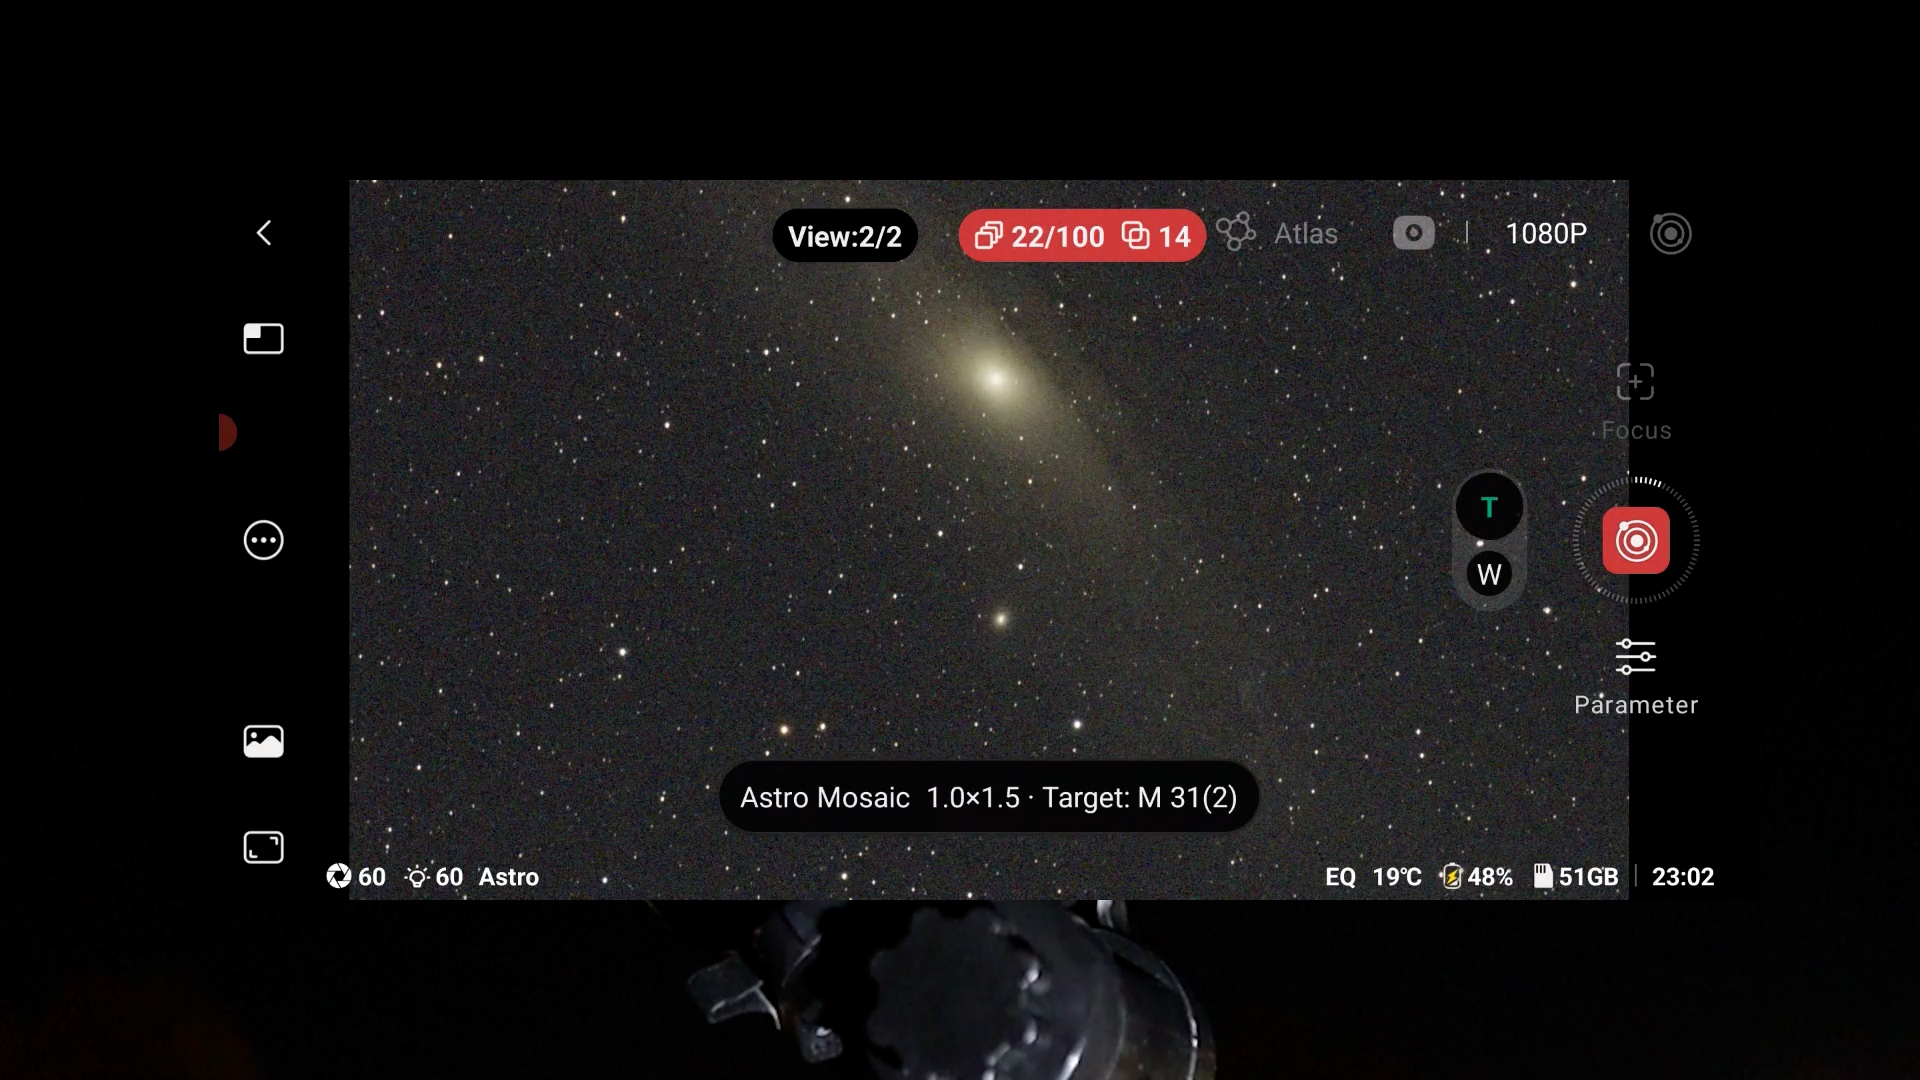
Talking about a larger field of view, I have to admit I’ve really fallen in love with the Seestar S30 Pro. It has the largest field of view in this comparison, making it easy to capture almost any object without needing the mosaic feature, which saves a lot of time.
And when I do use mosaic mode, the field of view becomes so wide that I could fit multiple deep-sky objects that are several degrees apart — like the Horsehead and Orion Nebula, or the Heart and Soul Nebula — into a single image. That level of automation is really impressive, especially considering that panorama shots like these used to take months of planning and careful integration with larger setups.
While the resolution isn’t dramatically better than the other smart telescopes in this comparison, the IMX585 sensor still produces very decent night-sky images, and the dual-band filter performs very well on emission nebulae. The Seestar app also offers in-app editing tools such as AI denoise, exposure, contrast, and saturation adjustments to further enhance your results.
Overall, I do think the Seestar S30 Pro, with its extremely wide field of view, offers something extra compared to the other smart telescopes in this comparison, and in my opinion, it is well worth the additional cost compared to the more affordable options.
The Seestar S30 Pro is available at ZWO (WW), Agena Astro (USA/WW), High Point Scientific (USA/WW), and Astroshop (EU/WW).
Seestar S50
Okay, so let’s talk about the odd but interesting one in this overview: the Seestar S50. It has the narrowest field of view, so even when using mosaic mode, it can be challenging to fit some of the larger deep-sky objects into a single stacked image. The IMX462 sensor is somewhat dated, and I had to limit exposures to 30 seconds in EQ mode.
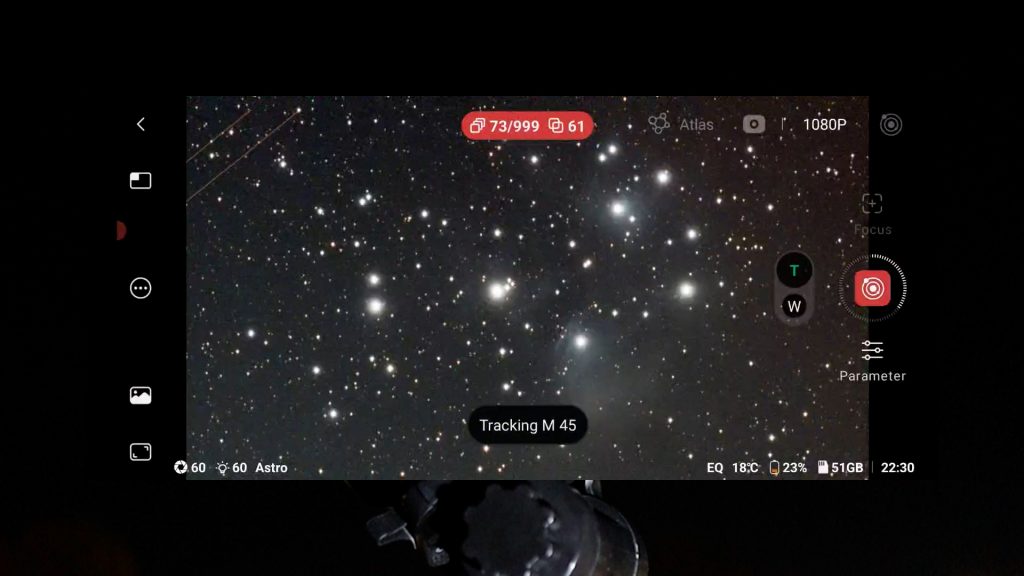
But if you’re willing to look beyond that, I actually find the Seestar S50 very intriguing. It has the largest aperture and the longest focal length of all the smart telescopes in this comparison, and I do see a noticeable difference in resolution. The image scale is the most detailed among the smart telescopes in this overview, which becomes clear when looking closely at objects like the Orion Nebula, the Pleiades, or the Eastern Veil Nebula.
It can even capture distant spiral galaxies like M51, which is only a few arcminutes across. So if you’re interested in higher-resolution images that reveal smaller deep-sky objects — or finer details within larger ones — the Seestar S50 is definitely still worth considering.


The Seestar S50 is available at ZWO (WW), Agena Astro (USA/WW), High Point Scientific (USA/WW), and Astroshop (EU/WW).
Planets
None of these smart telescopes are really well suited for capturing planets. Even when I point the Seestar S50 — which has the highest magnification in this comparison — at Jupiter, the largest planet in our night sky, you mainly see the Galilean moons orbiting around it. That’s nice to observe, but you won’t see any noticeable surface detail on the planet itself. For that kind of planetary detail, you need a much bigger telescope.
Filter comparison
There are differences in the type of filters that are included in each of these smart telescopes to capture day and nighttime images. Let me explain.
A dark filter is used to automatically capture dark frames, which helps reduce sensor noise during deep-sky imaging. A UV/IR-cut filter blocks ultraviolet and infrared light and is mainly used for daytime imaging and natural-looking color reproduction. An astro (broadband) filter passes most visible and near infrared light to preserve natural star colors and works well for galaxies and star clusters, while a dual-band filter isolates specific emission lines like H-alpha and OIII to enhance contrast when capturing emission nebula, especially under light-polluted skies.
The Dwarf Mini includes a dark filter, an astro broadband filter, and a dual-band filter, but it does not have a UV/IR-cut filter. This makes it less suitable for daytime imaging, as photos and videos can show a noticeable reddish color cast. The Dwarf 3 does include a UV/IR-cut, or VIS, filter for daytime use, along with an astro filter and a dual-band filter. However, it does not have a built-in dark filter, so if you want to reduce noise, dark frames need to be captured manually.
All Seestar telescopes include an UV/IR-cut filter for daytime use, a built-in dark filter, and a duo-band light-pollution filter, but they do not have a dedicated astro broadband filter.
Weight, size & battery life
When it comes to portability, all of these smart telescopes are easy to transport, but there are noticeable differences. The Seestar S50 is the heaviest at around 3.0 kg, while the Seestar S30 and S30 Pro are significantly lighter at approximately 1.65 kg. Dwarflab pushes portability even further with the Dwarf 3 at about 1.3 kg, and the Dwarf Mini stands out as the lightest option at under 1 kg, weighing roughly 840 grams.
Size-wise (L × W × H), the S50 is the largest at 26 × 14 × 13 cm. The S30 and S30 Pro have a flatter profile at 21 × 14 × 8 cm. The Dwarf 3 is similarly compact at 22.2 × 14.2 × 6.5 cm, while the Dwarf Mini is the smallest of the group at just 18 × 10 × 6 cm.
All of these smart telescopes have built-in storage for saving your photos and videos.
In this lineup, the Dwarf 3 and the Seestar S30 Pro offer the most internal storage, with 128 gigabytes each. The Seestar S50, Seestar S30, and Dwarf Mini come with 64 gigabytes, which is still plenty of space to cover multiple imaging nights before you need to transfer your files.
Battery life is fairly similar across the board. The Dwarf 3 is rated for up to eight hours of use, while the Seestar S50, S30, and S30 Pro provide around six hours on a full charge, which is enough for most imaging sessions. The Dwarf Mini runs for about four hours. All of these telescopes charge via USB-C, and you can even recharge with a power bank while they’re in use so you don’t have to worry about power at all.
Final conclusion
🏆 Best Overall
Seestar S30 Pro
My personal favorite is the Seestar S30 Pro. It captures the widest deep-sky views thanks to the IMX585 sensor combined with a 160mm focal length. The Milky Way mode and startrail features using the widefield IMX586 sensor don’t feel gimmicky — they add real value to the overall experience.
Using the 2x framing mode, I was able to simultaneously capture famous nebulae like the Heart and Soul Nebula, as well as the Orion and Horsehead Nebula, into one mosaic image that is created automatically.
Features within the Seestar app — such as in-app image stacking, editing, and planning mode to automate your imaging session — make this a complete package.
The wider deep-sky images compared to the more affordable smart telescopes in this overview give it a more professional look. The results approach what you would expect from higher-end astrophotography setups, with the difference that you’re up and running in minutes instead of building and balancing a full astrophotography rig.
The Seestar S30 Pro is available at ZWO (WW), Agena Astro (USA/WW), High Point Scientific (USA/WW), and Astroshop (EU/WW).
💰 Best Value for Money
Dwarf Mini
If we’re talking about the best value for money, I actually prefer the Dwarf Mini. I slightly preferred the quality of the astrophotos it produced compared to the S30, and considering its tiny size, portability, and price, it offers a lot of value.
I also personally prefer the landscape orientation over the portrait sensors of the Seestar telescopes — but that’s just my preference.
Keep in mind that it is not ideal for daytime use. The astro broadband filter, which is excellent for capturing broadband astrophotography images, also transmits near-infrared light. This can give daytime photos and videos a reddish tint. If daytime photography is important to you, I would go for the Seestar S30 instead.
The smaller IMX662 sensor on the Dwarf Mini — and the similar sensor size on the S30 — provides a somewhat limited field of view for very large deep-sky objects spanning multiple degrees in the night sky. You can use the 2x framing mode to create mosaics, but be aware that this requires longer total capture time, as separate panels need to be stacked and integrated into one final image.
The Dwarf Mini is available at Dwarflab (WW), Agena Astro (USA/WW), High Point Scientific (USA/WW), and Astroshop (EU/WW).
⭐ Special Mentions
Dwarf 3
The Dwarf 3 might actually be the best overall telescope if you’re into both daytime and nighttime photography and prefer a landscape sensor over portrait mode. It mounts on a regular photo tripod, captures in landscape orientation, and performs well during both day and night. It also includes a wide-field lens for Milky Way photography and offers the second-largest 4K field of view after the S30 Pro. The IMX678 sensor with its smaller pixel size also works well for capturing the Moon and the Sun. The main trade-off is the lack of a built-in dark filter, so dark frames must be captured manually for maximum noise reduction.
The Dwarf 3 is available at Dwarflab (WW), Agena Astro (USA/WW), High Point Scientific (USA/WW), and Astroshop (EU/WW).
Seestar S50
The Seestar S50 is the strongest option if you’re looking for magnification and detail in this price range. Despite being the heaviest, using the older IMX462 sensor, and having limited exposure times in EQ mode, its larger aperture and longer focal length clearly pay off on smaller objects like lunar features and compact deep-sky targets. Its image scale is the most detailed in this overview. The lack of a widefield sensor makes manual slewing more difficult, although the automatic GoTo system works well.
The Seestar S50 is available at ZWO (WW), Agena Astro (USA/WW), High Point Scientific (USA/WW), and Astroshop (EU/WW).
Seestar S30
The Seestar S30 is currently the most affordable option and shouldn’t be disregarded. While I was slightly more impressed by the Dwarf Mini’s images, the S30 offers longer battery life and is better suited for daytime photography thanks to its traditional UV/IR-cut filter, which prevents a reddish tint in daytime photos and videos.
The Seestar S30 is available at ZWO (WW), Agena Astro (USA/WW), High Point Scientific (USA/WW), and Astroshop (EU/WW).
Each of these smart telescopes really shines in its own way, so the right choice comes down to what you value most. Clear skies!