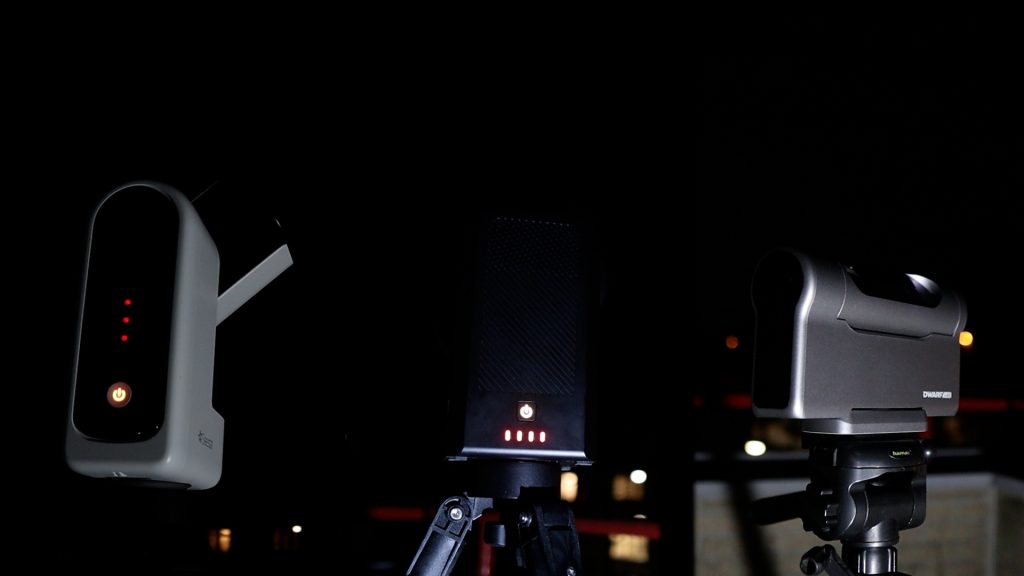
Introduction
In this blog, we’re diving into a comparison of three budget-friendly smart telescopes. As of now, the Seestar S30 is the most affordable at just $349, while the Seestar S50 and Dwarf 3 are priced between $499 and $599, depending on where you shop and any import duties. We’ll put each telescope through its paces by observing the Sun, Moon, and deep-sky objects, while also breaking down their technical specs to help you find the perfect match for your stargazing needs.
Why Choose a Smart Telescope?
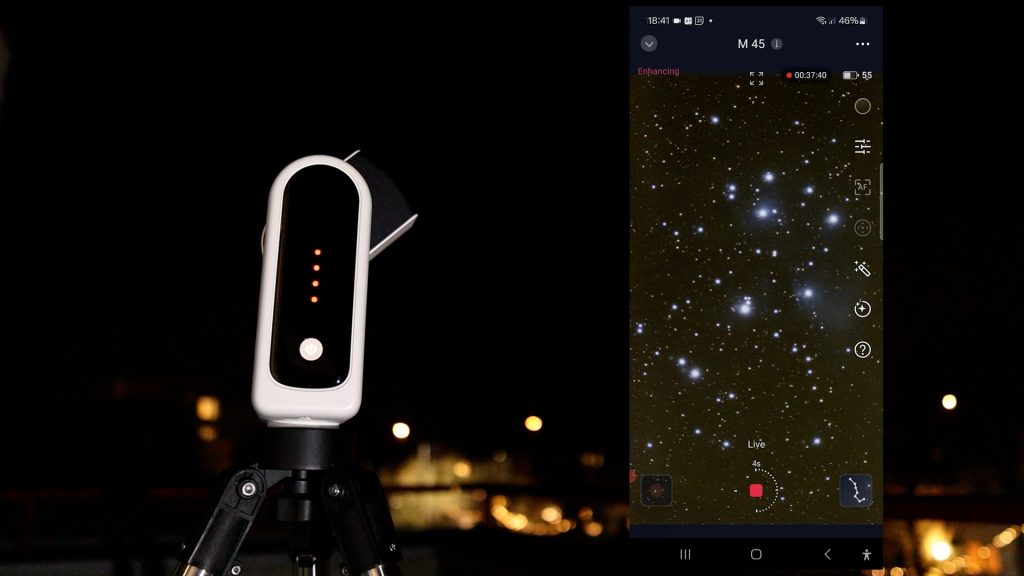
Smart telescopes are changing the way beginners can explore the night sky. Unlike traditional telescopes, they come with built-in cameras and are wirelessly controlled through user-friendly apps on your smartphone or tablet. This means no complicated setup—just power on the telescope, connect via the app, choose an object, and watch as the telescope automatically slews to the object in the night sky and automaticaly starts taking live images of that object that will appear on your smart device. Smart telescopes avoid the steep learning curve of traditional astrophotography, and they come in compact, portable designs.
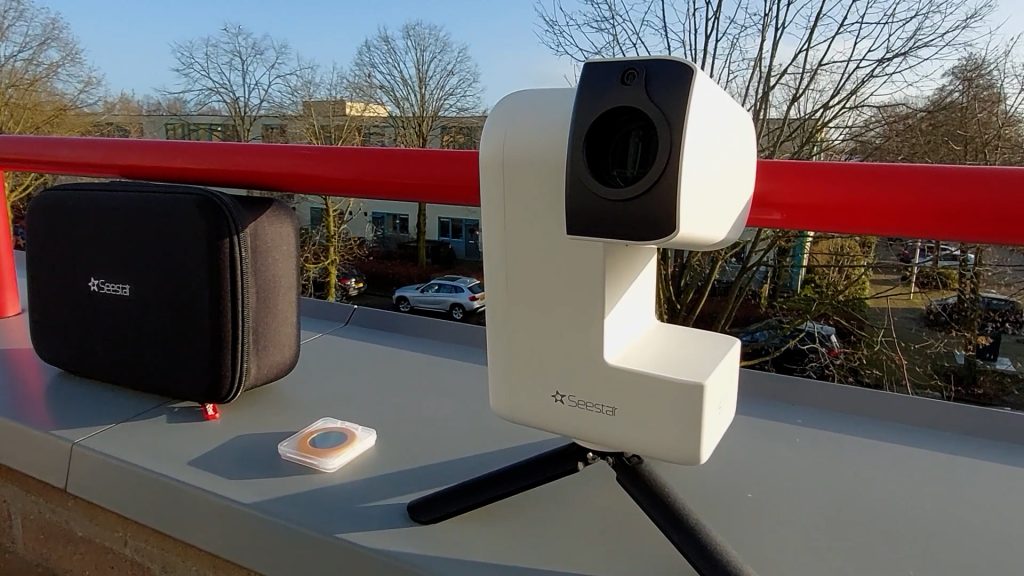
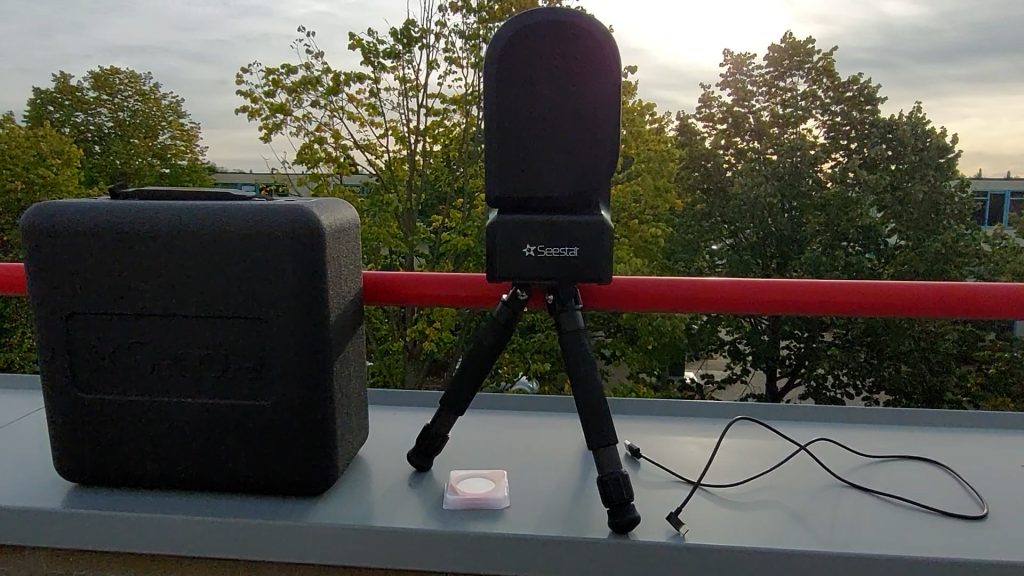
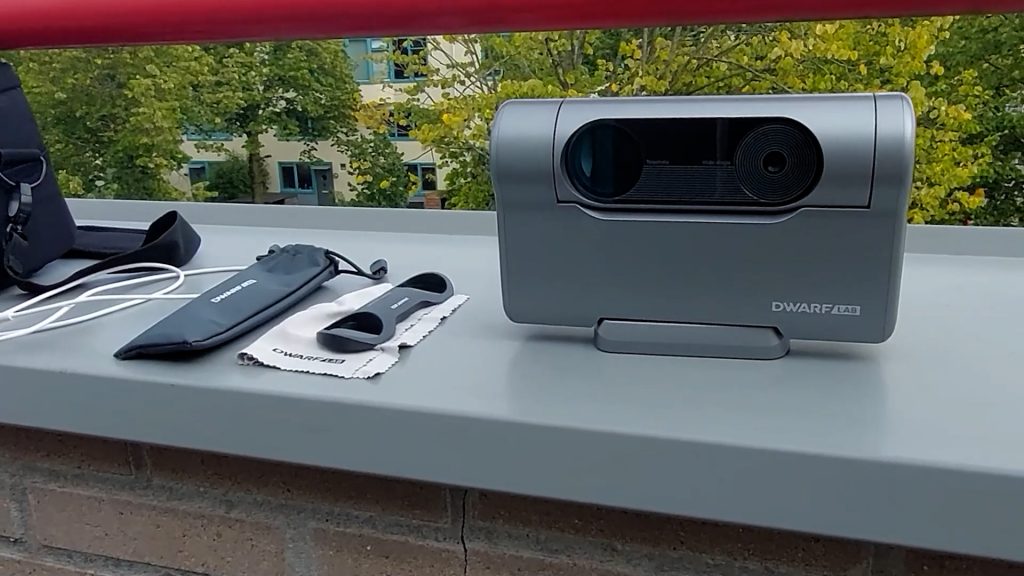
What’s in the Box?
When you buy the Seestar S30 or S50, you’ll get the telescope with a tripod, a solar filter, a USB-C cable and a sturdy case. The Dwarf 3 comes with the telescope, a solar filter, a USB-C cable and a carrying bag —but no tripod, which is offered as an optional extra. Alternatively, you can use any regular photo tripod for your Dwarf 3.
At the time of writing, the Seestar S30, Seestar S50, and Dwarf 3 are priced between $349 and $599. Prices may fluctuate based on import duties and availability. Here’s a list of reputable retailers where you can check out current prices and availablity:
- Seestar S30: ZWO (WW) | Agena Astro (USA) | High Point Scientific (USA) | Astroshop (EU)
- Seestar S50: ZWO (WW) | Agena Astro (USA) | High Point Scientific (USA) | Astroshop (EU)
- Dwarf 3: Dwarflab (WW) | High Point Scientific (USA) | Astroshop (EU)
Technical Specifications
Let’s break down the key technical differences between the Seestar S30, S50 and the Dwarf 3.

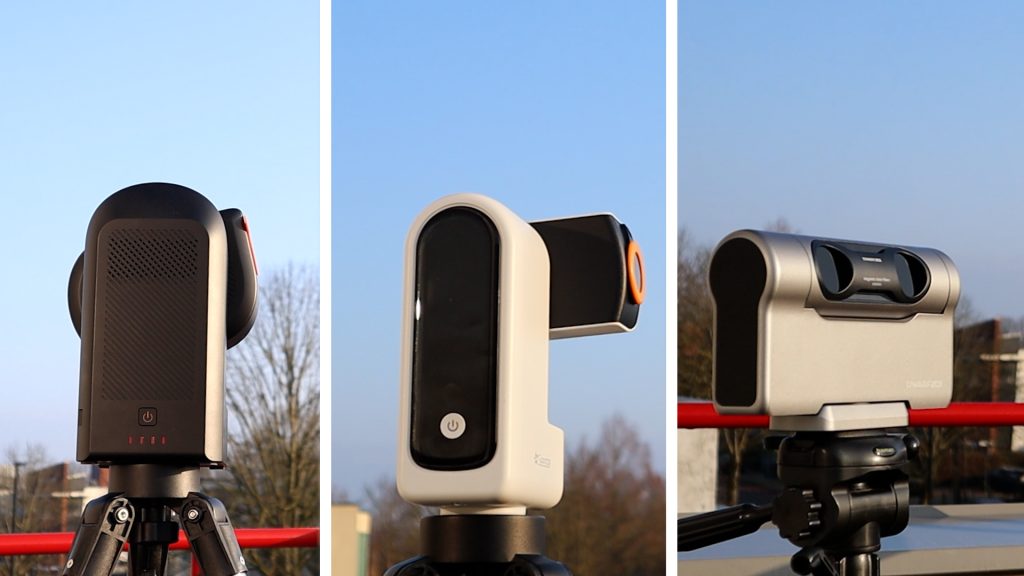
Telescope Type:
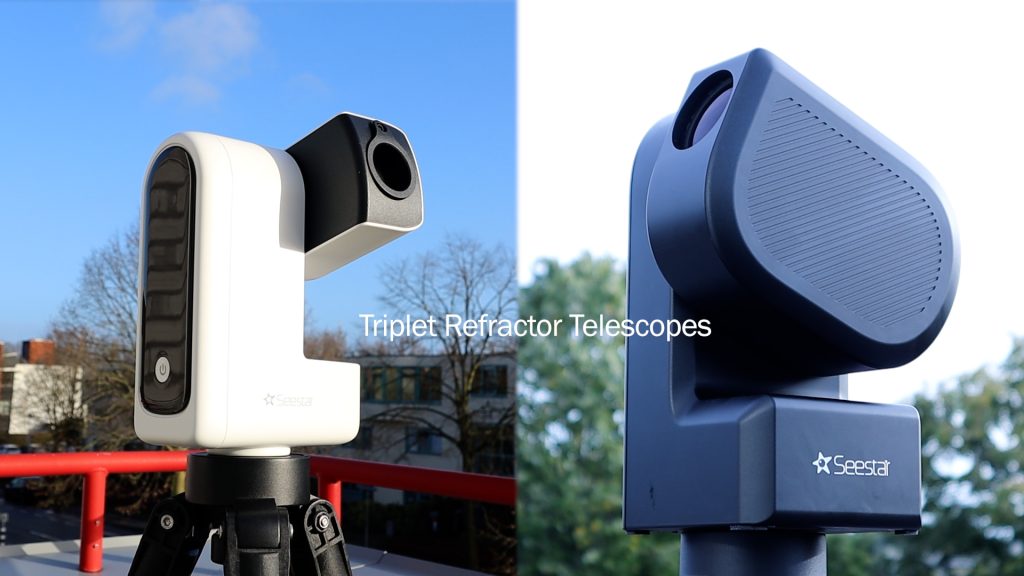
The Seestar S30 and S50 are triplet refractor telescopes, while the Dwarf 3 has a telephoto lens. All three telescopes have extra-low dispersion (ED) glass and are apochromatic telescopes, which promises sharp and color-accurate images of the night sky.
Aperture:
Aperture determines how much light a telescope collects. The S50 has the largest 50mm aperture, followed by the Dwarf 3 at 35mm and the S30 at 30mm. A larger aperture means better resolution—think of it like using a bigger bucket to catch more rain, but in this case, you’re catching more photons.
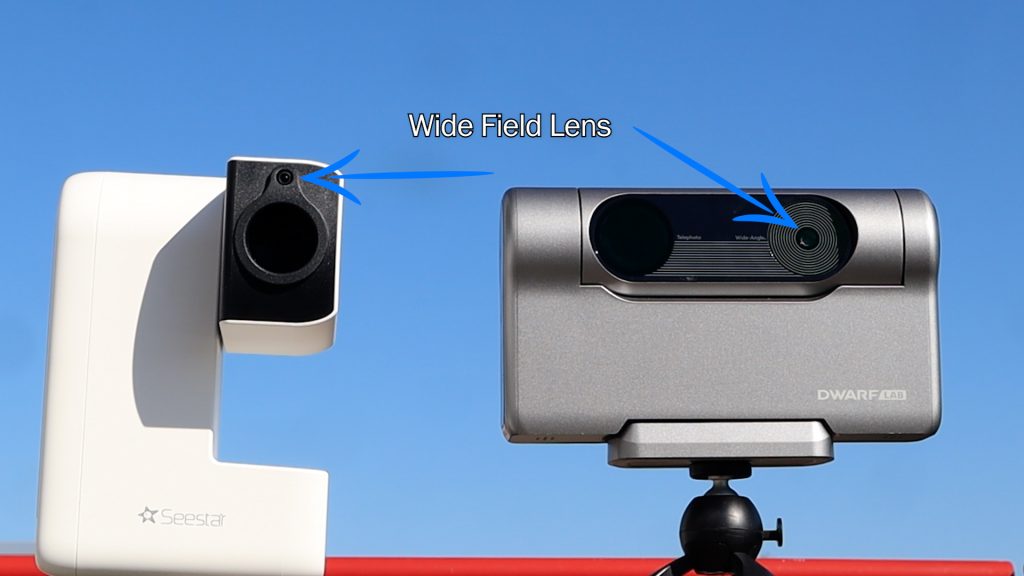
Widefield Lens:
The Seestar S30 and Dwarf 3 have an additional widefield lens to help visually locate objects in the sky like the moon. These lenses can also be used to take daytime and nighttime photos and videos.
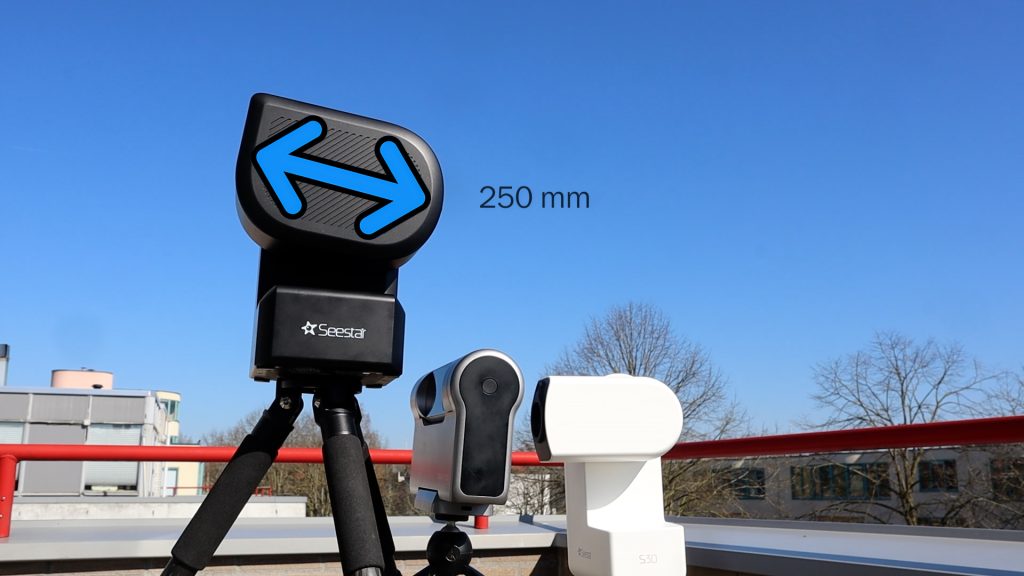
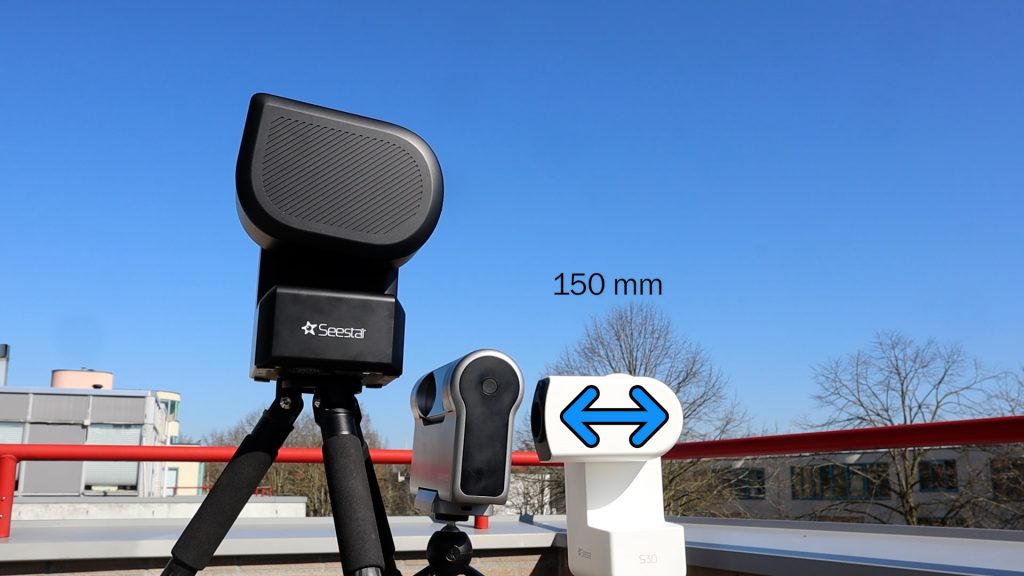
Focal Length & Zoom:
The S50 has a 250mm focal length, while the Dwarf 3 and S30 have 150mm. Focal length works like a zoom lens—at 150mm, you get a wider view, whereas at 250mm, you’re zoomed in and get a closer look at celestial objects.
F-Ratio & Light Capture:
The Dwarf 3 has a slightly faster f/ratio at f/4.3, while both Seestar models have an f/5 ratio. A lower f-ratio means faster light collection, which is useful for capturing dim objects.
Field of View (FoV):
The field of view determines how much of the night sky fits into the frame of your photo or video.

- The Seestar S50 has the smallest FoV at 0.7° x 1.3° of the night sky, just enough to fit the Full Moon.
- The Seestar S30 offers a 1.2° x 2.13° view, which would fit about two Moons.
- The Dwarf 3 has the widest FoV at 2.9° x 1.7°, fitting the Moon about six times over.
A wider field of view is perfect for imaging larger nebulae and galaxies. The Seestar models use a portrait-oriented sensor to align better with smartphone viewing, while the Dwarf 3 maintains a traditional landscape mode. All three telescopes use Sony camera sensors, with the S30 and Dwarf 3 having the newer Sony IMX662 and 678 color sensors, whereas the Seestar S50 has a slightly older IMX462 camera sensor.
Mosaic Mode:
Importantly, thanks to software updates, each of these telescopes are now capable of a mosaic mode, which stitches multiple images which can double the original FoV. We’ll explore the pros and cons of this feature later in this blog.
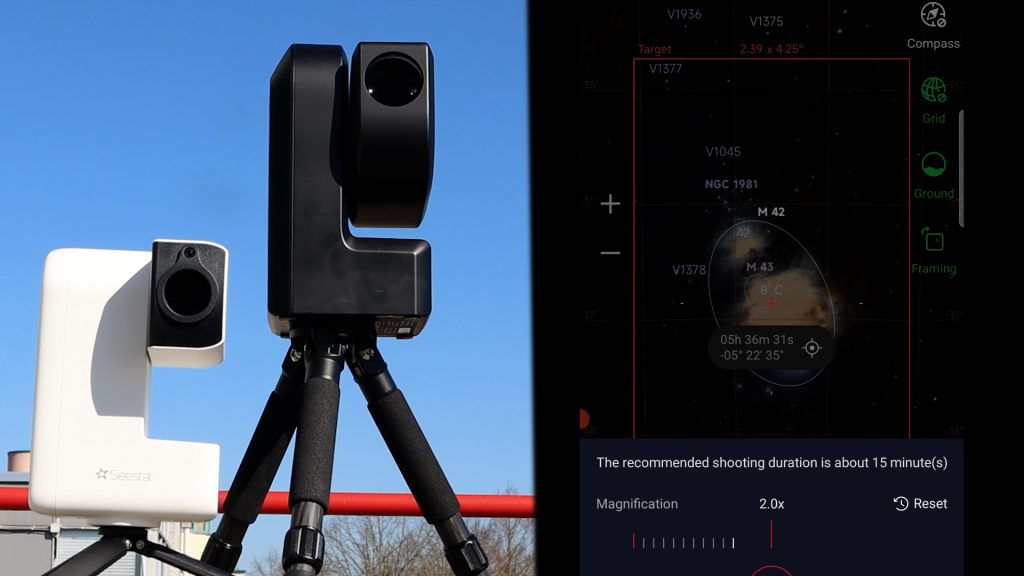
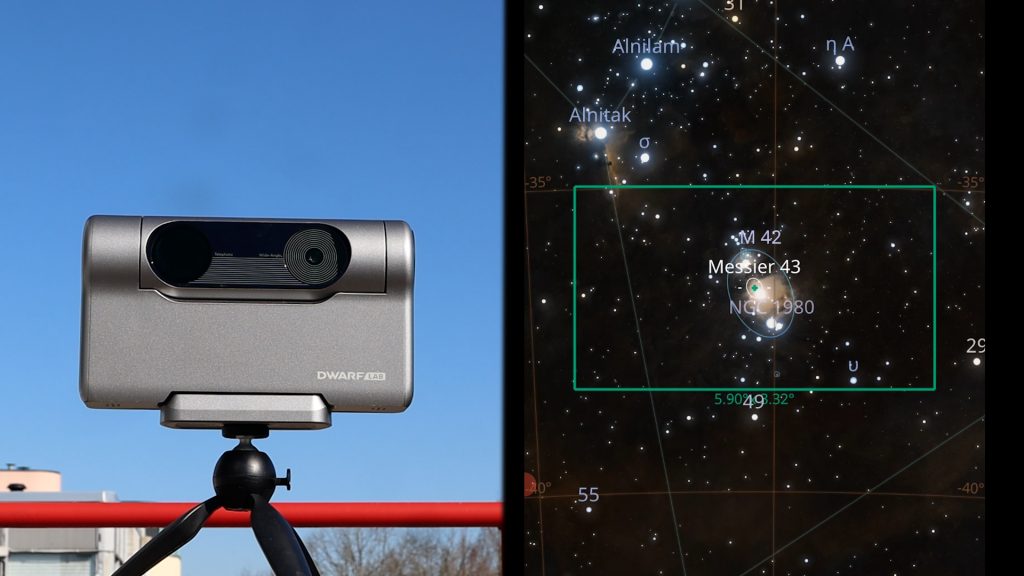
Photo & Video Formats:
All three telescopes support JPEG, FITS, and TIFF files, and MP4 video. However, the Seestar models go a step further with AVI RAW video, which is a great feature for those who want to get into advanced processing of the Sun and Moon. i’ll demonstrate this in a minute.
App Control & User Experience:
Both the Seestar and Dwarf 3 telescopes are controlled via their respective mobile apps, available for Android and iOS. These apps are beginner-friendly and easy to navigate. While the Dwarflab app initially had some issues, it has improved significantly and at this point I’d say that it is easy for any beginner to learn how to use both APPs.
Filters:
Each telescope has three built-in filters:
- IR/UV Cut Filter: For normal day and night imaging.
- Duo Band Filter: Enhances Ha and Oiii light from emission nebulae while blocking light pollution .
- Additional Filters: The Dwarf 3 has an astro filter for near-infrared imaging, while the Seestar S30/S50 have a dark filter for noise reduction.
A solar filter is included with all three models. The S30 and Dwarf 3 attach magnetically, while the S50’s filter requires manual placement—still easy, but it needs a bit more care.
If you’d like to compare the specs of these—and other—smart telescopes side by side, give my new interactive tool a try and let me know your thoughts.
Alright, I’ll get back to more technical specs later in the blog, let’s take a look at how each of these affordable smart telescopes perform in the real-world.
Real-World Performance
How to setup a smart telescope
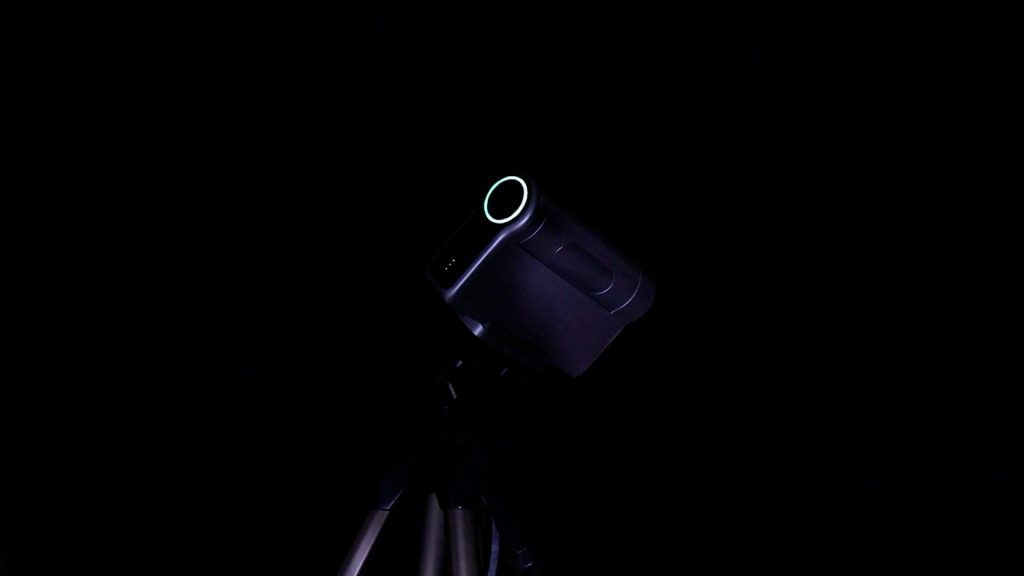
Using a smart telescope is quite straightforward. Start by placing the telescope on a tripod and ensuring it is level. Then, download the Seestar or Dwarflab app from the App Store on your smartphone or tablet. Once installed, power on the smart telescope, which will create a unique WiFi signal. Simply switch the WiFi signal of your smart device to this WiFi network, and open the APP. The first time you connect, you’ll need to complete an initial setup process. For a detailed walkthrough, check out my in-depth reviews of the Seestar S30, S50, and Dwarf 3.

Solar imaging
Alright, let’s take a look at how the Seestar and Dwarf 3 smart telescopes perform when imaging the Sun!
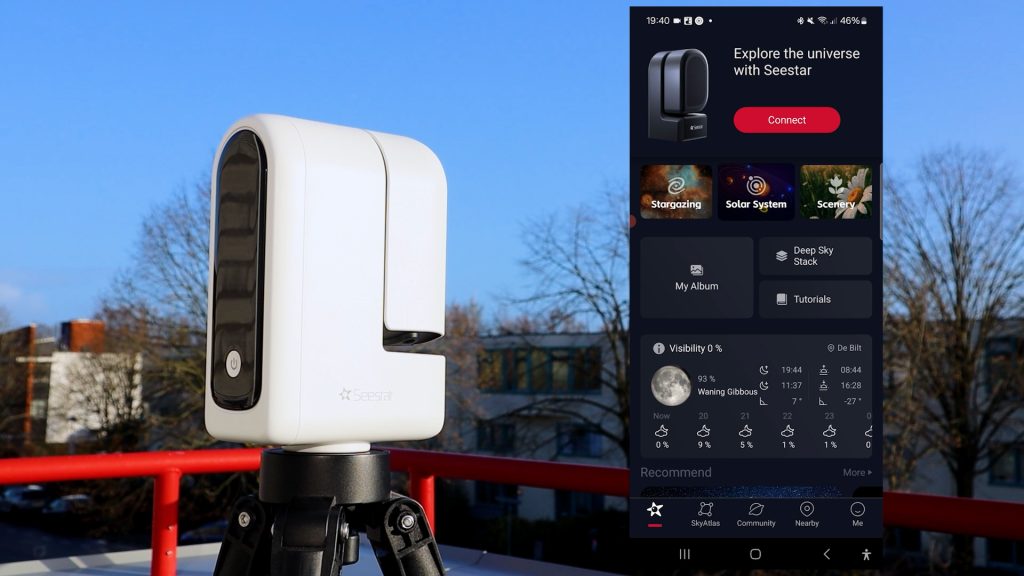
When you open the Seestar app, you’ll see a home screen with three main options:
- Stargazing for deep-sky imaging
- Solar System for the Sun, Moon, and planets
- Scenery for daytime photos, videos, and timelapses
In comparison, the Dwarf 3 is a bit more hands-on. It has a main screen and a photo button, and as soon as you press it, you’ll see the live view of the Dwarf 3 right on your smart device. Let me remind you to Never look directly at the Sun and always place a solar filter in front of the telescope lens.
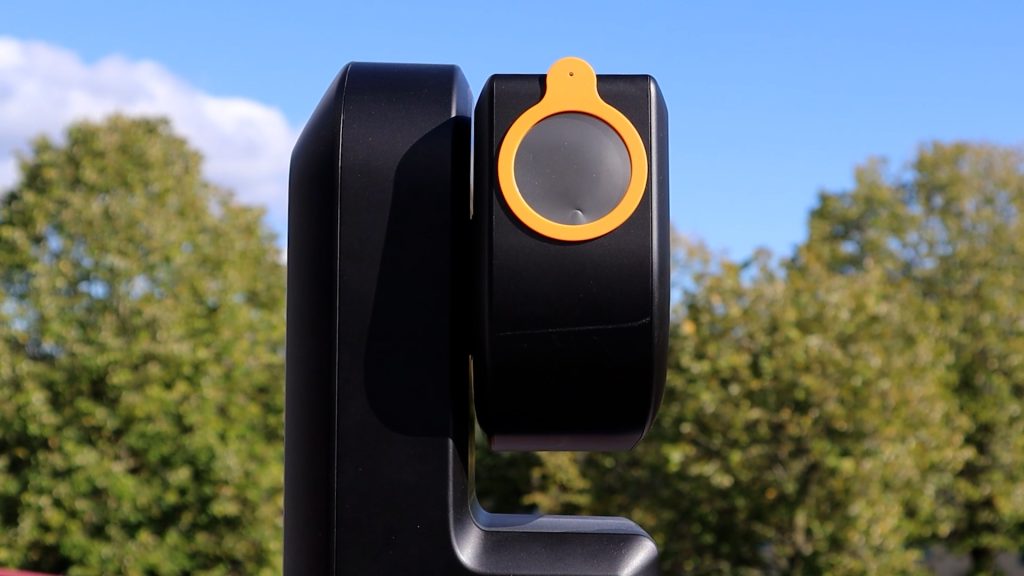
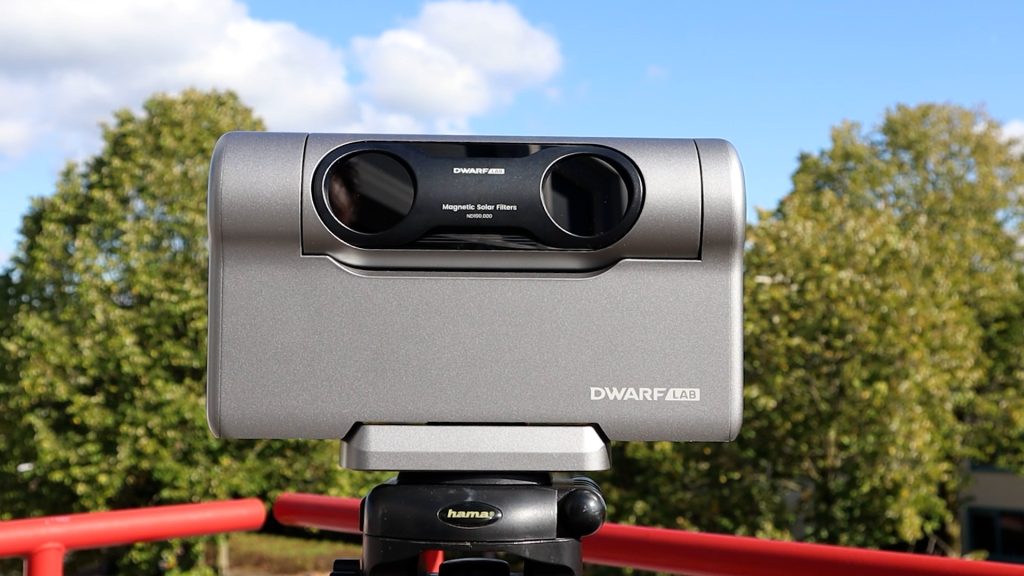
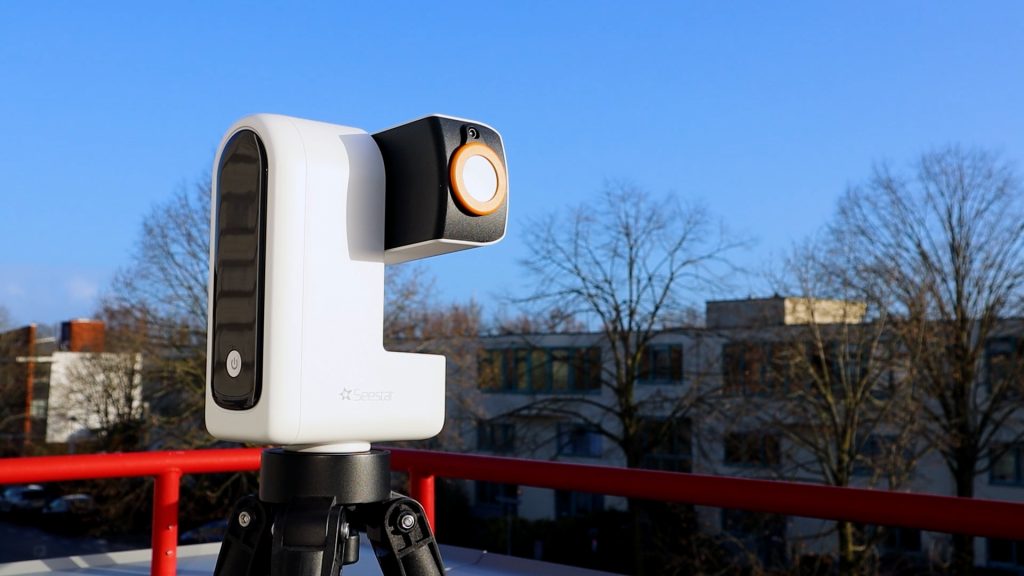
- The Dwarf 3 and Seestar S30 have magnetic solar filters, making them super easy to attach.
- The Seestar S50’s solar filter isn’t magnetized, so it takes a little more effort to position it —just be careful to avoid too much friction when placing it in front of the lens.
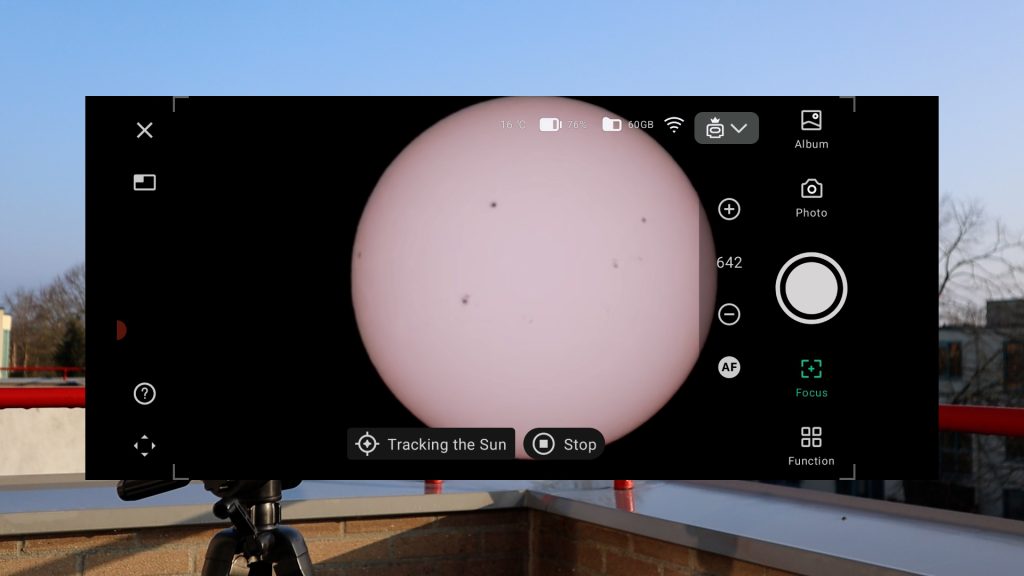
The Seestar S30 and Dwarf 3 include a wide-field lens to help locate the Sun before switching to the telescope view. In the Dwarf 3 app, tapping “photo” opens a live view of both the telephoto and wide-field lenses. Use the slew buttons on the lower left to center the Sun in the telephoto lens, and switch between views by tapping the top left of the screen.
The Seestar app allows users to select the Sun from the solar system menu and initiate a GoTo command, enabling the telescope to locate the Sun automatically. The Seestar S30 also supports manual slewing using the wide field view, while the Seestar S50 lacks a wide-field lens and relies entirely on GoTo. If the S50’s GoTo alignment is inaccurate, you can manually adjust its position using the slew buttons or retry the GoTo function.
Once the Sun is centered, all three telescopes offer automatic solar tracking, which will keep the Sun in view throughout your viewing session. All three telescopes offer auto-focus and allow you to adjust exposure and gain to your preference, though their default settings are already quite good.
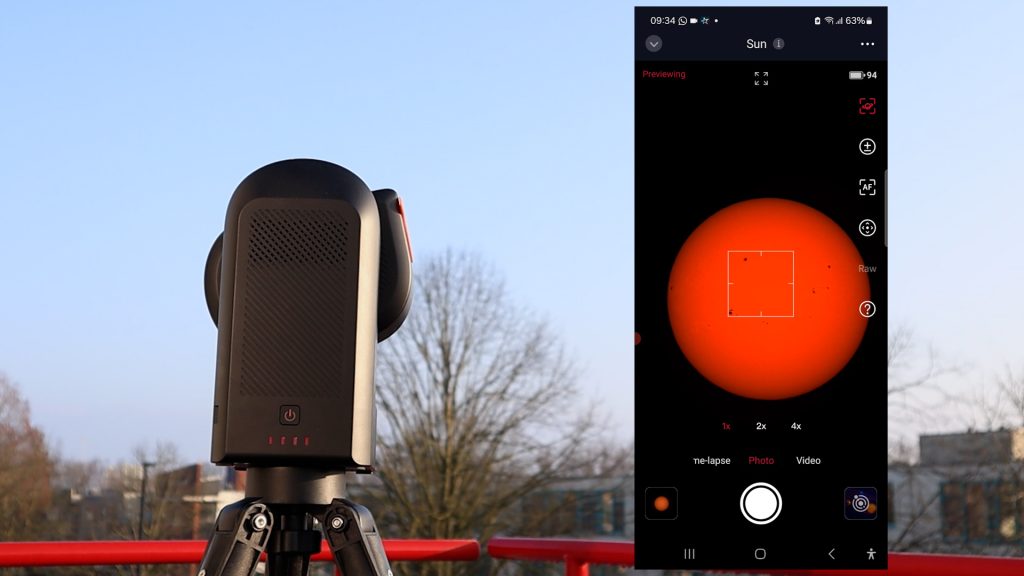
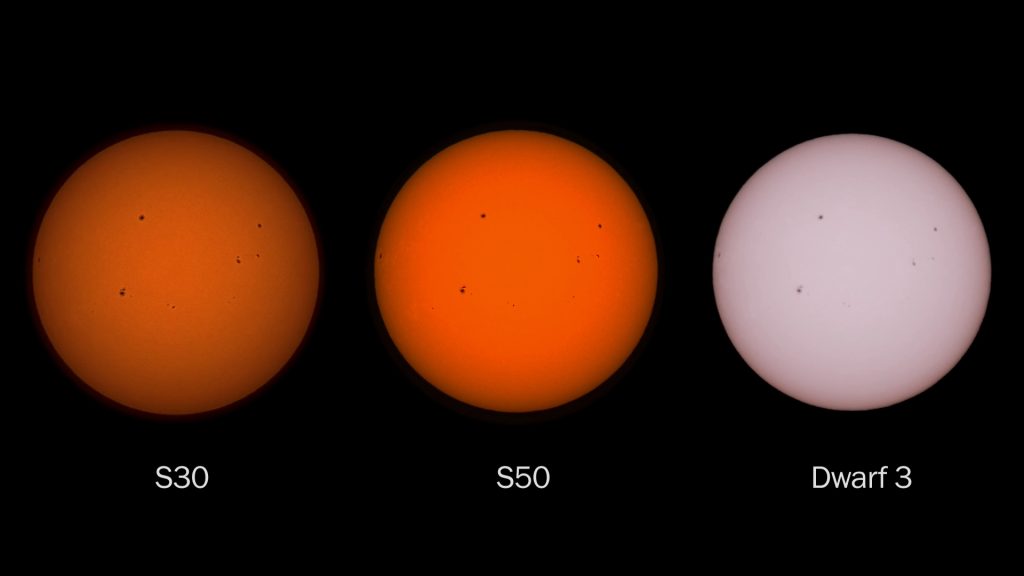
Now, let’s compare the live views of the Sun.Here are three unedited, single JPEG photos of the Sun. When comparing them, I think the Seestar S50 has a slight edge over the S30 and Dwarf 3, thanks to its larger aperture, which brings out a bit more detail in the sunspots
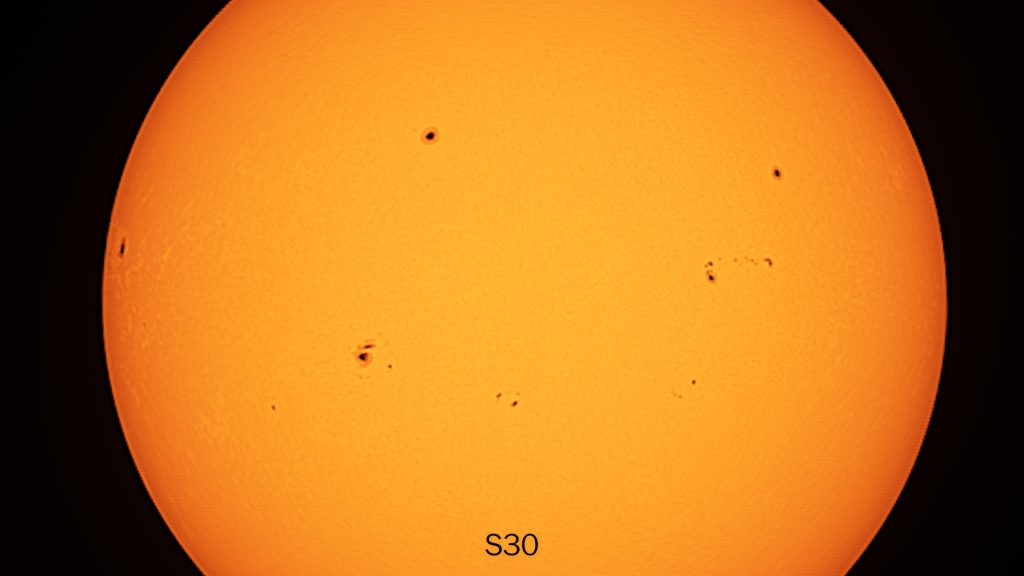
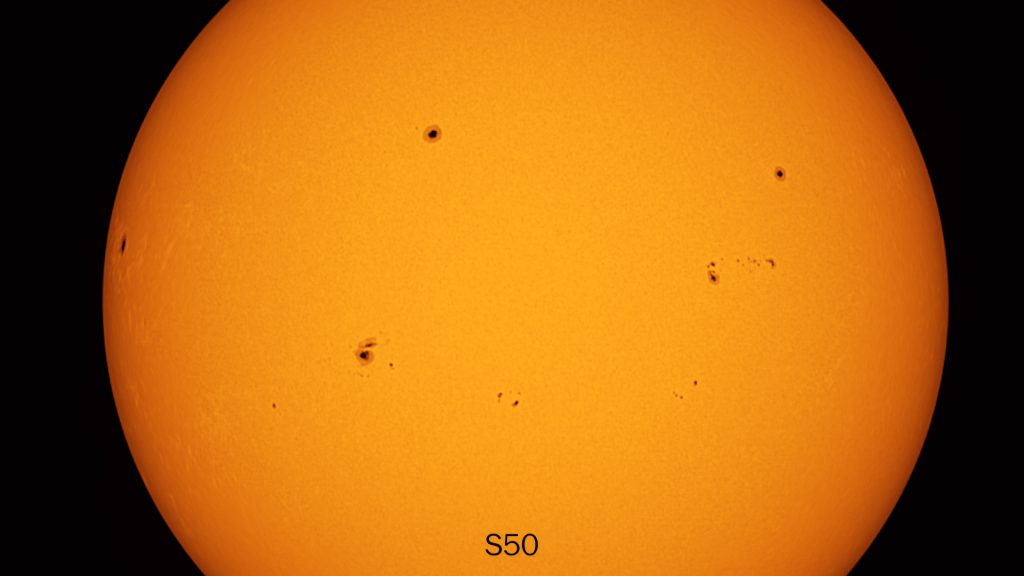
You can also create stacked images of the Sun using all three telescopes. With the Seestar telescopes, you can record a high quality AVI RAW video for up to 10 minutes, and than stack the frames using free software like AutoStakkert. The Dwarf 3 also has an in-app stacking option through the built-in astro mode, which lets you live stack images directly in the app. So let me also show you three stacked images of the sun with some processing from my side to the best of my abillity, after stacking about 500 individual frames for each of the photos. Again, I do think the Seestar S50 has a slight edge and shows a bit more detail than the other two. Let me know if you agree.

Lunar Imaging
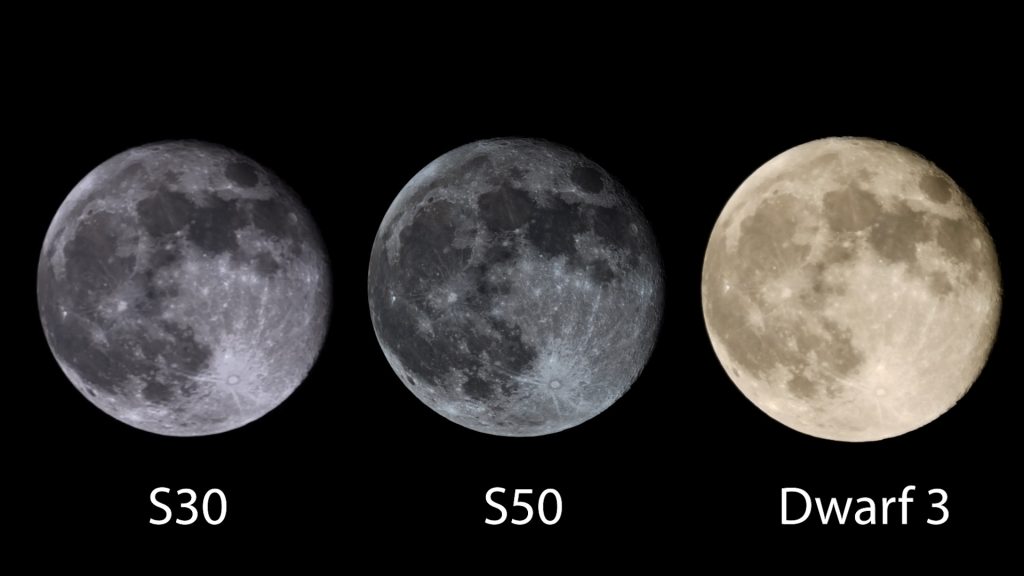
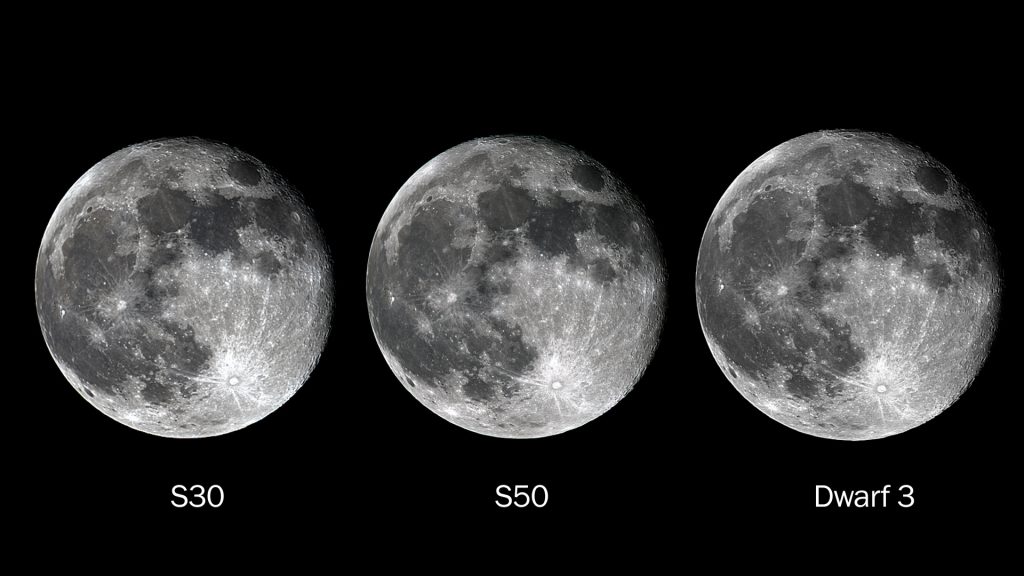
Imaging the moon basically works the same as imaging the sun, but without the need for a solar filter. I pointed all of the telescopes at the same moon during the same night, and here are three unedited jpeg images, and the stacked images taken with each telescope. Again, I do think thhat the Seestar S50 has a slight edge over the Dwarf 3 and Seestar S30 due to its larger aperture. Let me know if you agree with me in the comments, and let’s move on to observing the rest of the universe.
Deep-Sky Observations
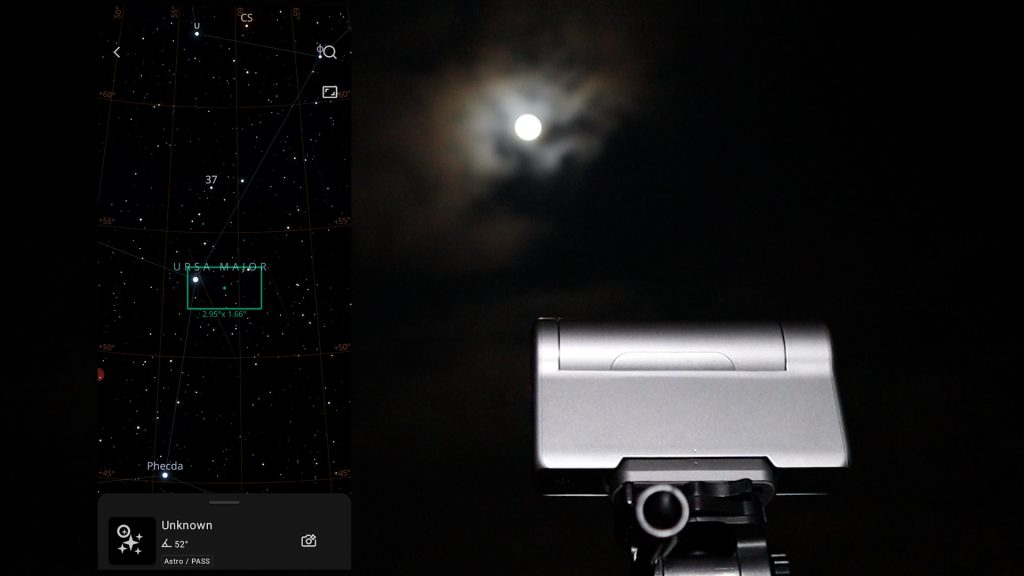
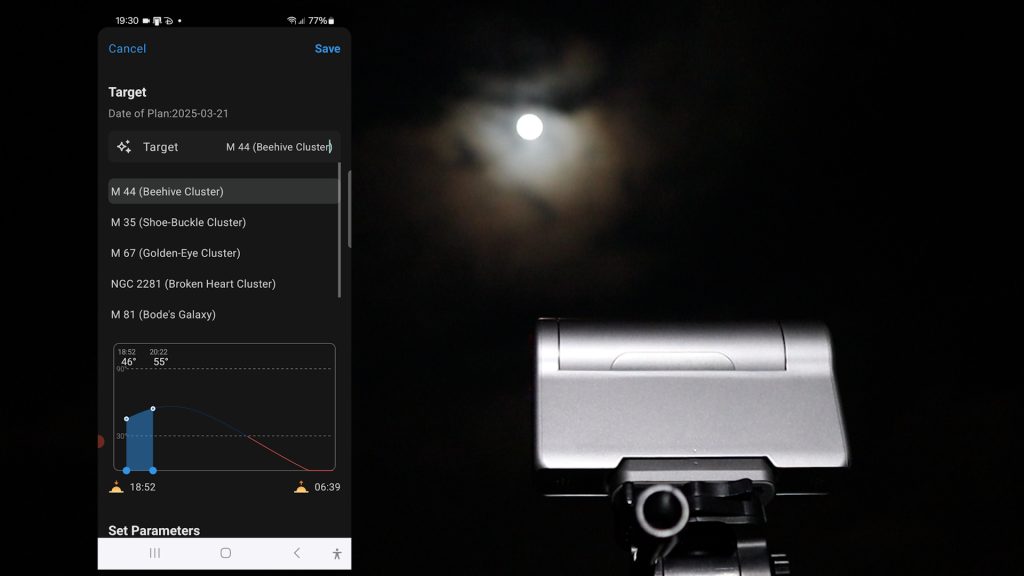
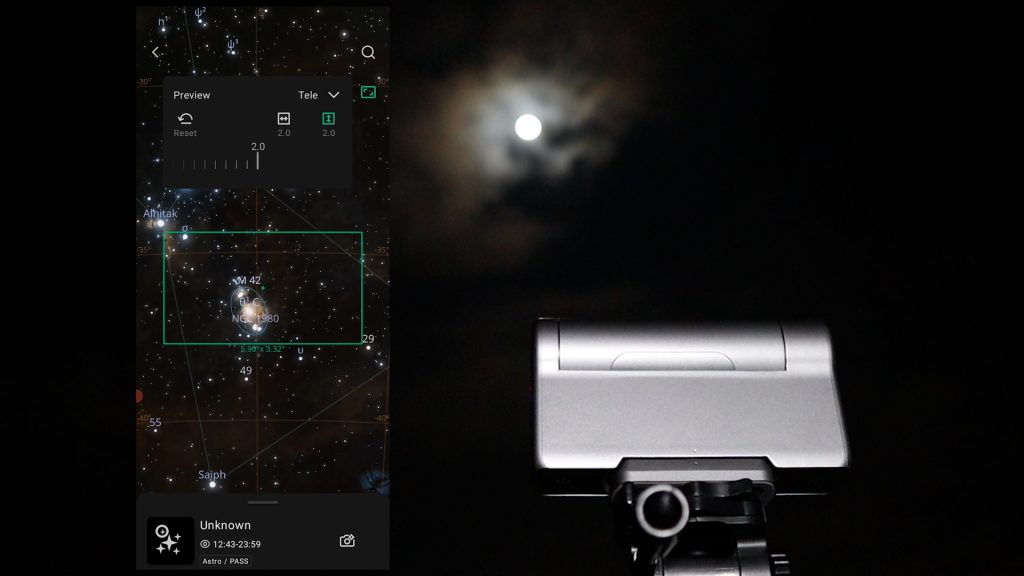
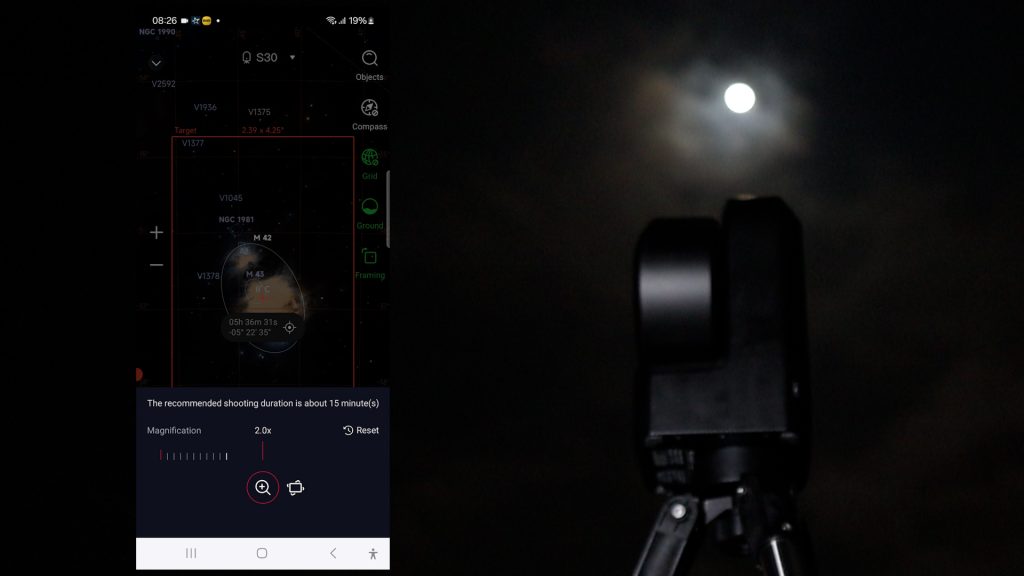
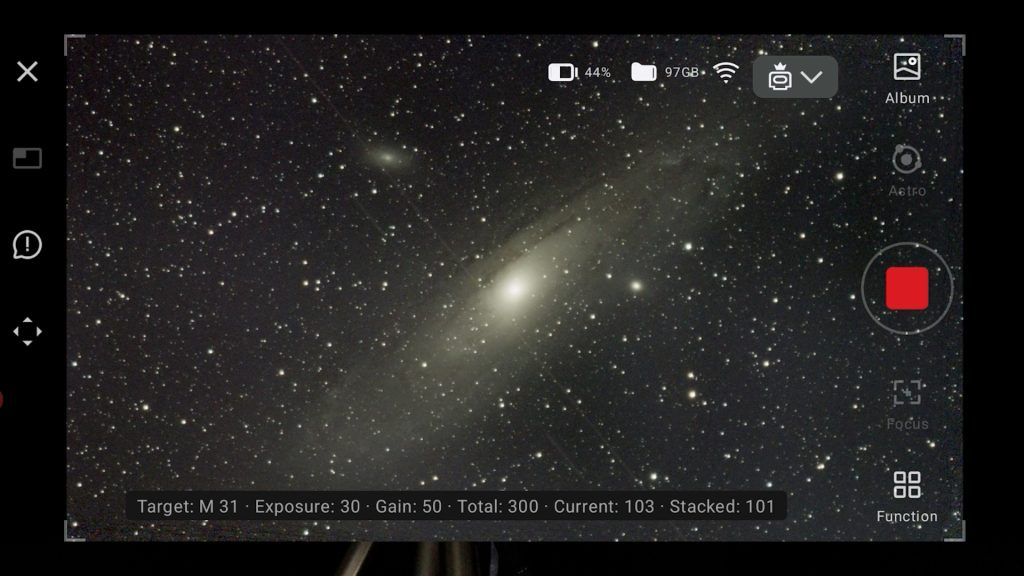
Both apps offer multiple ways to engage in deep-sky astrophotography. The Dwarflab app features a virtual sky atlas, allowing users to explore celestial objects. By clicking the search icon, you can access a list of recommended targets, including the Sun, Moon, planets, nebulae, galaxies, and star clusters. Just a simple tap on the photo icon, and the Dwarf 3 will slew to the object you’re interested in. Additionally, the Dwarflab app provides a scheduling tool that enables you to plan and automate your imaging session by selecting specific objects to capture at designated times and locations.
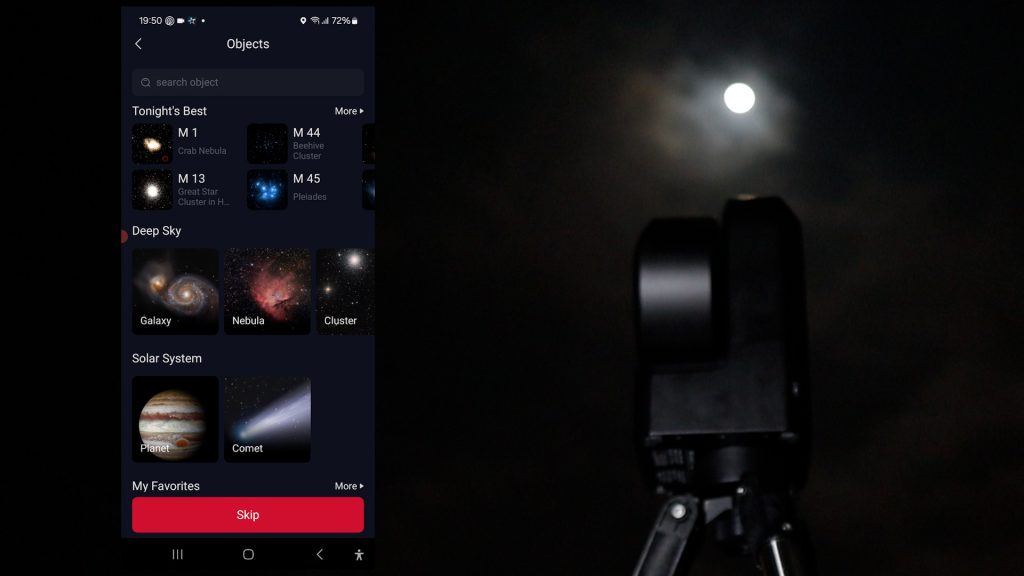
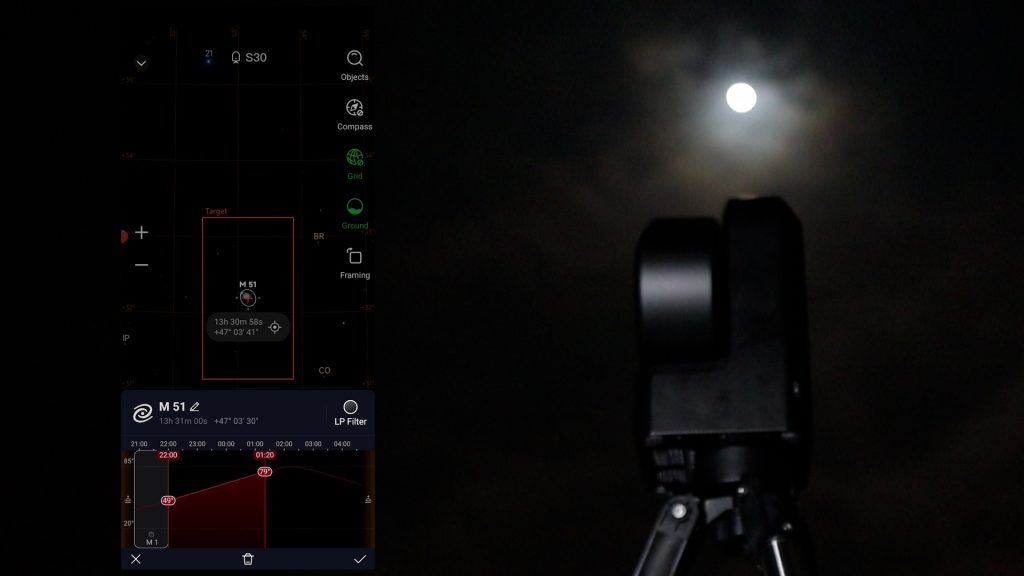
Similarly, the Seestar app offers various categories under stargazing, such as “Tonight’s Best,” galaxies, nebulae, star clusters, planets, and even recent comets. Like the Dwarflab app, it includes a virtual sky atlas and a planning feature to automate your imaging experience throughout the night.
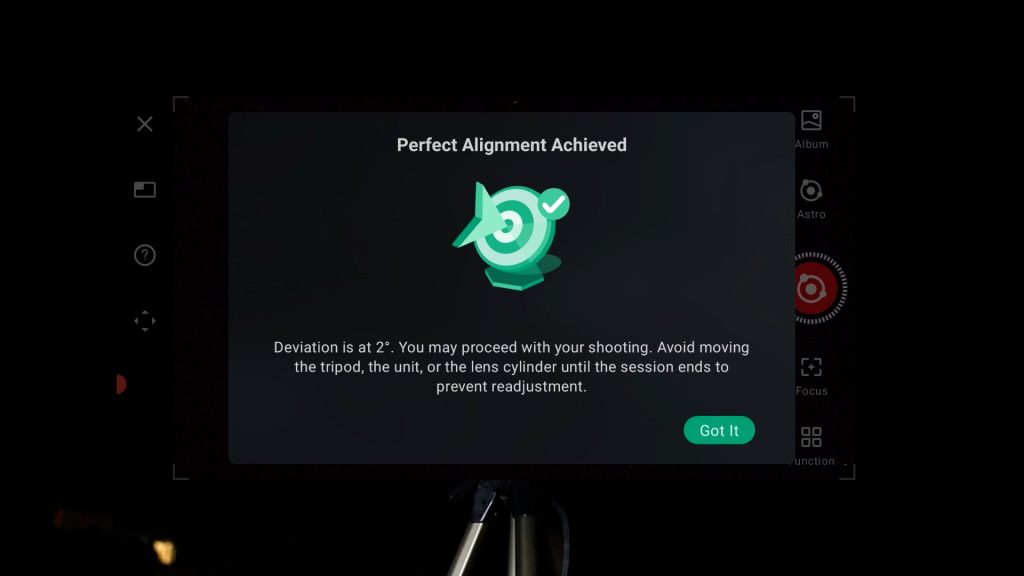
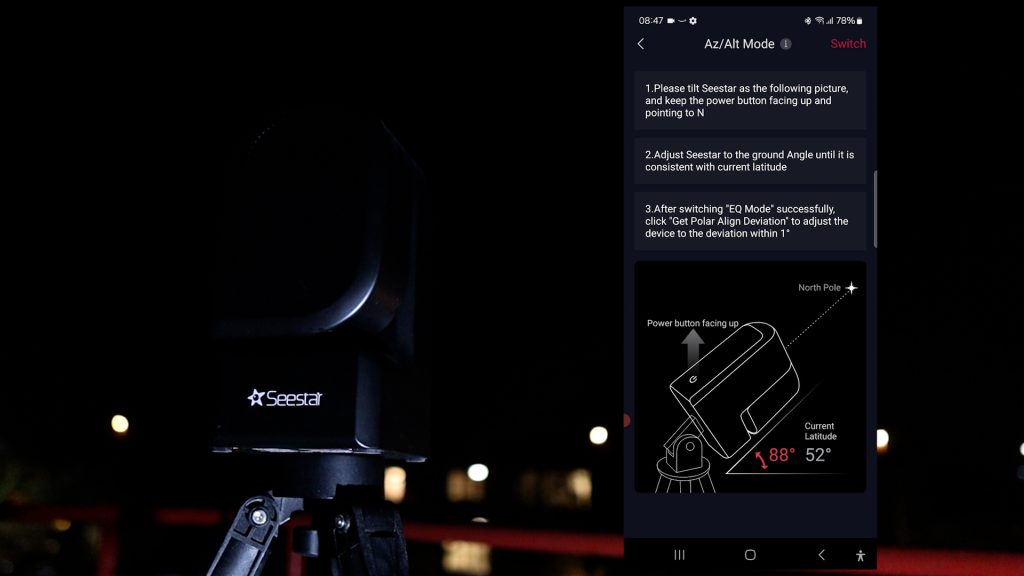
One key difference between the telescopes used to be the Dwarf 3’s ability to polar align to the celestial pole by using its EQ mode. This feature improves tracking accuracy, allowing for exposure times of up to two minutes. Longer exposures help accumulate more photons on the camera sensor, revealing fainter details and improving the signal-to-noise ratio for better image quality. While setting up the Dwarf 3 in EQ mode requires some additional effort, the benefits are well worth it. EQ mode is optional—if you choose to skip it, your exposure time will likely be limited to around 10 to 15 seconds before star trails become noticeable due to tracking inaccuracies.
That’s why Seestar telescopes default to 10-second exposures—they aren’t polar aligned. The big advantage is that you can simply set them down and start your session right away, without extra efforts.Now, of course, ZWO/Seestar is an innovative company and has been working on updating its firmware to include EQ mode. And this week, just after I finished the review, I received a firmware update that does appear to include a brand new EQ mode option. Since this feature is brand new, I will be testing it in a future blog – so stay tuned!
Both apps also include a framing or mosaic feature, enabling you to expand your field of view by up to 2x its original size. This is particularly beneficial for the Seestar S50, which has the narrowest field of view. However, using the mosaic feature requires additional capturing time since the camera must photograph different sections of the night sky and stitch them together. In contrast, the Dwarf 3, with its wider field of view, can capture larger objects more quickly without needing to create a mosaic. Additionally, all telescopes incorporate AI noise reduction to produce cleaner images of the night sky. It is important to note that AI in these smart telescopes doesn’t relate to virtual or preloaded images. They capture real-time photos of the night sky, including planes, clouds, and satellite trails.
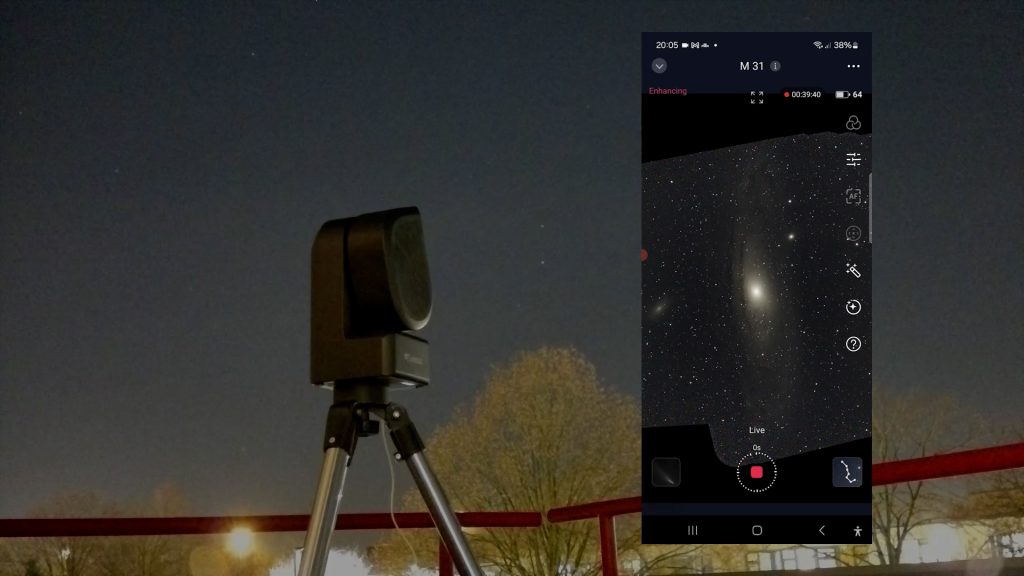
The capturing process is similar: Both the Dwarf 3 and seestar telescope slew to the selected object, calibrate, and then begin stacking images to improve detail and clarity of the object you want to view. I typically spend about 1 to 1 and a half hours imaging each object before moving on to another target which gives me decent results. The Dwarf 3 asks you to capture separate dark frames to reduce noise before starting a deep-sky capturing session, which you can do by following the instructions. The Seestar telescopes have a built-in dark filter and do this automatically, which streamlines the whole process.
DSO images compared
Now, let’s take a look at the original stacked images and my processed versions, captured with these three smart telescopes. Each photo is a stack of about 1 hour and 30 minutes of exposure time. With the Dwarf 3 in EQ mode, I took 30 to 60-second exposures, while the Seestar S50 and S30 were limited to their default 10-second exposures.
Starting with the Orion Nebula, the Dwarf 3’s longer exposures helped reveal more of the faint surrounding nebulosity. The Seestar S50’s larger aperture gave sharp core details, but I need to use mosaic mode to capture the whole nebula, which reduced exposure time per section. The Seestar S30 offered a balanced field of view and detail at a lower price.
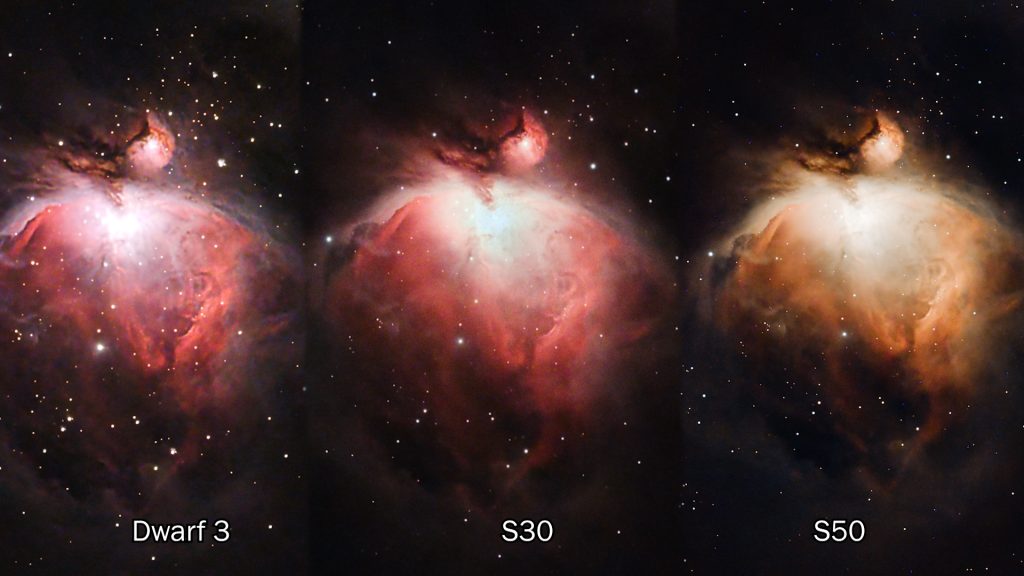
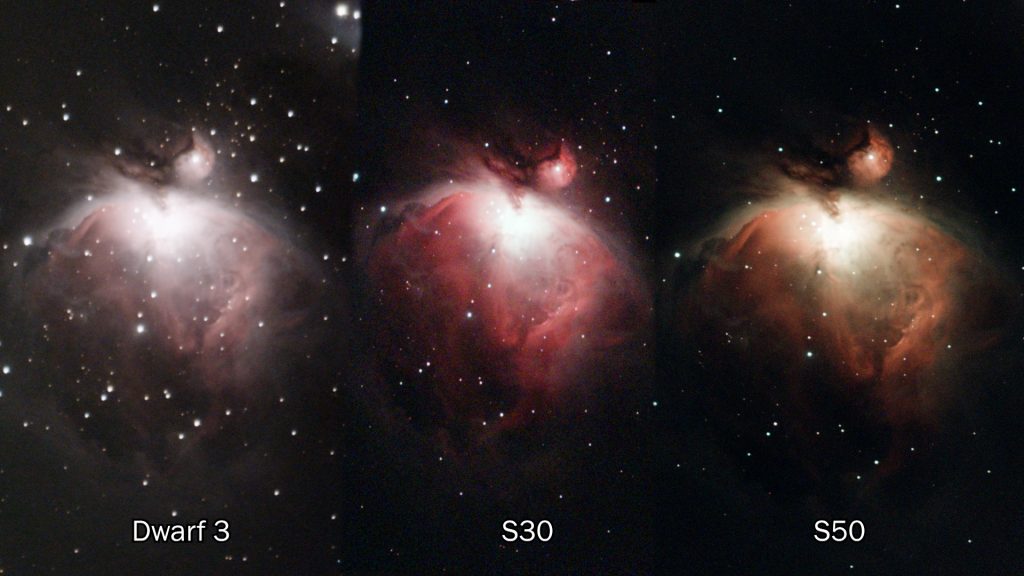
*Images do not display whole picture, but same part of the Nebula for comparison
For the Andromeda Galaxy, the Dwarf 3’s wider field of view is a major advantage, capturing more of the galaxy’s structure in a single frame at a longer exposure time which reveailed the faint nebulosity at the edges of the galaxy. The Seestar S50 and S30 have a narrower view, so I needed to use the framing mode. Especially the S50 produced a sharper core of the galaxy. The Seestar S30 also offered a well-balanced image .

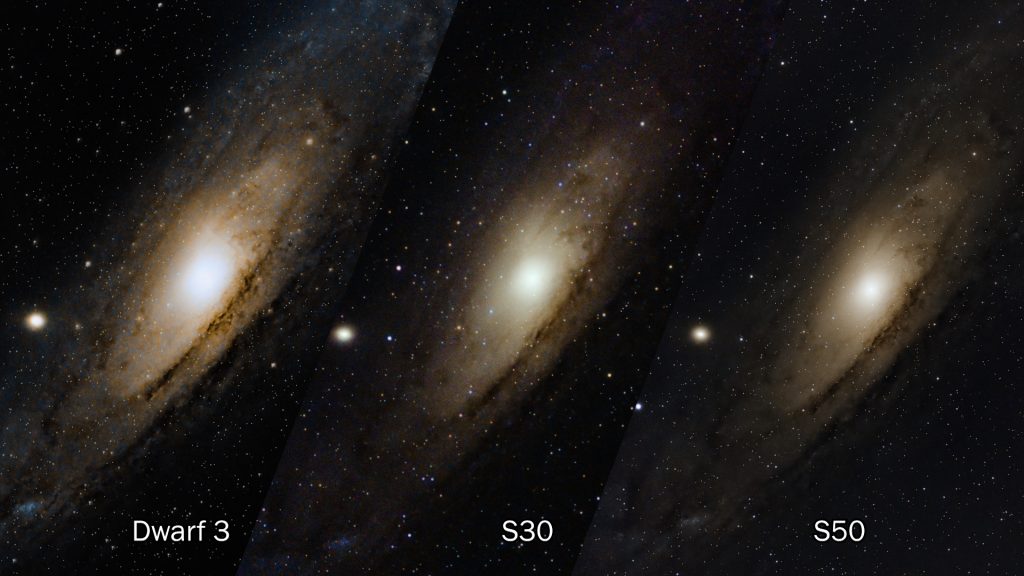
*Images do not display whole picture, but same part of the Nebula for comparison
With the Pleiades, one key difference stands out—the Seestar S50 larger aperture appears to handle the bright stars and blue nebulosity a bit better than the Dwarf 3 and the S30. The S50 produces tighter, more natural-looking stars, while the Dwarf 3’s and S30’s stars appear slightly more blurry and bloated.
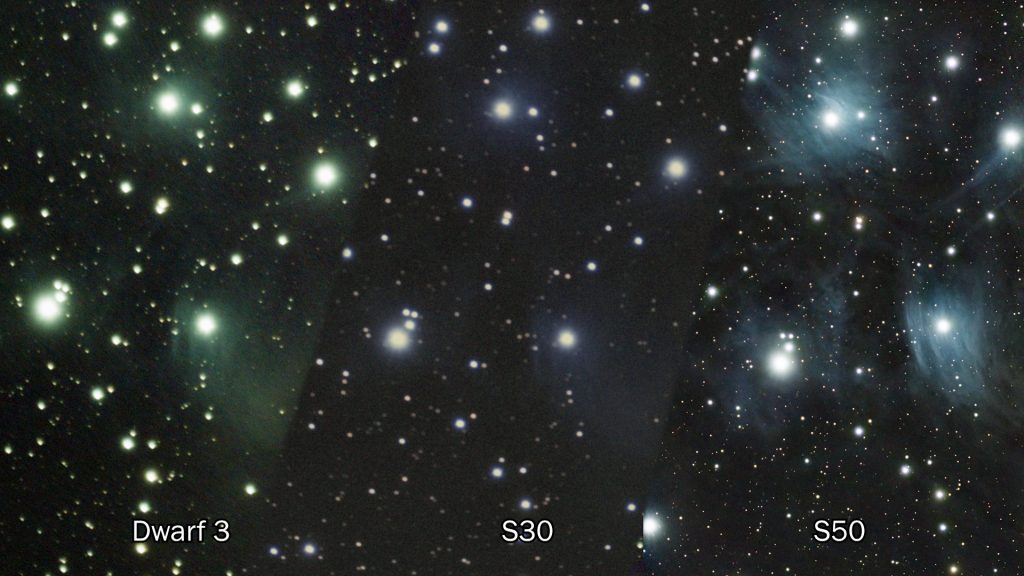
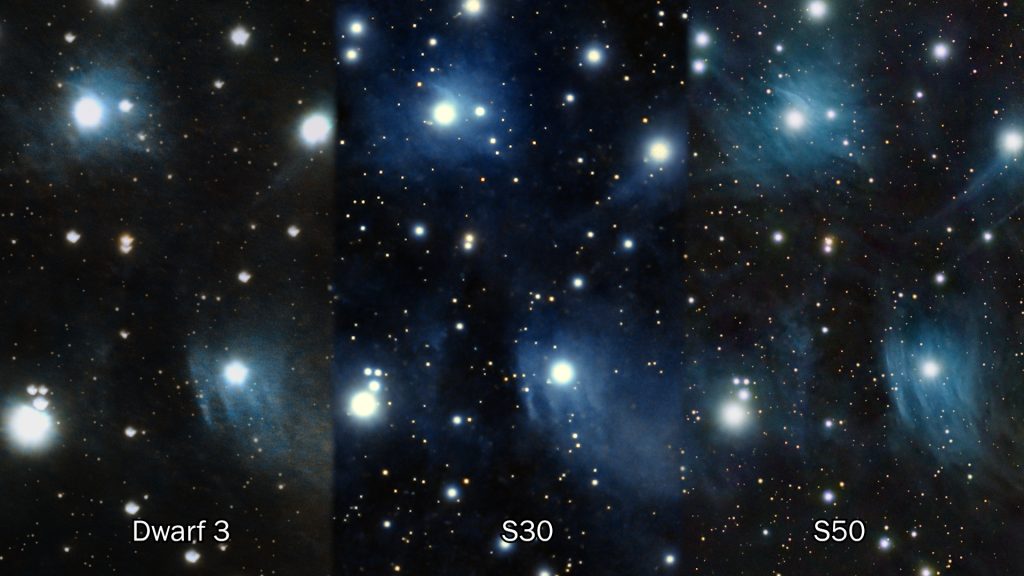
*Images do not display whole picture, but same part of the Nebula for comparison
All of these photos were taken under Bortle 7 city light-polluted skies, so if you’re imaging from a darker location, you can likely achieve even better results.
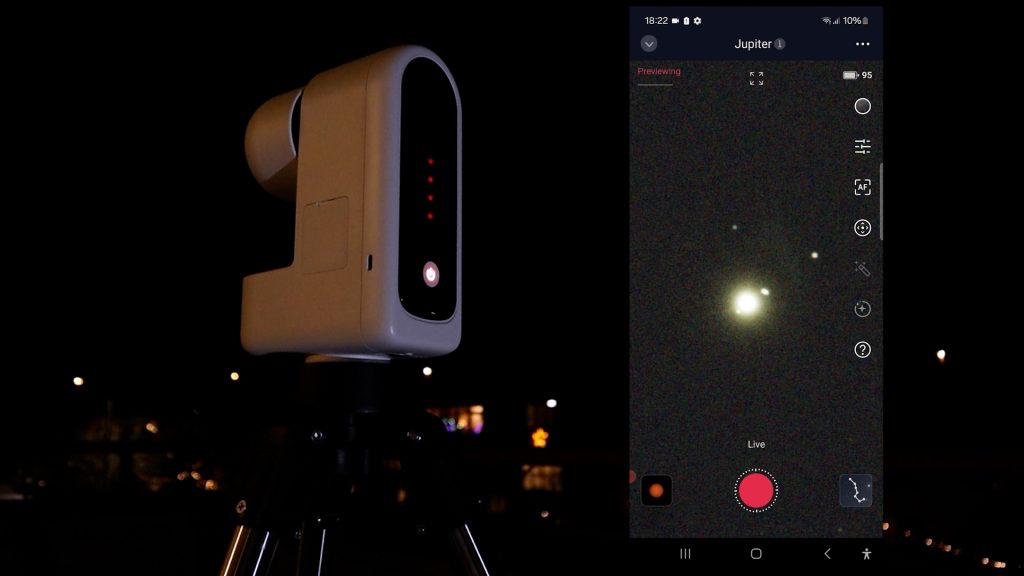
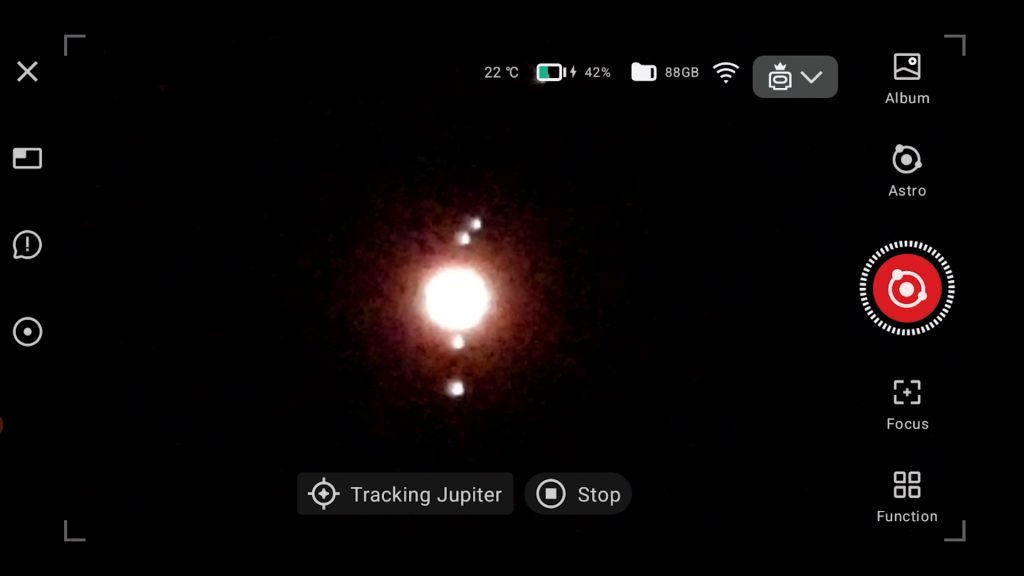
Imaging The Planets?
Finally, none of these budget smart telescopes are well-suited for capturing detailed views of the planets. They typically show planets as small dots in the night sky, and in Jupiter’s case, you may also see its Galilean moons. To observe surface details, a focal length of around 2000mm is required, which is best achieved with larger-aperture, mirror-based telescopes. The most affordable option for this is a Dobsonian, though Schmidt-Cassegrain and Maksutov telescopes are also excellent choices. I’ve covered this topic in more detail in one of my blog posts.
Extra Features
Storage & Battery Life:
The Seestar S30 and S50 come with 64GB of internal storage, while the Dwarf 3 offers 128GB. In terms of battery life, the Seestar models last around 6 hours per charge, whereas the Dwarf 3 extends to 8 hours. All three can be recharged via a USB-C cable while in use, allowing continuous operation throughout the night. A USB-C cable can also be used to transfer images to a laptop or PC for further processing.
Portability:
The Dwarf 3 is the lightest at 1.3kg, followed by the Seestar S30 at 1.7kg and the S50 at 3kg. With all models under 26cm in size, they are easy to carry around.
WiFi & Remote Access:
The Dwarf and Seestar telescopes can connect to your home WiFi, letting you control them remotely from the comforts of your home —perfect for those freezing nights. Another great feature is the ability to share your view with others. Folks can download the APP and login as guests to enjoy the views by up to two on the Dwarf 3 and up to eight on the Seestar. This makes them great telescopes for outreach and group stargazing. Here’s a table that highlights the key features of the three smart telescopes for easy comparison.
| Feature | Seestar S30 | Seestar S50 | Dwarf 3 |
|---|---|---|---|
| Telescope Type | Triplet Refractor | Triplet Refractor | Telephoto Lens |
| Aperture | 30mm | 50mm | 35mm |
| Widefield Lens | Yes | No | Yes |
| Focal Length | 150mm | 250mm | 150mm |
| F-Ratio | f/5 | f/5 | f/4.3 |
| Field of View (FoV) | 1.2° × 2.13° | 0.7° × 1.3° | 2.9° × 1.7° |
| Camera Sensor | Sony IMX662 (Newer) | Sony IMX462 (Older) | Sony IMX662 (Newer) |
| Mosaic Mode | Yes | Yes | Yes |
| Photo Formats | JPEG, FITS, TIFF, MP4, AVI RAW | JPEG, FITS, TIFF, MP4, AVI RAW | JPEG, FITS, TIFF, MP4 |
| Video Formats | MP4, AVI RAW | MP4, AVI RAW | MP4 |
| App Control | Yes (Android/iOS) | Yes (Android/iOS) | Yes (Android/iOS) |
| Filters | IR/UV Cut, Duo Band, Dark | IR/UV Cut, Duo Band, Dark | IR/UV Cut, Duo Band, Astro |
| Solar Filter | Magnetic attachment | Manual placement | Magnetic attachment |
| Storage | 64GB | 64GB | 128GB |
| Battery Life | 6 hours | 6 hours | 8 hours |
| Recharging | USB-C | USB-C | USB-C |
| Portability | 1.7 kg | 3 kg | 1.3 kg |
| WiFi & Remote Access | Yes | Yes | Yes |
| Guest Access | Up to 8 users | Up to 8 users | Up to 2 users |
Alternatives in this Price Range
Yes! If you already own a DSLR camera, a star tracker is a great option for astrophotography. Models like the Star Adventurer 2i Pro cost around $500 and track the night sky, allowing for long exposures. While you can capture deep-sky objects with a tracker, it requires more effort compared to a smart telescope.
Another alternative is to skip automation and get a Dobsonian telescope—offering the largest aperture for around $500. This is ideal for live stargazing through an eyepiece, providing fantastic views of the Moon, planets, and bright deep-sky objects. However, at this price, they lack GoTo or tracking, so you’ll need to manually locate and follow objects. Sky atlas apps can help, but since the human eye can’t stack images like a smart telescope, views will be less detailed and lack color as compared to stacked digital images from your smart telescope.
Final Verdict
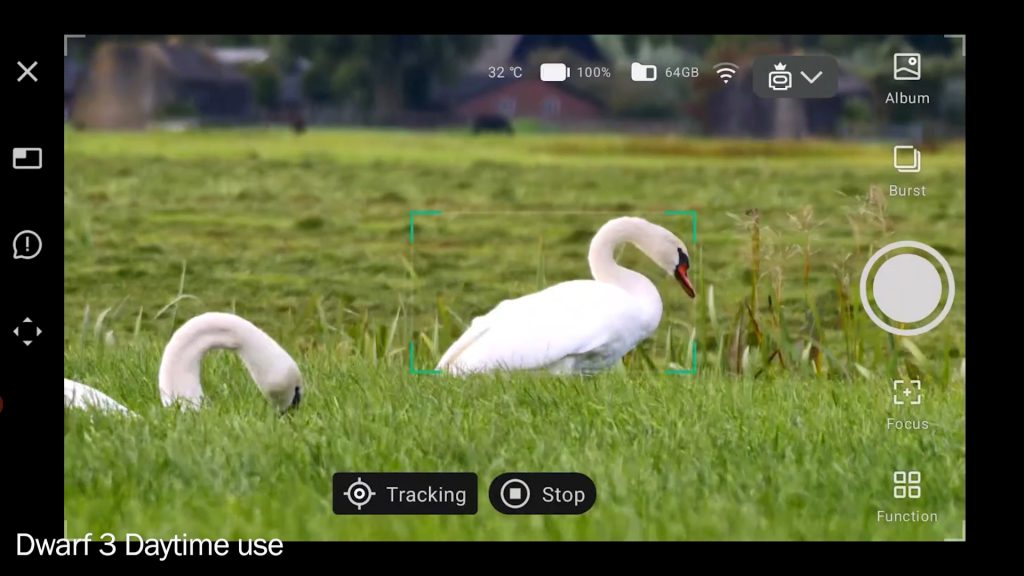
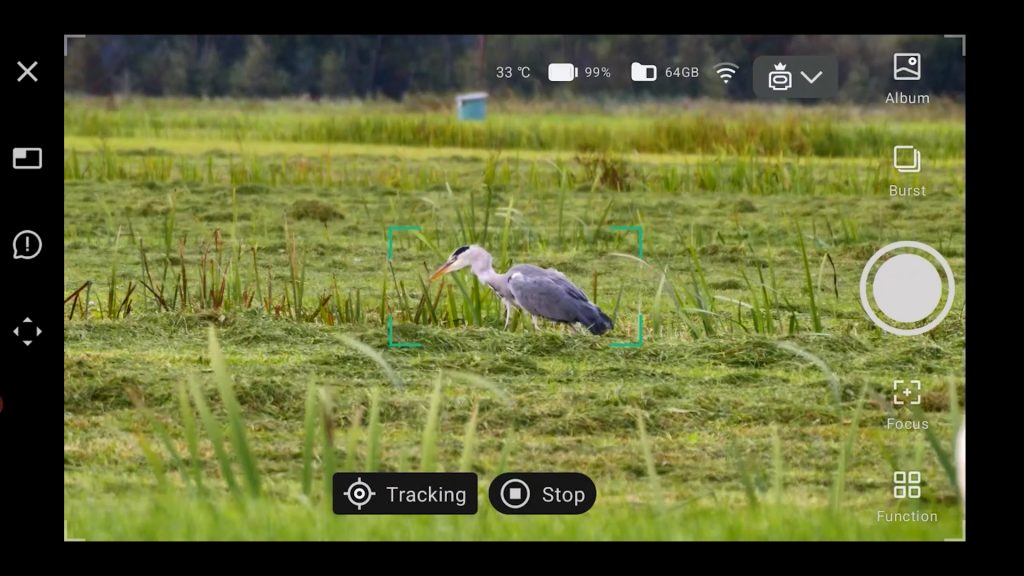
If I had to choose between these three telescopes, it’d be tough. Each has its strengths. If you want a versatile smart telescope that’s also great for daytime use, the Dwarf 3 stands out. It offers features like daytime tracking, time lapses, burst mode, and adjustable camera settings, plus the ability to switch between widefield and telephoto lenses, which makes it perfect for wildlife photography. The Seestar S30 can also do some of that but is more limited, and both the S30 an dS50 have a portrait-mode camera sensor, which is great for social media but perhaps not ideal for capturing daytime photos, unless you like your smartphone portrait pics more than landscape photos.

For stargazing and astrophotography, the seestar S30 is the most affordable choice, and with the latest EQ mode update, it can now track the night sky more accurately and take longer exposure photos just like the Dwarf 3. The Dwarf 3 has the widest field of view in this comparison, and has EQ mode, making it great for capturing larger and dimmer objects, but its focal length is shorter than the Seestar S50. The S50 excels at higher-resolution views of the Sun and Moon with its larger 50mm aperture and 250mm focal length. However, its narrow field of view and older camera sensor may limit its versatility, even when 2x framing mode is used.


Ultimately, it comes down to your preferences and what fits your needs. Each telescope has its pros and cons, and availability or pricing in your area could also influence your decision. I hope this comparison helps you make an informed choice. Clear skies!
Where to Buy:
- Seestar S30: ZWO (WW) | Agena Astro (USA) | High Point Scientific (USA) | Astroshop (EU)
- Seestar S50: ZWO (WW) | Agena Astro (USA) | High Point Scientific (USA) | Astroshop (EU)
- Dwarf 3: Dwarflab (WW) | High Point Scientific (USA) | Astroshop (EU)
An important thing worth mentioning is the image scale difference. True, the S50 has a longer focal length, but larger pixels… 2.5 versus 2.75 arc seconds per pixel. It will collect a bit more light because of the larger lens, but not that much more resolution.
It’s important to know that right now the Dwarf team is way ahead in the software realm. With mosaics that actually work and their included Stellar Studio software, they are just brilliant. they also have much smaller numbers of rejected frames, even comparing Dwarf one minute exposures to Seestar 30 second ones. But software advantages are subject to change and the shoe could be on the other foot in six months. I’m still loving my Seestar S50.