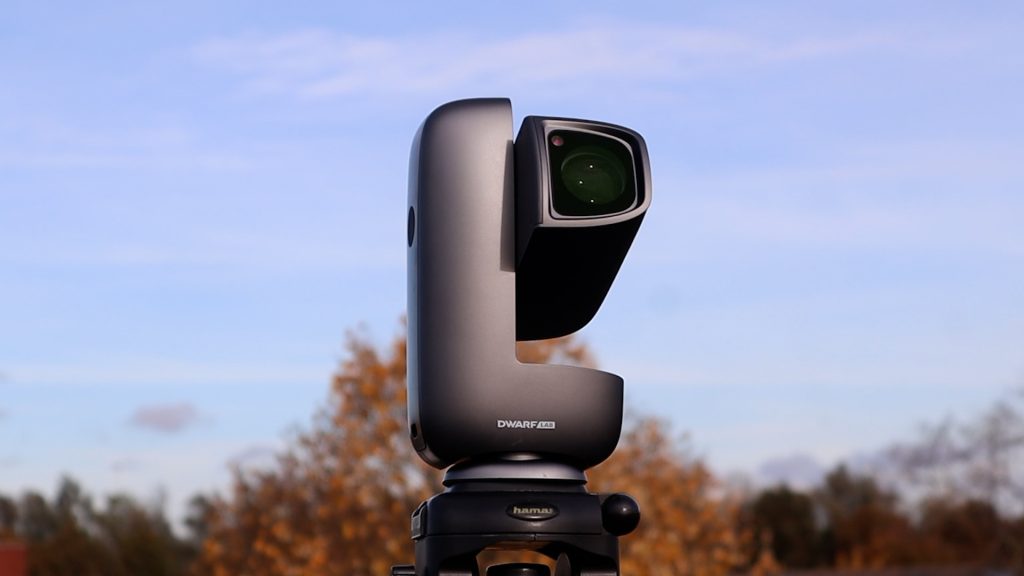
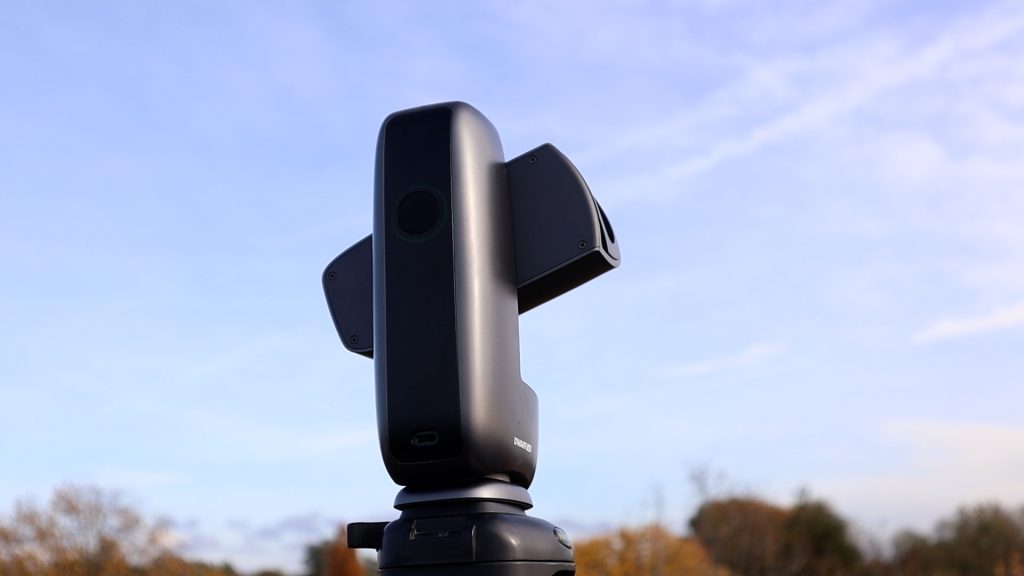
In this review blog, I’m looking at the Dwarf Mini smart telescope from Dwarflab. It weighs less than a kilogram, costs around $399, and promises that you can be set up in under three minutes and ready to take impressive pictures of the night sky.
But how true are those claims in real-world use? In this review blog I’ll share my own experience with the Dwarf Mini, photographing the Sun, the Moon, and several deep-sky objects. By the end, you should have a clear idea of what this mini smart telescope can – and can’t – do.
The Dwarf Mini is available at Dwarflab and High Point Scientific
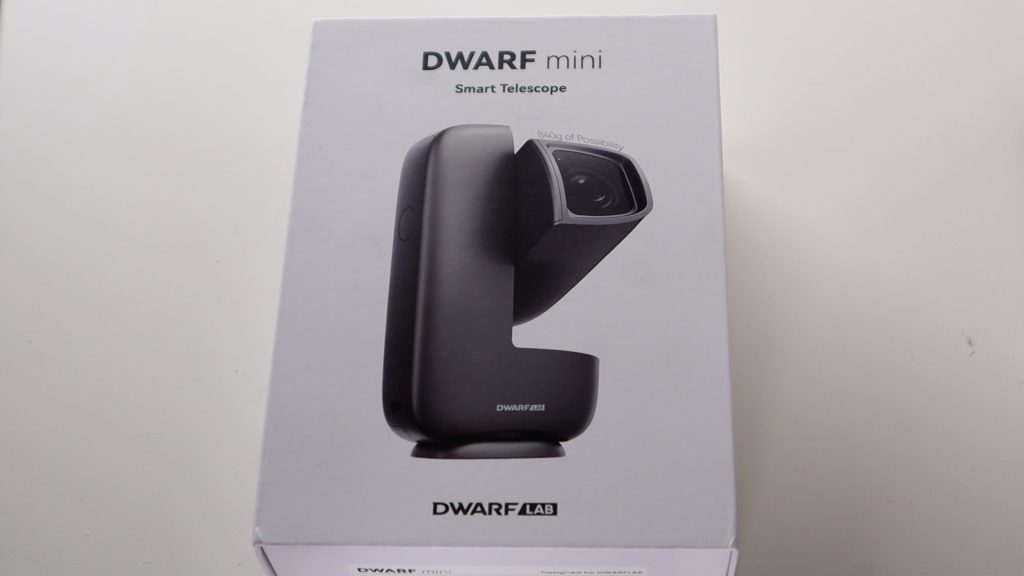
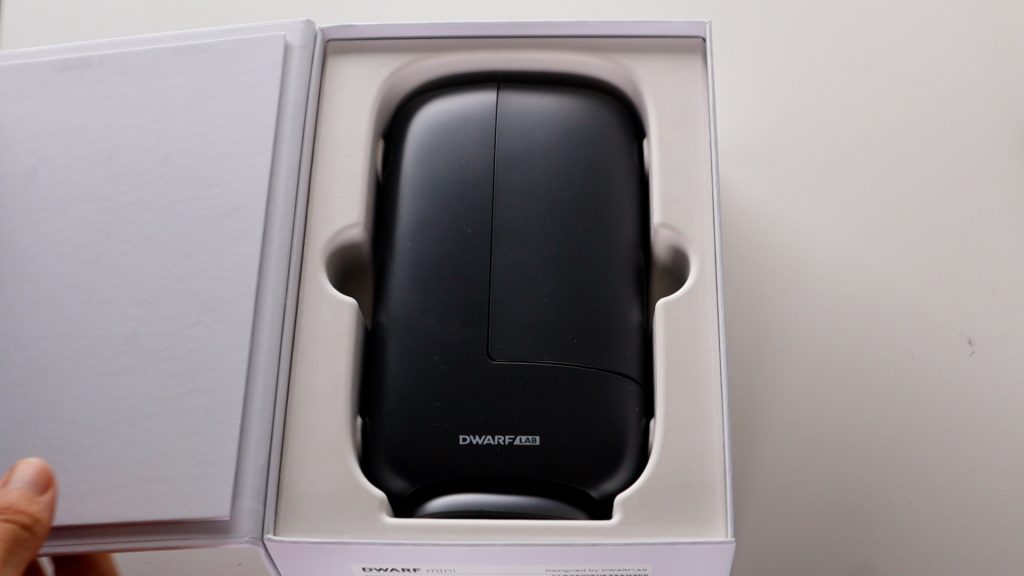
Dwarf Mini: Unboxing and Technical Specs
The Dwarf Mini arrived in this compact box with an ND solar filter, a user guide, a cleaning cloth and a USB-C charging cable. The Mini has a standard photo-tripod thread, so you can mount it on almost any tripod you already own—just note that the tripod itself isn’t included.

This smart telescope has a 30-millimetre aperture and 150-millimetre focal length, giving you about a 2.4 x 1.2 -degree field of view—roughly five times the apparent width of the Moon. There’s also a 3.4-millimetre wide-angle lens with a huge 50-degree field of view, which helps you line up objects like the moon for the telephoto lens and it can also be used for wide Milky Way photos.
Inside you’ll find a 2-megapixel Sony IMX662 sensor with built-in Astro, Dark and Duo-band filters. The Astro filter is ideal for broadband objects like the Moon, galaxies and clusters, while the Duo-band filter shines in capturing emission nebulae that are rich in ionized hydrogen and oxygen. The dark filter is perfect for taking optional dark frames before a session to reduce noise in your photos. Astro images are saved as single FITS and stacked TIFF files, while daytime photos are stored in JPG and videos and time-lapses are stored as MP4 files.
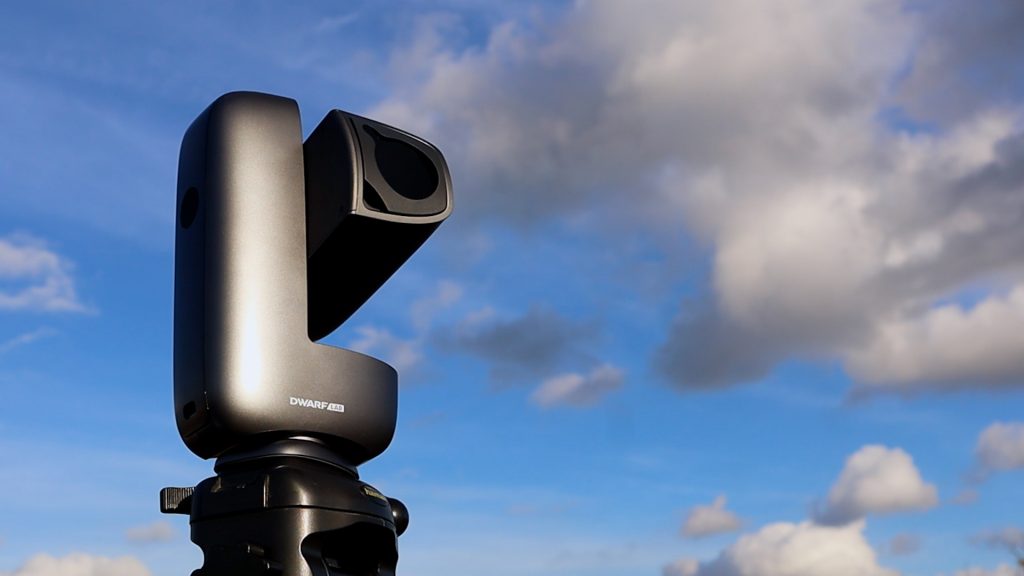
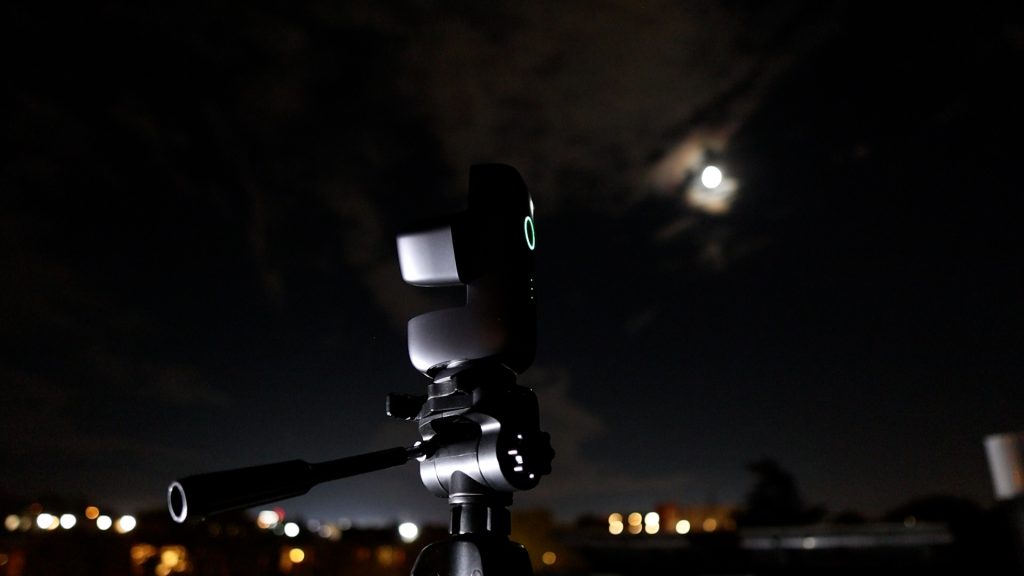
The Dwarf Mini includes 64 gigabytes of storage, a Wi-Fi and Bluetooth connection, plus a 7000-milliamp-hour battery that powers the mini for around four hours and can be re-charged with the USB-C cable. all of this sits in a body that weighs just 840 grams, with a 360-degree rotation mount that can be wirelessly controlled straight from your iOS or Android smart device.
How to connect and Photograph the Sun with the Dwarf Mini
To photograph the Sun with the Dwarf Mini, you simply place the small solar filter in front of the lens and you’re ready to go. Once the filter is attached correctly, the telescope is safe to use for solar imaging. After that, it’s mainly a matter of waiting for the Sun to peek out from behind the clouds – something we have more than enough of here in the Netherlands, especially now that autumn has arrived.
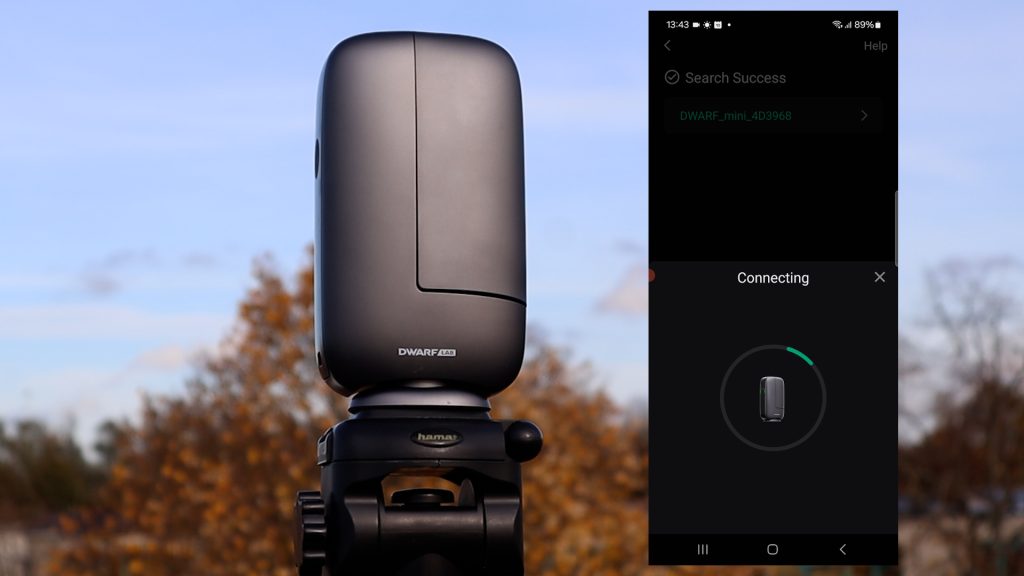
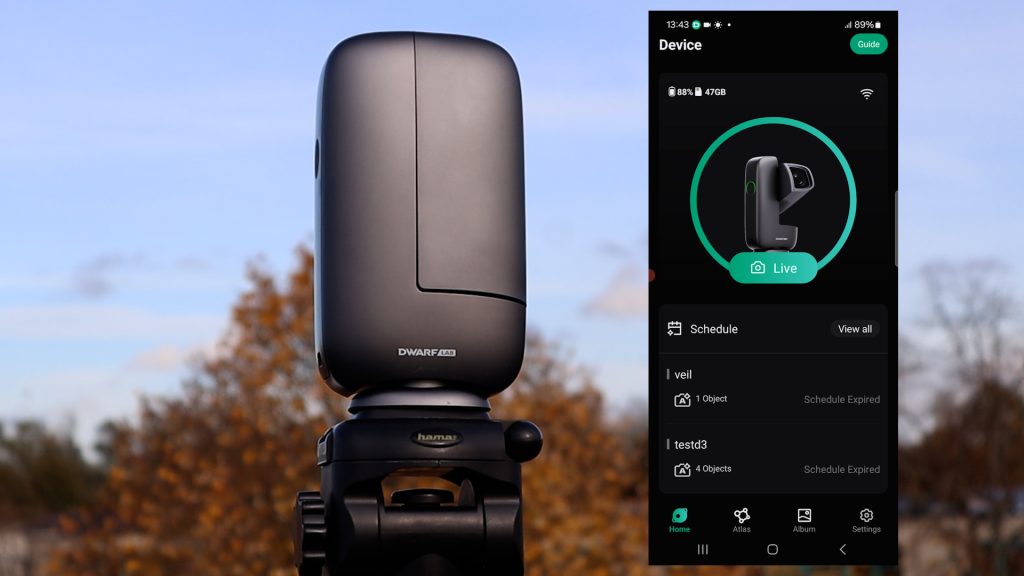
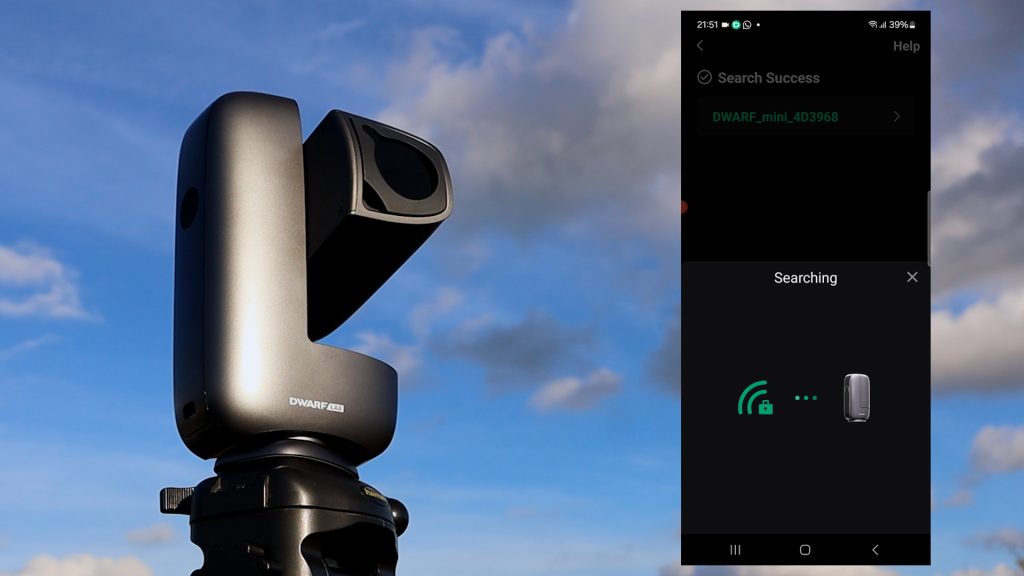
Setting up the DWARF Mini is really easy. Just put it on any photo tripod, make sure your tripod is properly leveled, and power on the telescope. After that, download the DWARFLAB app from the Play Store or App Store for your Android or iOS device. Open the app, select Connect, and make sure your Wi-Fi and Bluetooth are on. The app will find the WiFi signal of the DWARF Mini automatically (WiFi ID: DWARF_mini_XXXXXX; default password: DWARF_12345678). Select the DWARF Mini, and it will automatically connect to your smart device and show “Connection successful,” after which it automatically returns to the home screen. Then click the Live button to see the live view of the telescope. This whole procedure takes only about a minute, and was really easy to do.

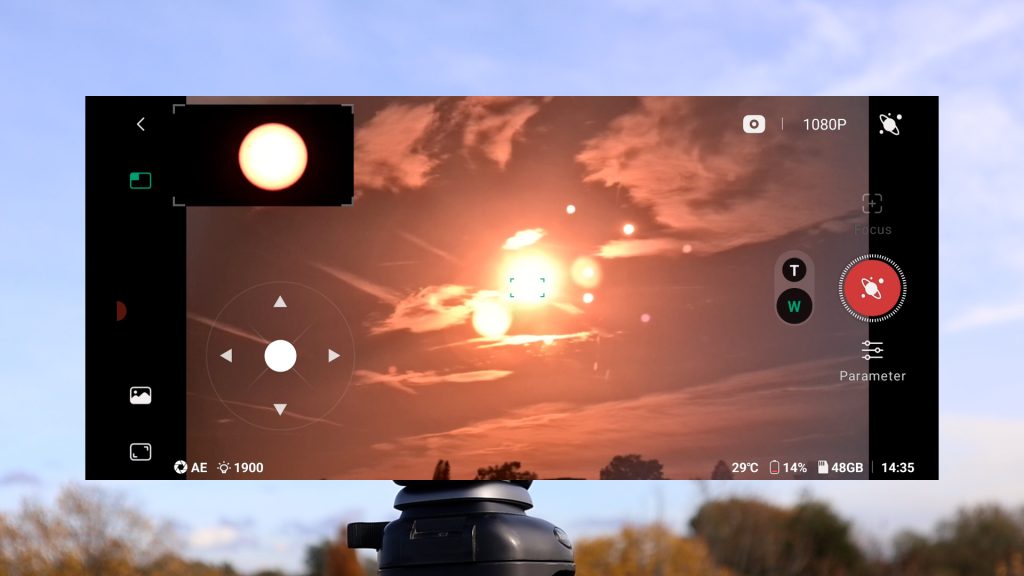
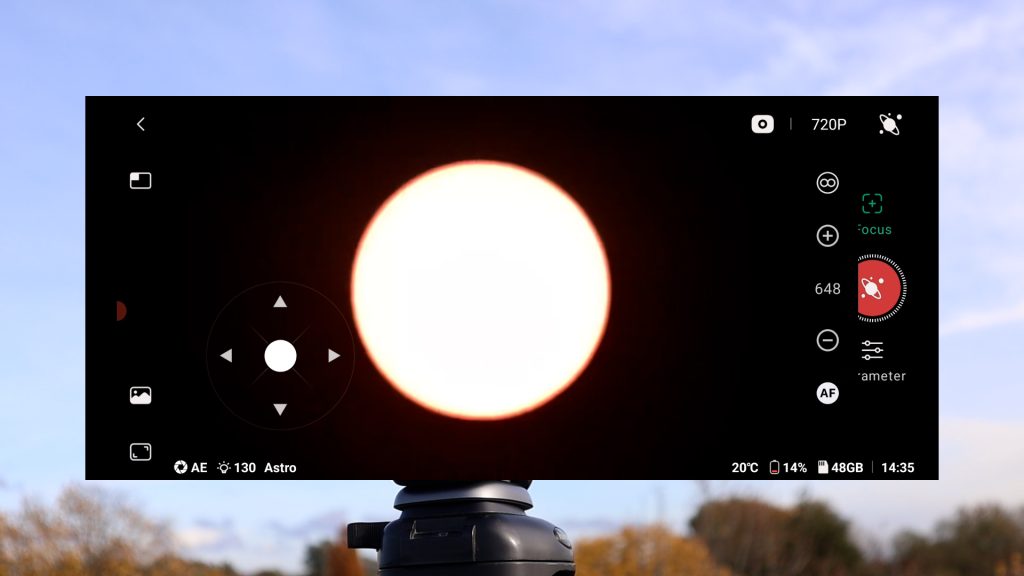
After tapping Live, and with the solar filter mounted in front of the DWARF Mini, I switched to the wide-field view and used the control buttons at the bottom left to move the telescope until the Sun was centered in the telephoto lens’s field of view. Once it was roughly in place, I tapped the telephoto view at the top left, and the live view switched over accordingly. I then deselected the wide-field preview window by tapping the small preview icon at the top left, and continued to fine-tune the Sun’s position in the telephoto view.
I quickly noticed that swiping on the controls resulted in movements that were a bit too large, so I had to tap the control arrows very gently to bring the Sun precisely into the field of view. When it was centered, I tapped Focus at the top right and chose Autofocus. The DWARF Mini did an excellent job locking focus on the sunspots that were visible that day. This entire alignment and focusing process took about a minute.
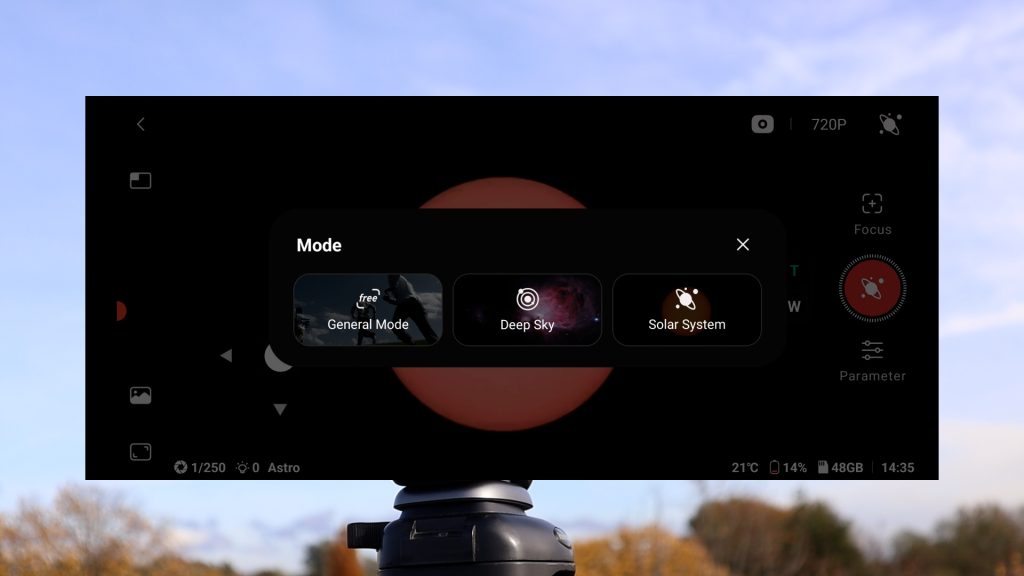
Next, I tapped the camera icon at the top of the screen, which lets you choose between three modes on the DWARF Mini:
- General – for regular photos, videos, and timelapses
- Solar System – for the Sun, Moon, and planets
- Deep Sky – for objects far beyond our solar system
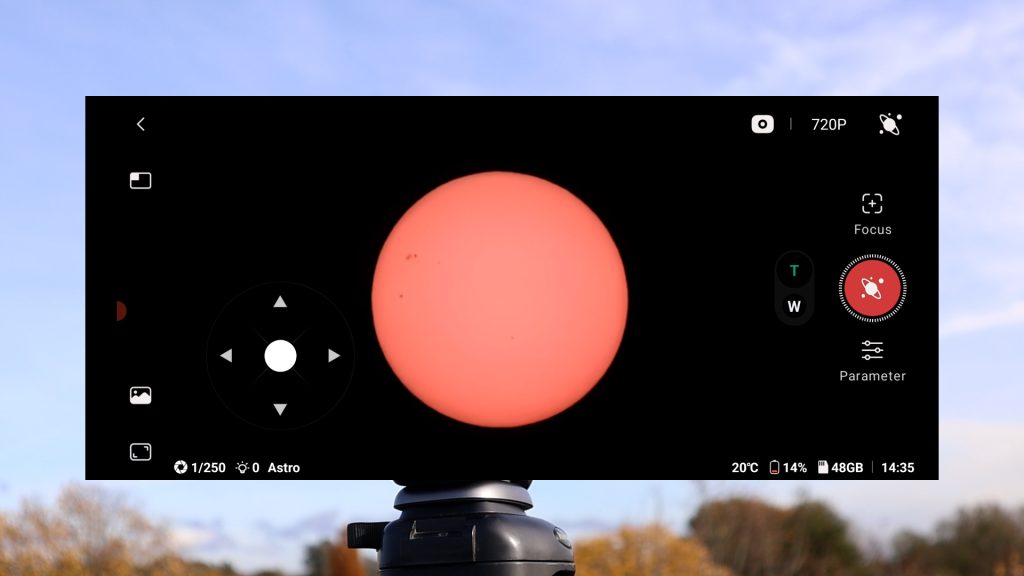
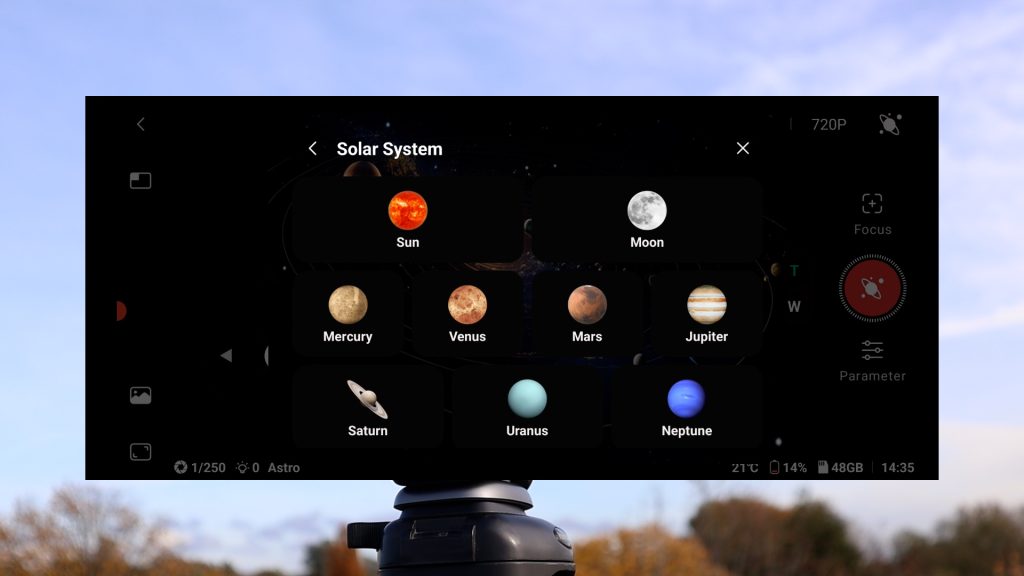
For this test I selected Solar System and then tapped Sun. The app warned me to use the ND solar filter and to make sure the Sun was centered in the telephoto view. As I had already done that, I tapped Done Already. The DWARF Mini then closed and opened again, which is likely part of its internal calibration routine to automatically center the Sun. After that, the live view showed a message at the bottom indicating that the Mini was now tracking the Sun automatically.
I then tapped Parameter, which showed the settings the DWARF Mini had chosen: the Astro filter, automatic shutter time, gain 0, and a count of 75, indicating the number of images that would be stacked. I was happy with these automatic settings, so I left them as they were and tapped the red Solar System shutter button to start capturing.
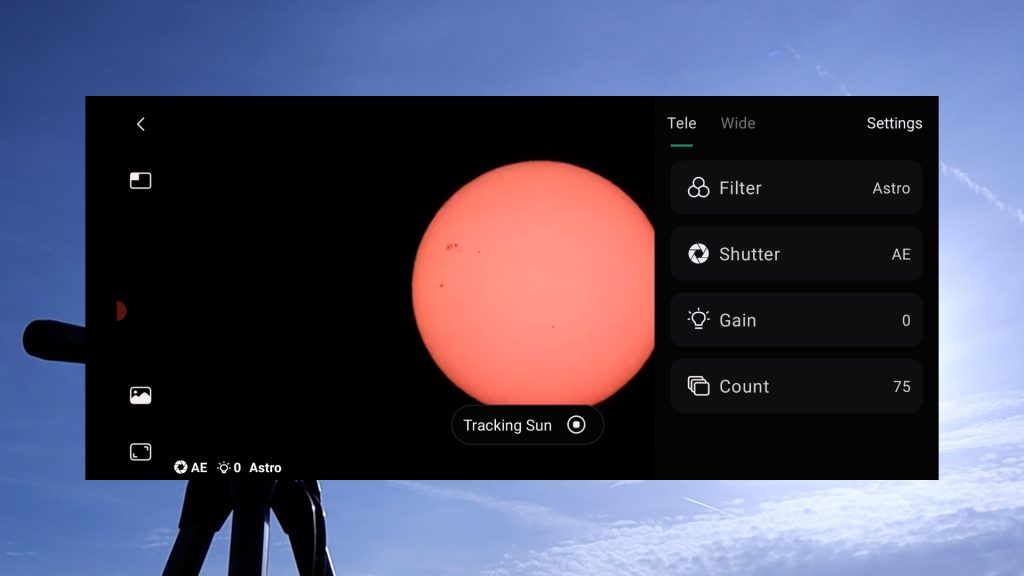

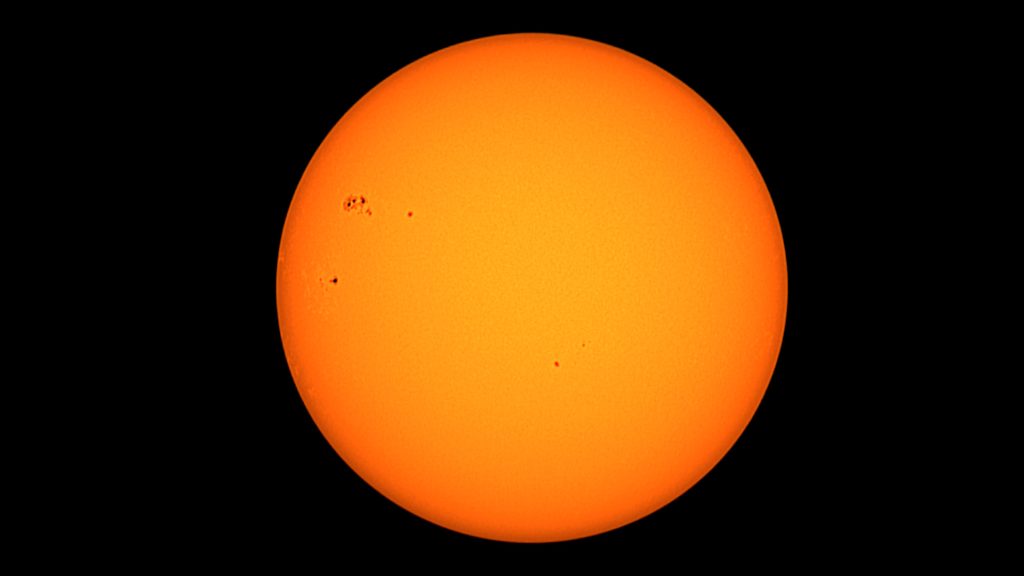
This triggered the live stacking process. The DWARF Mini began taking 75 individual images of the Sun and stacking them one on top of another, which significantly improves the final resolution and overall image quality. Live stacking is a well-known technique in astrophotography, and it was nice to see it implemented in such a beginner-friendly way. The automatic settings rendered the Sun in a pleasant yellowish tone. While astronomers know the Sun is technically white, I actually liked this warm, golden look. I zoomed in a bit on the live view and could clearly see how the image became sharper as more frames were stacked.
After 75 frames had been stacked, I stopped the capture. The resulting image of the Sun showed surprisingly good detail for a smart telescope with just a 30 mm aperture and 150 mm focal length. The DWARF Mini also saves both the individual frames and the stacked result in FITS format on its memory card, so you can transfer them to your computer and process them further in dedicated solar-system imaging software such as AutoStakkert!4, WaveSharp, or AstroSurface.
Photographing the Moon with the Dwarf Mini
Capturing the Moon works almost the same way as capturing the Sun with the DWARF Mini. I started in the wide-field view and used the on-screen controls to move the telescope until the Moon was centered in the telephoto field of view. Then I switched the main display to the telephoto view by tapping the telephoto preview in the top-right. Once again, the wide-field lens made it very easy to get objects centered in telephoto mode.
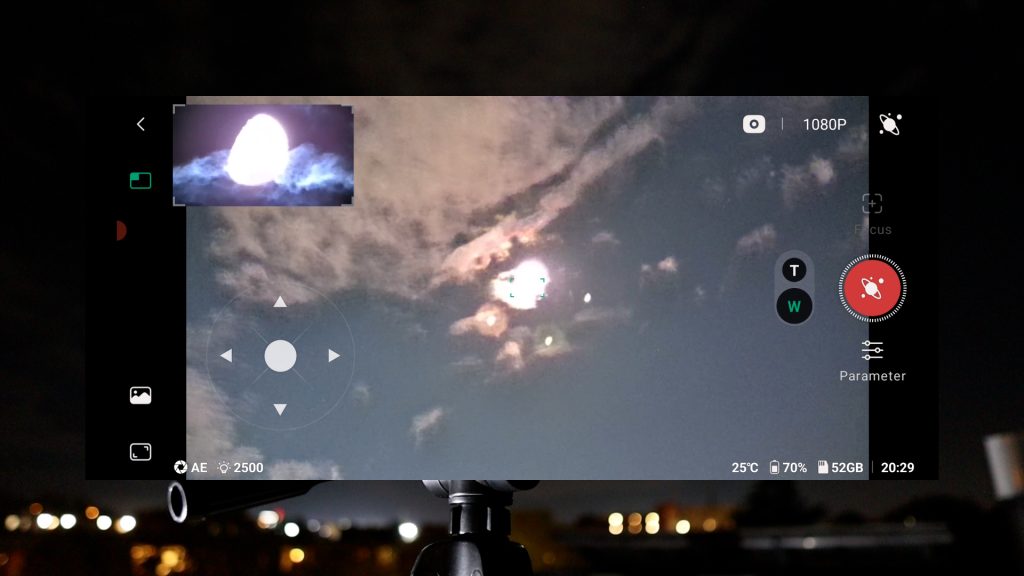
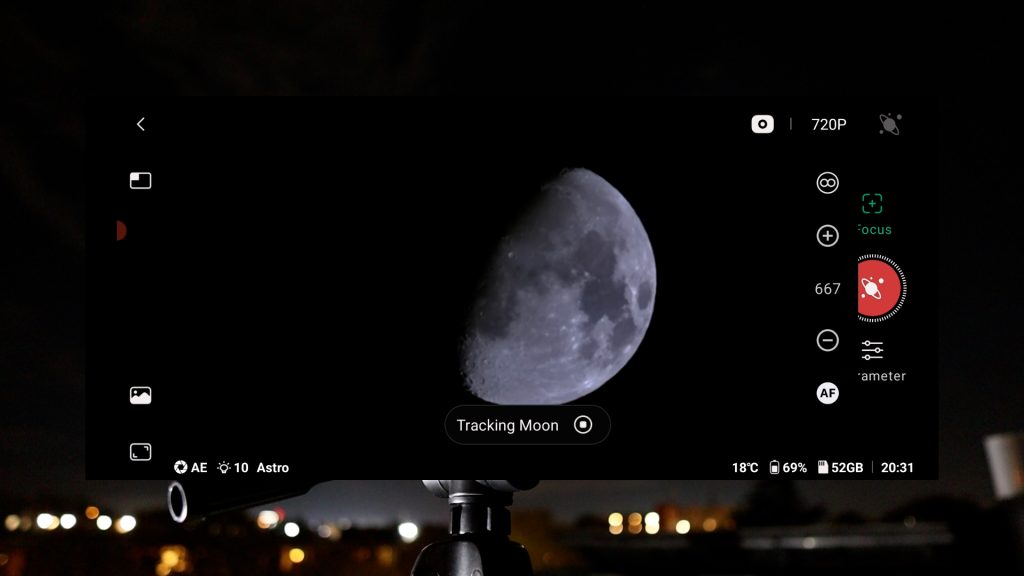
I tapped Autofocus, and the DWARFLAB app automatically focused on the Moon and adjusted the exposure. This immediately gave me a pleasant live view of the Moon at around 60% illumination.
In Solar System mode, I selected Moon, and the app reminded me to center it in the telephoto view. Since I’d already done that, I tapped Done, after which the DWARF Mini performed its short calibration routine (closing and reopening) and confirmed that it was now actively tracking the Moon. I ran autofocus once more to be sure focus was spot on, then tapped the red shutter button to start stacking 20 images of the Moon.
The first result looked promising, so I decided to push it a bit further and increased the capture count to 250 frames to create a deeper stacked image.
Below you can see the automatically stacked Moon images straight out of the DWARF Mini, without any additional editing. Considering the Mini’s modest 30 mm aperture and 150 mm focal length, the results are quite decent. There is a slight improvement in detail between the 20-frame stack and the 250-frame stack, although the difference is fairly subtle.
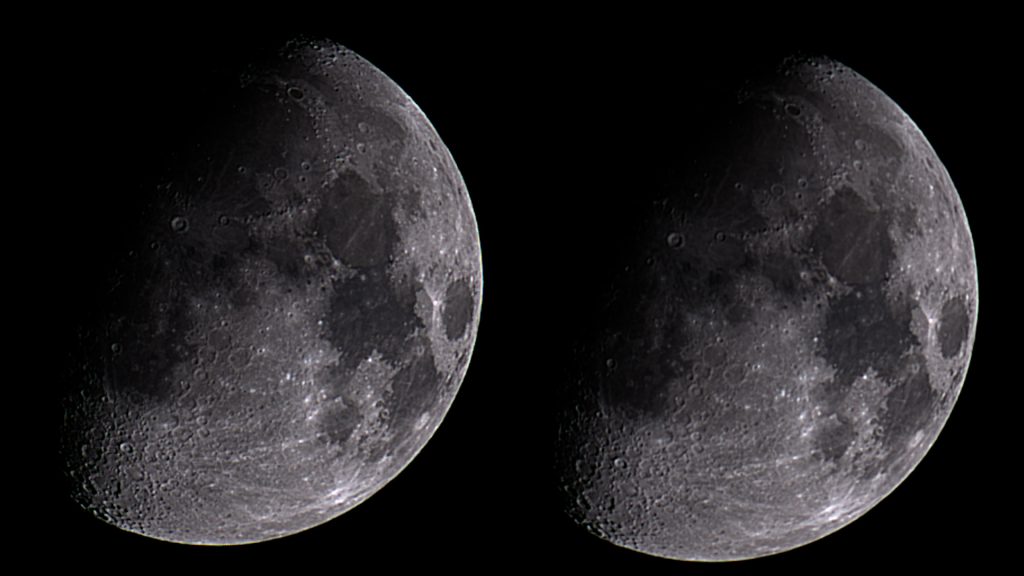
As with solar imaging, the DWARF Mini saves both the individual frames and the stacked result in FITS format. You can connect the device to your computer via USB-C, copy the files, and process them in your favorite planetary/ lunar software if you want to squeeze out even more detail.
With the Moon covered, it was time to move on to some deep-sky objects.
How to Use Dwarf Mini EQ Mode
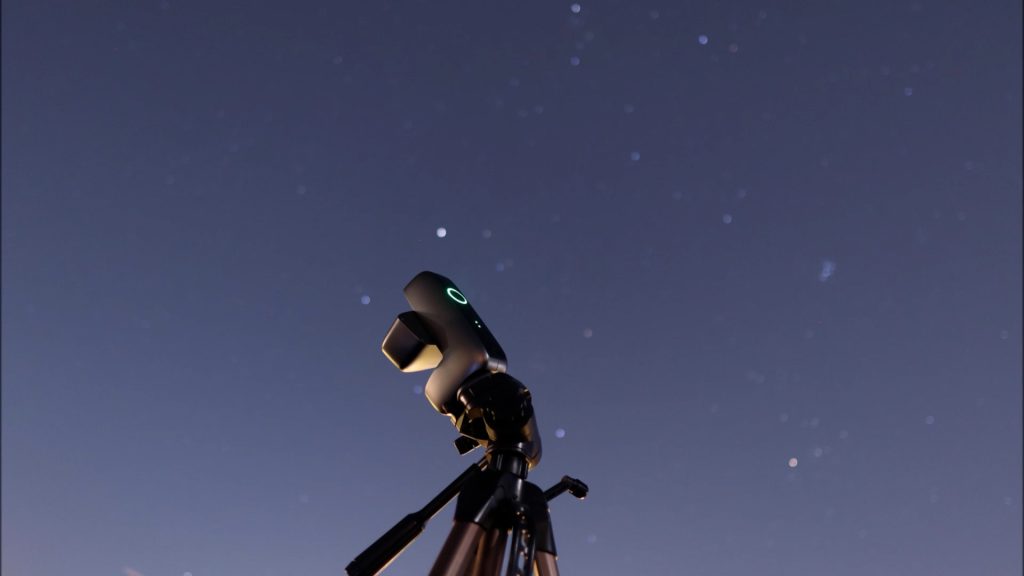
One great feature of the Dwarf Mini is its optional Equatorial (EQ) mode for tracking deep-sky objects. As Earth turns, the stars move in a curved path that varies with your location. In EQ mode you align the telescope with the celestial pole, so it tracks objects more accurately than a leveled tripod, like when I captured the Sun and the Moon. Better tracking lets you take longer exposure photos to capture the faint light of deep sky objects like stars, galaxies, and glowing nebulae far beyond our solar system.
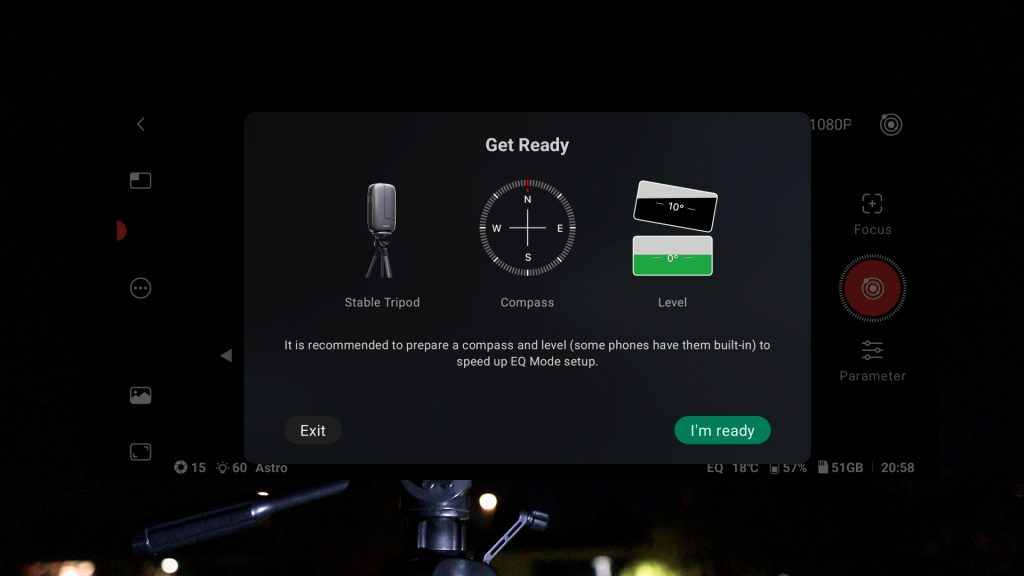
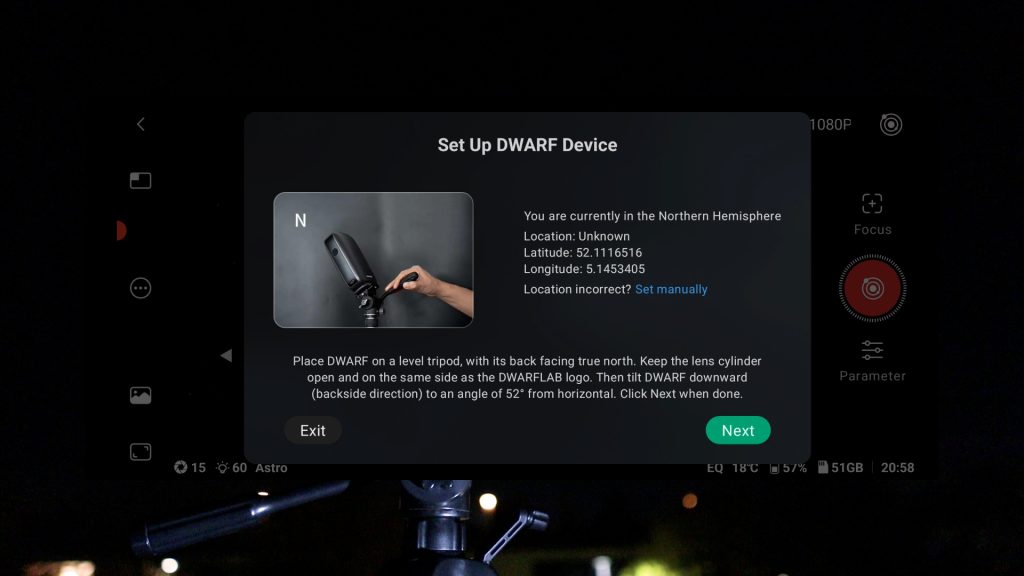
To put the Dwarf Mini into EQ mode, I first selected Deep Sky mode and tapped the three dots on the left of the live view. This opened a menu on the right with EQ mode as an option. After tapping it, a warning reminded me to point the telescope upward towards the stars. as the mini was already pointed at the stars I tapped Continue and saw a new screen advising me to use a stable tripod, compass, and level. I only had a tripod, but I continued. The next screen played a user-friendly video showing how to enable EQ mode. It asked me to point the back of the telescope north (so the front faces south) and tilt it towards the north celestial pole (NCP). As I’m in the northern hemisphere I pointed the back of the telescope towards Polaris, the north star that’s near the NCP, and put the Dwarf mini to what I thought was roughly a 52° angle to match my latitude.
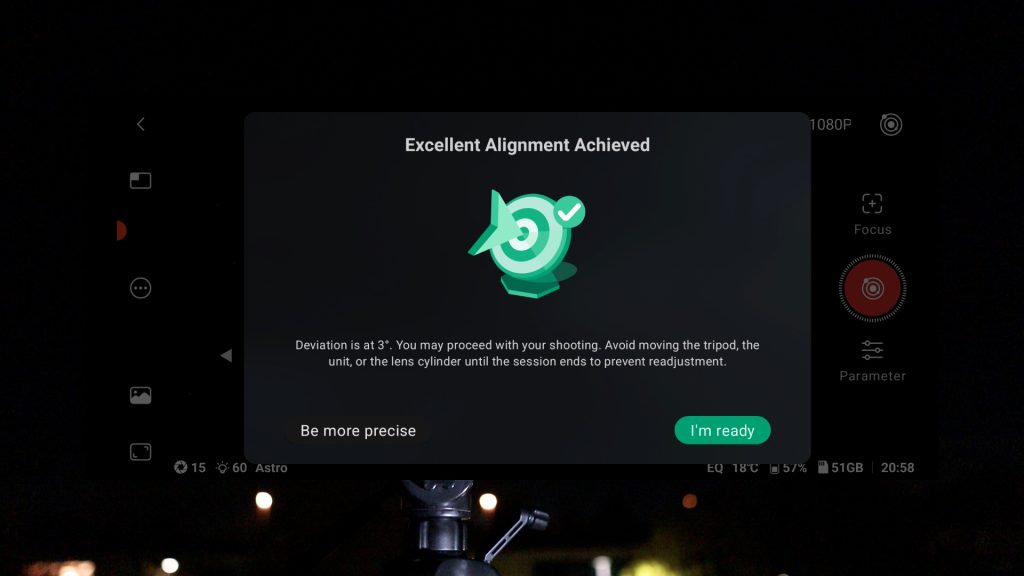
After that, I tapped Next and the Dwarf mini calibrated its position for about 30 seconds and reported I was polar aligned within 3°—lucky me! I clicked the “be more precise” button, after which the DwarfLab app showed me another very useful video to angle the tripod a few degrees left and up. I made the adjustments and tapped I’m ready. The dwarflab app recalculated and showed I was now within about 2° of the north celestial pole. I was happy with that result and tapped Ready, which took me back to the live view.
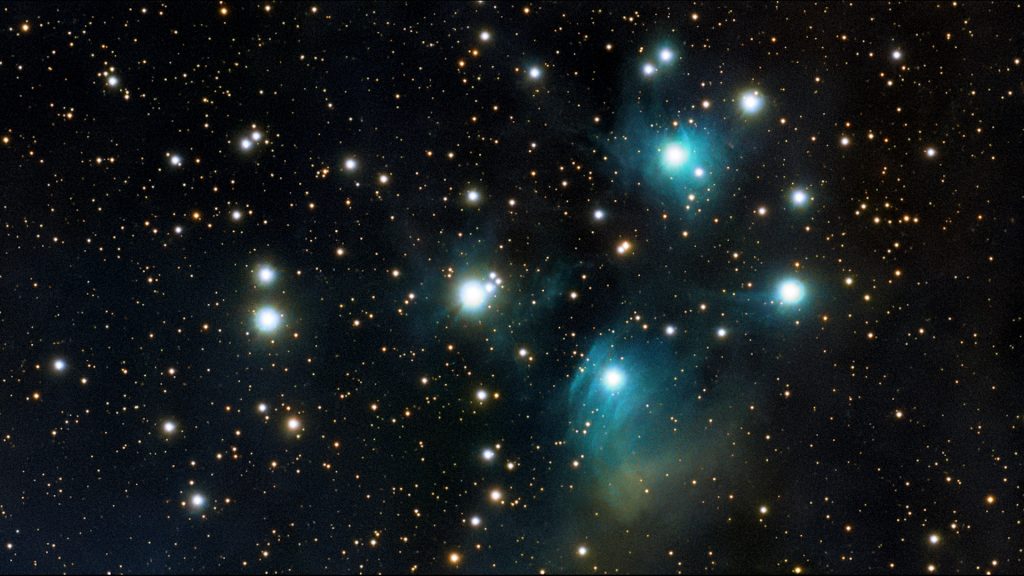
Dwarf Mini: Pleiades (M45)
Clear autumn nights in the Netherlands are rare, so I decided to make the most of one good night by imaging four deep-sky objects, spending about one to two hours on each object. I started with the Pleiades, also known as the Seven Sisters.
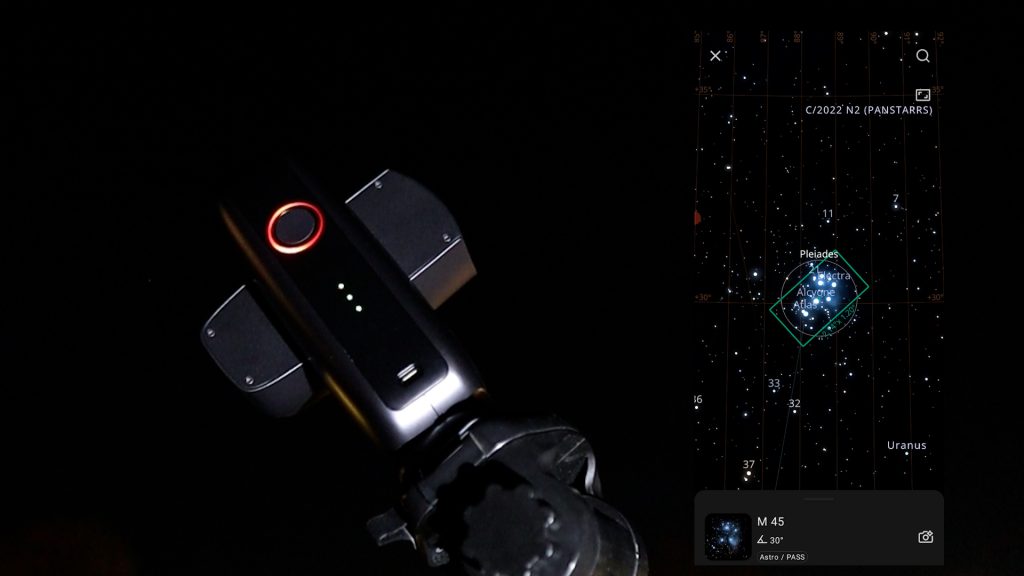
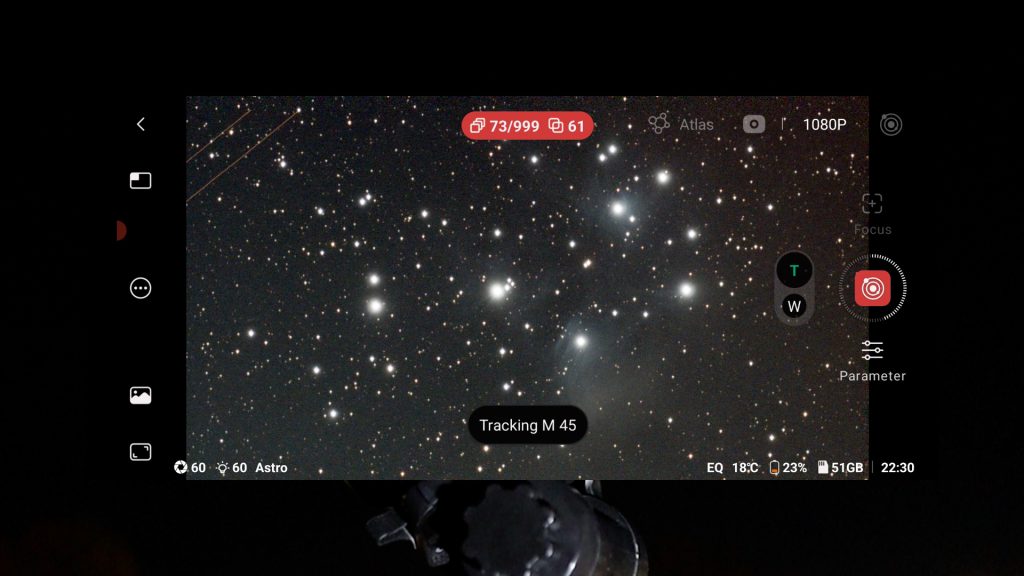
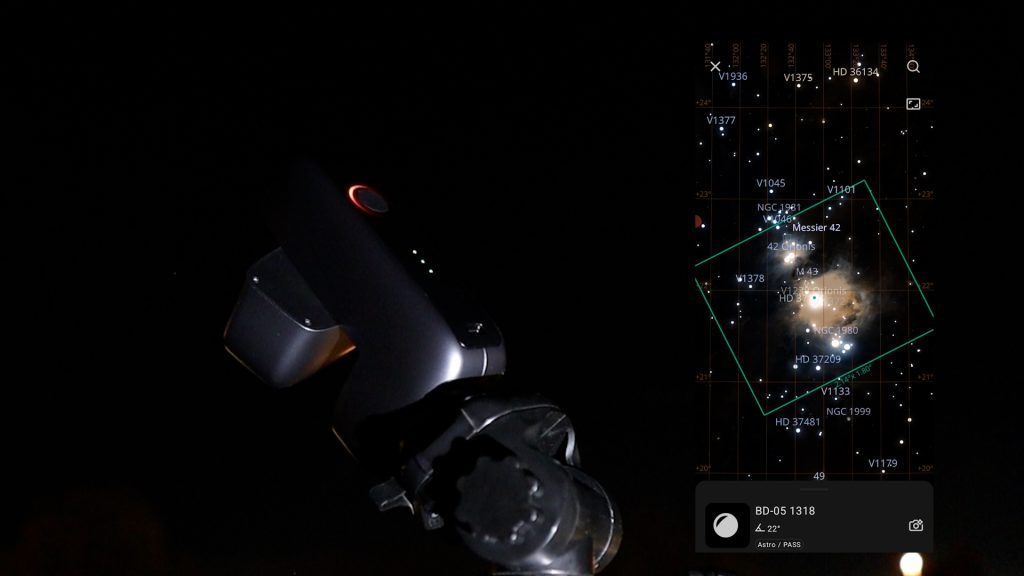
To find it in the night sky, I selected Atlas in Deep Sky mode in the DWARFLAB app, which opened in portrait orientation. I tapped the magnifying glass icon to bring up a list of recommended objects, then used the search bar to type “M45”, the Messier designation for this beautiful open star cluster. After selecting M45, Atlas showed a capture preview, and I was pleased to see that the Pleiades fit perfectly within the DWARF Mini’s field of view. I tapped the photo icon at the bottom right, and the Mini went through its familiar calibration routine (similar to what it did for the Sun and Moon), then automatically slewed to M45 and began tracking it.
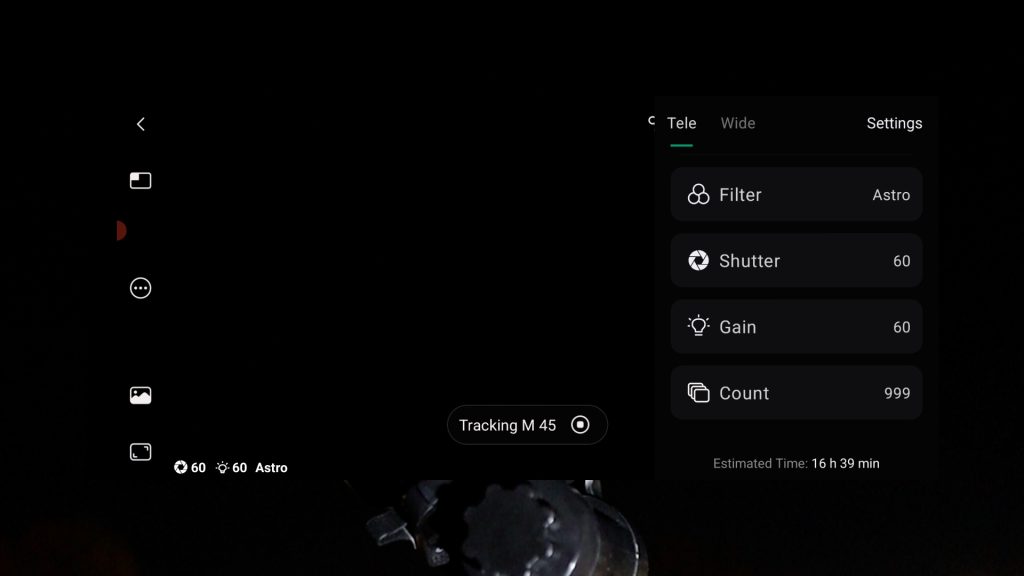
For the capture settings, I chose the Astro filter, as the Pleiades is a broadband object. I set the exposure time to 60 seconds per frame. The DWARF Mini can go up to 120-second exposures, but given that I was using a budget tripod, was only polar aligned to within about 2°, and there was some wind that night, I decided that 60 seconds was a safer choice. I left the gain at 60, which is roughly in line with recommendations for this sensor. For the count, I set it to 999—mostly to see what would happen.
The Mini took a short moment to initialize and then displayed a message estimating a total imaging time of about 16 hours, warning me that it would likely run out of battery long before completing that, since it has around four hours of battery life. It also noted that details of the object would become noticeably better after about 10 minutes, which is DWARFLAB’s simple way of explaining stacking: the more images you stack, the more faint details you accumulate and the cleaner the final stacked photo.
I tapped “Don’t remind me” and OK, and the Mini started stacking 60-second exposures of the Pleiades. I noticed that it took a few minutes for the tracking and stacking to settle down, so my advice is to be patient during the first few minutes of a session; the Mini may need a bit of time to lock onto the object and stack cleanly.
After about 75 minutes, I decided to stop the capture. By that point, the app reported that it had stacked around 60 images of M45—roughly one hour of total exposure time. I long-pressed the red shutter button in the app to force the DWARF Mini to stop capturing. In the stacked image, you can see that a plane crossed the field of view in the top-left corner, leaving two bright orange streaks as a reminder that this is very much real-time sky imaging. The telescope happily records clouds, planes, and satellites along with your object, and these can show up in the stacked result.
The good news is that the DWARF Mini saves every single frame as well as the stacked image to its memory card. That makes it easy to delete any bad subframes (like the one with the plane) and restack the remaining data on your computer using your preferred software. You can even use the built-in Stellar Studio in the app for basic processing, although I personally prefer working on a larger screen.
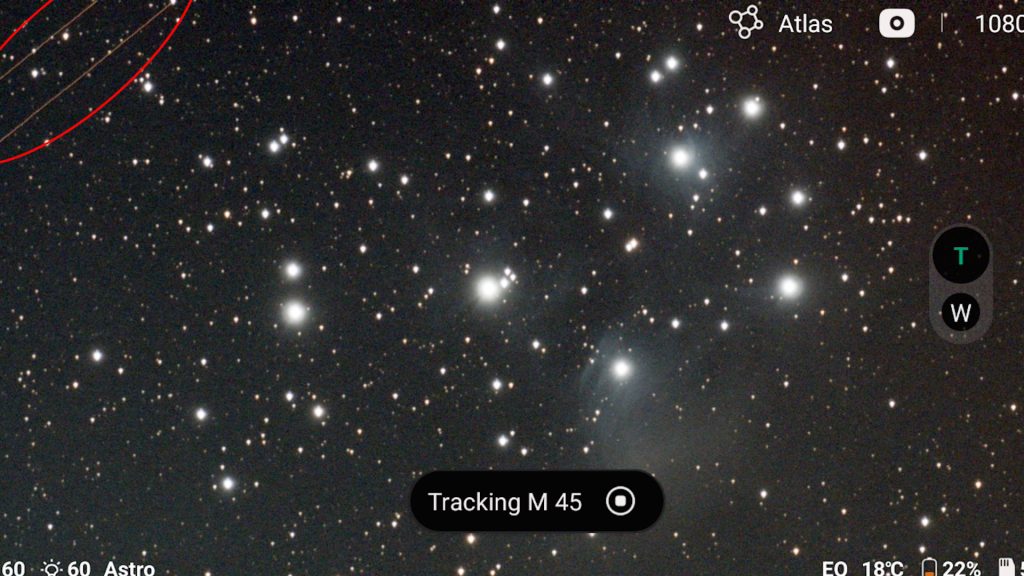
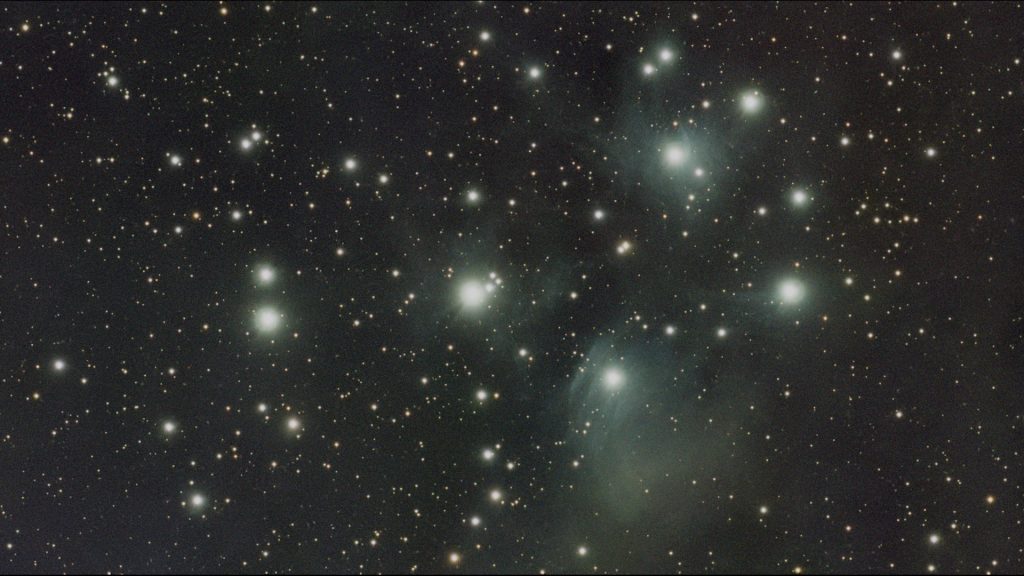
Below is the stacked image of M45 where I removed the single frame with the plane before doing any further processing. And here is my final one-hour image of the Pleiades, processed in PixInsight, an advanced astrophotography processing program. Considering this was taken under urban, light-polluted skies with a 30 mm aperture smart telescope, I think the result is pretty respectable for just one hour of integration time.
Dwarf Mini Mosaic Mode: Andromeda Galaxy (M31)
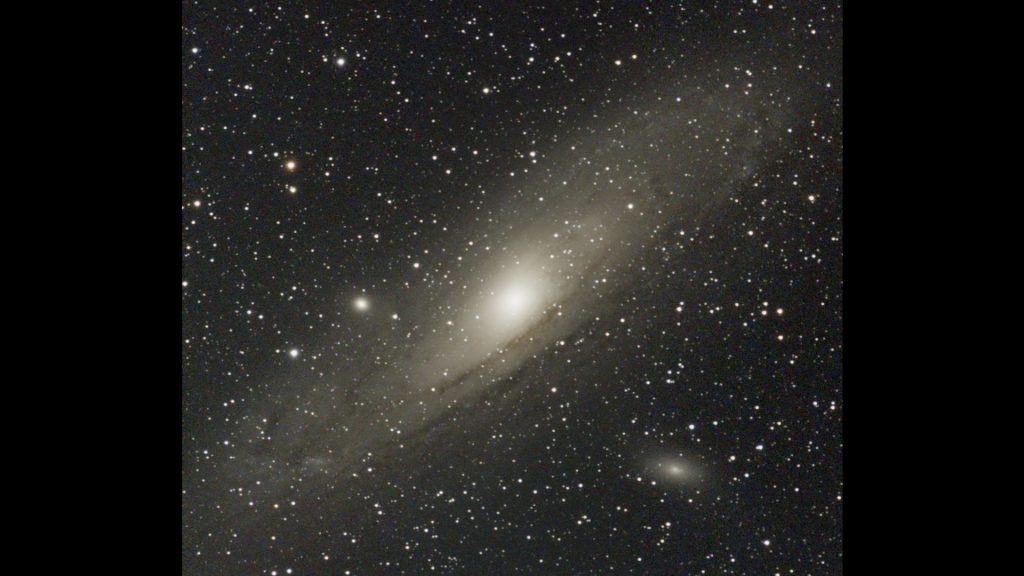
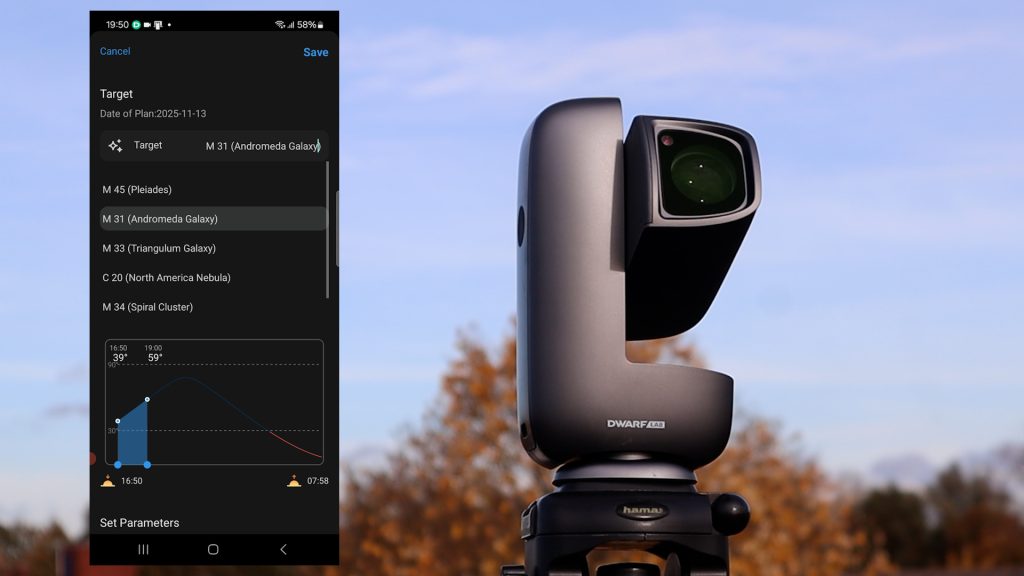
I could easily have spent a few more hours on the Pleiades to further improve the image, but instead I decided to move on. Back in Atlas, I searched for M31 – the Andromeda Galaxy, our closest large neighbouring galaxy at about 2.5 million light-years away.
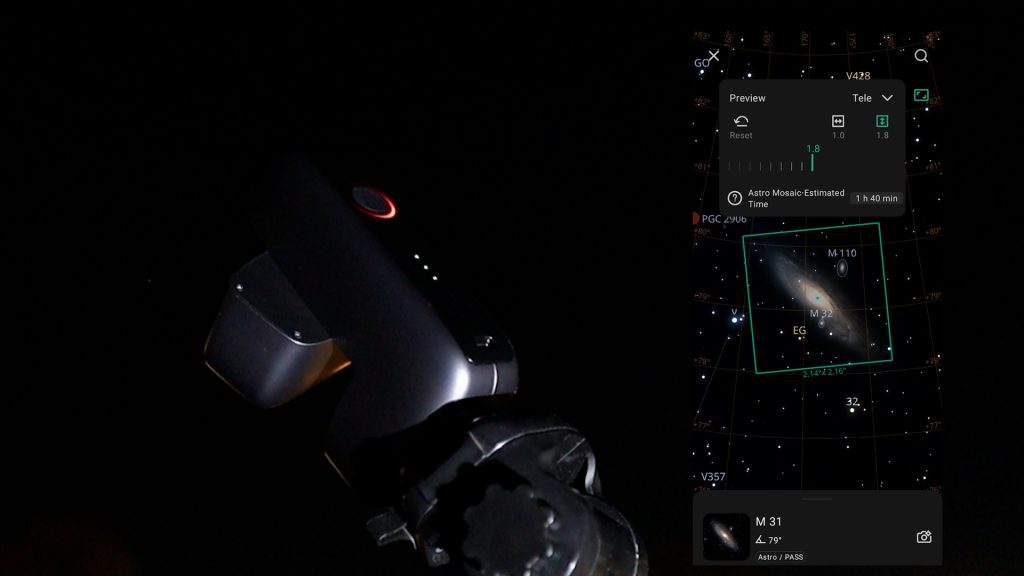
The atlas showed that the Andromeda Galaxy was too large to fit into the native field of view of the Dwarf Mini’s 2 MP camera sensor. Fortunately, the Mini has a trick up its sleeve: mosaic mode. By tapping the small rectangle icon at the top right, you can expand the field of view beyond the native sensor size. I chose a 1 × 1.5× mosaic layout, which would just about fit Andromeda in the frame, and then tapped the photo icon. The Dwarf Mini automatically slewed to M31 and started tracking it.
Since Andromeda is also a broadband object, I kept the same capture parameters: Astro filter, 60-second exposures, and gain 60. I tapped the red shutter button again to start the imaging session.
Because the camera sensor isn’t large enough to cover the entire galaxy in one shot, the Mini alternates between two overlapping views. It will stack around 20 images in the first view, then automatically slew to the second view and stack about 20 more. After that, it slews back to the first view, and this back-and-forth pattern continues until it has captured the number of frames you specified—or until you long-press the red shutter button to stop the session.
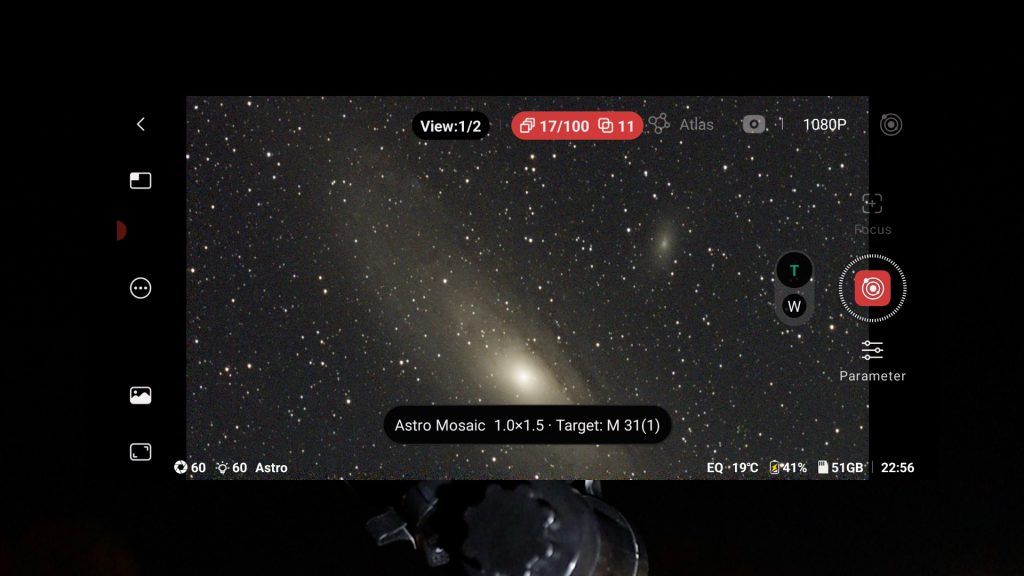
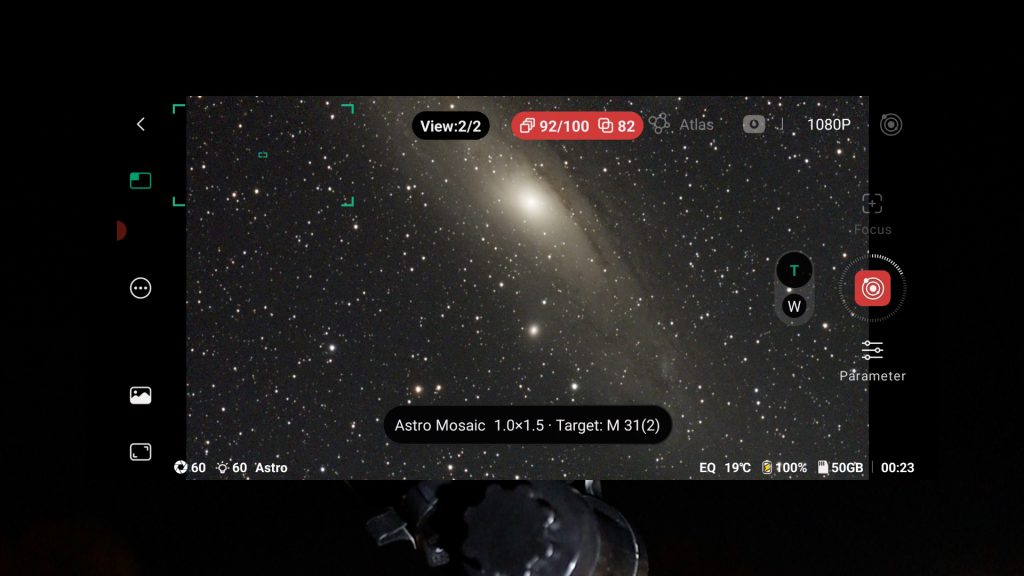
The trade-off here is that, with a larger sensor, you could capture the entire Andromeda Galaxy in a single frame, meaning all of your exposure time would go into one integrated image. With the DWARF Mini’s mosaic approach, your total imaging time is effectively split over multiple panels. For example, after about 90 minutes of imaging, I ended up with roughly 80 minutes of usable data on Andromeda—but because this was divided between two views, that worked out to around 40 minutes per panel instead of 80 minutes on the whole galaxy in one go.
I stopped the capture after those 90 minutes. The Dwarf Mini stored both the integrated stacked mosaic and the individual stacked panels, along with all the separate subframes, in dedicated folders on its memory card for later processing.
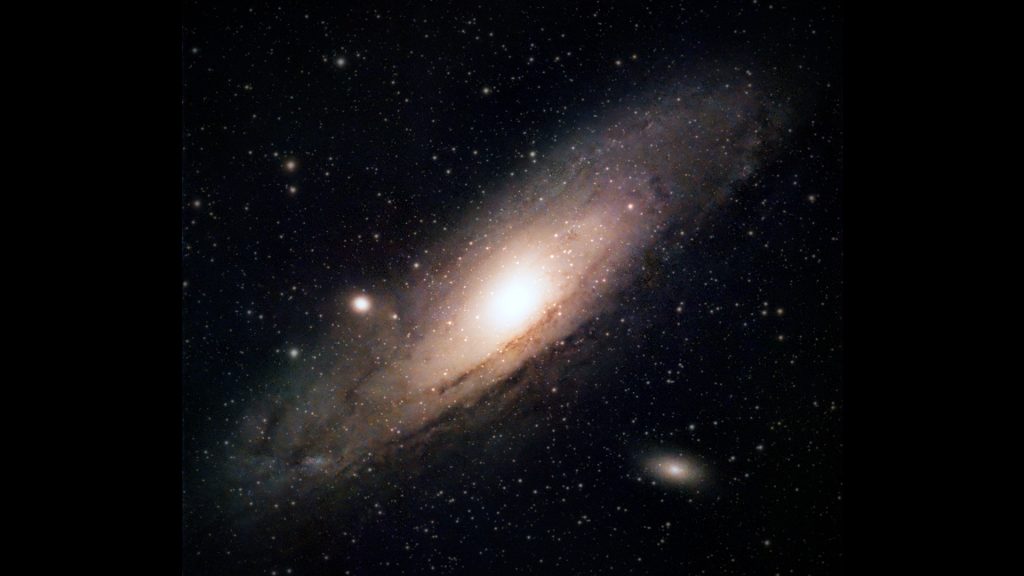
Here’s what the unedited stacked mosaic of M31 looked like straight from the Dwarf Mini. And below that is the final processed version, after I combined and refined everything in PixInsight. For a 2 × 40-minute mosaic taken under urban, light-polluted skies, I think the result is quite respectable. That said, if you want an even smoother and deeper image, you’d ideally spend several hours on a single object and, if possible, travel to a darker-sky location.
Dwarf Mini: The Orion Nebula (M42)
Next, I pointed the DWARF Mini towards the famous Orion Nebula (M42), the nearest large stellar nursery at roughly 1,344 light-years away. By this time, the internal battery was running low, so I connected a USB-C cable to recharge it while continuing to image. This worked flawlessly and didn’t interrupt the session.
I kept the same settings as before: Astro filter, 60-second exposures, and gain 60. I decided to use mosaic mode again, because there’s a beautiful structure just above M42 called the Running Man Nebula, and I wanted both objects in a single frame. I captured two overlapping views for about 90 minutes in total.
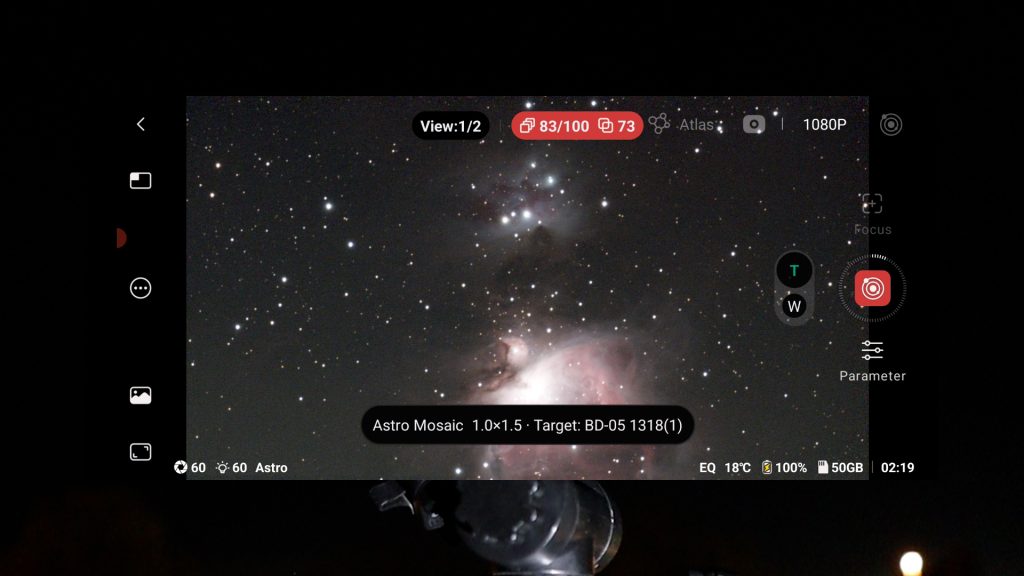
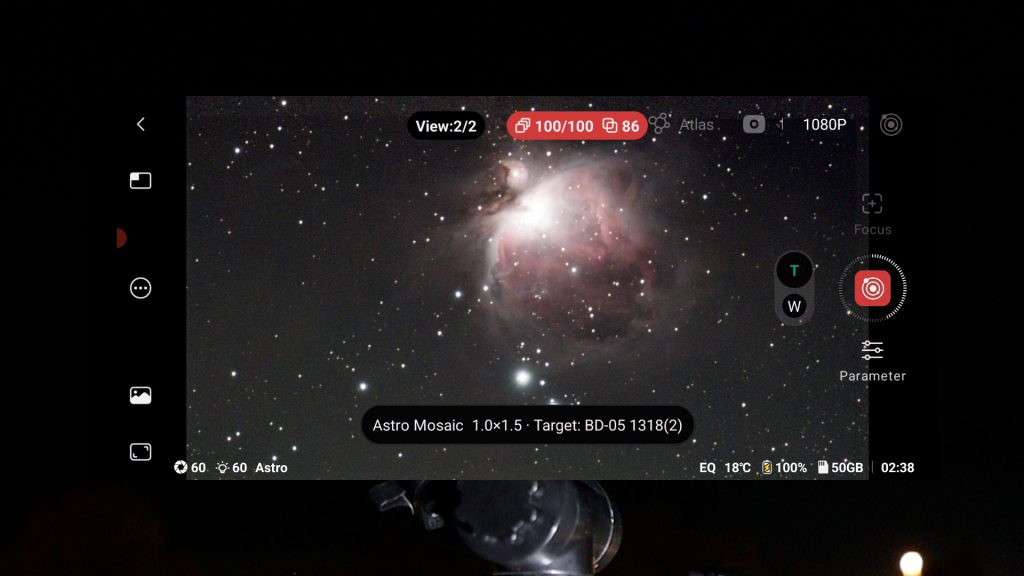
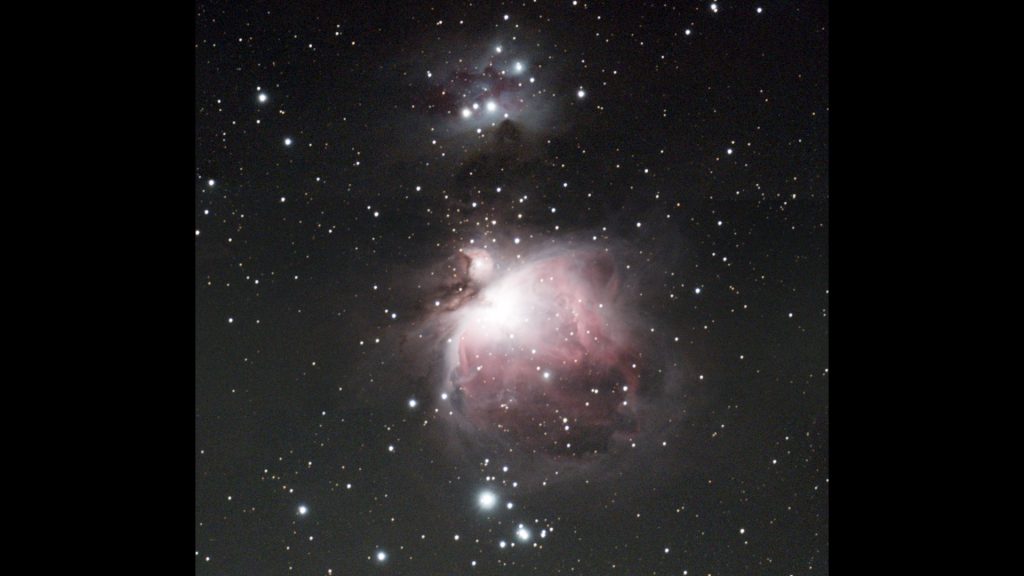
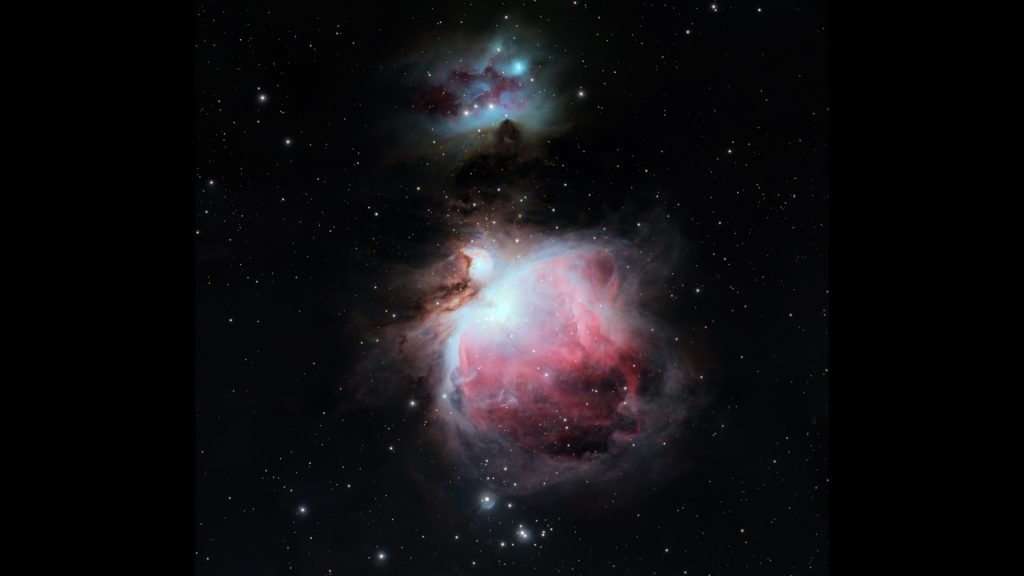
Below is the unedited mosaic straight from the DWARF Mini, showing the Orion Nebula with the Running Man Nebula above it, followed by the processed version. Again, for roughly 2 × 40 minutes of data under urban skies, the result is surprisingly solid for such a small smart telescope.
Dwarf Mini Duo-Band Filter: The Heart Nebula (IC1805)
For my final object of the night, I chose the Heart Nebula (IC 1805), an active H II region rich in ionized hydrogen and oxygen. This is exactly the type of object the DWARF Mini’s duo-band filter is designed for, as it isolates those emission lines while blocking much of the unwanted background light from city light pollution.
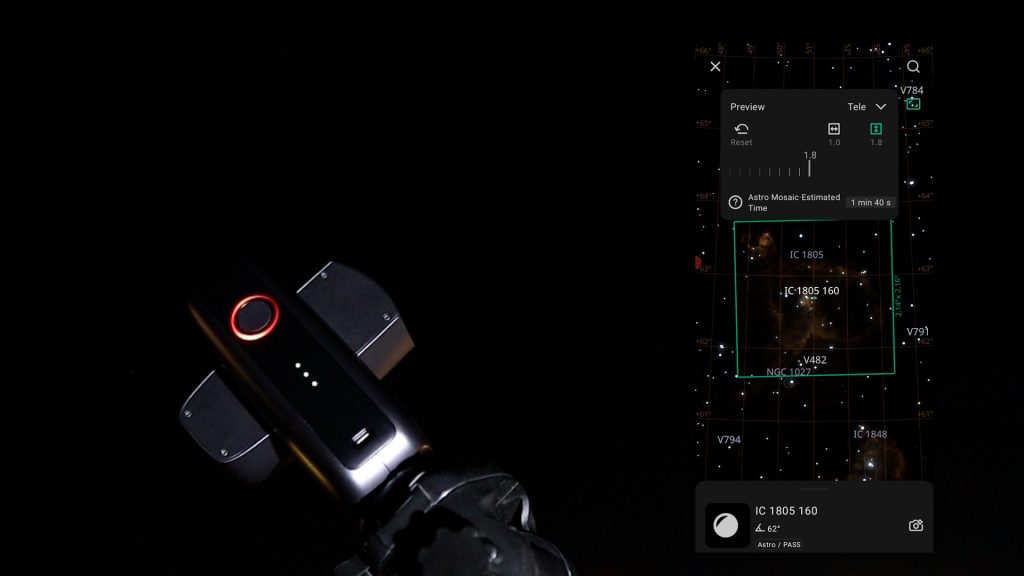
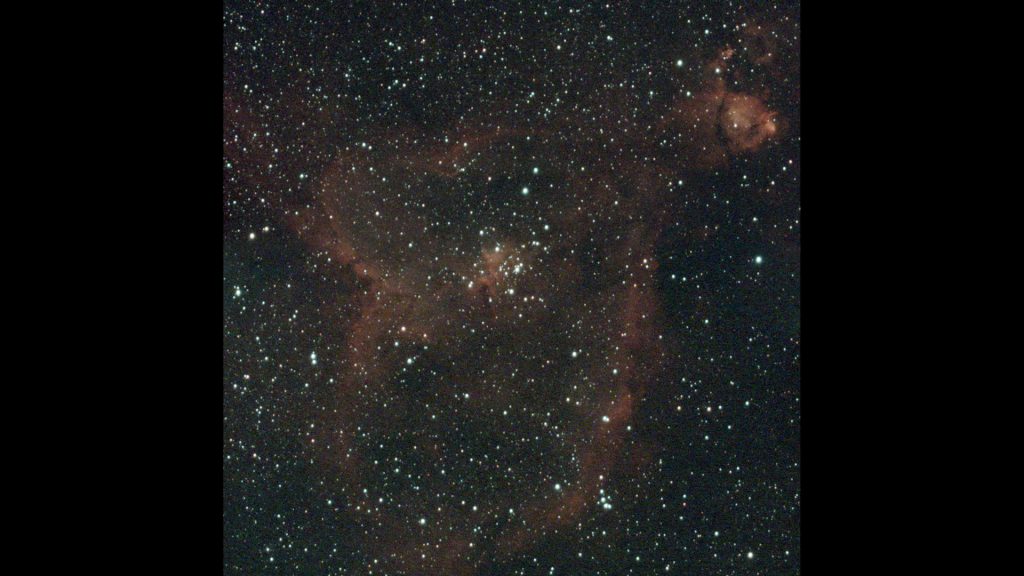
The Heart Nebula is quite large, so once again it wouldn’t fit into the native field of view of the Mini. I switched to mosaic mode to cover the full extent of the nebula. After about two hours of imaging, I ended up with around 50 stacked photos per panel, giving me a decent amount of data to work with.
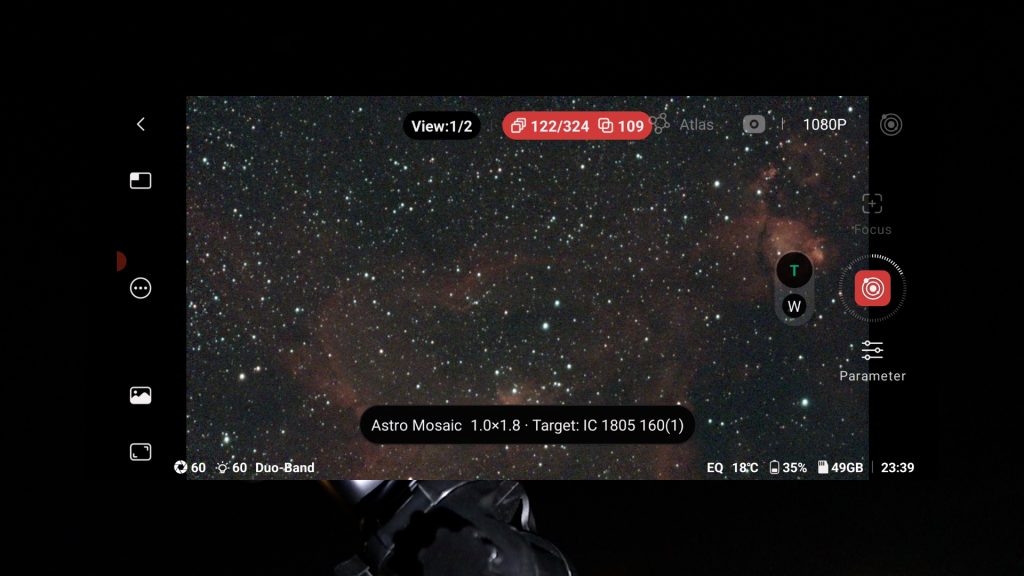
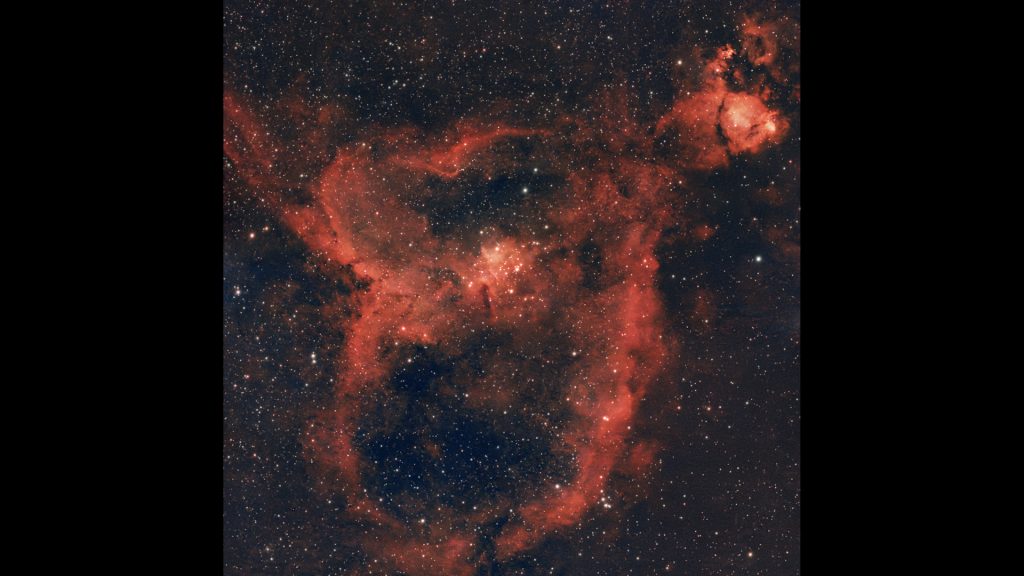
Below you can see the raw, unedited mosaic of the Heart Nebula, followed by the processed image. The duo-band filter really helps to bring out the structure and contrast in this kind of emission nebula, even from a light-polluted location.
Dwarf Mini: What about the Planets?
Finally, it’s worth mentioning one important limitation: the focal length and aperture of the DWARF Mini are simply too small to capture meaningful planetary detail. When I pointed the Mini at Jupiter, the largest planet in our Solar System, the result was a bright disc with no visible surface features.
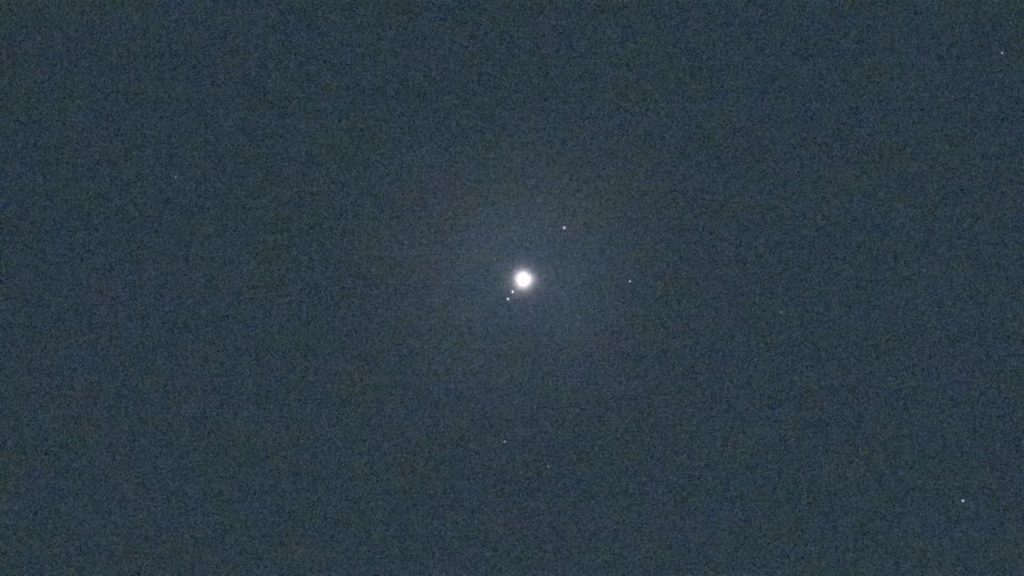
You do clearly see the four large Galilean moons orbiting Jupiter, which is a nice touch for beginners, but if your main goal is to photograph details like Jupiter’s cloud bands or the Great Red Spot, you’ll need a larger, higher-magnification telescope. The DWARF Mini is much better suited to wide-field solar, lunar, and deep-sky imaging than to serious planetary work.
Dwarf Mini: Additional Perks and Final Verdict
By this point in the review, I’ve already covered a lot, and I still haven’t mentioned some of the extra perks that come with the DWARF Mini.
First of all, you can use Station Mode to connect the Mini to your home Wi-Fi network. That means you don’t have to stay right next to the telescope outdoors; you can control it from anywhere in your house, which can literally save you a few cold trips into the night.
The DWARFLAB app also includes a scheduling module that lets you automate an entire imaging session for a given night. You can set up your objects and parameters in advance and let the Mini run on its own as conditions allow.
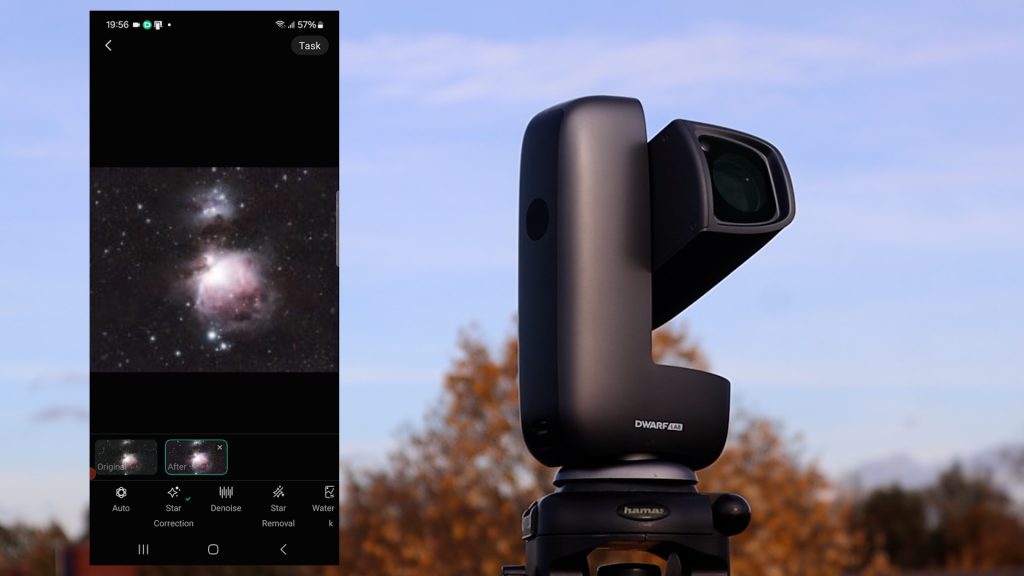
Finally, the app offers an in-app editing environment called Stellar Studio. With Stellar Studio you can denoise your images, create starless versions, and apply some basic processing steps directly on your phone or tablet. It’s not a replacement for full desktop software, but it’s a nice bonus for quick edits and sharing.
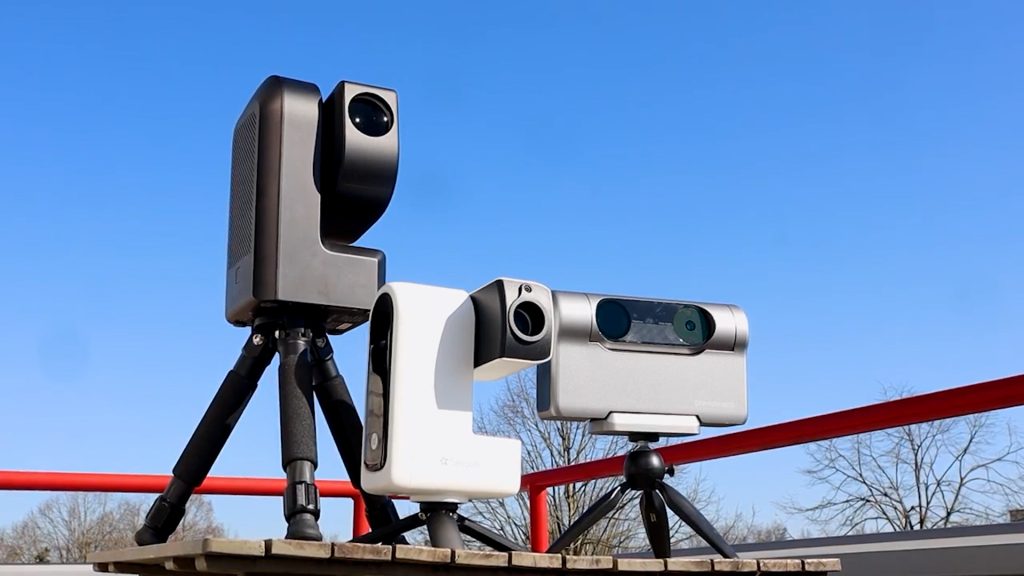
Of course, the DWARF Mini isn’t the only smart telescope on the market. There are several alternatives, such as its bigger sibling the DWARF 3, ZWO’s SeeStar S30 and S50, and the Vaonis Vespera. If you’re curious about those, you’ll find links to my other reviews on my website or youtube channel (Wido’s AstroForum).
That said, the DWARF Mini stands out as one of the most affordable and beginner-friendly ways to explore the night sky. If you want to get started with astronomy and astrophotography without spending a fortune or dealing with a complex setup, the DWARF Mini is a very compelling option.

Thankyou for this comprehensive review
Great review! I was looking for a Black Friday discount on the Dwarf 3 and accidentely found the Dwarf Mini on the Dwarf Lab-side.
10 % early-bird-discount and some YT-vids later, it was clear that the Mini will be the item of choice.
Hope it will be sent soon. 🙂
Just watched your review, very informative. This looks a great introduction smart telescopes and is highly portable. Can this be used to track the milky way as well as that is something that fascinates me. I am guessing it would use the wide angle or use mosaic mode?
Yes, both the Dwarf Mini and the Dwarf 3 are equipped with a wide-angle lens that allows you to photograph or record the Milky Way.