In this comparison, I take a deep dive into two of the leading entry-level smart telescopes on the market in 2026: Dwarflab’s DWARF Mini and ZWO’s Seestar S30. I’ll be breaking down the technical specifications, the overall value proposition, and the real-world ease of use for both devices. Most importantly, I’ll share the side-by-side photos and videos I captured during my hands-on testing to show you exactly how they perform in the field. By the end, I’ll reveal which of these budget powerhouses I would personally choose—and help you decide which one belongs in your gear bag. Let’s get started.
In This Review:
- → Why choose a Smart Telescope
- → Prices and Unboxing
- → Technical specs
- → Seestar vs Dwarflab APP
- → Solar and Lunar Performance
- → Imaging Deep-Sky Objects
- → Final Verdict: Which one?
Why Choose a Smart Telescope?
If you are new to the hobby, you might wonder why these devices have become so popular. Essentially, the two smart telescopes in this comparison are all-in-one astrophotography devices. They combine a telescope, a high-sensitivity camera, and a robotic mount into one system that you control wirelessly using an app on your phone or tablet.
They offer three game-changing advantages:
- Ultimate Portability: Unlike traditional setups that require heavy telescopes, mounts, and tripods, these are “grab-and-go” devices. They are small enough to carry in a backpack, making it easy to seek out darker skies away from city lights.
- Zero-Stress Setup: Usually, finding a deep sky object like a faint nebula or galaxy in the sky requires a lot of practice. A smart telescope does the hard work for you. You simply set it down, turn it on, and select an object from the app. After calibration is complete, the telescope automatically figures out where the object is, points itself at the object, and stays locked onto it as the Earth rotates.
- Seeing the “Invisible”: Traditional, visualtelescopes use eyepieces, which often shows deep sky objects as faint, grey smudges. Smart telescopes use a digital camera sensor to perform “Live Stacking.” The camera takes multiple long-exposure photos and layers them on top of each other in real-time. This reveals vibrant colors and intricate details that are literally invisible to the human eye.
A Quick Reality Check: It is important to manage expectations. Budget-friendly smart telescopes aren’t designed to compete with high end consumer or professional rigs that cost $5,000 or more. However, for their size and price, the results are often stunning. You might be surprised by the level of detail you can capture right from your backyard. With that context in mind, let’s dive into the pricing.
Pricing & Unboxing
At the time of writing, the S30 and Dwarf mini both cost about $399. Keep in mind that these prices are vendor-based and don’t include possible tariffs or VAT for your country. Also, there are regular offers from various vendors, so for the most accurate pricing, check the links below.
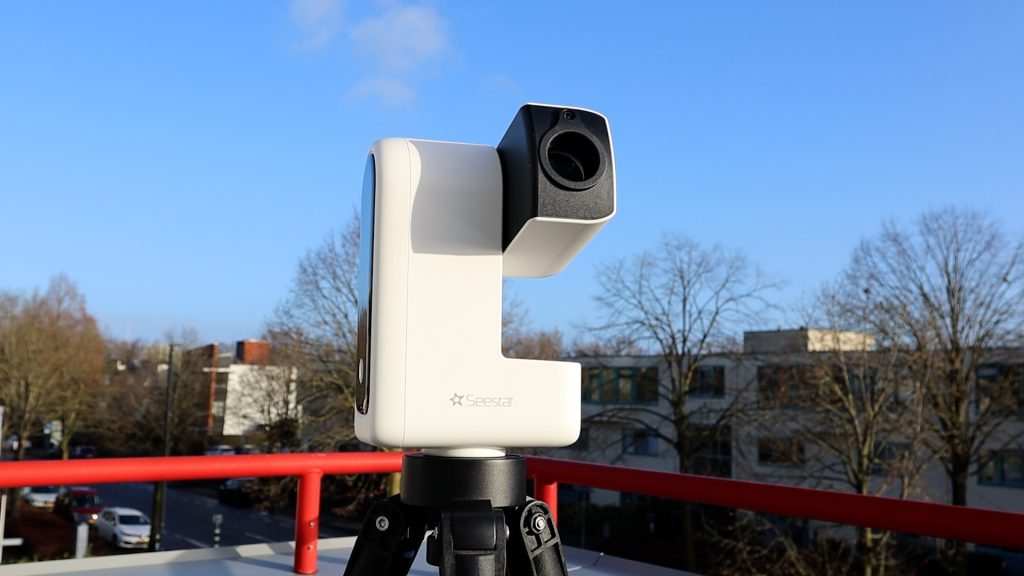
The Seestar S30 smart telescope comes with a carrying bag or case, a small tripod, a solar filter, and a USB-C cable, as shown in the picture below. The Seestar telescopes use a 3/8″-16 astronomy-style connection, which is the standard connection for tripods in the astronomy world.

Dwarflab’s DWARF Mini comes with a solar filter, a USB-C cable, and a cleaning cloth right in the box. Note that a tripod is not included with this model; however, it features a standard 1/4″-20 photo-style tripod mount on the base. This universal connection allows you to easily secure the telescope to any regular camera tripod or mount you may already own.

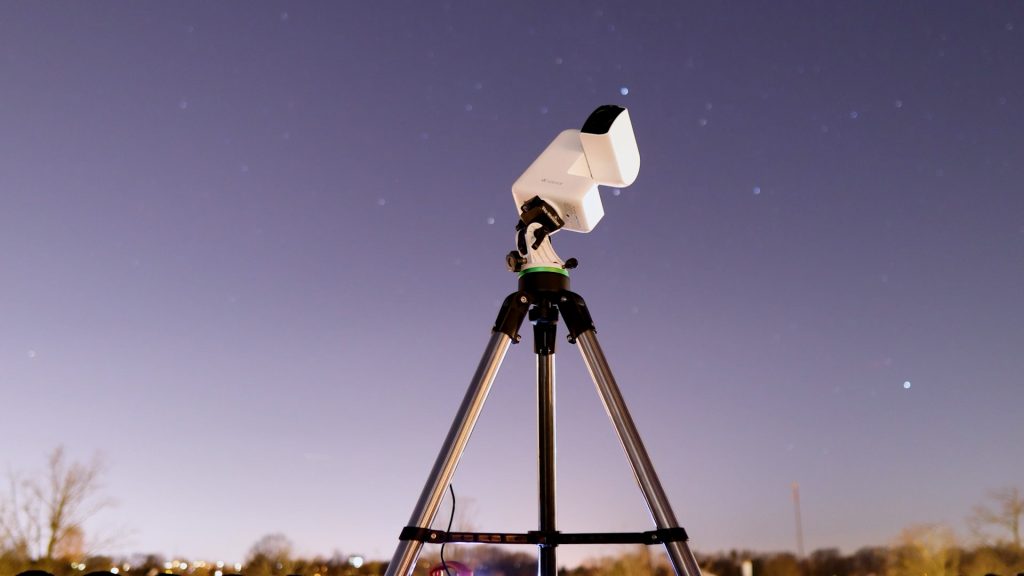
The Seestar tripods included with each of their smart telescopes are certainly decent—especially for travel—but they are small. As you can see in the videos, I often use my larger telescope tripod instead with the Seestar telescopes.

Design & Materials used
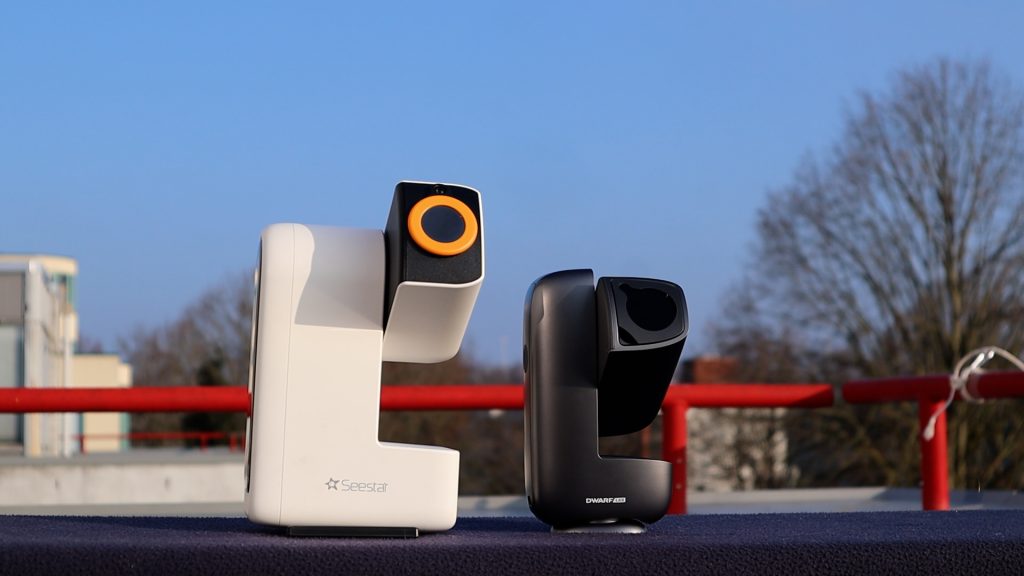
ZWO keeps things consistent with the S30, which offers a clean, compact look in white. However, the DWARF Mini’s curved silver frame feels a bit more refined. Its matte finish carries a certain density that suggests a sturdiness beyond typical entry-level gear. While it feels light enough for travel, the metal threads and internal motors hint at a build meant to last, provided it’s kept in a case. The Seestar S30 gives off a similarly premium vibe with its rugged polycarbonate body. It feels solid yet portable, and the reinforced mount suggests it’s built to endure years of dark-sky adventures if stored properly.
Technical specifications
Telescope type
Dwarflab’s DWARF Mini is in essence, a 150mm telephoto lense with extra-low dispersion glass to achieve well color-corrected views of the night sky. In contrast, the Seestar models of ZWO are APO refractor telescopes. The Seestar S30 uses a triplet APO design to deliver high-quality images with excellent color correction. What does that mean in terms of photo quality? I’ll get to that.
Field of View & Resolution
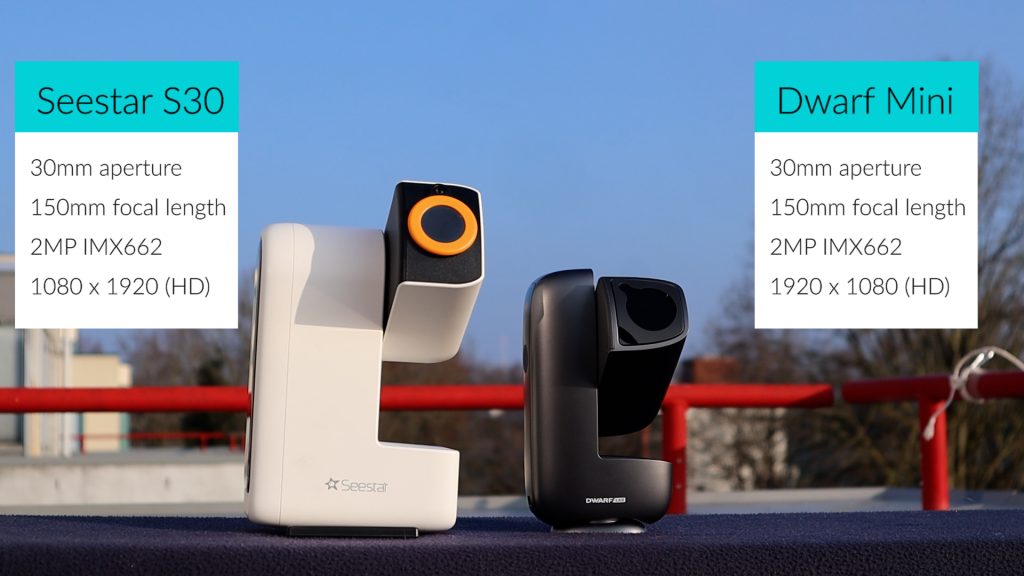
Both the Seestar S30 and the Dwarf Mini feature a 30 mm aperture and a 150 mm focal length, and they use the same 2-megapixel IMX662 sensor. This combination delivers an HD field of view of 2.13° × 1.2° (1080 × 1920), which is roughly four times the apparent size of the Moon. With an image scale of 3.99 arcseconds per pixel, the full Moon ends up spanning about 451 pixels across the sensor.
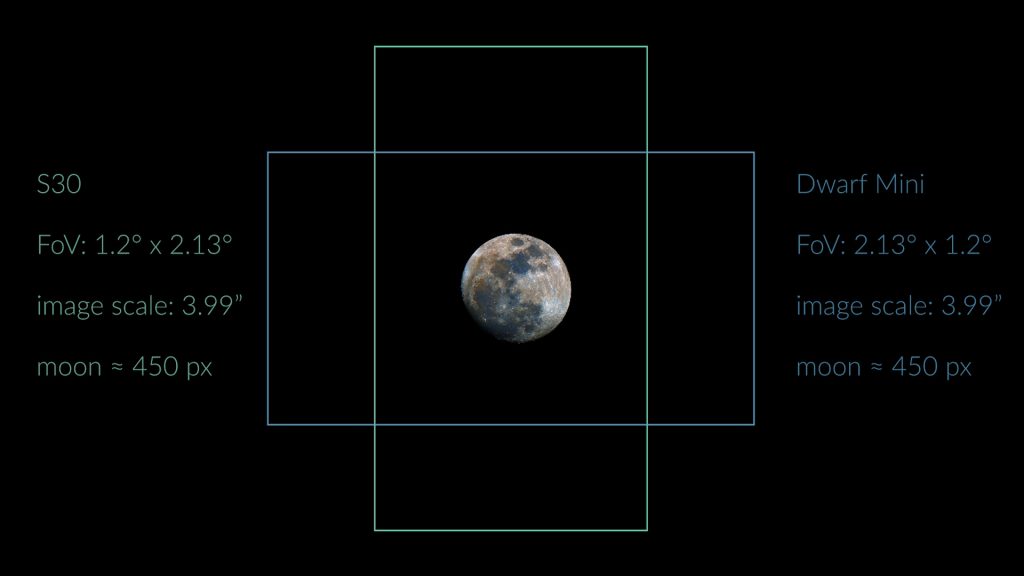
The Dwarf Mini outputs a landscape view, while the S30 uses a portrait orientation. Now, of course there is no up and down in space but some objects like the andromeda galaxy better fit a landscape view, whereas others like the orion and running man nebula better fit the portrait mode.
Filter comparison
Smart telescopes use different internal filters to optimize images for specific targets. Dark filters reduce sensor noise for deep-sky objects, while UV/IR-cut filters ensure natural colors for daytime use. At night, Astro (broadband) filters preserve natural star colors in galaxies, whereas dual-band filters isolate light from nebulae to help them “pop” against city light pollution.
The DWARF Mini is built for deep-sky versatility with its included dark, astro, and dual-band filters; however, because it lacks a UV/IR-cut filter, daytime photos will have a noticeable reddish tint. In contrast, the Seestar S30 is better suited for dual-purpose use; it includes a UV/IR-cut filter for natural-looking daytime shots and a duo-band filter for nebulae, though it lacks the dedicated astro filter.
Weight, size & battery life
When it comes to portability, all of these smart telescopes are easy to transport, but there are noticeable differences. The Seestar S30 is 1.65 kg whereas the Dwarf Mini stands out as the lightest option at under 1 kg, weighing roughly 840 grams. Also size-wise (L × W × H) the Seestar S30 is somehwta bigger at 21 × 14 × 8 cm whereas the Dwarf Mini is the smallest of the group at just 18 × 10 × 6 cm.
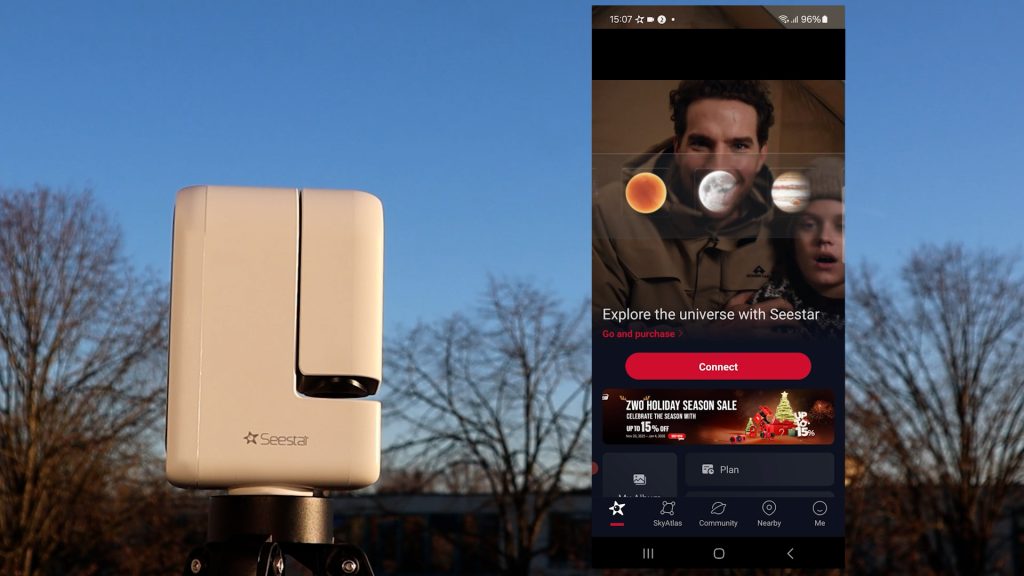
Wireless remote control: Dwarflab vs Seestar APP
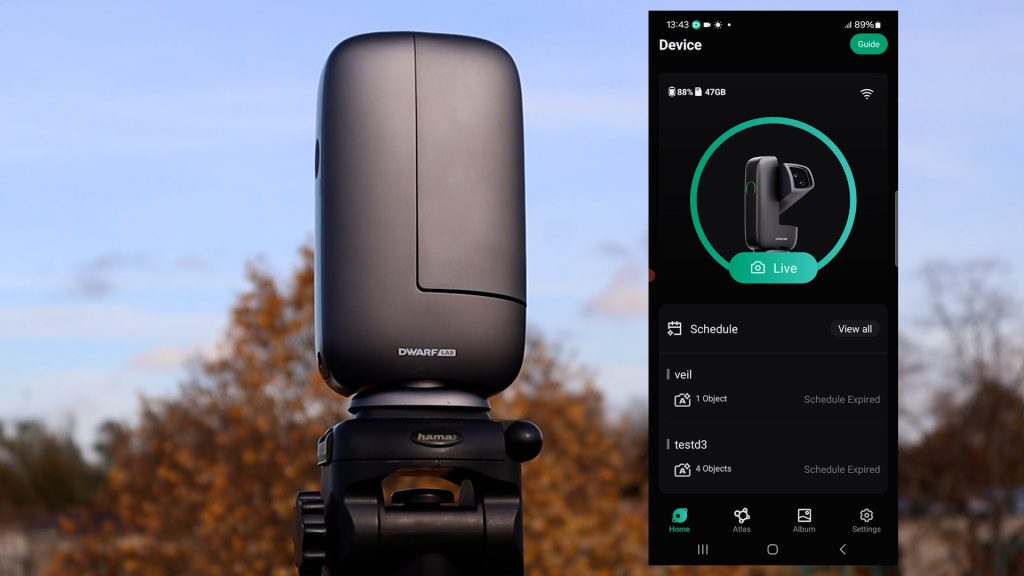
Both DwarfLab and Seestar frequently provide software updates to their apps and telescopes to introduce new features. When you connect for the first time, you’ll likely be prompted to install an update—just follow the simple on-screen instructions and you’ll be good to go.
Both apps are very user-friendly and offer similar functionality. The Seestar app features a clear home screen with dedicated modes for Stargazing (deep-sky), Solar System (Sun, Moon, and planets), and Scenery (daytime), plus an interactive sky atlas to find objects easily. Similarly, the DwarfLab app includes modes for General Daytime use, Solar System, and Deep-Sky imaging, along with its own sky atlas for navigation.
A key difference is the daytime output: the Seestar S30 includes a UV/IR-cut filter for natural, true-color images, whereas the Dwarf Mini uses an astro filter that results in a reddish tint during the day. Both apps are packed with advanced extras like Mosaic Mode for capturing large sections of the sky, automated session planning, and built-in photo editing. Because they are so evenly matched, there isn’t a clear “winner” when it comes to the app experience.
In-app editing tools
In addition, both apps include in-app editing tools to enhance your stacked deep-sky images. While they aren’t as powerful as dedicated astrophotography processing software like PixInsight, Siril, or general processing tools like Photoshop, they are great for making quick improvements. Both apps support basic options like adjusting exposure, contrast, and saturation. The Seestar app features a built-in AI Denoise tool, while DwarfLab offers its own Stellar Studio app that can denoise photos, create starless images, and perform star correction.
It’s also important to point out that these telescopes capture real-time photos of the sky, including planes, clouds, and satellite trails. There are no downloaded or AI-generated images here—which is worth mentioning, especially given how flooded the internet is with AI images these days.
Solar and Lunar Imaging
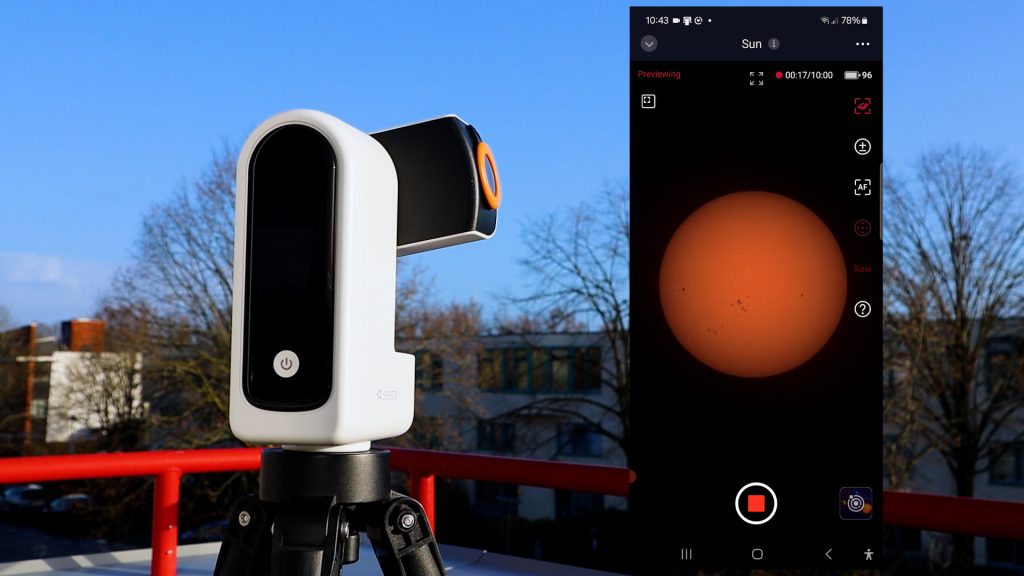
When imaging the Sun, safety is the priority: never look directly at the Sun and always use a proper solar filter. Both the Dwarf Mini and Seestar S30 include magnetic solar filters for quick, easy attachment.
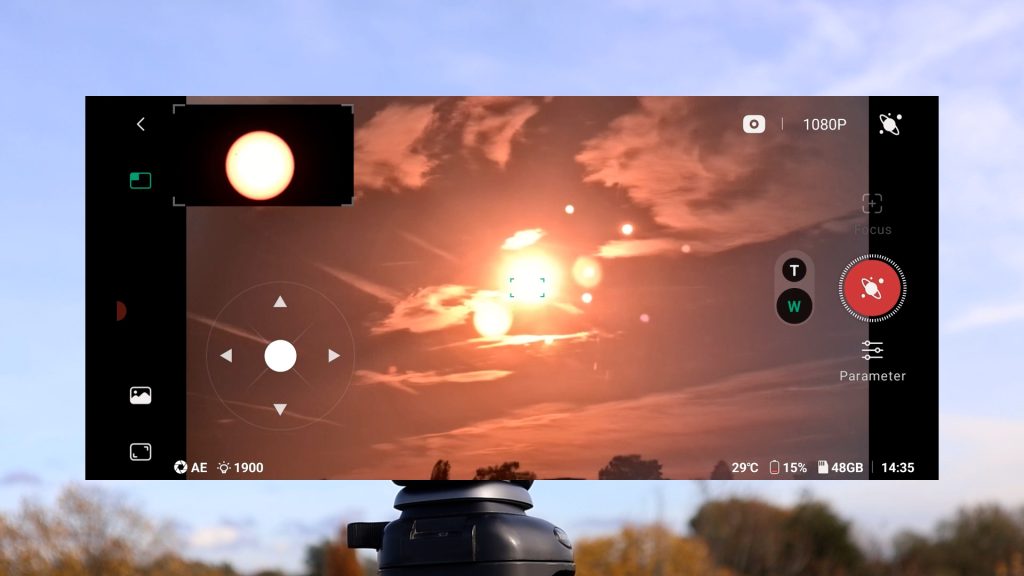
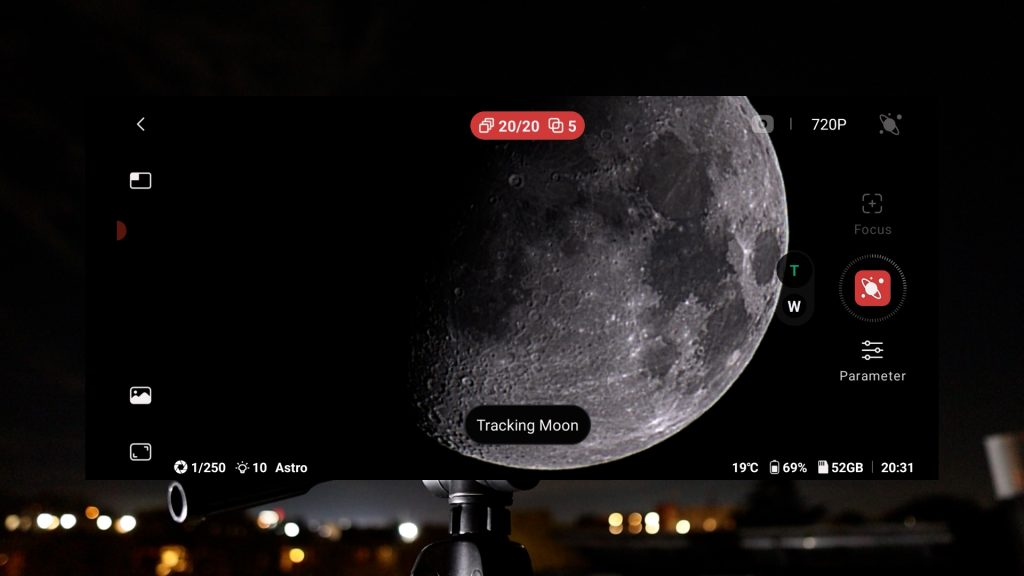
Both telescopes use a wide-field lens to help locate targets. In the DwarfLab app, you center the Sun manually using a dual-lens live view and on-screen controls. The Seestar app simplifies this with an automatic GoTo command to find the Sun, though manual slewing is also available. Once centered, both systems offer automatic solar tracking, autofocus, and adjustable exposure for capturing photos, MP4 videos, or timelapses.
For high-resolution details like sunspots or craters, the processing methods differ:
- Dwarf Mini: Features a convenient automatic in-app stacking mode that reduces atmospheric blur in real-time.
- Seestar S30: Records high-quality RAW AVI videos for post-processing. While it has an in-app stacking tool, it is quite slow—stacking a 90-second video can take 10 minutes.
For the best results with the Seestar, I recommend keeping AVI videos under 30 seconds if stacking in-app, or downloading the files to use free external software like AutoStakkert and WaveSharp.
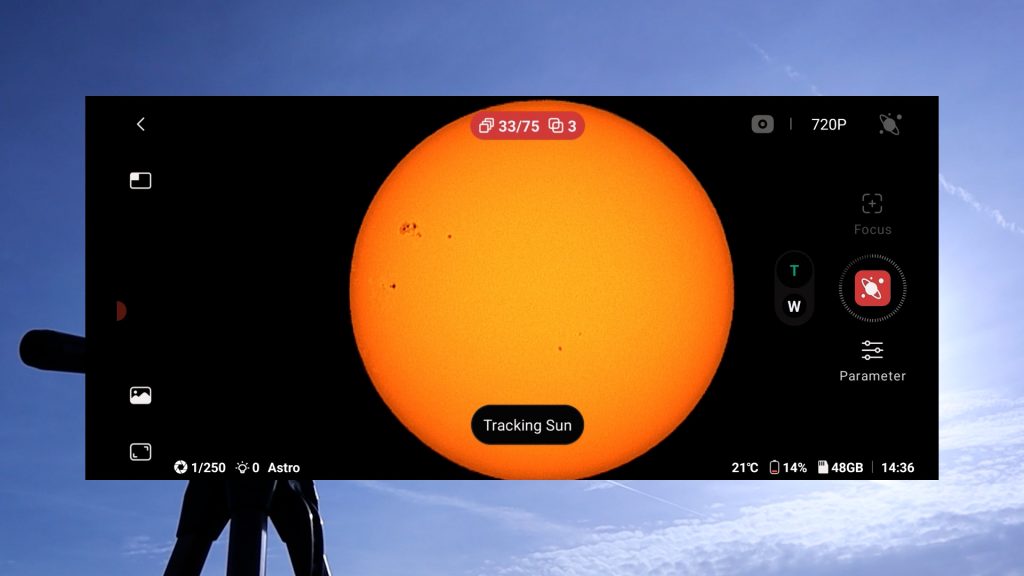
I pointed both the Dwarf Mini and Seestar S30 at the Sun. Starting with the Dwarf Mini, I captured and stacked 50 frames using default settings after initiating tracking and autofocus. The telescope automatically stacks the images, but also saves the individual frames so you can process them yourself with your preferred software.
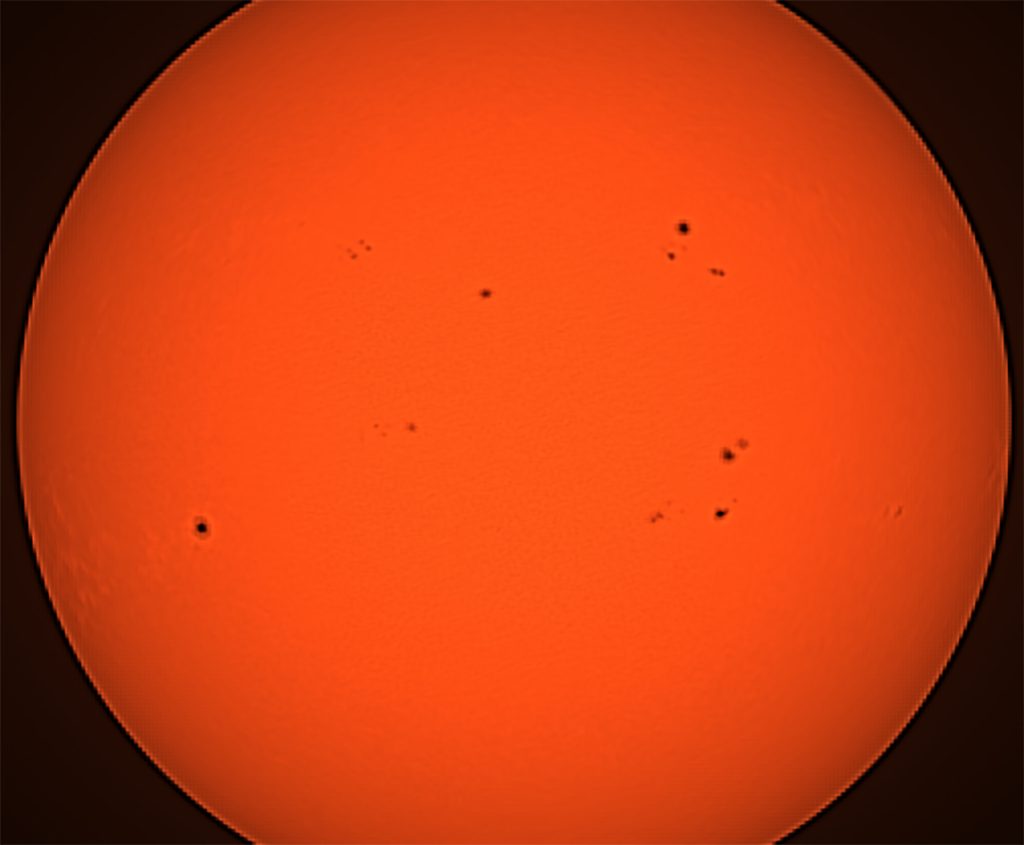
Dwarf Mini – Solar Images
The auto-stacked image was sharp, though slightly noisy and overexposed (top right). However, after manually stacking those frames in AutoStakkert (free Windows-based software) and applying sharpening and denoising in wavesharp, I achieved a final processed image of the Sun (top right) that I found surprisingly pleasing.
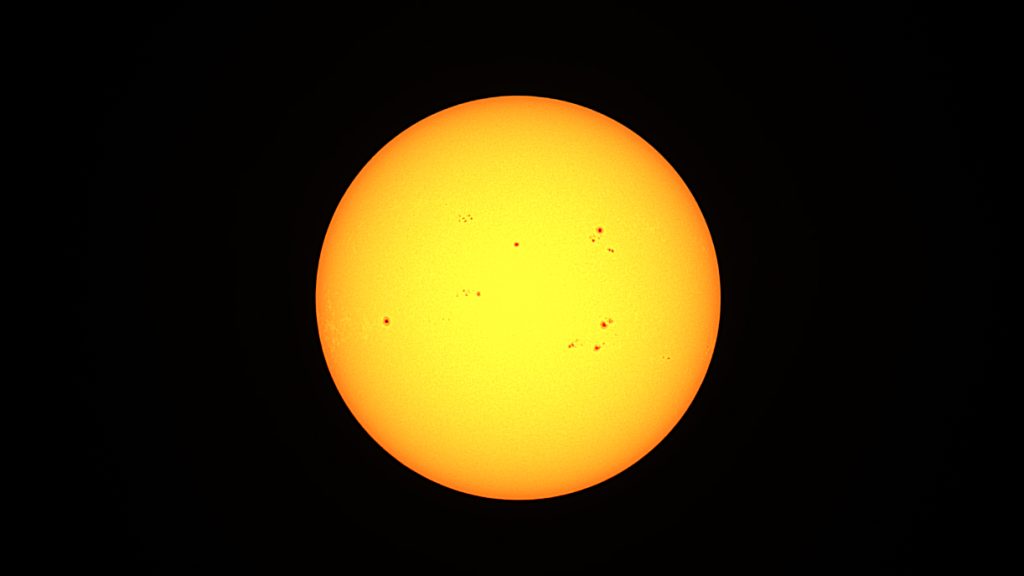
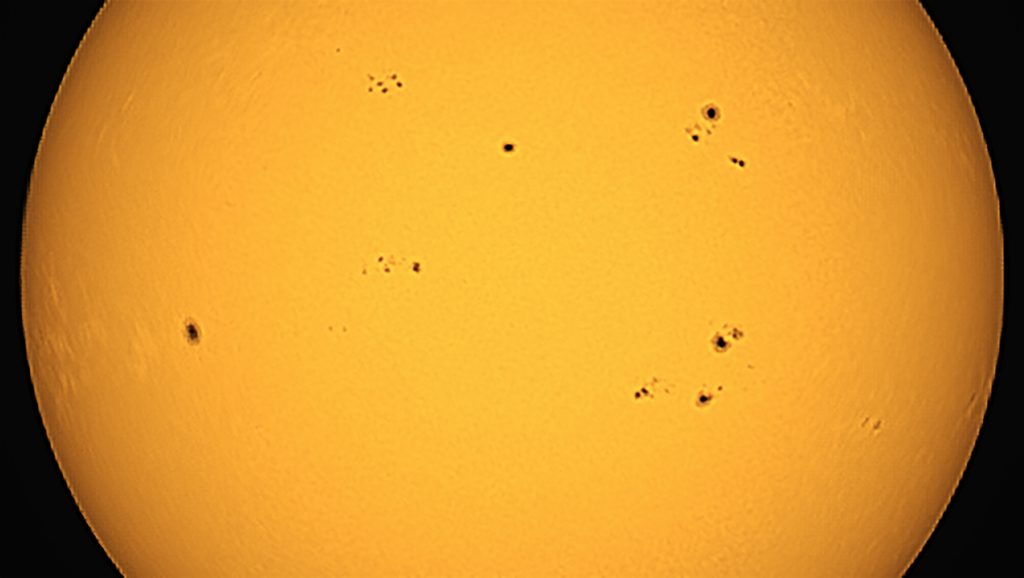
Zooming in on the stacked image (bottom left) and processed image (bottom right) clearly shows the many sunspots visible on the Sun that day, and I have to say I was pretty pleased with the results. I do think the automatically stacked image looks a bit too sharpened and overexposed, with a reddish tint due to the absence of a UV-IR cut filter (bottom left), but I was happy with the results of my own processed image (bottom right). We do see some noisy sunspots, but that is to be expected given the limited focal length and 2-megapixel camera of the Dwarf Mini.
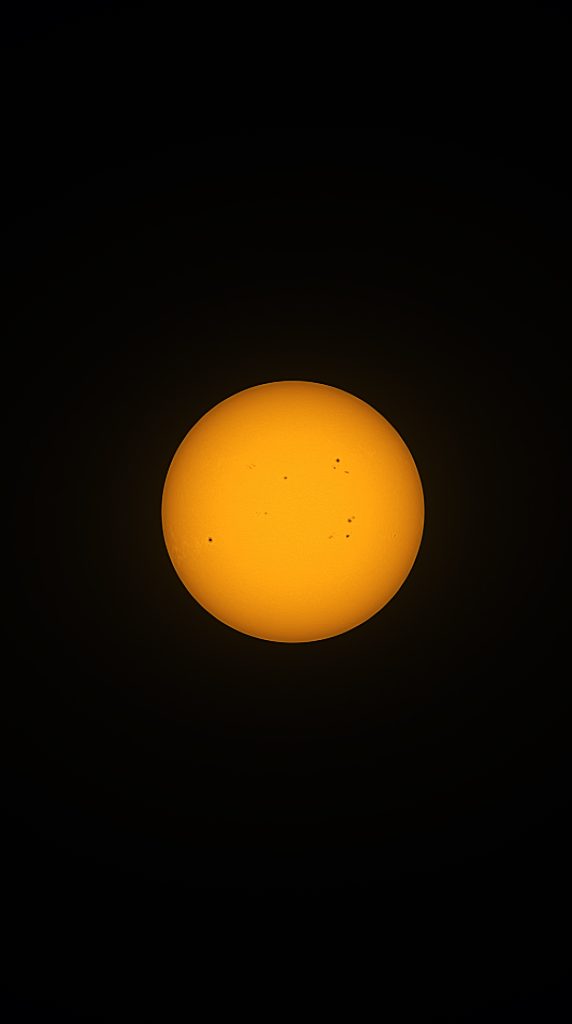
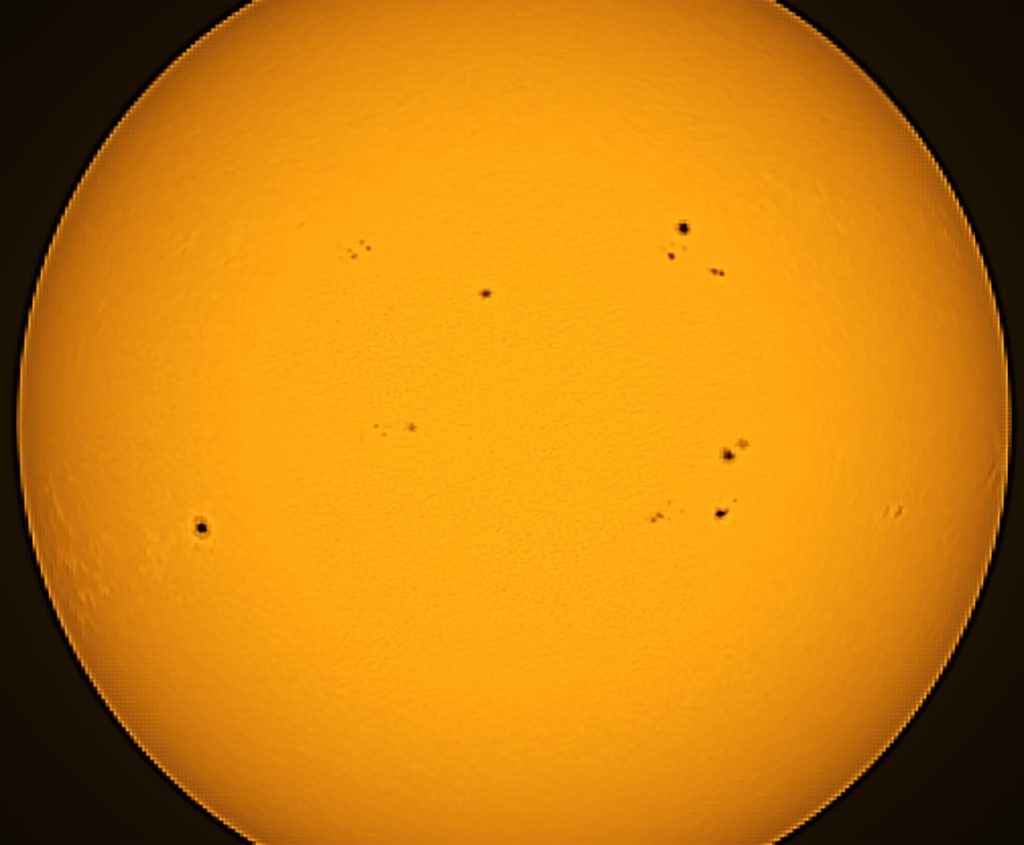
Seestar S30 – Solar Images
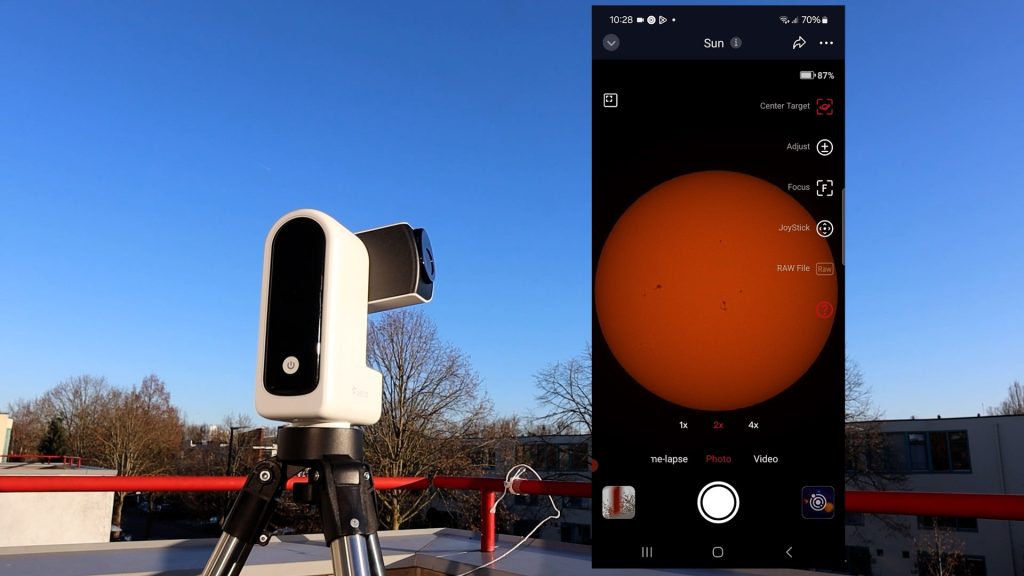
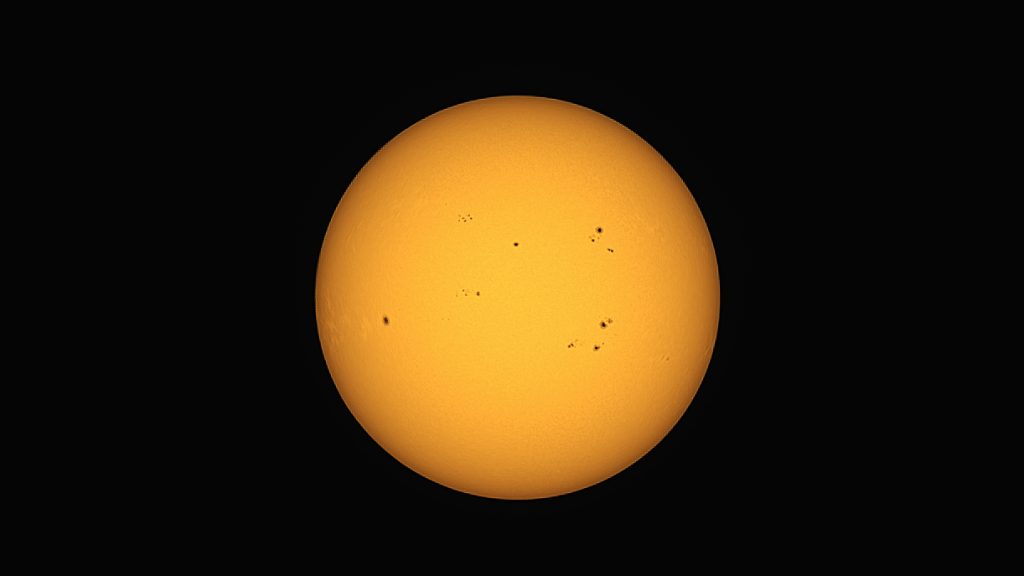
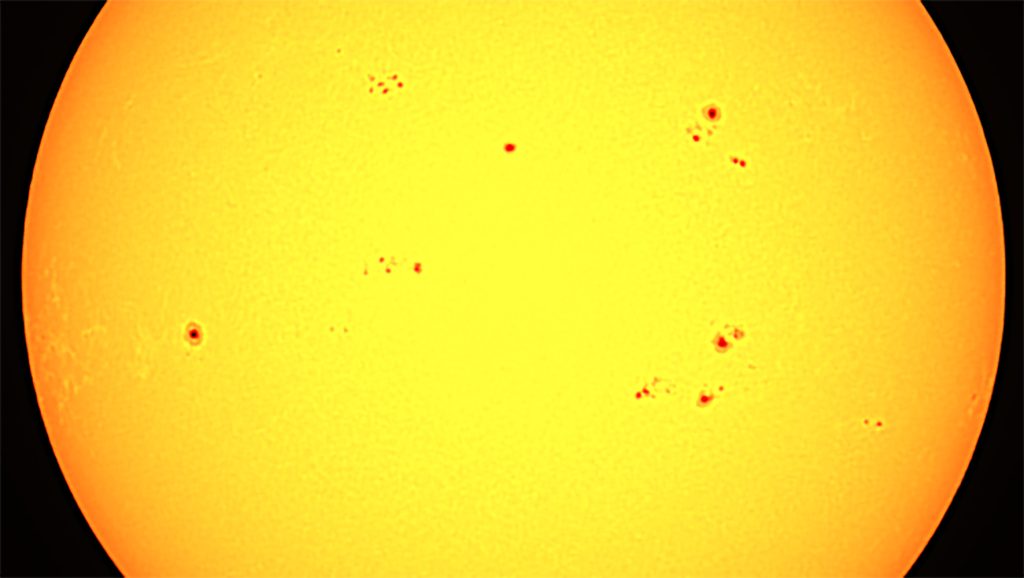
I used the Solar mode in the Seestar app to point and autofocus on the Sun, after which I took a one-minute video in AVI RAW format. This generated about 1,000 frames, of which I stacked the best 50% in AutoStakkert. Note that the native solar filter of the Seestar S30 displays the Sun with an orange tint (top left), which, with some color editing can be changed to a more orange-yellow tint that I personally prefer. Note that the Sun is technically white, so the coloring is purely a personal preference. While the stacked (top left) and processed (top right) pictures look acceptable, I do prefer the slightly more punchy images of the Dwarf Mini.
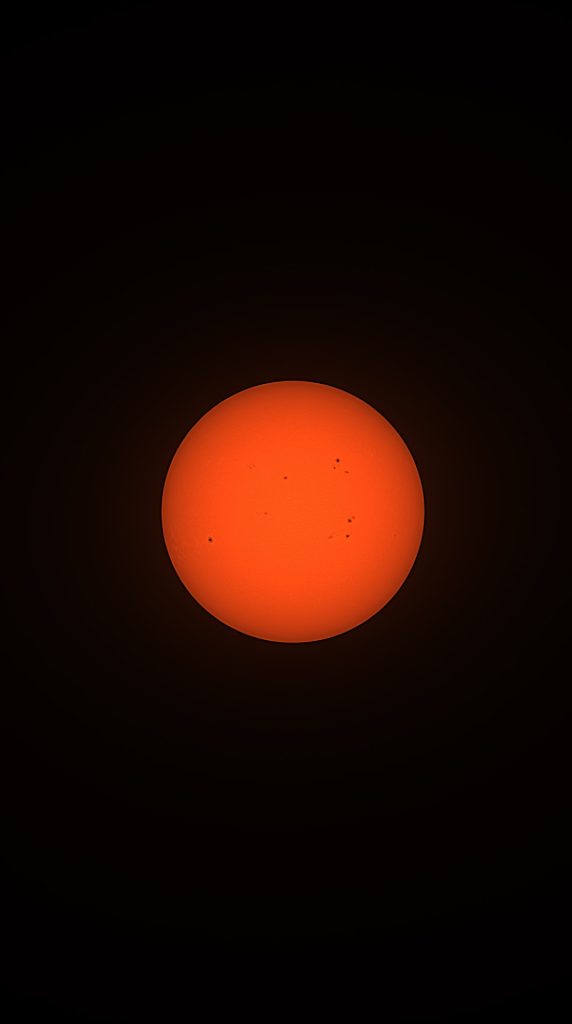
When zooming in, the stacked (bottom left) and processed (bottom right) images look a bit underwhelming, although the sunspots are clearly visible. The overall performance is decent at this price range, but with a limited focal length and a 2-megapixel camera, you don’t get high-resolution details of the sunspots. All in all, I prefer the more punchy and dynamic solar images produced by the Dwarf Mini over the solar images of the Seestar S30.
Lunar Imaging
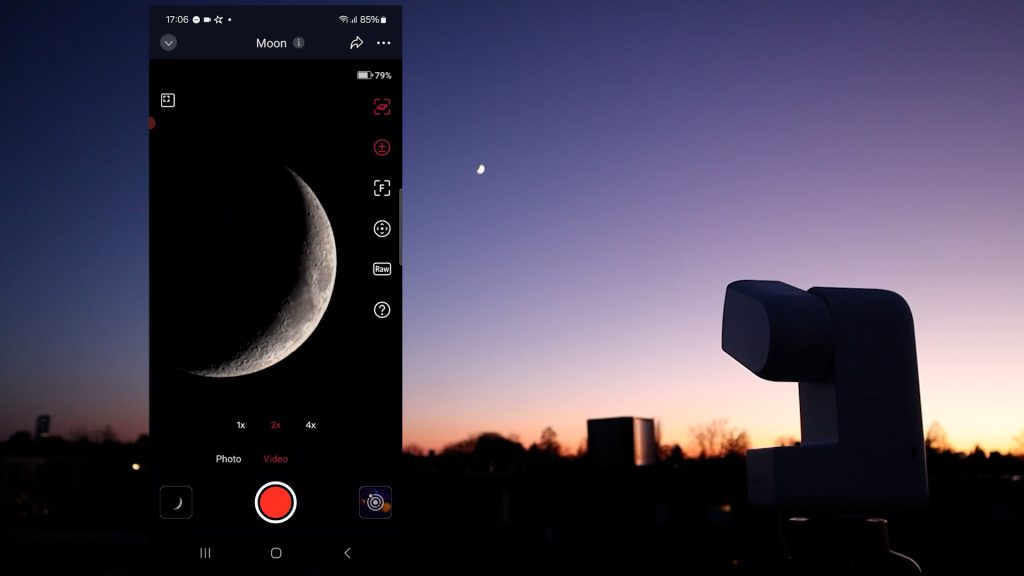
I waited until nightfall and imaged the full Mon with the Dwarf Mini and S30. Overall, the images look quite similar, but there are some key differences worth pointing out. I captured 50 pictures with the Dwarf Mini, using the solar system mode again after selecting and autofocussing on the Moon . Similar to the solar imaging process, the Dwarflab app creates an internal map with individual images you can download and process, as well as an automatically stacked image of the Moon (top left). The Dwarf Mini delivered a solid automatically stacked picture of the full Moon (top left), and some basic sharpening, exposure, and contrast enhancement, I created the slightly sharper image on the top right (top right).
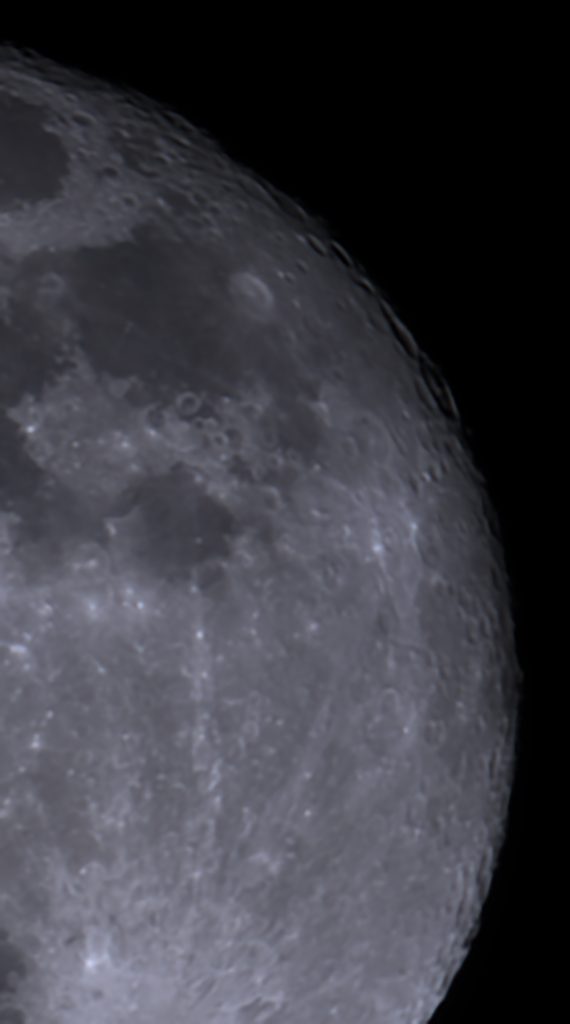
Dwarf Mini – Moon
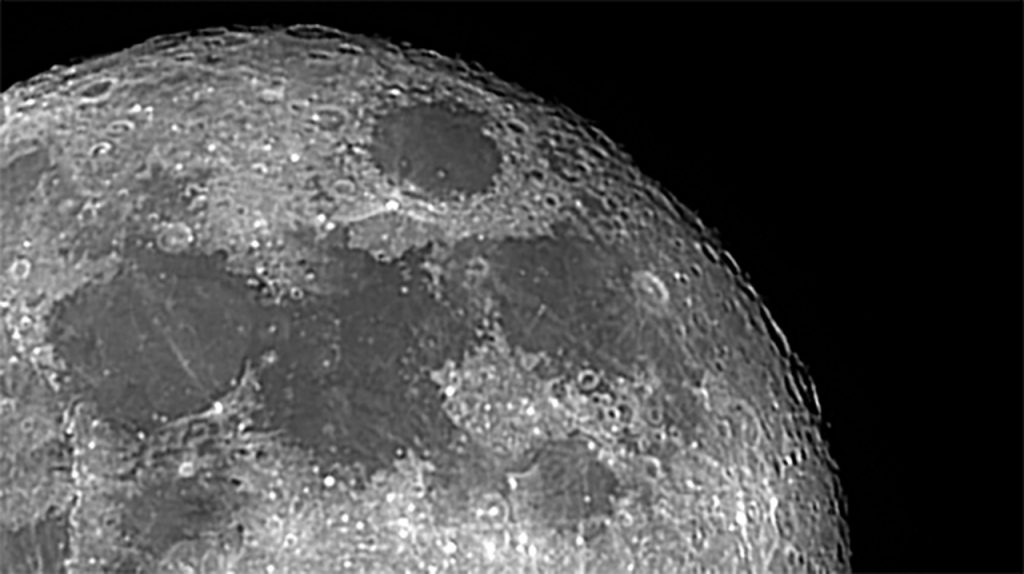
When zooming in, a few limitations become noticeable. In the top-right crater region (bottom left), there is some minor chromatic aberration visible upon closer inspection. To reduce this, I had to desaturate the image (bottom right). Also, at a focal length of 150mm, the zoomed-in views reveals the limits of fine detail you can capture at this focal length. To capture the Moon with significantly more detail, you’ll need optics with a larger aperture and a longer focal length.
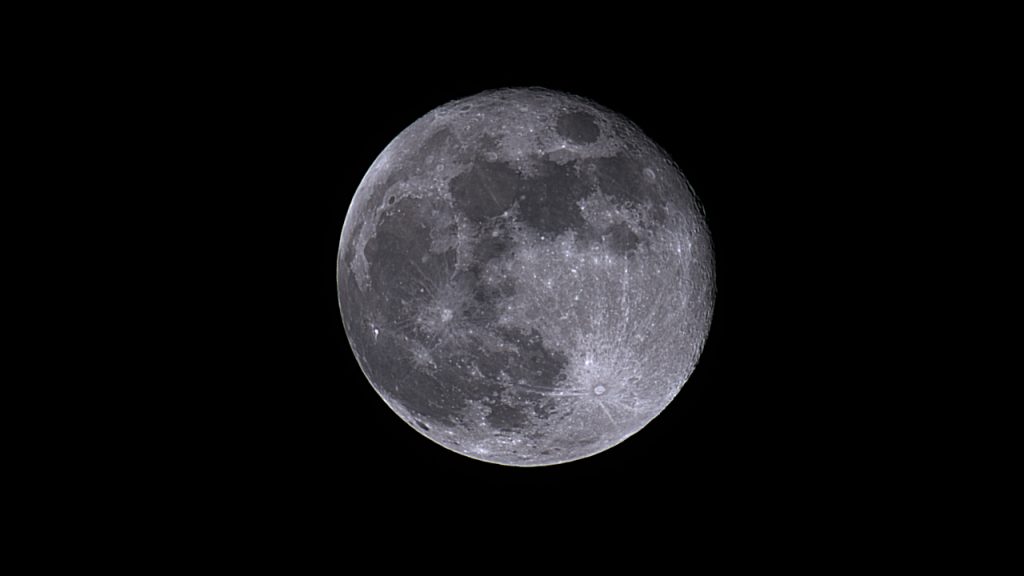
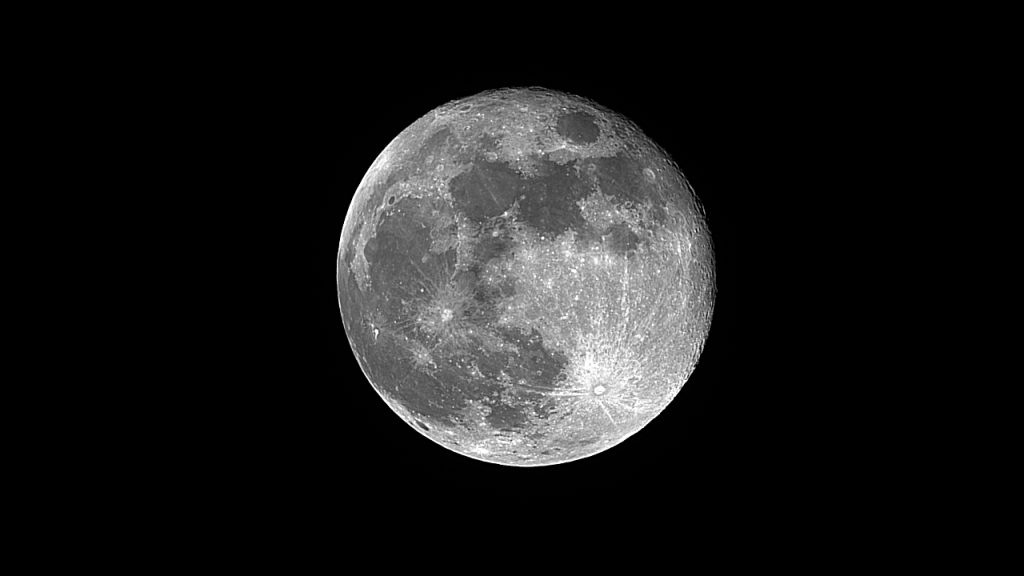
Seestar S30 – Moon
I took a 60 second AVI RAW video of the same Moon with the Seestar S30, and stacked the best 50% of the frames video in autostakkert. Looking at the stacked image of the Seestar S30, the Moon presents a slightly soft but pleasing view (top left) in portrait orientation. After applying some basic contrast, sharpening, and exposure adjustments (top right), the full Moon image becomes much more visually appealing.
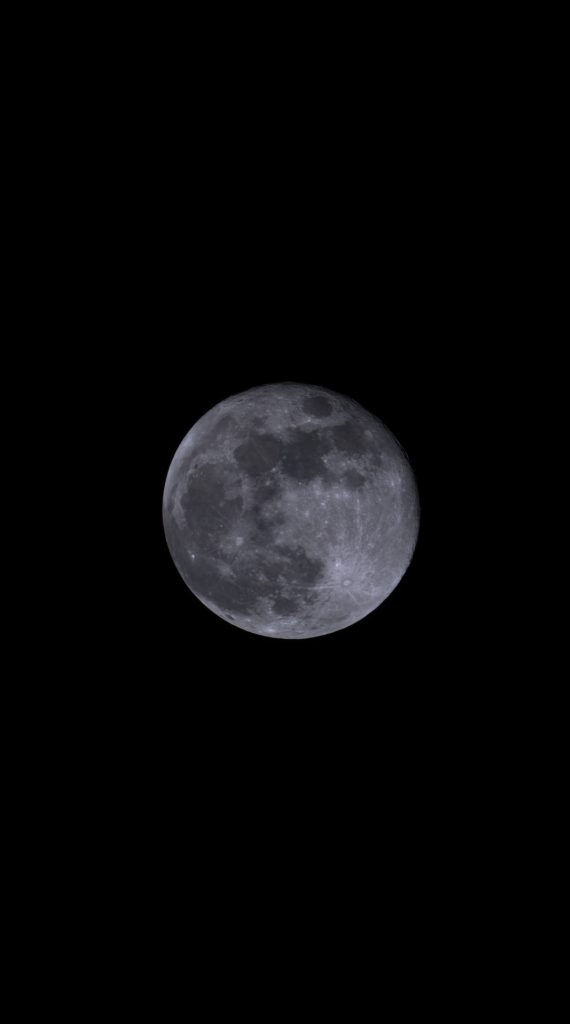
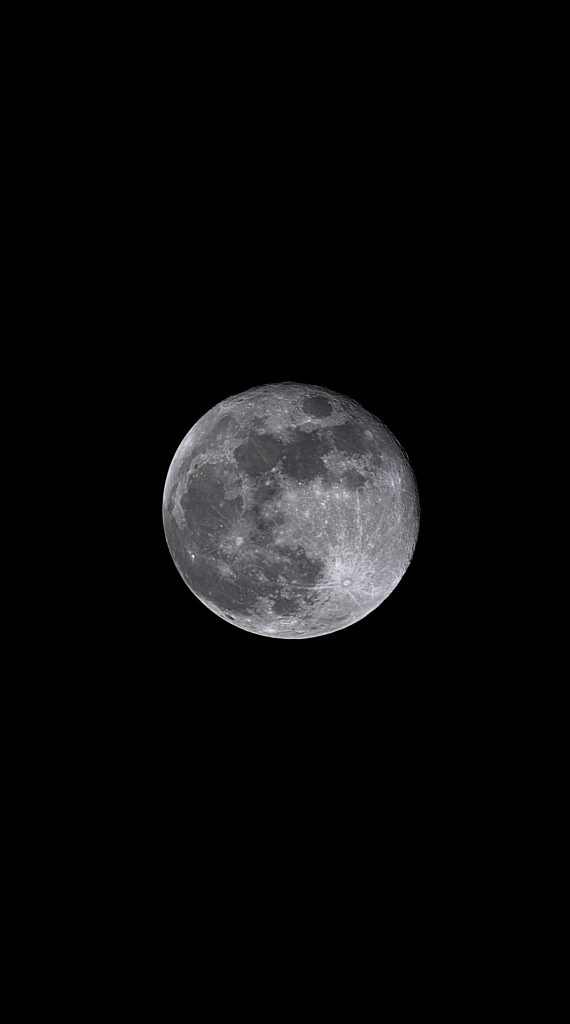
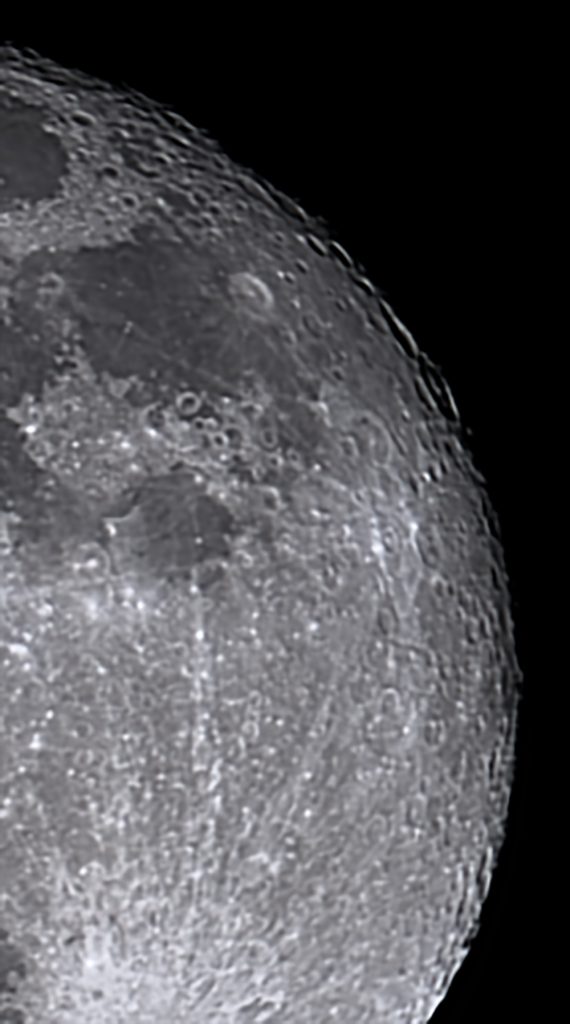
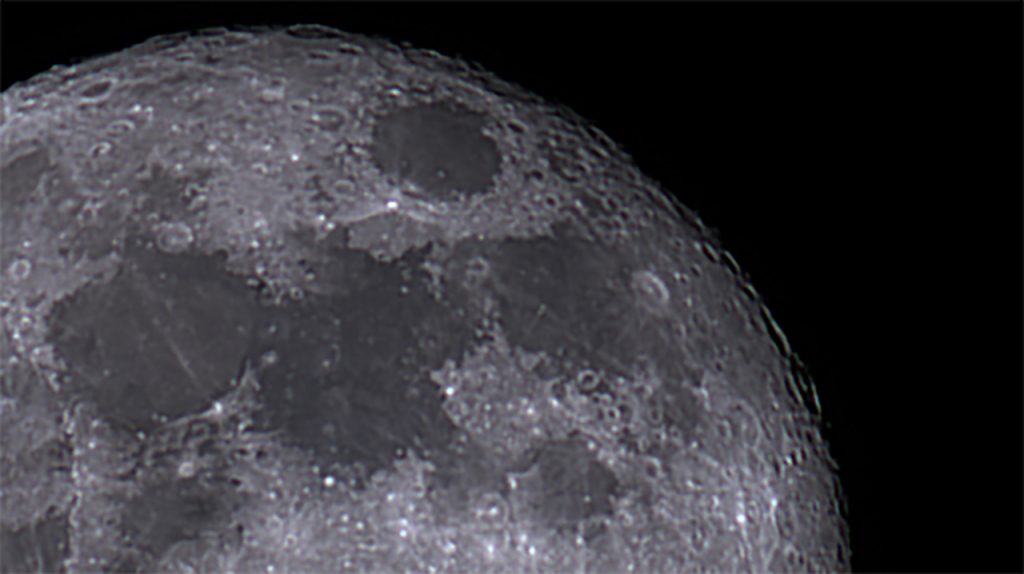
When zooming in, there’s no visible chromatic aberration, confirming that the Seestar is a true apochromatic telescope. The close-up view (bottom left) appears natural, though a bit denoised. This can be improved with additional sharpening, along with fine-tuning of exposure and contrast (bottom right) However, similar to the Dwarf Mini, the level of detail remains acceptable but somewhat limited at this pricepoint. With a focal length of 150mm and with a 2 MP sensor, you simply cannot capture extremely fine details. Achieving that requires a telescope with a larger aperture and a longer focal length. Overall, the Dwarf Mini and Seestar S30 perform quite similarly, but I preferred the Seestar S30 images due to thanks to its better color correction.
Deep Sky Astrophotography
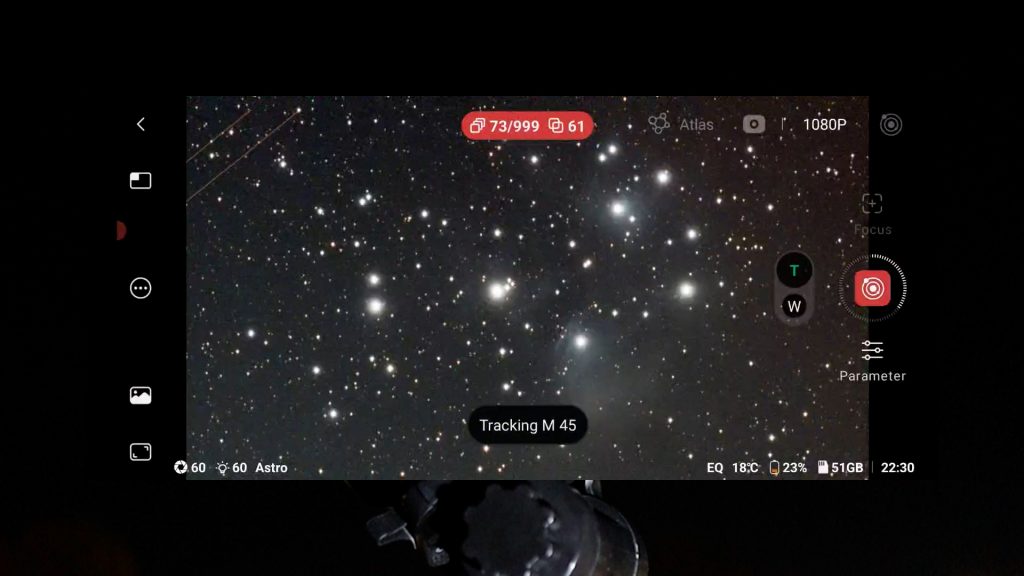
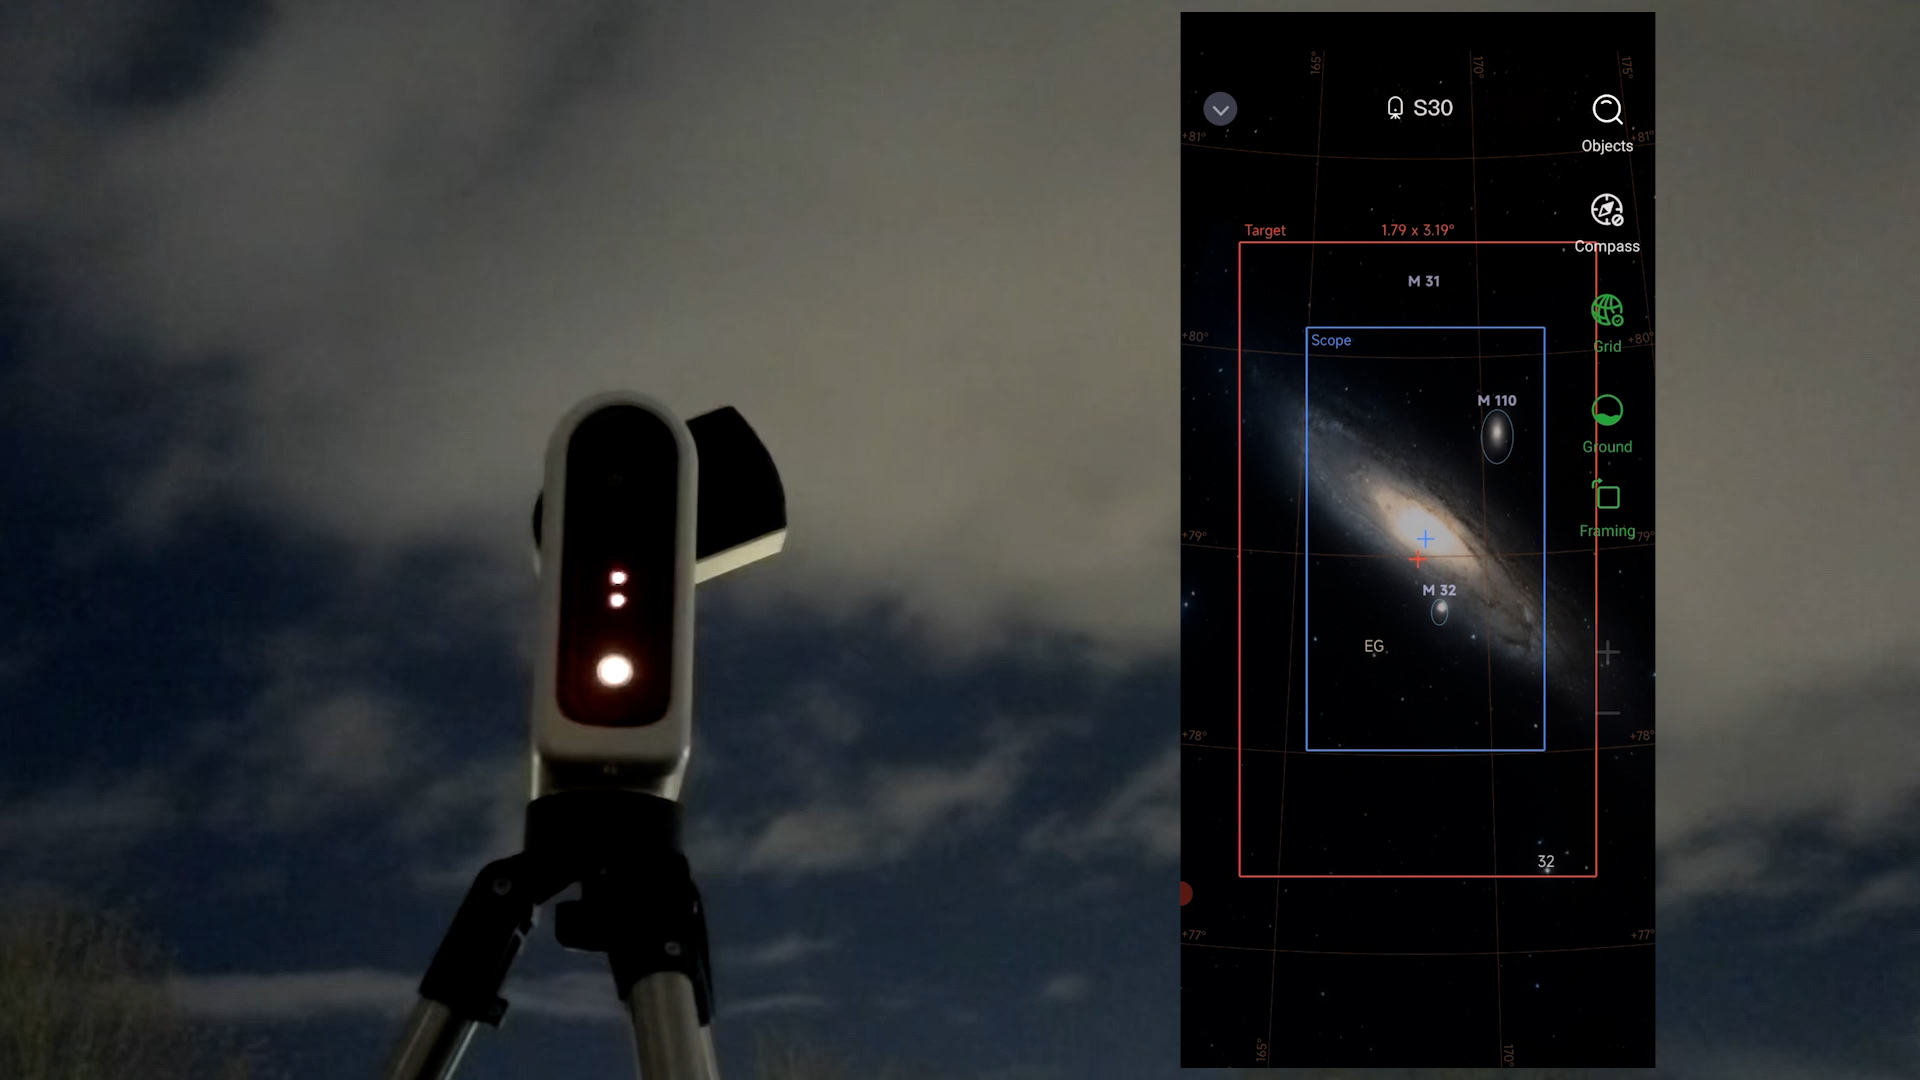
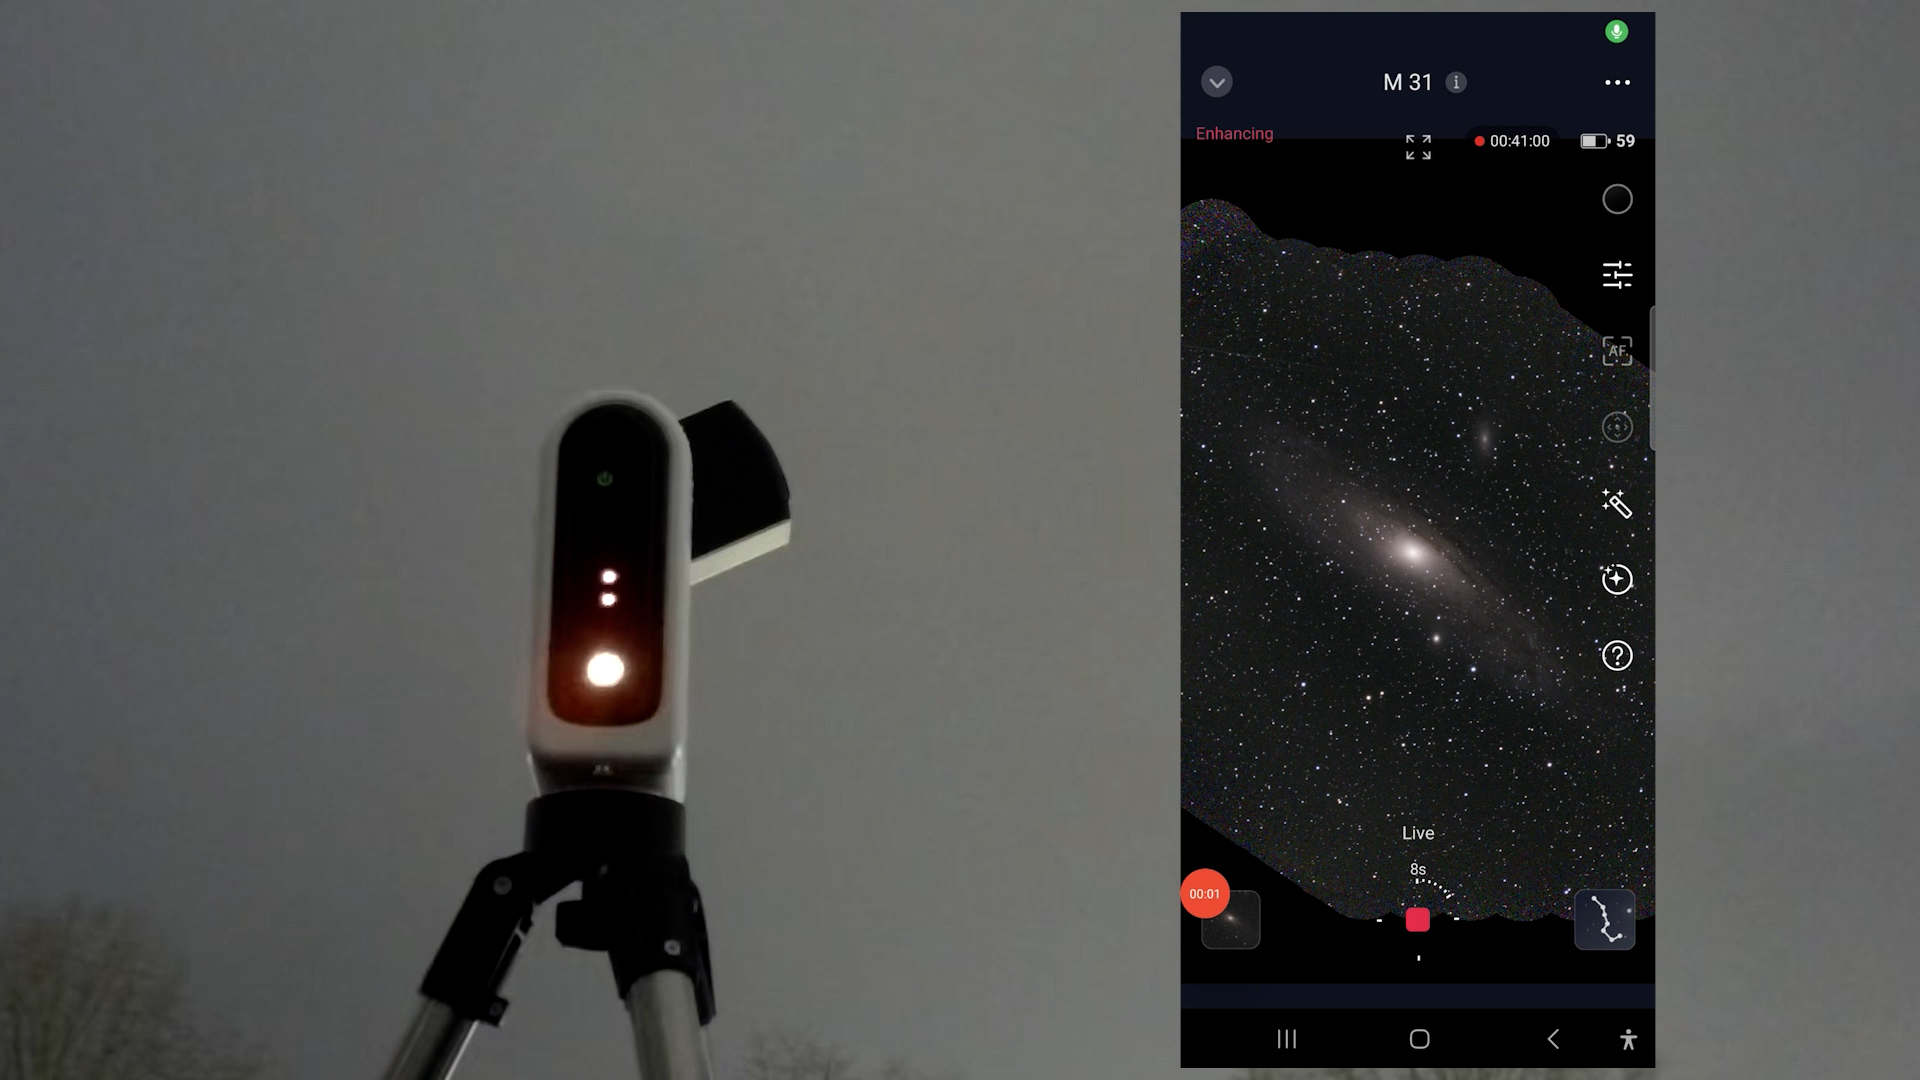
Both apps offer multiple ways to engage in deep-sky astrophotography. The Dwarflab app includes a virtual sky atlas and a deep-sky menu where users can explore and select objects such as nebulae, galaxies, and star clusters. In deep-sky mode, a simple tap on the photo icon slews the telescope to the selected target. The app also features a scheduling tool that allows you to plan and automate your imaging session by selecting specific objects at set times.
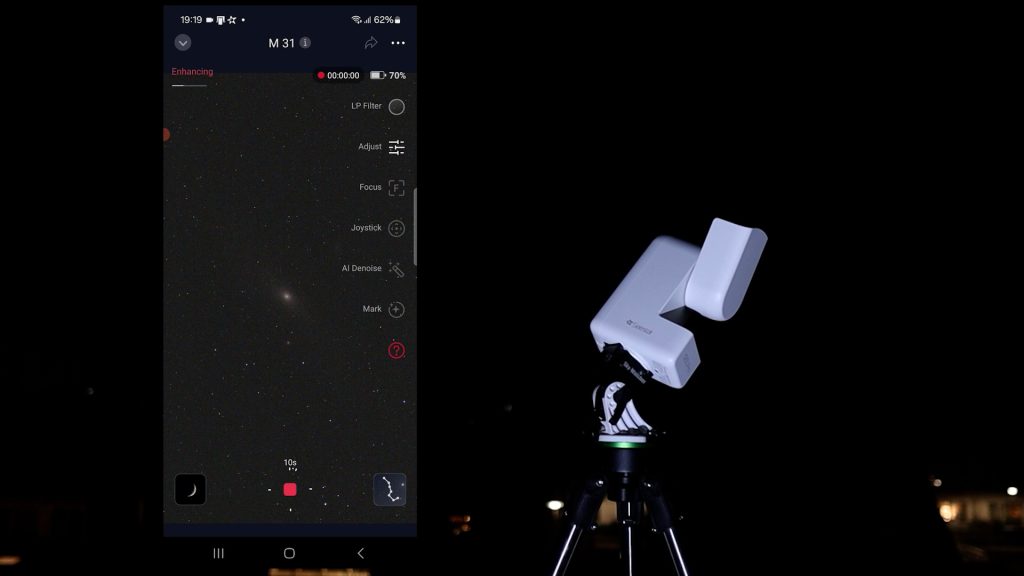
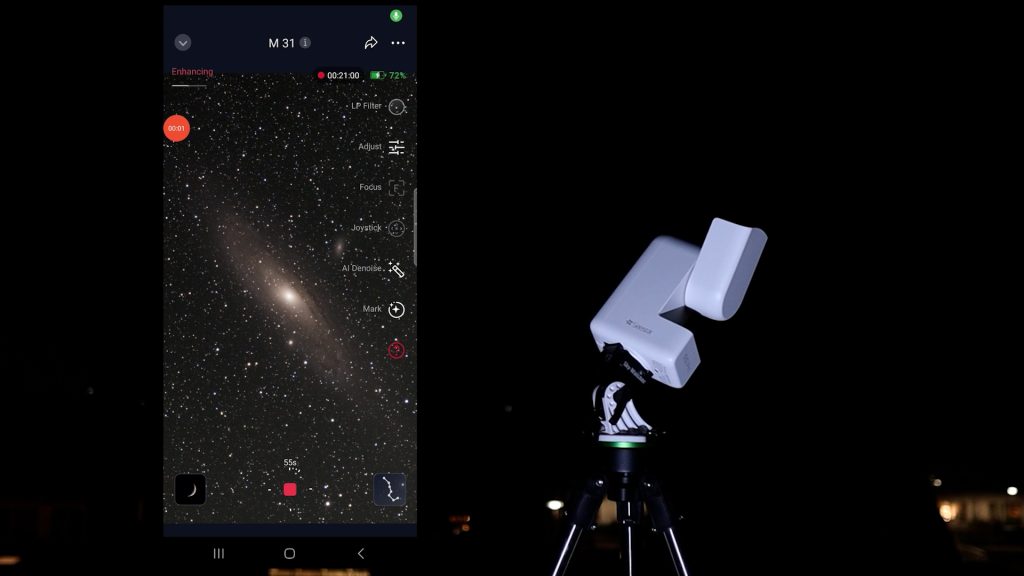
Similarly, the Seestar app organizes objects into categories such as “Tonight’s Best,” galaxies, nebulae, and star clusters. Like the Dwarflab app, it includes a virtual sky atlas and a planning feature to automate imaging throughout the night. Select your objects, tap GoTo, and the telescope begins capturing and stacking images.
The capture process is very similar on both APPs. After selecting an object, the telescope slews to it, calibrates, and starts stacking images to improve detail. As each frame is added, the signal-to-noise ratio increases, making faint details more visible. Just sit back and watch the image gradually improve as more frames are stacked.

EQ mode improves tracking for longer exposure photos
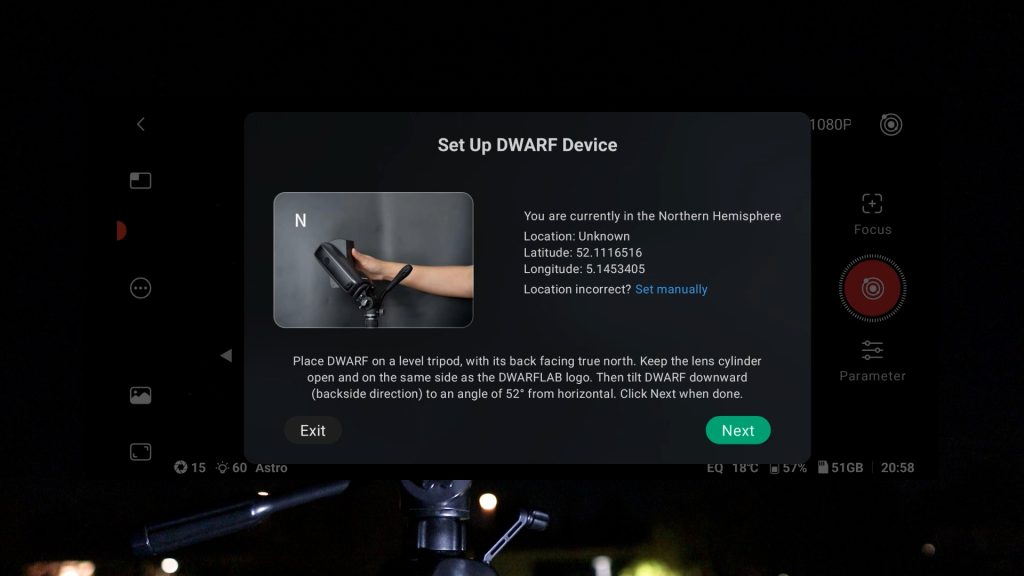
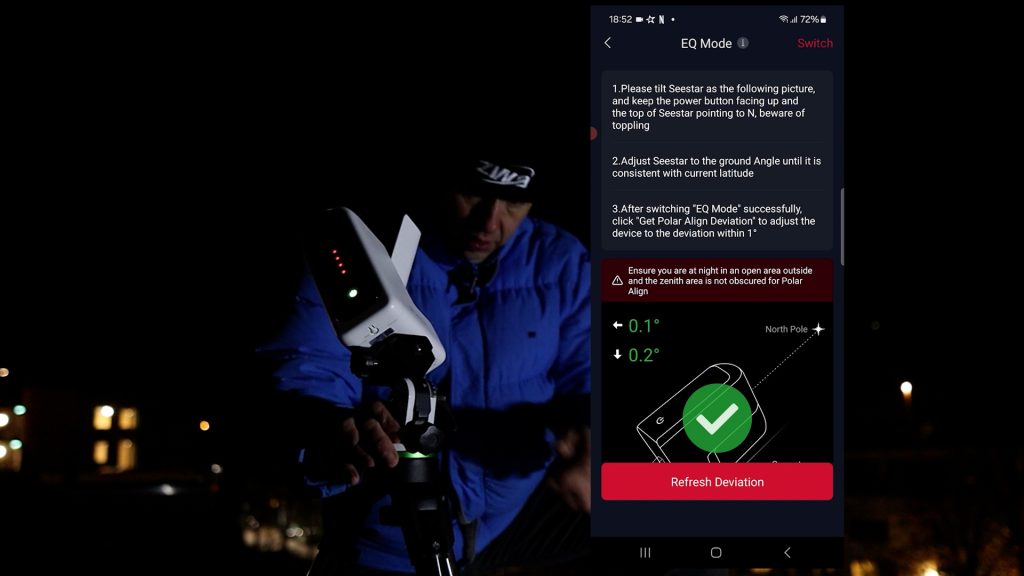
One excellent feature shared by both Dwarflab and Seestar smart telescopes is EQ mode, which allows you to align the telescope with the celestial pole. Polar alignment does require some extra effort: Seestar users may need an optional wedge, while Dwarflab telescopes require a tripod that can be tilted toward the celestial pole.
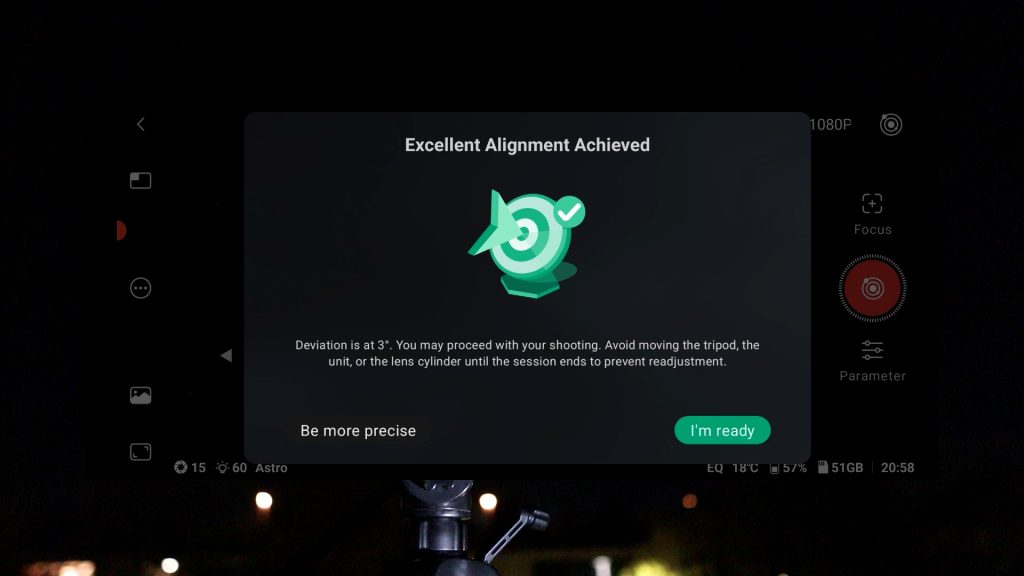
EQ mode significantly improves tracking accuracy by compensating for Earth’s rotation. Instead of being limited to 10-second exposures in the normal alt-az mode, you can take much longer exposures, allowing you to collect much more light from faint deep-sky objects in each stacked photo.
I tested EQ mode on both smart telescopes. With the Seestar S30, I could reliably reach 60 seconds and with dwarf mini even 120 seconds, depending on weather conditions. Both apps have a dark filter that is automatically used to reduce the noise in your deep sky photos. I noticed that the Dwarflab app is slightly more forgiving when stacking frames, typically keeping about 90%, compared to roughly 60 to 70% with Seestar. This also depends on weather conditions such as sky clarity and wind.
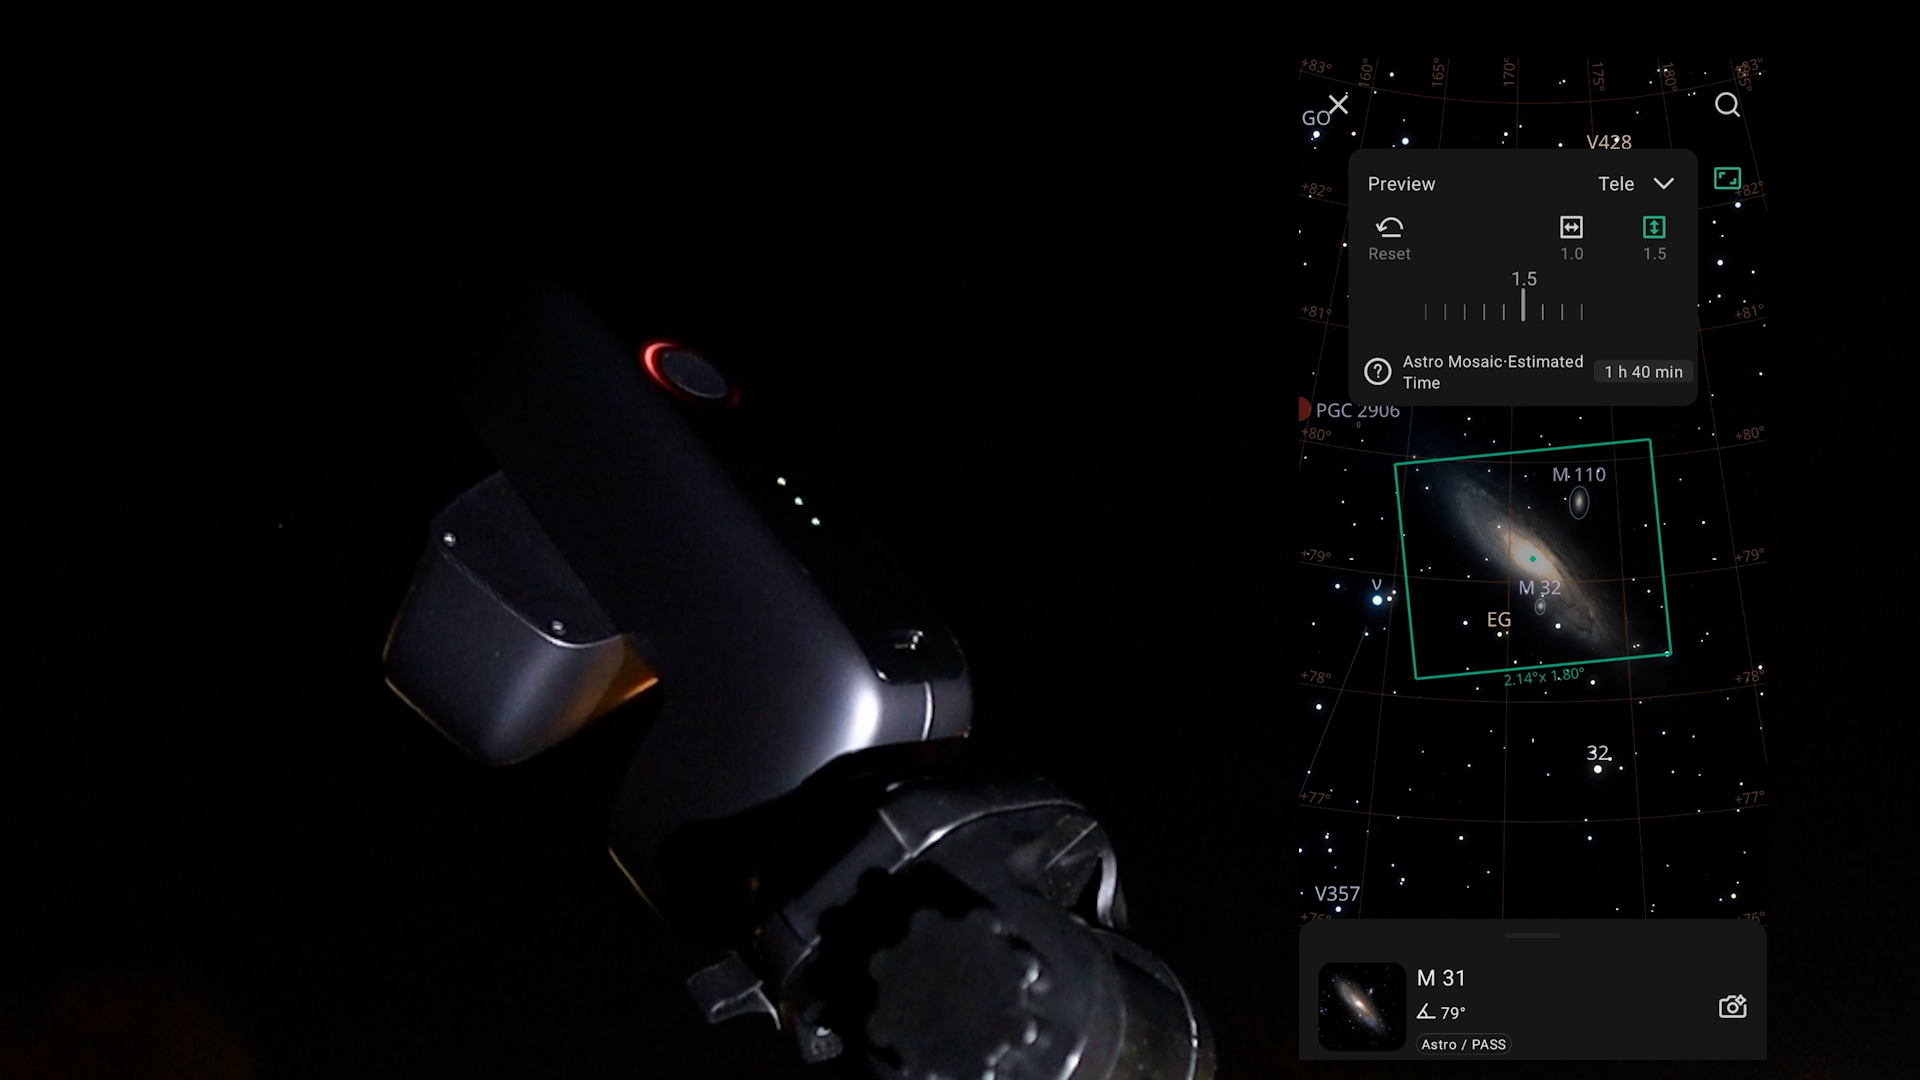
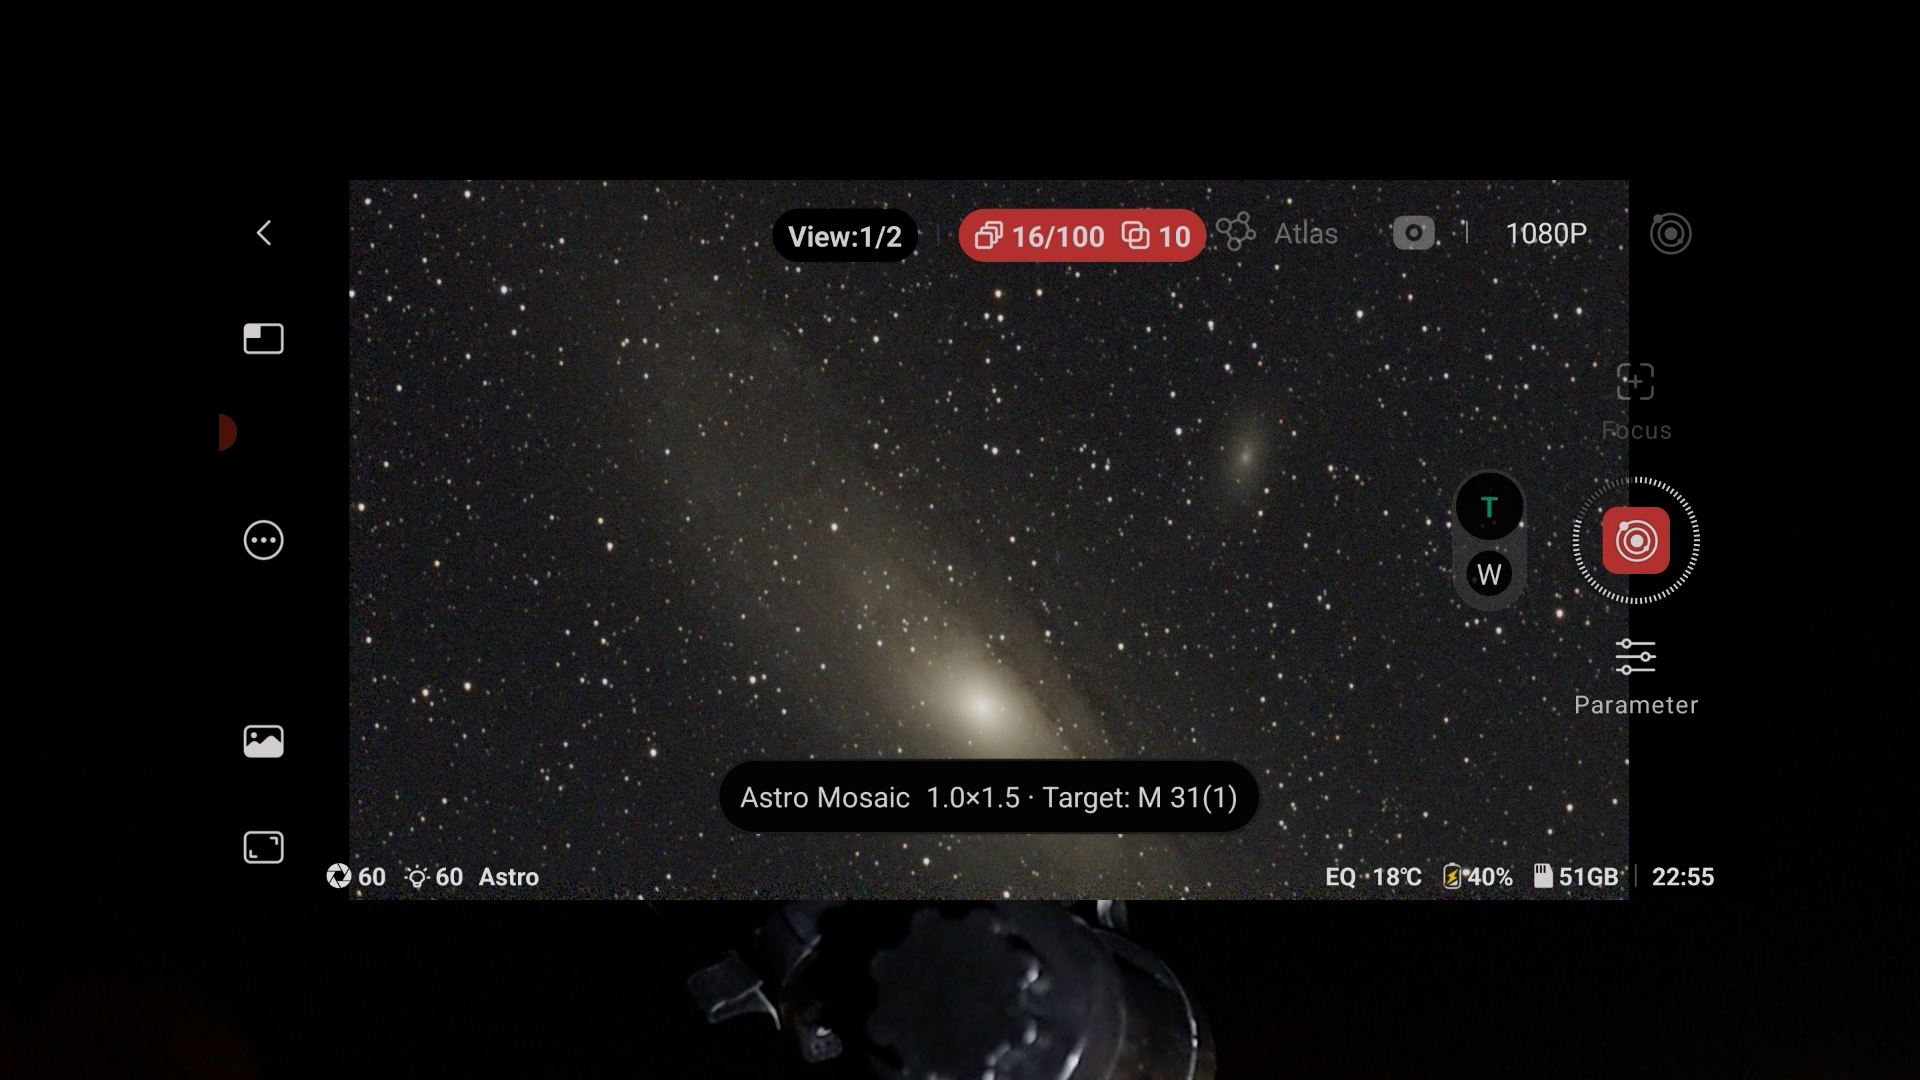
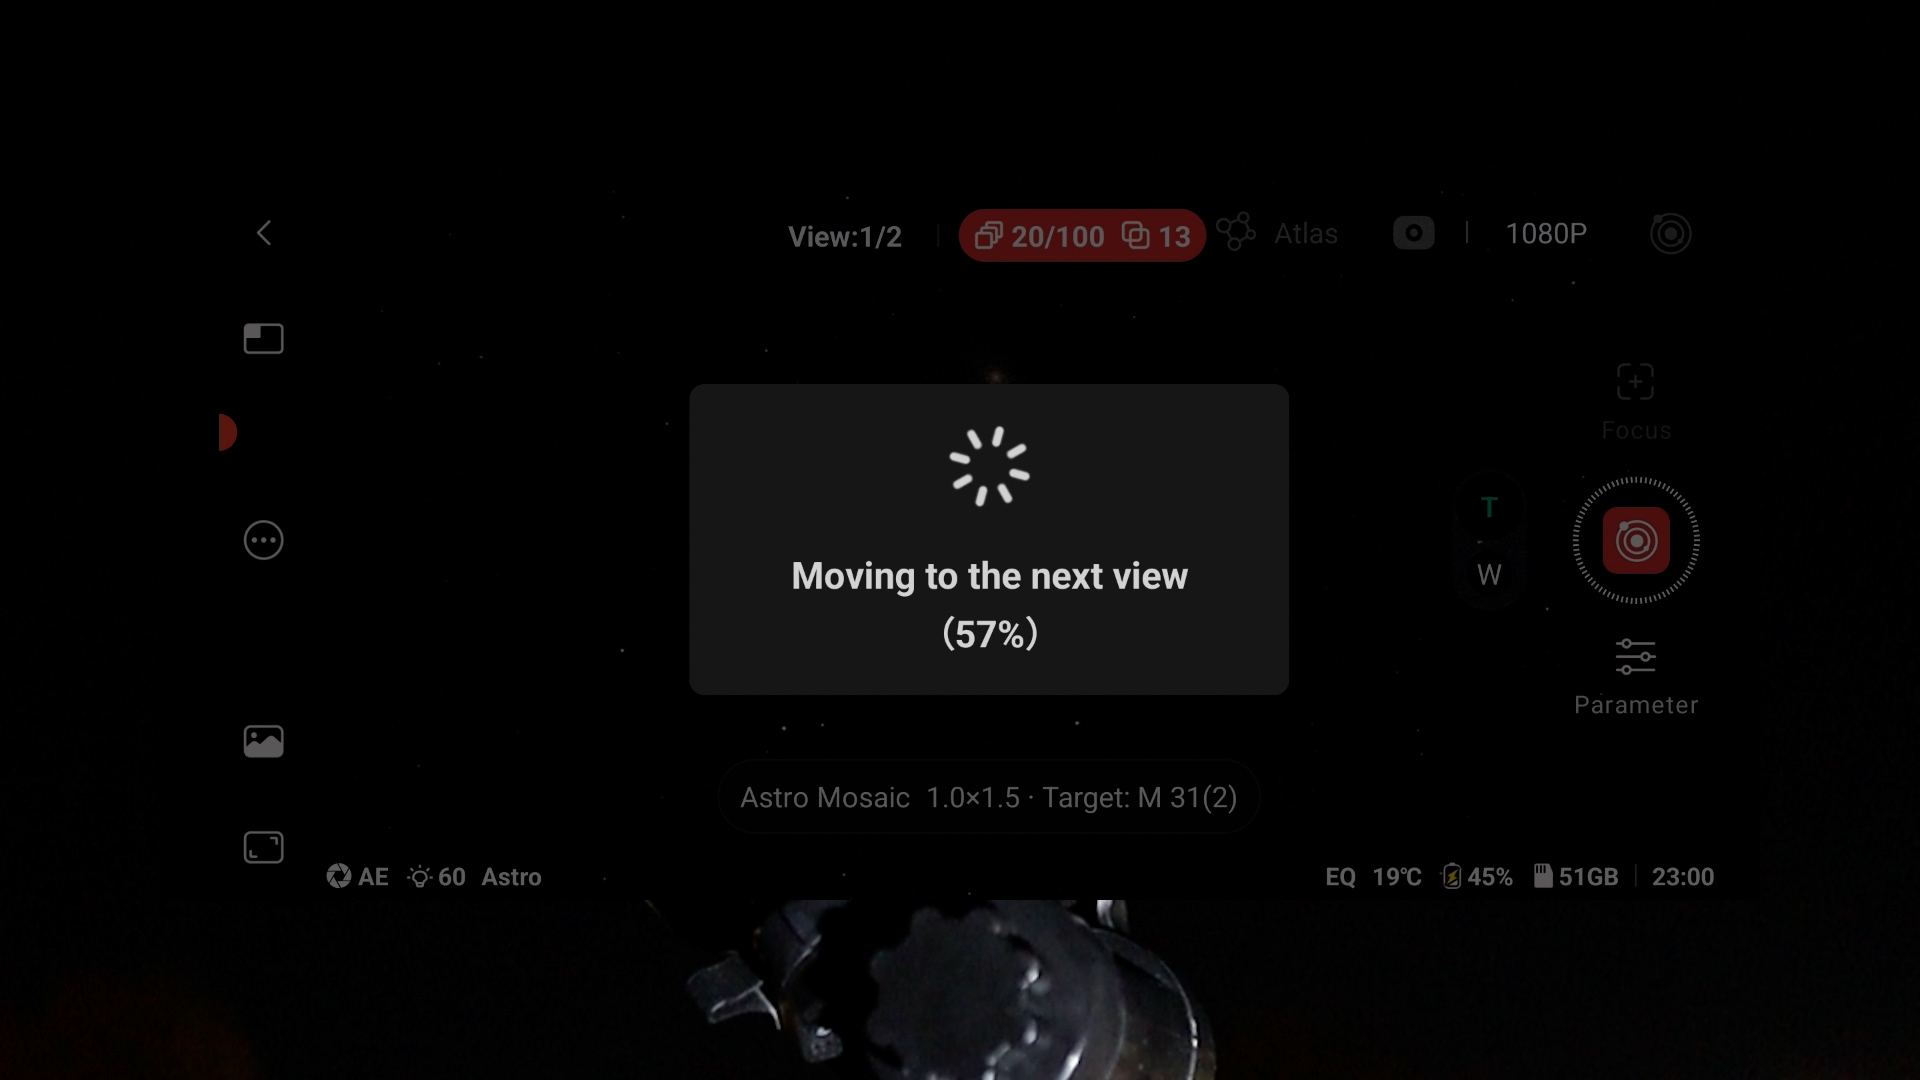
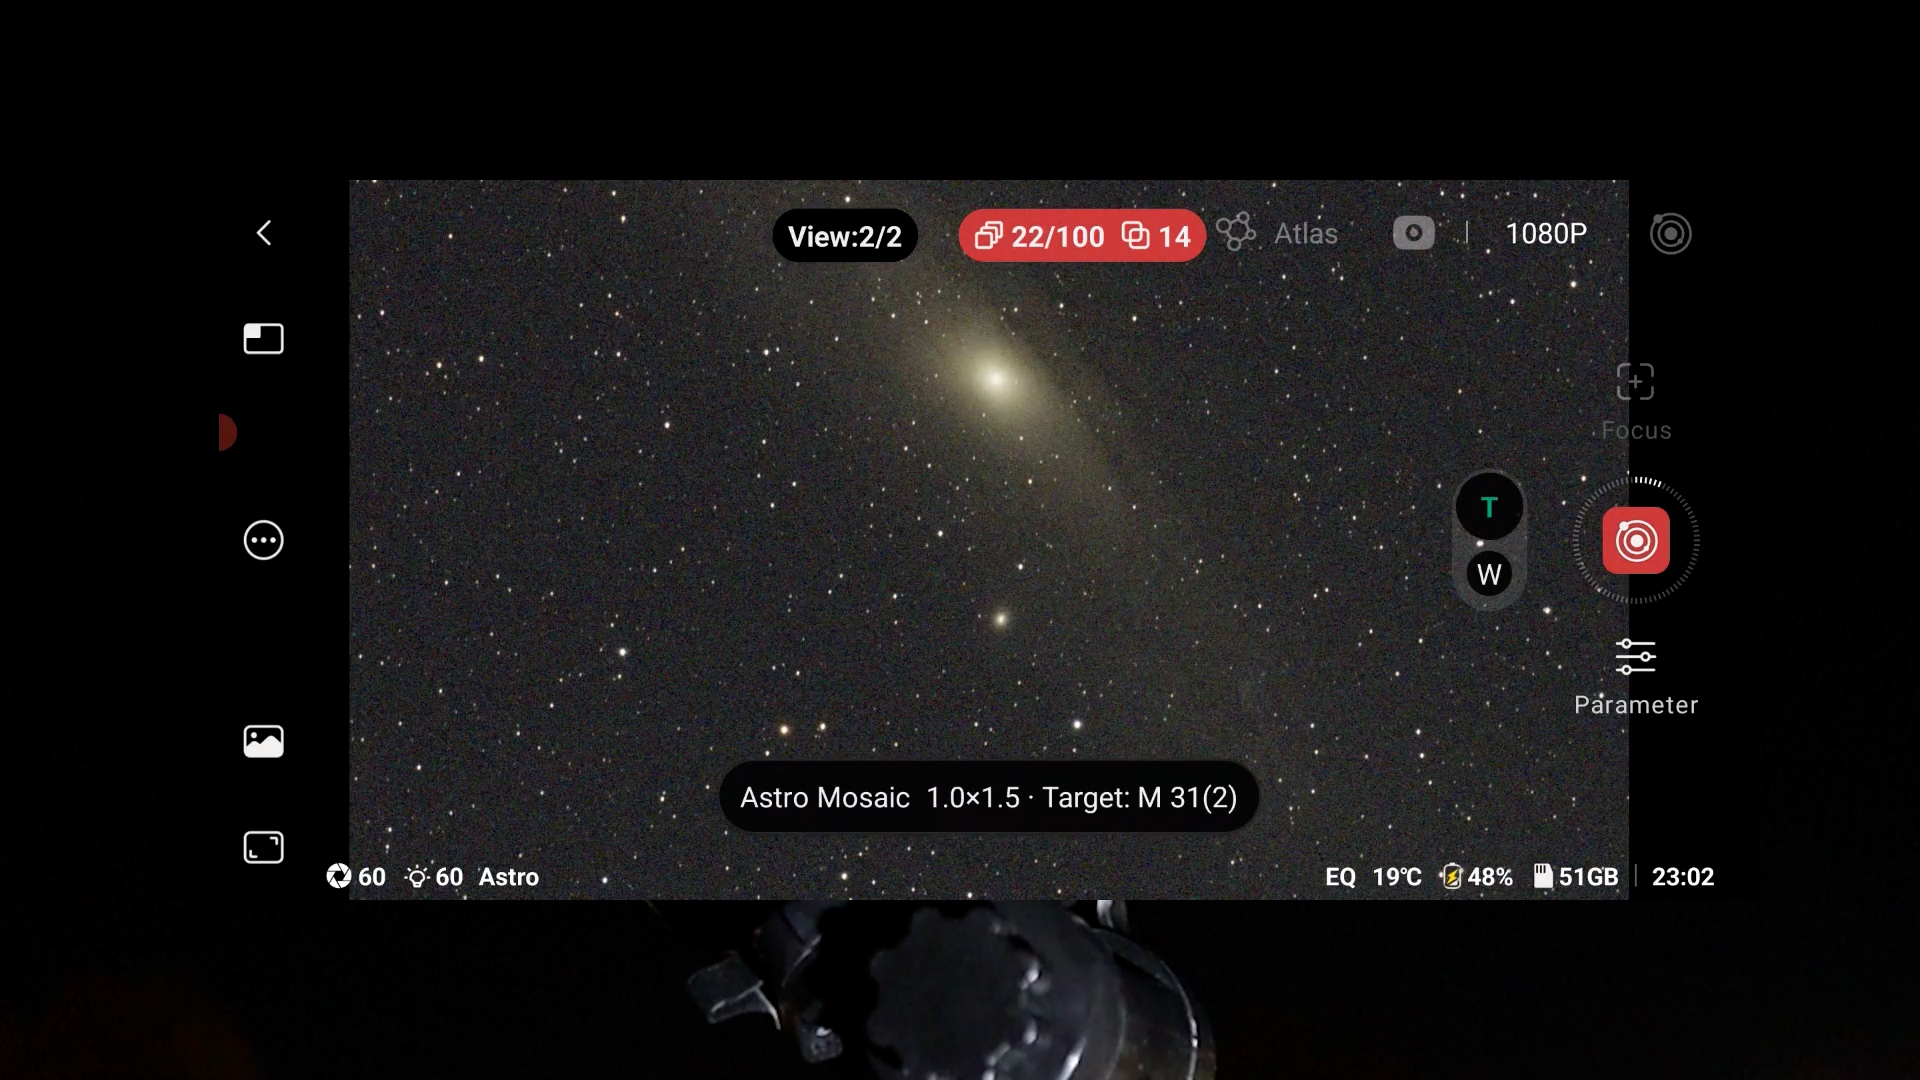
Mosaic feature
Both apps include a mosaic feature that expands the field of view by up to 2x, which is especially helpful given the narrow views of the Seestar S30 and Dwarf Mini. However, keep in mind that mosaics require extra time since the camera must photograph multiple sections of the sky and stitch them together. In my testing, the two apps handled tracking in mosaic mode differently. I experienced significantly more “drop-outs” with the Seestar app, where up to 40% of frames were rejected on some nights.
The Dwarf Mini is much more forgiving in both regular and mosaic mode, but its stars in the auto-stacked images appear to be somewhat more eccentric (less round). It seems the DwarfLab algorithm includes frames with minor tracking errors that the stricter Seestar app would exclude. While the Seestar requires longer sessions to reach the same total exposure time, the sharper, rounder stars it prioritizes are key to higher-quality images. Both telescopes allow you to save individual frames, giving you the freedom to use your own stacking software if you want to improve upon the automatic results.
Disclaimer: My Imaging conditions
I spent 1 to 1.5 hours of integration time on each deep sky object I’m about to show you. Since this only includes the final “keeper” frames, the total imaging time for each DSO was actually closer to 2 to 3 hours. Keep in mind that image quality will only improve with even longer integration times. Because I shoot from a Bortle 7 urban environment, these results represent a realistic baseline that most can achieve—or easily surpass—under darker skies. This light pollution also serves a purpose: it is the perfect environment to stress-test how effectively different astro-filters handle city glow.
Dwarf Mini DSO images
The Dwarf Mini has a small field of view so I often needed to use the mosaic feature to capture larger objects. That said, I was positively surprised as the Dwarf Mini actually performed quite well on deep sky objects. I took 60-second exposures in EQ mode on a photo tripod, and I did notice a small amount of star trailing in the automatically stacked images. After performing some post-processing to correct the stars, reduce noise, and remove background light pollution, I did get some pleasing final images. You can use the slider to switch between the automatically stacked images of the Dwarflab and my final processed images.
The built-in astro filter produces nicely balanced and natural colors on broadband objects like the Andromeda Galaxy and the pleiades, whereas the dual-band filter works very well on emission nebulae like the Heart Nebula, giving them solid contrast and structure. All in all, I was surprised by what this small and affordable smart telescope could accomplish.
Seestar S30 DSO images
Like the Dwarf Mini, the Seestar S30 has a narrow field of view, making mosaic mode essential for larger objects. With comparable total integration times of 1 to 1.5 hours, the automatically stacked images appeared slightly darker than those from the Dwarf Mini.
The dual-band filter is effective for capturing emission nebulae and suppressing light pollution. While I was pleased with the results, I found them a bit less impressive than those from the Dwarf Mini; the stacked images appeared over-denoised and lacked fine detail. Since these photos were captured on different nights, variables like sky conditions and temperature may have influenced the outcome.
A technical explanation for this difference is that the Dwarf Mini utilizes an astro filter that captures near-infrared light, whereas the Seestar S30 uses a standard UV/IR-cut filter for broadband imaging, which blocks infrared wavelengths. Below are my automatically stacked and processed images from the Seestar S30. Select different objects and use the slider to switch between the automatic stacks and my final processed versions.
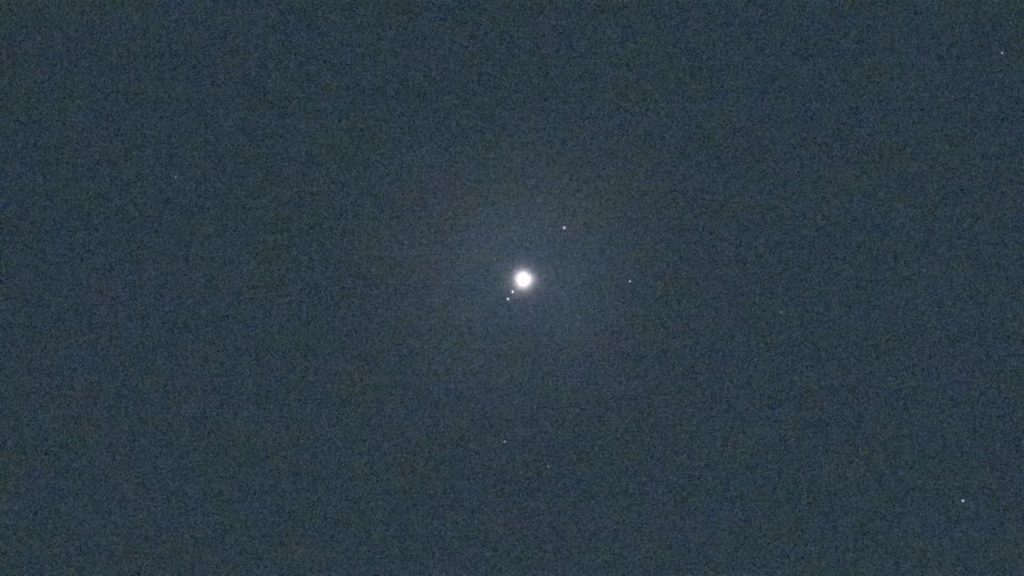
Planets
None of the budget smart telescopes are well suited for capturing planets. When I point both telescopes at Jupiter, the largest planet in our night sky, you mainly see the Galilean moons orbiting around it. That’s nice to observe, but you won’t see any noticeable surface detail on the planet itself. For that kind of planetary detail, you need a much bigger telescope.
Final Verdict: Choosing Your Entry-Level Smart Telescope
When it comes to getting the best value for your money, my preference leans toward the Dwarf Mini. In my experience, the image quality it produced for both the Sun and deep-sky objects was superior to the S30. The Mini is also lighter and more portable, which makes it a more appealing option for a travel telescope. While I personally prefer a landscape orientation over the portrait sensors found in the Seestar lineup, your preference might differ if you primarily view your photos and videos on a smartphone.
If you plan to use your telescope for daytime photography, the Seestar S30 is likely the better choice. It includes a dedicated UV/IR-cut filter similar to standard cameras, which ensures a natural color balance. Because the Dwarf Mini uses an astro broadband filter that transmits near-infrared light, its daytime photos and videos often have a noticeable reddish tint. Additionally, I found the lunar images on the Seestar S30 to be slightly sharper and more pleasing than those from the Mini, which showed a small amount of chromatic aberration around the Moon’s edge.
Both the Dwarf Mini and S30 utilize the smaller IMX662 sensor, which results in a limited field of view for larger deep-sky objects. You can use the 2x framing mode to create mosaics, but keep in mind that this requires a significantly longer total capture time since separate panels must be stacked and integrated. If you require a wider native field of view, you may want to consider their more advanced siblings, the Seestar S30 Pro or Dwarf 3. Ultimately, if you are looking for a budget-friendly way to see what lies beyond the reach of a smartphone, both of these telescopes offer a surprising look at the wonders of the night sky.
Clear skies!
Wido
Hello, I would like to thank you for your detail reviews. You were very detailed in the information presented. I had a catadioptric scope years ago and I’m just getting back into it again. I am looking for a smart scope right now and it seems like the dwarf mini is the better option for me. I’ve repeatedly read about software issues with Seestar on there last few updates and it makes me cautious about there products right now, I’m sure they’ll correct it. I just wanted to say how much I enjoyed your review. I’ve watched more than 15 reviews and yours is really the best covering all the points. I’d like to know how to contact you and ask you some questions about filters. Thank you.