The Seestar S30, priced at $349 at the time of writing, is an excellent smart telescope for those looking to enhance their stargazing experience without breaking the bank. Ideal for beginners, it features an intuitive Seestar app, available for iOS and Android devices. The app allows users to wirelessly control the telescope with a smartphone or tablet. This makes astrophotography and advanced stargazing accessible without the steep learning curve of traditional equipment. Simply select an object, and the S30 handles the rest, delivering impressive images for its price. Like all telescopes, the S30 has its limitations. It’s not ideal for planetary observation—larger aperture telescopes like Dobsonians or SCTs are better suited. The alt-az tracking limits deep-sky exposures to max. 30 seconds and can cause field rotation during longer integrations. Still, the S30’s affordability and ease of use make it a great choice for beginners and casual users. Even experienced astrophotographers can appreciate its convenience and capabilities for quick, enjoyable observations.
The Seestar S30 is currently available at ZWO (WW), High Point Scientific (USA/WW), Agena Astro (USA/WW), and Astroshop (EU/WW).
Unboxing & Technical specifications
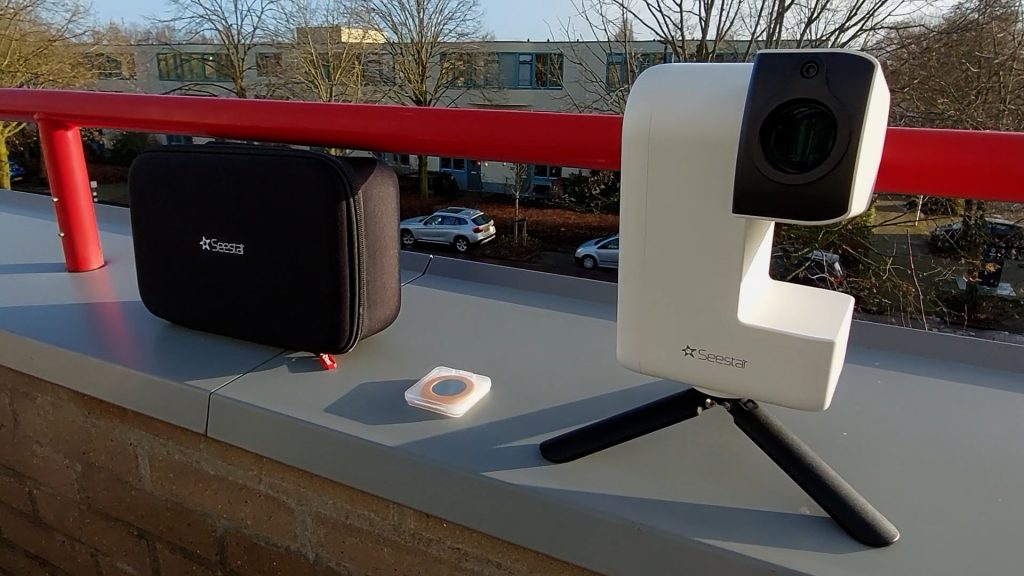
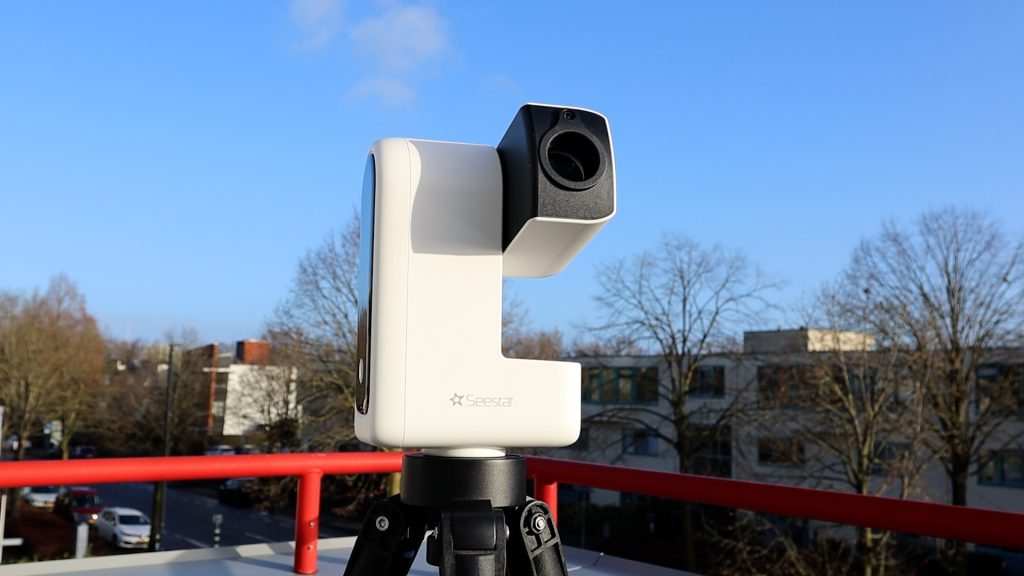
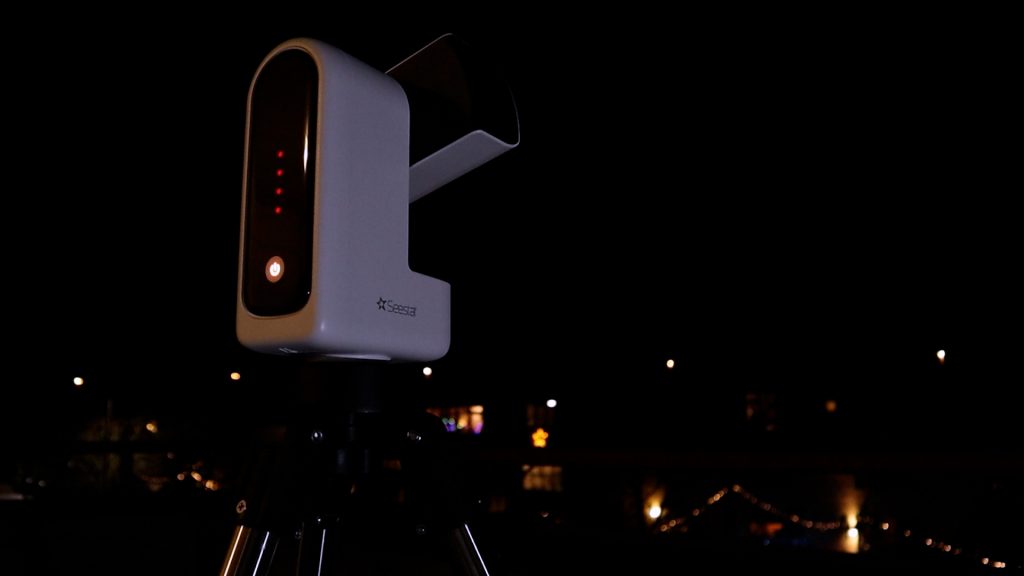
Available for $349, the new Seestar S30 smart telescope comes with a compact, tripod (3/8″-20 screw), a solar filter for safe solar observations, a USB-C cable for charging and data transfer, and a sturdy black carrying case. The Seestar S30 is an apochromatic refractor telescope with a 30mm aperture and a 150mm focal length, giving it an f/5 focal ratio. It includes extra-low dispersion glass, which promises sharp and true-color images of the night sky. The telescope features an ASI662MC camera color sensor with a 1080×1920 resolution, and it has a secondary wide-angle lens which can be used for object targeting. The S30 has an image scale of 4 arcseconds per pixel and a field of view of 1.2° x 2.13°. While the image scale is less detailed than the ideal 1-2 arcseconds per pixel for deep-sky imaging, it should still work well for large celestial objects like the Andromeda Galaxy. Using the app’s framing mode, this field of view can be expanded to 2.39° x 4.25°, allowing the S30 to capture widefield views of the night sky. The Seestar S30 is an incredibly lightweight smart telescope, weighing just 1.65 kilograms (3.6 pounds). It features a 64GB internal memory card and a 6000 mAh battery that provides hours of operation. The battery can also be recharged via a USB-C cable, even while the telescope is in use.
Wireless control via the Seestar APP
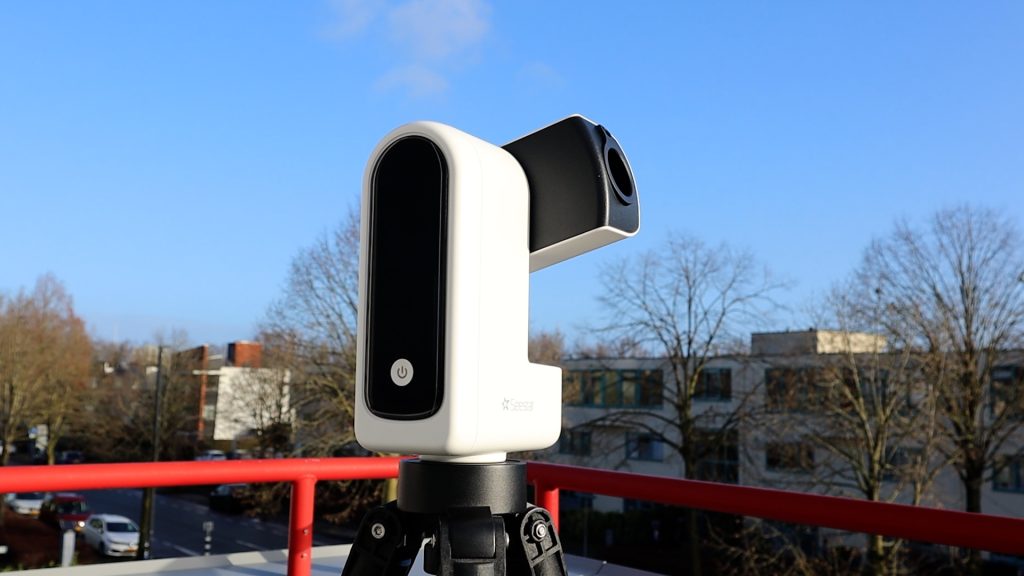
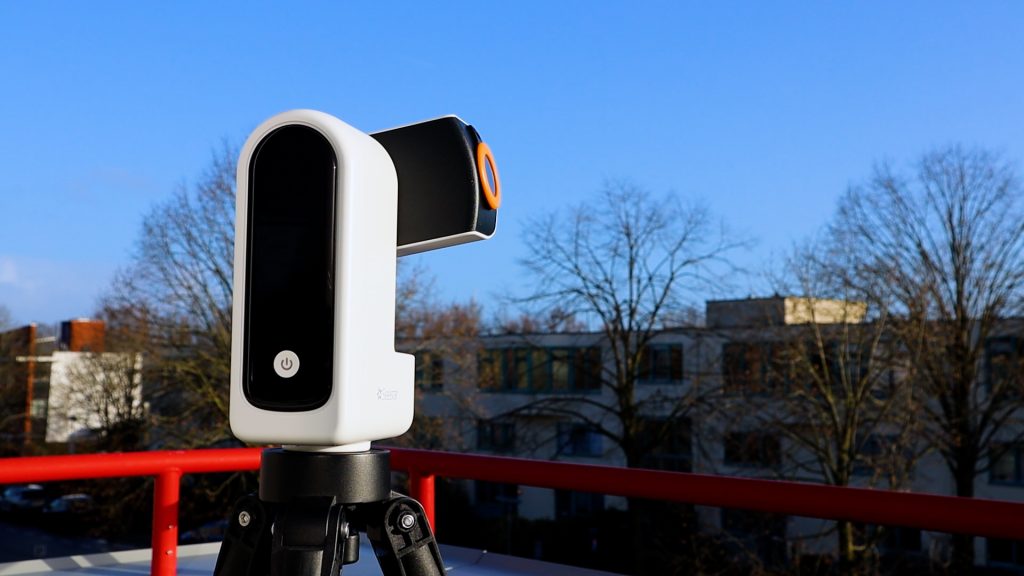
After powering on the telescope, the Seestar S30 can be wirelessly controlled via the Seestar APP, available for iOS and Android mobile devices. The telescope creates its own WiFi signal, allowing you to connect directly to the telescope, without needing a mobile network. The name of the WiFi signal is usually S30 followed by an underscore and other characters and numbers. The standard password for Seestar devices is usually 12345678. After connecting to the WiFi signal, you’re ready to use the APP to control the telescope. When connecting for the first time, the Seestar app will probably prompt a firmware update for the telescope. Simply follow the on-screen instructions to complete the update, after which your telescope will be ready to use. The WiFi range is about 10 meters (32.8 feet). It’s worth noting that you can close the app while the S30 is tracking or imaging an object. The telescope will continue its task uninterrupted, and you can relaunch the app at any time to reconnect and check its progress. Let me share my experiences in capturing the sun, the moon, and some deep-sky objects with the Seestar APP.
Imaging the Sun with the Seestar S30
The main screen of the Seestar app shows several categories, including Stargazing, Solar System, and Scenery. It also shows current weather for your location as well as recommended events. After connecting to the WiFi signal of the telescope, I tapped on ‘Open Arm’ at the top of the app, which pointed the telescope’s arm forward. To view the Sun, I clicked on the Solar System tab, showing various objects in our solar system, and selected the Sun. A warning appeared, reminding me to install the solar filter before pointing the telescope at the Sun.
ZWO made significant improvements in terms of user experience with the S30 compared to its predecessor, the S50. For example, attaching the magnetic solar filter to the telescope lens is much easier as compared to the Seestar S50, where it was a bit trickier. Another upgrade as compared to the S50 is the added widefield lens, which makes it easier to locate objects like the Sun or Moon. I used the widefield view and slew feature in the app to point the telescope at the Sun before switching to the tele view. While the telescope can find objects automatically, I appreciate the extra option to manually slew and use the widefield lens to center objects in the tele-view. This feature is also useful for daytime observations when using scenery mode.
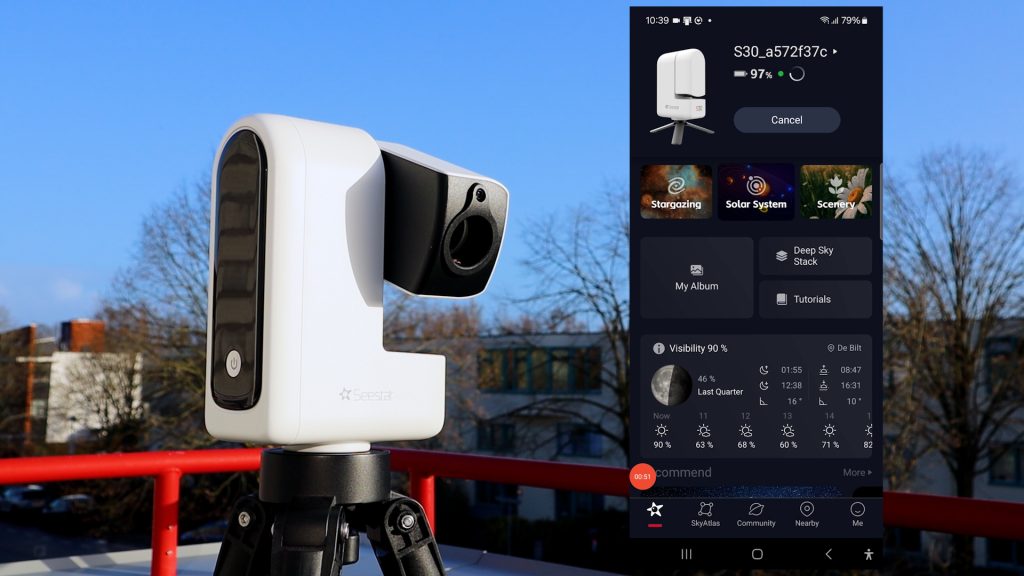
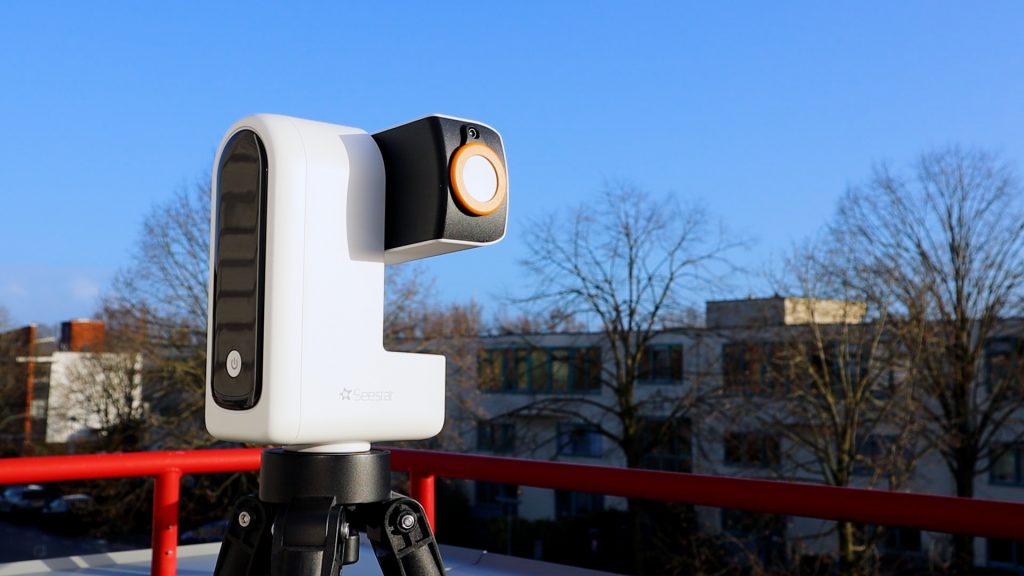
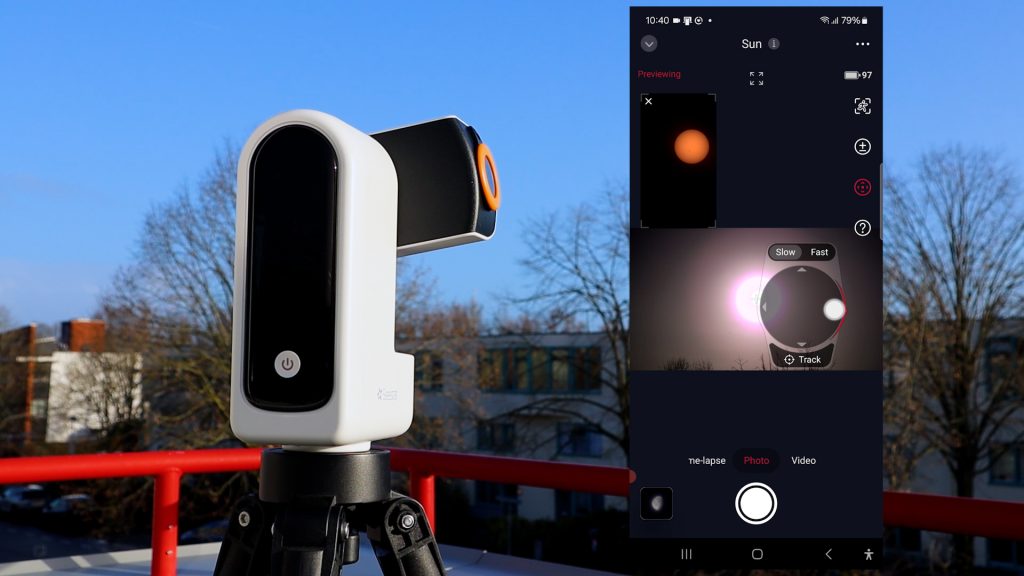
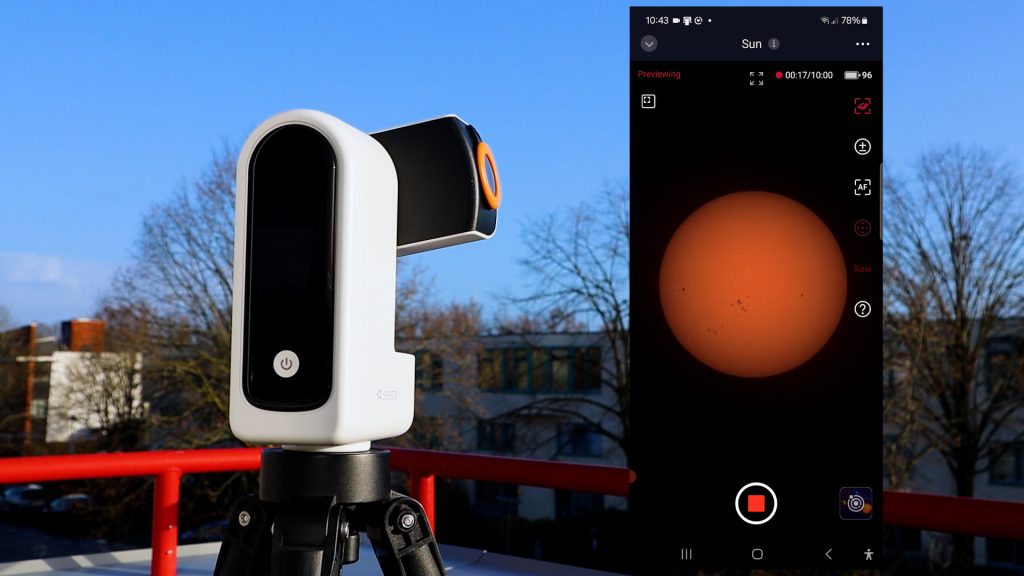
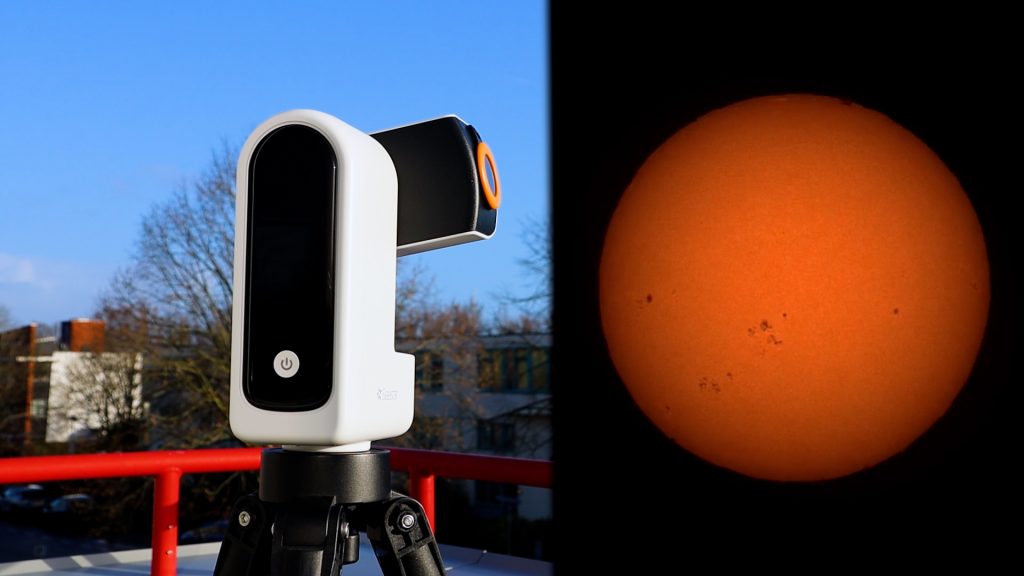
After centering the Sun, I tapped the tracking icon in the top-right corner, and the S30 automatically began tracking the Sun. I then used the autofocus feature to focus on the sunspots visible that day, repeating the process with the 4x zoom, which worked flawlessly. To capture a photo, I simply selected “Photo” and pressed the large shutter button at the bottom of the screen.
Next, I decided to capture a one-minute video of the Sun. Regular videos are stored in MP4 format on the Seestar S30’s 64GB internal memory card. I then switched to RAW video mode in the app and recorded another one-minute video. RAW videos are high-quality AVI files, ideal for post-processing with free software like Autostakkert, which allows you to stack the best frames to enhance the image. These AVI files are larger, about 1.5 GB per minute, and are recorded at 12 frames per second. You can capture up to 10 minutes per AVI file, which is stored on the internal memory card and can later be transferred to your computer via USB-C for further processing.
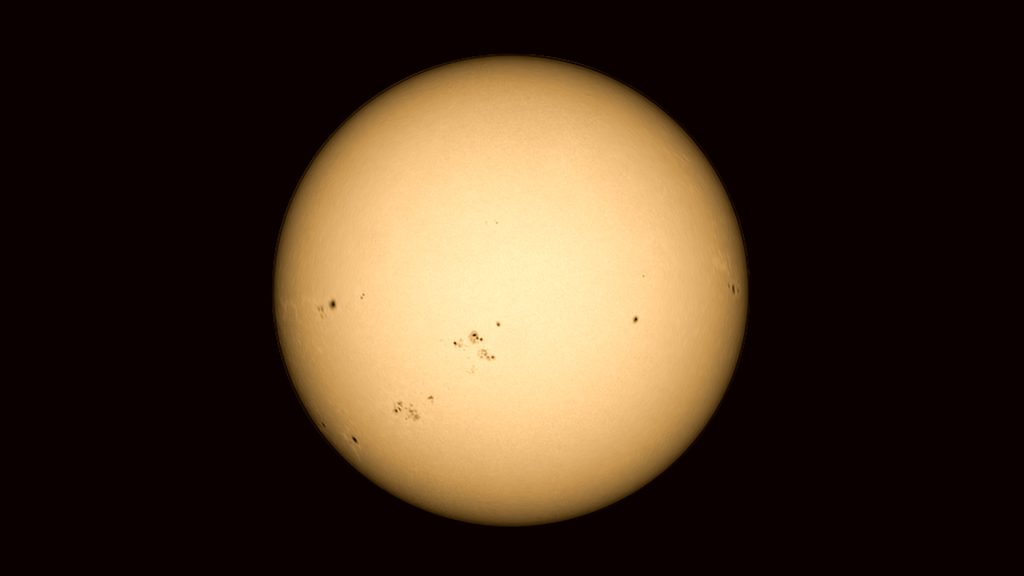
After stacking the best frames in Autostakkert, I ended up with a decent image of the Sun. While the Seestar S50, with its larger aperture and longer focal length, handles fine details a bit better, it also costs about $150 more than the S30. Additionally, the weather wasn’t ideal when I captured these shots—December, with haze and the Sun low on the horizon.
Planetary and Deep-sky Astrophotography with the Seestar S30
The weather in the Netherlands has been very cloudy and humid in december , giving me limited opportunities to test the S30. Still, I managed to take advantage of brief 15–30 minute gaps in the clouds to capture some famous deep-sky objects with this smart telescope. I was pleased with the internal anti-dew heater, which you can switch on using the Seestar APP to prevent the telescope lens from fogging. A small smart telescope like the S30 is perfect for these short breaks in the clouds since it only takes minutes to start tracking and imaging objects after powering on the telescope. Let me show you how this works and what I captured.
Jupiter
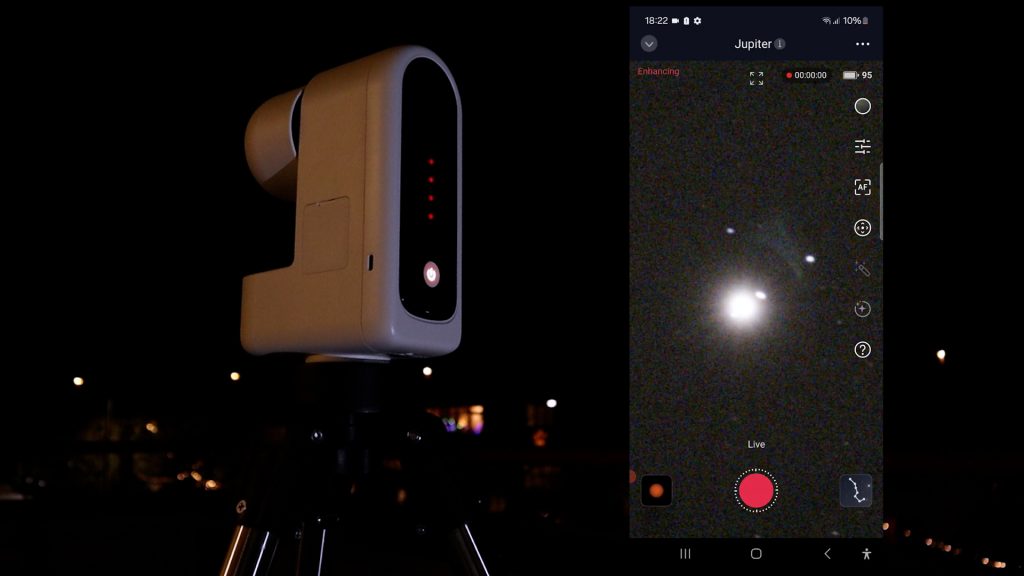
Before imaging deep-sky objects, I noticed Jupiter shining brightly in the night sky, so I decided to take a quick look at the largest planet in our solar system. After selecting Jupiter and clicking “Go Gazing,” the telescope swiftly slewed to the planet and performed automatic calibration and image enhancement, which took about two minutes. While planets are tiny targets requiring much larger telescopes to detect detailed surface features, I was delighted to spot Jupiter’s Galilean moons as bright dots nearby circling the planet. These inner moons orbit Jupiter in just a few days, so their changing positions each night are fascinating to observe.
Deep-sky objects
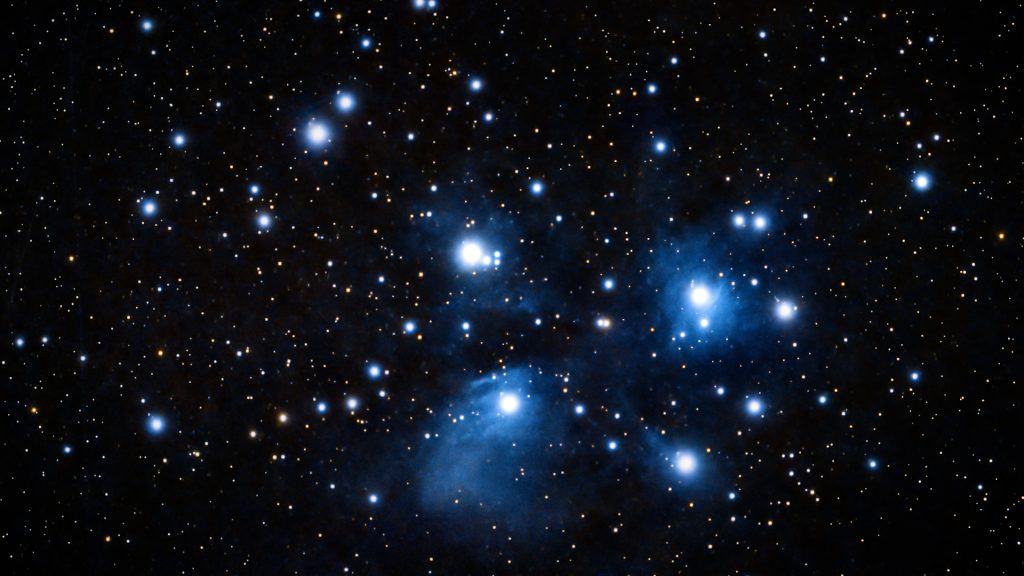
Next, I turned to the Pleiades, also known as Messier 45, a stunning cluster of bright blue stars. It was one of the recommended objects displayed in the Seestar app, based on my location. After selecting it and clicking “Go Gazing,” the telescope automatically located the cluster and began capturing and stacking 10-second exposures. Stacking more images improves the signal-to-noise ratio, revealing more details, and the Pleiades perfectly fit the S30’s field of view.
You can use the app’s virtual sky atlas by clicking on its icon on the bottom right. In the atlas, you can adjust the telescope’s position by dragging the red rectangle to refine my view and clicking “Goto” to align the telescope accordingly. The blue rectangle represents the telescopes current position. Despite imaging from my urban light polluted Bortle class 8 balcony under poor sky conditions, the Pleiades were clearly visible—even without the use of the optional internal light pollution filter.
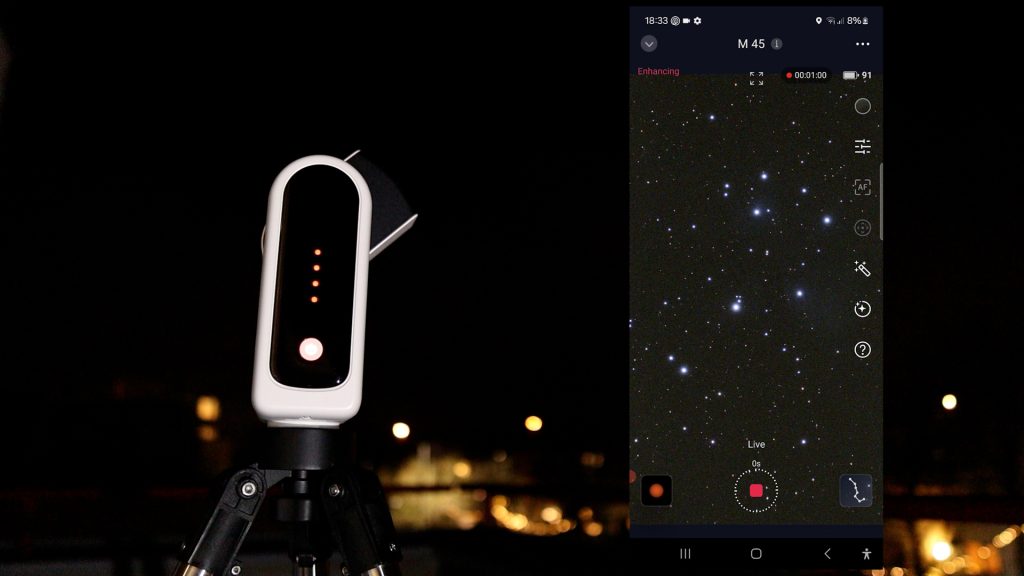
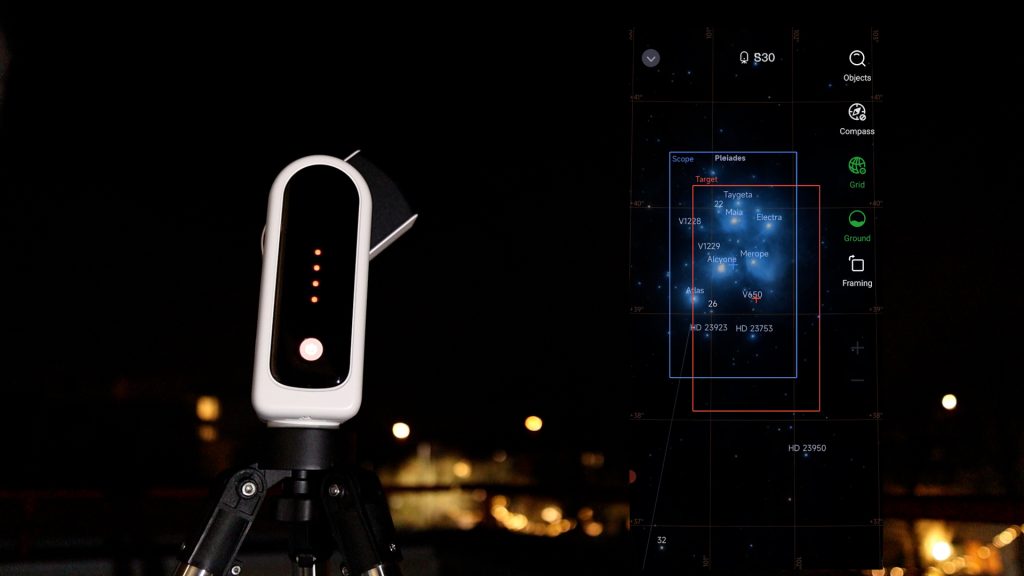
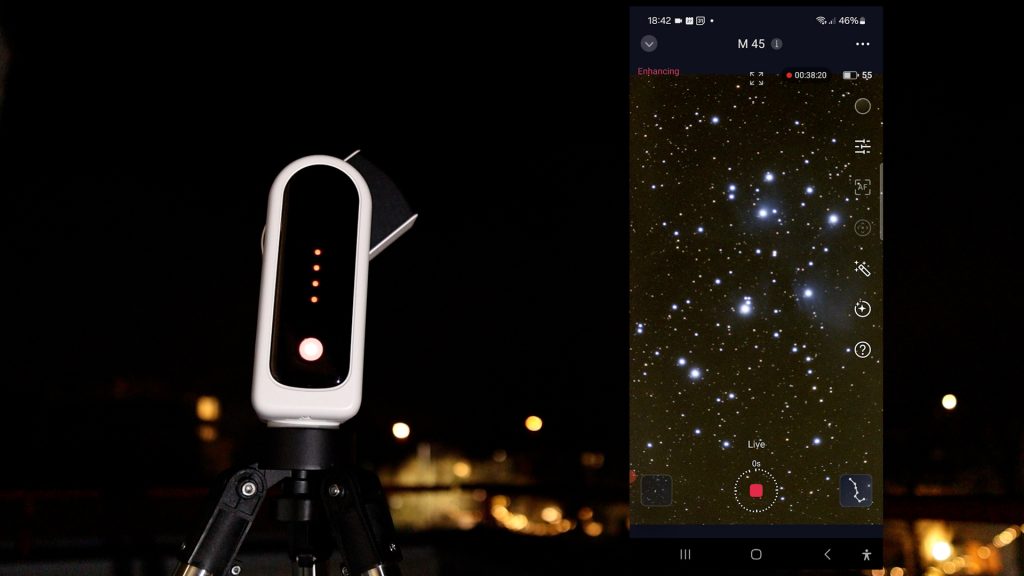
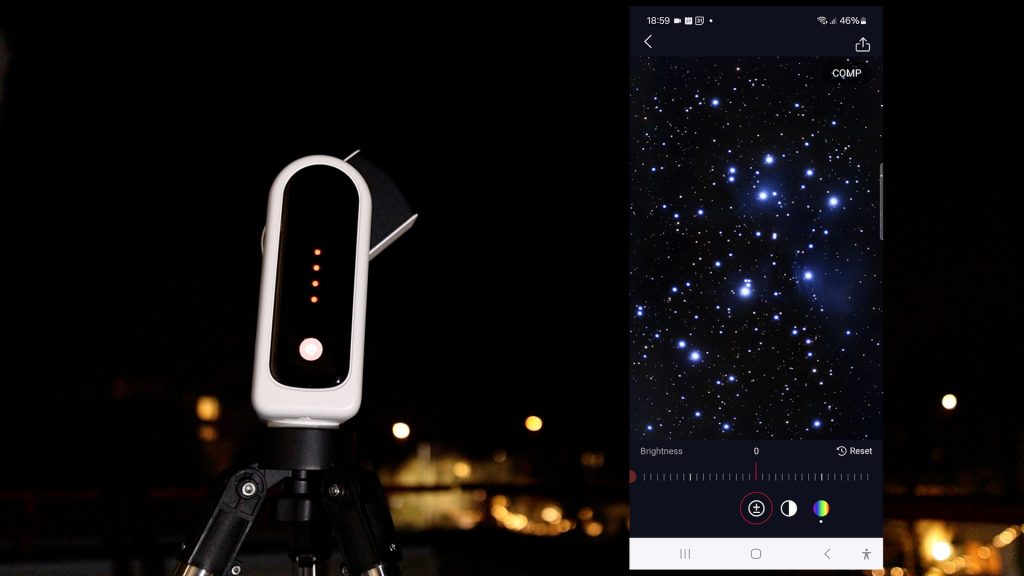
The newly introduced AI Denoise feature in the app helps reduce light pollution and background noise, while also offering basic editing options like exposure, contrast, and saturation adjustments. This makes it ideal for beginners who prefer a quick and easy editing solution without the need for expensive software like Photoshop or PixInsight. Here’s my final processed image of M45, with a total exposure time of around 50 minutes.
On another night with brief gaps in the clouds, I attempted to capture the Andromeda Galaxy, our nearest spiral galaxy, home to 1 trillion stars. Using the Seestar app, I selected M31 from the recommended objects on the main screen. The telescope automatically slewed to its position in the night sky. Since Andromeda spans about 3 degrees of the sky, I accessed the virtual sky atlas using the bottom-right icon to check if the galaxy would fit within the Seestar S30’s field of view. The view was tight, so I decided to magnify it by about 1.8 times using the framing option. This triggered the mosaic feature, where the telescope photographs different sections of the sky and stitches them together to create a single image. The maximum magnification is 2x the S30’s field of view, but note that creating mosaics takes extra time as larger portions of the sky need to be captured and integrated. That said, this feature is fantastic, as it provides greater control over how you frame objects in your final picture. You can also adjust the rotation of the object.
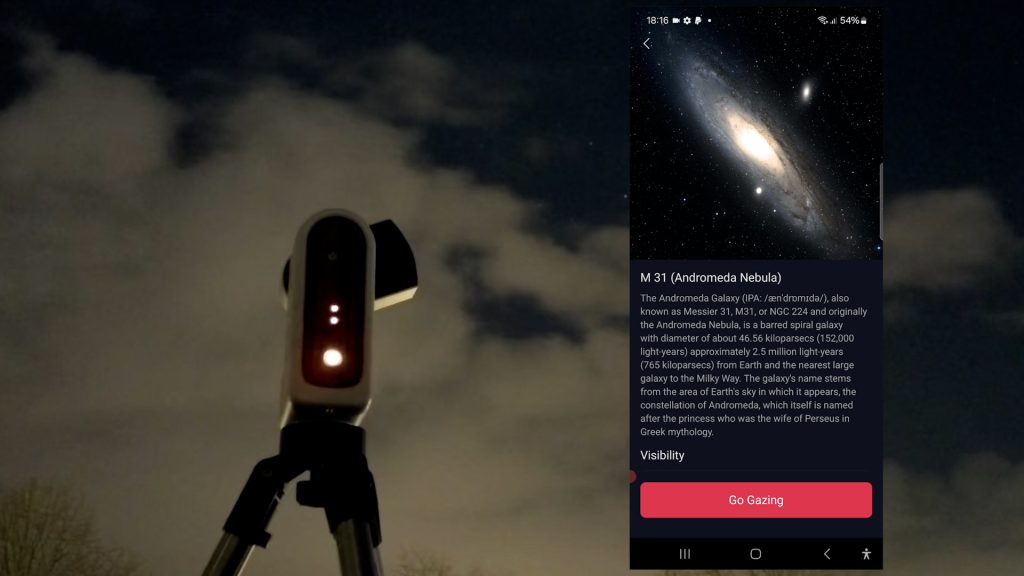
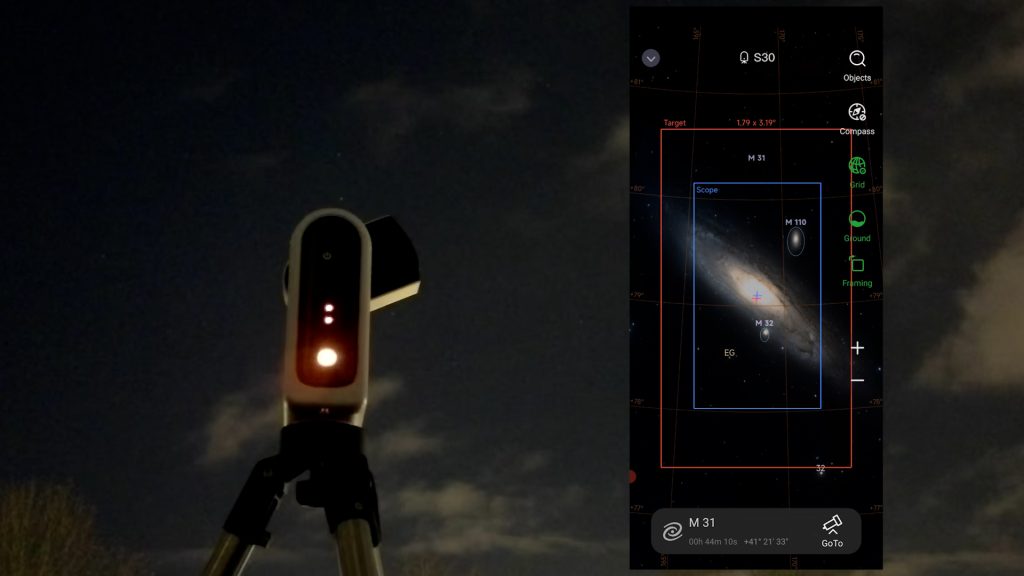
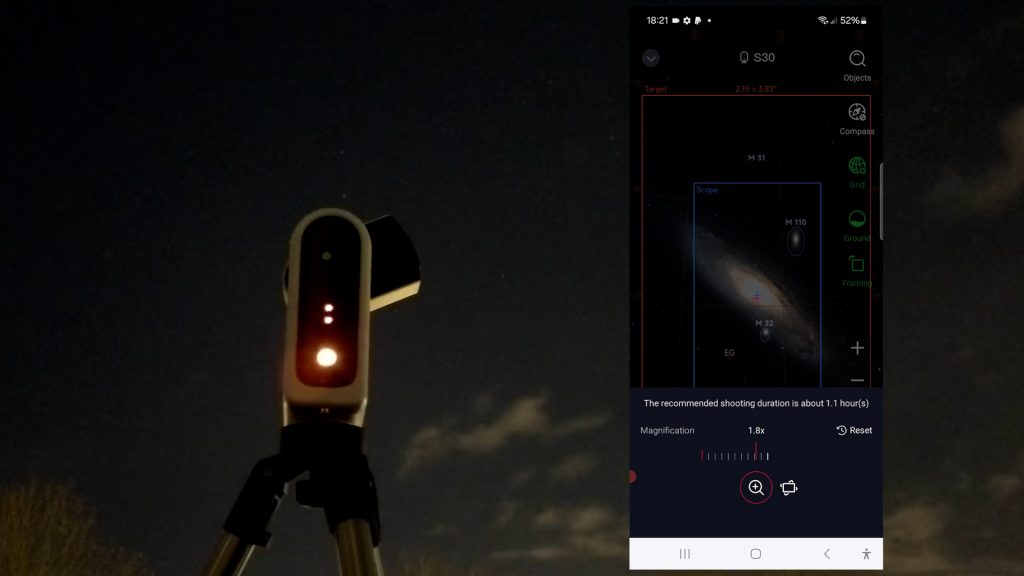
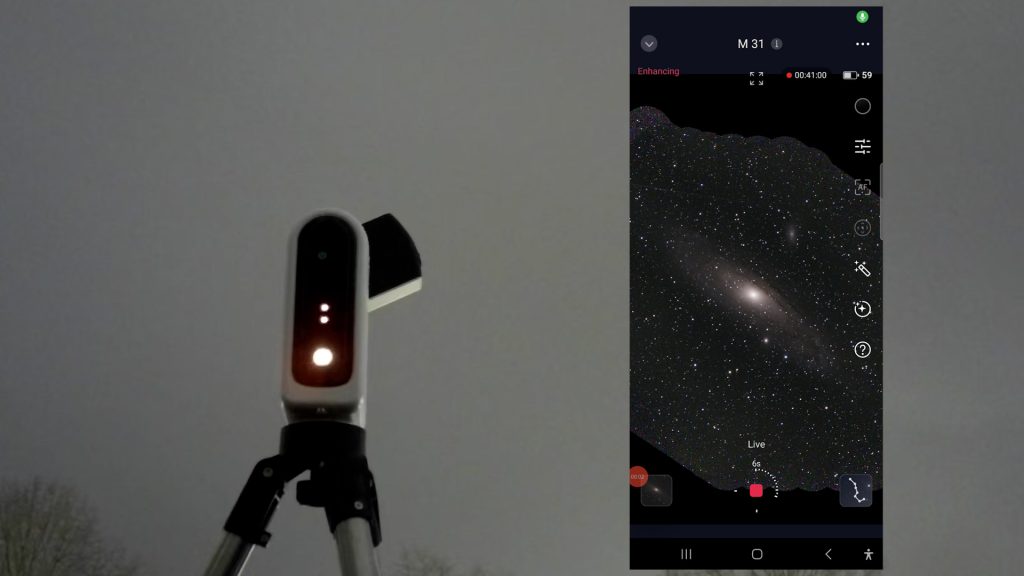
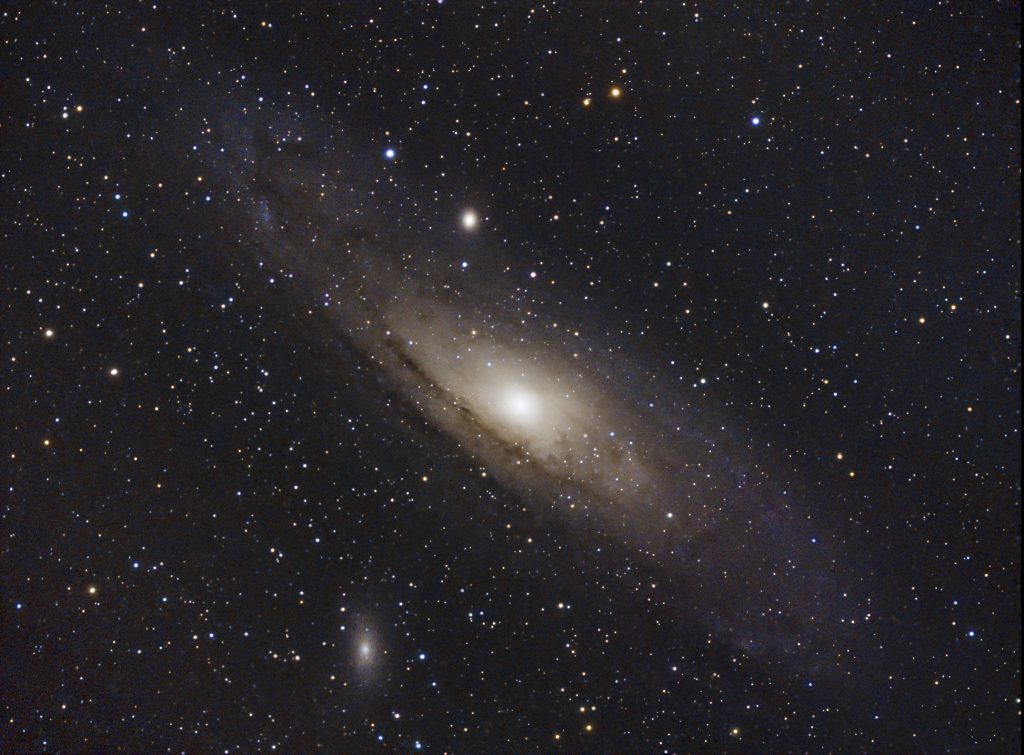
After 40 minutes, clouds returned, halting the session before the total image was done. Here’s a cropped image of M31 that the S30 did capture —pretty impressive when considering the telescope’s price and the limited imaging time.
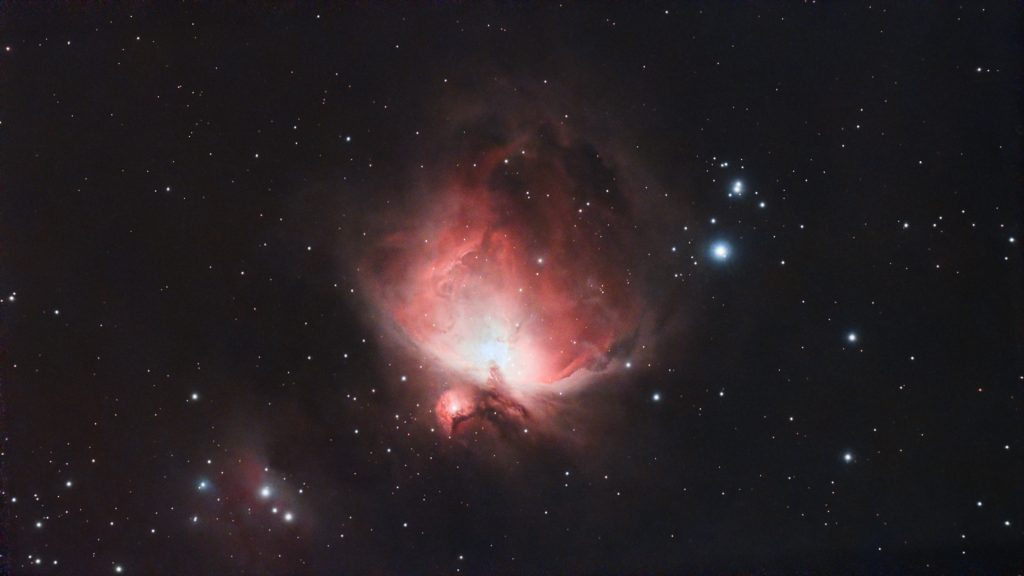
One final deep-sky image I want to share with you is M42, the famous Orion Nebula—our closest stellar nursery in the night sky. This time, I only had about 10 minutes of clear skies, but I was amazed at how quickly the telescope produced an acceptable image. For this object, the S30 automatically used its internal duo-band filter to bring out the ionized hydrogen and oxygen in the nebula while blocking artificial light pollution. After just a few minutes, I experimented with the AI denoise feature, and the Orion Nebula already looked quite good. After about 10 minutes, I had to end the session due to clouds, and this is the final image of the Orion Nebula. Yes, I know it’s one of the brightest nebulae in the night sky, but I think this result is impressive, considering only 10 minutes of imaging in very poor weather conditions.
The Moon
As mentioned, the weather in the Netherlands has been very poor lately, but one early morning, I spotted the waning moon in a hazy sky. I quickly grabbed my S30 and set it up on the rooftop of my backyard shed to capture it. Capturing the moon is similar to capturing the sun, but, of course, no solar filter is needed. I selected the moon in the app and used the wide-field lens view to locate it in the morning sky. After centering it, I clicked the tracking icon, and the S30 began tracking the moon automatically. I quickly activated autofocus, and the S30 focused well on the moon’s craters.
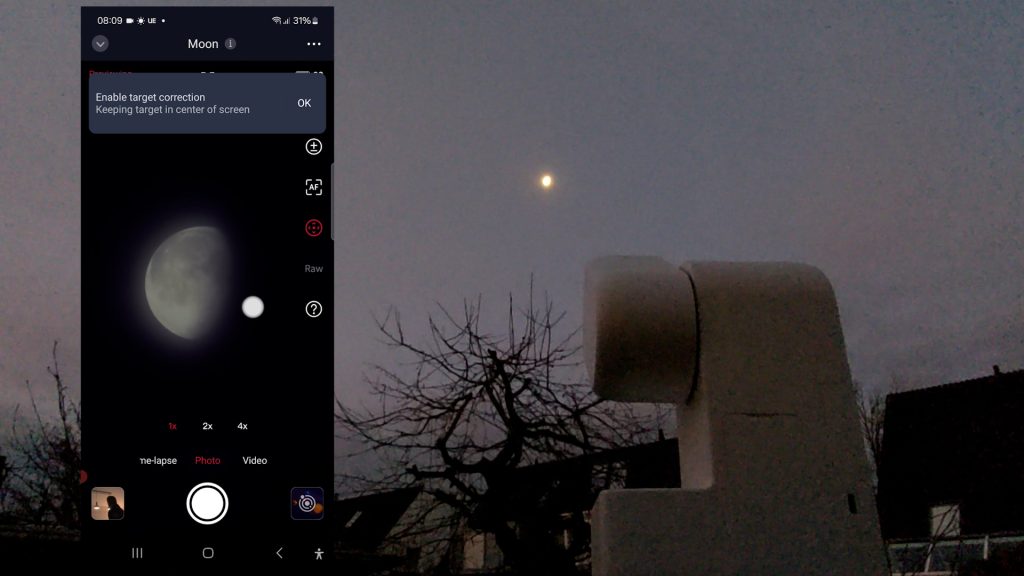
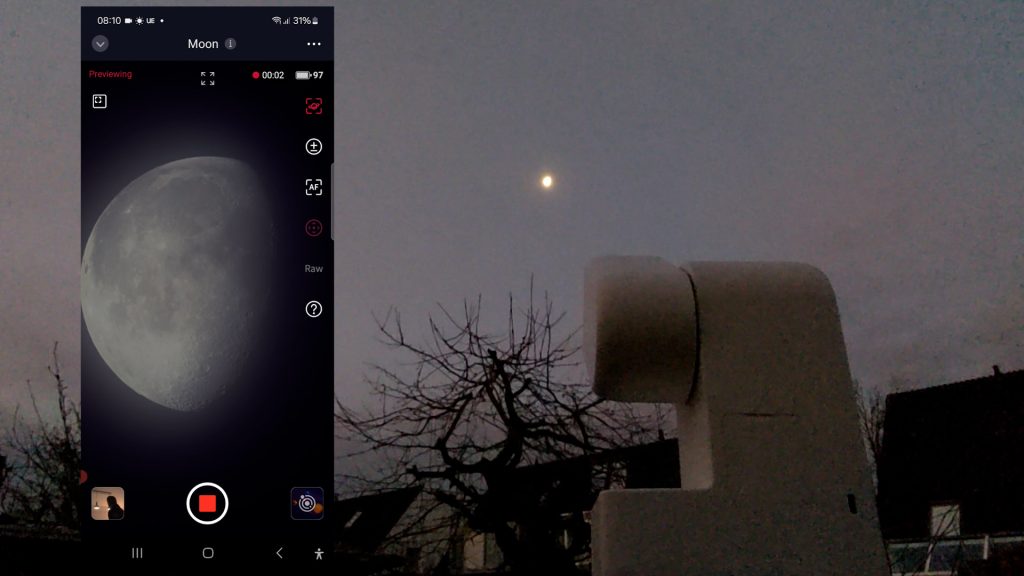
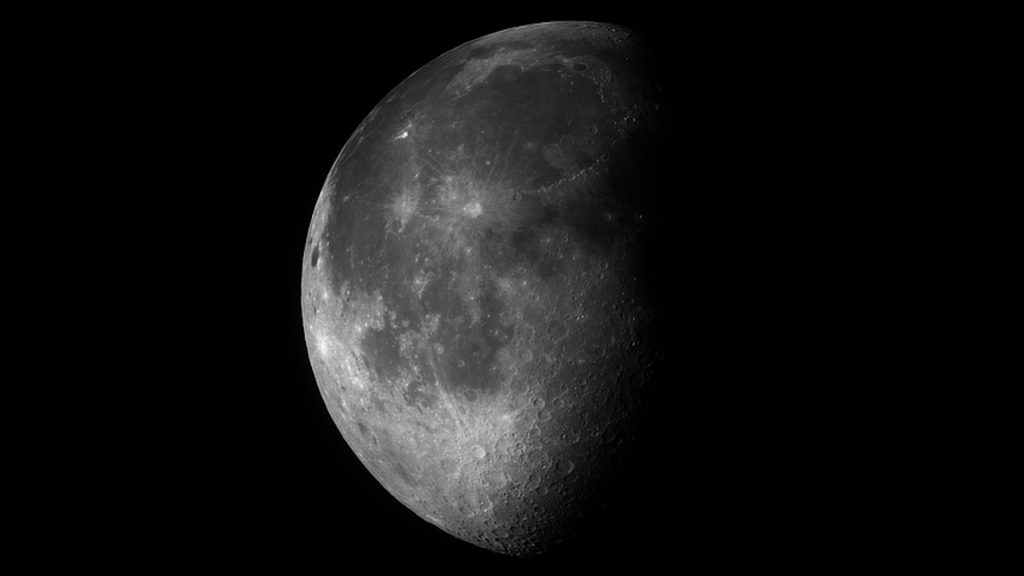
I decided to take a regular one-minute MP4 video and also captured a one-minute RAW video, which I processed using AutoStakkert and RegiStax. Here’s my final image. Despite the very hazy conditions and limited visibility, I’m quite happy with this image of the moon.
Additional features
Before giving my final verdict, let’s review some additional features of the Seestar S30. With “Station Mode”, you can connect the telescope to your home WiFi network, allowing you to control it from indoors while the S30 captures the night sky. The S30 can also save individual photos alongside stacked images, enabling you to manually download and stack the highest-quality photos using free software like DeepSkyStacker.
You can extend the exposure time to 30 seconds, though ZWO recommends sticking to the default 10 seconds due to the Seestar S30’s alt-az tracking mode. It would be interesting to see if ZWO includes equatorial tracking options in the future, enabling longer exposures and eliminating field rotation during extended integration times. The community tab is another excellent feature, allowing users to share images and engage with others. Lastly, the S30’s battery lasts for several hours and can be recharged during use, ensuring uninterrupted imaging sessions.
Final verdict
If you’re looking for a way to enhance your views of the night sky without spending a fortune, the Seestar S30 is an excellent smart telescope that gets the job done. Even if you’re new to astrophotography, the easy-to-use Seestar app makes it possible for beginners to engage in advanced stargazing and astrophotography, without getting into a steep learning curve of how to operate telescopes, mounts, and cameras. Simply use the app to control the telescope, select an object, and you’ll be stargazing in minutes while the S30 does all the work. This compact, lightweight telescope provides impressive images of the night sky for its price.
This being said, every telescope has it’s limitations and the S30 is no exception. If you’re primarily interested in planetary observation, I would advise you to save up for a larger aperture telescope like a Dobsonian or SCT. The S30 also offers lower resolution images compared to other smart telescopes, like its bigger sibling, the Seestar S50. Additionally, the alt-az tracking mode of the Seestar limits its exposure time for deep-sky photography to 30 seconds, and causes field rotation during longer integration times.
Despite these limitations, the Seestar S30 is one of the most affordable smart telescopes on the market today and perfect for folks who want to get into enhanced stargazing and astrophotography without breaking the bank. Even as an experienced astrophotographer, I enjoyed using and reviewing this tiny but mighty smart telescope.
Clear skies!
The Seestar S30 is currently available at ZWO (WW), High Point Scientific (USA/WW), Agena Astro (USA/WW), and Astroshop (EU/WW).
One Reply to “ZWO Seestar S30 Smart Telescope Review + Tutorial”