Dwarflab recently released the first RAW images captured with their upcoming Draco Smart Telescope. As someone who spends far too much time obsessing over astrophotography gear, I couldn’t resist doing a deep dive into these files. I wanted to analyze what this scope is actually producing and compare it directly to a stacked image of the exact same object shot with my custom $5,000 astrophotography rig including my 80mm flatfield apochromatic telescope and asi2600MM Pro cooled camera.
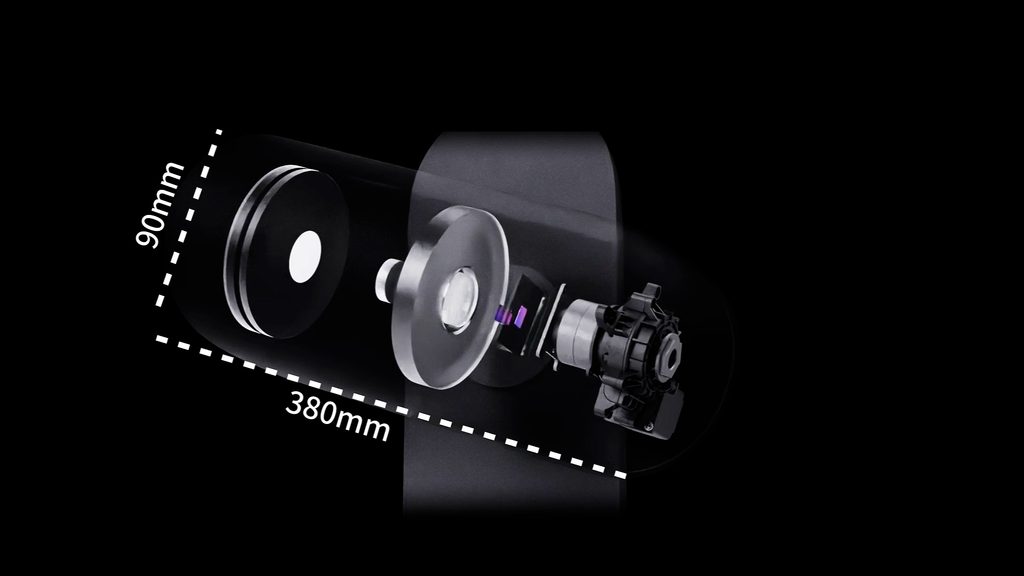
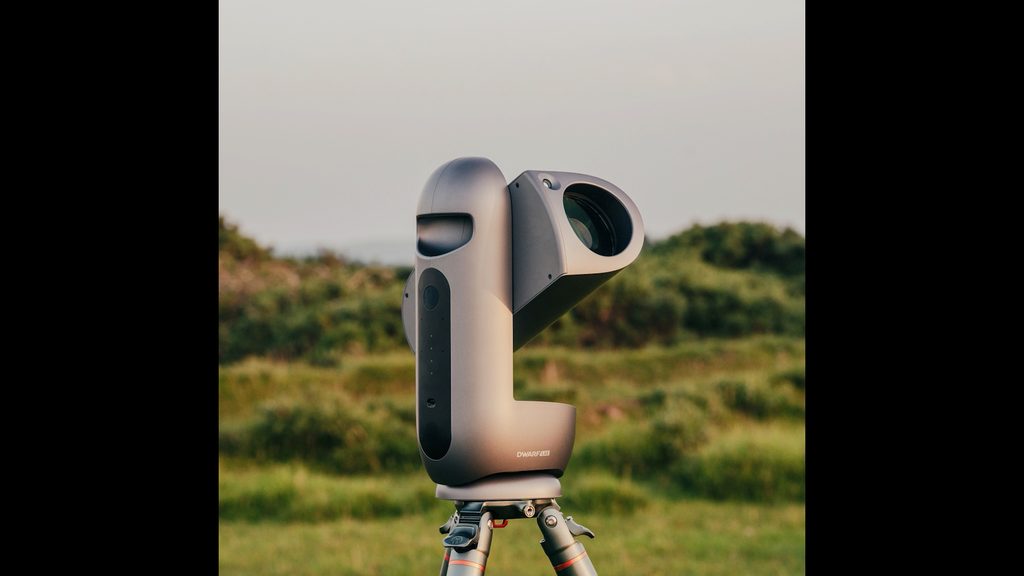
If you aren’t familiar with the Draco yet, it’s a compact catadioptric, mirror-based Smart Telescope featuring a 90mm aperture and a 340mm focal length (f/3.8). What makes it particularly interesting for amateur astrophotographers is its tracking design: it aims to track for up to 5-minute exposures in Alt-Az mode using active autoguiding and an internal rotating camera sensor to eliminate field rotation.
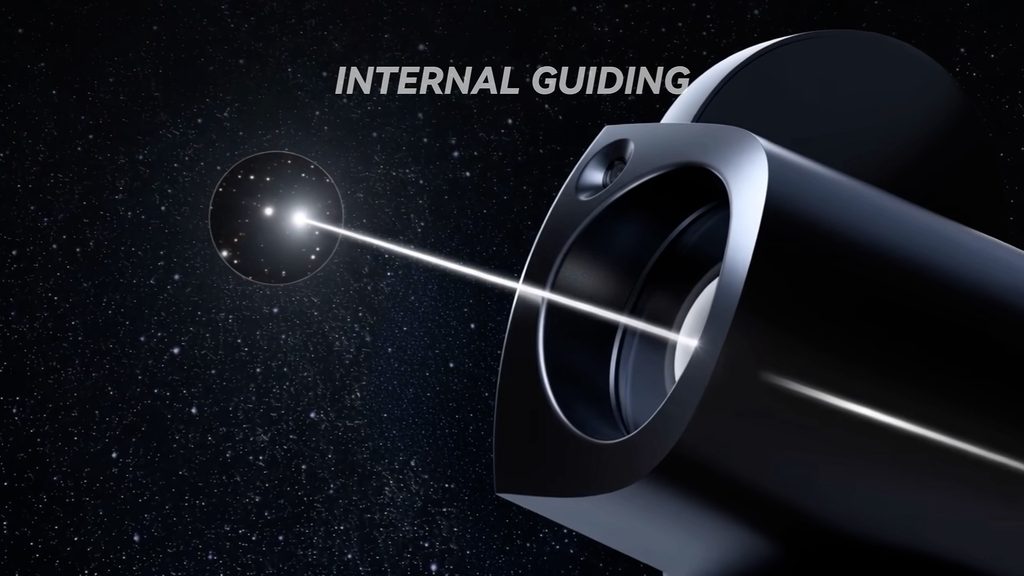
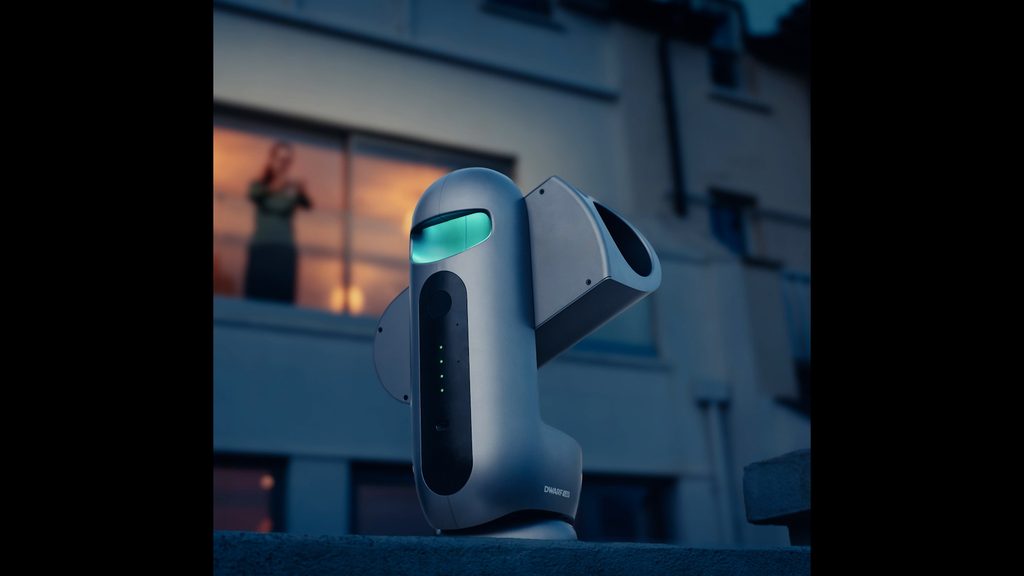
In practical terms, the workflow involves placing the Draco on a table or balcony, selecting a target in the mobile Dwarflab app, and letting the scope locate, track, and capture the object automatically with exposures up to 300 seconds. Shooting 5-minute sub-frames allows you to gather a massive amount of light and build a strong signal-to-noise ratio—essential for pulling out faint, wispy structures in deep-sky emission nebulae using its internal 13nm dual-band filter.
Furthermore, the Draco’s internal camera sensor de-rotation system is designed to make setting up in EQ mode (or lugging along an equatorial wedge) completely unnecessary. On paper, the de-rotating sensor continuously counters field rotation during tracking, which should ideally deliver round stars across 300-second exposures directly in its native Alt-Az configuration.
I emphasize “on paper” because the Draco is not officially released just yet. As of early October 2026, Dwarflab’s target launch is still roughly three months away, with first production units slated to ship in early 2027 and only pre-orders available right now. The base model, which includes a dual-band Hα/OIII filter, is priced at $1,399, while the SHO version comes in at $1,599 and adds an SII/OIII dual-band filter. If real-world testing proves it can genuinely compete with a $4,000 to $5,000 custom rig, it represents a substantial shift in accessible astrophotography—especially considering you bypass the typical cable management, polar alignment routines, and hardware troubleshooting inherent to custom builds.
Examining the RAW Data
The released dataset consists of 17 individual 300-second exposures of NGC 6992—the Eastern Veil Nebula, part of the famous supernova remnant in Cygnus. It’s a classic northern summer target that passes nearly overhead at my latitude. Having photographed it frequently over the years with various astrophotography rigs, I’m very familiar with how it responds to different optical setups.
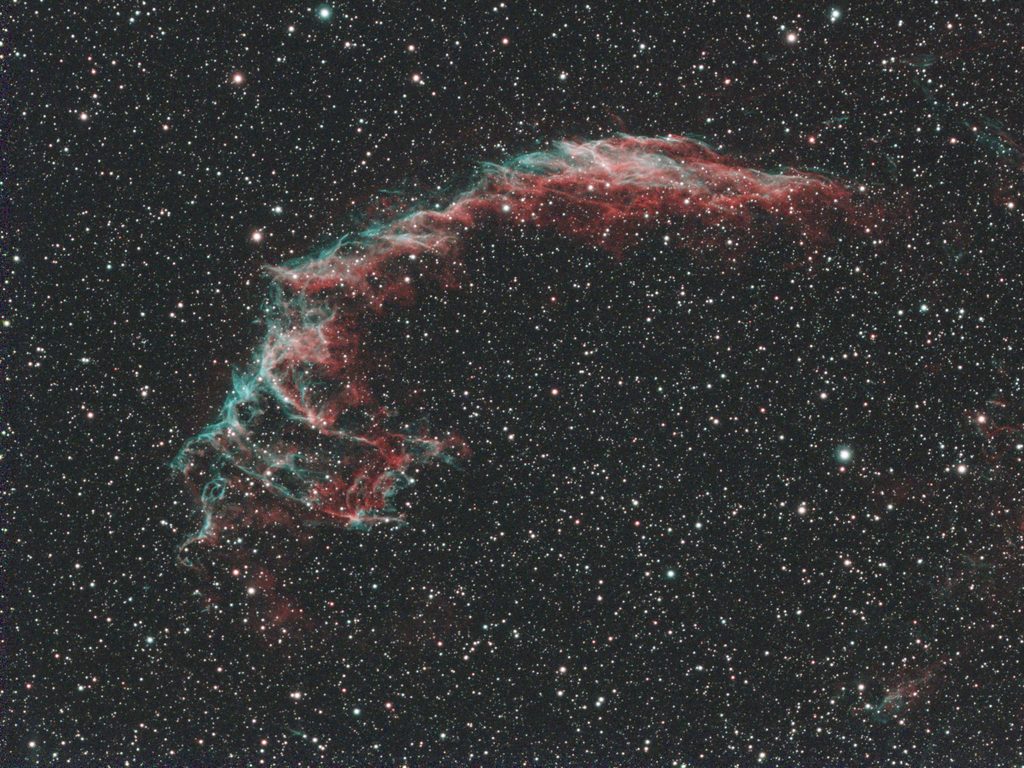
The automatically live-stacked JPEG preview generated by the Draco looks surprisingly good for just 1 hour and 25 minutes of total integration time. However, to see what’s really going on, I loaded the raw 16-bit FITS files into PixInsight.
Inspecting the frames in PixInsight’s Blink process revealed a few unexpected details right away:
Sensor Temperature: The FITS headers recorded sensor temperatures fluctuating between 11°C and 15°C throughout the run. Given that Dwarflab advertises an active cooling system for the Draco, I was initially surprised to see the sensor temperature drift across individual frames rather than lock onto a fixed, sub-zero baseline like a traditional cooled camera. It’s easy to confuse marketing specs here: while Dwarflab lists an operating temperature range of -20°C to +45°C, that figure simply refers to the environmental ambient conditions the physical hardware and electronics can tolerate in the field. It is not a cooling statement. When I reached out to Dwarflab for clarification, they noted that it takes time for the camera to reach thermal equilibrium. Furthermore, unlike dedicated deep-sky cameras with dual-stage TEC coolers capable of 30°C deltas and regulated temperature locks, the Draco employs a lightweight cooling system designed to pull the sensor roughly 5°C to 10°C below ambient. Because there is no software setpoint to lock the temperature, the sensor naturally tracks ambient shifts. While this still provides a significant reduction in thermal noise over uncooled smart scopes, it makes temperature-matched dark frame calibration more critical.
Total Imaging Time vs. Real Time: The 17 frames were captured between 22:05 and 23:58 on September 19, 2026. That’s a total elapsed window of 113 minutes to capture 85 minutes of exposure data, leaving roughly 28 minutes of missing time. Looking at the individual timestamps, there are a few 10-minute gaps between shots instead of the expected 5-minute cadence. This can happen for ordinary reasons, like passing clouds, refocusing routines, or sequence pauses, so it’s too early to draw conclusions about tracking reliability. Dwarflab’s response was they experienced some clouds passing during the capture, which would explain the extra capture time. Dropping occasional frames during 5-minute exposures also happens to me on my custom rigs.
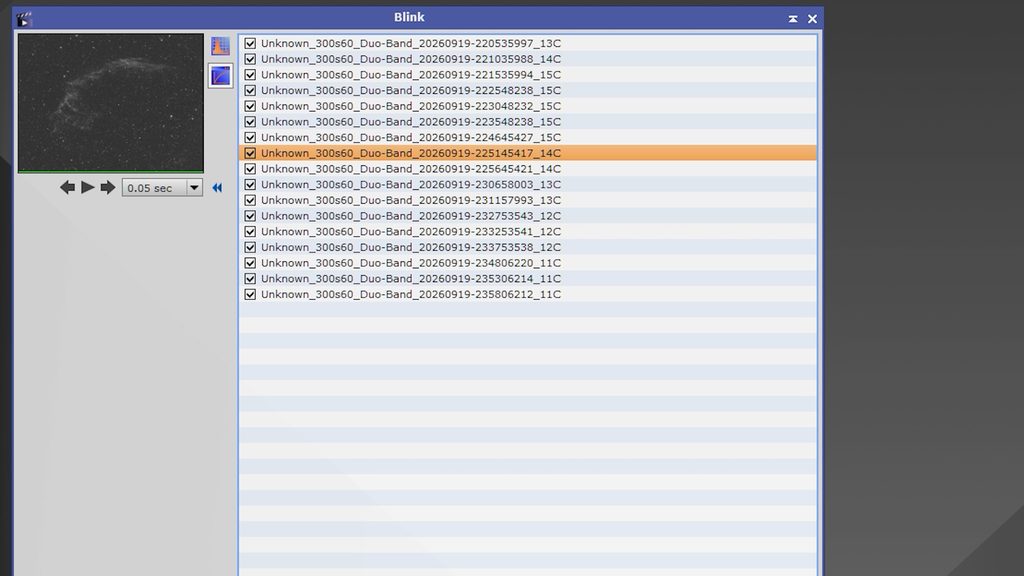
Calibration files were a bit of a mixed bag. The darks folder contained 300-second frames at Gain 60 matching the light sub-exposures, but they showed similar temperature drift. Most files were stacked dark files labeled stack_4 through stack_60 where the number after the underscore presumably indicates how many dark frames were stacked together into a master dark. To calibrate the light frames in PixInsight’s WeightedBatchPreProcessing (WBPP) script, I selected the pre-stacked master darks that fell within that same 11°C to 15°C temperature window. The flat and bias folders only contained two flat frames and a single bias shot captured at a different gain setting, so I stuck strictly to a dark-only calibration.
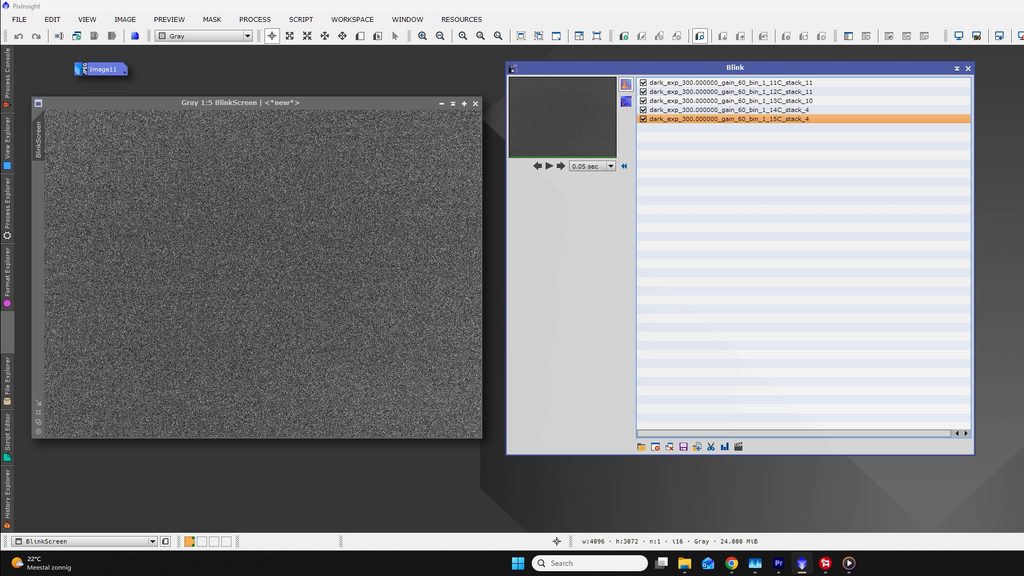
Looking closely at the calibrated sub-exposures before stacking, the target shifts position slightly every two or three frames. Rather than tracking issues, this looks very much like automated dithering where the scope deliberately shifts position by a few pixels between exposures so stacking algorithms can eliminate hot pixels and sensor artifacts. Seeing that built into the automatic sequence is a very positive sign.
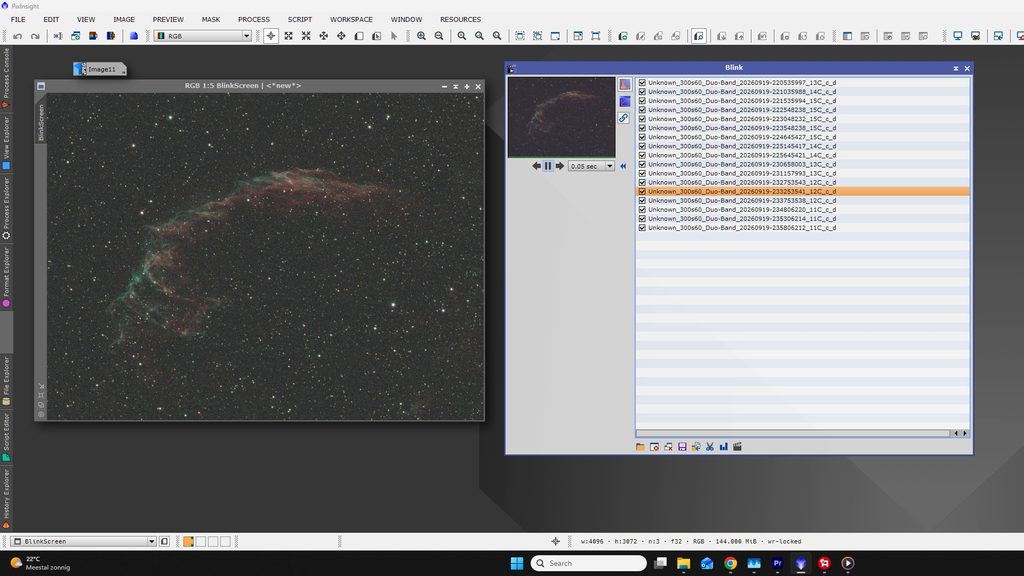
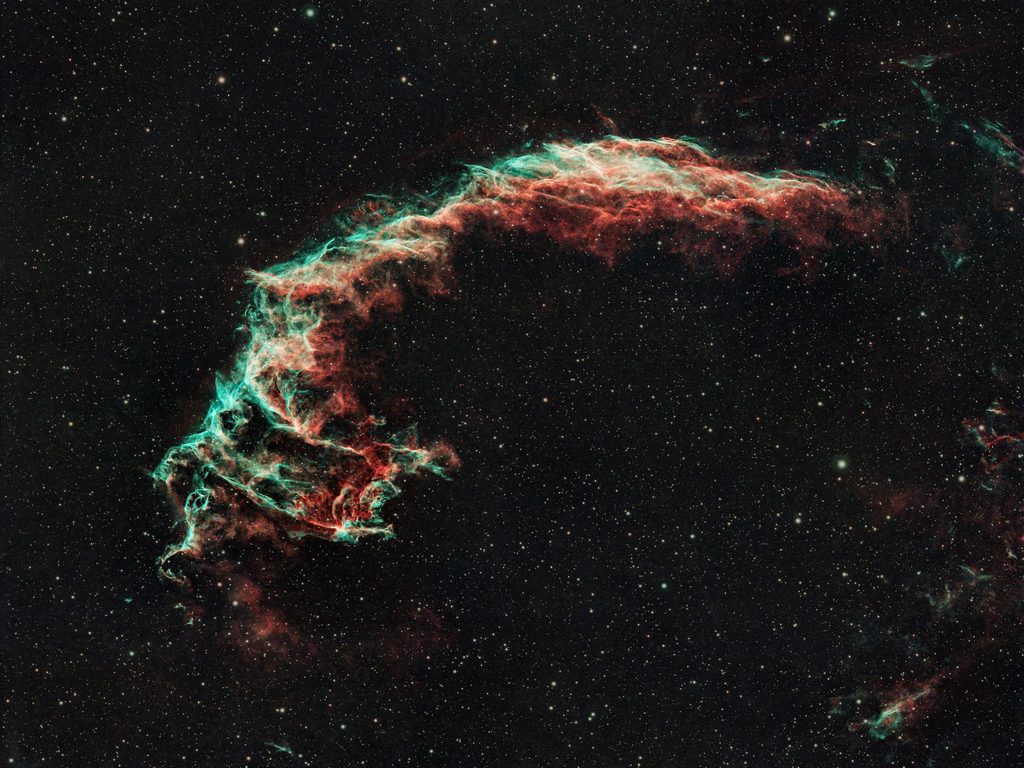
Stacked Draco Image vs my HOO image Custom Setup (~$5,000)
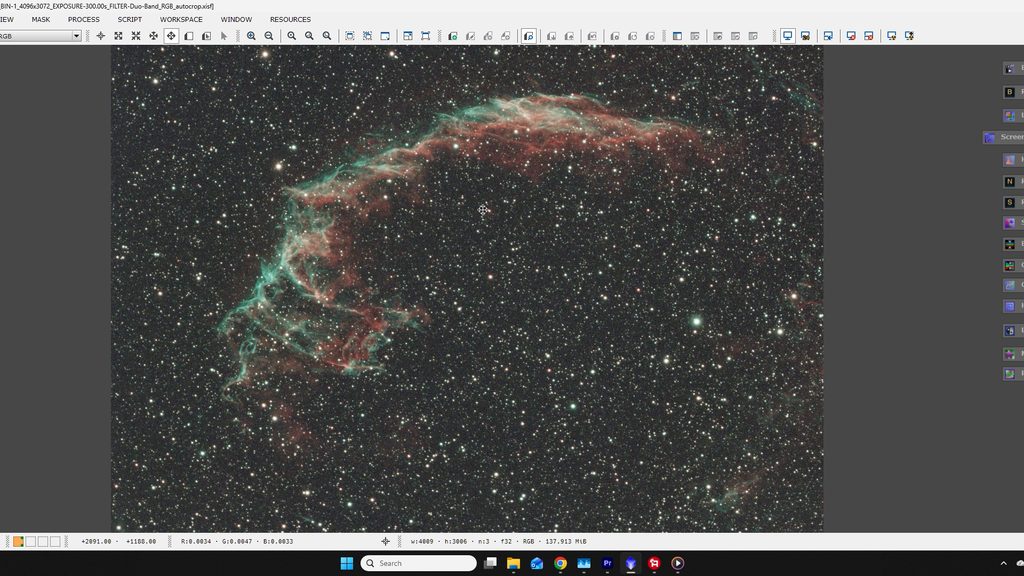
Straight out of PixInsight, the dark-calibrated linear stack looks remarkably clean. Applying an unlinked screen transfer stretch brings out fine structural detail throughout the Eastern Veil.
To benchmark the result, I pulled up data I shot of the exact same object using my 80mm flatfield APO refractor equipped with a cooled monochrome camera (the ZWO ASI2600MM Pro, set to -15°C). My setup was used to shoot separate 7nm H-alpha and OIII narrowband exposures at 5 minutes each, accumulating around 6 hours of total integration time. Comparing a dual-band color image to a cooled monochrome narrowband stack is undeniably an “apples to oranges” test, but I still wanted to know how close this compact setup gets to my dedicated custom setup.
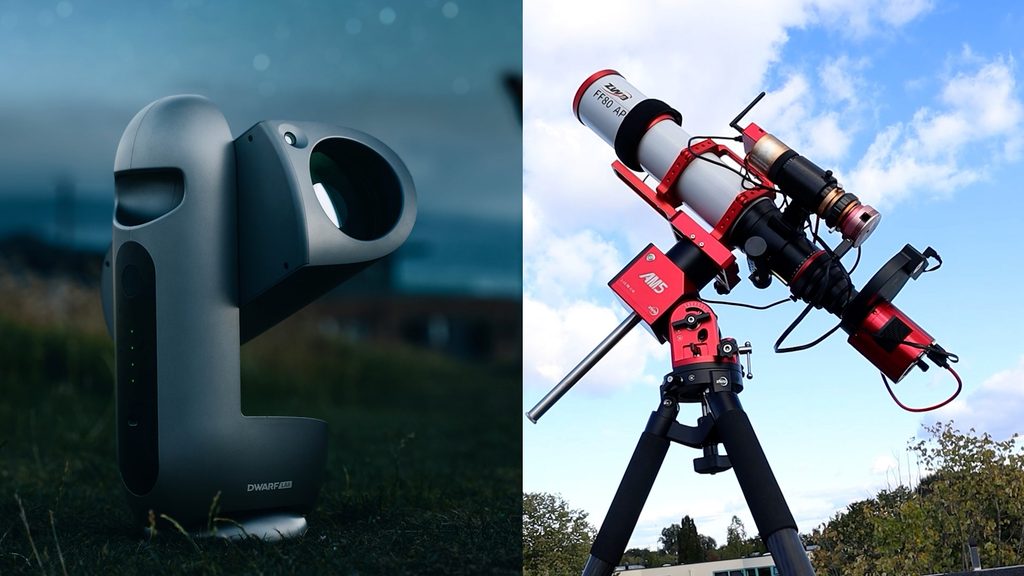
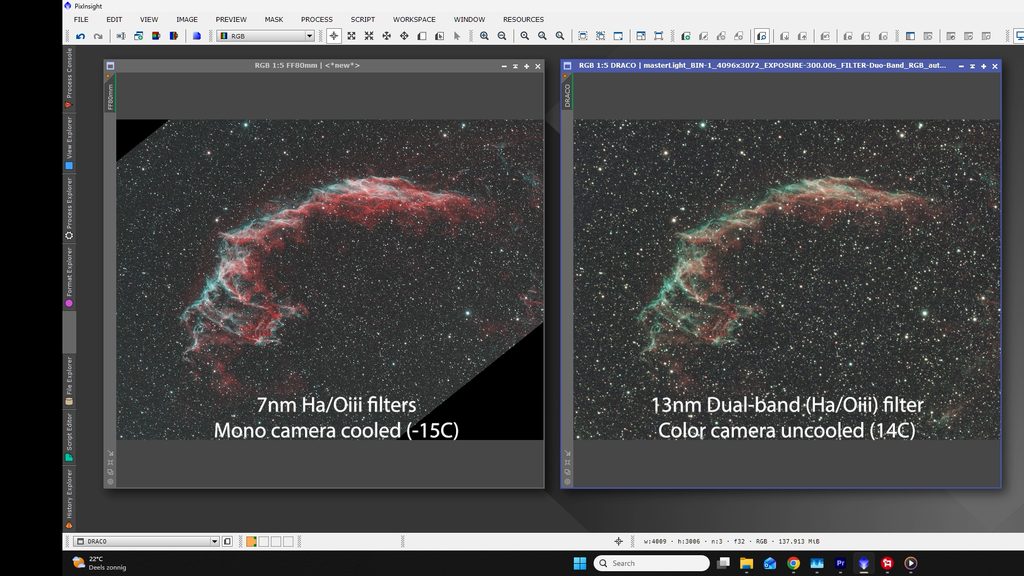
Combining my Ha and OIII master stacks into an HOO composite and matching the Draco’s field rotation made one thing instantly clear: visually, the two images are remarkably competitive at first glance.
| Feature | Custom 80mm Refractor Rig (FF80) | Draco Smart Telescope |
|---|---|---|
| Aperture & Focal Length | 80mm (600mm native FL, f/7.5) | 90mm (340mm FL, f/3.8) |
| Camera & Cooling | Cooled Mono ASI2600MM Pro (-15°C) | Integrated Color (11°C to 15°C drift) |
| Sub-Exposures & Gain | 300s sub-exposures (Gain 100) | 300s sub-exposures (Gain 60) |
| Filters | Separate 7nm Ha & OIII filters | Dual-band HO filter (~13nm bandpass) |
| Total Exposure Time | ~6 hours (48x300s) across filters | 1 hr 25 min (17 x 300s) |
| Color Rendition | Strong cyan/blue OIII emphasis | Natural dual-band (includes green) |
The Draco output displays a mild greenish tint, which is standard behavior for dual-band light-pollution filters on a color sensor. My mono rig shows a deeper cyan tone because the narrower 7nm OIII filter isolates the pure blue-green emission line. The Draco’s broader ~13nm bandpass lets a bit more light through overall, which serves a dual purpose: it acts as an effective light-pollution filter under urban skies while preserving enough of the broader emission spectrum to reveal green tones that tighter filters cut out.
While both setups show minor haloing around the brightest stars above the nebula, the halo effect on the Draco image is noticeably stronger. This comes down to that same broader 13nm bandpass allowing more off-band reflections between the sensor and filter coatings, paired with the scope’s faster f/3.8 optical speed, which drives incoming light through the filter at steeper angles.
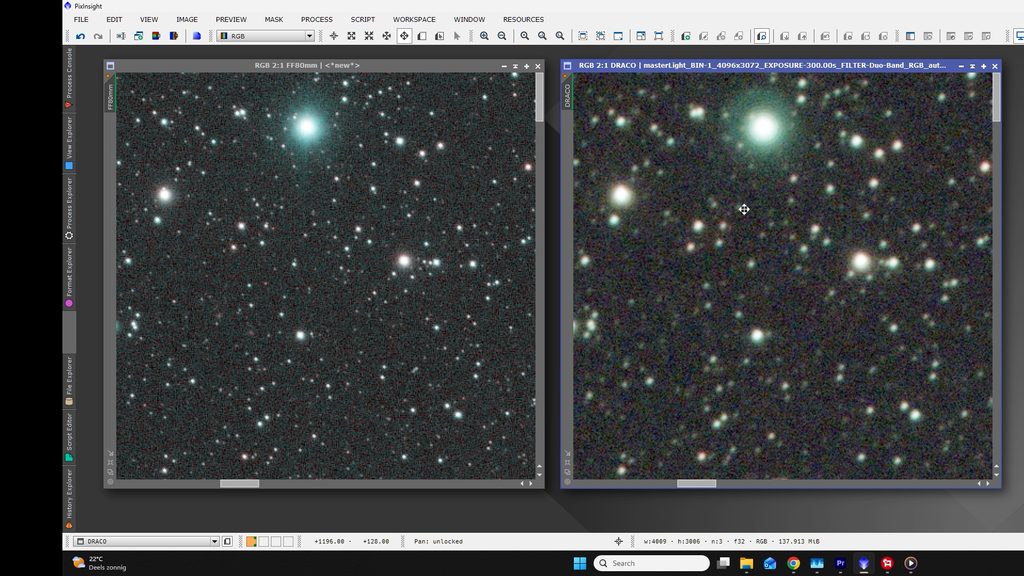
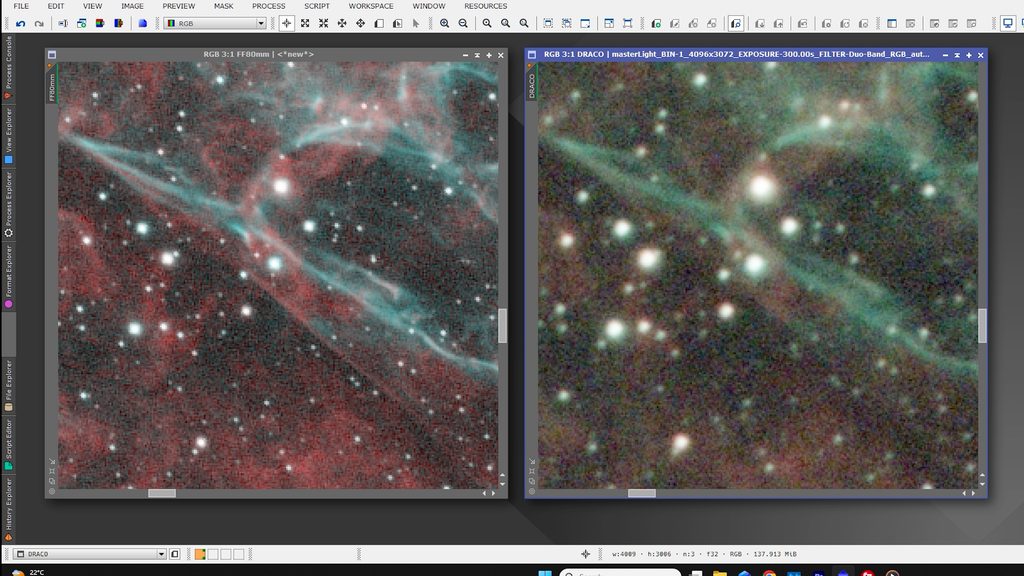
Zooming into the head of the nebula reveals where the physical differences really become apparent. My custom setup isolates noticeably sharper structural detail—especially when inspecting fine features like the delicate, curly filaments, the nebular spikes, and the faint red outer shell wrapping around the main structure.
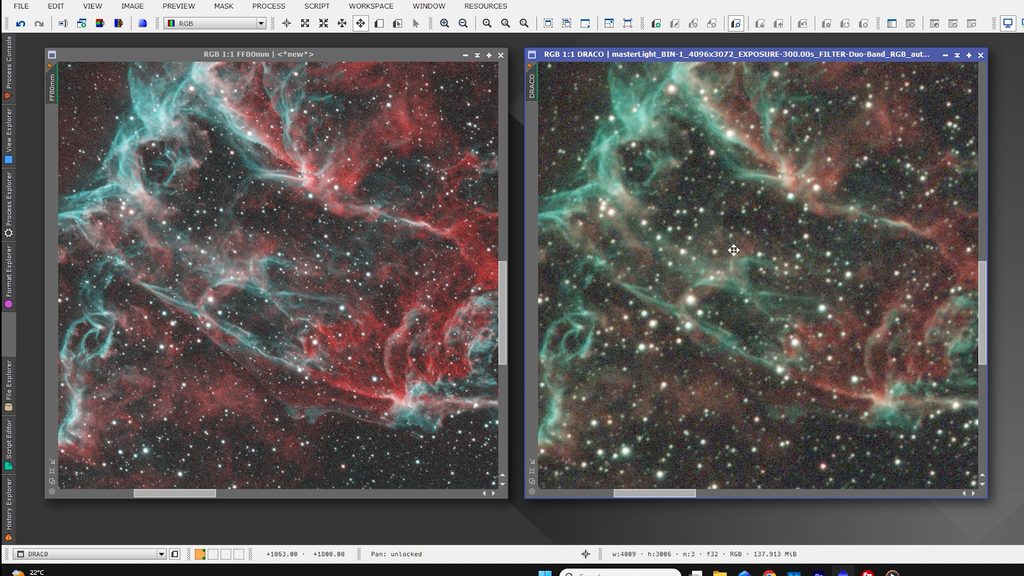
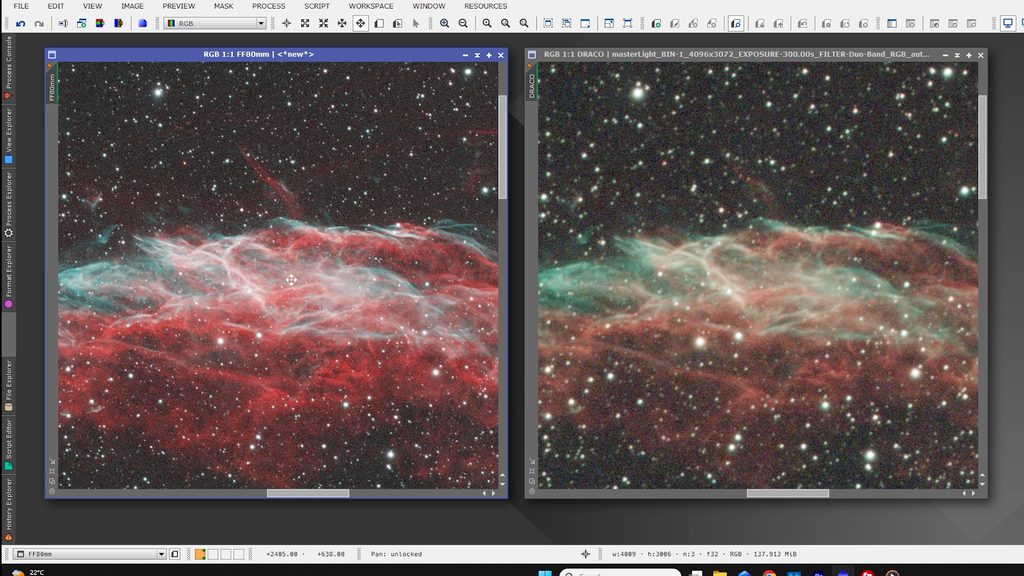
This performance gap comes down to some key astrophotography principles working in tandem. First, a monochrome camera utilizes 100% of its sensor pixels for incoming photons, whereas a color camera uses a Bayer matrix that allocates only a fraction of its pixel grid to red or blue light, giving the mono setup an inherent advantage in spatial resolution. Second, the tighter 7nm filters on my custom rig block significantly more background sky glow than the Draco’s broader 13nm bandpass, which yields higher local contrast and makes structural boundaries look much crispier. Finally, having over quadruple the total integration time—roughly 6 hours compared to the Draco’s 1.5 hours—accumulated a far stronger signal-to-noise ratio which leaves those delicate outer wisps clearly defined and separated from the background noise in the raw stack. If you were to accumulate a significantly longer integration time with the Draco, these more subtle detail and contrast differences would likely become less prominent.
Analyzing Star Profiles and Optics
Subjective impressions only tell half the story, so I ran image analysis scripts in PixInsight to look at the raw numbers:
| Metric | Custom 80mm Refractor Rig (FF80) | Draco Smart Telescope |
|---|---|---|
| Image Scale | 1.29 arcsec/pixel | 1.45 arcsec/pixel |
| Median Star Sharpness (FWHM) | 1.64 px (~2.1 arcsec) | 3.51 px (~5.1 arcsec) |
| Median Eccentricity | 0.46 (consistently round) | 0.51 (slight corner elongation) |
| Frame Uniformity | Uniform across entire sensor | Shifts diagonally from 0.44 (bottom-left) to 0.58 (top-right) |
In real-world terms, Full Width at Half Maximum (FWHM) measures the physical width of a star in pixels, which we convert into angular size on the sky using the optical setup’s image scale. For context, astronomical seeing describes the turbulence in our atmosphere that blurs incoming starlight, with typical suburban skies sitting between 1 and 3 arcseconds of atmospheric distortion on an average night.
Multiplying the Draco’s median FWHM of 3.51 pixels by its 1.45 arcsecond-per-pixel image scale gives a real-world star profile of 5.1 arcseconds, meaning its stars are noticeably softer than what atmospheric seeing alone would allow. In comparison, my 80mm refractor on the ZWO AM5N mount delivered a median FWHM of 1.64 pixels at an image scale of 1.29 arcseconds per pixel, which translates to a tight 2.1 arcseconds under my Dutch skies. By converting both measurements to actual arcseconds on the sky, we eliminate differences in camera sensor size and focal length, allowing us to say that my custom refractor setup produced stars roughly 2.5 times sharper than this initial Draco dataset.
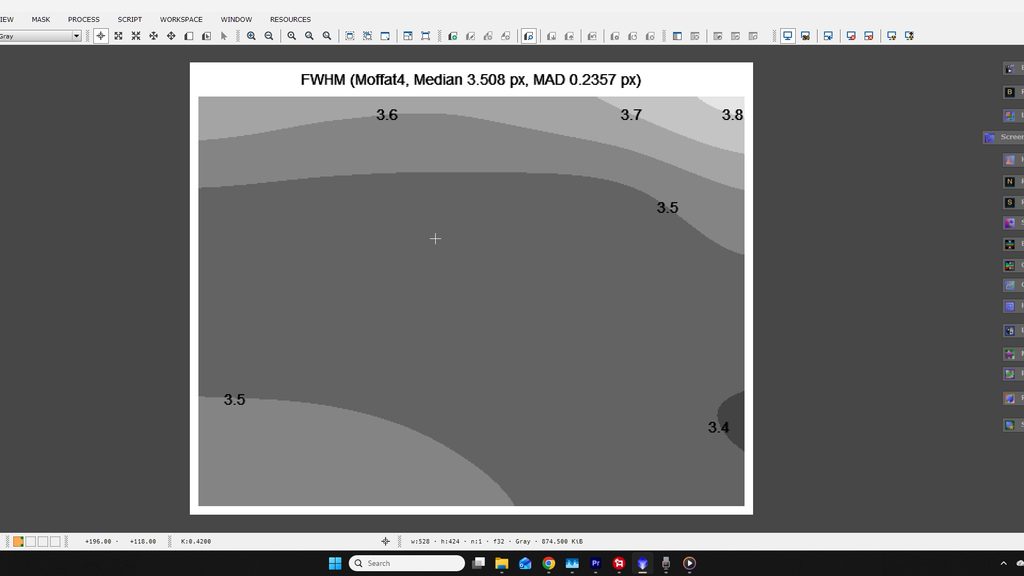
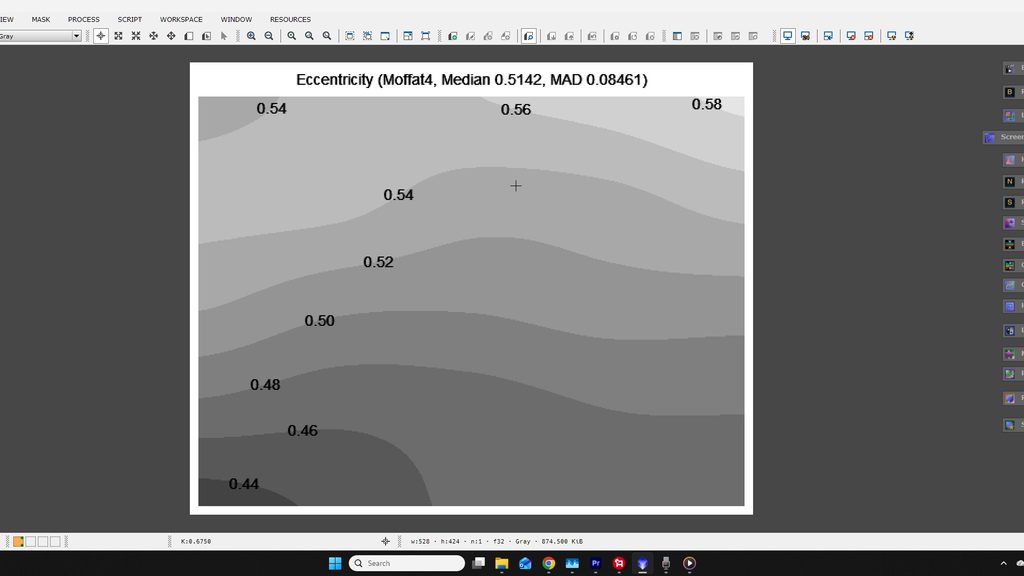
Beyond overall star sharpness, looking at how FWHM and eccentricity are distributed across the frame gives us a clear window into optical alignment and tracking performance. Across the Draco stack, FWHM values varied slightly from 3.4 pixels near the center to 3.8 pixels near the edges, while eccentricity shifted diagonally across the sensor from 0.44 in the bottom-left corner to 0.58 in the top-right. In astrophotography, an eccentricity below 0.5 means stars appear visually round to the human eye, whereas values approaching 0.6 indicate noticeable oval distortion or elongation. That diagonal eccentricity shift on the Draco may point to physical factors: in a fast f/3.8 optical system with an internal rotating sensor, corner-to-corner variations typically stem from slight sensor tilt, minor mechanical tolerance in the rotator bearing, or micro-lags as the scope actively counteracts field rotation. By contrast, my flat-field 80mm refractor held an almost flat profile across the entire sensor, with FWHM fluctuating tightly between 1.62 and 1.68 pixels and eccentricity staying consistently round between 0.44 and 0.49 from corner to corner, demonstrating the pinpoint edge-to-edge performance you expect from a dedicated apochromatic setup with an external autoguider and a good subarc tracking mount.
Fixing Star FWHM and Eccentricity in Post-Processing
Before sounding overly critical of those raw optical metrics, it’s worth remembering that modern image processing tools can dramatically reshape these numbers. Applying deconvolution algorithms like BlurXTerminator to the Draco stack drops the median FWHM from 3.51 down to 1.67 pixels and pulls median eccentricity down to 0.45, while completely sharpening up those outer corners. While optical purists might debate relying on post-processing routines to clean up native star shapes, software deconvolution has become an essential part of the modern astrophotography workflow, and it demonstrates just how far you can push the final output of a compact smart telescope like the Draco.
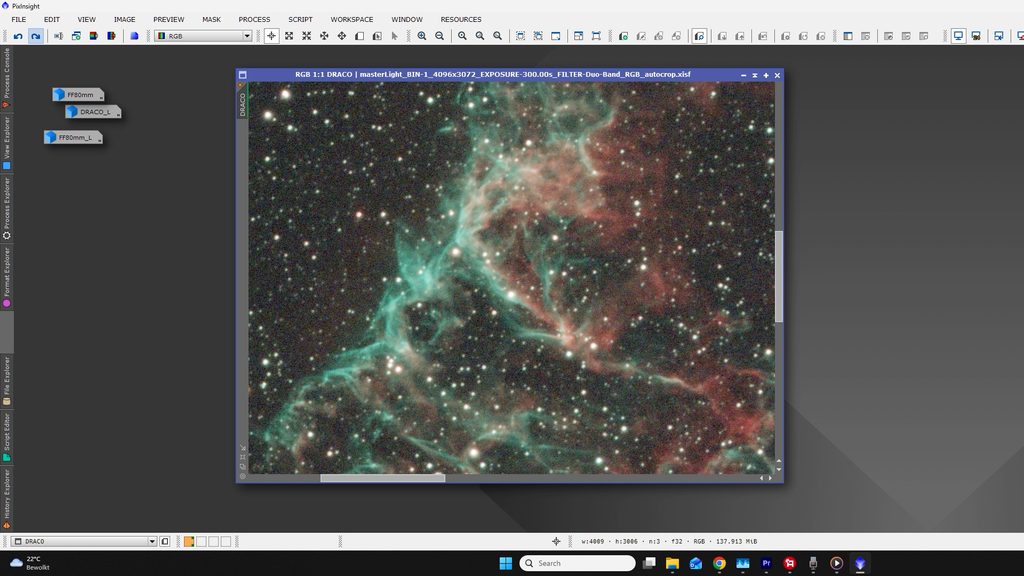
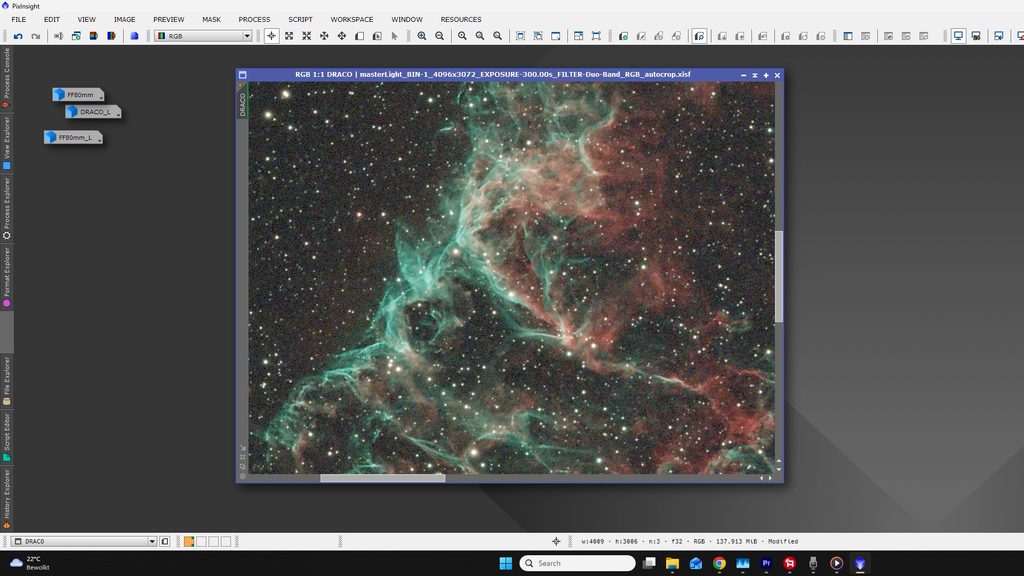
Of course, I couldn’t resit and processed the stacked Draco image in Pixinsight and Photoshop:
Final Thoughts
These initial RAW files demonstrate that the Draco is punching well above what we have traditionally seen from compact, fully automated smart telescope systems. The overall image quality, signal collection, and star shapes from a 1 hour and 25 minute stack are genuinely impressive for a standalone package in this price range. While it doesn’t quite match the raw optical performance of my custom $5,000 refractor rig, it is getting remarkably close.
My remaining open questions after this processing run center around sensor cooling and tracking performance over extended sessions. First, I want to see how effectively the TEC cooling system manages temperatures in real-world conditions, and what precise temperature delta below ambient it can reliably maintain. Second, while Dwarflab noted that the missing exposure time in this run was caused by passing clouds, I would love test the Draco across multiple long nights to calculate the true drop-out percentage over 300-second guided exposures. If the final production units handle sensor thermals effectively and maintain a good keeper rate on 5-minute subs, a portable smart scope like this becomes a very compelling alternative to hauling a custom APO refractor astro rig out into the field.
Clear skies!
@Wido’s AstroForum
Pre-Order the DWARFLAB Draco
If you are planning to purchase, using the affiliate links below directly supports my independent reviews at no extra cost to you.
Draco Standard Edition ($1,399)
Draco SHO Edition ($1,599)
Join as an Astrocoffee supporter for $2.99/mo