After the Seestar S50, the S30, and the S30 Pro, this is ZWO’s latest and most expensive smart telescope: the S50 Pro. I spent 24 hours with the Seestar, and in that time I was able to capture four deep-sky objects, the Milky Way, star trails, the Moon, Saturn, and the Sun—all from a light-polluted Bortle 7 city sky. Let me take you along on my journey and show you all the photos and capabilities of the S50 Pro.
Hardware & Specifications
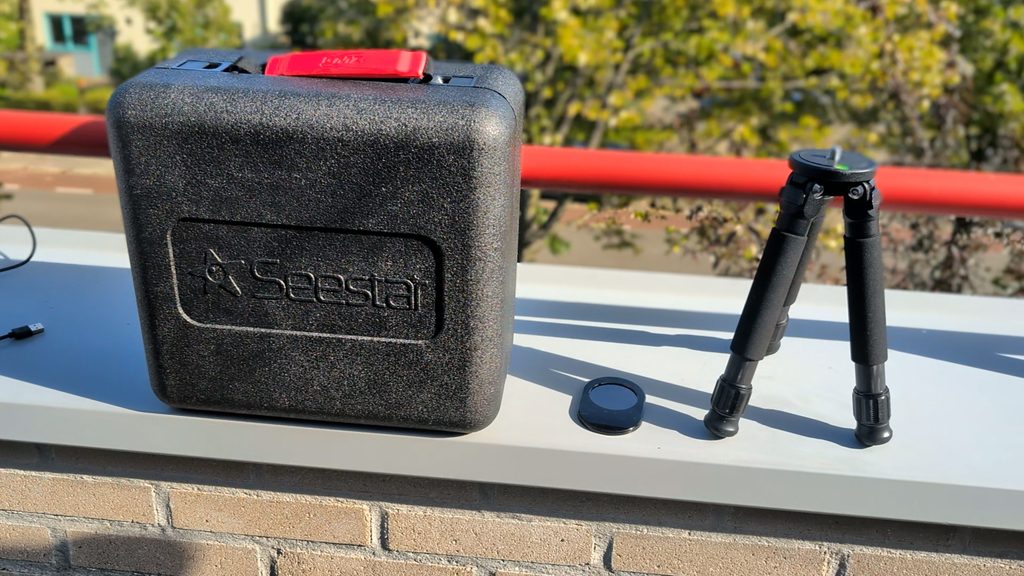
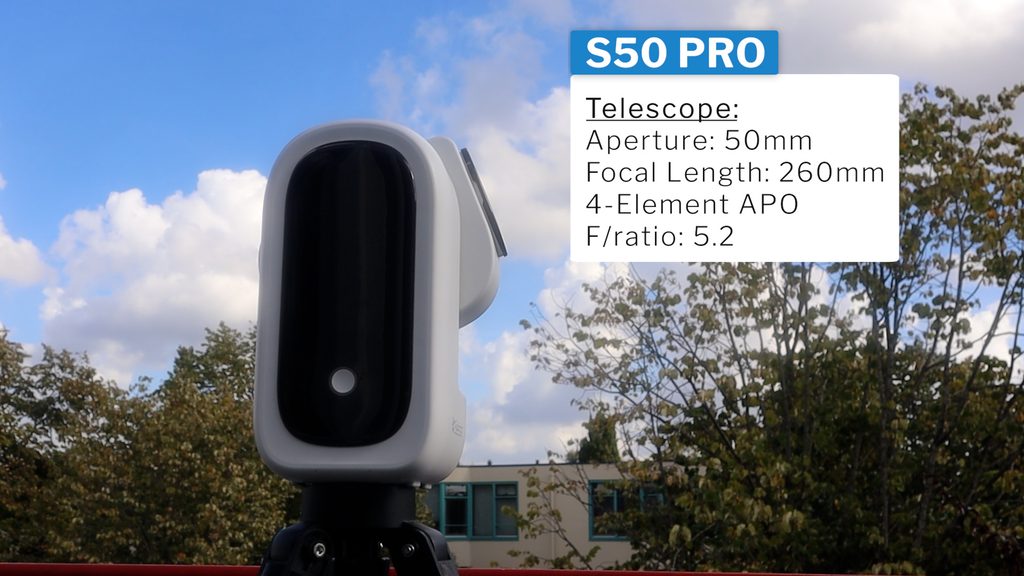
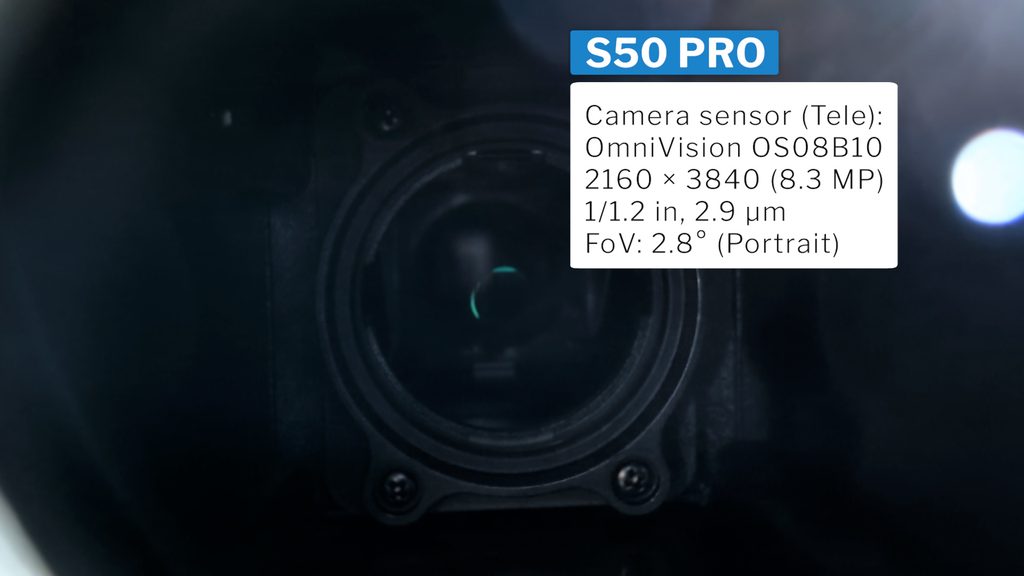
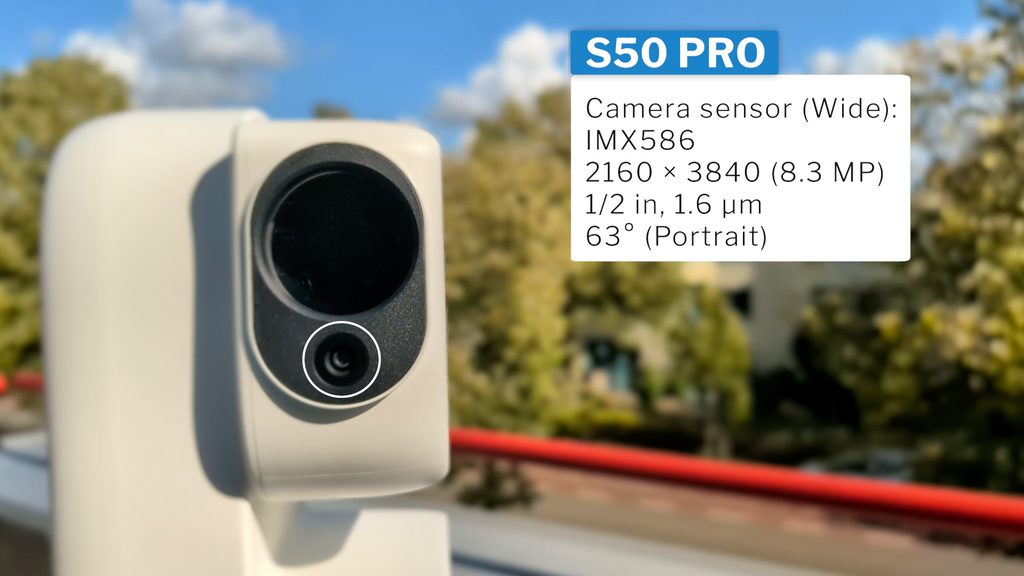
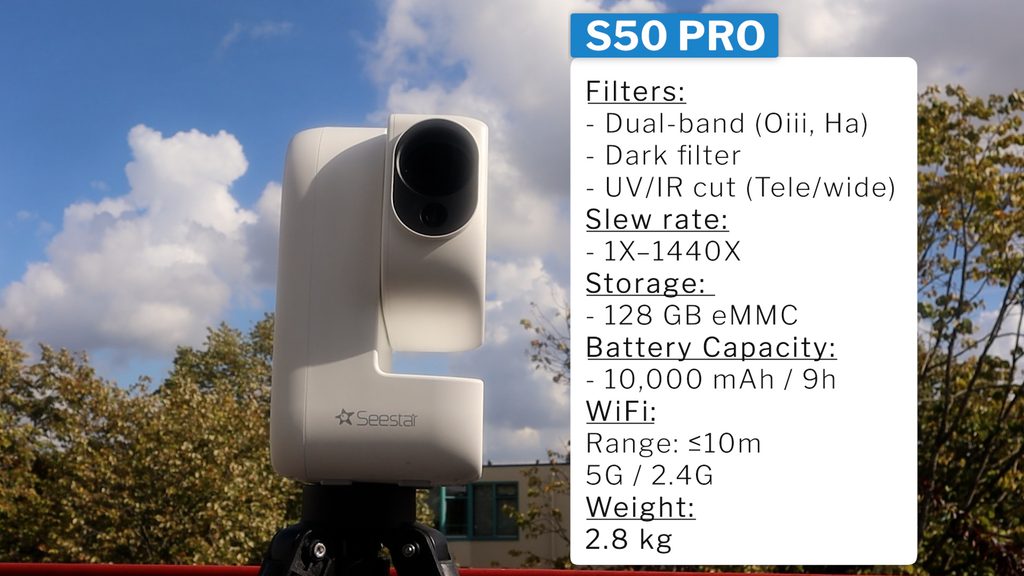
The S50 Pro arrived in a nice hard foam case, complete with a small tripod, a solar filter, and a USB-C cable. The telescope features a 50mm quadruplet lens with a 260mm focal length, paired with an 8.3-megapixel main camera sensor shooting in native 4K. It has a second 63-degree wide-angle camera, alongside an upgraded drive system, a built-in light pollution filter, 128 GB of storage, and a big 10,000 mAh battery that gives you up to 9 hours of use.
Setup & First-Time Connection
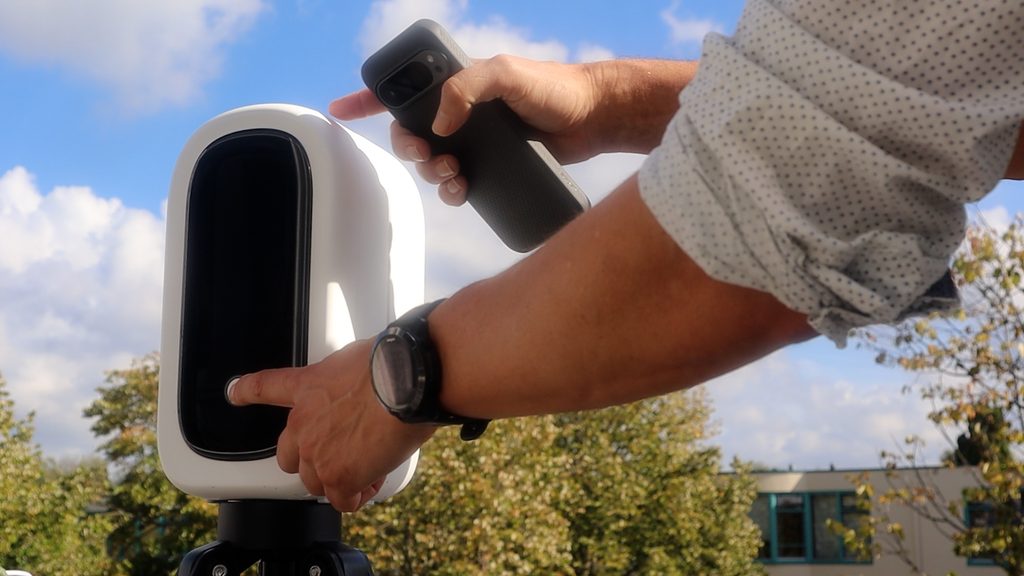
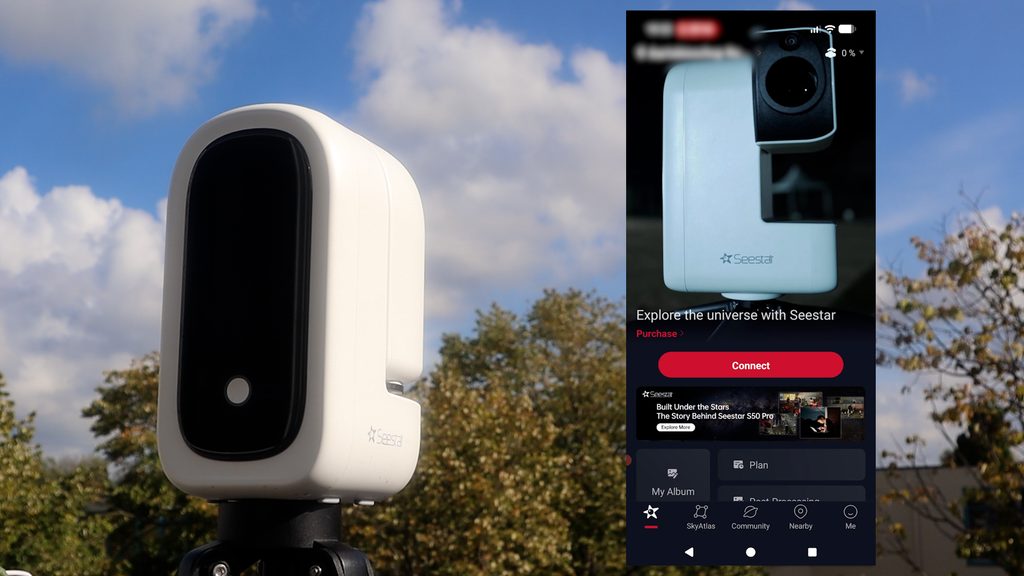
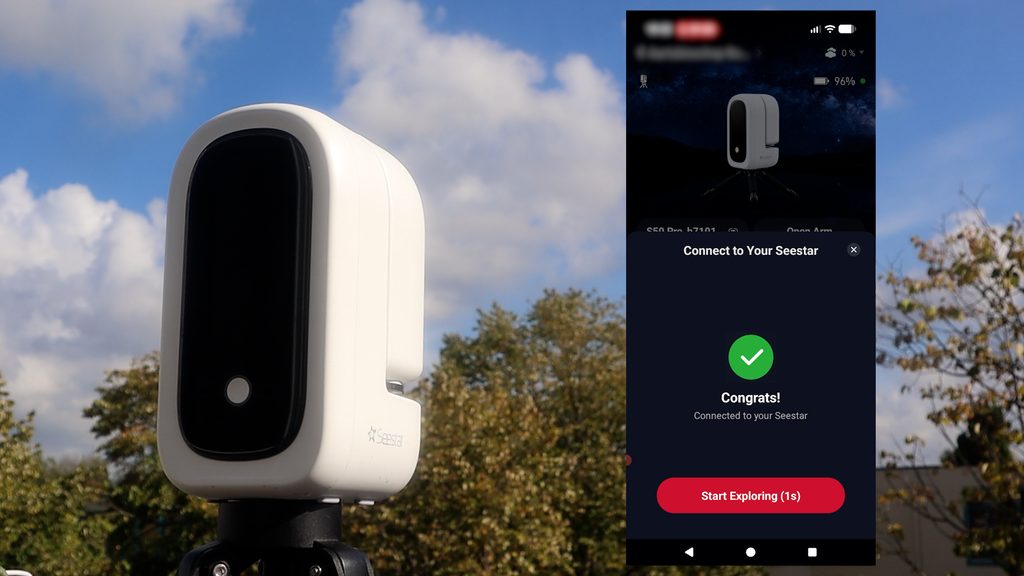
All Seestar smart telescopes are controlled entirely through the Seestar app. Connecting is super simple: open the app, hit Connect, and join its Wi-Fi using the default password 12345678. If it’s your first time, you’ll just need to push the button on the bottom of the scope to pair it with your smart device, run whatever firmware update pops up, and reconnect after the telescope reboots.
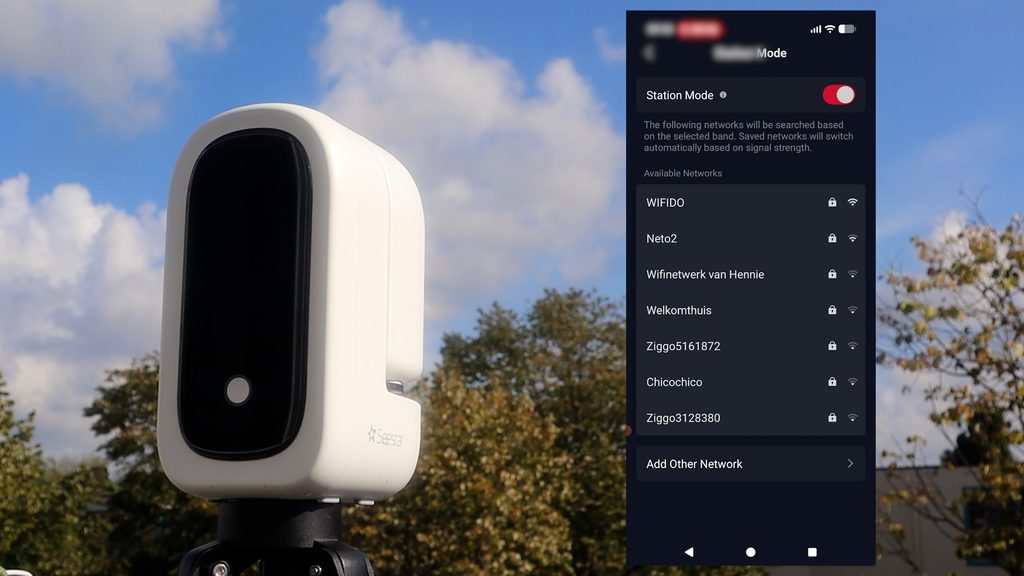
Pro Tip: If you want to control your Seestar right from your couch, tap the Seestar photo on the main screen and turn on Station Mode to connect it straight to your home Wi-Fi. I actually keep one of my routers close to the telescope, and this works great!
19:00 – 20:30: Sunset Timelapses
I set the S50 Pro on my rooftop right before sunset and shot a timelapse using the daytime Scenery Mode. As you can see, the wide lens records in 4k portrait mode. Call me an old boomer, but as someone who loves landscape photography, I’d love for ZWO to rotate that lens 90 degrees—though I really get why portrait mode probably makes more sense for smartphone users. Getting into Scenery Mode is super easy: just select it on the main screen, and you can shoot photos, videos, or timelapses.
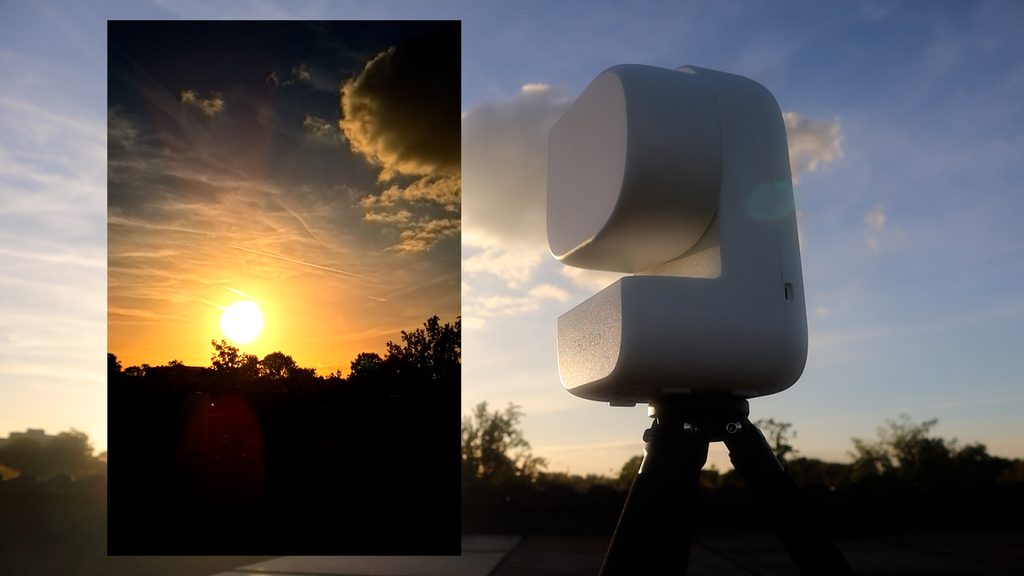
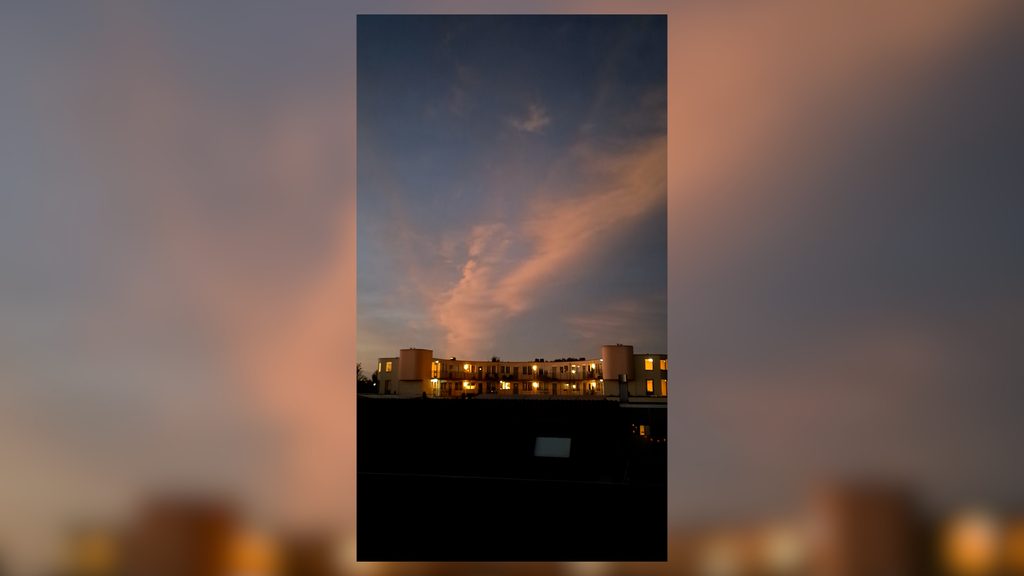
I took a second timelapse right after sunset, capturing some high clouds while waiting for nightfall. I left the exposure and gain on auto, and I was impressed by how smoothly the Seestar adjusted as it got darker. You can see the whole transition from twilight to night, right down to the building lighting up in the background.
21:15: Switching to EQ Mode
Once night fell, I put the S50 Pro into EQ mode. This may be a bit hard to do if you’re not (yet) into astrophotography, so let me explain. Right out of the box, all Seestar telescopes operate in a default Alt-Az mode on the standard tripod, which limits your exposures to 10 seconds. By putting your Seestar telescope in EQ mode, you avoid field rotation and can capture up to 60-second photos, meaning you capture more light and reduce noise in your images.
You’ll need a tilt head or an EQ wedge for this, which are sold separately—ZWO sells their TH10 fluid head, but I used an old star-tracker wedge I had lying around.
To put the S50 Pro into EQ mode in the app:
- Tap the Seestar picture on the main screen and select Device Management.
- Tap Mount Mode and select EQ mode.
- Set your wedge to your local latitude (52 degrees North for me) and point the scope toward the north star Polaris with the power button facing up.
- Tap Align. The Seestar moves up and takes a couple of pictures, then tells you how to move your EQ wedge to align your telescope.
Importantly, only use the adjustment knobs and clutches on your wedge to center both axes to near zero. Whatever you do, don’t move the tripod legs, or you’ll have to start all over!
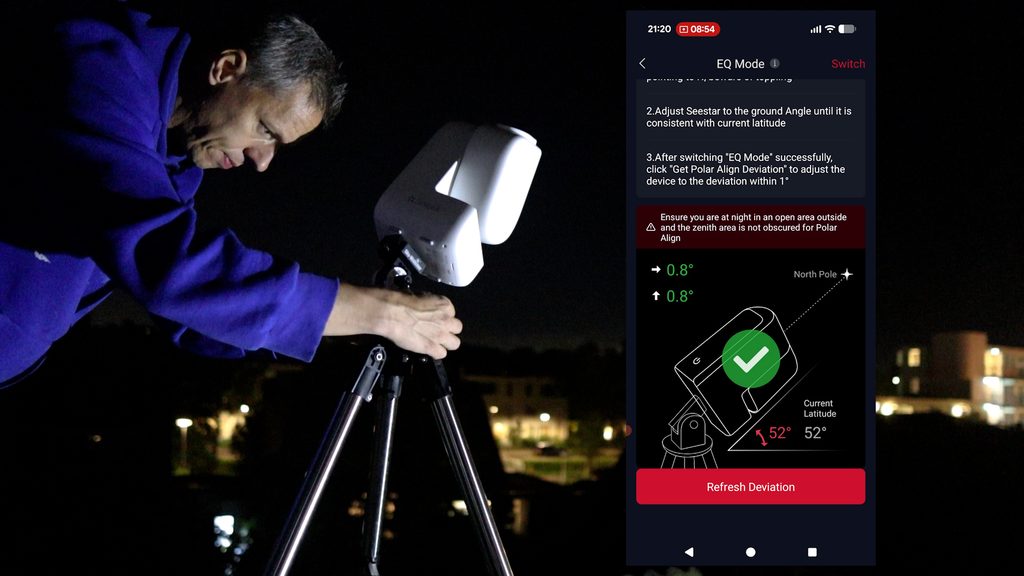
With the original S50, my tracking experiences were pretty mixed and I could never really push it beyond 30 seconds. So, feeling a bit paranoid, I refreshed the alignment a few times to force a new calculation, and I even exited Mount Mode altogether, closed and reopened the arm, and re-ran the entire align procedure from scratch. Was this overkill? Maybe—but it definitely paid off.
21:37: First Light with Messier 27
After EQ mode was done, I wanted to select my first object to photograph. Selecting a deep-sky object is simple: you can open the Sky Atlas at the bottom of the main screen to freely swipe and zoom around in a virtual sky. It overlays the S50 Pro’s native field of view (which has a 2.8° diagonal), so you can see exactly what you will photograph. Alternatively, if you tap Stargazing on the main screen, you get sub-menus with curated lists like Tonight’s Best, the Deep Sky, Solar System catalogues and more, or you can search an object directly by using the search bar.
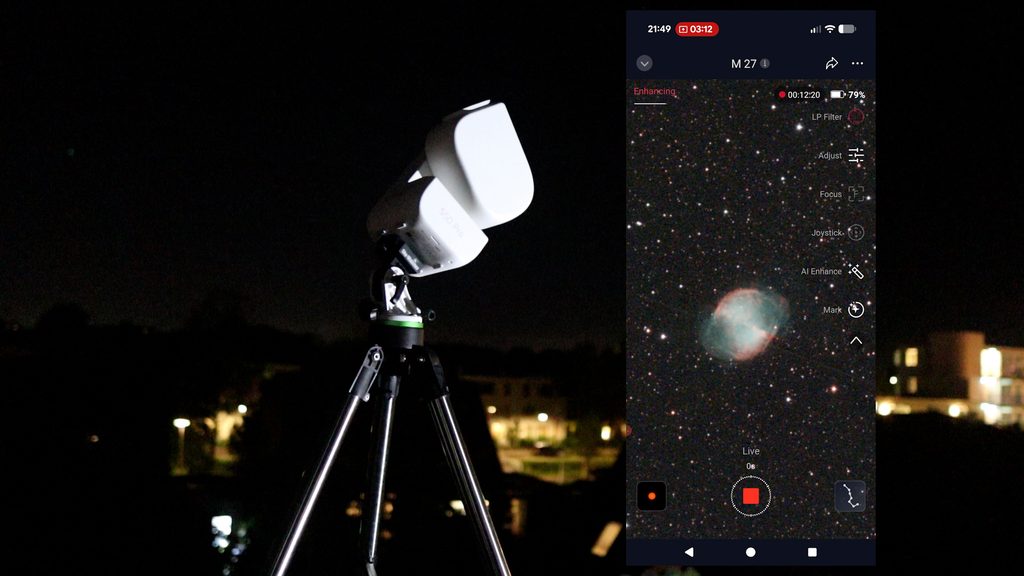
As my first deep-sky object, I selected Messier 27 from the Tonight’s Best list and tapped Go Gazing. The scope automatically slewed and found the object while the virtual astronomer in the app chimed in with some info. The cliff notes version: M27 is a famous planetary nebula that originated after a sun-like star exploded 10,000 years ago—right when humans invented agriculture, which eventually led to cities, civilization, and the invention of the Seestar S50 Pro!
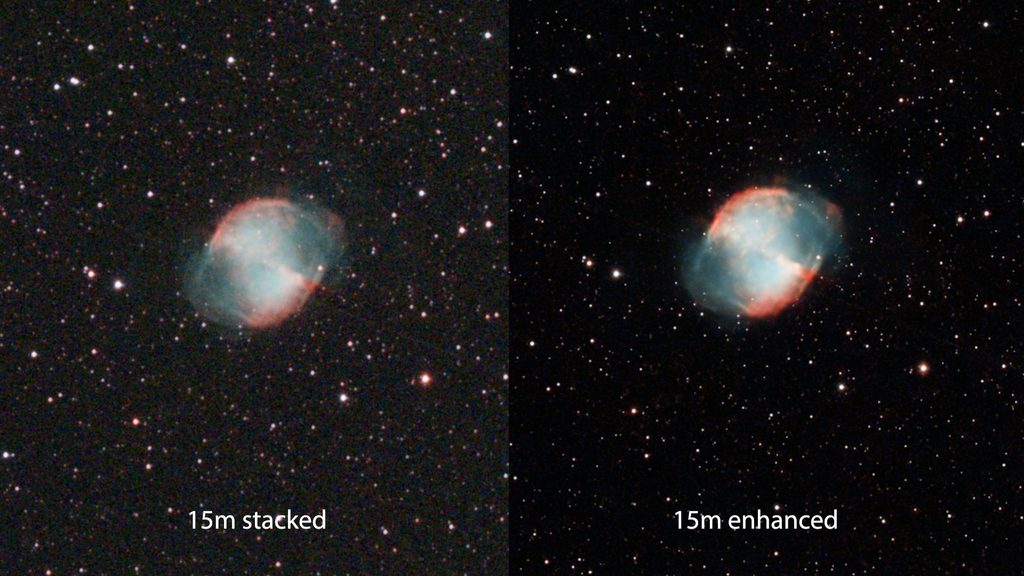
After a 1-minute autofocus and calibration, the telescope automatically started stacking 10-second photos. Stacking multiple photos increases the object’s signal while averaging out background noise. Look at what just 15 minutes of stacking gets you—M27 is a small deep-sky object, but it came out beautifully!
Now, pros—like myself—often use specialized desktop software like PixInsight along with expensive add-ons to edit these objects. Instead, let me show you what you can do to improve your stacked image right inside your Seestar app without ever leaving it.
If you tap AI Enhance, you can reframe your object, after which the app automatically applies background extraction, denoise, and star reduction for you. Don’t let the name freak you out—this isn’t generative AI making stuff up. It uses standard astrophotography algorithms to process your actual data. From there, I used the manual sliders for star reduction, brightness, contrast, saturation, and denoise to fine-tune it. While it doesn’t beat advanced desktop software, you can get a very decent image in just a couple of minutes.
21:56: Pushing EQ Limits on the Eastern Veil Nebula
After that first light picture, I decided to push the Seestar S50 Pro to its EQ limits. I selected the Eastern Veil Nebula, the scope slewed automatically, calibrated for a minute, and started stacking 10-second photos again. But this time, I tapped the three dots in the top right and switched it to 60-second exposures.
What happened next blew my mind. The S50 Pro produced round stars without dropping a single 60-second frame. The S50 Pro has significantly upgraded tracking capabilities compared to the original S50. It took 60-second images all night long and dropped less than 1% of its frames, which is amazing. This is a huge improvement because it means you can shoot all night long without wasting precious imaging time.
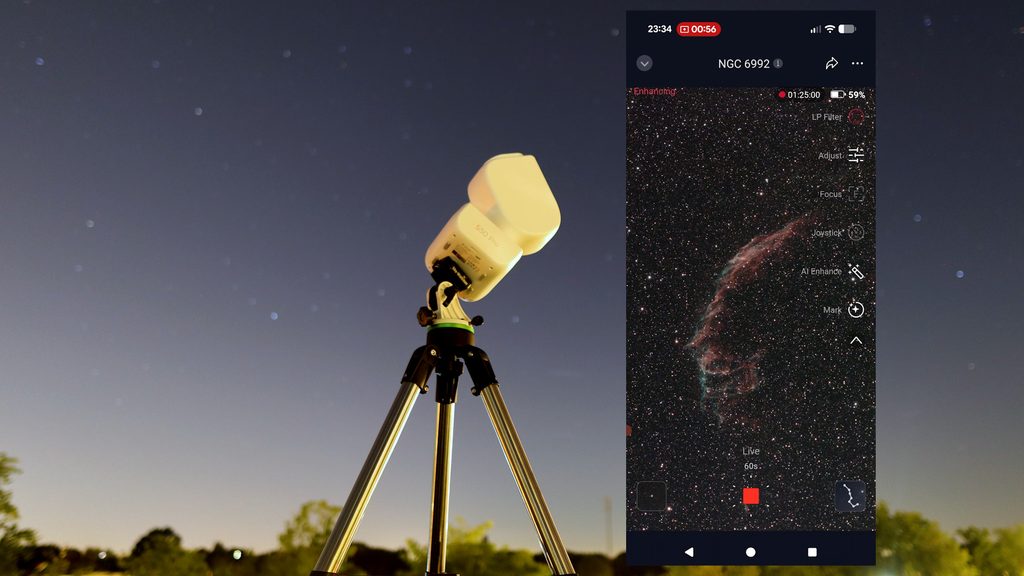
The Eastern Veil Nebula is what’s left of a supergiant star that exploded about 10,000 years ago. This supernova remnant appears much bigger than M27 in our night sky, but the S50 Pro’s 4K native field of view frames this object nicely with room to spare.
The app automatically selected the built-in light pollution filter, which is perfect for blocking city light pollution while boosting contrast on specific H-alpha and OIII emission gases. You can toggle the filter manually anytime in the app, alongside options like refocusing. After about an hour and a half, I stopped stacking and used the AI Enhance tool right on my rooftop to polish the stacked photo on my smartphone.
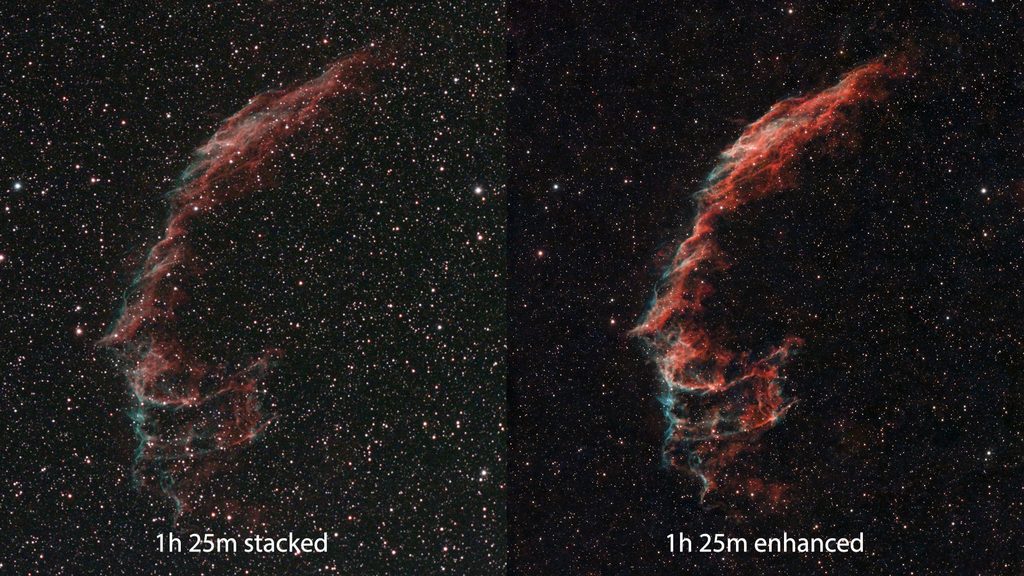
Again, no generative AI is used to make things up—it only optimizes your actual raw data. From there, I tweaked the image further with the adjustment sliders. While I miss having advanced controls like masking, histograms, and curve stretch tools, I’m genuinely impressed by the quality boost you get in just a couple of minutes.
23:50: Solar System Imaging (Moon & Saturn)
Close to midnight, the 70% lit Moon rose in the east, so it was time for some lunar imaging. I selected the Moon in Solar System mode, and the scope slewed right to it.
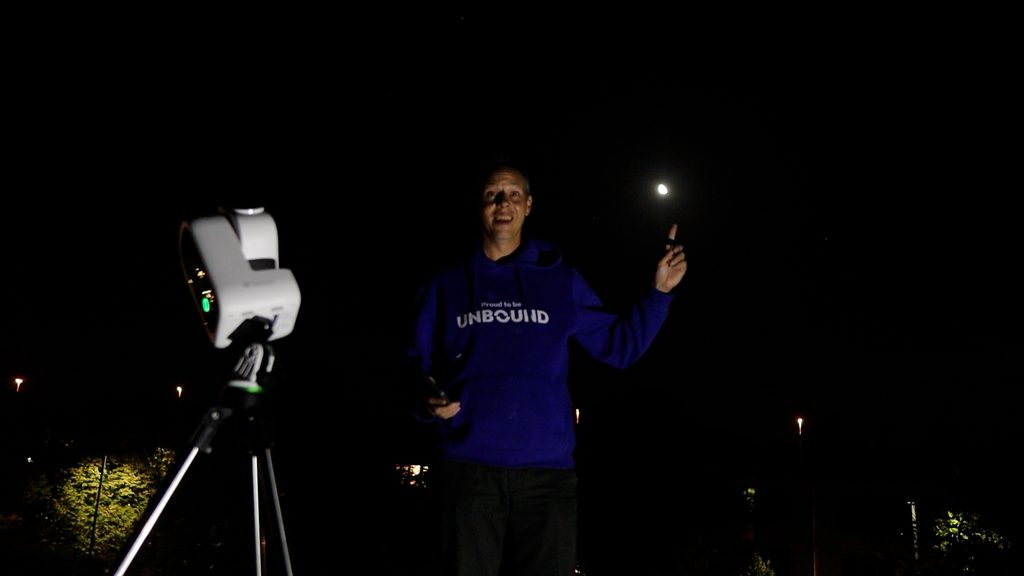
With the original S50, finding the Moon could be frustrating, but with the S50 Pro’s wider field of view and widefield lens, finding the Moon is effortless. Once it’s in view, just tap the Track icon on the top right, and it will track the Moon automatically. If you’re used to the original S50, you might notice the Moon appears smaller on screen due to the larger camera sensor on the Pro—simply zoom in to get the detailed close-up view you’re used to.
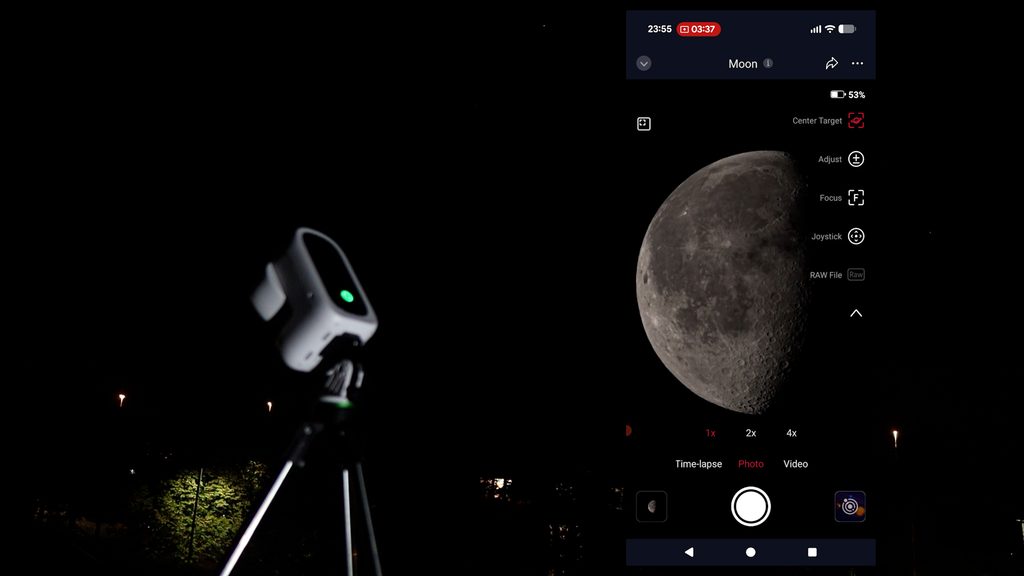
The app gives you three modes to capture the Moon: Timelapse, Photo, and Video. Here is the absolute best way to do it in just a couple of minutes:
- Switch to Video Mode and select RAW.
- Record a 30-second RAW video.
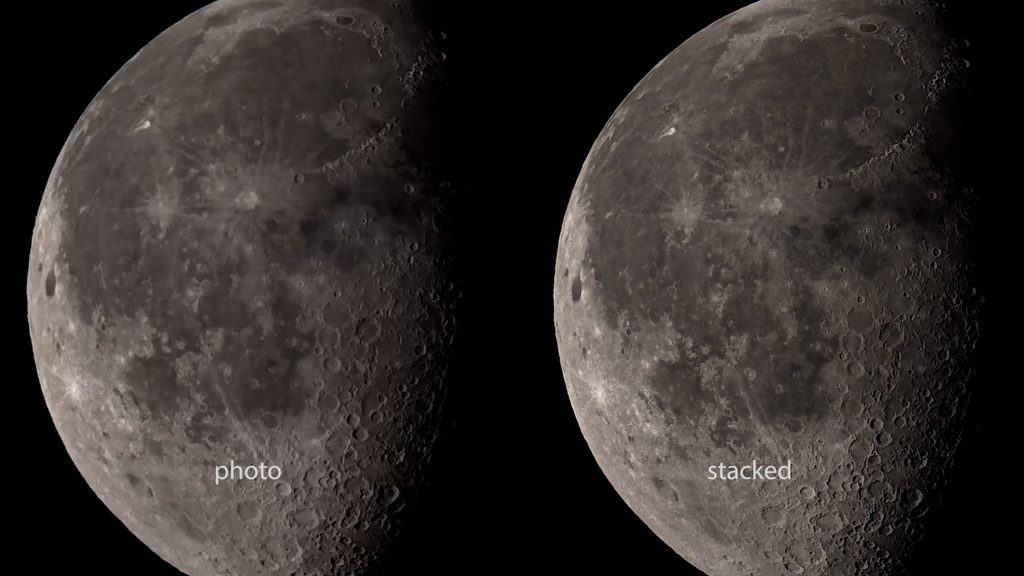
- Open that file in your Album (under your Seestar files on the main screen) and tap Stack.
- The app automatically stacks the individual frames in a couple of minutes.
After that’s done, you get sliders to adjust brightness, contrast, saturation, and sharpening. It offers a huge jump in detail for just a couple of minutes of work!
00:04: Saturn
Just after midnight, I decided to capture Saturn. I went to Solar System mode, selected Saturn, and the S50 Pro effortlessly slewed right to it. Saturn was at opposition, meaning it was at its closest point to Earth. Once the scope found it, I could see what looked like a tiny star off in the distance. After zooming in all the way, I could just make out the rings and a few of its orbiting moons.
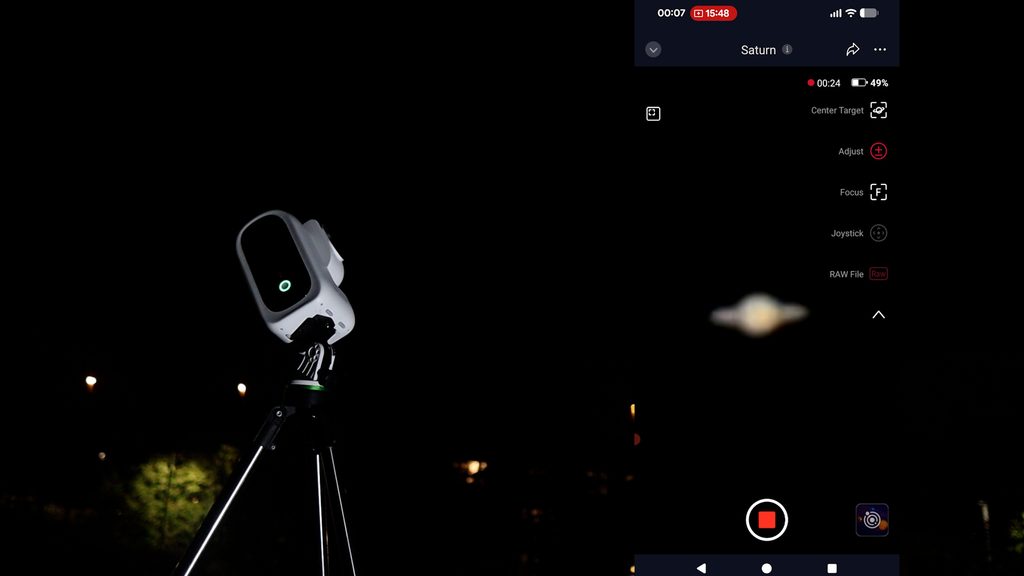
I tapped the exposure icon (+/-) to manually lower the brightness and gain settings, which revealed a bit more detail on the disk. I then recorded a 30-second RAW video again and stacked it directly from the video stored on the Seestar. Even after stacking, the planet remained very tiny and hazy. So if there’s one takeaway here, it’s that this is not the telescope you want for dedicated planetary imaging. You really need a big aperture and a long focal length telescope for that.
00:29: Widefield & Star Trails (Milky Way Mode)
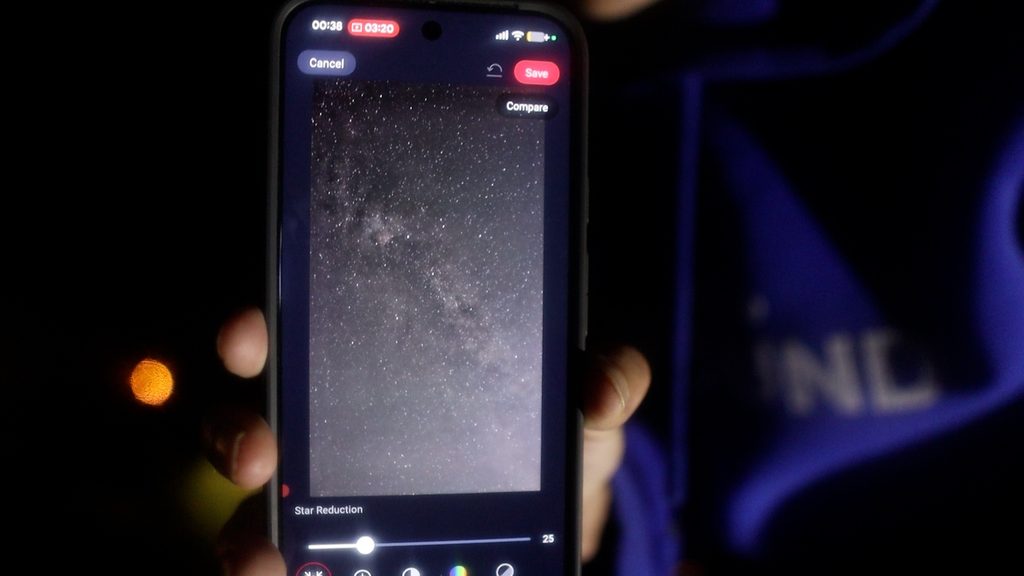
At half past twelve, I decided to test out the Milky Way mode in the app using the widefield lens. Shooting the Milky Way from a light-polluted city sky under a 70% lit Moon sounds a bit insane, but I pointed toward the setting Milky Way in the west (Cygnus / Swan constellation) and started stacking 10-second exposures.
To my surprise, after just 10 minutes, the faint structure of the Milky Way was clearly visible. Running the in-app enhance tool made the dust lanes stand out even more. Just remember that the widefield camera sensor shoots in portrait orientation. While it won’t replace a dedicated mirrorless camera setup, it’s far more than a gimmick—it’s a fantastic bonus feature to capture widefield nightscapes.
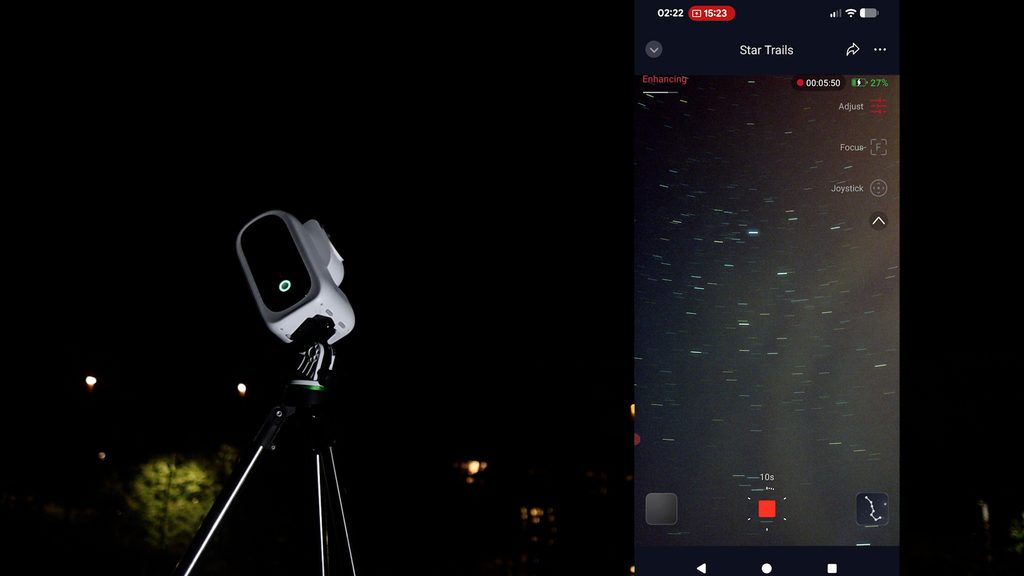
At 02:16, I also quikcly tested the Star Trail option in Milky Way mode. Smooth curved trails were already forming on screen after just 5 minutes, and it worked really well.
00:42: Andromeda Galaxy
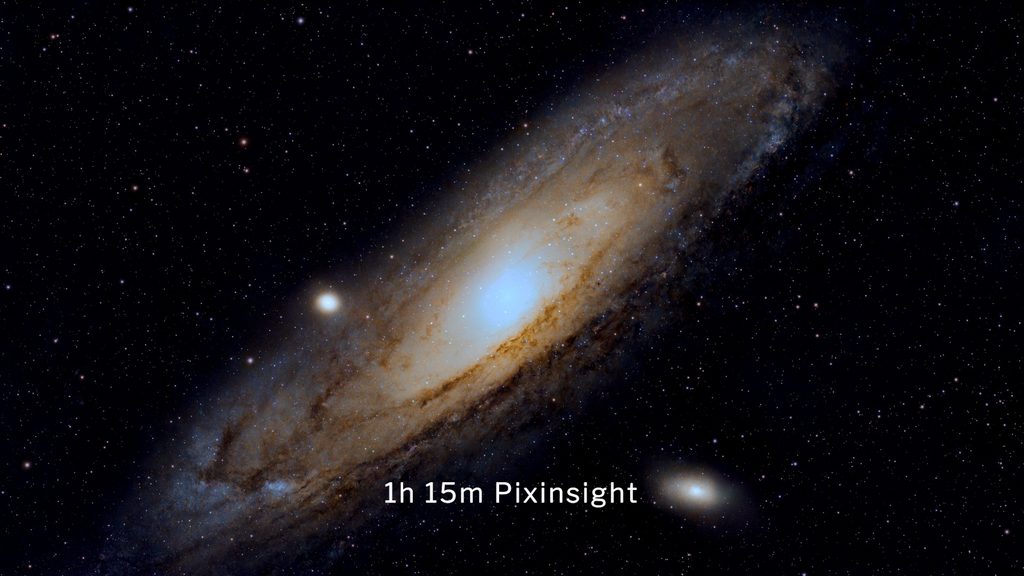
Next, I targeted the Andromeda Galaxy (M31), our closest grand spiral galaxy neighbor about 2.5 million light-years away. The Seestar automatically slewed to Andromeda and started stacking 60-second exposures. Keep in mind that once you set the app to 60 seconds, it stays at that exposure length until you manually change it back.
Pro Tip: If you plan on doing advanced processing, remember to tap the three dots in the top right and select Save each frame. Saving individual subs gives you the opportunity to throw out frames that are ruined by passing clouds, satellites, or airplane trails or those that are out of focus.
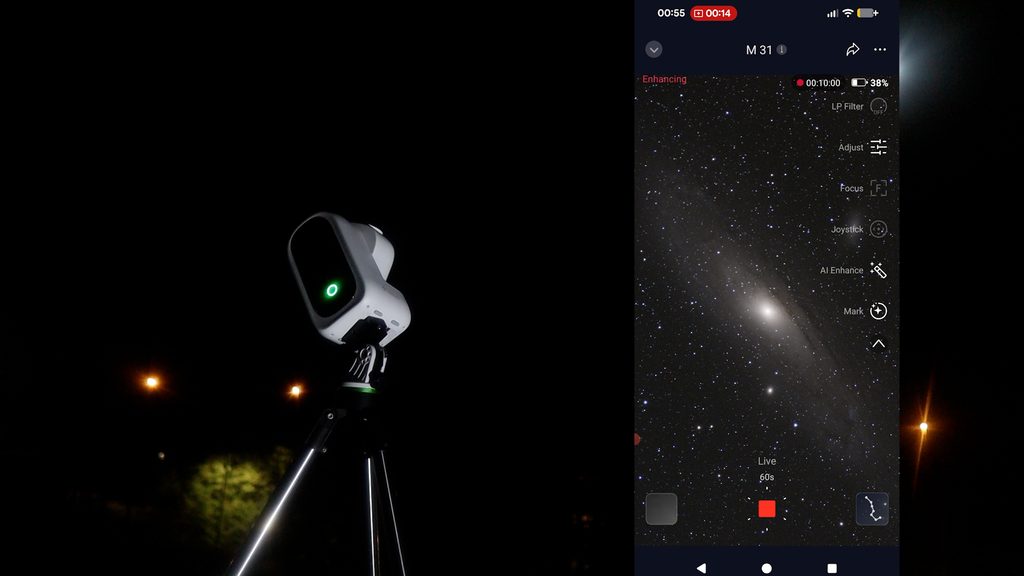
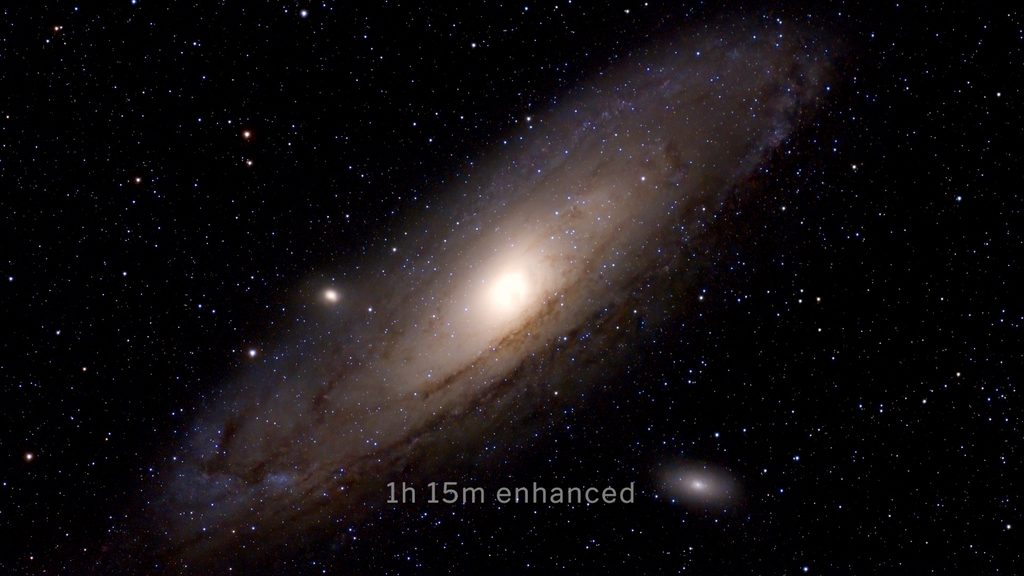
Andromeda was a real test because it is a broadband object. This means it emits light across the entire spectrum, so you cannot use the light pollution filter without cutting out actual galaxy data. With a 70% Moon washing out the sky and my regular camera fogging up, I expected a washed-out image. But after just an hour of stacking, I ran it through the in-app AI Enhance tool and was really happy with the result—all edited without using external software! Let me also show you a picture of my processed image in PixInsight, which is advanced astrophotography processing software.
02:25: Automated Sleep Imaging with Plan Mode
By 02:00 AM—after about seven hours of continuous use—I noticed the Seestar was down to 20% battery. I hooked up a power bank via USB-C to recharge the S50 Pro. The great thing is that you can keep imaging while it charges, so you never have to worry about running out of power mid-session.
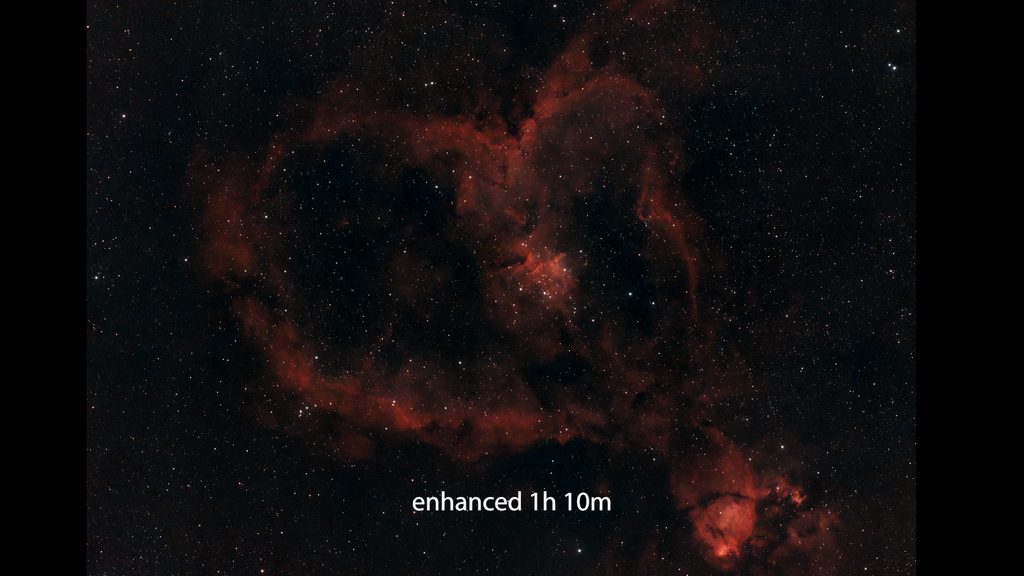
By 02:30 AM, I was getting exhausted, but I still wanted to capture IC 1805 (the Heart Nebula), a massive emission nebula. This is where the app’s Plan Mode comes in, letting you fully automate your entire imaging session while you sleep!
When I selected the Heart Nebula in the planning tool, I saw that even with the S50 Pro’s larger field of view, this huge nebula barely fit. So I tapped Framing Mode, which lets you capture almost twice the normal area by creating an integrated mosaic. I set the framing box to about 1.6 times the original view and set it to capture for 1 hour and 20 minutes.
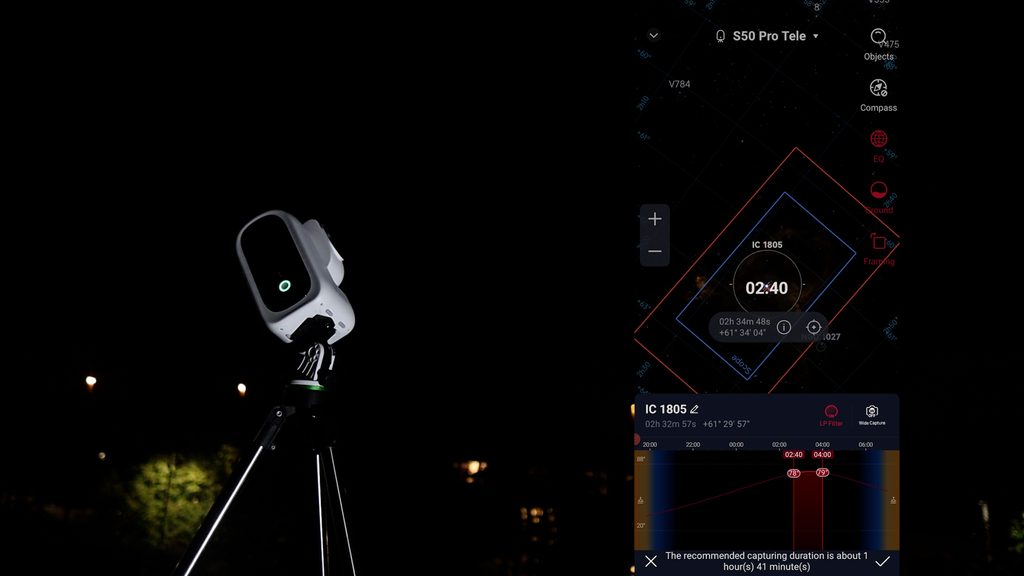
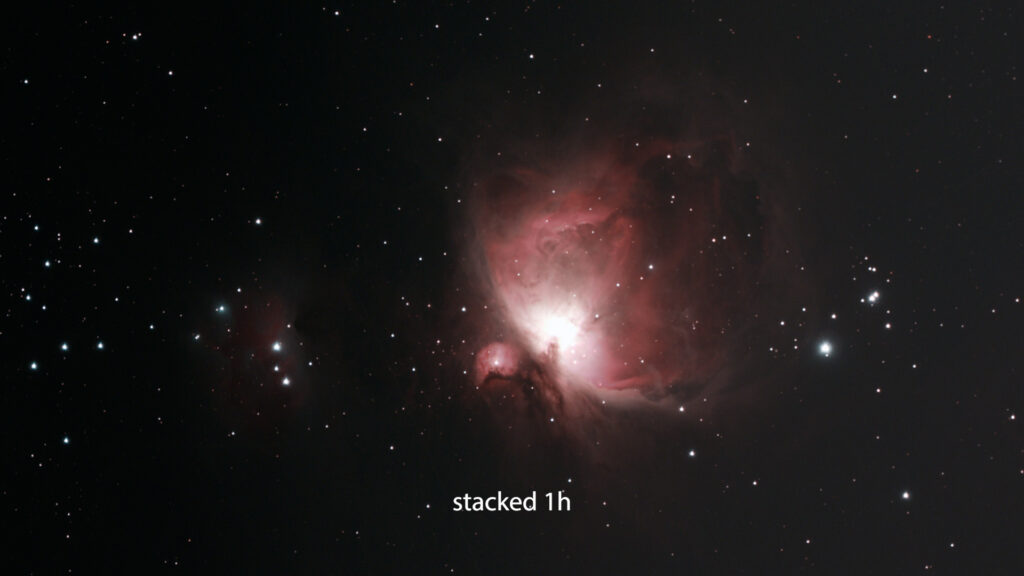
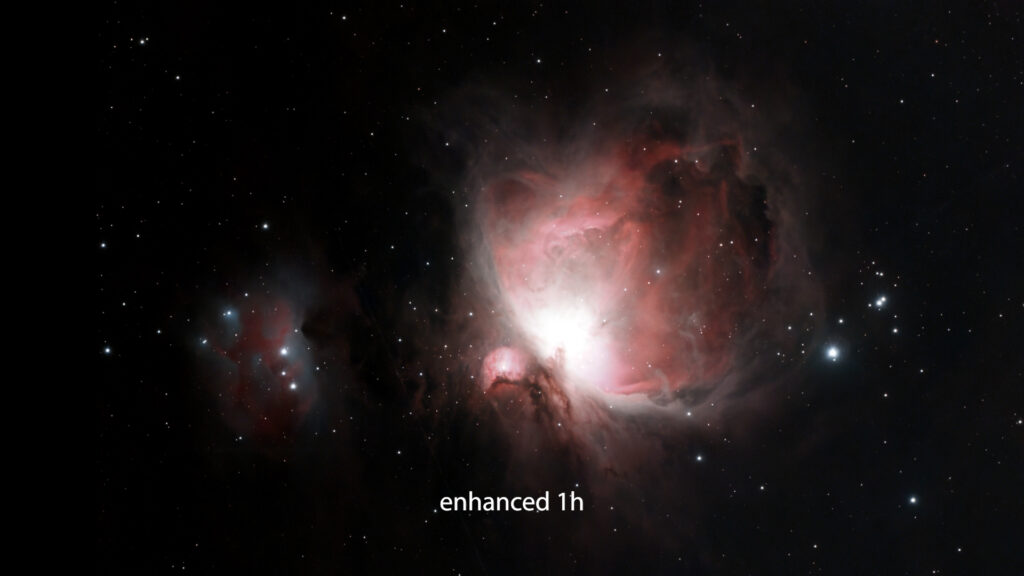
I also added the Orion Nebula to the plan as my next object as Orion rose in the early morning sky. I started the plan, monitored the first 12 minutes to watch the mosaic picture build on screen, and then went inside to sleep while the Seestar stayed on the rooftop capturing automatically.
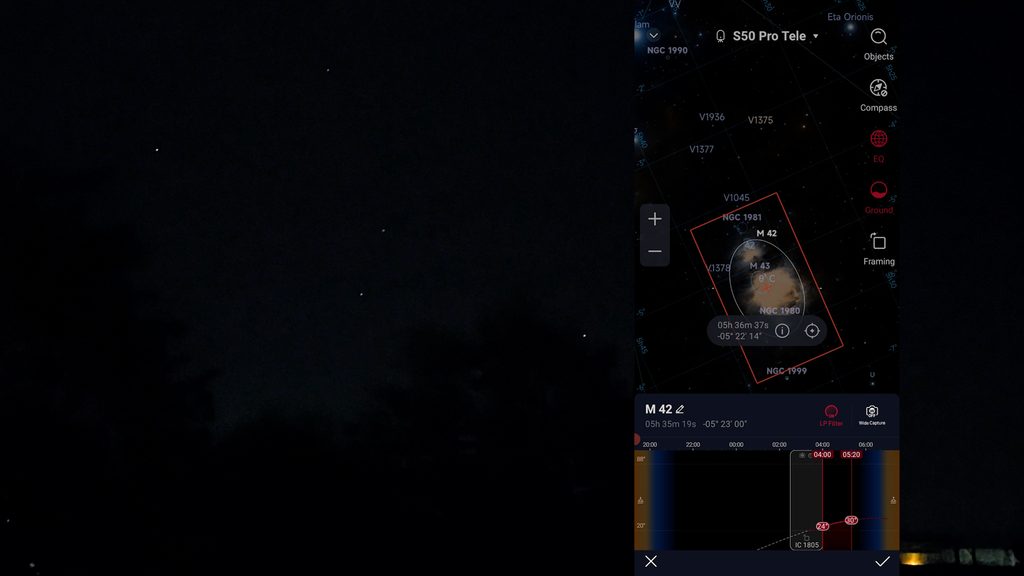
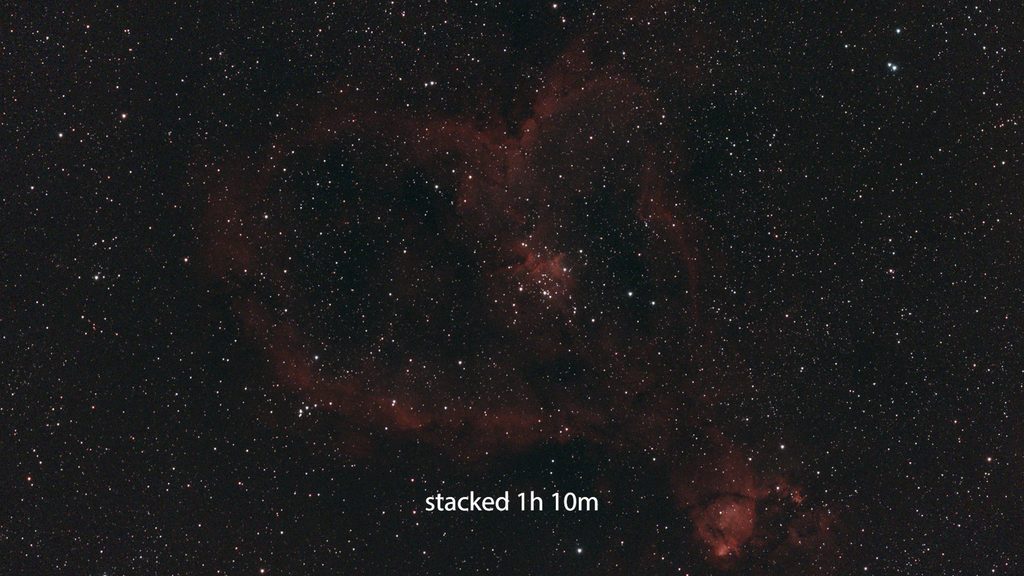
Around 05:00 AM, I woke up to check on progress and saw the S50 Pro still working hard through the night to capture the Orion Nebula before I fell back asleep. Here are both the stacked and in-app enhanced images.
08:36 – 12:55: Daytime Solar Observation
I woke up at 08:00 AM and saw the sun rise in the east. I took the S50 Pro from my rooftop, switched back to Alt-Az mode, and put it on a tripod to capture a sunrise timelapse. After that initial sunrise, I didn’t want to risk damaging the telescope so I quickly put on the solar filter.
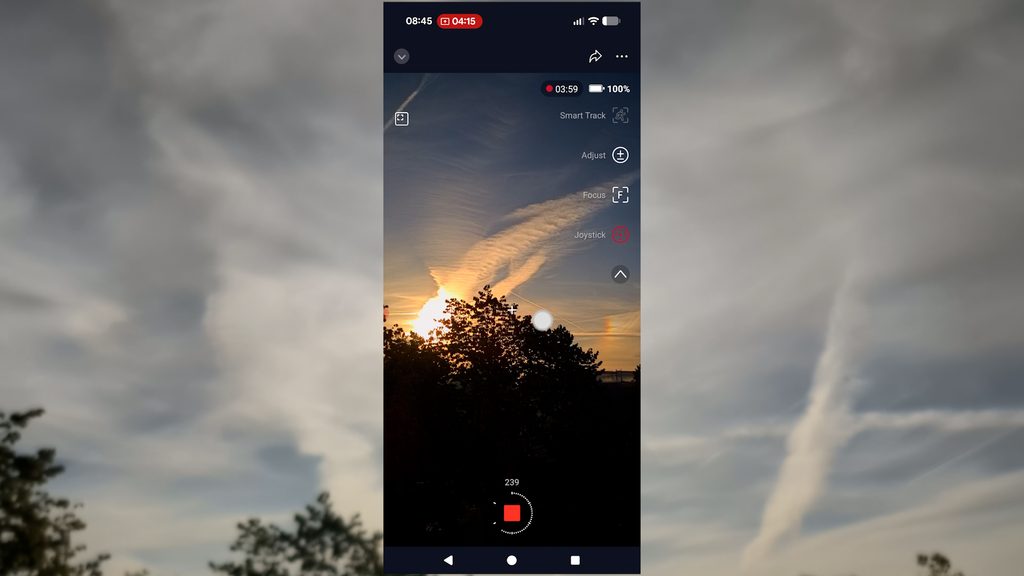
I had to wait until after midday because of clouds to image the Sun. I put on the included solar filter to capture the Sun, and I need to warn you: Never look directly into the Sun as you might go blind. We had a couple of cases again in Europe during the solar eclipse. Also, always use the solar filter to image the Sun, you don’t want to take any chances. ..After selecting the Sun in Solar System mode, the S50 Pro slewed right to it. Even as clouds passed in front of it, the active tracking kept the Sun perfectly centered in the frame.
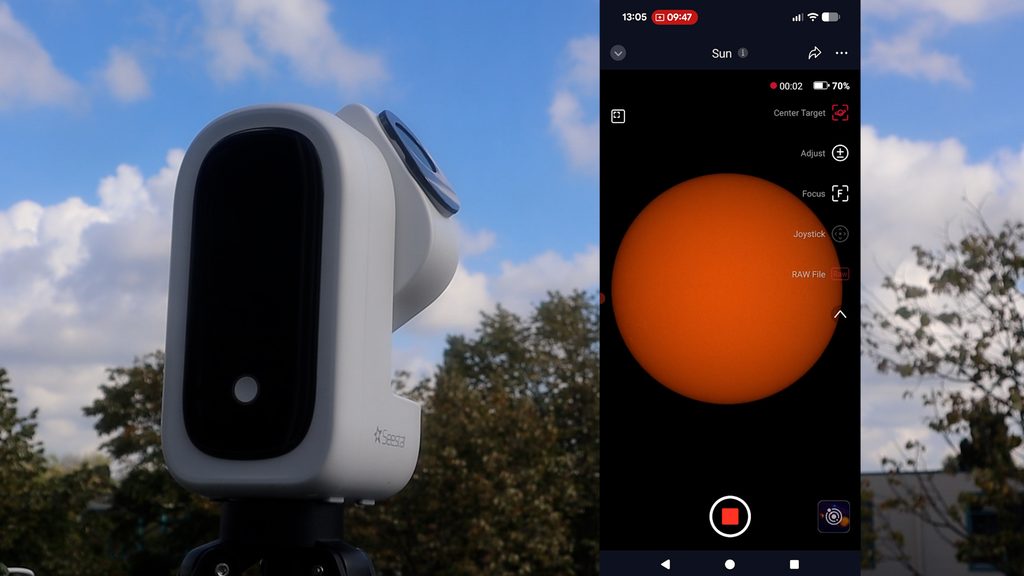
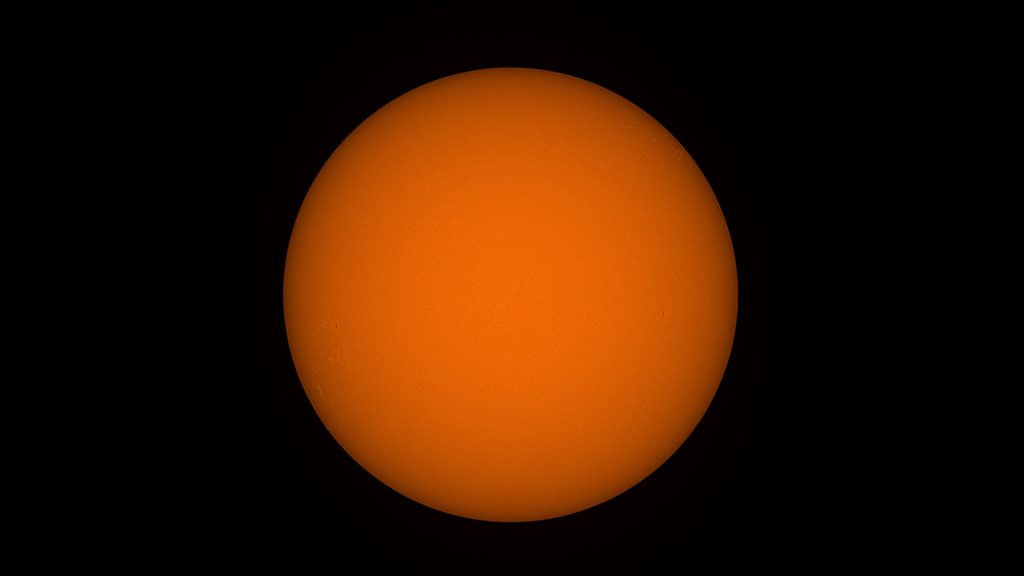
There were almost no significant sunspots that day, unfortunately. Just like with the Moon, I captured a 30-second RAW video of the Sun, stacked it in the Seestar app, and tweaked the picture using the in-app editing tool for a crisp, quick result.
Conclusion & Model Comparisons
My 24 hours are up, which leaves me with a couple of clear conclusions. Again, this is my independent review and honest opinion:
- Do I like the S50 Pro? Yes, I like it a lot. Compared to the old S50, the added widefield lens with Scenery and Milky Way options, the bigger camera sensor that captures larger deep-sky objects in the native field of view of the S50 Pro, and the improved tracking capability to capture 60-second exposures without dropping any significant number of frames are all big improvements.
- Does it beat my €5,000 custom telescope rigs? No, not yet. But let’s see what future updates bring!
- Do I recommend buying it? Absolutely, if you have the budget. At around $999 / €999, it’s an investment, but still a fraction of what a custom telescope setup costs.
How it Compares to Other Seestar Models:
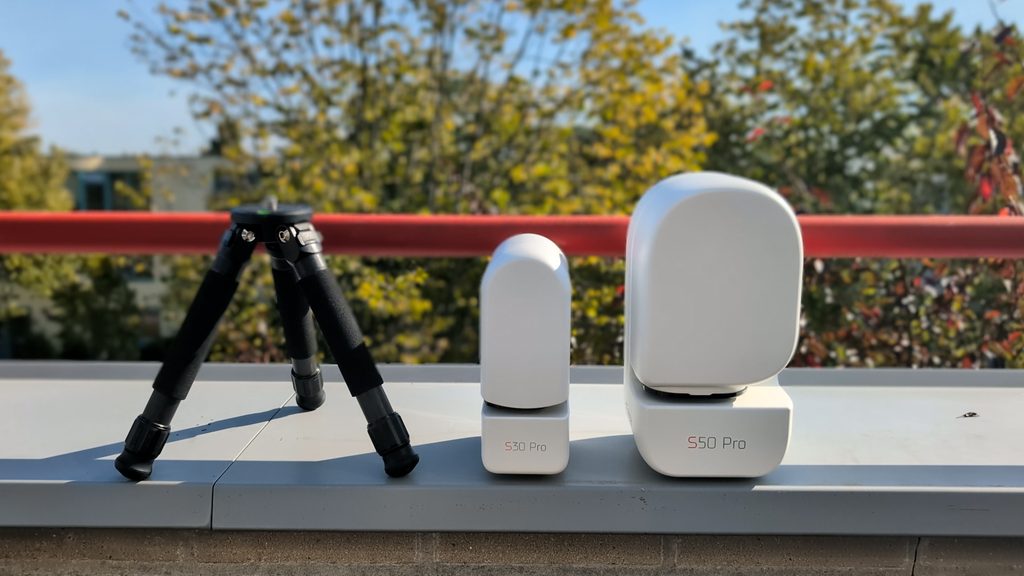
- Seestar S30 Pro ($699 / €699): Gives you the same smart features, but with a 30mm aperture and shorter focal length, it captures less light and less detail compared to the S50 Pro. Its main advantage is a much wider native field of view, allowing you to capture huge target pairs (like the Orion & Horsehead Nebulae, or the Heart & Soul Nebulae) in a single image. It is also lighter and smaller.
- Seestar S30 ($399 / €399): Shares almost the same native field of view as the S50 Pro, but with a smaller 30mm aperture, shorter focal length, and smaller camera sensor, you end up with much less image detail and sharpness.
Let me know in the comments if you plan on picking one up, if you already did, or if you have any additional questions.
Thanks for reading, and clear skies!
Wido.