Is bigger always better in astrophotography? I spent the last months testing the Seestar S30 Pro and S50 Pro Smart Telescopes on my urban (bortle 7) rooftop and in this blog, I’ll discuss price, features, and show you real photos from deep sky and solar system objects, so you can decide which one is best for you. Let’s get started.
Why a smart telescope?
The main advantage of starting your astrophotography journey with a smart telescope like the Seestar S30 Pro or S50 Pro is that it makes stargazing ridiculously easy. Instead of dealing with heavy gear, complicated wires, and hours of setup time, everything is built into one compact system that you control right from your phone or tablet. You just set it down, power it on, pick an object in the app, and the telescope finds it and starts building a live photo on your screen in minutes. Add to that the option to capture the Milky Way, star trails, and timelapses with a secondary wide-angle lens, and you can see why these smart telescopes have become so popular.
What’s in the Box?
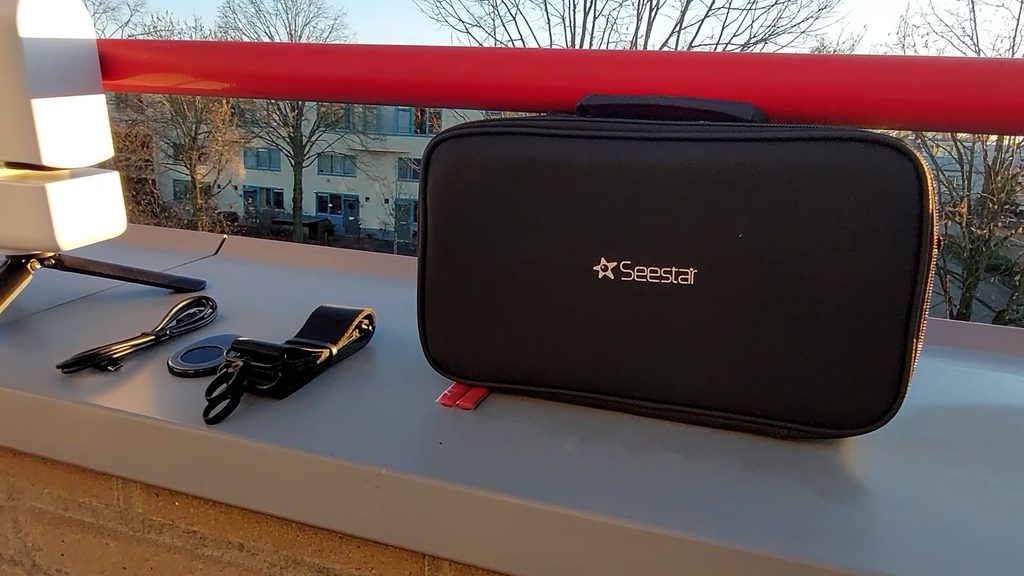
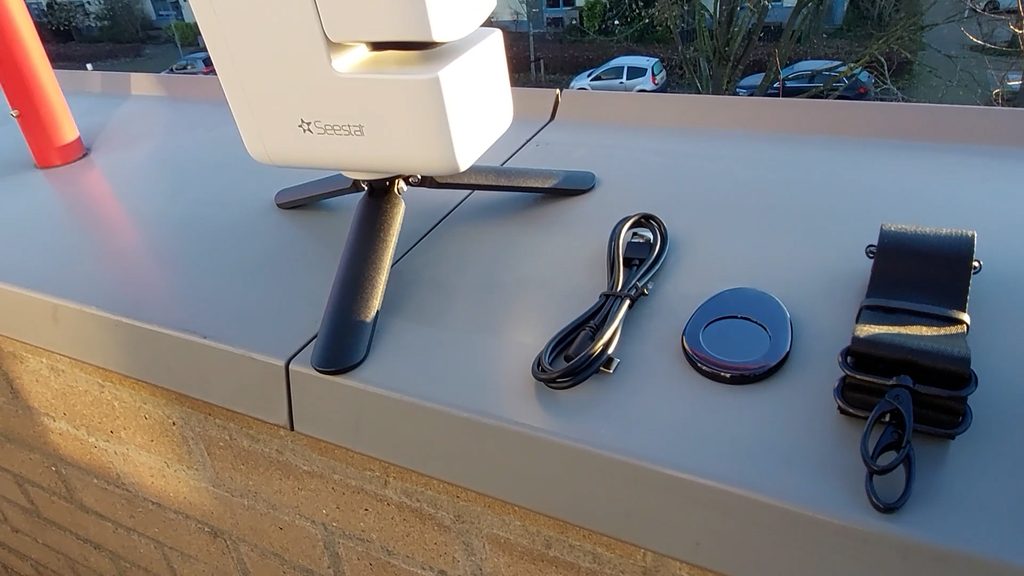
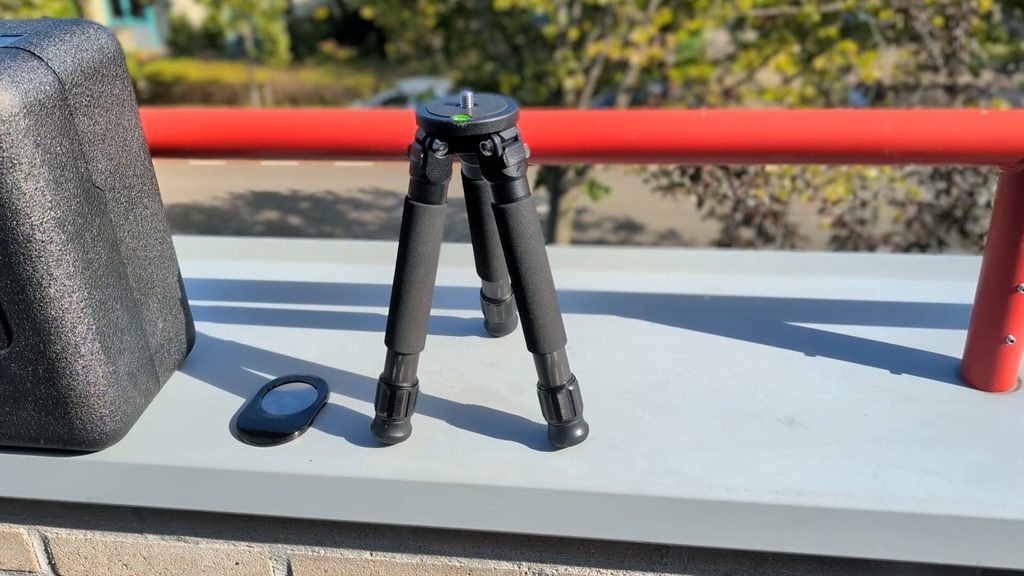
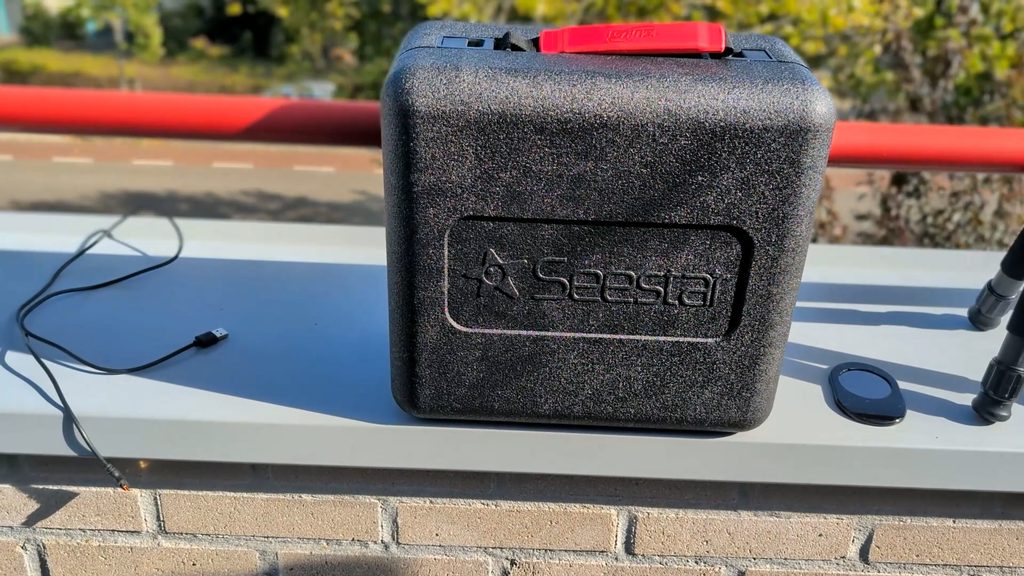
Both Seestar telescopes come ready to use out of the box with an ultra-light tripod, a solar filter, and a USB-C cable. For travel, the larger S50 Pro includes a hard-foam storage case, while the S30 Pro comes with a padded soft carrying bag with a shoulder strap. The tripod on the Seestar S50 pro is sturdier, and the tripod can be extended.
Price &Technical comparison
Let’s start with the pros of the S30 Pro—pun intended. The biggest advantage of the S30 pro right out of the gate is price: $699 compared to the S50 Pro’s $999. A a quick side note, prices often drop during November and December sales, so if you’re looking for a discount, check out my price watch for the S50 Pro and the S30 Pro with links to reliable telescope shops across the US and Europe.
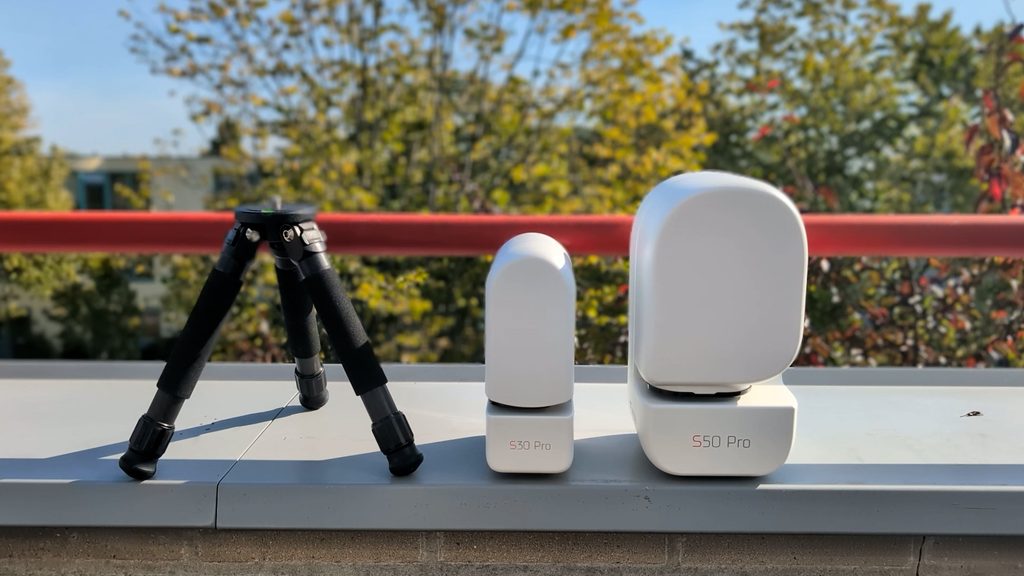
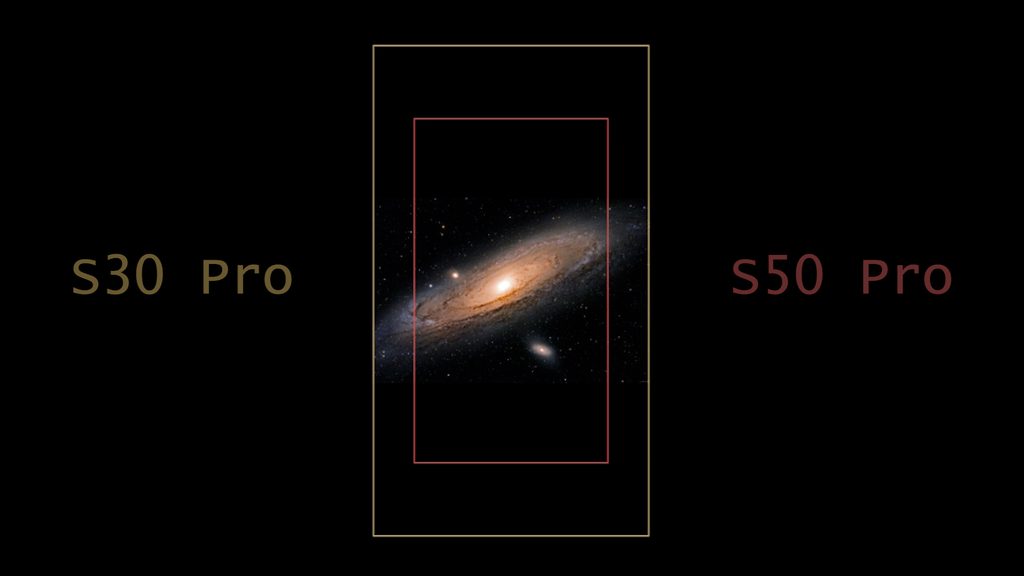
The S30 Pro is also significantly more portable. At just 1.65 kilograms compared to the 2.8 kg’s on the S50 Pro, it’s about 40 percent lighter and more compact making it the best choise to pack up and travel with. Because of its shorter 160-millimeter focal length, the S30 Pro gives you a native field of view of 2.24 by 3.99 degrees, capturing about 2.6 times more total sky area than the S50 Pro. That makes the S30 Pro great for framing large nebulae in its native field of view without having to create mosaics which take up more time to capture. Check out my interactive comparison tool to compare the field of view of these and other smart telescopes here.
The main advantages of the S50 Pro relate to its better optical power and finer image scale. The S50 Pro’s larger 50-millimeter aperture collects 2.8 times more total light than the S30 Pro’s 30-millimeter lens. The S50 Pro should also produce more detailed images with its longer focal length of 260 millimeters versus 160 millimeters. That translates to a finer image scale of 2.3 arcseconds per pixel compared to the S30 Pro’s 3.74 arcseconds per pixel.
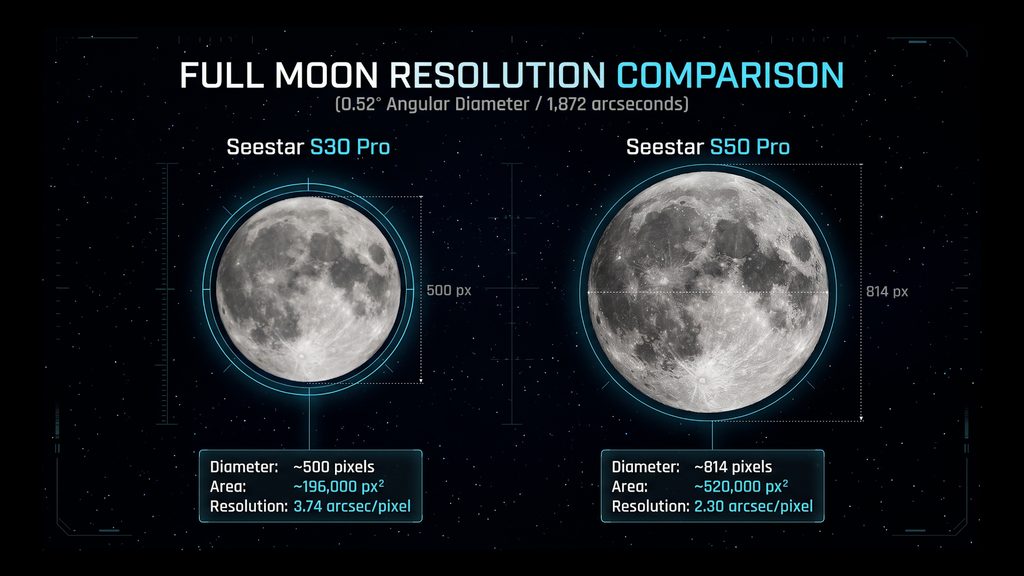
To put that into perspective, the full Moon is about half a degree in the night sky and spans about 500 pixels across on the S30 Pro, but jumps to over 800 pixels on the S50 Pro. If we calculate the total surface area of the Moon, it adds up to roughly 190,000 pixels on the S30 pro compared to over 500,000 pixels on the S50 Pro which is over two-and-a-half times as much.
For all-night imaging, the S50 Pro offers a longer battery life of up to 9 hours on a single charge compared to 6 hours on the S30 Pro. Cold weather will shorten those runtimes, but you can easily plug in an external USB-C power bank to keep either telescope running all night long.
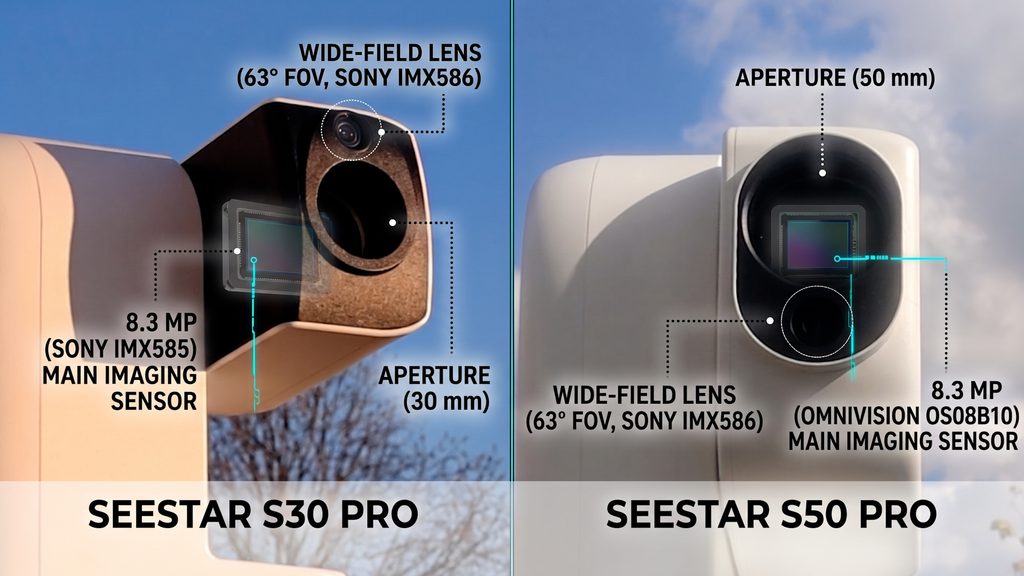
Both telescopes feature a 4-element ED Apochromatic quadruplet lens design for sharp, color-corrected images, and both run a dual-camera system. On the main telescope side, each use an 8.3-megapixel 4K sensor—the S30 Pro features a Sony IMX585 and the S50 Pro features an OmniVision sensor. Both telescopes have a secondary 63-degree wide-angle camera for shooting widefield images of the milky-way and star trials. Both telescopes have a uv/ir cut filter for daytime and regular nighttime imaging, a dualband filter for capturing Ha and Oiii emission lines in emission nebulae while blocking out potential light pollution, and a dark filter to calibrate your photos to clean up background noise. Both telescopes are controlled by the same Seestar app with the same options.For a full side-by-side comparison of tech features across various smart telescopes, check out my smart telescope comparison tool.
Setup & First-Time Connection
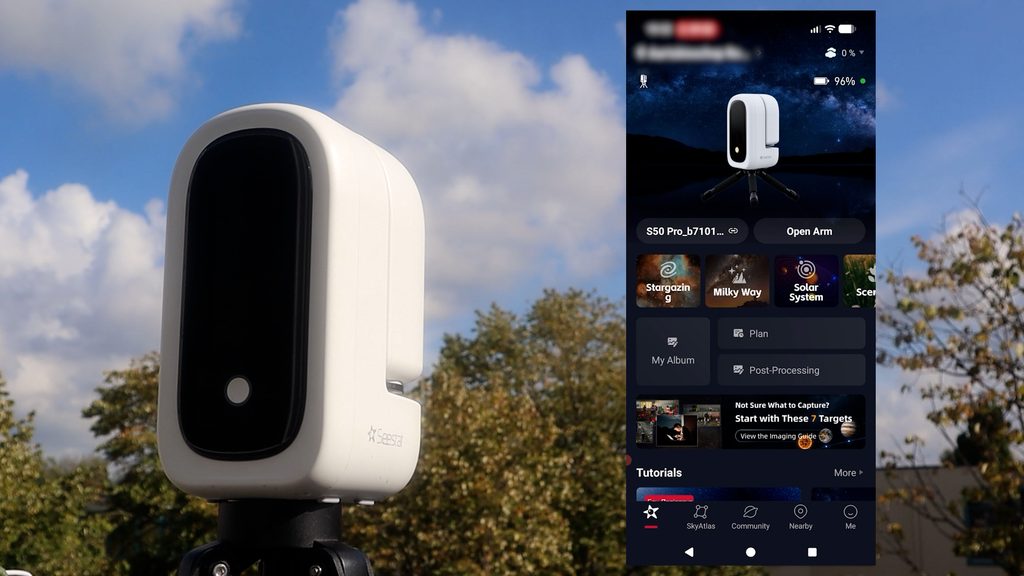
All Seestar smart telescopes are controlled entirely through the Seestar app. Connecting is super simple: open the app, hit Connect, and join its Wi-Fi using the default password 12345678. If it’s your first time, you’ll just need to push the button on the bottom of the scope to pair it with your smart device, run whatever firmware update pops up, and reconnect after the telescope reboots. Pro Tip: If you want to control your Seestar right from your couch, tap the Seestar photo on the main screen and turn on Station Mode to connect it straight to your home Wi-Fi. I actually keep one of my routers close to the telescope, and this works great!
Deep Sky Mode
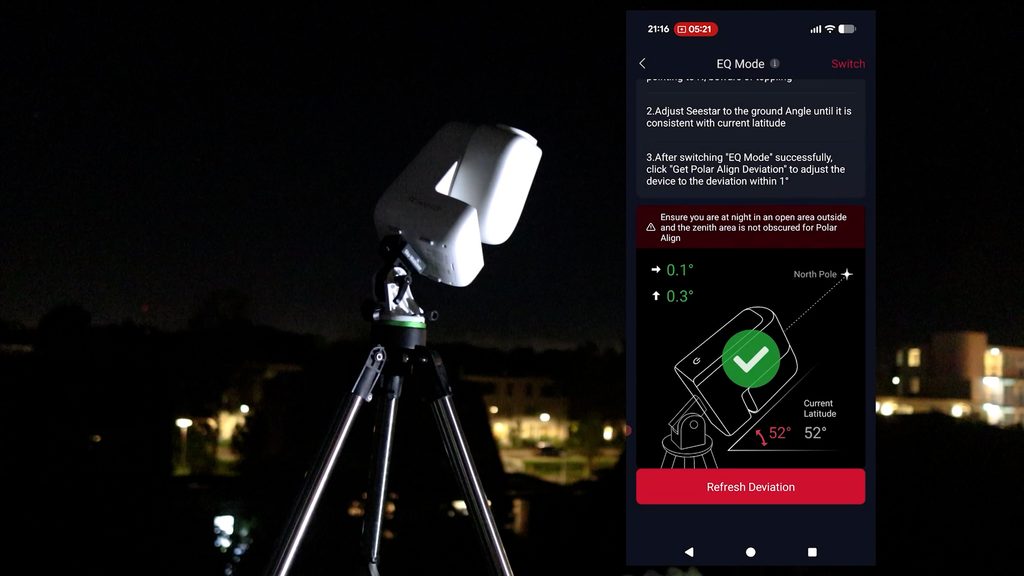
Alright, before showing you the images from the S30 Pro and S50 Pro, you should know that I used both telescopes in EQ mode using an extra equatorial wedge on my larger tripod.Out of the box, Seestars operate in default Alt-Az mode on the standard tripod, which limits exposure times to 10 seconds. Switching to EQ mode lets you take up to 60-second exposures, capturing more light and reducing noise for a better photo of faint deep-sky objects. To use EQ mode, you’ll need an extra equatorial wedge or tilt adapter, which is fairly easy to set up. You also need to switch the mount setting in the Seestar APP from Alt-Az to EQ mode, and perform a so-called polar align procedure in the APP. It takes a bit of extra setup time, but in my opinion it’s well worth it.
I developed a course with short, hands-on videos on how to use the Seestar app to capture, image, and edit your photos and videos. the videos are simple and include many tips like how to create mosaic images of large deep-sky objects, how to use the planning tool to fully automatice your imaging sessions, how to use the seestar app to edit your images, and much more. It’s available for my YouTube channel members for just €2.99 a month. It might save you some time, and you’ll help me keep this channel going by becoming a member. I’m eternally grateful for your support!
Finding Objects
So finding objects is very easy to do. The app offers a virtual sky atlas you can use to see what objects are currently in your local night sky with a rectangle that shows you exactly how much of the night sky the telescope can image in a single frame. The app also offers plenty of menus like stargazing which shows you all kinds of objects like tonight’s best, and lists of galaxies, nebulae and solar system objects like the moon and the planets. Just tap on any of the objects you want to gaze at, click go gazing, and the seestar telescopes will automatically find those objects in the night sky. After a couple of seconds of calibration, the app will start shooting the night sky.
RAW stacked images comparison
Alright, so I’ve used both telescopes in EQ mode taking 60-second exposures to capture some of the most iconic deep-sky objects in the night sky. For newcomers, each 60-second photo is automatically stacked onto the previous one, and each photo increases your so called signal-to-noise ratio. This means the deep-sky object you’re photographing gets clearer and more detailed with every additional frame, while the noise in your image decreases.
I kept a total exposure time of about 1 to 1.5 hours per image, and i took all my images from my urban rooftop using both telescopes so we can compare the images. Keep in mind, if you’re shooting from rural, darker skies, or when you are going to capture longer total exposure times on an object, you’ll get even better results than what I’m about to show you.
For comparison, I’m going to show you unedited, stacked photos side by side, meaning i did not edit any of these images – they are just the automatically produced images by the telescope so we can make an honest comparison.
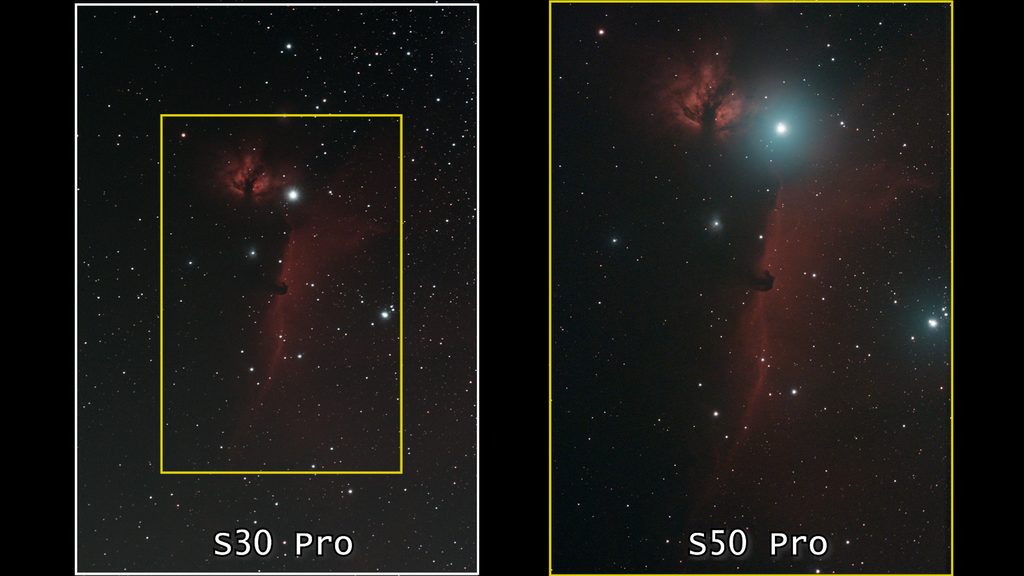
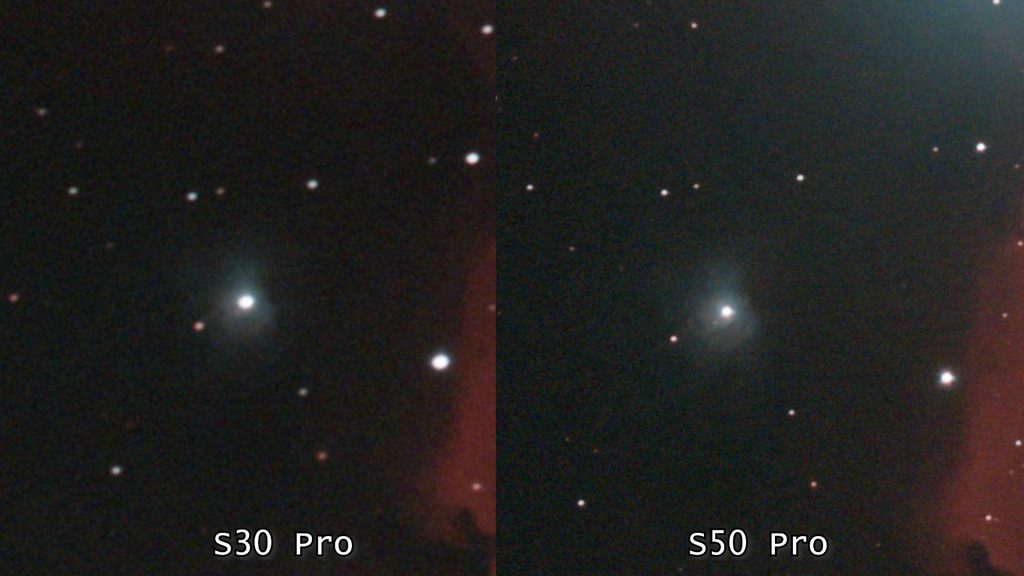
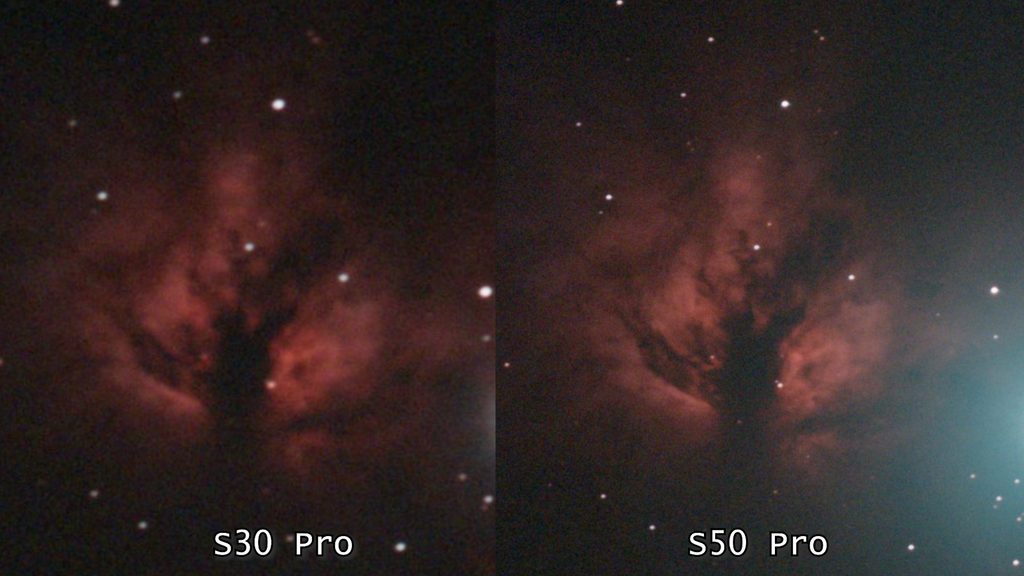
Let me first show the unedited automatically stacked images of IC 434 for both telescopes, which is the Horsehead Nebula. The stacked images also include other objects like the Flame Nebula and the bright star Alnitak. I used the dual-band light-pollution filters on both telescopes to capture the emission nebulae in high contrast and block out the urban light pollution.
The first thing to notice is the wider field of view on the S30 Pro, which captures over 2x more of the night sky in a single frame than the S50 Pro. When we zoom in on the Horsehead, we can see that the S50 Pro shows sharper stars and a less grainy image of the nebula. Likewise, the small reflection nebula below the horsehead called NGC 2023 is brighter and more detailed in the S50 Pro stacked image, and the same is true for the larger Flame Nebula.
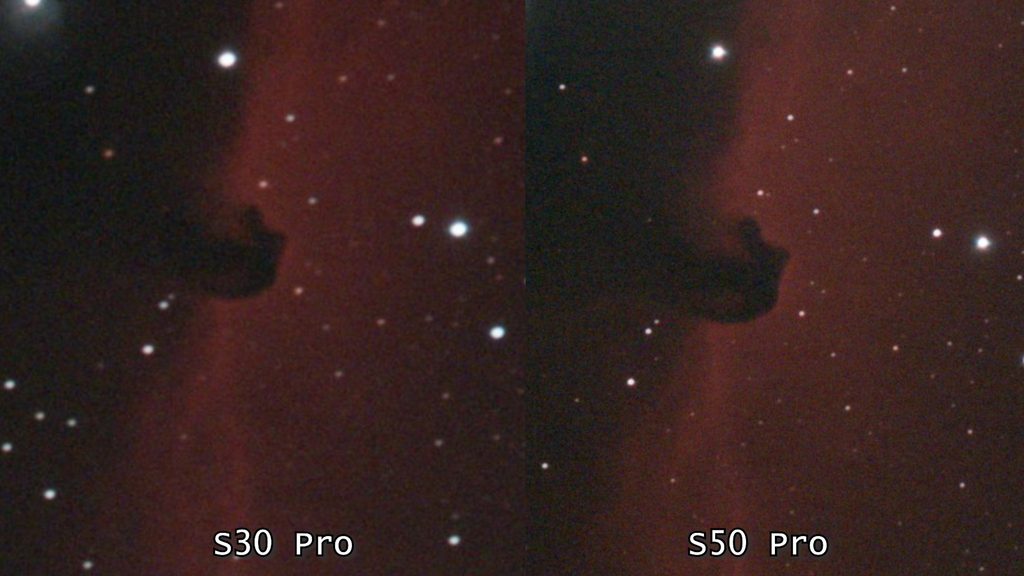
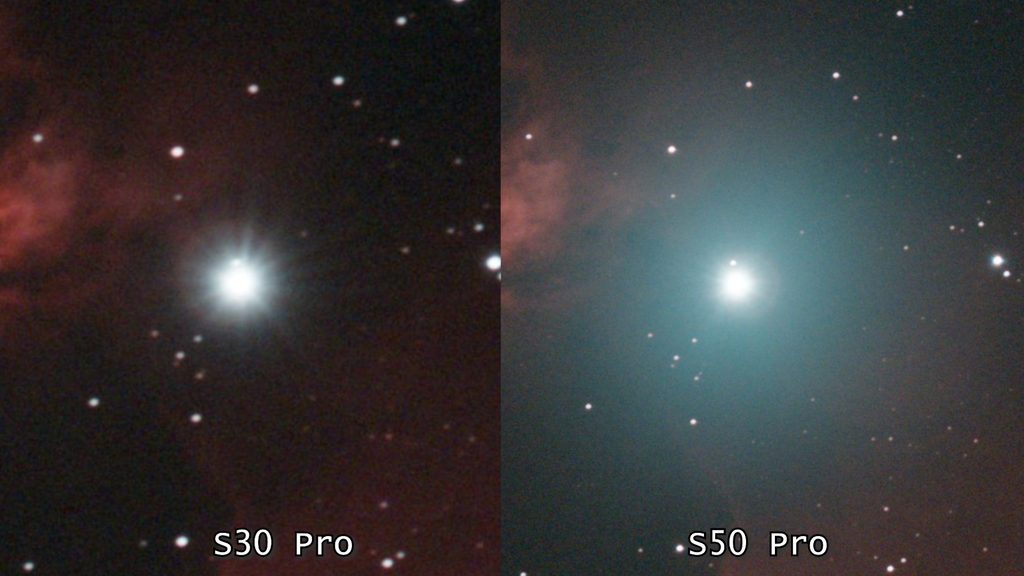
When looking at the bright star Alnitak – one of the three bright stars in Orion’s belt – it is better contained in the S30 Pro stacked image while it shows a blue-ish halo in the S50 Pro stacked image. This is a classic filter halo. Alnitak is a super-hot blue star, so its intense OIII light reflects inside the dual-band filter coatings, creating that distinctive blue disk on the S50 Pro, with its bigger aperture that collects more light.
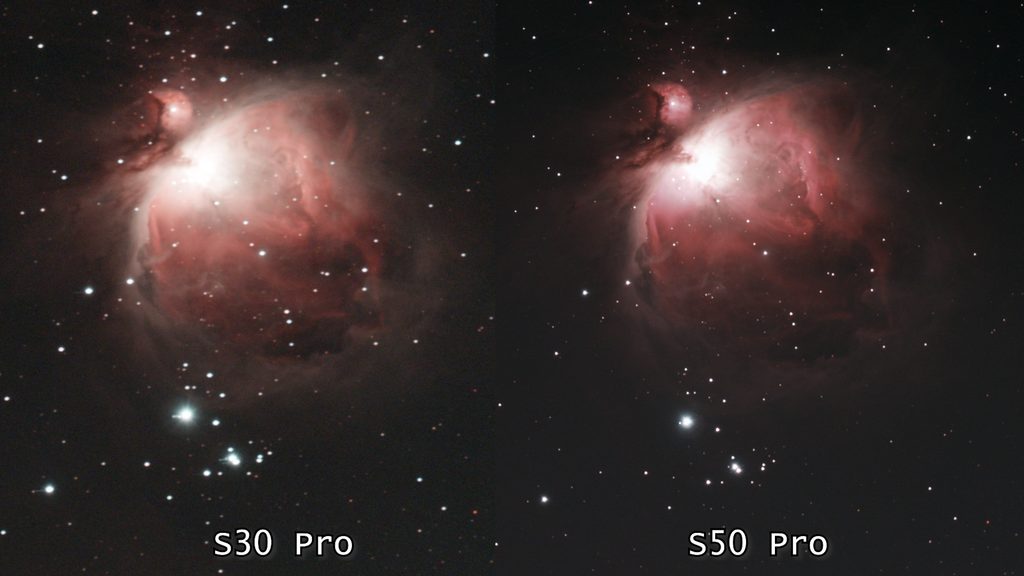
Let’s move on to the Orion Nebula. Let me emphasize again that these are the unprocessed, automatically stacked images using the dual band light pollution filter on both telescopes. With the S30 Pro, we can see again that it captures a more than two times wider field of view compared to the S50 Pro. Interestingly, since M42 is quite a bright object, it appears very clearly in both pictures after just 1 hour of stacking, and we also start to see the running man nebula above the orion nebula. This is a reflection nebula but it is picked up by the broader dual band light pollution filters on both scopes, which is nice.
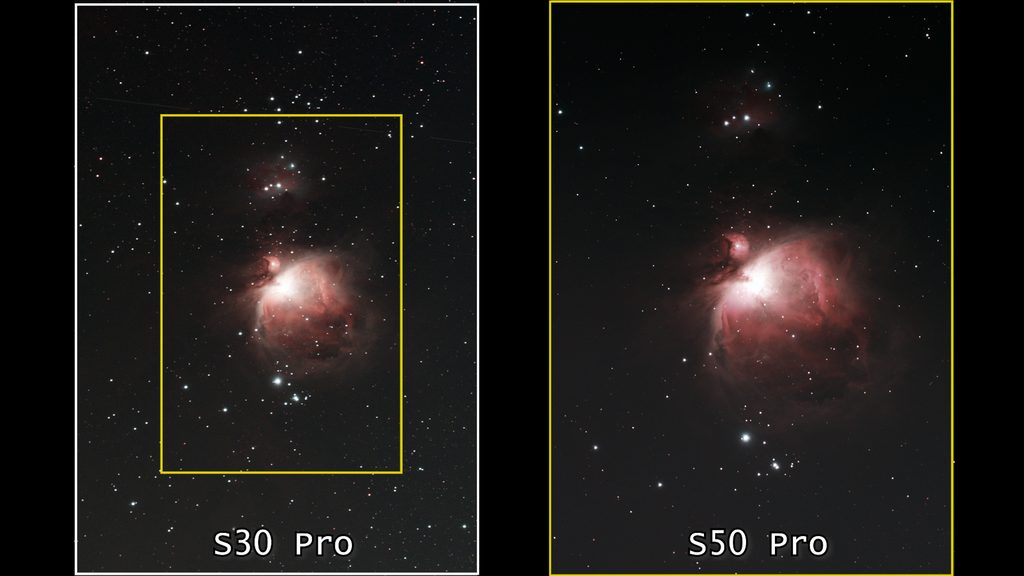
The most noticeable difference when zooming in is the tracking accuracy. With the S50 Pro, I got rounder stars and a more detailed structure of the Orion Nebula in the automatically stacked image, whereas on the S30 Pro, the stars are somewhat egg-shaped, and the nebula was blurrier. So the Orion Nebula sits quite low in the night sky from my location in the Netherlands, and I have noticed across multiple imaging nights that tracking, especially at lower altitudes, is typically less accurate on the S30 Pro compared to the S50 Pro. I only own two units, but I’ve seen other folks reporting similar findings, with the S50 Pro showing superior tracking capabilities over the S30 Pro. This being said, the Sony IMX585 sensor on the S30 Pro did a better job at picking up the darker nebula structure than the Omnivision sensor on the S50 Pro.
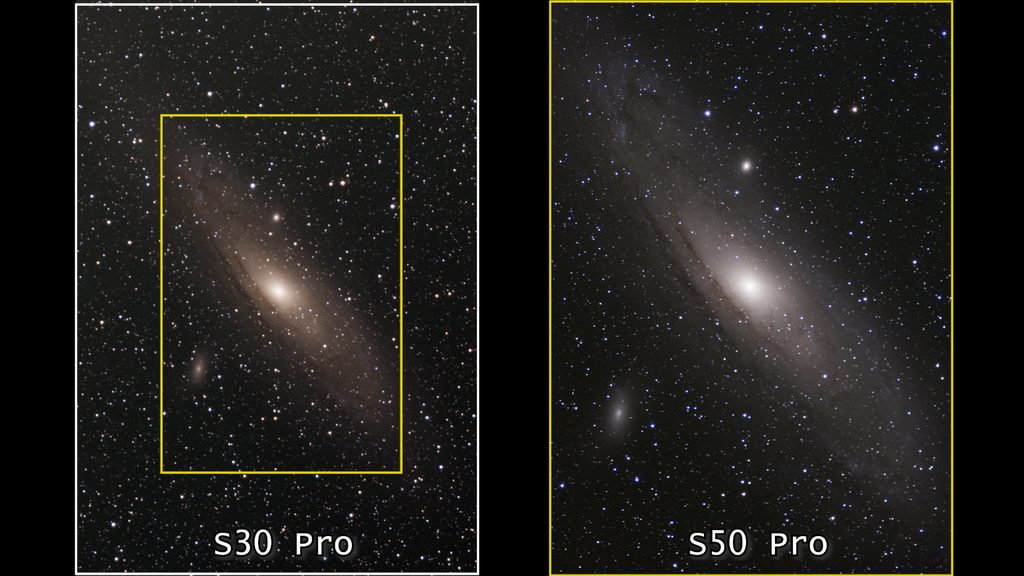
So let’s move on the a third image, which is the Andromeda galaxy, captured with the standard UV/IR cut filter on both telescopes. And again, because of the S30 Pro’s larger field of view, a large object like Andromeda fits the native field of view of the S30 Pro comfortably, while it feels kind of cramped in the native field of view of the S50 Pro.
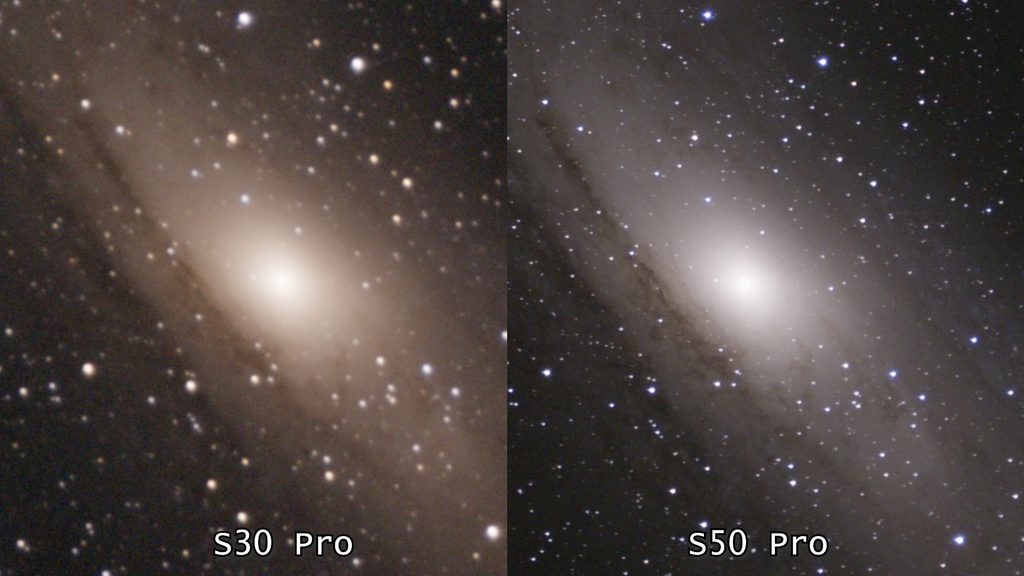
When zooming in, we see again that the S50 Pro shows sharper details on the spiral structures of the galaxy as compared to the S30 Pro. When looking at the stars, we do see a small tracking error on the S50 pro, but tracking was still somewhat better than on the S30 Pro stacked image.
These three examples represent my findings across many deep sky objects i photographed with both telesocpes over multiple imaging nights. I found that the S50 Pro shows consistently more detailed, sharper images of objects and tighter stars due to its larger aperture and better image scale. Also, the tracking capability of the S50 Pro when using 60-second exposures in EQ mode is better compared to the S30 Pro, especially with objects that appear lower in my night sky.
Mosaics on the S30 Pro…
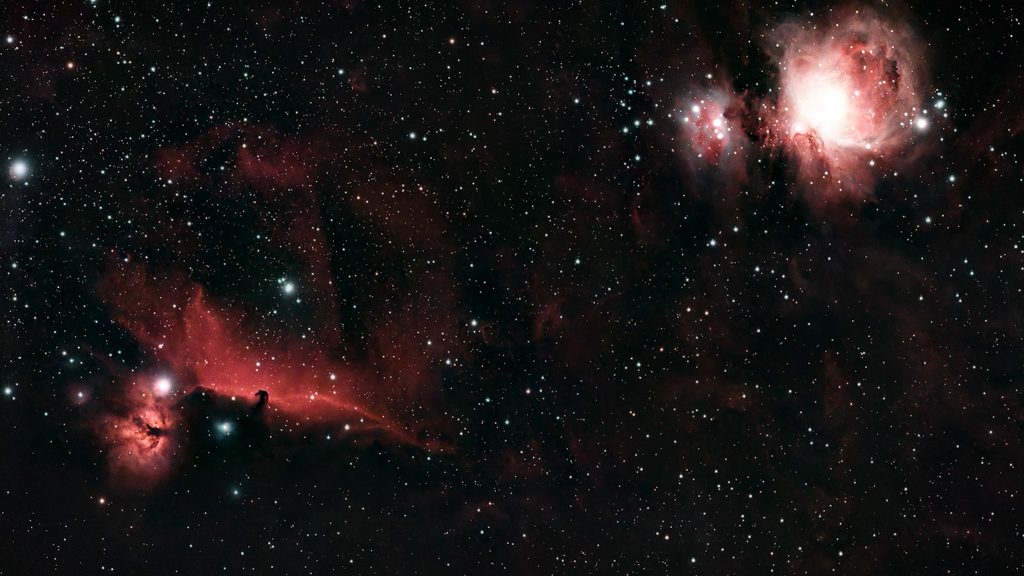
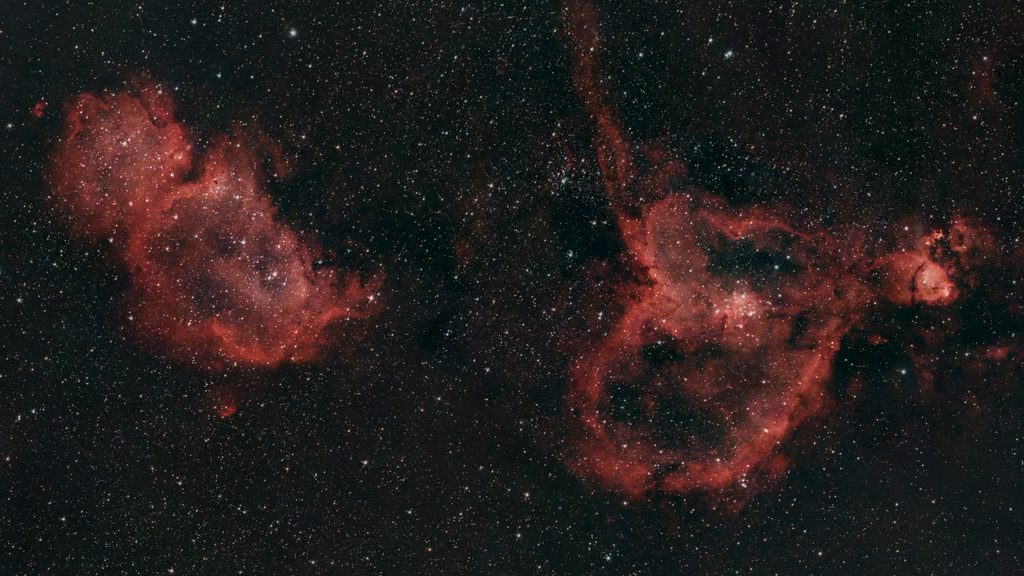
One aspect I do prefer on the S30 Pro is its ability to capture awesome wide-field images. The Seestar app has a Framing mode that lets you capture up to 2×2 the native field of view of the telescope, creating a mosaic image of up to 33 megapixels. You can use this technique with both telescopes, but because the native field of view is over two times larger on the S30 Pro, it allows you to capture objects that are several degrees apart—like the Horsehead and Orion Nebulae, or the Heart and Soul Nebulae—in a single mosaic picture.
Solar system objects
I focused on deep-sky objects in this blog but of course, you can also capture solar system objects. In Solar System mode, you just select an object, and the Seestar will automatically find and track it. If you plan to image the Sun, always use the solar filter—and never look directly at the Sun, unless you want to end up blind like Galileo Galilei!
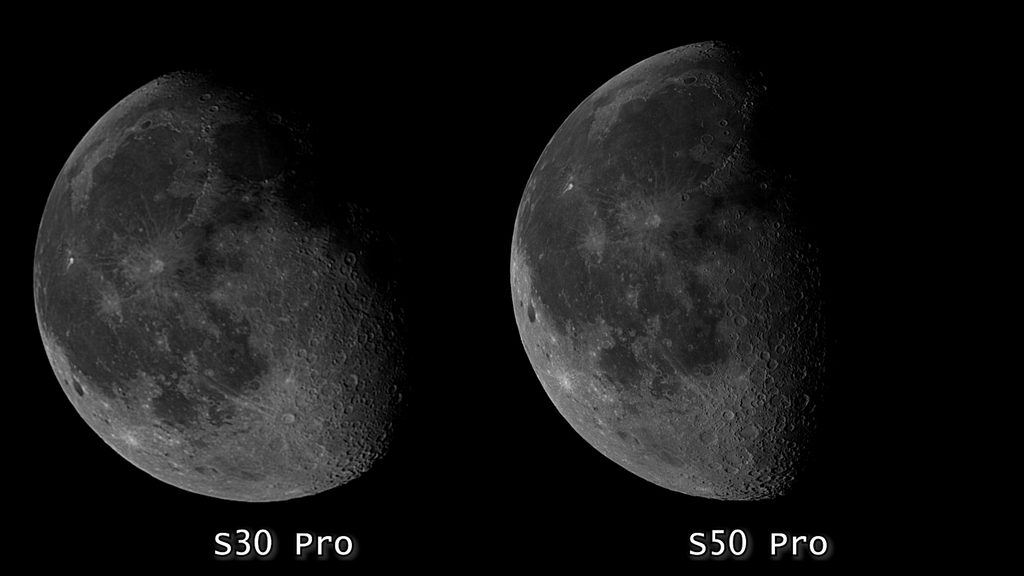
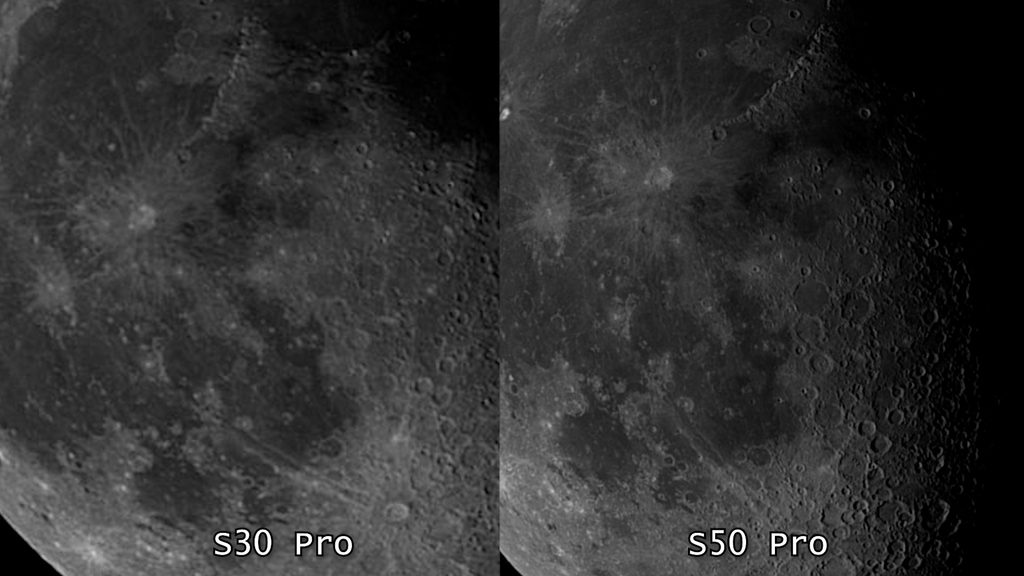
Solar System mode allows you to adjust focus, zoom in, and tweak the brightness settings. A great trick to improve your final images of the Sun or Moon is to record a short RAW video of about 30 seconds and stack those frames directly inside the Seestar app for a much sharper result. Once again, I noticed similar differences here, with the S50 Pro delivering more detailed photos and videos of the Moon and Sun compared to the S30 Pro.
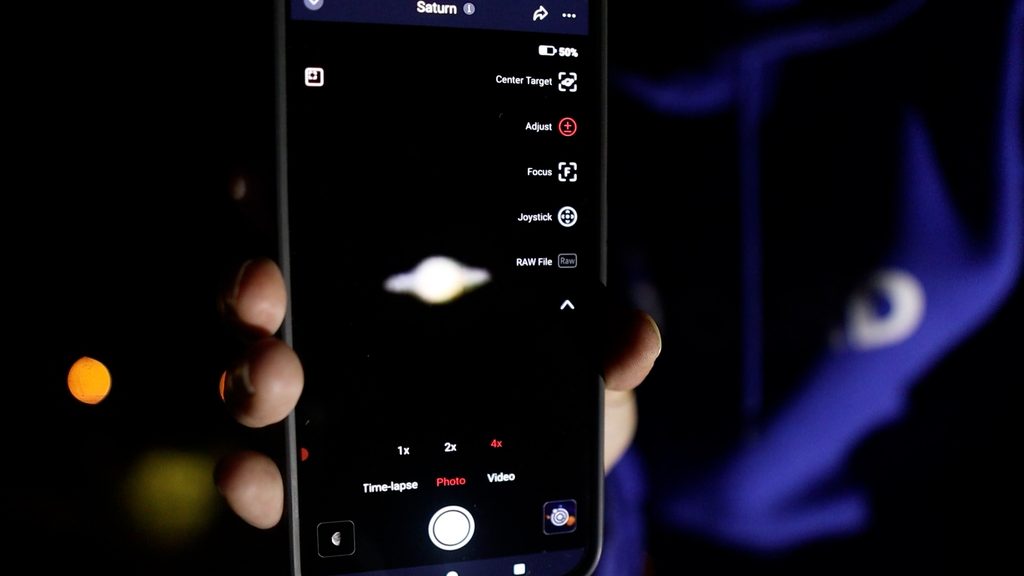
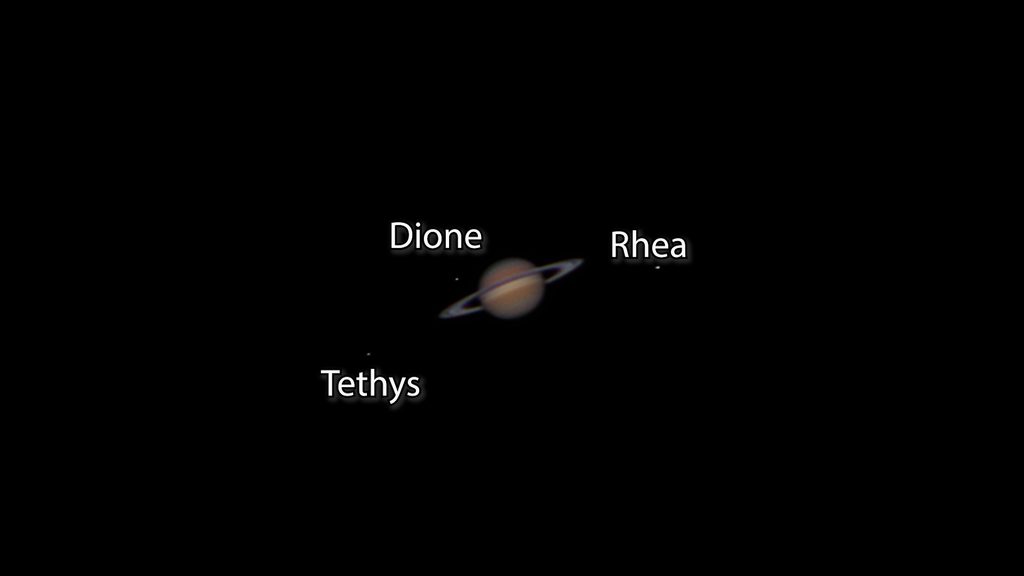
Finally, you can also capture the planets with both telescopes, but any experienced astrophotographer will tell you that resolving surface details requires a much larger aperture and longer focal length telescope, as planets appear tiny in the frame. Let me show you what happens when I try to capture Saturn with the S50 Pro. At first, you just see a bright dot surrounded by smaller dots—which are its orbiting moons. But when I lower the brightness and zoom in, there’s practically no surface detail to speak of. At a 250mm focal length, you only have about 15 to 25 pixels to work with, including the rings.
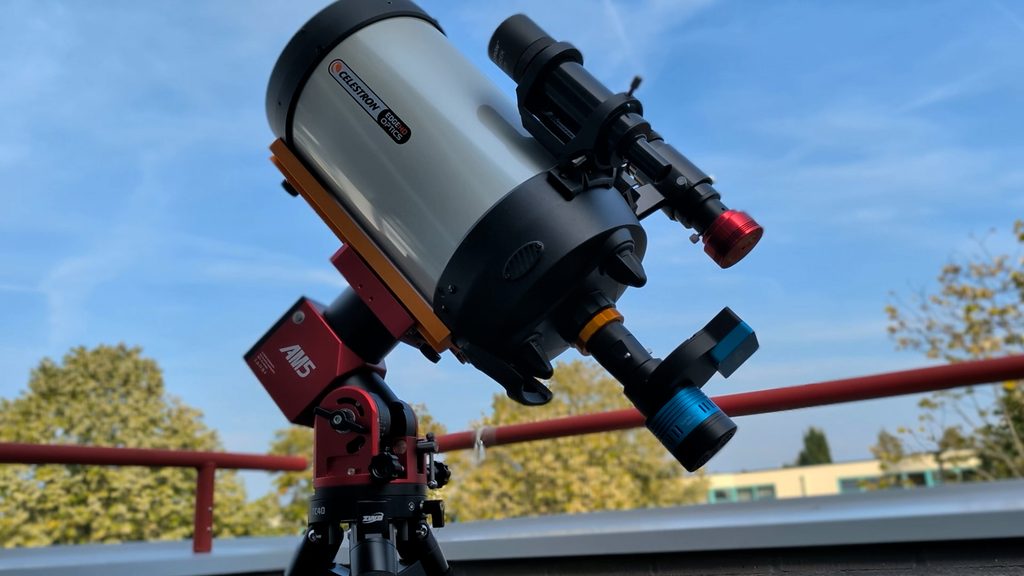
A lot of beginners are apparently waiting for a smart telescope to image planets, but they don’t realize you need a completely different setup—First, you need a telescope with a much larger aperture and much longer focal length. Second, you’d need a high-speed planetary camera and fast processor to capture hundreds of frames per second to freeze atmospheric seeing conditions and stack only the sharpest frames across thousands of images! That’s how I managed to get a shot like this one, which I took with my 8-inch EdgeHD when Saturn was in opposition. And even this 8″ aperture at 2000mm focal length gives us this modest picture. But anyway, I’m getting off-topic…
Final Verdict
So in conclusion, the images backed up the differences we could expect based on the technical specifications. The S30 Pro is around 300 dollars or euros more affordable and offers a 2.6 times wider native field of view of the sky. It is also lighter and more compact, making it the best choice for your backpack. However, for that extra 300, the S50 Pro clearly offers sharper, more detailed images of the night sky, along with more reliable equatorial tracking compared to the S30 Pro. Check out my price watch for the S50 Pro and the S30 Pro with links to reliable telescope shops across the US and Europe.
Clear skies!
Wido.